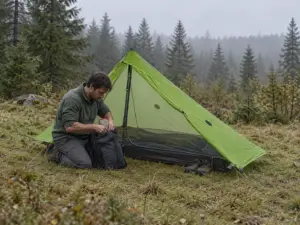
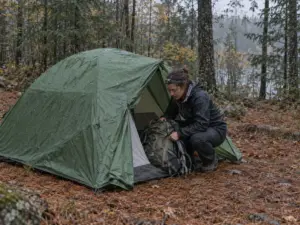
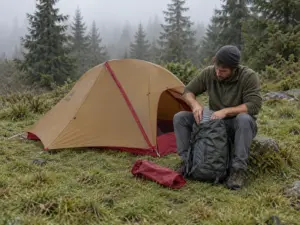


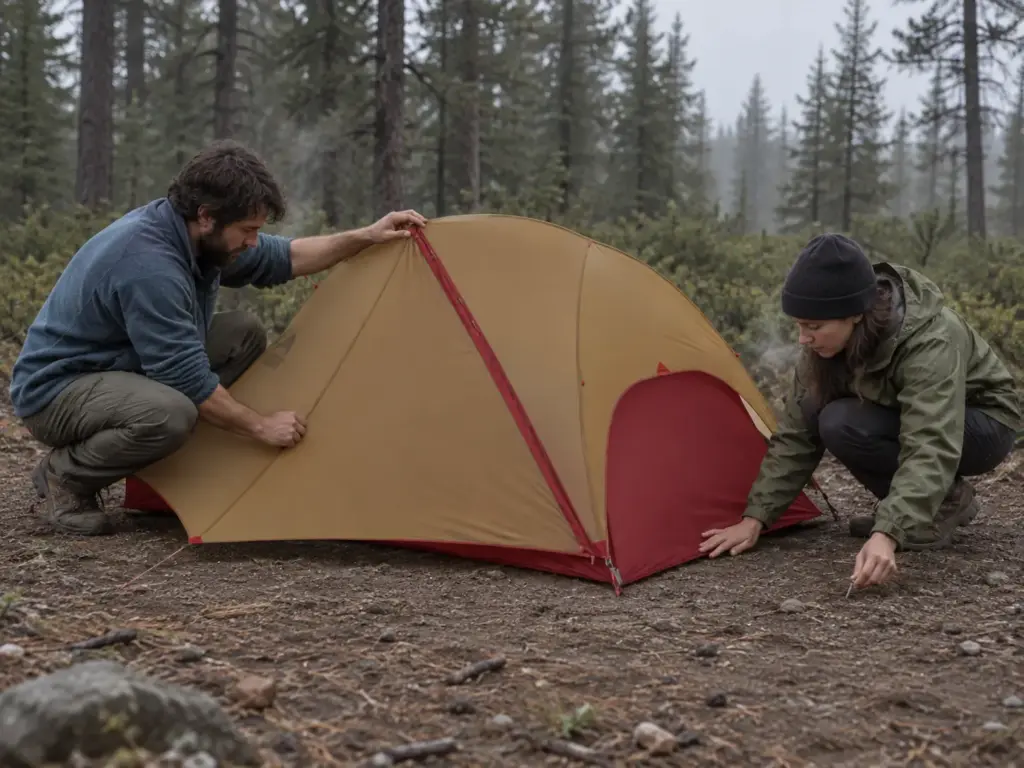
You get to camp an hour before dark, unroll a brand-new 2 person backpacking tent, and lay both sleeping pads inside for the first time. One of them won’t sit flat. The box said two people. The floor has a different opinion, and now one of you is sleeping half on the bathtub floor seam with an elbow in a mesh wall.
This is the most repeated complaint in this entire gear category, and gear testers have put real numbers behind it: CleverHiker’s size testing found exactly one mainstream 2P tent that’s genuinely true to size for two adults on wide pads, and it’s also one of the heaviest tents on their own list. That’s not a manufacturing failure. That’s the market telling you something, and almost nobody puts it at the top of the page where it belongs.
So here’s what this guide does in order: what “2 person” actually means in inches of floor width, when you should quietly size up instead, and which tents are worth your money right now for four specific kinds of pairs.
What “2 Person” Actually Means in a Backpacking Tent
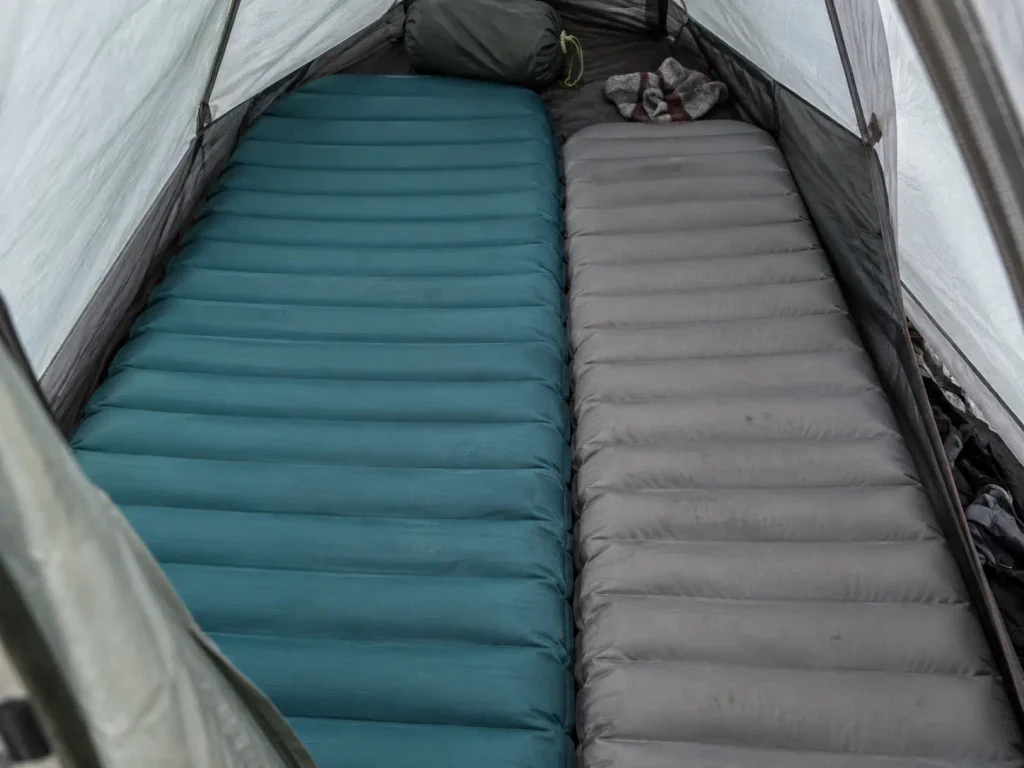
Capacity ratings are written by the people selling the tent. That’s not a conspiracy, it’s just how the spec sheet works: the number describes the floor area, measured corner to corner, with no allowance for the humans who have to lie on it. Nobody at any brand has ever measured your shoulders.
The honest translation is short. Most 2P tents fit two regular sleeping pads and nothing else. No gear inside, no elbows out, no dog at your feet, no room to sit up and dig through a pack without kneeling on your partner’s shin.
Floor Width Versus Sleeping Pad Width
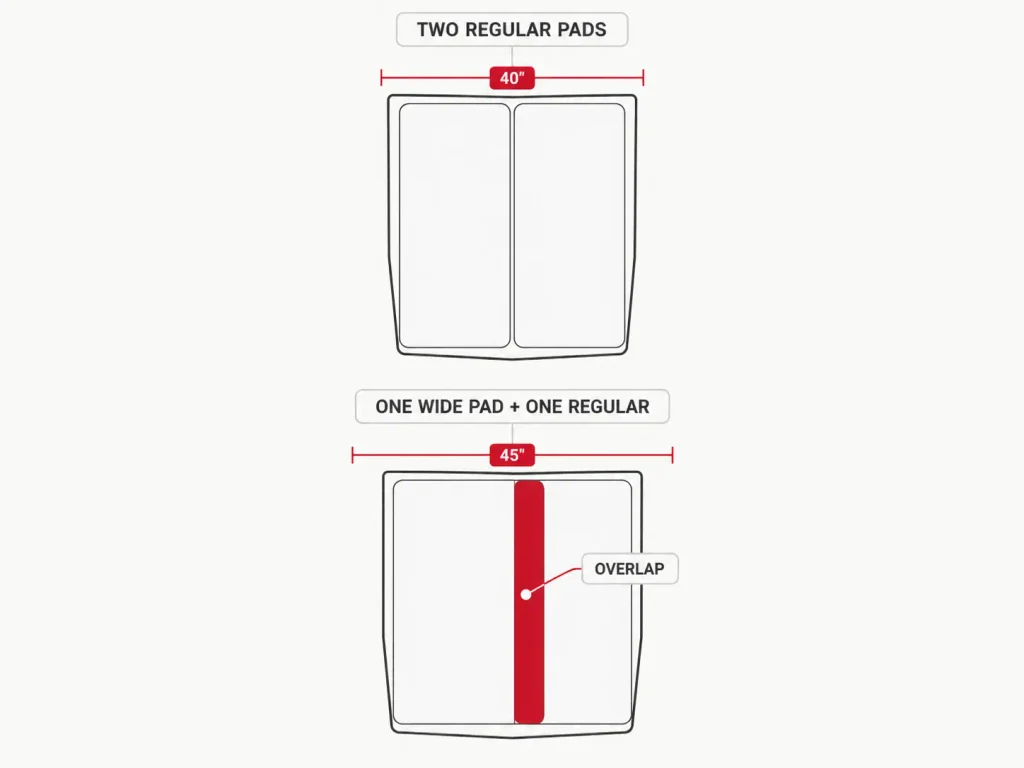
Here’s the number that decides everything, and it isn’t on the front of the box. A standard regular-width sleeping pad is 20 inches. A wide pad is 25 inches. Two regular pads, side by side, need 40 inches of usable floor width, and a typical 2P tent gives you somewhere in that neighborhood, tapered at the foot.
Now swap one of those for a wide pad. You need 45 inches, and CleverHiker’s testing is blunt about the result: in most 2P tents, a wide pad plus a regular pad won’t both lie flat. One of them rides up the sidewall or overlaps the other. Whoever brought the wide pad wins the floor, and the other person spends the night sliding downhill toward the door.
That single measurement is worth more than every review you’ll read this week. Floor area in square feet tells you almost nothing here, because a tent can bank its square footage in length or in a tapered foot end and still leave you short exactly where your shoulders are.
Why Capacity Ratings Run Optimistic
Tent capacity has no governing standard. No independent authority certifies that a 2P tent fits two adults, the way a climbing rope gets a fall rating. Each brand sets its own listed capacity, and every brand is competing on weight, so the incentive runs one direction only: shave the floor, keep the label.
Run it through the testers’ own language and the pattern is consistent. Gear reviewers describe most of this category as a tight fit for two and genuinely comfortable for one adult plus gear. That’s not a knock on any particular model. It’s the category baseline, and once you accept it, the rest of your shopping gets much easier.
The community shorthand for the exception is worth learning: true to size. It means a tent that actually delivers its stated capacity for two adults, as opposed to the optimistic industry norm. The reason the phrase exists at all is that it describes a minority.
Read the floor dimensions, not the floor area. When a spec line gives two floor widths instead of one, say 50 inches at the head and 42 at the foot, it’s telling you the foot end tapers, which is fine if you both sleep straight and a problem if either of you sprawls. The square-footage number hides that taper completely.
The Two-Regular-Pads Test Before You Buy
Do this before you open a single product page. Go find the pads you already own, look at the tag or the spec page, and write down two numbers: the width of each pad, and whether either one is insulated and therefore thicker and less willing to squeeze.
Add the widths. If you land at 40 inches or under, a well-shaped 2P tent will work for the two of you. If you land at 45, you are shopping for a 3P and you’ll save yourself a return. If one of you doesn’t own a pad yet, buy the pad first, because pad width decides tent capacity and not the other way around.
The mistake that drives this whole section is simple, and it’s the number one buying error in the category: assuming the label means two comfortable adults. It means two pads, measured generously, on a good day. Everything else you’d like to have inside that tent has to come out of that same floor.
If you want the wider view of how these tents get designed and rated before you narrow down to two people, it’s worth understanding how backpacking tents are built and rated across the whole category, because the same optimism that shapes capacity ratings shapes the weight numbers too. That’s the other place the spec sheet gets quietly generous, and what the listed weight on a spec sheet leaves out follows the same logic as capacity: the number is true, it just isn’t complete.
Share a 2P or Size Up to a 3P — The Decision Nobody Leads With
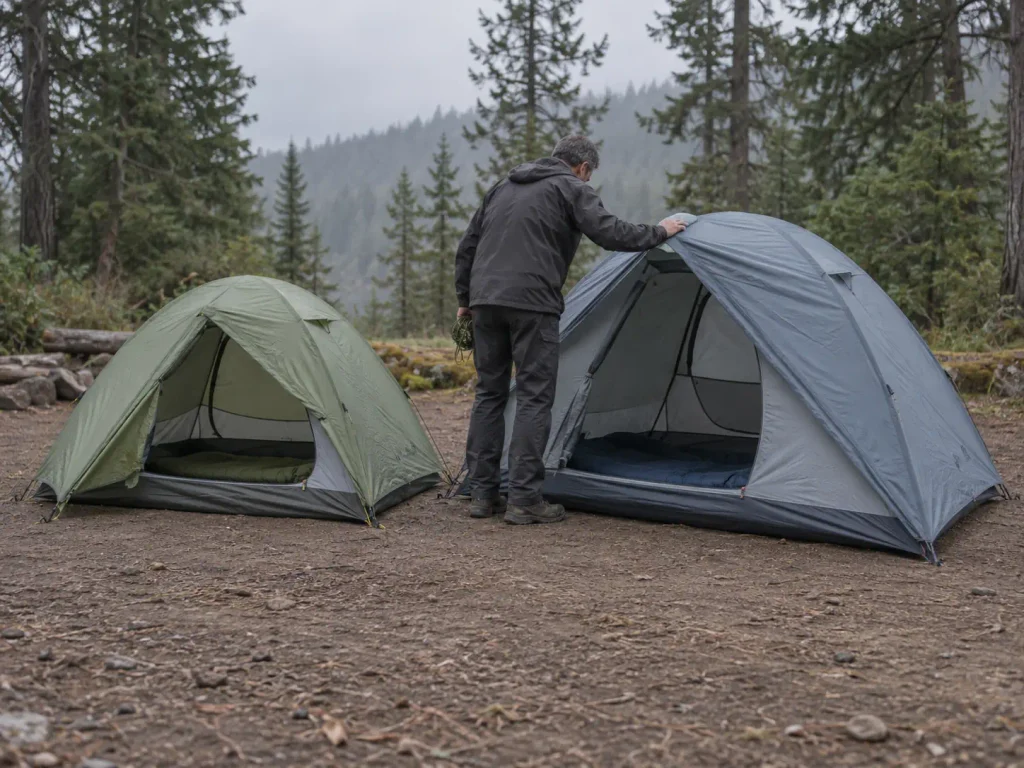
Every big tent guide eventually admits this, usually somewhere around paragraph forty, in a single sentence that reads like an aside: for two people, we’d rather carry a 3-person tent. Then the article goes right back to ranking 2P models.
That’s backwards. It’s the first fork in the road, not a footnote, because it determines whether the entire shortlist you’re about to read applies to you at all.
When Sizing Up Costs You Almost Nothing
The assumption everyone carries into this decision is that a 3P tent means a meaningful weight penalty. Compare specific ultralight models instead of generic capacity classes and that assumption falls apart fast. An ultralight 3P can land within a fraction of a pound of some heavier 2P tents, and CleverHiker’s own comparisons put the realistic combined penalty at under a pound in most matchups, occasionally at zero.
Now split that penalty between two packs. A pound of extra tent, divided by two hikers, is eight ounces each. Eight ounces is a granola bar and a half. In exchange you get a floor that fits two pads and a gear pile, doors that don’t require a negotiation, and a night where neither of you wakes up wearing the mesh.
There’s a second reason this fork matters, and it’s the cleanest tradeoff in the category. The roomiest genuinely true-to-size 2P tent in CleverHiker’s testing, the REI Half Dome 2 Plus, is also among the heaviest and bulkiest tents they list. True capacity and lowest weight pull in opposite directions inside the 2P class. A lightweight 3P sidesteps the whole argument by being a different size class.
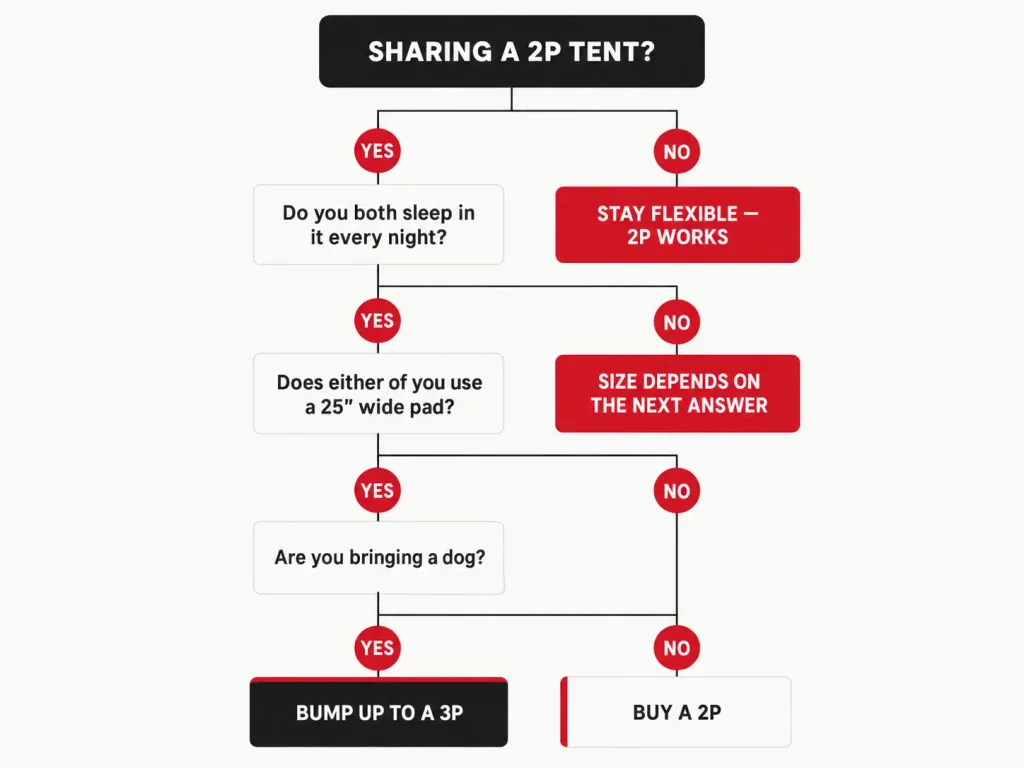
Who should bump up, in the community’s own phrase for sizing up a capacity class:
- Two adults who sleep in the tent every night of every trip
- Anyone where either partner uses a 25-inch wide pad
- Anyone bringing a dog, which needs a pad-sized footprint of its own
- Taller pairs, where a tapered 2P foot end becomes a nightly argument
- Anyone who wants gear inside the tent rather than in the vestibule
Who should not:
- A mostly-solo hiker who shares occasionally
- Anyone working toward a specific base-weight target for a long trail
- Anyone who camps in tight, established sites where a bigger footprint won’t fit
When a 2P Is Genuinely the Right Call
None of the above means the 2P class is a trap. It means the 2P class is precise, and it rewards a specific reader.
If you’re mostly a solo backpacker who shares a few weekends a year, a 2P is the correct tent and it’s not close. You’re carrying it solo the majority of the time, which means every ounce is yours alone, and on solo nights that tight two-person floor becomes a genuinely luxurious one-person palace with room for your pack at your feet. The category’s biggest weakness turns into its main feature the moment there’s one of you in it.
The same logic holds for the backpacking couple chasing a base weight together. Once you’re counting ounces seriously, the 2P class is where the interesting shelters live, and a mostly-solo hiker with a shared-weekend habit gets the best of both. Worth knowing what thru-hikers actually carry when they’re sleeping solo before you commit either way, because if the honest answer is that you almost never share, a dedicated 1P shelter beats a compromise 2P on every metric that matters.
And the plain economic case: a 2P tent is the more resellable, more rentable, more lendable size. It’s the default, which means there’s always a friend who needs to borrow one and always a buyer when you upgrade.
The Wide-Pad and Dog Exceptions
Two situations override everything else in this section, and neither is unusual.
The wide pad is the first. A 25-inch pad is the standard fix for side sleepers and for anyone whose shoulders wake them up on a 20-inch mat, which is a large slice of hikers. If one of you has already solved a sleep problem with a wide pad, do not un-solve it to fit a tent. Size up the tent and keep the sleep.
The dog is the second, and it’s the one people talk themselves out of. A medium dog occupies roughly the floor space of a third sleeping pad, sheds water off a wet coat onto whatever it touches, and does not understand the concept of staying on its half. Two adults and a dog in a 2P tent is a 3P situation that hasn’t accepted itself yet. On rainy nights, the dog is coming inside, so plan the floor around that now rather than at 11pm in a downpour.
When you compare a 2P against a 3P, compare two named models, never the classes. “3P tents weigh more” is true on average and useless in practice, because the average includes car-camping tents that weigh nine pounds. Pull up the two actual tents you’re considering, write both minimum trail weights on the same line, and let the real gap decide. That gap is usually smaller than the story in your head.
Weight, Livability and the Tradeoff You Can’t Escape
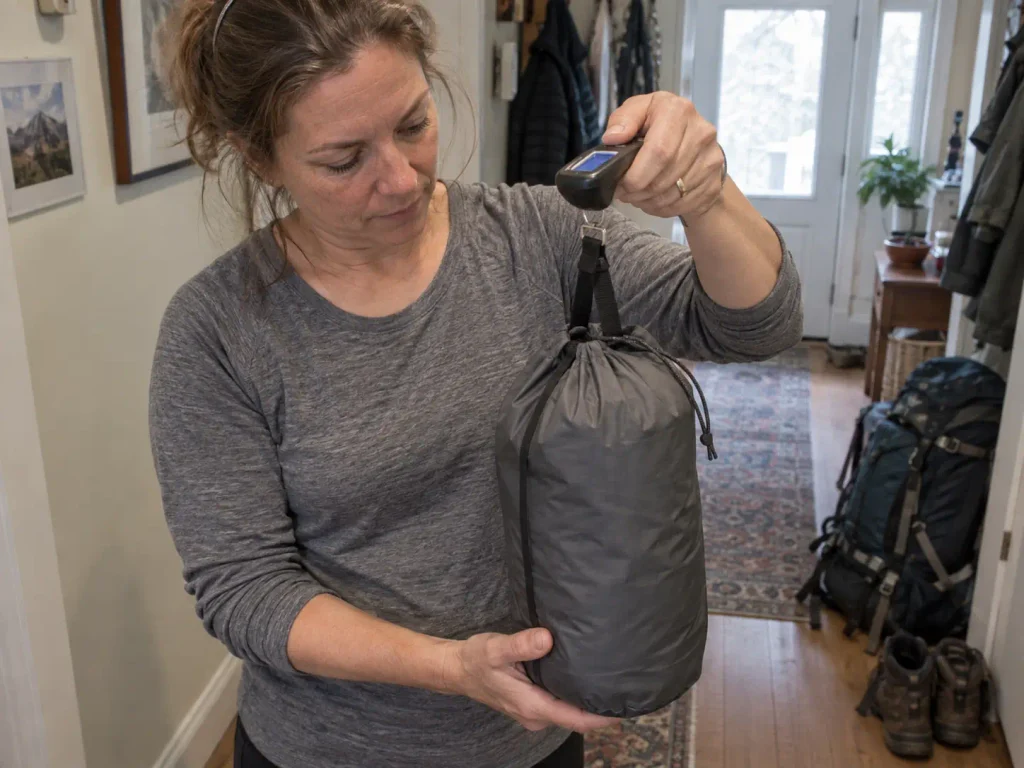
Every tent is a negotiation between what you carry uphill and how much you like each other at hour fourteen of a rainstorm. No tent wins both ends of that trade, and any review that says otherwise is selling something.
The Per-Person Weight Ceiling for Beginners
Start with the number that keeps beginners out of trouble. SectionHiker’s rule of thumb for a first backpacking tent is under 2.5 to 3 pounds per person, which puts a shared 2P tent under a combined ceiling of roughly 5 to 6 pounds. That’s a wide target on purpose. It’s a ceiling, not a goal.
Stay under it and you’re carrying a tent that won’t wreck your back on a 12-mile day. Go dramatically under it and you start paying in other currencies: thinner floors, single-wall condensation, stakes that have to be perfect, a pitch that punishes you for being tired.
Which brings up SectionHiker’s more useful warning, stated flatly: don’t buy the lightest tent money can buy as your first one. The lightest tents in this category are specialist equipment. They assume you already know how to read ground, tension a guyline in wind, and manage condensation by site choice. Buy that tent before you have those habits and you’ll blame the tent for things the tent didn’t do.
For context on where your candidates sit against everything else out there, it helps to see how tent weights compare across the categories rather than judging a number in isolation. Three pounds means something different in a freestanding double-wall than it does in a trekking-pole single-wall.
What Livability Actually Measures
Livability is the word reviewers use for everything the floor-area number can’t express, and it has four parts: floor area, peak height, vestibule size, and door count. A gear loft or a wall pocket is the fifth thing you notice on night two, when there’s nowhere dry to put a headlamp.
Floor area alone is a bad proxy, and here’s the mechanism. Two tents can both list 29 square feet. One is a tapered tube with a single high point over the middle, where one person sits up and the other can’t. The other has a wide top crossbar that pushes the walls closer to vertical, so two people sit up side by side, facing each other, playing cards while it rains.
That crossbar geometry is what actually creates usable headroom for two, and it’s the single most overlooked spec in the category. Manufacturers give it names: zone construction, high-volume hub, and a half dozen other brand terms. In plain English they all mean the same thing: pole geometry that fights the natural tendency of a tent to be a triangle, so the walls stand up and the interior volume sits where your head is instead of over your knees.
Door count is the other half. Two doors and two vestibules mean neither person climbs over the other at 2am, which sounds like a luxury until the first night it isn’t.
There’s a point where shaving weight starts actively costing you nights of sleep, and that line is worth finding before you cross it. The clearest way to see it is to look at the point where shaving weight starts costing you livability at the far end of the spectrum, where the shelter is a bag and livability is zero. Once you’ve seen the extreme, the middle of the range makes more sense.
Trail Weight, Packed Weight and the Number on the Box
Two numbers appear on every spec sheet and they are not interchangeable.
Minimum trail weight is the tent body, the fly, and the poles. That’s it. No stakes, no guylines, no stuff sacks, no repair kit, no footprint. It’s the number marketing leads with, because it’s the smallest true number available.
Packed weight is everything in the box, including the sacks you’ll probably leave at home and the stakes you definitely won’t. Real carried weight for most people lands between the two, and closer to packed weight than anyone expects, because the stakes are heavier than they look and you will want the guylines the first windy night.
Then there’s the footprint, which usually isn’t in either number and gets recommended to you at checkout. Add four to eight ounces if you buy the brand-specific one, and remember that a tent advertised at two pounds is a tent that weighs closer to two and a half by the time it’s actually camping.
There’s a third number that never makes the spec sheet at all, and for a pair it’s often the one that bites: packed size. Weight is what your shoulders feel, but volume is what decides whether the tent goes inside the pack or gets strapped to the outside where it snags brush and collects rain.
Two tents at the same weight can pack very differently, because a laminate fly resists compressing while a coated woven one crushes down small. Splitting the tent between two packs helps here too, and swapping the factory sack for a compression sack on the soft parts, the fly and the canopy, recovers real room. The tent poles never compress, so they’re the piece to plan around, not the fabric. Carbon fiber poles shave a little more and cost a lot more, and they’re less forgiving of a bad pitch than aluminum.
Weigh the tent yourself when it arrives, with everything you plan to actually carry inside the sack, and write that number on the stuff sack in permanent marker. Now you own one honest number instead of two marketing ones, and every future gear decision gets easier because you’re comparing reality to reality.
Freestanding or Trekking-Pole — Match the Tent to Your Ground
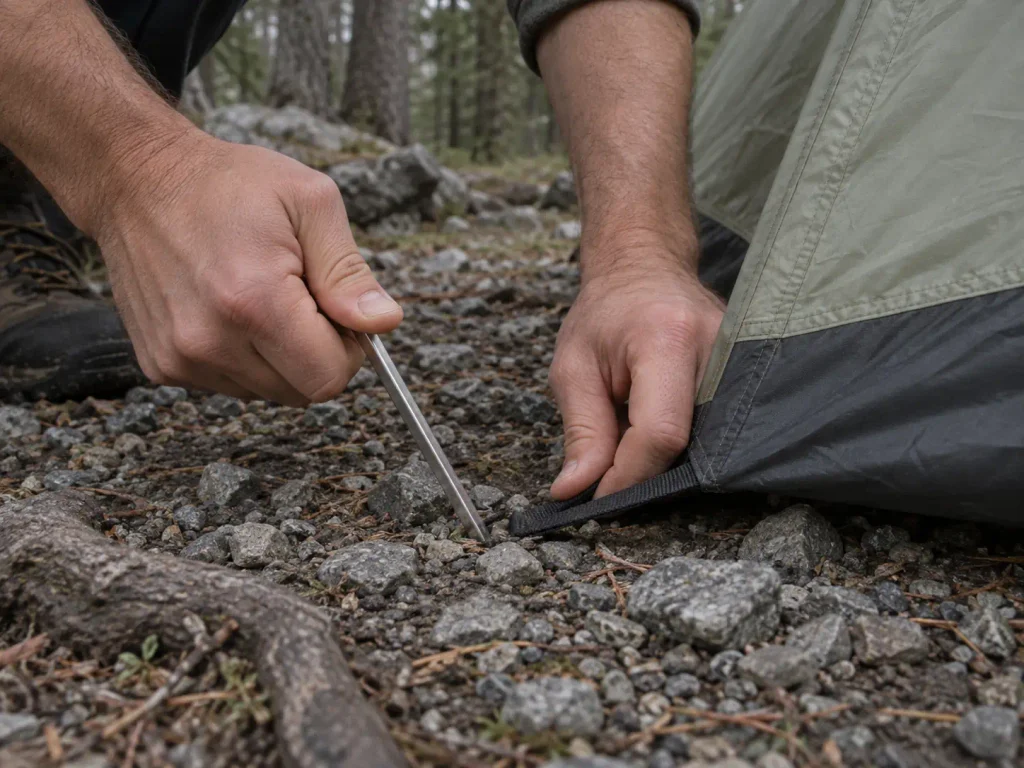
A trekking-pole shelter is lighter right up until you’re standing on granite slab at dusk with nowhere to sink a stake. Then it’s a tarp you’re holding.
This is the structural choice, and it decides where you’re allowed to camp, which matters more than most people realize when they’re comparing weights on a screen at home.
Where Freestanding Wins
A freestanding tent holds its shape from its own pole structure. Clip it together, stand it up, and it’s a tent before you’ve touched a stake. You stake it out afterward to tension the fly and open the vestibules, but the shelter exists without the ground’s permission.
A non-freestanding tent borrows its structure from stakes and tensioned guylines. Pull the stakes and it’s fabric. That difference is invisible on a spec sheet and enormous at a real campsite, because it means a non-freestanding tent requires ground that will hold a stake: firm soil, reasonable depth, no slab, no root mat, no six inches of loose sand over hardpan.
Freestanding tents pitch on sandy and rocky ground far more easily, and that’s the whole argument. Tent pads in established sites are frequently compacted gravel. Alpine sites are frequently slab with a dusting of grit. Desert sites are sand.
In all three, a freestanding tent goes up and a pole shelter turns into a problem-solving exercise you’d rather not run in fading light.
If you don’t yet know where you’ll be camping most, freestanding is the safer first tent, full stop. It’s the shelter that doesn’t require you to have already learned anything. The full terrain-by-terrain breakdown of how the two pitching styles behave on different terrain is worth reading before you commit, because the answer genuinely does change by region.
And when you do end up on sand with a freestanding tent, you still need it anchored against wind, which is its own skill: anchoring in sand when stakes won’t hold uses buried objects instead of stake-holding power, and it’s the technique that saves desert nights.
What a Trekking-Pole Shelter Really Costs
A trekking-pole tent is lighter. That part is true and it’s why they exist. The honest accounting has three lines under it that reviews tend to leave off.
First, the poles. If you already hike with trekking poles, the structure is free and this is a genuinely brilliant deal, because you’re carrying that weight anyway and it’s now doing two jobs. If you don’t hike with poles, you’re buying poles to use the tent. That cost belongs in the tent’s price, and so does the weight, because you’re now carrying poles in your hands on trail whether or not you wanted them there.
A shelter that’s a pound lighter and requires a pound of poles you didn’t own is not a pound lighter.
Second, condensation. Many a single-wall tent of this type collects more condensation than a double-wall freestanding tent, because there’s no mesh canopy separating you from the surface where moisture forms. The weight saving has a named cost and it shows up as damp on your quilt at 5am.
Third, the learning curve. A pole shelter pitched badly sags, flaps, and touches you. A pole shelter pitched well is taut and quiet and genuinely lovely.
The gap between those two outcomes is practice, and you pay for it in a few mediocre nights. If you’re going this route, learning the mechanics of using the poles you already carry as your tent’s structure in the yard first saves you those nights.
The far end of that same skill set is the flat tarp, which is where pole-supported pitching gets genuinely creative. If you want to understand what your poles can do, pitching a tarp shelter when there are no trees to work with teaches more about tension and geometry than any tent will.
Semi-Freestanding — The Middle Ground
A semi-freestanding tent is the sensible compromise, and it’s where a lot of the best 2P tents live. The pole structure holds up the head end and most of the body on its own. The foot end needs two stakes to reach its full shape.
Practically, that means you get most of the forgiveness of a freestanding setup with a real weight saving, and you only need two tent stakes to hold ground that a full pole shelter would need six or eight to satisfy. On a gravel tent pad you can usually find two spots that take a stake even when you can’t find eight.
One more practical difference worth knowing before it rains on you: many double-wall tents allow a fly-first pitch, where the rainfly goes up before the inner canopy so the interior never sees the weather. If you camp anywhere wet, check whether the tent you’re considering supports it, because on a soaking afternoon it’s the difference between a dry bed and a damp one.
The tradeoff is that the foot end isn’t self-supporting, so a lazy pitch leaves the footbox sagging onto your sleeping bag. Stake those two corners properly every time and it’s a non-issue. Skip them because you’re tired and you’ll find out at 3am.
Vestibules, Condensation and the 2AM Problem
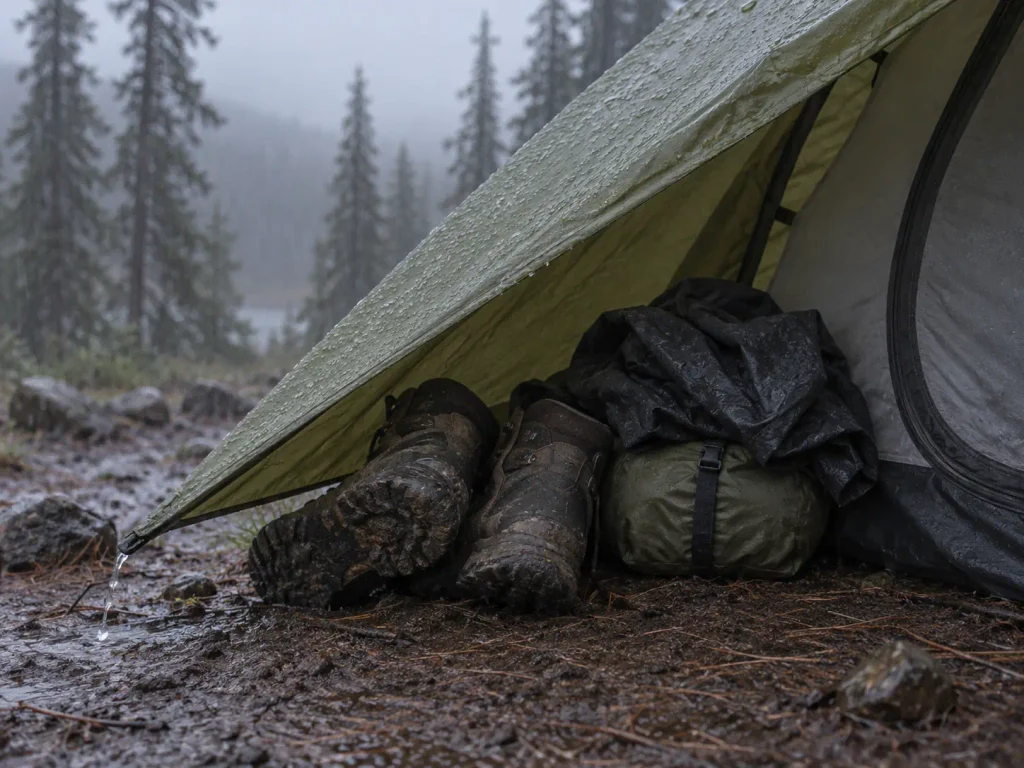
Here’s the night that teaches you what a vestibule is for. Day three of a wet trip, rain that hasn’t let up since noon, two pairs of boots caked in mud, one soaked rain shell, and possibly a wet dog. At 2am one of you needs to get out. The vestibule is the only dry real estate on earth, and whether your tent has one or two of them decides whether that trip stays pleasant or turns into three days of quiet resentment.
Competitors will tell you the vestibule is 8.75 square feet. None of them tell you what it’s for.
Why Two Doors Change a Shared Tent
Two doors and two vestibules mean neither person climbs over the other to get out at night. That’s the entire pitch, and it’s the most underrated livability spec in a shared tent.
Think about what a single-door 2P tent actually requires. The person on the inside wakes the person on the outside, every time, in the dark, while both of you are in sleeping bags. It happens at least once a night for most people.
Multiply by trip length. Now add rain, so the maneuver involves a wet jacket and a headlamp.
The gear math matters too. Two vestibules means each person has their own dry porch for their own pack and boots, which means nobody is rummaging through a shared pile at dawn. One vestibule means one pack gets the porch and the other pack comes inside, which eats the floor you already established you don’t have.
If you’re buying a tent for two people to genuinely share, two doors is close to a requirement and worth weight. It’s the spec most likely to be quietly missing from the lightest models in any given lineup, so check it rather than assuming.
Condensation Is Physics, Not a Defect
Waking up to a wet tent interior is not a product failure and it’s not something a better tent eliminates. Warm, damp air, which is what two sleeping humans produce all night, meets a cold fly surface and the moisture in it condenses. Your breath alone puts out a surprising amount of water over eight hours, and everything you’re wearing adds more.
You have two levers, and neither is the tent’s brand name. The first is ventilation: air moving through the tent carries damp air out before it reaches the cold surface. That’s why a mostly-mesh inner body is an anti-condensation design and not just a weight saving, and why vent placement gets engineered rather than decorated. MSR builds the Hubba Hubba LT2’s mesh ratio and kickstand vents specifically to keep that airflow going when the fly is closed in rain, which is precisely when you need it and can’t just open a door.
The second lever is double-wall construction. Two layers means the condensation forms on the fly, not on the inner canopy against your face and your quilt. Most single-wall designs give you one surface, and that surface is the one you’re sleeping against. Double-wall tents manage condensation better than the great majority of single-wall designs, and that’s a structural fact, not a quality difference.
The complete set of habits that cut condensation down, from site choice to whether you leave the fly door cracked, is worth learning once: why you wake up to a wet tent, and how to cut it down is a skill that makes a cheap tent behave like an expensive one.
Where You Pitch Matters as Much as What You Pitch
Buying the right tent doesn’t fix bad campsite selection, and this failure happens before the tent gets involved.
Low, sunken ground gets extremely wet when it rains. Water moves downhill and pools at the bottom, which is exactly where the flattest, most inviting, most obviously-a-campsite ground tends to be. That grassy hollow that looks like a bed at 6pm is a shallow pond at 3am, and no floor material in the category is going to argue with standing water.
The fix is to pitch slightly high, on ground that sheds rather than collects, even when it means accepting a spot that’s marginally less flat. A one-degree slope you can sleep on beats a perfect bowl you can’t. The National Park Service’s guidance on choosing a safe, well-drained campsite is the short version, and it’s worth reading before a trip rather than remembering during one.
Site choice also cuts condensation, which is the part nobody connects. Camping right next to water or in a still hollow puts you in the dampest, least-ventilated air available. Move fifty yards uphill into moving air and you wake up drier in the same tent on the same night, because a cross-breeze through both doors carries damp air out instead of letting it settle.
There’s a limit to what any of this buys you, though. A 3-season tent pitched perfectly is still a 3-season tent, and there’s a point in the calendar and the elevation profile where you need different equipment rather than better technique. Knowing where a 3-season tent stops being enough keeps you from testing that boundary by accident on a shoulder-season trip.
Which brings up the spec nobody shops for until the night it matters. Weather resistance on a 2P tent isn’t one number, and no brand publishes a storm performance rating you could compare across models.
What you can read off a spec sheet is the geometry, and geometry is most of it. A classic A-frame shape sheds wind well and wastes headroom at the edges; a rectangular footprint with near-vertical walls does the opposite.
Beyond the shape, wind resistance comes from a low profile, poles that cross to brace each side against the others, and guy-out points partway up the fly rather than only at the corners. A tall, boxy tent with steep walls buys you the sit-up room this article has been recommending, and it pays for that room in a crosswind. A 4-season tent solves it with more poles, less mesh, and a fly that reaches the ground, which is why it’s heavier than any pair on a summer trip wants to carry.
The practical version for a couple: pick the tent for the weather you actually camp in, then respect its limits with your pitch. Put the narrow end into the wind, use every guy-out point when the forecast turns instead of only the corners, and treat an exposed ridge in a building storm as a site to walk past rather than a test of the fabric.
Fabrics, Floors and Whether You Need a Footprint
Denier numbers and fabric names are the part of the spec sheet everyone skips. Two of those numbers actually predict how long the tent survives, so they’re worth five minutes.
The Fabric Specs That Actually Predict Durability
Start with the entry-level baseline, using The North Face Stormbreak 2 as the reference point because its spec sheet is typical of the tier: 75D polyester taffeta canopy and rainfly, 40D mesh, and a fully seam-taped canopy and floor.
Read that from the back. On any budget backpacking tent, seam-taped is non-negotiable. Every seam is a line of needle holes through waterproof fabric, and tape is what closes them. A tent that skips seam taping on the floor will wet out from below on wet ground no matter what the fly does, and there is no price point where that’s acceptable.
The D is denier, a measure of yarn thickness. Higher denier means a thicker, tougher, heavier fabric.
A 75D fly is heavy and slow to wear out. A 15D fly is feathery and needs a gentler owner. The number alone doesn’t tell you the whole story, because the weave and the DWR coating that sheds water off the surface both matter, but between two similar tents the higher-denier floor is the one that survives more nights on gravel.
Brands also market proprietary weaves by name, the way NEMO sells OSMO fabric as its low-stretch blend, and the useful move is to read past the trade name to the denier and the coating underneath. Polyester versus nylon is the other fork in the entry tier, and polyester’s advantage is that it sags less when wet and holds up better to sun. Ripstop nylon, woven with a reinforcing grid so a puncture stops spreading, is stronger for its weight and dominates upward of the budget tier, but it stretches when it gets wet, so your perfect pitch goes slack in the first hour of rain and needs re-tensioning.
Seams age. Tape peels, usually starting at the floor corners where the tent flexes most, and typically around the point you’ve grown attached to the tent. That’s a repair, not a replacement, and re-sealing seams before they start letting water through is a kitchen-table job that adds years to a good tent.
Silnylon, Dyneema and What You’re Paying For
Above the budget tier, the fabric question becomes a fork with money on both sides.
Silnylon is silicone-impregnated nylon. It’s light, it’s affordable relative to the alternative, it packs small, and it stretches when wet. It’s also repairable with tape and a needle, which matters more over a tent’s life than people expect.
Dyneema Composite Fabric, which everyone calls DCF, is a laminate rather than a woven fabric. It’s dramatically lighter, it doesn’t stretch when wet so your pitch stays taut through a storm, and it’s essentially waterproof rather than coated-waterproof. It also costs a great deal more, it’s noisy, it packs bulkier than its weight suggests because it doesn’t compress the same way, and it’s more vulnerable to abrasion and puncture than its price implies.
Weight, cost, and repairability move together on this fork, and they don’t move in the same direction. The honest framing is that DCF is specialist equipment for people covering big distances where every ounce compounds. Silnylon is the right answer for most pairs on most trips, and the money saved buys the rest of your kit. If you’re weighing the two seriously, how silnylon and Dyneema compare over a tent’s whole life covers the durability question that the weight comparison ignores.
Footprint, Tyvek, or Nothing At All
A footprint protects the tent floor from abrasion and punctures. That’s the whole job. It doesn’t add meaningful waterproofing to a bathtub floor that’s already seam-taped, and it does add weight and cost.
Whether it earns its place depends entirely on your ground. Gravel tent pads and desert grit chew floors. Forest duff and alpine grass don’t. The full argument on whether a footprint earns its weight at all is worth having before you accept the one the checkout page suggests, because the brand-specific footprint is the most expensive way to solve this problem.
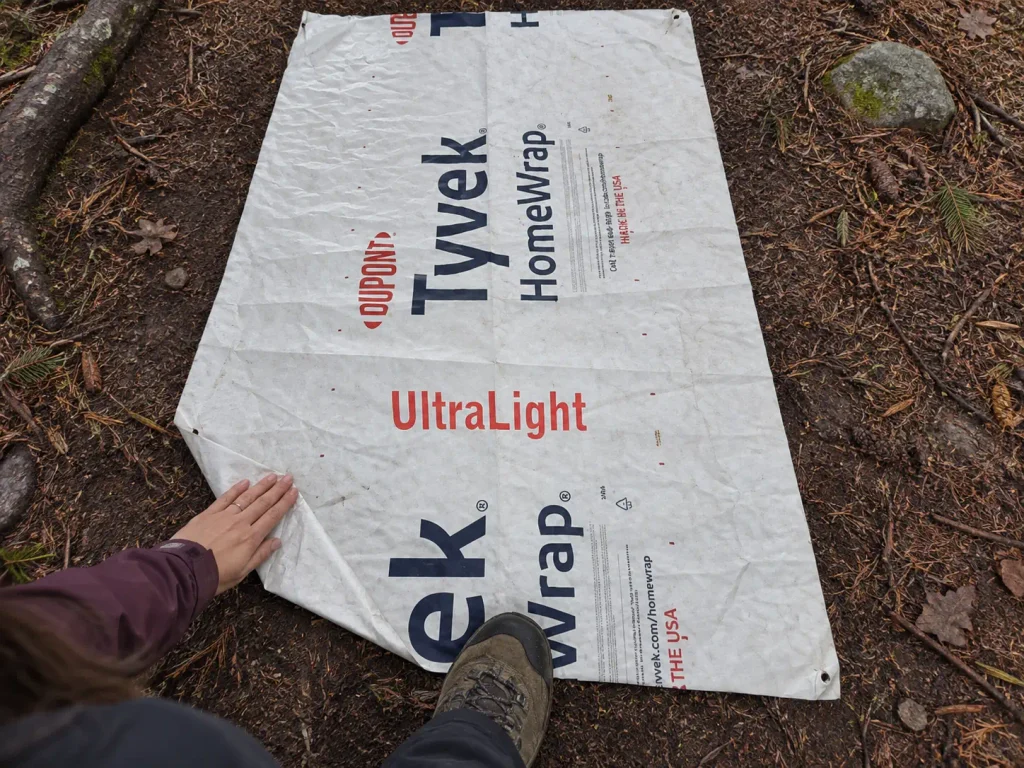
The cheap way is a cut-to-size sheet of Tyvek house wrap, and it does the same job for a fraction of the outlay. It’s tear-resistant, it’s very light, it cuts with scissors, and it doesn’t care that it wasn’t made by your tent’s manufacturer. A universal option like the Tyvek Ground Sheet & Tent Footprint comes in multiple sizes, so you trim it to your tent’s floor dimensions and keep the offcut for a repair patch or a sit pad. It softens after a few nights of being folded, which makes it pack better, and that’s about the extent of its personality.
Cut it slightly smaller than the tent floor. This is the rule that matters, and it’s the failure mode the NPS documents directly: any footprint or tarp that sticks out past the tent floor collects rainwater instead of shedding it. Water runs down the fly, lands on the exposed lip of your groundsheet, and pools there, under the tent, which is the precise opposite of what you bought it for. Fold the excess under the tent, always, and the NPS backcountry camping guidelines confirm that a properly waterproofed tarp is a legitimate footprint substitute when you handle that detail correctly.
Trace your tent floor onto the Tyvek with the tent pitched on top of it, then cut two inches inside the line all the way around. Round the corners while you’re at it, because square corners are the first thing to catch on a root and start a tear. Ten minutes on the lawn, and you’ve replaced a sixty-dollar accessory with something that works better in rain.
Floors and seams are also the parts you can repair yourself, which quietly changes the lifetime math on a more expensive tent. A floor puncture is a patch. A peeling seam is a tube of sealant and an afternoon. A tent you can maintain is a tent that amortizes over ten years rather than three, and that reframes what “expensive” means in this category.
The Best 2 Person Backpacking Tents for Each Kind of Pair
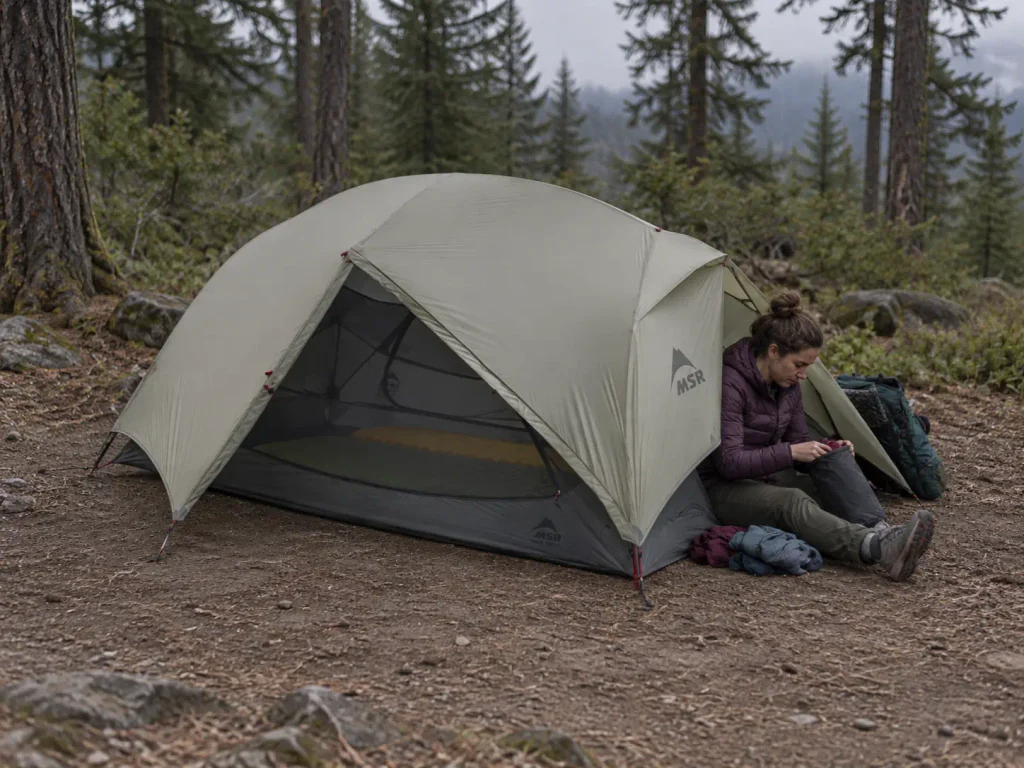
Four pairs of hikers walk into a gear shop with the same budget and should walk out with four different tents. The rankings you’ve been reading pretend there’s one winner. There isn’t, because the winner depends on which of these four you are.
Read the use case first and the product second. If the use case doesn’t describe you, skip the card.
Best Overall for Weekend Pairs
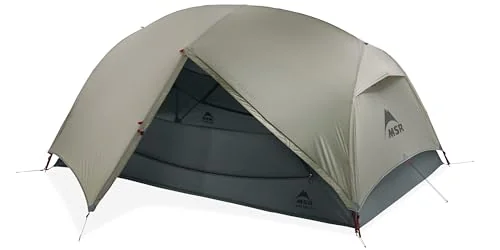
If you hike weekends, share the tent most of those nights, and want one shelter that handles a rainy Appalachian weekend and a dry Sierra one without drama, the MSR Hubba Hubba LT2 is the default recommendation and has been for years, through several generations of the design.
The reason it earns that spot isn’t any single spec. It’s that every part of it is the version you’d pick if you were choosing them one at a time. Thirty-two square feet of interior is generous for the class without being heavy.
The two doors and two vestibules solve the 2am problem properly rather than partially. The mesh-forward inner body addresses condensation as a design goal, and the two kickstand vents let the fly stay closed in weather while air still moves, which is exactly when a closed-up tent turns into a swamp. DAC NFL poles are the standard the rest of the industry gets compared against.
Where it’s honest about its limits: it’s a 2P tent, which means everything in the first two sections of this guide still applies. Two regular pads fit. A wide pad plus a regular pad is going to be a negotiation. And it sits in the mid-weight range, so if you’re counting grams toward a thru-hike base weight, the FreeLite below is the same brand’s answer to a different question.
It’s also the safest pick for a pair where one of you is newer. It pitches freestanding, it’s forgiving of a mediocre site, and it doesn’t punish you for being tired at the end of a long day. That’s worth more to a beginner pair than half a pound.
Best When Weight Comes First
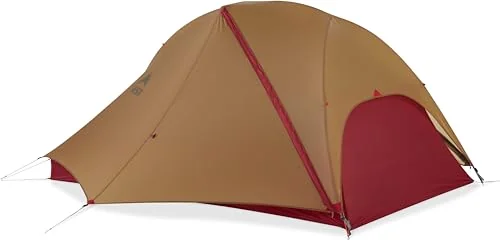
If your shortlist is sorted by weight and you’ve already decided the tent is the next place to cut, the MSR FreeLite 2 is the pick that doesn’t make you give up the things that matter at camp. Two pounds minimum trail weight, split between two packs, is a pound each for a shelter with two doors.
The semi-freestanding structure is the smart part. The pole geometry holds up the body and the head end on its own, and the foot end takes two stakes to reach full shape. That’s a real weight saving over a fully freestanding design while keeping you out of the trap from the freestanding section: you need two stake spots rather than eight, so a gravel pad or a thin-soil alpine site is still a workable campsite instead of a hunt. It’s also considerably easier to pitch well than a pure trekking-pole shelter, which makes it the right ultralight tent for a pair who hasn’t spent a season learning to tension a pole tent in wind.
It keeps two vestibules at 8.75 square feet each, which is the spec ultralight tents usually sacrifice first, and 39 inches of peak height is enough for one of you to sit up properly. Both of those are livability lines that most two-pound tents cross.
Be honest with yourself about the tradeoff, though.
Fabrics this light need an owner who checks the ground for sticks before pitching, who doesn’t drag the floor across granite, and who carries a patch kit as a matter of routine. This is not a first tent. It’s the tent you buy once you know how you camp, and it rewards that knowledge with a pack that feels different at mile ten. If you want this weight class without that responsibility, the Hubba Hubba above is the trade to make.
Best for Two People Sharing Every Night
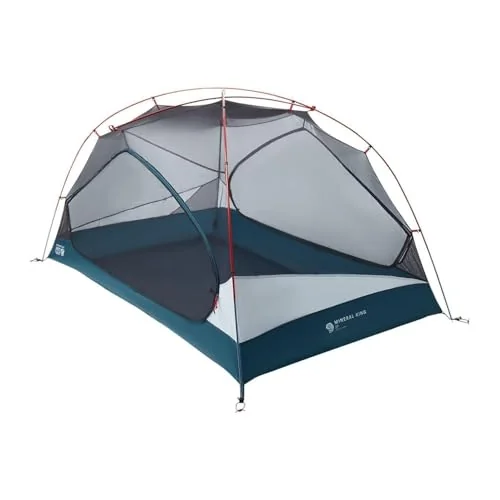
This is the pick for the pair who read the sizing-up section, agreed that livability matters more to them than grams, and wants to stay in the 2P class anyway because they camp in tight established sites or already own everything else. The Mountain Hardwear Mineral King 2 is built around the daily-use question rather than the spec-sheet question.
Two large doors, and the word doing the work there is large. Door size is a spec almost nobody lists and everybody feels, because a small door means you exit a tent by a specific choreographed maneuver and a large door means you just get out. Multiply that across every night of every trip and it’s the difference between a tent you tolerate and a tent you like.
Fully freestanding is the other half of the case. It goes up anywhere, including the compacted gravel tent pads that established backcountry sites are full of, and it can be picked up and moved after it’s pitched, which you’ll do the first time you realize you’re on a slope. That flexibility is worth weight to a pair sharing nightly, because the cost of a bad site is doubled when there are two of you in it.
The tradeoff is the obvious one and it’s fine: it carries more than the FreeLite and it’s not trying to compete there. It’s also the natural pick if your trips are a mix of backpacking and car camping, because a freestanding 3-season tent with big doors is genuinely good at both, and one tent that does two jobs beats two tents that each do one.
Best Budget Pick That Still Holds Up
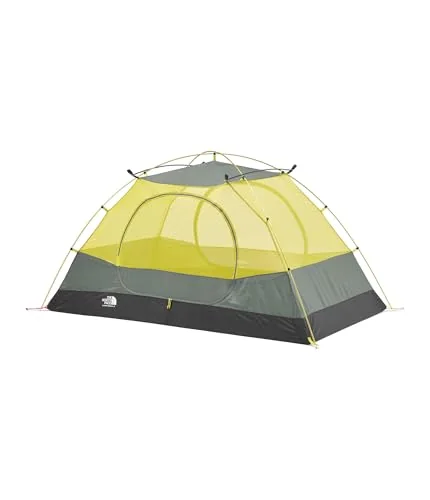
If this is your first tent and you’re not ready to spend premium money on a shelter for a hobby you’ve done four times, the The North Face Stormbreak 2 is the budget answer with real construction behind it rather than a price and a logo.
Look at what it doesn’t cut. Fully seam-taped canopy and floor, which is the line I’d refuse to cross at any price, because a tent that leaks through its own stitching is not a cheap tent, it’s a failed one. The 75D polyester taffeta canopy and fly is genuinely heavy fabric by modern standards, and at this tier that’s a feature: it takes gravel, sun, and a new owner’s mistakes without complaint. High-low ventilation openings give it a path for damp air to leave, which a tent with less mesh in the body needs more than a mesh-forward design does.
The cost is weight, and it’s real. This is not a tent you take on a thru-hike, and it’s several pounds off the pace of the ultralight picks above. Split between two packs on a weekend trip, it’s entirely carryable, and it’s a far better first purchase than a light tent you handle badly.
One more thing worth knowing about buying a first tent: REI’s return policy gets used by beginners as a low-risk way to find out whether a tent is right, and SectionHiker names that explicitly as sound advice rather than a loophole. Buy, pitch it, use it on one real trip, and take it back if it’s genuinely wrong for you. That’s the policy working as intended, and it beats guessing from a spec sheet.
If you’re a step further back than that, and honestly unsure whether backpacking is going to stick, there’s a cheaper gut check.
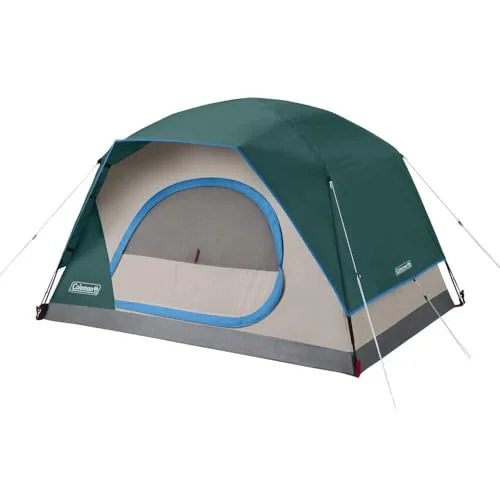
Let me be direct about what the Coleman Skydome 2-Person is and isn’t, because the honest framing is the whole value here. It is car-camping-grade. It’s too heavy to carry any meaningful distance, and nobody should put it on a packing list for a real backpacking trip.
What it is: the cheapest possible answer to the question “do the two of us actually like this?” A five-minute setup and a night at a drive-in site tells you whether you both sleep outside happily, whether one of you hates the sounds, whether the person who suggested this is going to be the only one who enjoys it. That’s information worth having before you spend four times as much on a tent that assumes the answer is yes.
The construction is better than the tier suggests, too. WeatherTec welded corners and inverted seams are a real approach to keeping water out at the floor, and the dome geometry buys about 20% more headroom than the traditional two-pole shape, which you feel when you’re both sitting up waiting out a shower. If you go two nights and love it, you now know exactly what to buy next and you’ve spent almost nothing to find out.
A few older names deserve a mention here, because you’ll see them in every forum thread and every older roundup: the Big Agnes Copper Spur UL2, the NEMO Dagger and Dragonfly OSMO, the Marmot Limelight. They earned their reputations and they set the benchmarks the tents above are measured against. They’re also difficult to actually buy right now, which is why they’re context here rather than recommendations. If you find one secondhand from someone who cared for it, you’re not making a mistake.
Once you’ve picked one, the skills are the other half of the purchase. Worth reading up on packing and pitching a tent over a multi-day trip before the first trip rather than after it.
And if this whole section has left you unconvinced that sleeping on the ground is the format you want, two adjacent categories are worth a look. Hammock shelters, if neither of you is committed to sleeping on the ground solve the flat-site problem entirely in forested terrain, and inflatable shelters and how they handle trail weight and wind are a genuinely different structural approach with a different set of tradeoffs.
Splitting the Load and Testing It Before the Big Trip
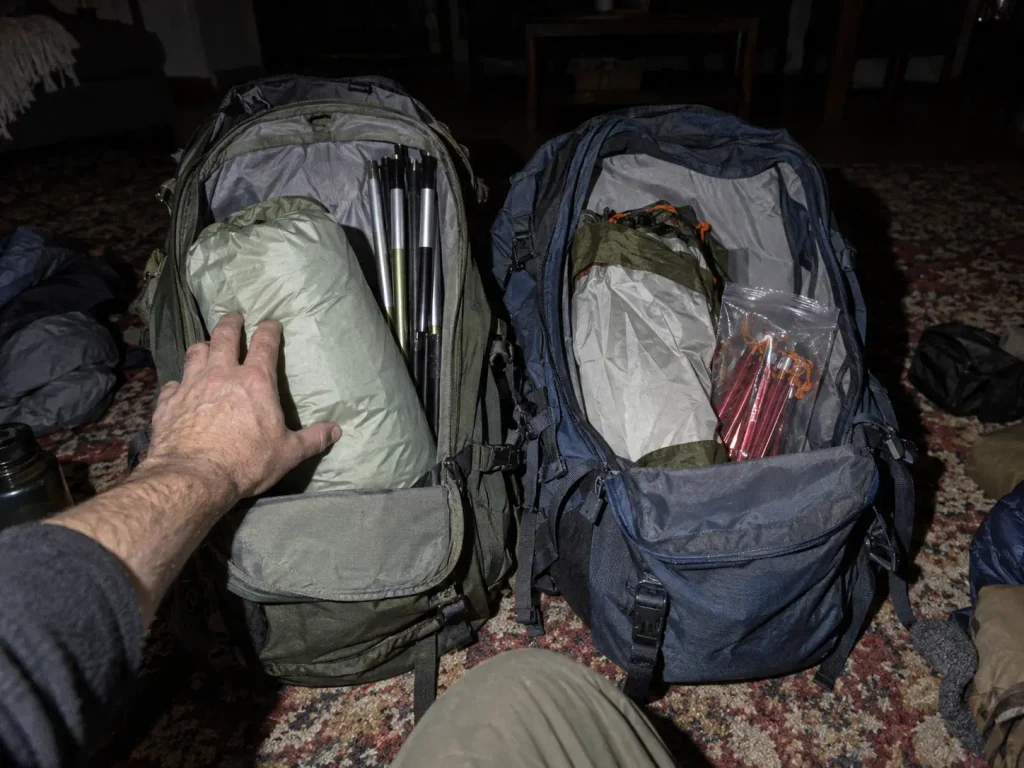
A 2 person backpacking tent is the only thing in your pack that belongs to two people. That changes how you carry it, and it changes how you find out you bought the wrong one.
Both of those are habits, not purchases, and they’re the part of the process that almost nobody teaches.
Dividing the Tent Between Two Packs
Splitting tent weight is standard practice among pairs and it’s rarely explained as a decision, which is strange, because it’s the thing that makes a heavier and more livable tent viable in the first place.
The split is component by component. Poles in one pack, tent body in the other, rainfly in whichever pack has room, stakes with whoever is carrying the poles because they live in the same sack anyway. A five-pound tent becomes two and a half pounds each, and neither of you notices the tent at all.
Run that through the weight ceiling from earlier and the math gets interesting. A 6-pound tent that would blow past a solo hiker’s budget sits comfortably inside the 2.5-to-3-pounds-per-person rule the moment there are two of you. That’s how a pair can carry a tent with two big doors, real headroom, and a floor that fits both pads, and still be inside the same guideline as a solo hiker with a minimalist shelter. The livability you’d have to give up alone comes back for free when there are two packs.
Which reframes the whole shopping process for a pair: you’re not shopping against a total weight, you’re shopping against a per-person weight, and the number you care about is half the number on the spec sheet.
A practical note on the split. Poles are the awkward component, long and rigid, and they want a pack with a long internal cavity or external compression straps. The body and fly are soft and compressible, so they fill gaps around other gear. If one of you has the smaller pack, give that person the fly, which stuffs into whatever space is left.
Give the wet components to the same person every trip. The fly and the footprint come down soaked and they stay soaked, so they want the same outside pocket every time rather than migrating into whoever’s pack has room. The person carrying the fly carries a slightly heavier pack on day two of a wet trip, and the other person’s sleeping bag stays dry. Trade the job on alternate trips if it bothers anyone.
Who Carries Shelter If You Split Up
Here’s the scenario that decides how you split, and it isn’t a weight question at all.
You’re on a trip where one of you wants to tag a side summit and the other would rather sit by the lake with a book. Perfectly normal, happens on most multi-day trips with two people.
Now think about where the tent is. If the poles are in one pack and the body is in the other, and those two packs go three miles in opposite directions, then neither of you has a shelter. Not half a shelter. None.
That’s fine on a bluebird afternoon two hours from the trailhead. It’s a genuinely serious problem if weather moves in, if somebody rolls an ankle on the descent, if the summit party gets benighted and the lake party gets rained on. Two people with half a tent each are two people with no tent.
So the rule is simple: when you might separate, keep the tent whole in one pack. Whoever is going further from camp, or into more committing terrain, carries the complete shelter.
If you’re staying together all day and camping together every night, split it however is comfortable. The split is for carrying efficiency. Keeping it whole is for the day the plan changes.
The related habit is worth building at the same time. Decide the split at the trailhead, out loud, so both of you know who has what. The failure mode here isn’t a wrong decision, it’s two people who each assumed the other one packed the stakes.
The Shakedown Night Before the Real Trip
Shakedown is the community’s word for a practice trip that exists to find gear failures before they matter. One night close to the car tells you more than a month of reading spec sheets, and it’s the single highest-value thing you can do with a new tent.
What a shakedown night actually catches: the pole section that doesn’t seat properly, the missing guyline that never came in the box, the stake count that’s one short, the fly that’s oriented in a way you couldn’t figure out in the dark, the two pads that don’t fit flat, the door that opens on the wrong side for how you like to sleep. Every one of those is a five-minute problem in a campground and a ruined evening in the backcountry.
Before even that, pitch it once in the yard. Take everything out of the sack and count it against the packing list on the manufacturer’s page. Set it up in daylight with no time pressure, then take it down and put it back in the sack, which is its own small skill. Find the missing guyline at home, not at dusk.
The broader discipline of running a shakedown trip to find the failures early applies to your whole kit, not just the tent, and it’s how people avoid discovering four problems at once on day one of something long.
One more failure to plan for, because it’s the most common one that ends a night early: zippers. Tent zippers fail more often than fabric does, usually from grit in the teeth rather than anything structural, and a failed door zipper on a buggy night is a long evening. Knowing the field fix for fixing a zipper that fails on the trail takes ten minutes to learn and turns a trip-ending problem into an annoyance.
Measure Your Pads Before You Open Another Product Page
Three things to carry out of here.
Measure your pads, not the label. “2 person” is a floor spec written by the people selling the tent, and two 20-inch pads fit where a 25-inch and a 20-inch usually won’t. That measurement decides your shortlist before any brand does.
If you’re both in the tent every night, price the 3P before you buy the 2P. The weight penalty people assume exists is usually under a pound, and split between two packs it’s eight ounces each for a floor that actually works.
Pick the pitching style for the ground you’ll really camp on, then let weight decide between what’s left. Freestanding on gravel and slab, pole-supported if you already carry poles and know how to tension them, semi-freestanding when you want most of both.
Then do the thing that beats all the reading: pitch whatever tent you end up with in the yard, with both pads inside, before the first real trip. Lie down in it, sit up in it, and get in and out once each. You’ll learn more in ten minutes on the lawn than in a week of spec sheets.
Frequently Asked Questions
01What weight should a 2 person backpacking tent be?
Aim for under 2.5 to 3 lb per person, so a shared 2-person tent should land under about 5 to 6 lb combined. That is the beginner rule of thumb gear testers use, and it leaves room for a tent that is still livable rather than one stripped to the minimum.
02Does a 2 person backpacking tent actually fit two people?
It fits two regular-width 20 inch sleeping pads and very little else. If either of you uses a wide 25 inch pad, the two usually will not lie flat side by side, and you are better off in a 3-person tent.
03What is the best tent for backpacking with two people?
For most weekend pairs it is a double-wall, two-door, two-vestibule tent in the mid-weight range, and the MSR Hubba Hubba LT2 is the reference point for that shape. The best one for you depends on whether you share nightly, chase low weight, or are buying your first tent.
04Is it better to buy a 2 person or 3 person tent for two people?
If you are both in the tent every night, or either of you uses a wide pad, a 3-person tent is often the better buy. Ultralight 3P models can weigh close to some heavier 2P tents, so the extra room can cost under a pound split between two packs.
05Do you need a footprint for a 2 person backpacking tent?
Not necessarily, but you do need to protect the floor on rough ground. A cut-to-size Tyvek sheet does the same job as a brand-specific footprint, as long as you fold any excess under the tent so it sheds water instead of collecting it.

I've spent more than a decade researching hiking gear and trail technique. I read the specs, the forum threads and the long-term reviews, and every pick here comes with what it gets wrong.
End of the trail
You read every mile of this one. Here's where the trail goes next.