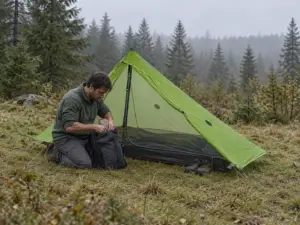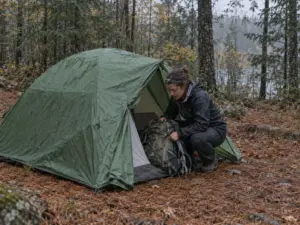
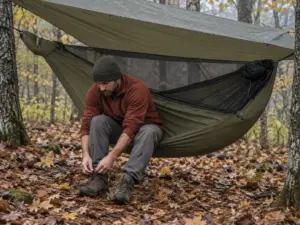
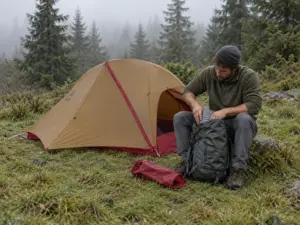


















You and a friend crawl into a shelter you bought because the tag said 2-person, and by 10pm your shoulders are touching, your packs are outside in the rain, and neither of you can sit up to pull off a wet jacket. Nobody warned you, because the number on the tag is a marketing figure, not a floor plan. Ask around in any gear thread and the sizing complaint comes back more often than any other, and the arithmetic behind it is public: a standard sleeping pad is about 20 inches wide, and two of them side by side eat almost the entire floor width of a typical lightweight two-person model. So here are seven great backpacking tents worth your money, sorted by who you are and what you’re walking into, plus the two things the top search results skip entirely: why your tent gets wet from the inside, and how to pitch it when the sky turns on you.
What “2-Person” Actually Means on a Backpacking Tent
Every hiker’s first shared tent night follows the same script. You both lie down, your shoulders touch, and there is nowhere for the packs. The tag never mentioned that part, and neither did the product page.
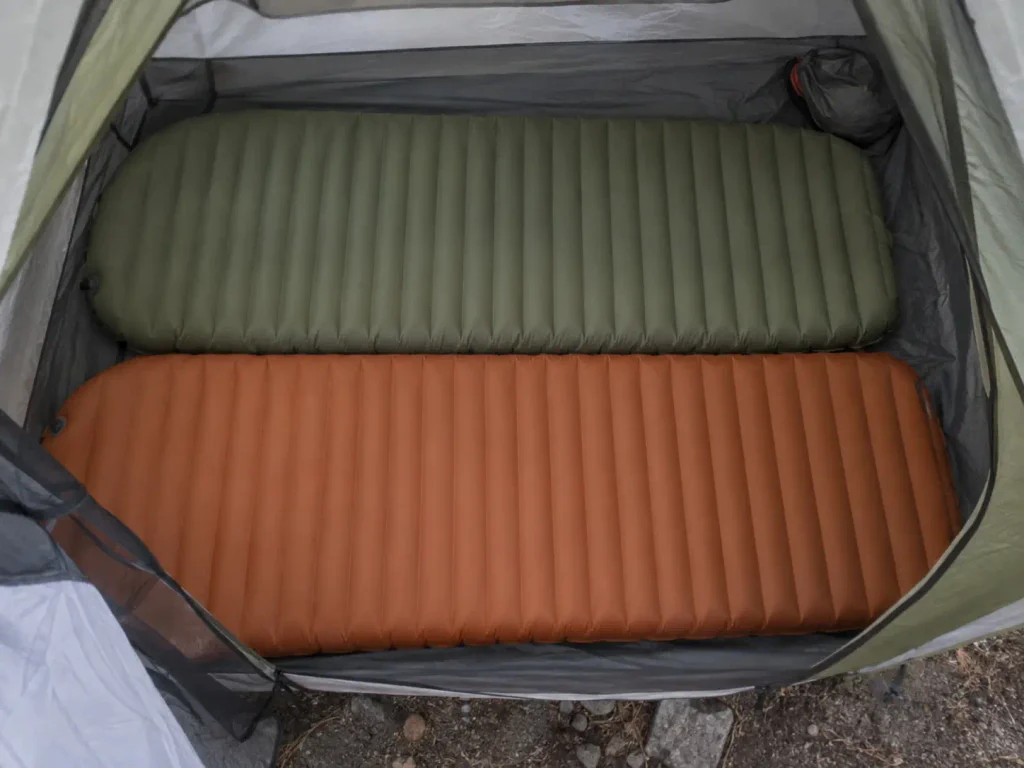
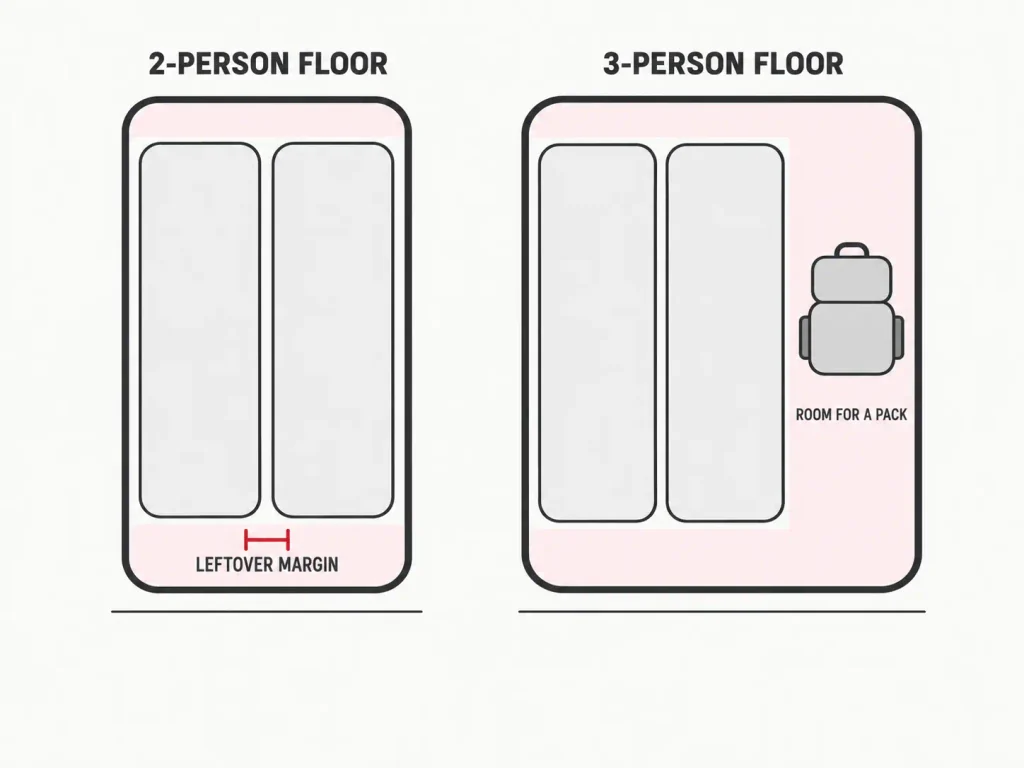
Here is the arithmetic that should have been on the tag. A standard backpacking tent pad runs about 20 inches wide, so sleeping pad width is the spec that quietly decides everything else. Two pads, laid side by side with no air between them, need 40-plus inches of floor width.
Most lightweight two-person tents give you somewhere between 45 and 50 inches. That five-to-ten-inch margin is the entire space budget for two headlamps, two water bottles, two pairs of damp socks, and whatever you didn’t want sitting in the vestibule.
Go one level deeper into the numbers and the picture sharpens. A typical 2-person tent floors out at roughly 88 to 92 inches long by 50 to 58 inches wide, with a peak height around 40 to 44 inches. That length is fine for anyone under about six-foot-two, and the width is workable if you like each other.
The peak height is where the disappointment lives: 42 inches means you can prop yourself on an elbow, not sit up and change clothes.
The rule: size up one person
Buying one tent for two people? Buy the 3-person model. That’s it. That’s the rule, and it holds across brands, price tiers and pitch types.
If either of you sleeps on a wide sleeping pad, the 25-inch kind that most side sleepers end up loving, the rule stops being advice and becomes arithmetic. Two 25-inch pads need 50 inches of usable floor, which is the upper end of what a 2P tent offers on paper and more than it offers in practice once the walls start sloping inward. A three-person floor clears that comfortably, and suddenly there’s a lane down the middle for gear.
The weight penalty for sizing up is usually under a pound, and it splits between two packs. That’s a few ounces each for the difference between sleeping well and just getting through the night. If you want the full breakdown of how two hikers actually split a tent night after night, including who carries what and how the arguments start, that’s the deeper dive on sharing a shelter.
Hikers invented a term for this gap, which tells you everything. True capacity is what the community calls the honest number, as opposed to the listed capacity printed on the stuff sack. When a user base has to coin vocabulary to describe a spec’s unreliability, the spec is not reliable.
Why the measured width isn’t the width you get
The number on the spec sheet is measured at the floor seam, and that is the widest the tent will ever be. Every inch you rise off the ground, the walls lean in. On a tapered design, and most lightweight 2P tents taper toward the foot to save fabric, the floor might measure 52 inches at the shoulders and 42 at your feet.
That taper is why two pads that fit on paper still fight each other in practice. Pads are not flat rectangles once you inflate them; they’re rounded tubes about three inches tall, so they need their full 20 inches of width at pad height, not at seam height. Two inflated pads in a tapered 50-inch floor overlap at the edges and ride up the sidewalls, which means one of you spends the night sliding gently downhill toward the middle.
Three practical cases where the sizing rule matters more than usual, all worth checking before you commit:
- Two people plus a dog. The dog does not fit in the leftover margin, and the dog will not stay in the vestibule.
- Two people who want gear inside. If you camp anywhere with a bear box shortage or heavy overnight rain, packs come in. Packs need a person’s width of floor.
- Anyone over six feet. Pad length plus a stuffed-clothing pillow eats the 88-inch floor fast, and your feet press the foot-end wall, which is exactly where the condensation sits.
The reverse case is worth naming too, because it’s the one exception most guides miss: three adults in a 3-person tent is a genuinely tight pitch, tighter than two adults in a 2P, because the middle sleeper has no wall to lean toward and no vestibule of their own. The sizing rule scales up, so three people should look hard at a 4-person floor rather than assuming the 3P holds three.
Before you buy anything, lay your actual pads out on the living room floor and tape a rectangle around them at the tent’s listed floor dimensions. Painter’s tape, five minutes. You will learn more from that rectangle than from a month of reading spec tables, because you will see exactly where the packs don’t go.
Where the rule bends
One case flips the whole thing: a solo hiker buying a 2-person tent. Here the printed number undersells what you get. One person in a 2P has room to roll over without touching fabric, a full spare vestibule for a pack that never has to go outside, and space to sit cross-legged with a stove going in the doorway on a rainy afternoon.
Plenty of experienced solo backpackers carry a 2P for exactly this reason and never regret the extra 12 ounces. The capacity number is only a lie when you take it literally. Read it as “the maximum number of adults who can fit in here” and it becomes useful.
There’s a second bend worth knowing, and it’s about how you sleep rather than how many of you there are. Two people who sleep head-to-toe instead of side-by-side buy back several inches of shoulder room, because the widest part of one person lines up with the narrowest part of the other. It’s a free fix on a tapered floor, it costs nothing, and it works well enough that couples who’ve tried it on a tight pitch often keep doing it. The trade is that you get a foot near your face and you lose the ability to talk at normal volume, which some people find a fair price and others absolutely do not.
Weight Numbers That Matter and the Ones That Don’t
Three different weights show up on one tent’s spec sheet, and brands quote whichever one flatters the model. Minimum trail weight, trail weight, and packaged weight are all real measurements of different things, and only one of them predicts what’s on your back at mile nine.
Start with the thresholds the experienced crowd uses to sort real ultralight tent claims from marketing copy. A lightweight two-person tent should come in at or under about 3.5 pounds. A one-person ultralight tent should run about 2 pounds or less. Those two numbers do more filtering work than any review score, and they cut the shortlist fast.
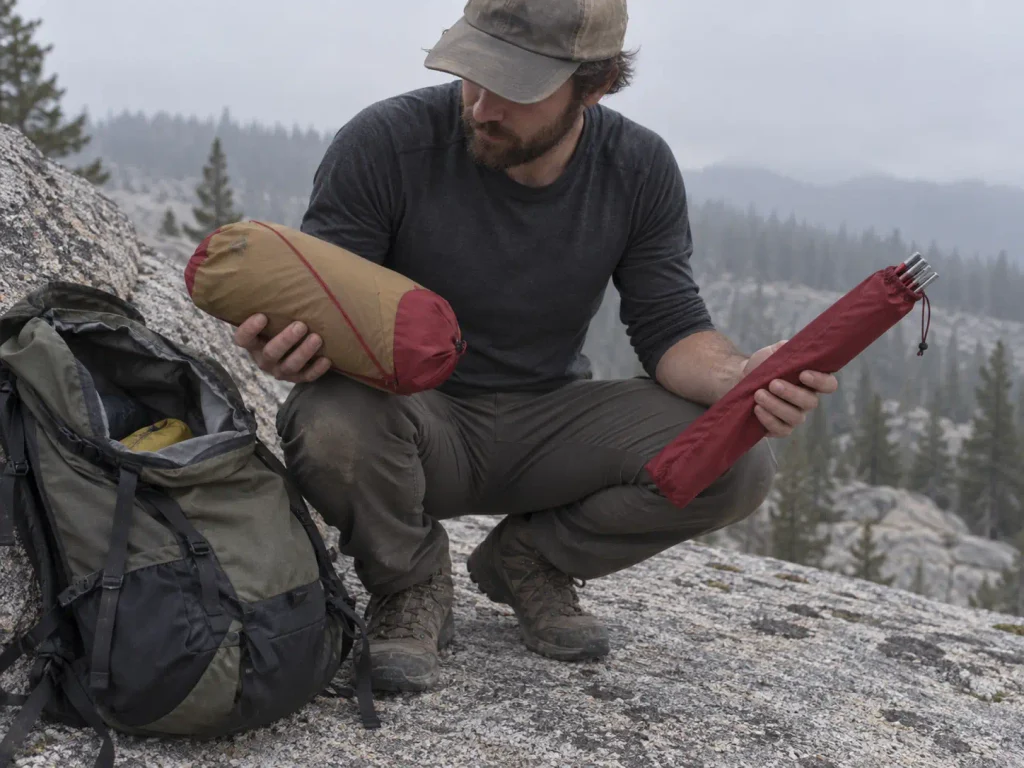
Packaged weight is everything in the box: fly, inner, poles, stakes, guylines, stuff sacks, the spare stake you’ll lose, the repair sleeve you’ll never use. Trail weight is what you carry if you leave the packaging and spares at home. Minimum weight is fly plus inner plus poles only, which is a legitimate number and also a slightly fictional one, because pitching without stakes is a decision you should not be making (more on that when we get to storm pitching).
The gap between packaged and minimum runs six to ten ounces on most tents. That’s not nothing, but it’s also not where your pack weight problem lives. Your pack weight problem is almost always water, food, and one luxury item you won’t admit to.
Splitting a tent between two packs is the cheapest weight savings in backpacking, and it costs exactly zero dollars. One person takes fly and stakes, the other takes inner and poles. A 3-pound-12-ounce tent becomes under two pounds each, which puts a comfortable, roomy shelter in the same personal-weight bracket as a cramped ultralight one.
That split changes which tents you should even be considering. Solo, a 4-pound tent is a real burden on a long day. Shared, a 4-pound tent is two pounds a person, and two pounds buys a lot of floor space and a second door. Run the numbers per person before you eliminate anything, and check what each tent category actually weighs so you’re comparing across classes instead of within one.
Here’s the weight number nobody publishes. The weight you actually notice on day three of a wet trip is the water sitting in your fly at 6am. A soaked double-wall rainfly gains real, measurable weight overnight, and it does not dry while packed.
Your tent gets heavier as the trip gets harder, which is exactly backward from what you want, and no spec sheet mentions it. That’s part of why the morning wipe-down routine in the condensation section below is worth the two minutes. The same goes for packed weight on a crossover tent you also use for car camping: the number on the box was measured dry, in a warehouse.
There’s also a floor to how far cutting weight pays you back. Below roughly two pounds for a two-person shelter, you are buying single-wall tent construction, Dyneema Composite Fabric (the material the cottage world still calls cuben fiber), or both. The savings are real. So are the trade-offs, and they move from your shoulders to your sleeping bag, which is a worse place for them to live.
Freestanding, Semi-Freestanding, or Trekking-Pole Pitch
The word freestanding has caused more field trouble than any other spec in this category, because it sounds like a promise about wind and it is only a statement about shape.
A freestanding tent holds its own form with poles alone. Set it up on a gym floor and it stands there, and that is the complete meaning of the term.
It says nothing about whether the tent stays where you put it when a gust comes over the ridge, and confusing those two ideas is the root of the most common storm-pitch mistake in backpacking. It says nothing about wind resistance either, which is a separate property of the pole geometry and the guy-out points. Understanding which pitch type suits the terrain you hike most matters more than the weight difference between the three classes.
Freestanding: the forgiving choice
Full freestanding design means a pole structure that supports the tent everywhere: usually a hubbed pole system with a ridge pole across the top. You can pitch it on rock, on a wooden platform, on packed sand, in a shelter floor. You can pick the whole thing up and move it six feet left when you find the better spot, which is a genuinely useful trick at 8pm.
The cost is a few extra ounces of aluminum and slightly more packed volume. For anyone who camps on varied ground, or who has ever tried to find a stakeable spot in the dark, that’s a fair trade. This is also the class most beginners should start in, because a freestanding tent forgives a bad pitch.
Semi-freestanding: the weight compromise most buyers should take
A semi-freestanding tent puts the hubbed poles up front where you need headroom and relies on staked corners at the foot. The tent stands on its own but sags into a shape you don’t want until those two stakes go in.
You save four to eight ounces and keep most of the setup speed. The catch is that you now need ground that takes a stake at the foot end, which covers most campsites in most of North America but not all of them. This is where the majority of buyers should land, and where most of the best current 2-person designs live.
Trekking-pole and pyramid shelters: lightest, fussiest
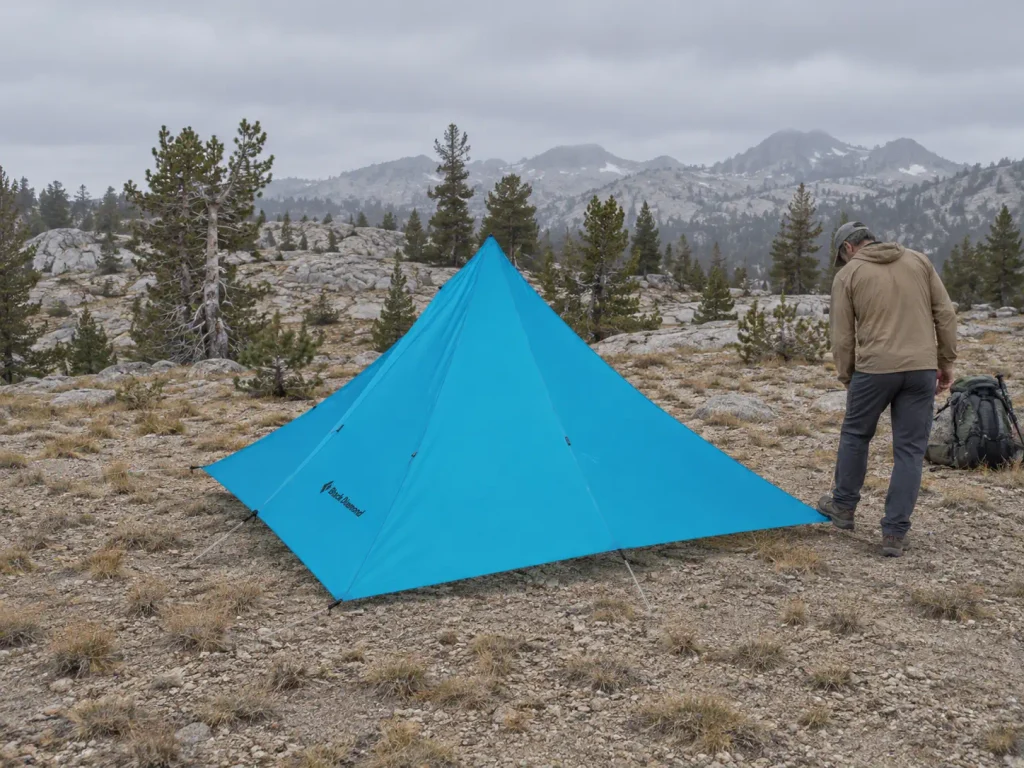
A non-freestanding tent carries no dedicated poles at all. Trekking-pole tent designs use the poles already in your hands, and pyramid shelter designs use one center pole and a ring of stakes. Per square foot of covered space, nothing else here comes close on weight.
Every ounce you save comes out of convenience. You need stakeable ground at every corner, you need to get the tension right or the fabric flaps all night, and the learning curve is real. If you’ve never done it, pitching a shelter on your trekking poles is worth practicing at home before it matters.
Where you camp decides this category more than what you weigh. Granite shelf above treeline in the Sierra, hardpan in Utah, wooden platforms on the eastern trails, soft duff under conifers in the Cascades: each one changes which class works.
You find out which one you own the first night you pitch on solid slab and end up guying out to rocks and logs. The tent still works. It takes twenty minutes instead of four, and you do it in fading light with cold hands.
Worth knowing before you shop: most of the celebrated ultralight non-freestanding shelters are cottage-brand, direct-purchase gear. The Zpacks Duplex Classic, Hyperlite Mountain Gear Unbound 2, SlingFin Portal 2, Durston X-Mid 2 and X-Mid Pro 2, Six Moon Designs Lunar Duo and Lunar Solo, Tarptent Hogback and Scarp 2, LightHeart Gear Duo.
They’re excellent and they are not one-click purchases. You buy from the maker, you wait, and you often wait longer when everyone is buying thru-hike gear at once in the spring. That’s not a knock, it’s a planning fact other roundups quietly skip.
Best Non-Freestanding Pick: Black Diamond Mega Light
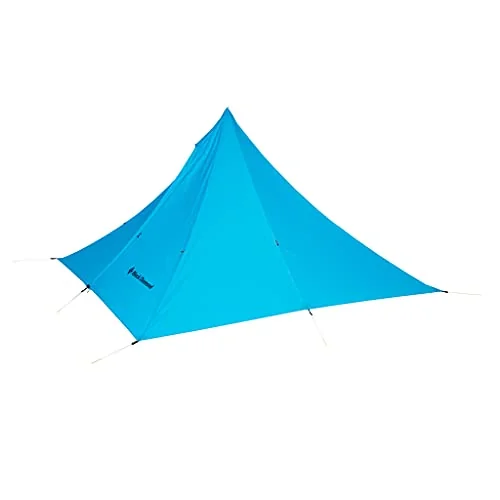
The Black Diamond Mega Light is in this article to show you what the non-freestanding trade actually looks like when you push it all the way. Under three pounds of fabric and one pole gives you more usable interior than a four-person double-wall tent weighing twice as much. Four people fit under it with room to sit and cook. Two people fit under it with room to spread out gear and still walk around each other on their knees.
What it does not give you is a floor or bug protection. You’re sleeping on the ground you chose, which means site selection stops being a comfort question and becomes the whole game. In bug season you add a bivy or a mesh inner, and the weight advantage narrows. In late season above treeline, with no mosquitoes and hard ground, it’s hard to argue with.
The honest read: this is a second shelter for most people, or a first shelter for someone who has already figured out that their real problem is space for the group, not ounces on the scale. Beginners should not start here. The pitch demands a taut, even tension on every corner, and a sloppy pyramid pitch flaps loudly enough to keep everyone awake. Also worth noting when you plan: this one often ships on a lead time rather than next-day, so order it before the trip is a week out.
Best Overall Backpacking Tents for Two
Most readers came here for one recommendation, so here it is, with the honest note on what the money buys and what it doesn’t.
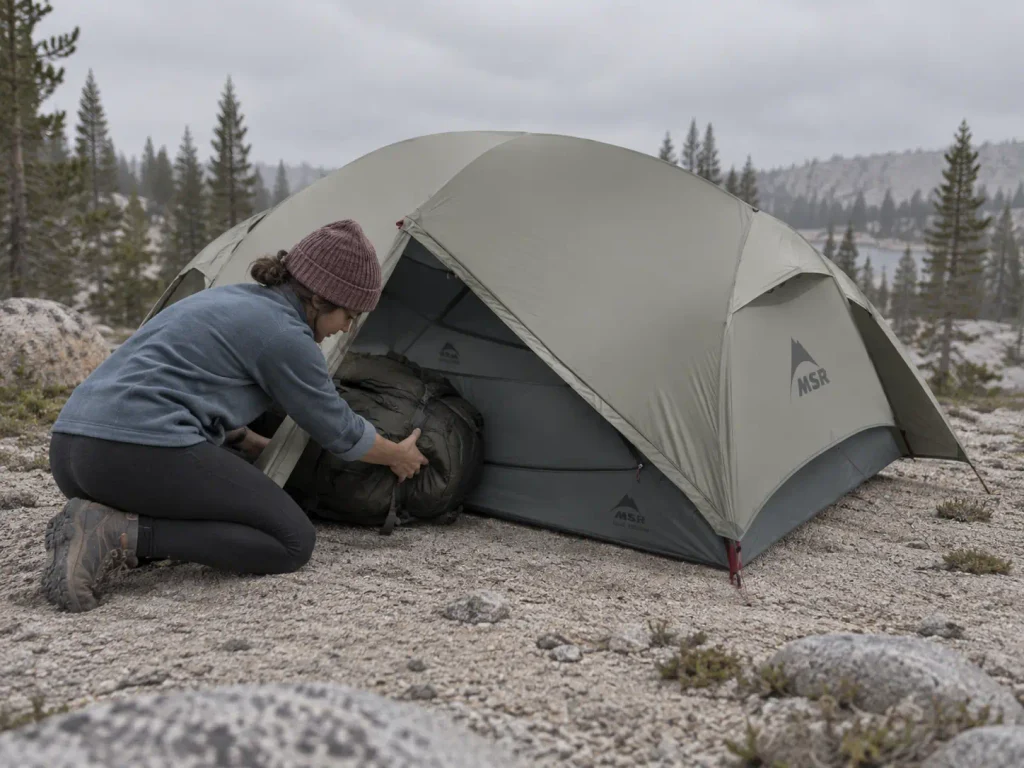
MSR FreeLite 2: the best overall pick
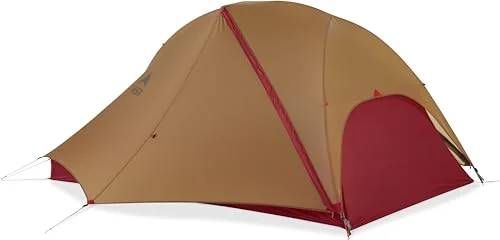
The reason the MSR FreeLite 2 takes the top slot is that it refuses the usual trade. Getting a two-person shelter down to roughly 2 pounds 8 ounces of trail weight almost always means going single-wall, going non-freestanding, or both. This one stays double-wall construction and stays freestanding, which means it handles the granite slab and the wooden platform and the rainy pitch without asking you to change your plans.
Split between two packs, you’re carrying about 20 ounces each. That is the same personal load as a solo ultralight tent, for a shelter that sleeps two with two doors. For weekend trips, week-long trips and the long trails, that math is hard to argue with, which is why it’s been a common sight on the AT, the PCT and the CDT.
What you give up is fabric weight. Ultralight denier means thin floors and thin flies, and thin ripstop nylon wants a little more care than the heavy stuff. Don’t drag it, don’t pitch it on sharp gravel without thinking, and don’t stuff it wet for three days straight.
The floor is not fragile, but it also isn’t the 75D tarp on a car-camping tent. Handle it like gear that cost real money and it lasts years.
The other honest note: at this weight you’re in premium price territory. If you back out to the value picks further down, you’ll pay roughly a third as much and carry a pound and a half more. That is the whole trade in one sentence.
MSR Hubba Hubba LT2: when livability beats ounces
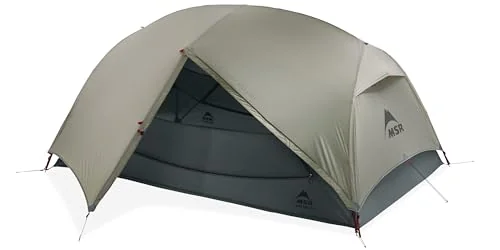
Around 3 pounds 9 ounces, the MSR Hubba Hubba LT2 sits just inside the 3.5-pound lightweight threshold while feeling like a substantially bigger tent than the FreeLite. Split two ways that’s under 29 ounces each, and what you buy with the extra pound is the stuff you notice every single night rather than once per trip on the scale.
Dual vestibules are the headline. Two doors and two covered gear areas mean each person has their own way out and their own garage. Nobody climbs over anybody at 2am, nobody’s wet pack ends up against someone’s sleeping bag, and nobody has to negotiate boot placement.
Two doors is the feature readers most consistently underrate before buying and most consistently refuse to give up afterward. It reads like a luxury on a spec sheet and functions like plumbing: you only appreciate it when you think about not having it.
The fabric is a step up in toughness from the ultralight tier, and the pitch is symmetrical enough to get right in the dark. That combination makes it the better pick for anyone whose tent is going to live a hard life: guiding, repeat weekend use, shared household gear that different people pack badly.
When rain is already falling, pitch a double-wall tent fly-first if the design allows it: fly and poles up, then clip the inner underneath from below. The inner never sees a drop. Anyone who has done it once in a real downpour never goes back to the inner-first sequence in weather, and it is worth a dry-run at home to learn whether your tent can do it.
What the premium ultralight tier buys you
A fair question at this point: what about the tents everyone else recommends? The premium ultralight class is genuinely excellent.
The Big Agnes Copper Spur HV UL2 has been the reference point in this category for years, with steep walls and a shape that punches above its weight for interior volume. The Big Agnes Tiger Wall UL2 trades a little of that for fewer ounces. The NEMO Dragonfly OSMO 2P brings OSMO fabric, which shrugs off water absorption and stretches less when wet than most coated nylons.
All three are worth owning. None of them is currently a reliable one-click purchase, which is why they’re named here rather than linked. You’ll find them at specialty retailers and direct from the brands, and availability swings hard with the season. If you want one, plan on shopping for it deliberately rather than expecting it to be in stock the week before a trip.
Which brings up the thing that actually matters: the FreeLite and Hubba Hubba are in the same performance conversation as those three. You are not settling. You are buying a tent you can get.
Once you’ve picked, the next problem is living with it. Carrying and pitching a tent on a real trip covers where it rides in the pack, how to keep it out of the mud, and how to get it away wet without soaking everything else.
Tents With Real Headroom and Usable Vestibules
Livability is something you feel on the third night of a rainy trip, not in the store aisle. It shows up when you’re stuck inside for four hours waiting out weather and the only question that matters is whether you can sit up.
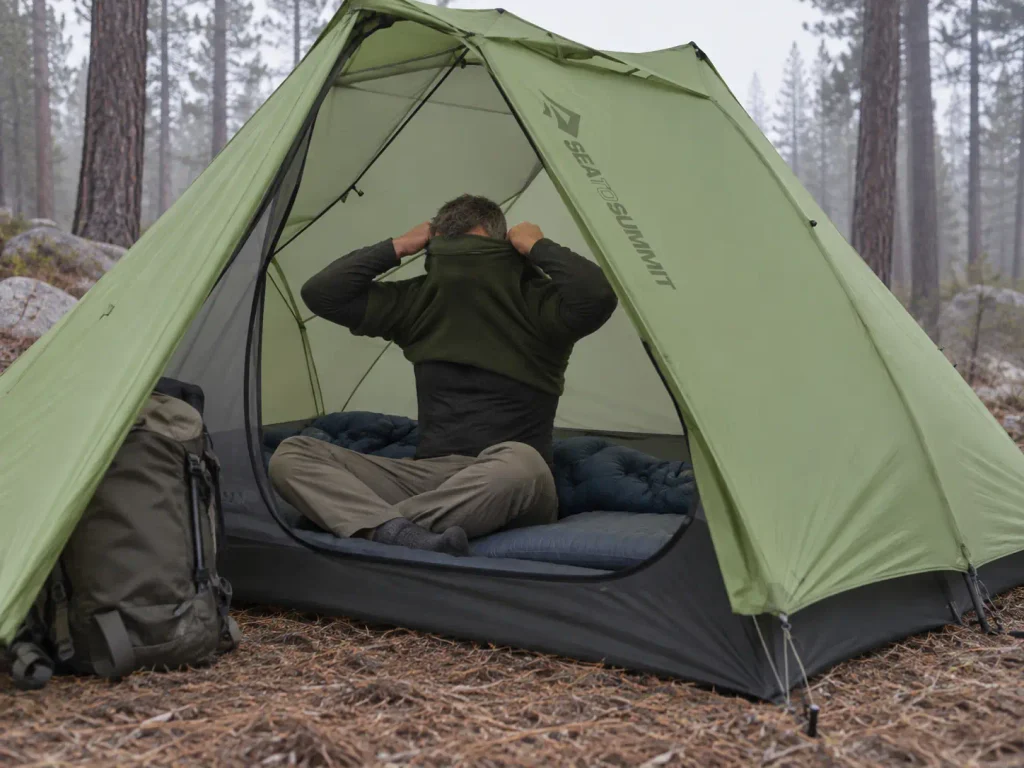
Peak height is the headline spec, and it’s a weak one on its own, because wall angle does most of the work. A tent with 42 inches of peak height and steep, near-vertical walls gives you usable space at shoulder height across most of the floor. A tent with the same 42 inches and a low-angle dome shape gives you a single usable point in the middle and a tapering coffin everywhere else. Same number, completely different tent.
That’s why the numbers-only comparison tables you find in most roundups don’t answer the question. Two tents can post identical headroom figures and feel two feet apart inside. What you want to know is where the walls are when you’re sitting with your back against one.
Best Headroom: Sea to Summit Alto TR2
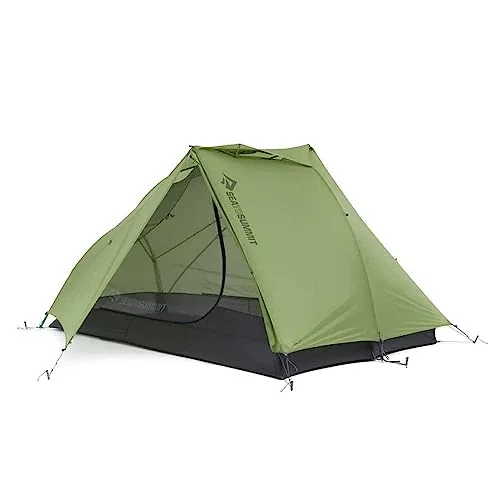
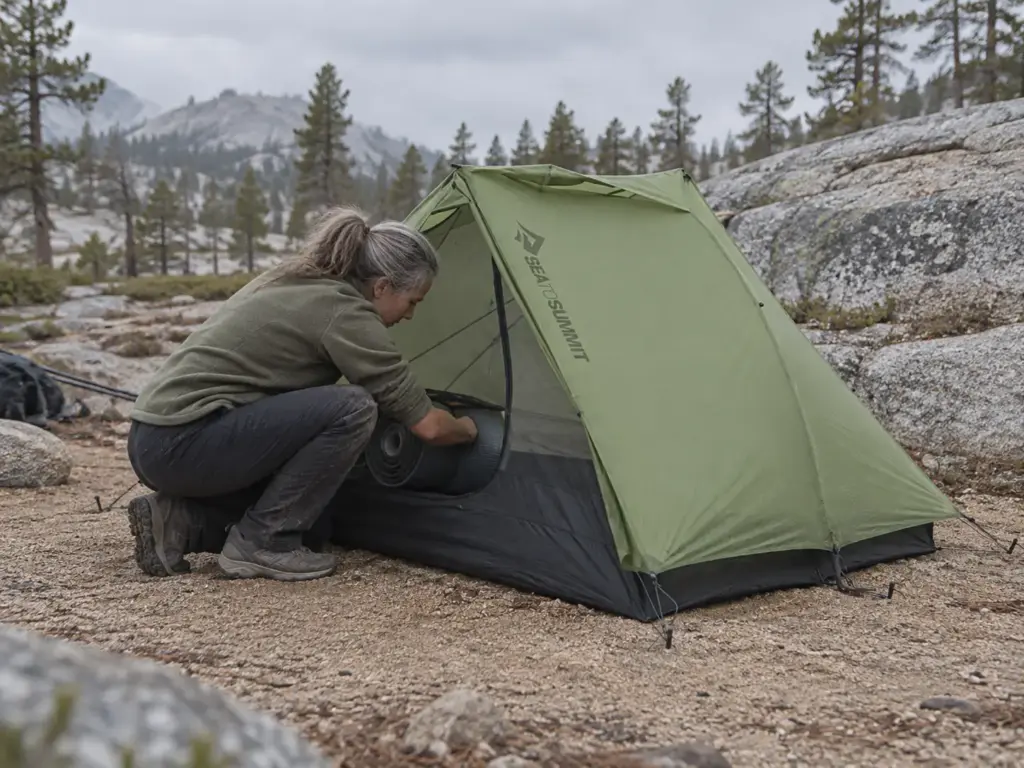
The Sea to Summit Alto TR2 earns its place here on geometry rather than on a bigger number. The Tension Ridge architecture inverts the usual pole arc so the ridge is pushed up and the head-end walls are pulled outward rather than sloping in. The practical result is that the width you paid for exists at chest height, not just at floor level.
That matters because the cramped feeling in a typical 2-person tent isn’t really about floor inches. It’s about the fact that the walls close in above the floor, so the 52 inches of measured width becomes 40 inches of shoulder room and 20 inches of usable space where your head is. Push the walls out and the same footprint becomes a tent two adults can sit up in at the same time.
At roughly 3 pounds 3 ounces it’s semi-freestanding, so you need stakeable ground at the foot. In exchange you get the livability of a much larger tent without the pack penalty. This is not the pick for someone who camps mostly on rock slab, and it is a strong pick for anyone who’s been frustrated by tents that measure fine and feel tight.
Vestibules are gear garages, not decoration
A vestibule is covered floor outside the inner tent, and it does one job well: keep wet, dirty gear under cover and out of your living space. A wet pack, muddy boots, a soaked rain shell, a stove you want to run in the drizzle. All of that belongs in the vestibule and none of it belongs against your sleeping bag.
Vestibule space is worth reading as carefully as floor area, and shape matters more than square footage. A long narrow vestibule takes a pack lying flat. A shallow wide one takes boots and nothing else. If you camp in wet country, the difference decides whether your pack starts every morning damp.
While you’re in the accessory aisle, it’s worth thinking about whether a footprint earns its weight before you add one by reflex. On some tents it’s genuine floor insurance and on others it’s five ounces of habit, and the answer depends on the floor denier and where you camp. Note that footprint included is rare at this price level, so budget for the groundsheet separately if you decide you want one.
One floor feature is worth checking before you buy, because it does real work in weather: a bathtub floor is a floor whose waterproof fabric curves up the sidewalls several inches before the seam starts, so runoff pooling under the tent has to climb before it can reach a stitch line. Nearly every tent on this page has one; the ones that don’t are the ones you find out about in a downpour.
Here is the livability test that no spec sheet covers: can you take off a soaked rain jacket inside the tent without wiping it down the inner wall? Most 2-person tents fail it, which is how the wall gets wet on a night it never rained inside. A tent with steep walls and real sit-up height passes, and that pass is what you’re buying.
The four-hour test
Here’s the way to think about livability that no spec sheet supports. Ask what happens when you’re stuck inside for four hours in the afternoon, because at some point you will be.
In a low dome, four hours means lying on your back staring at mosquito mesh, because there is no sitting position that works. You eat lying down and you can’t read comfortably.
Two people can’t both be propped up at once without one of them wedged against a sloping wall. The tent is a place to be unconscious, and any waking hour spent in it is an hour of waiting.
In a tent with steep walls and 43-plus inches of peak height, four hours means two people sitting cross-legged facing each other with a stove running in the vestibule doorway. You can pull a map out, change a base layer, play cards.
The difference is not comfort in the abstract; it’s whether a rained-out afternoon is a nuisance or a sentence.
That’s the number to interrogate at the store: not peak height alone but peak height plus how far the walls stay vertical. Sit in it, in the shop, with a pack next to you. If your head touches fabric when you sit up straight, the specs lied to you in a way that will cost you an afternoon.
Two secondary features carry more weight than their spec lines suggest. Side pockets at head height keep a headlamp, glasses and a phone off the floor, which sounds trivial until you’ve spent ten minutes hunting for a headlamp at 2am by feel. And a ceiling gear loft or mezzanine pocket gets damp socks up into the warmest, driest air in the tent, where they might actually dry.
What high walls cost
Steep walls and high peaks are more fabric standing up into moving air. A tall tent catches more wind than a low one, and it needs more attention to orientation when the forecast turns. The fix is free and it’s in the storm-pitch section below: point the narrow end into the wind and get the guylines out.
The NEMO Dragonfly OSMO 2P sits in this same livability conversation, with a fabric that resists water absorption well and a shape that reads roomier than its numbers. Same caveat as the other premium picks: it’s specialty-retail and direct territory right now rather than a reliable click-to-buy, so name it on your shortlist and shop for it on purpose.
Why Your Tent Gets Wet From the Inside
You wake up at 5am, the inside of the fly is beaded with water, your sleeping bag footbox is damp, and it did not rain. Almost everyone’s first conclusion is that the tent leaks. It almost never leaks.
What condensation actually is
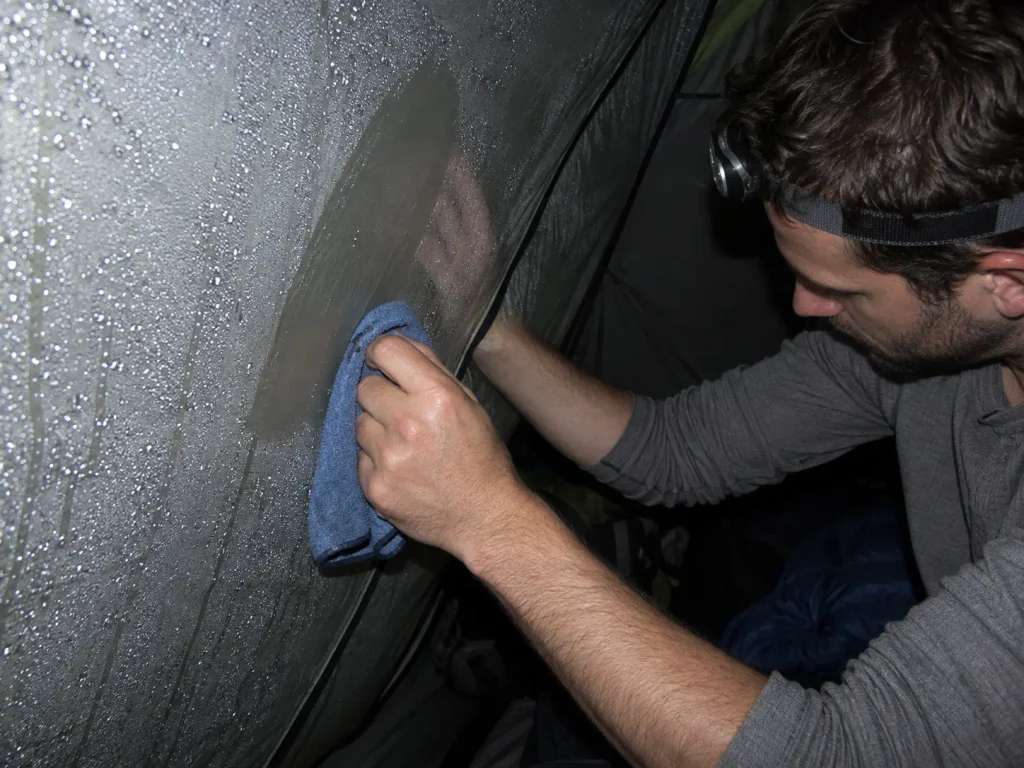
Condensation happens when warm, humid air meets a colder surface. Your breath is the main source, along with the warmth you give off and any wet gear you brought inside. Two sleeping adults put out a surprising volume of water vapor overnight. That vapor rises, hits the tent wall that has been cooling toward the outside air temperature all night, and comes back out of the air as liquid on the fabric.
That’s physics, not a defect. Every tent on this page does it in the right conditions, and the right conditions are common: cool night, humid air, still wind, two people inside. A tent that never condensed would be a tent with no walls.
What changes between tents is where the water ends up. In a double-wall tent, your vapor passes through the inner mesh panels and condenses on the underside of the separate outer rainfly, inches away from you but not touching you or your gear. In a single-wall shelter there is no second layer, so the vapor condenses on the one wall you’re sleeping against. That single mechanism is why DCF and single-wall tents feel wettest at 5am, and it’s the main reason double-wall stays the sensible default for most backpackers.
Material behavior plays into it too. If you’re weighing an ultralight fabric purchase, understanding how silnylon and Dyneema behave once they’re wet is worth the ten minutes, because silnylon, silpoly and Dyneema each handle moisture and sag differently, and the differences show up on exactly these mornings.
Two fabric specs are worth knowing how to read while you’re at it, because they get quoted at you constantly and neither one means what the marketing implies. Hydrostatic head is the water column a fabric holds before it leaks, measured in millimeters; a higher number is genuinely better, but once a fly clears the rating any mainstream brand ships, your wet-morning problem is condensation rather than water coming through. And a PU coating is the cheaper waterproofing route, which works well and eventually hydrolyzes into a sticky mess after years of humid storage, where silicone-impregnated fabric just keeps going.
Site selection: the free fix nobody uses
Here’s the lever most hikers never pull, and it costs nothing. Where you pitch changes how much condensation you get, often more than which tent you own.
Cold, damp air sinks and pools. That flat, soft, grassy hollow by the stream is the most humid, coldest spot in the whole drainage, and it is exactly the spot that looks most inviting at the end of a long day. Camp thirty vertical feet higher on a bench under tree cover and you’ll wake up measurably drier, because the air is warmer and moving and the ground is exhaling less moisture into your tent.
The rules of thumb that work: get away from lakes and streams, avoid low grassy depressions, look for ground that sits higher than what surrounds it, and take partial tree cover when you can get it, because a canopy slows overnight radiative cooling and keeps your fly closer to air temperature.
The convenient part is that this is also what the regulations want. The National Park Service’s backcountry camping distance rules commonly require camping at least 100 feet from trails and water sources, and many wilderness areas ask for 200 feet from lakes and streams. Follow the rule and you’ve already moved off the wettest ground. The compliant site and the dry site are usually the same site, which is the rare case where doing the right thing is also the comfortable thing.
Crack the vents or door zips on both sides of the tent, not one. One open vent gives you a dead end; two give you a cross-breeze that carries vapor out instead of letting it sit. This holds in cold weather too, which is when most people seal everything up and then blame the tent for the wet wall at dawn. A few degrees colder inside beats a soaked quilt every time.
Venting both sides, even when it’s cold
Ventilation is the second lever, and the mistake is almost universal: people open one vent. Air needs somewhere to go. A single opening lets a little vapor escape and leaves the rest circulating. Two openings on opposite sides create actual airflow through the tent, and moving air carries water vapor out before it reaches the wall.
Cold nights are when this gets abandoned and when it matters most. It’s 34 degrees, you zip everything shut for warmth, and by morning the wall is running with water and your bag has picked up two degrees of lost insulation from the damp. A wet bag is colder than an open vent. Leave the vents cracked, wear the hat, sleep warmer.
The third lever is the morning fallback, and it’s the one that saves your whole trip in a multi-day rain. Before you pack up, wipe the inside of the fly down with a pack towel and wring it out. Two minutes, and the water goes on the ground instead of into your pack for the next eight miles. It’s also the difference between a fly that dries at lunch and one that’s still soaked at the next camp.
If you want the whole routine end to end, from evening pitch to morning wipe-down, the full ventilation routine for a wet night breaks it down step by step. The short version: pick a higher, drier, partly sheltered site, vent both sides all night, and wipe the fly before it goes in your pack.
Two details separate people who manage condensation from people who complain about it. The first is what comes inside the tent with you: a soaked rain shell, wet socks and a damp pack are all still evaporating all night, and everything they give off ends up on your wall. That gear belongs in the vestibule, which is what the vestibule is for.
The second is where your face points. Breathe toward a vent rather than toward the foot of the tent, and you move the single biggest moisture source toward the exit instead of into the dead air over your feet.
Cooking inside is the fast track to a soaked tent, and worth saying plainly: a stove boiling half a liter of water puts that entire half liter into the air as vapor, and all of it lands on your walls. In steady rain the temptation is real. Cook in the vestibule with the door open, never in the inner.
One more note for anyone eyeing an ultralight single-wall shelter. The stories about waking up in a DCF tent with a damp sleeping bag footbox are real and they’re common. Owners manage it with aggressive site selection and by accepting a morning wipe-down as routine. Fair trade for the weight if you know it’s coming, unpleasant surprise if you don’t.
Storm Pitching and Campsite Non-Negotiables
Gear reviews score weather resistance in a test chamber. Nobody tells you the four things you do with your hands at the site, which matter more than the tent’s rating.
Orienting the tent to the wind
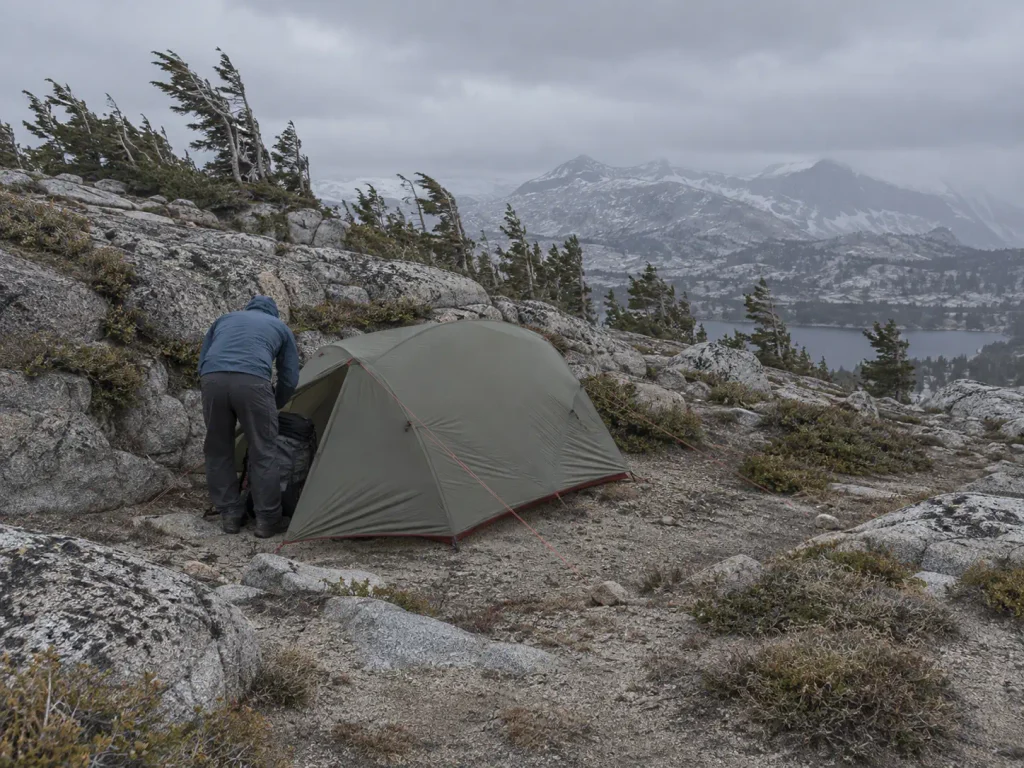
Point the narrowest profile into the wind and put the doors on the downwind side. Two effects, both worth having.
First, you cut the load on the broad walls. A tent presenting its long flank to a steady wind flexes, drums, and puts all that force into two stake points. Turned end-on, the same wind slides over a shape designed to shed it and the load spreads across the pole structure.
Storm resistance ratings assume you did this. The tent tested at 30 mph was tested pointing the right way.
Second, and this one you appreciate at 3am, a downwind door means you can unzip without a faceful of rain. An upwind door in a storm turns every trip outside into a soaking for both of you, and the water blows straight onto the inner.
Wind direction shifts overnight in mountain terrain, often reversing as the valley drains after dark. Read the trees, look at where the snow drifted or where the ground litter has piled, and pitch for the dominant pattern rather than the breeze that happens to be blowing while you’re setting up.
Stakes and guylines are not optional
This is the big one, and it’s the most common storm-pitch mistake in backpacking: skipping the stakes on a freestanding tent because it stands up without them.
Say it plainly. Freestanding means self-supporting, not wind-resistant. A freestanding tent with no stakes is a very expensive kite with your sleeping bag in it. The stories of a “freestanding” tent going over an exposed ridge mid-pitch, or flattening in the night, all end the same way: nobody staked it, because it didn’t look like it needed staking.
Every corner gets a stake, every night, whether or not the tent needs one to stand. Then the guylines go out. A tent pitched with corners only transfers all wind load to four points at ground level. Guylines from the pole junctions to the ground spread that load and stop the wall from flexing inward, which is what breaks poles.
Tension them taut, not slack. A slack guyline does nothing at all until the gust that snaps it tight does something bad to the fabric or the pole it’s attached to. Taut lines share load continuously. Slack lines deliver it as a shock, which is how a pole section cracks.
If it’s already raining when you arrive, check whether your tent supports a fly-first pitch, where the rainfly goes up first and the inner clips underneath it while it’s already sheltered. Some double-wall designs do this natively and some can’t do it at all, and it is the single most useful feature nobody shops for. The related trick, once the weather passes, is the awning pitch: prop the vestibule door open on a trekking pole to make a covered porch you can cook and sit under.
Ground that won’t hold a stake changes the technique, not the principle. Sand, loose gravel, deep duff, snow: anchoring a tent where stakes won’t hold covers the deadman burial and the rock-and-log variations. You still anchor. You just anchor differently.
Stake the two upwind corners first, then build the tent away from the wind. Trying to thread poles into a loose tent in a blow is how people lose a fly down the slope, and it is always the moment somebody’s headlamp battery dies. Two stakes before anything else costs fifteen seconds and removes the whole problem.
Reading the site before you pitch
Campsite selection is the skill that makes every other decision on this page matter less. Look at the ground before you commit, and look at it as water would.
No depressions, no gullies, no drainage paths. A flat, soft, appealing patch of sand in a dry wash is flat and soft because water made it that way, and it will be doing that again by 2am if a storm hits upslope. Check what’s above you: if the terrain funnels toward your spot, you’re in the funnel. Look for the fine grit lines, flattened grass, and debris piles that mark where water ran last time.
Then look up. Dead limbs overhead, leaning trees, hanging broken branches in the canopy. This is the hazard nobody scouts for, and wind is exactly when it comes down. Thirty seconds of looking up is the highest-return safety check in camp, and moving twenty feet solves it.
The rest of the non-negotiable list is short. Clear the sharp debris under the floor before the tent goes down, since a stick point under a 15D floor with your weight on it all night is how floors get holes. Pitch the fly taut enough that it doesn’t touch the inner anywhere, because contact points wick water straight through.
And handle the waterproofing at home, not at camp. Most modern flies arrive seam-taped from the factory, which covers you for a few seasons; when that tape starts lifting, keeping the seams watertight before the trip is a twenty-minute job on the kitchen floor that prevents the failure you can’t fix in the rain.
Great Backpacking Tents on a Budget
Now the honest part. Most roundups fence the cheap tents into their own section at the bottom, which quietly implies they’re a different category of thing. They’re not. They’re the same category with different trade-offs, and the trade-offs deserve to be compared out loud against the premium picks above.
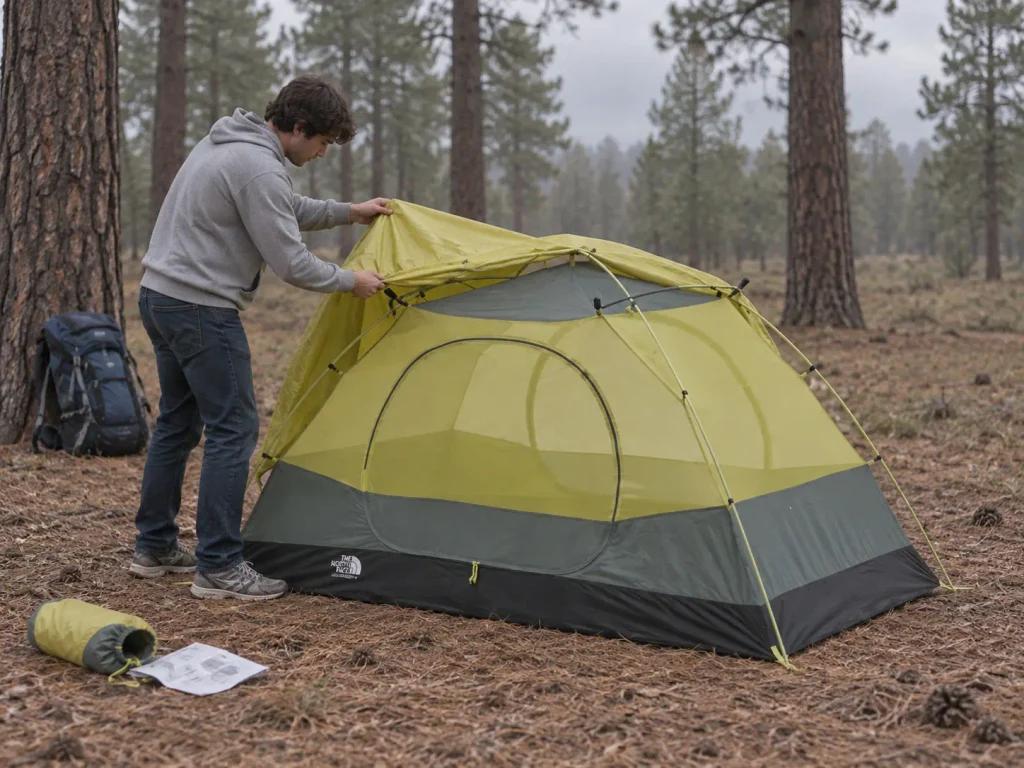
So here’s the direct comparison. Against the FreeLite or the Alto TR2, a budget backpacking tent costs you three things: weight, packed volume, and a fly that isn’t cut to handle sustained wind. That’s the real list. What it does not cost you, in ordinary conditions, is dryness in normal rain, floor durability, or a decent night’s sleep in fair weather.
Sit with that for a second, because it reframes the whole purchase. If your trips are weekend trips in reasonable weather within a few miles of a trailhead, the budget tier does the actual job. The premium tier does the same job while weighing less and holding up better when things get bad.
Mountain Hardwear Mineral King 2: best value freestanding
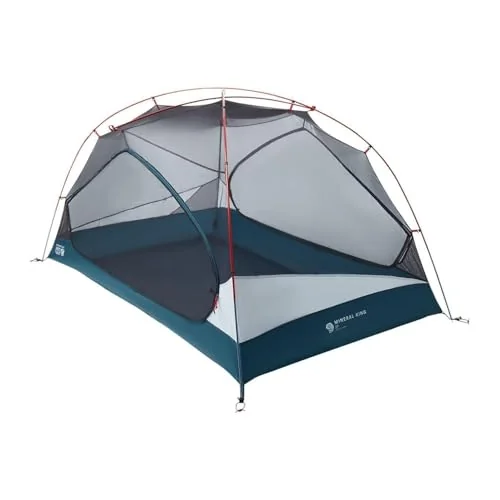
The Mountain Hardwear Mineral King 2 is the value pick because it keeps the architecture and spends less on the fabric. Full freestanding, 3-season tent protection, a mainstream brand that answers the phone about warranty claims. The pitch is the same kind of pitch you’d learn on a tent costing three times as much.
Where the money went missing is in weight and packed size. You’ll notice both, especially solo. Split between two packs it becomes unremarkable, which is the whole argument for buying value gear when you hike with a partner.
For a hiker doing eight to fifteen weekend trips a year on established trails, this tent does everything the premium picks do. Buy it, put the savings into a good pad, and reconsider in three years when you actually know what annoys you.
The North Face Stormbreak 2: the first tent to buy
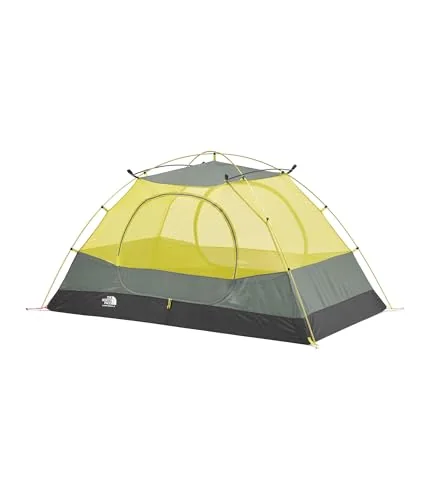
If someone asks what their first backpacking tent should be, the The North Face Stormbreak 2 is the easy answer. Higher denier fabric, a pole structure with no clever parts, and a floor that shrugs off the pine cone you forgot to clear.
Here’s the reasoning that matters more than the spec sheet. Your first season, you will pitch on a root. You will stuff the tent wet. You will drag the floor across gravel while repositioning, and you will close a zipper on fabric.
An ultralight tent punishes all four; this one absorbs them. The tent that survives your learning curve is worth more than the one that saves you four ounces.
It’s heavier than anything else on this list and the packed size is real. You’ll feel it at mile ten. You will also still own it in five years, probably as the tent you hand to friends who want to try backpacking, which is a genuinely useful thing to have in the garage.
Speaking of the parts that break: zippers are the first failure point on nearly every budget tent, and they fail from grit rather than age. Knowing how to fix the zipper that always goes first turns a trip-ending problem into a ten-minute chore with a multitool. Keep the zipper track clean and it mostly doesn’t happen at all.
Coleman Skydome 2-Person: the honest budget floor
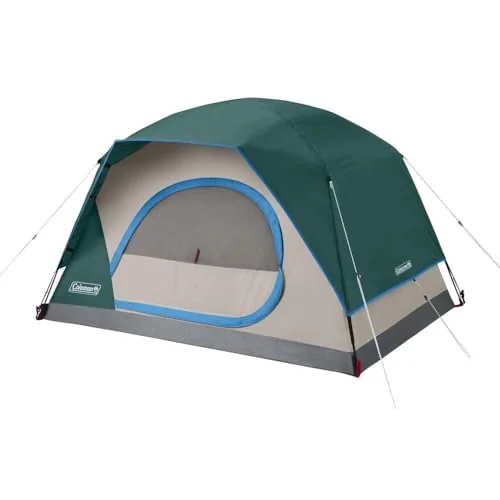
The Coleman Skydome 2-Person is the honest bottom of this list, and it’s included because knowing where the floor is makes everything above it legible.
What you get: a simple pole structure, a genuinely fast pitch, and a shelter that keeps normal rain off you. What you give up, stated flatly: pack weight that pushes past what most people want to carry more than a few miles, a packed size that eats a real chunk of a 50-liter pack, and a fly that is not cut for sustained wind. That last one is the limit that matters. In a steady blow on an exposed site, this tent is working harder than it was designed to work.
Where it genuinely belongs: short approaches, established campgrounds, first overnights with kids, the loaner tent, the trip where you walk two miles to a lake and back. Those are real trips, and plenty of people’s entire hiking life fits in that description.
Where it doesn’t belong: above treeline, in shoulder season, on anything with a long carry. Not because it’s a bad tent, but because it’s a car camping tent being asked to do a backpacking job, and that asymmetry shows up somewhere around mile six.
First tent or fifth: the upgrade path
Here’s the framework the review sites skip, split by where you actually are.
If this is your first tent: buy at the Stormbreak or Mineral King tier and put the difference into a sleeping pad and a quilt or bag. Comfort at night comes from the pad far more than the tent, and a cheap pad ruins good sleep in an expensive tent. You also don’t yet know what bothers you, and you can’t buy your way around that. Five trips will tell you whether you care about headroom, doors, or ounces, and then you’ll buy the right thing instead of the well-reviewed thing.
If you’ve done five or more trips: now the ultralight premium starts paying you back, because you know your mileage, your weather patterns and your specific annoyance. Buy the fix for what bothers you. If it’s crawling over your partner, buy two doors. If it’s not being able to sit up in rain, buy the Tension Ridge geometry. If it’s the last four miles of every day, buy the two pounds off.
If your tent is already fine: don’t buy a tent. Buy the pad, the shoes, or the permit. The budget tent that gets carried on twelve trips beats the premium one bought after two seasons of saving and hesitating.
And one option that belongs in a budget conversation nobody puts it in: sometimes the right answer is no tent at all. The nights a tent is the wrong call entirely makes the case for cowboy camping when the forecast is clear and the bugs are down, which costs nothing and weighs nothing.
Matching the Tent to the Season and the Trip
Last filter before checkout. A 3-season tent covers the overwhelming majority of what American backpackers actually do, and knowing exactly where that coverage stops is worth more than owning a 4-season tent you carry twice.
Three-season is the right default
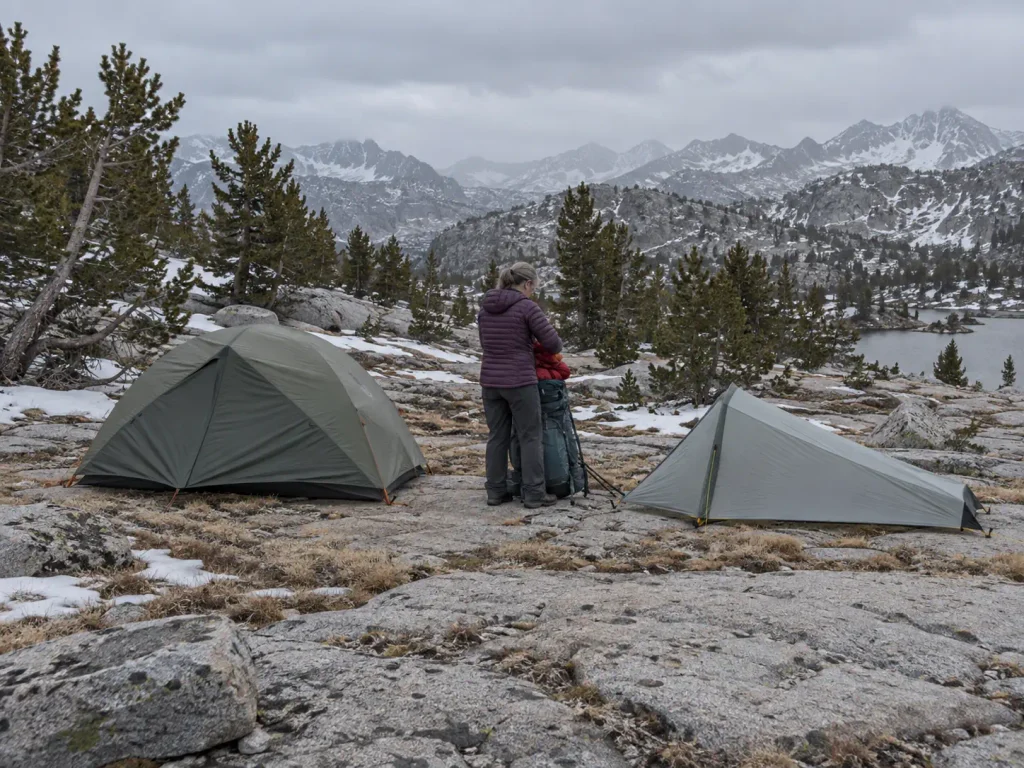
Three-season means bug season through shoulder season: rain, moderate wind, light frost, mosquitoes. That describes normal conditions on the Appalachian Trail, the Pacific Crest Trail, the Colorado Trail, the John Muir Trail and the Long Trail in their standard windows, plus essentially every weekend trip most people take.
Where it stops is specific and worth memorizing. Sustained snow load, which needs a pole structure built to carry weight rather than shed wind. Persistent above-treeline wind over long periods, which fatigues lightweight poles and fabric. Real winter backpacking, with the condensation and cold-soak problems that come with it.
That’s 4-season territory: heavier, pricier, and worth renting once before you buy, because most people who buy one use it less than they imagined. If you want the boundary drawn precisely, where 3-season protection runs out covers the specific failure modes on each side of the line.
The trap here is subtle and common: buy a 4-season tent for one planned winter trip, then carry that extra pound and a half in July because it’s the tent you own. The tent you buy shapes the trips you take, and it does it quietly.
Solo versus shared: two different purchases
If you hike alone most of the time, a solo backpacking tent at or under about two pounds is a genuinely different purchase from splitting a 2-person tent with a partner, and the answer depends entirely on your ratio of solo to shared trips.
Mostly solo with occasional company: buy the 1P and let your partner carry their own shelter, or buy a 2P and enjoy the space. Mostly shared: buy the 2P or the 3P and split it, because the per-person weight is the number that matters. Genuinely fifty-fifty: buy the 2P, which is the worst tent for neither use case and the best for neither, and is still the right call. For the solo end of the spectrum, what thru-hikers carry when they go solo is where the real weight-cutting happens, since one person has nobody to split with and every ounce is theirs.
Tarps, bivies and floorless shelters
Before you spend, it’s worth knowing the shelter classes that sit outside the tent category entirely, because one of them might fit your trips better.
A tarp shelter is the lightest and most adaptable option, with no floor, no bug protection, and a setup that depends on what you can tie to. On treed trails it’s brilliant and on open ground it’s a problem, which is exactly why pitching a tarp where there are no trees is a skill worth having before you rely on one.
A bivy sack goes the other direction: minimum weight, minimum space, maximum condensation. It’s a sleeping bag cover with weather protection, and it suits fast alpine trips where you’re sleeping four hours and walking the rest. The bivy-versus-tent weight trade lays out what you’re really buying with those saved ounces, and it’s less than most people assume once you’ve spent a rainy night in one.
The floorless pyramid class from the Mega Light section above splits the difference: tent-sized covered space, tarp-level weight, no floor and no bugs handled. Pick the class before you pick the tent, because the class decides what your backcountry travel can look like and the model is just details after that.
Rent or borrow the shelter class before you buy into it, especially for anything floorless or 4-season. One night in a borrowed pyramid tells you more about whether you can live without a floor than a month of reading about it, and the rental fee is a rounding error against the cost of a shelter that ends up in the closet.
The One Thing to Do Before Your Next Trip
Three things carry over from all of this.
Size up one capacity rating from your headcount. The printed number is the manufacturer’s best case and never yours, and the weight penalty for getting it right is usually under a pound split between two packs.
Your tent gets wet from the inside more often than the outside. Pick a higher, drier site away from water, vent both sides all night even when it’s cold, and wipe the fly down before you pack it. All three are free.
Stake it and guy it out every night, freestanding or not. Freestanding describes self-support, never wind-hold, and the tent that stays put is the one you staked.
Then do this before the next trip: pitch the tent in the yard and time yourself doing it with every stake and every guyline out. Then do it once more in the dark with a headlamp. The night you need that speed is the night you won’t have light to work it out, and fifteen minutes on the lawn is how you buy it back.
Frequently Asked Questions
01Who makes the best backpacking tents?
No single brand wins across the board. MSR, Big Agnes, NEMO and Sea to Summit all build excellent 2-person tents, and the right one depends on whether you are optimizing for weight, headroom or price. Cottage brands like Zpacks and Durston go lighter still but sell direct only.
02Which type of tent is best for backpacking?
A double-wall, freestanding or semi-freestanding 3-season tent covers the large majority of backpacking trips. Double-wall wins because condensation lands on the outer fly instead of your bag. A trekking-pole shelter beats it only when weight rules and the ground takes stakes.
03Is a 5 lb tent too heavy for backpacking?
Not for a weekend, and not if two hikers split it into 2.5 pounds each. It is about 1.5 pounds over the practical threshold for a lightweight 2-person tent, so it will slow you on long days. A 5-pound tent you own beats a 2-pound tent you do not.
04What are the top 5 best camping tents?
For backpacking: MSR FreeLite 2 overall, MSR Hubba Hubba LT2 for livability, Sea to Summit Alto TR2 for headroom, Mountain Hardwear Mineral King 2 for value, The North Face Stormbreak 2 as a first tent. Car-camping tents are a separate purchase, heavier and roomier by design.
05Should I buy a 2-person or 3-person tent for two hikers?
Buy the 3-person if you can carry it. Two standard 20-inch pads need 40-plus inches of floor against a typical 45 to 50-inch 2-person width, leaving no room for gear. The weight penalty is usually under a pound, split between two packs.

I've spent more than a decade researching hiking gear and trail technique. I read the specs, the forum threads and the long-term reviews, and every pick here comes with what it gets wrong.
End of the trail
You read every mile of this one. Here's where the trail goes next.