



















The average Appalachian Trail thru-hiker goes through four pairs of shoes before they touch Katahdin. That single fact makes “which shoe is best” the wrong question, because you are not making one purchase, you are making four, and the shoe that wins on a store shelf is rarely the one that wins at mile 500. According to the annual Appalachian Trail Thru-Hiker Survey, 87% of 2025 finishers spent most of their hike in trail runners, and the Altra Lone Peak has topped that list every year since 2017. The best thru-hiking shoes are the ones that survive the most miles per dollar while still fitting a foot that is going to change shape on you. This guide covers what separates a 400-mile shoe from a 700-mile one, how to size for feet that swell, and which three shoes are worth buying four times.
Why Nearly Every Thru-Hiker Now Wears Trail Runners
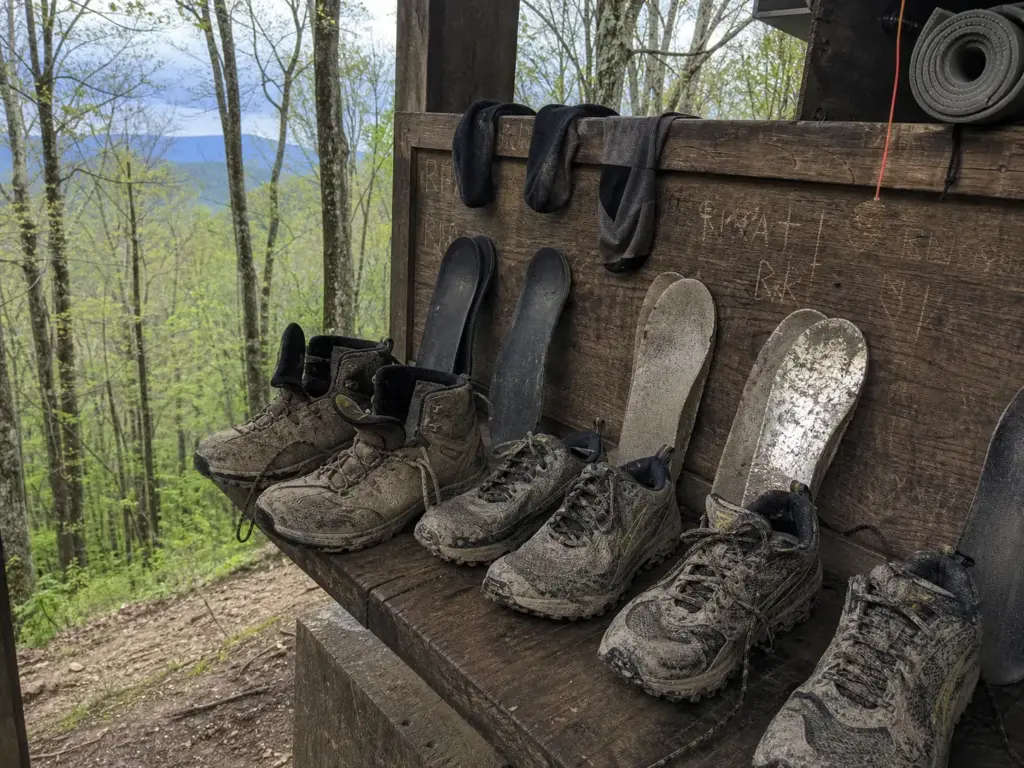
The boot-versus-trail-runner debate is settled on the trail, and it ended for deeply unglamorous reasons. In the annual Appalachian Trail Thru-Hiker Survey, 87% of 2025 hikers wore trail runners for the majority of their miles, while only 77% started in them. That ten-point gap is the whole story compressed into two numbers.
People switch to trail runners mid-hike. Almost nobody switches back.
What Changed Between the Trailhead and Mile 500
Walk any popular trailhead in April and you will see a healthy share of leather boots. Walk a shelter in Virginia in June and the ratio has flipped. The hikers who started in boots did not have a philosophical conversion, they had a physical one, usually somewhere in the first three weeks when their feet stopped tolerating a stiff shoe for twelve hours a day.
Boots are still the right tool for some jobs, particularly winter travel and off-trail scrambling with a heavy load. But the thru-hiking use case, which is high mileage on maintained tread day after day, punishes exactly what boots are built to provide. Stiffness that protects on a scree slope becomes a hot spot at mile 18.
The Weight Penalty Nobody Adds Up
Pack weight rides on your hips and shoulders. Shoe weight gets lifted by your leg on every single stride, and a thru-hiker takes millions of them. That is the asymmetry most gear lists miss.
A pair of mid-cut leather boots weighs roughly twice what a pair of trail runners does. Call it a pound or more of difference, lifted and swung a few million times over a long trail. The long-standing rule of thumb among hikers is that weight on your feet costs you several times more effort than the same weight in your pack, and while the exact multiplier gets argued about, no version of that math favors the boot.
The practical translation is that hikers in lighter shoes finish their days with more left in the tank, which turns into more miles, which turns into a schedule that works.
What You Give Up Going Low-Cut
Two real things. First, underfoot protection: a thin trail runner on sharp rock will let you feel every edge, which is why a rock plate matters more than most buyers realize. Second, the ankle cuff.
That second one deserves honesty rather than a slogan. The cuff on a hiking boot does provide some proprioceptive feedback and some resistance to ankle rolling, but the ankle support argument doesn’t hold up the way most hikers assume once you look at what actually prevents rolls, which is ankle strength, foot placement, and fatigue management. A cuff on a tired hiker is not a substitute for any of those. There is even an argument running the other way: a low-cut shoe preserves ankle mobility, and an ankle that moves freely tends to be an ankle that reacts in time.
One vocabulary note, because it trips up searches: on trail, people say trail runners. In stores and search bars, people say hiking shoes. For thru-hiking purposes they are the same category, and the hiker asking about one is almost always asking about the other.
What Actually Makes a Shoe Last 700 Miles
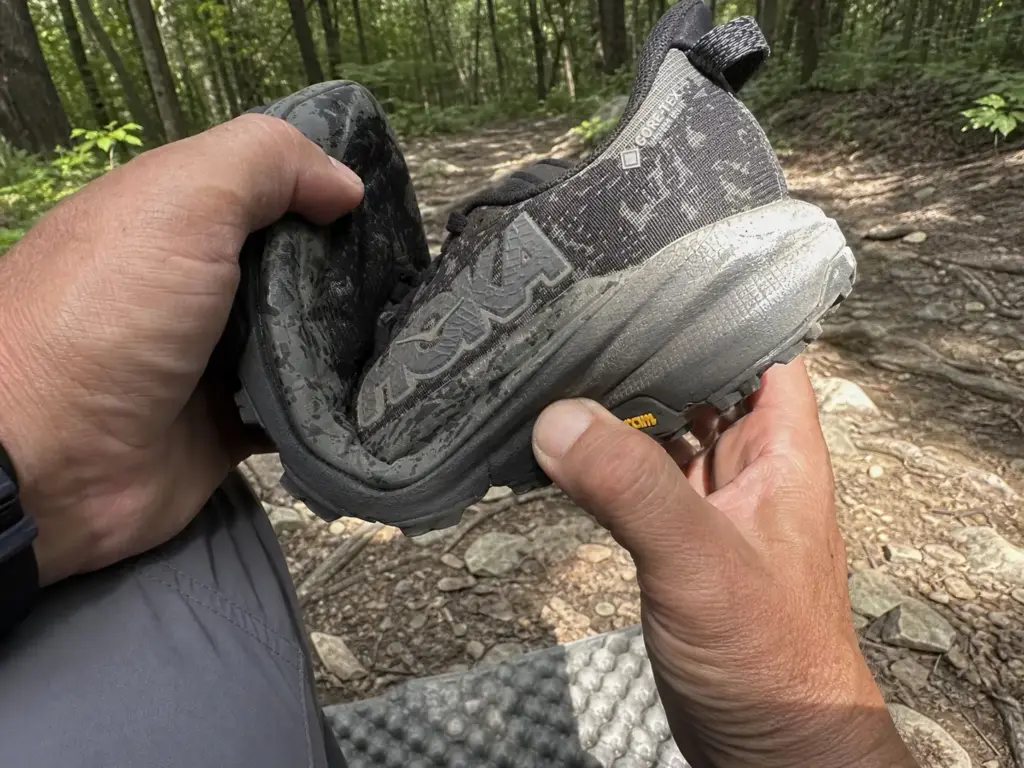
Everyone asks how long a shoe lasts. The better question is which part dies first, because the answer is almost never the tread, and that catches people off guard. A shoe can look perfectly serviceable and be completely finished.
Published ranges put most trail runners at 300 to 500 miles, with the more durable builds reaching 600 to 900. The 700-mile shoe exists. It is just not the average shoe, and it is never the average shoe under a heavy pack on granite.
Which Part of the Shoe Dies First
Here is the failure order, ranked by what actually ends a shoe’s useful life on a long trail.
- Midsole compression. The foam loses its ability to rebound. This is invisible from the outside and it is the number one killer.
- Heel-cup collapse. The rear structure softens and folds, your heel starts sliding, and blisters follow. On some models this shows up shockingly early.
- Upper mesh blowout. The fabric splits at the flex crease behind the toe box, usually where the shoe folds hardest on climbs.
- Outsole delamination. The rubber separates from the midsole, often at the toe or heel edge.
- Tread wear. Almost always last. By the time your lugs are rounded, the foam under them died two hundred miles ago.
That ordering is the single most useful thing in this section. Most hikers inspect the bottom of the shoe because it is the part they can see, and the bottom of the shoe is the part that matters least.
The 400-Mile Warning Sign
The Appalachian Trail survey data lands on four pairs for a full thru-hike, which works out to roughly one pair every 520 miles. That figure holds for boot wearers too, which quietly demolishes the idea that durability is a reason to choose boots.
The mistake that costs people a knee is waiting for visible failure. A compressed midsole still walks fine on flat ground. It fails on descents, where it is supposed to absorb impact and instead passes it straight up your leg. Hikers who push shoes to 700 miles because “they still look fine” tend to show up in shelters complaining about shin splints and a knee that started aching around Pennsylvania.
Watch the calendar, not the tread. Somewhere between 400 and 500 miles, do a real inspection: press your thumb hard into the midsole sidewall and see how fast it springs back, bend the shoe at the flex point and look for creases that have become folds, and check whether the heel collar still holds its shape when empty.
Take a photo of your new shoes on day one, standing empty on flat ground, shot from the back. At 400 miles take the same photo. If the heel counters are leaning inward in the second shot, the heel cup is gone and no amount of lacing will fix it.
Build Features That Actually Buy Miles
Four things separate shoes that reach 700 miles from shoes that quit at 350.
Denser midsole foam is the biggest one, and it is a genuine trade-off rather than a free upgrade. Most trail runners use some form of EVA foam, and the softer the compound, the better it feels in the store and the faster it dies on trail. A rock plate sitting between the midsole and outsole spreads point loads, which both protects your foot and reduces the localized foam crushing that ends midsoles early.
TPU overlays at the flex crease keep the upper from splitting where it works hardest, and a knit upper with no overlays at all is the build most likely to blow out first. A reinforced toe cap handles the rock strikes that peel outsoles. Lug depth matters less for durability than people assume, though deeper lugs do hold their traction longer as the outer edges round off.
If you want to understand why two shoes with the same advertised cushioning feel and last completely differently, it comes down to stack height and how the midsole is built, which is where the density-versus-softness trade-off actually lives. More stack is not automatically more durable, and softer is almost never more durable.
The Cost-Per-Mile Math That Changes What You Buy

This is the part where the arithmetic goes against intuition, so here it is on a napkin.
A $140 shoe that dies at 400 miles costs you $0.35 per mile. A $180 shoe that reaches 700 miles costs about $0.26 per mile. The cheaper shoe is roughly a third more expensive to walk in, and that gap only widens as the mileage stretches.
Running the Numbers on Four Pairs
The multiplier nobody applies is the four-pair reality. You are not comparing one $140 purchase to one $180 purchase, you are comparing a season of them.
Over a 2,190-mile Appalachian Trail thru-hike, the 400-mile shoe means roughly five and a half pairs. The 700-mile shoe means roughly three. At those sticker prices, that is around $770 versus around $540 for the same distance walked. The shoe that cost more per box cost less per trail.
Quality trail runners built for this kind of mileage generally run $140 to $180 a pair, and within that band the sticker price tells you almost nothing about the per-mile cost. That is the whole point.
Why “Budget Pick” Misleads Thru-Hikers
Every roundup has a budget pick, and for a day hiker buying one pair a year, that framing is fine. Sticker price is basically the whole cost, and a shoe that lasts two seasons of weekend miles has done its job.
A thru-hiker is a different customer entirely. You are buying a season’s worth of footwear inside five months, so your total spend is dominated by replacement frequency rather than unit price. The budget pick that dies at 350 miles is not the budget option, it is just the option with the lowest number on the tag. Value per mile is the metric that survives contact with a long trail.
The same logic scales beyond trail runners, and if you have ever wondered why serious hikers spend real money on footwear that lasts, it is the same cost-per-mile logic applied to boots that explains the price gap between a resoleable full-grain build and a disposable synthetic one.
The One Thing Per-Mile Math Can’t Measure
Fit is a gate, not a variable. A shoe that reaches 700 miles and gives you toe-bang the entire way is worth exactly nothing per mile, because you will stop wearing it in Damascus and buy something else anyway.
Run the cost math only among shoes that fit. Never use it to talk yourself into a shoe that pinches, because the per-mile winner on paper becomes the pair sitting in a hostel hiker box.
One honest caveat on all of these numbers: published mileage ranges are planning figures, not guarantees. A lighter hiker with a light base weight on soft Virginia tread will get considerably more out of a pair than a heavier hiker with a loaded pack on Pennsylvania rock. Terrain, load, and gait all move the number, and they move it enough that two people in identical shoes can retire them hundreds of miles apart.
Heel-to-Toe Drop and Who Should Skip Zero-Drop
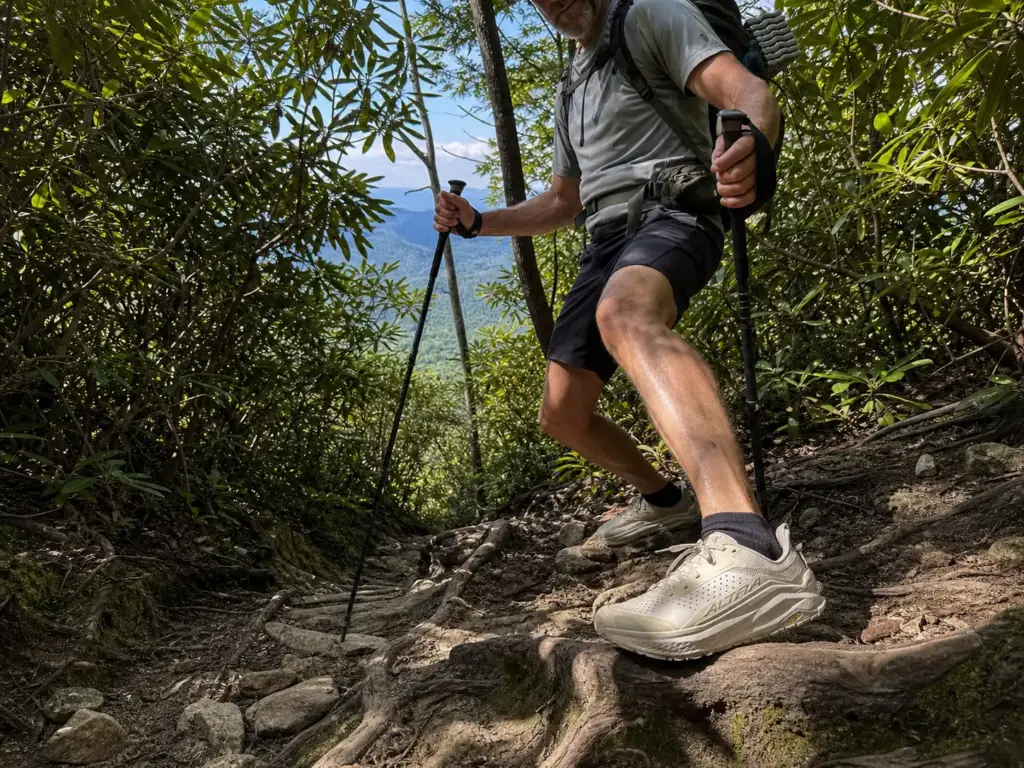
The most popular shoe on the Appalachian Trail is exactly wrong for some feet, and the people it is wrong for tend to discover this around mile 200 with an Achilles that will not settle down. This is the warning that belongs before the purchase, not after.
What Drop Does to Your Calves and Achilles
Heel-to-toe drop is the height difference between the heel stack and the forefoot stack. Zero-drop means both sit at the same height. Low drop runs 4 to 6mm. Traditional running and hiking shoes sit at 8 to 12mm.
Drop is not a comfort setting, it is a load-distribution setting. A higher heel puts your ankle in slight plantarflexion, shortening the demand on the calf and Achilles while sending more load through the knee. Drop the heel to zero and that reverses: your calf complex and Achilles tendon absorb more, your knees absorb less. If you want the mechanical detail on how zero-drop shoes change your stride, the short version is that it is a redistribution, not a reduction.
Nobody gets a free lunch here. You are choosing which tissue does the work.
Who Should Not Default to Zero-Drop
Three groups should treat zero-drop as a considered choice rather than the default.
- Anyone with Achilles tendon history. Tendinopathy, a past partial tear, chronic tightness. Zero-drop increases exactly the load that structure already struggles with.
- Anyone with plantar fasciitis history. The same kinetic chain, the same increased demand.
- Anyone coming straight from 10mm-drop shoes with no transition window. Your calves have been living in a shortened position for years. They will let you know.
None of this makes zero-drop bad. It makes it a platform with a specific cost, and the cost lands hardest on people who are already carrying an injury in that chain. The mistake is buying the Lone Peak because everyone on the trail wears one, without ever holding your own injury history up against the platform.
How to Transition Without Wrecking a Hike
The transition window is four to six weeks of gradually increasing mileage, and the operative word is before. A thru-hike start line is the worst possible place to begin adapting to a new drop, because your daily volume goes from whatever you were doing to fifteen miles a day, permanently, with a pack.
Start at short walks in the new shoes while keeping your old pair for longer efforts. Add distance in the new platform every few days. Expect calf soreness that feels like the day after a hard hill workout, and treat sharp Achilles pain as a stop sign rather than a soreness to push through. For a full week-by-week protocol, a transition timeline that doesn’t blow up your calves is worth following properly rather than improvising.
If your start date is six weeks out and you have never worn zero-drop, you have exactly enough time. If it is two weeks out, buy the low-drop shoe.
Sizing for Feet That Swell (and Sometimes Never Shrink Back)
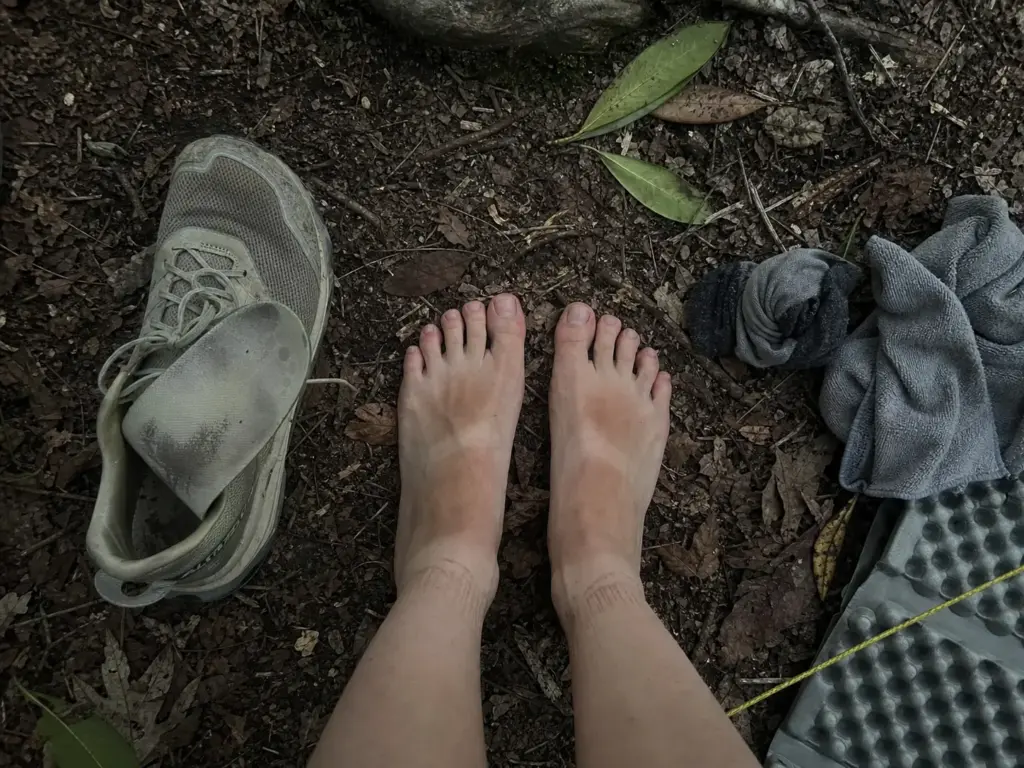
Every roundup on the internet tells you to size up half a size. Almost none explains why, and none mentions that for a lot of thru-hikers, the change does not reverse.
Why Feet Swell Up to 8 Percent
Sustained weight-bearing activity drives fluid into the tissues of the foot. A university study measuring foot volume change during long-distance activity documented volume increases of up to 8% under sustained load, which is far more than a half-size of extra length, it is extra girth in every direction.
On a thru-hike, three factors compound that. Consecutive high-mileage days never give the tissue a full reset. Heat accelerates the fluid shift. A loaded pack adds carried weight to every footfall, which raises the load driving the swelling in the first place.
This is also why foot type matters less than most fit guides suggest once you are forty days in. Hikers with narrow feet often start in a snug shoe and end up needing the same extra volume as everyone else, and hikers who rely on structured arch support frequently find that the arch they were supporting has changed shape underneath the insole.
The result is that your foot at mile 15 of day 40 is meaningfully bigger than the foot you measured in a store on a Saturday morning. A shoe fitted to the second foot will torture the first one.
The Thumb-Width Test and When to Do It
Do the final fit check at the end of a hiking day, when your feet are already at trail volume. This single piece of timing prevents more misery than any brand choice.
The test itself is simple. With the shoe on and unlaced, slide your foot all the way forward until your toes touch the front. There should be roughly a thumb’s width of space behind your heel. Then lace it normally, stand, and check that your toes can splay without pressing the sides, and that the widest part of your foot sits at the widest part of the shoe rather than ahead of it.
The failure mode this prevents is toe-bang on descents, where your foot slides forward on every step and slams the front of the toe box. That is where black toenails come from, and it is the most preventable injury in this entire article.
That said, more room is not automatically better, and there is a real difference between when sizing up helps and when it just creates slop. A shoe that is too long lets your foot slide even with a good heel lock, which trades toe-bang for heel blisters.
When the Change Doesn’t Reverse
Here is the part that surprises people. Long-distance hikers commonly report a permanent half-size to full-size increase that persists years after the trail. The hiker who started in a 10.5 and is still buying 11.5 four years later is not an unusual story, it is a common one in any thru-hiker community.
The proposed mechanism is structural rather than fluid: sustained mileage under load gradually stretches the ligaments supporting the arch, the arch flattens slightly, and the foot lengthens and widens. Worth labeling honestly, this comes from consistent practitioner reports rather than clinical consensus, and the research on permanent arch change in long-distance hikers is thin.
The practical takeaway does not depend on the mechanism. If you have done a long trail, measure your feet again before buying your next pair rather than ordering your old size out of habit. Plenty of people have bought three pairs of the wrong size before someone told them this.
If you are mailing later pairs ahead, buy your pair three and pair four a half size larger than pair one. By the time you open that box you will have a different foot, and a box with the wrong size in it 900 miles from home is a genuinely expensive mistake.
Waterproof or Not, Settled
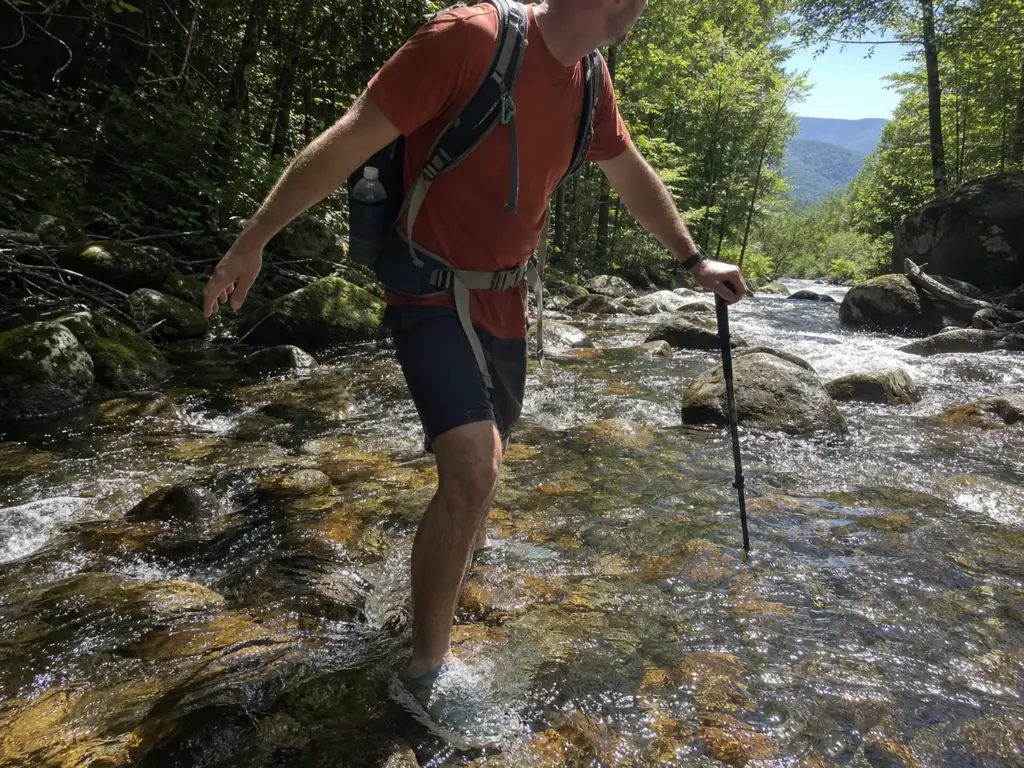
GORE-TEX sounds like the upgrade. On a thru-hike it is usually the downgrade, and the reason is almost funny: the membrane does an excellent job keeping water out, right up until water comes in over the collar. Then it does an equally excellent job of keeping it in.
Why the Membrane Works Against You
A waterproof membrane is a two-way barrier with a strong directional bias in marketing copy and no such bias in physics. Water gets into a low-cut shoe over the cuff, which is where stream crossings, wet brush at calf height, and rain running down your leg all deliver it. The membrane has nothing to say about any of those entry paths.
Once water is inside, the difference is dramatic. A mesh trail runner drains through the fabric and dries in a couple of hours of walking. A membrane shoe holds the water against your foot and can take most of a day, sometimes overnight, to dry out. On a trail where you cross water most days, that is the difference between wet feet for two hours and wet feet for fourteen.
Prolonged saturation is not a comfort issue, it is a skin-integrity issue. Macerated skin blisters at pressures that dry skin shrugs off, and a field study on foot swelling in ultra-endurance athletes documents how much foot tissue is already changing under that kind of sustained load without adding a day-long soak to it. If you want the dry-time penalty in plain numbers, the comparison is more lopsided than most buyers expect.
When Waterproof Actually Earns Its Place
Dismissing waterproofing outright would be its own kind of marketing. There are three situations where a membrane genuinely wins.
Cold shoulder-season conditions, where wet feet are a temperature problem rather than a comfort problem. Persistent damp with low temperatures, like a Pacific Northwest spring where nothing dries anyway and the membrane at least keeps the initial soak out. And shorter trips where you can dry gear indoors overnight, which removes the drying penalty entirely.
Notice what all three have in common. They are cold, or they are short. A summer stretch on the Pacific Crest Trail is neither, and a membrane there is a sweat trap with a premium price tag.
One detail worth knowing: even non-waterproof shoes usually ship with a DWR coating on the upper, which sheds light dew for the first few weeks and then wears off. That is fine. The quick-drying behavior you actually want comes from the mesh underneath it, not from the treatment on top.
The alternative that most long-trail hikers land on is mesh uppers, a deliberate sock strategy, and simply accepting that feet get wet. Wet feet are not the problem. Wet feet for fourteen hours are.
The Shoes Worth Buying Four Times
Three picks, each judged against the standard built across the last two thousand words: does it reach real mileage, does it fit a foot that will swell, and what is its honest failure mode. Each one leads with its weakness, because a shoe you know the weak point of is a shoe you can plan around.
Best Overall — Altra Lone Peak 9
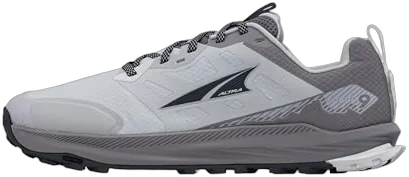
The warning goes first, because it is the reason a lot of people should not buy this shoe. Heel-cup collapse is a documented, repeatedly reported failure in the Lone Peak line, showing up as early as 75 miles on some earlier versions, with noticeable tread wear around 200. When the heel structure softens, your foot starts moving inside the shoe on descents, and the blisters that follow are the kind that end days.
The second warning is the platform. This is a zero-drop shoe, which means everything from the drop section applies at full strength. If you have Achilles or plantar fasciitis history, this is the shoe to skip, not the shoe to default to, no matter how many people at the shelter are wearing them.
With both of those on the table, here is why it still earns best overall. The FootShape toe box is genuinely the roomiest mainstream option available, and for a foot that gains 8% in volume, room is not a luxury, it is the whole ballgame. The 25mm stack with a StoneGuard rock plate handles Appalachian rock adequately without the disconnected feel of a max-cushion shoe. And at roughly one in five hikers on the AT in 2025, the sheer install base means outfitters in trail towns actually stock it, which matters more than you would think when you need a replacement in Hot Springs.
The Lone Peak 9 ships in several versions within the same family, including waterproof variants, so check which specific version a listing is offering before you order. Given the drying penalty covered above, most thru-hikers want the standard mesh build, not the waterproof one.
Max Cushion — HOKA Speedgoat 6
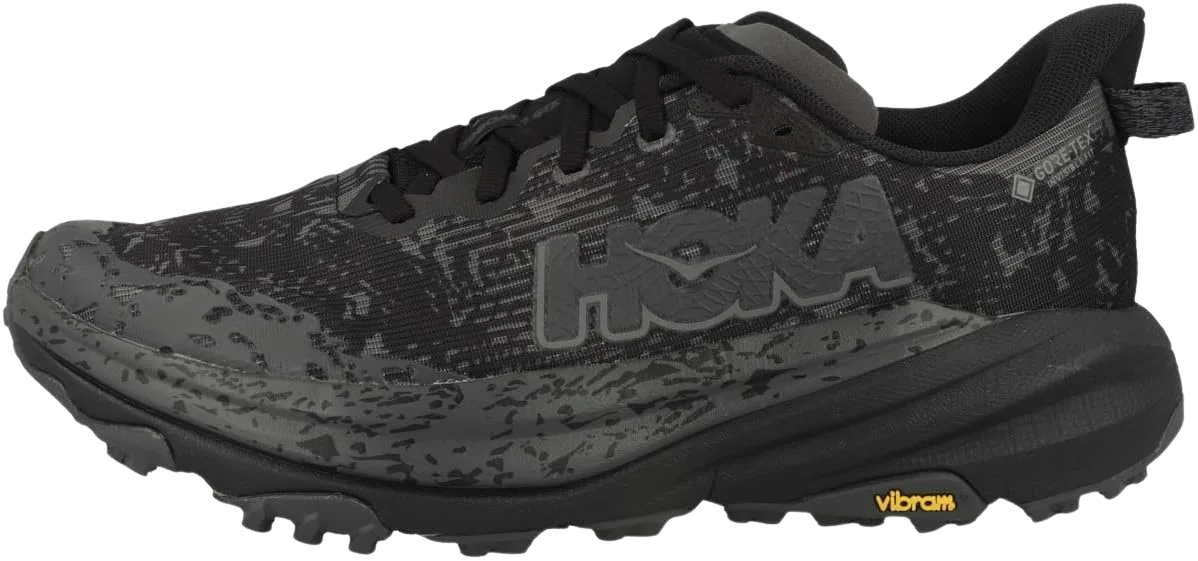
Two honest flags before the case for it.
First, the Speedgoat 6 is sold in both a GORE-TEX version and a standard mesh version, and listings for the two sit close enough together that people order the wrong one regularly. Everything in the waterproofing section applies: for a summer thru-hike, you want the mesh build, and the GTX version is the right call only for cold, persistently wet shoulder-season sections. Confirm which version a listing is showing before you check out, including which version each gender’s listing defaults to, because they do not always match.
Second, outsole delamination gets reported across the HOKA line often enough to name it. It is not universal, but it is the failure mode to watch on these, and it tends to show up at the toe edge.
The case for it is straightforward. When your limiting factor is foot fatigue under a loaded pack, stack height is the most effective lever you have. The high-stack midsole means sharp rock arrives at your foot as pressure rather than as a point, and after ten hours that difference compounds into whether you can do fifteen more miles tomorrow. The 5mm lugs are the deepest here, which is what you want in mud and on loose ground.
It also runs a conventional drop rather than zero-drop, which makes it the natural pick for anyone the previous section warned off the Altra platform. If you are specifically hunting for trail runners chosen specifically for heavy pack days, this is the family that keeps coming up.
Zero-Drop With More Underfoot — Altra Olympus 6
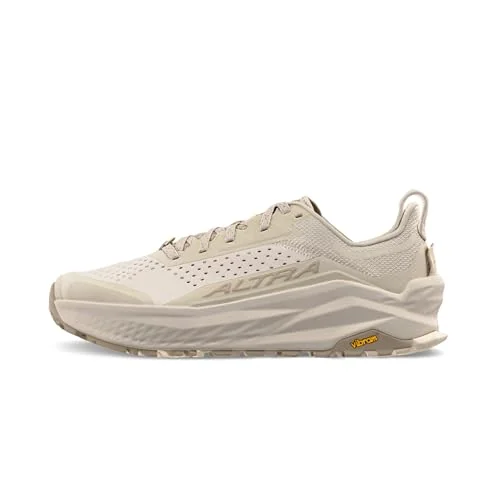
The warning: stacking 33mm of foam on a zero-drop platform raises the transition cost rather than lowering it. You are asking your calves to handle zero-drop loading while standing on a taller, less stable base, and that combination is more demanding than the Lone Peak, not less. It is also noticeably heavier. This is not a first zero-drop shoe, it is a second one.
For the hiker it fits, though, it solves a specific and common complaint. Plenty of people love the Altra toe box, need the room for swelling feet, and still finish rocky sections feeling like they walked on the rocks rather than over them. The Olympus 6 keeps the FootShape fit and the zero-drop geometry while adding the underfoot protection the Lone Peak trades away, and the Vibram Megagrip outsole is a meaningful upgrade in the wet.
If you have already done a season in Lone Peaks and your only complaint is rock, this is the direct answer. If you have never worn zero-drop, start with the Lone Peak or start with the Speedgoat.
Also Worth Knowing About
Three more shoes come up constantly in thru-hiker conversations and deserve naming even though they are not linked here.
The Merrell Moab Speed is the one people bring up for durability at a friendlier price, a reasonable angle for hikers whose budget matters more than the last ounce. The Topo Athletic MTN Racer 3 covers the gap almost nobody else fills, a genuinely wide toe box without committing to zero-drop, which makes it the interesting option for a hiker who needs Altra-level room but has the Achilles history that rules out the platform. And the Salomon X Ultra line remains the reference point for hikers who prioritize lateral stability on uneven ground over cushioning or toe room.
If one of those three matches your feet better than the three picks above, that is worth knowing regardless of where you buy it.
Replacing Shoes Mid-Trail Without Losing Days
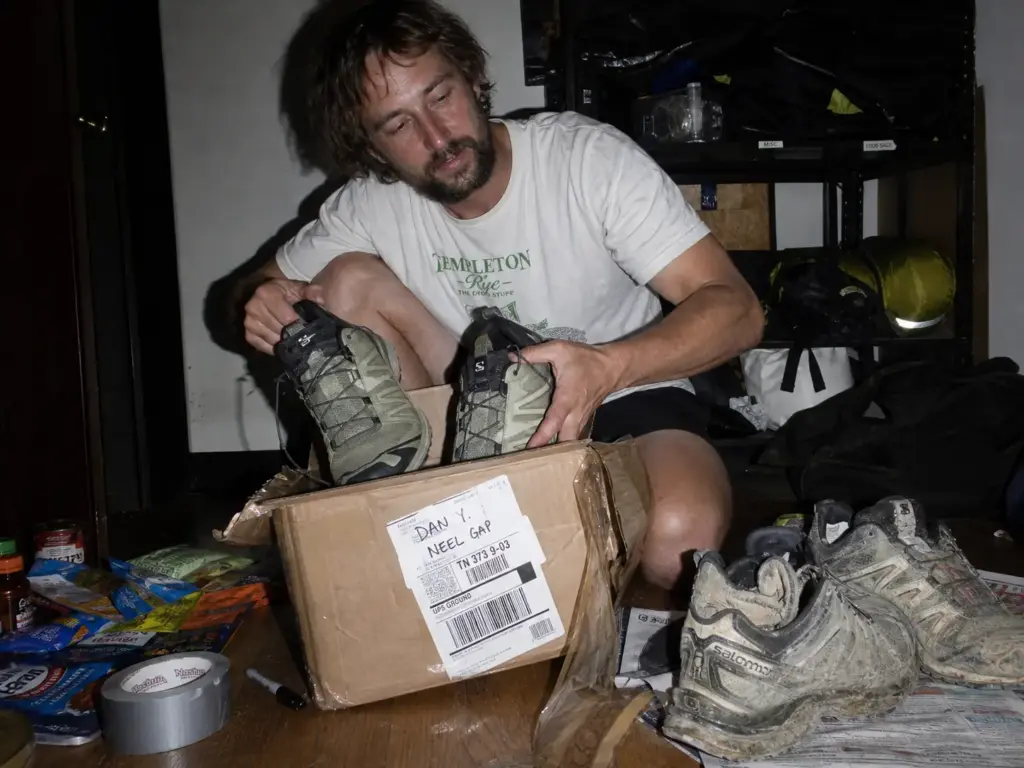
The shoe decision does not end at checkout. It repeats four times, in towns, on a schedule you either set months ago or scramble to fix from a hostel bunk. This is the logistics half of the question, and it is the half nobody writes about.
Mail Ahead or Buy in Town
Two live strategies, and they are not equally good.
Mailing a pair ahead means buying your replacement pairs before you leave, breaking them in at least a little, and sending them to a post office or hostel in a town you will reach around the right mileage. You control the model, the size, and the condition. The cost is planning time and postage, plus the risk of having guessed your future size wrong.
Buying in a trail town means walking into whatever outfitter exists and taking whatever they have. The appeal is flexibility, and in a handful of well-known trail towns with real gear shops, it works fine.
Mail-ahead usually wins, for a reason that catches people out: trail town outfitters stock limited sizes, and your size is now half a size larger than when you left. The shelf that has your old size in three models frequently has your new size in none. The mechanics of how resupply boxes are timed and packed apply directly here, since a shoe box travels the same system as a food box and needs the same lead time.
This is the same decision hikers make about food, and the same mail-drop-versus-buy-in-town trade-off applies to food with the variables flipped. Food is available everywhere and mailing it is often unnecessary. Shoes are available almost nowhere in your size, which is exactly why they are the strongest case for a mail drop on the entire trail.
Timing the Swap Around Mileage, Not Feel
Plan the swap around the 400 to 500 mile mark, not around how the shoe feels. By feel, you are already late, because the midsole died silently a hundred miles before your knees started reporting it.
Practically, that means looking at your itinerary before you start and picking the towns that fall closest to 450, 950, and 1,450 miles, then aiming boxes at those. Build in slack, since your actual pace will drift and post offices keep hours that assume you are not a person who walked there.
One factor that changes the calculation as you go: a fresh pair at mile 1,400 needs far less break-in tolerance than a fresh pair at mile 400. Your feet and gait have adapted, your mileage per day is higher, and critically you have fewer remaining days to absorb any discomfort a new shoe causes. Late-trail swaps should stay within the same model you have been wearing. Early-trail swaps are the only place experimenting is cheap.
Finally, break in the mailed pairs before the hike, even a little. Twenty miles of neighborhood walking is enough to find a rubbing seam while you can still return the shoe. A box containing a factory-fresh, never-worn shoe is a box containing thirty miles of blisters, delivered to you at the worst possible moment.
Put a fresh pair of insoles in every shoe box you mail. Insoles pack flat, weigh almost nothing, and swapping them at 250 miles buys real life out of a midsole that is only partway gone. It is the cheapest mileage extension available.
Matching the Shoe to Your Trail and Your Feet
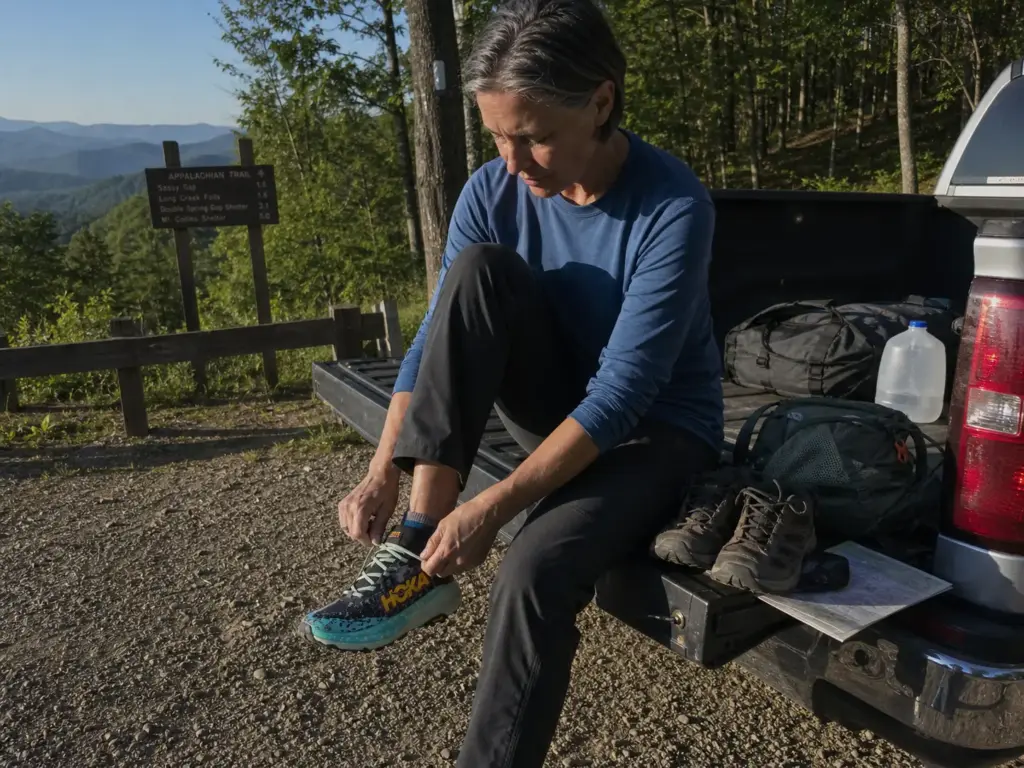
Forget which shoe is best. Here is how to work out which one is best for you, in about five minutes of honest self-assessment.
Three Questions That Narrow It to One Family
Do you have Achilles or plantar fasciitis history? If yes, rule out zero-drop unless you have six weeks to transition properly and a reason to want it. That removes both Altras and leaves you in the Speedgoat family or something with a conventional drop.
How wide is your foot, and how much does it swell? If you have historically bought wide sizes or your toes press the sides of normal shoes, the Altra FootShape family exists specifically for you and nothing else in the mainstream comes close.
What is your actual limiting factor? If it is fatigue under a heavy pack, go max cushion. If it is rock bruising, prioritize a rock plate and stack height. If it is blisters and hot spots, the answer is probably fit and socks rather than a different model. And if you are still unsure where the category boundary sits, what separates a trail runner from a hiking shoe on paper is worth reading before you shop.
Three answers and you are down to one family. That is as far as the internet can take you, and the last step belongs to your feet in a store at the end of a hiking day.
Terrain, Pack Weight, and the Rest of the System
Terrain shifts the choice in predictable ways. Desert sections on the Pacific Crest Trail favor breathable mesh and compatibility with gaiters, because sand in your shoe is a daily tax. Sustained rocky trail favors a rock plate and more stack. Cold, persistently wet conditions, plus early-season snow on high passes, are the narrow window where a membrane earns its place, and only there.
The Continental Divide Trail deserves its own note, since it mixes all three within a single week and rewards terrain-specific traction more than either of the other long trails. A section hike simplifies this considerably: you know the terrain and the season in advance, so you can match the shoe to that stretch instead of compromising across 2,000 miles.
Pack weight is a modifier on all of it. Heavier loads compress midsole foam faster, which shortens replacement intervals and pushes the choice toward more stack. If your base weight is 30 pounds, plan on the low end of every mileage range in this article.
The most important adjustment is not the shoe at all. Socks, liner socks, and insoles change fit and blister outcomes as much as a model swap does, and they cost a fraction of the price. Getting how many pairs of socks the system actually needs right will do more for your feet than upgrading from a good shoe to a slightly better one.
Which leads to the honest close: most fit problems get blamed on the shoe when they belong to sizing or socks. Before you conclude a model is wrong for you, check the size, change the socks, and try a different lacing pattern. And once you have a shoe that works, the daily foot care that keeps a good shoe working is what determines whether it stays working for 700 miles.
The Bottom Line
You will buy four pairs. Judge shoes by cost per mile rather than sticker price, and the “budget” shoe usually stops looking like one.
Size for the foot you will have at mile 500, not the foot you have in the store. That means a half to a full size up, checked at the end of a hiking day, with a thumb’s width behind your heel.
The most popular shoe on the trail is the wrong shoe for some feet, and your injury history tells you whether you are one of them. Achilles or plantar fasciitis history means zero-drop is a considered decision, never a default.
Before you order anything, go do the thumb-width test on the shoes already in your closet, tonight, after you have been on your feet all day. A lot of people discover they have been a half-size off for years. That costs nothing to fix and prevents more trail damage than any model upgrade you can buy.
Frequently Asked Questions
01How many miles do thru-hiking shoes last?
Most trail runners last 300 to 500 miles, with more durable builds reaching 600 to 900. The Appalachian Trail Thru-Hiker Survey puts the real-world average at four pairs per thru-hike, roughly one pair every 520 miles, and that figure holds for boots too.
02Should thru-hiking shoes be waterproof?
For most thru-hikes, no. Non-waterproof mesh dries in hours while a membrane shoe can take most of a day, and water enters over the collar at stream crossings regardless. Waterproofing earns its place mainly in cold, persistently damp shoulder-season conditions.
03How much should I size up for a thru-hike?
Half a size to a full size, checked at the end of a hiking day rather than in the morning. Sustained weight-bearing activity can increase foot volume by up to 8%, so the fit that feels right on a rested foot will feel tight at mile 15.
04Why do hikers say their feet grew after a thru-hike?
Many long-distance hikers report a permanent half-size to full-size increase that persists for years, attributed to arch and ligament change under sustained mileage and pack load. These are practitioner reports rather than clinical findings, but they are consistent enough to measure your feet again before your next purchase.
05Is the Altra Lone Peak the right shoe for everyone?
No. It has been the most-worn shoe on the Appalachian Trail every year since 2017, but the zero-drop platform is a poor match for hikers with Achilles or plantar fasciitis history, and its heel cup is a documented weak point. Popular is not the same as correct for your feet.

I've spent more than a decade researching hiking gear and trail technique. I read the specs, the forum threads and the long-term reviews, and every pick here comes with what it gets wrong.
End of the trail
You read every mile of this one. Here's where the trail goes next.