In this article
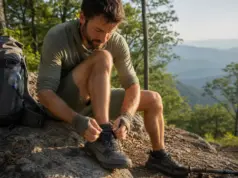
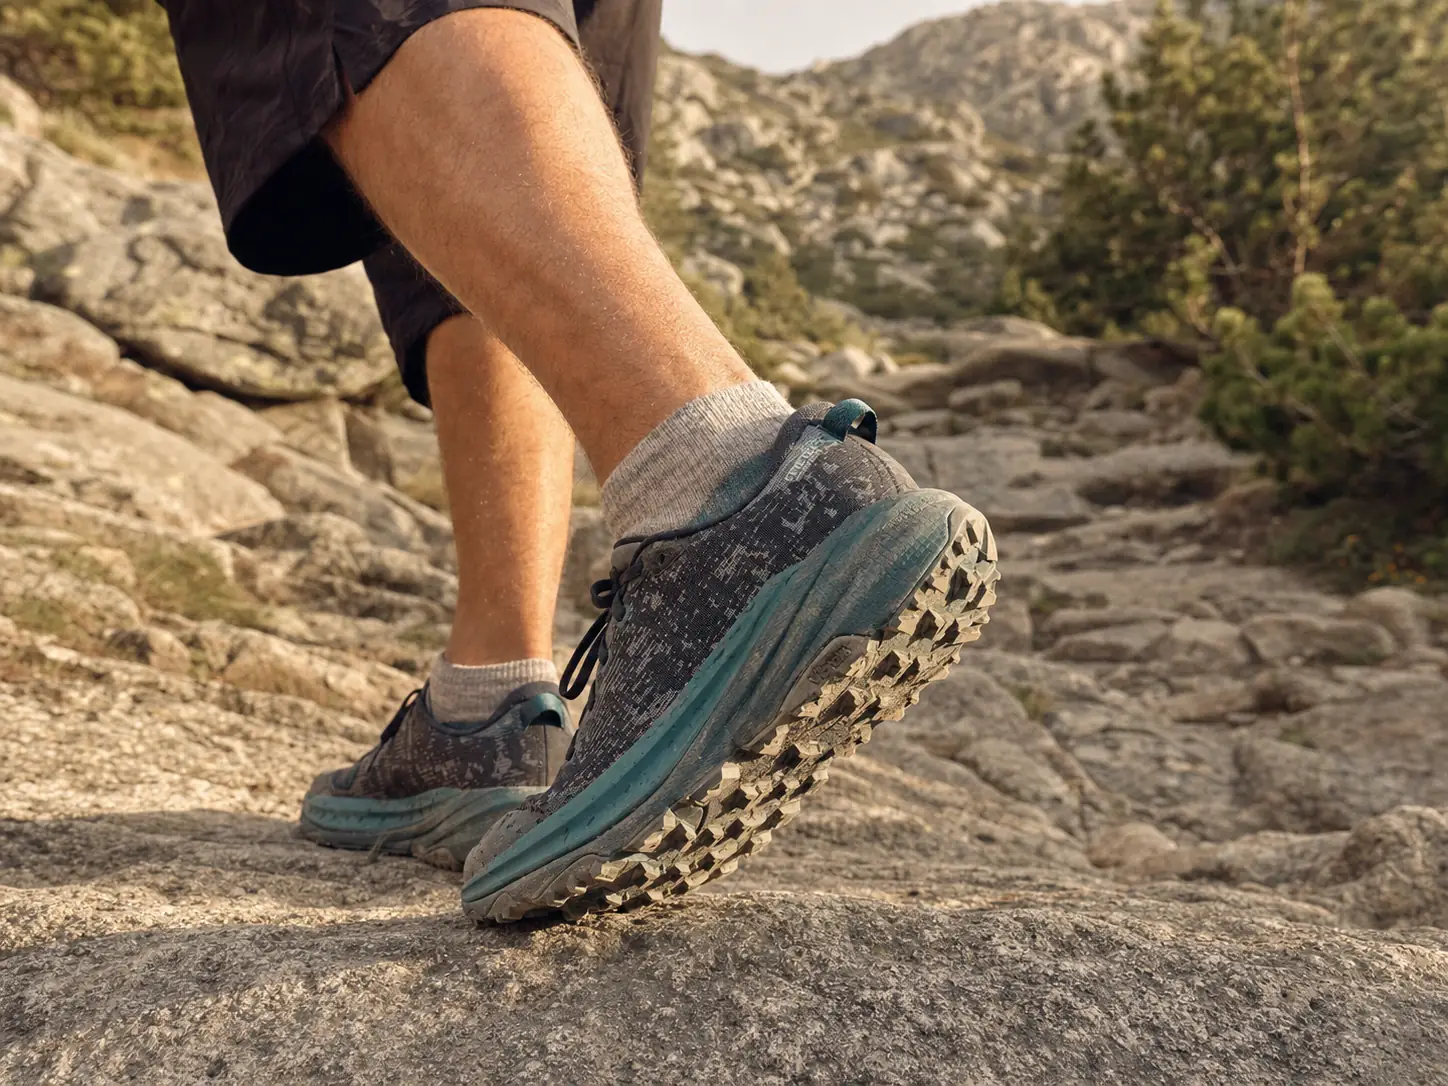
You keep seeing it on trail. Somebody passes you on a climb wearing what look like running shoes, moving faster than you are with a pack that looks about the same weight as yours, and it starts to feel like everyone got a memo you missed. The American Hiking Society ranks footwear as the single most important thing you put on before a hike, which is exactly why the answer to this question deserves an explanation and not another ranked list of ten shoes. So here’s what trail running shoes actually are, part by part, and where they fit for hiking.
What Makes a Shoe a Trail Runner (Not Just a Sneaker with Tread)
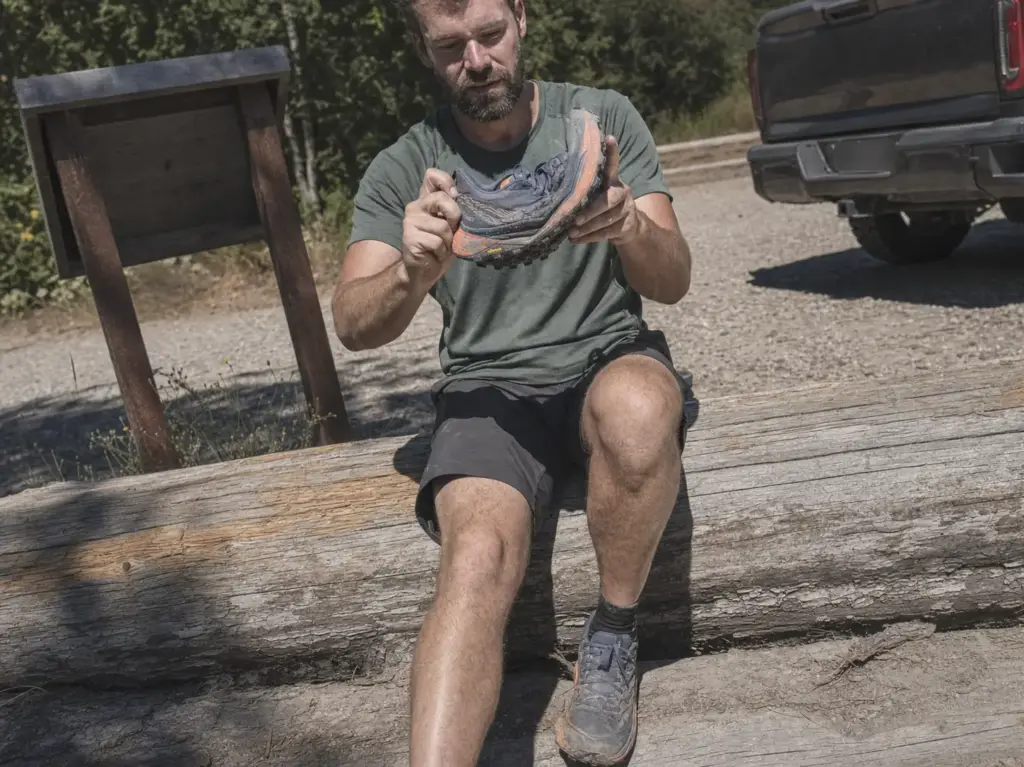
Pick up a trail runner and a hiking shoe in the same hand and the difference lands before you read a single spec. The trail runner bends in the forefoot. The hiking shoe fights you. That flex is not a shortcut or a cost saving, it is the entire design intent, because the shoe was built for a running gait where the foot needs to roll through the step instead of being braced through it.
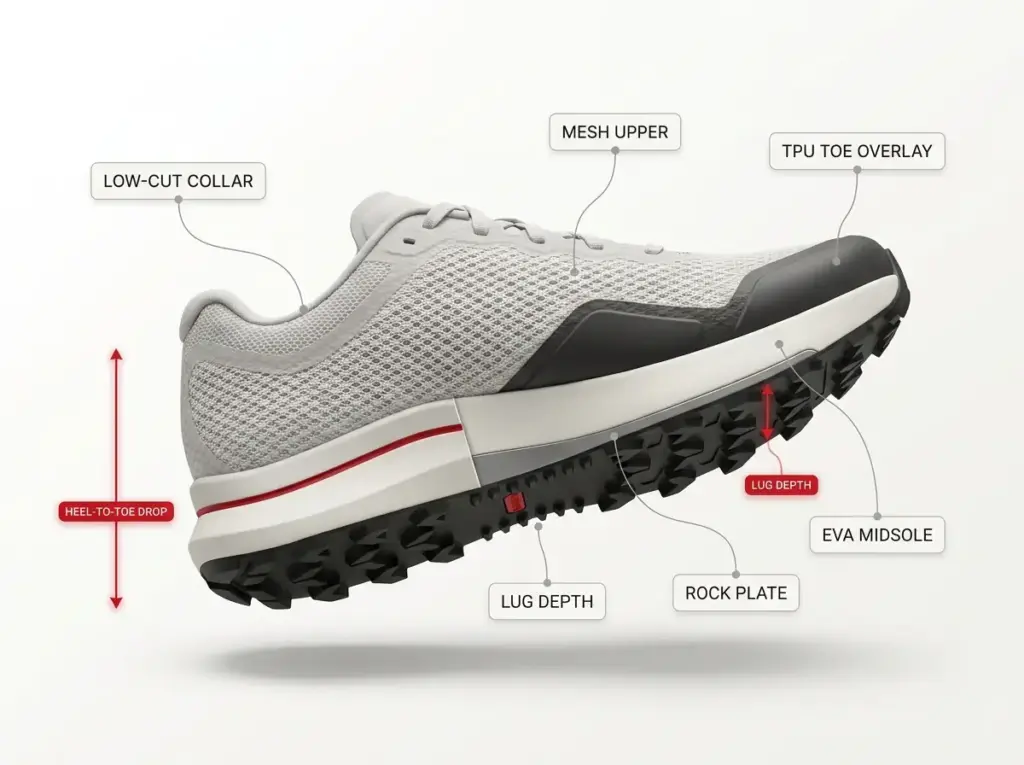
The upper is breathable mesh, usually reinforced with thin TPU overlays across the toe and midfoot where abrasion happens. That mesh is why the shoe drains a creek crossing in minutes and dries while you keep walking. It is also why it scuffs through faster than the leather or heavy synthetic on a hiking shoe. One material, both consequences.
Underneath sits an EVA foam midsole tuned for running cadence rather than load carrying, which is where the flexibility comes from. Because a flexible midsole leaves your foot exposed to sharp rock, many trail models add a rock plate, a thin stiff sheet laminated between midsole and outsole. It stops stone bruising without turning the shoe into a boot. Worth remembering that distinction, because it gets oversold constantly.
The outsole carries the aggressive part. Lugs typically run 3.5mm to 5mm deep in sticky rubber compounds like Vibram Megagrip or Salomon Contagrip, spaced widely enough to shed mud instead of packing it into a smooth pad. A road running shoe has none of this. That single component is most of what separates the two categories.
Then there is the cut. Low collar, no shank, a minimal heel counter, and a weight that changes the math on a long day. Gear guides consistently put boots at up to three times the weight per pair, and weight on your feet is felt far more than the same weight sitting in your pack, because you lift it and place it thousands of times. That is the whole pitch for trail running shoes for hiking, compressed into one sentence.
The community shorthand for building a whole kit around this idea is fastpacking, which is worth knowing because it unlocks the right conversations. Search for hiking advice and you get boot content. Search for fastpacking and you get people who have already worked out how to carry a multi-day load on running shoes. If you want the materials science one layer deeper, the foam, membranes and outsole compounds that go into modern hiking footwear is the longer version of this section.
Trail Runners vs. Hiking Boots and Hiking Shoes
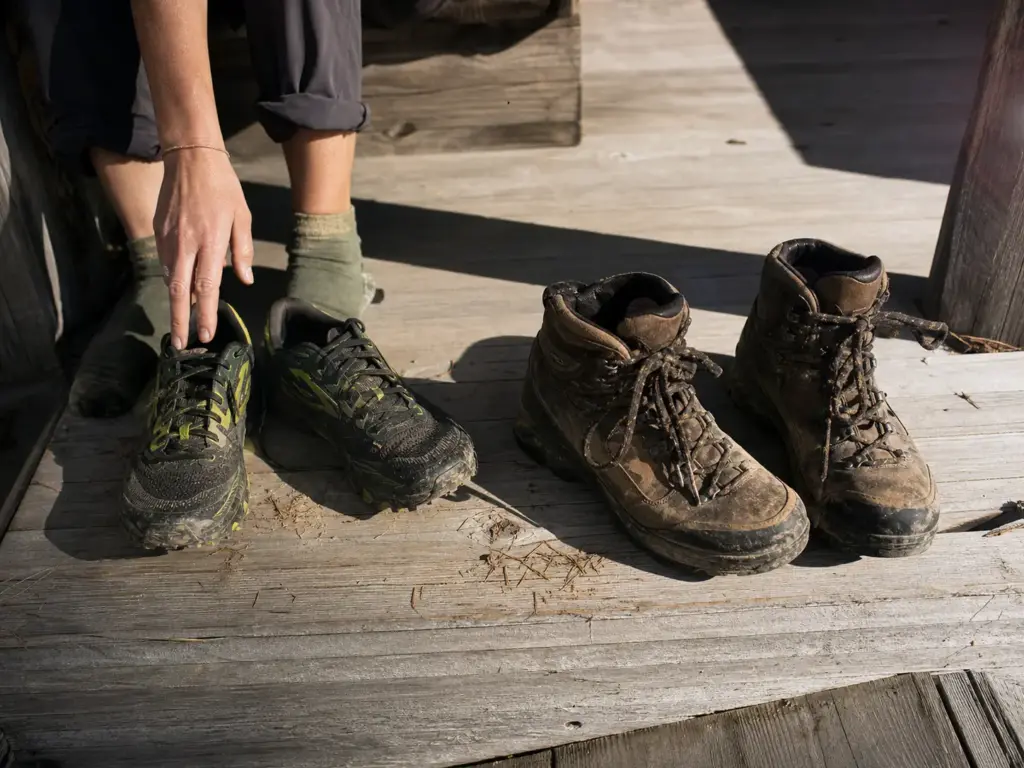
Here is the framing almost every article gets wrong. Moving from boots to trail runners is not an upgrade. It is a trade, and you can name exactly what sits on each side of it.
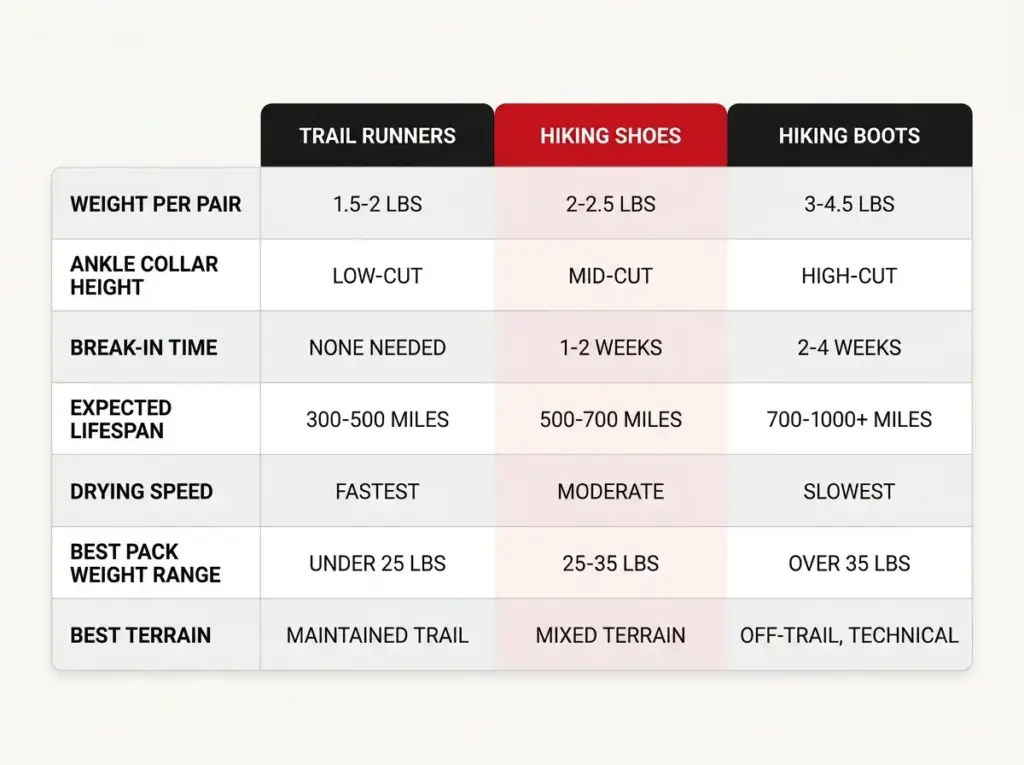
On the gain side: weight, break-in and drying. Boots run up to three times heavier per pair, and that difference compounds across a multi-day trip more than shaving the same weight off your pack would. Trail runners also need essentially no break-in, which is a genuine advantage that gets undersold.
You buy them, you hike in them. No two weeks of blisters while stiff leather learns the shape of your foot.
On the give-up side, the honest version of the ankle argument. The Appalachian Mountain Club’s position is that stiffer footwear, with more torsional rigidity through the midfoot, resists ankle roll better than a flexible low-cut shoe, and the American Hiking Society ranks appropriate footwear as the #1 essential for any hike partly for this reason. The counterargument hikers make is that a low-cut shoe lets the ankle move and strengthen instead of being splinted. Both of those are true.
The variable that decides which one matters more for you is load and terrain, not preference, which is why “are trail runners better than boots” has no answer in the abstract.
Durability is the other real cost. A trail runner gets 300 to 500 miles and then it is done, where a quality boot can be resoled and keep going. Whether that matters depends on arithmetic we run in the next section, and the answer surprises people in both directions. If you want the case for the boot side argued properly, where boots actually earn their extra weight covers the head-to-head.
Stop wearing your trail runners around town. Expected lifespan drops roughly 20% on pavement versus soft trail, so every errand run burns trail miles you paid for and never got to use. Keep a beat-up old pair for the coffee shop and the good pair for dirt.
Key Specs Decoded — Drop, Stack Height, Lugs and Rock Plates
Every trail runner listing hands you a wall of millimeters and explains none of it. Three of those numbers change how the shoe feels underfoot, one is routinely misread, and all four are easier than the spec sheet makes them look.
Heel-to-toe drop is the height difference between the foam under your heel and the foam under your forefoot. A shoe with 40mm at the heel and 32mm at the forefoot has an 8mm drop. Trail shoe drops run from 0mm up to about 16mm. Zero-drop puts your heel and toes level, which is closer to how your foot sits barefoot, and it moves work onto your calves and Achilles that a raised heel used to do for you.
That transfer is the whole reason zero-drop needs a transition period, covered further down. Anything at 8mm or above will feel familiar if you are coming from ordinary running shoes.
Stack height is simply how much cushioning sits between your foot and the ground, from around 3mm on minimal shoes to 30mm and beyond on maximalist ones. The common mistake is assuming stack and drop move together. They do not. A shoe can be high-stack and zero-drop at the same time.
High stack absorbs impact and gives back some energy return over long mileage, but it costs you ground feel, the tactile read of what the trail is doing under you, which matters on technical rock. Low stack gives you that read back and tires your feet faster on hardpack. Worth knowing that stack height is measured on an empty shoe, and a loaded pack changes what is actually under your feet, because the number on the box assumes nobody is standing in it.
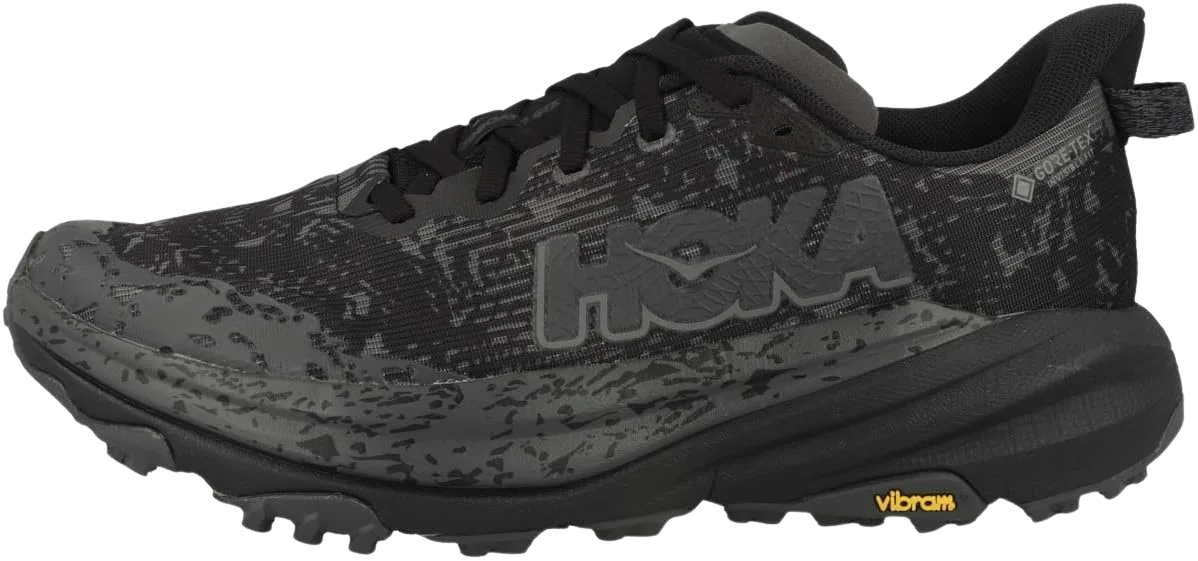
The Speedgoat sits at one end of a spectrum, and knowing where a shoe falls on it tells you more than any review score does. If you hike mostly rocky, rooty ground and your feet ache by mile ten, high stack is solving your actual problem. If you get spooked by not feeling the ground on technical footing, it is creating one.
Lug depth and pattern decide traction, and deeper is not automatically better. Roughly 3.5mm to 5mm covers most trail use. Deeper, widely spaced lugs clear mud instead of clogging with it, which is what you want in wet clay or mud season on a thawing trail. Shallower, denser lugs roll better on hardpack and pavement, which matters if half your route is a road walk to the trailhead.
The rock plate is the spec people over-read most. It protects the sole of your foot from stone bruising on sharp gravel and rooty ground. It does nothing whatsoever about a rolled ankle. A rock plate does not make a trail runner into a load-carrying boot, and reading it that way is how people end up hurt on terrain their shoes were never meant for.
How Long Trail Runners Last and What They Really Cost Per Mile
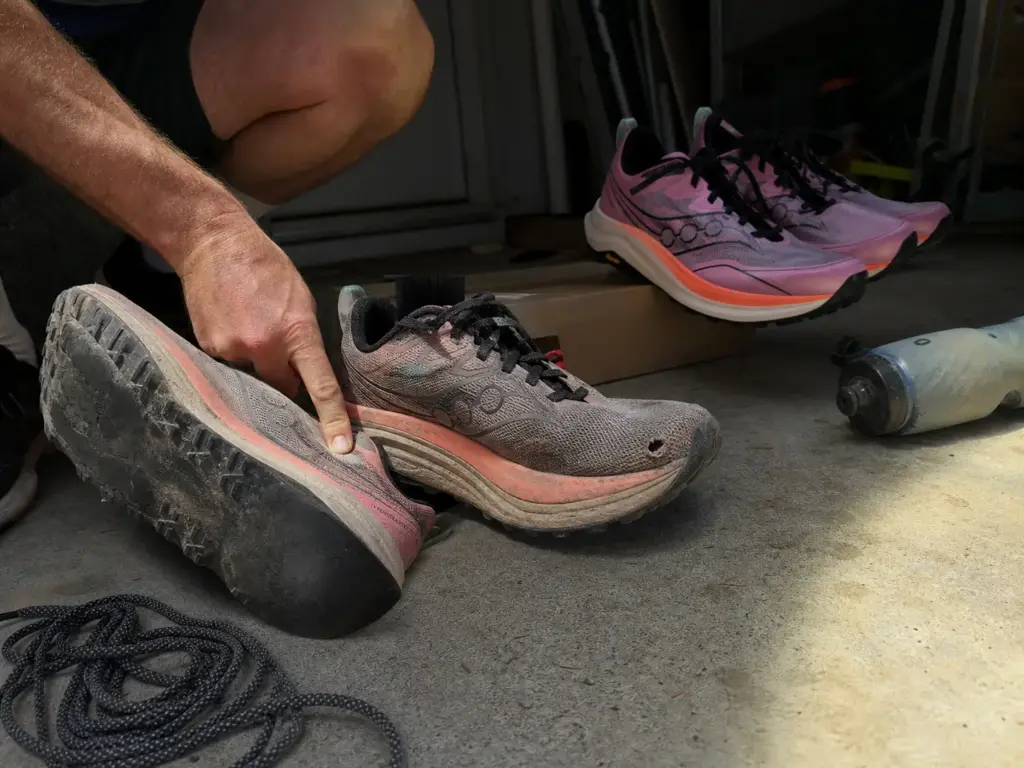
Sticker price is the wrong comparison and everybody makes it anyway. A boot costs more than a trail runner on the shelf, therefore the trail runner is the budget option, therefore the boot buyer overpaid. Run the actual numbers and that story falls apart in both directions.
Start with lifespan. Expect 300 to 500 miles before the midsole cushioning packs out and the lugs round off. You will see people claim 700 miles, and that happens, but it is an outlier and not a number to plan around.
At thru-hiking pace of 15 to 20 miles a day, 400 miles is three to five weeks, so anything longer than a big weekend means budgeting a swap at a resupply. That is a logistics fact more than a durability complaint.
Now the arithmetic, out loud, because nobody else runs it. A pair around $120 replaced every 400 miles works out to roughly $0.30 per mile. A $160 pair over the same 400 miles is about $0.40 per mile.
A $220 boot resoled once and carried to 800 miles lands near $0.28 per mile. The boot wins on cost per mile, narrowly, and only if you actually hike enough to justify the resole.
That last clause is where it turns. Most weekend hikers never accumulate the mileage that makes a resole worthwhile, so the boot’s advantage stays theoretical while its weight penalty is felt every single trip.
For a thru-hiker or somebody logging serious mileage, the calculus genuinely flips. Same numbers, opposite conclusions, depending entirely on how much you hike. The lesson is not that one is cheap and the other expensive, it is that the answer depends on a number only you know: your annual mileage.
Write the date on the inside of the tongue with a permanent marker the day you start hiking in a new pair, and log rough mileage in your phone’s notes app. Dead cushioning creeps up so gradually that most people only notice it after their knees start complaining on descents, which is three hundred miles too late.
Two shoes make this concrete from opposite directions. The Saucony Peregrine 16 (men’s · women’s) is the honest budget answer, and it does not feel like a compromise: 4mm drop, a PWRTRAC outsole with real bite, and a rock plate at the lowest price in this group. Every competitor roundup on this topic packs its picks into the premium tier and leaves the budget question unanswered, which is a strange omission when cost per mile is the deciding factor for most people.
At the other end of the durability question, the Brooks Cascadia 19 (men’s · women’s) has been refined across a long run of versions for a reason. DNA LOFT v3 cushioning, a TrailTack Green outsole, and an 8mm drop that makes it the easiest shoe here to step into straight from ordinary running shoes with no adaptation period at all. If your goal is to push toward the top of that 300-to-500-mile window, this is the build to bet on.
The last variable is where you walk them. The 300-to-500-mile replacement window most shoe makers and coaches converge on assumes trail use, and pavement shortens it by roughly 20%. Wearing trail runners as everyday shoes is the most expensive habit in this entire category, and fixing it costs nothing. Once you have settled on the category and want to compare specific models under load, a full breakdown of trail runners that hold up under a loaded pack goes model by model.
Waterproof or Breathable — Pick One
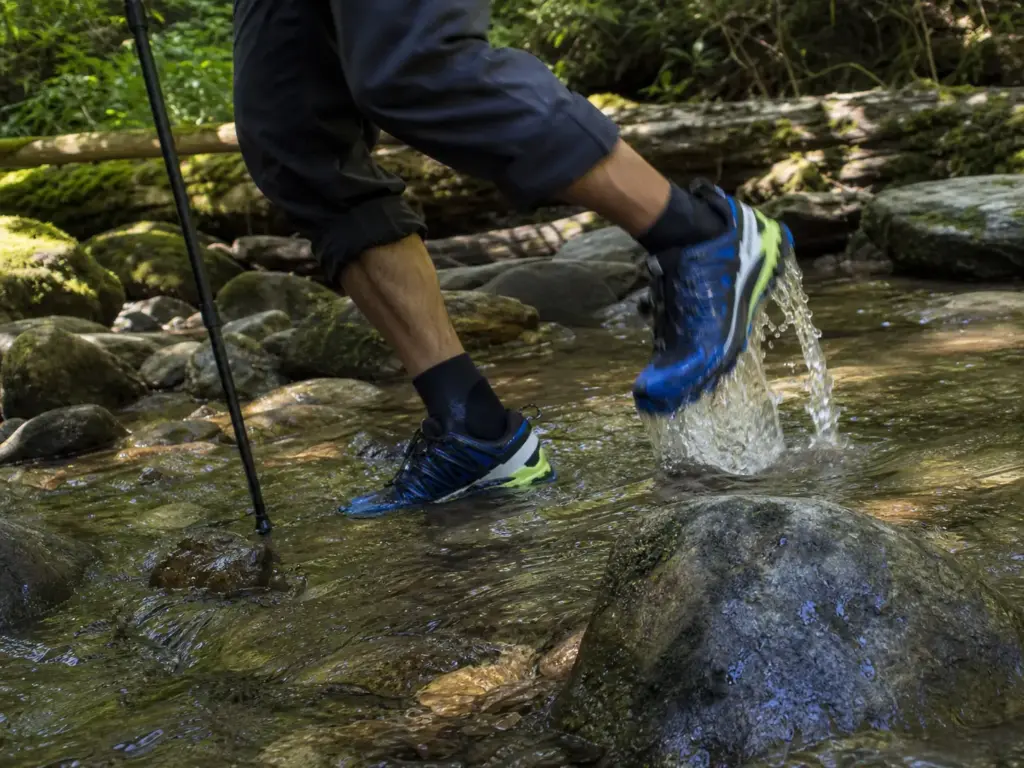
The instinct is that waterproof is the better version of the same shoe. On a low-cut trail runner it frequently is not, and the reason is geometry rather than membrane quality.
A Gore-Tex trail runner keeps out light rain, wet grass and morning dew, and it does that well. The problem starts the moment water comes in over the collar, which on an ankle-height shoe means any creek deeper than a few inches, a hard downpour running down your legs, or an hour of pushing through soaked brush. The membrane that was keeping water out is now keeping it in, and the shoe that was going to keep your feet dry becomes a bucket that drains far slower than mesh would.
This is why experienced hikers in genuinely wet regions choose non-waterproof mesh on purpose. The Pacific Northwest logic goes: your feet are getting wet today regardless, so pick the shoe that empties and dries while you keep walking rather than the one that holds the water against your skin for the rest of the afternoon. That is a deliberate strategy, not a budget compromise.
Waterproofing earns its place in cold conditions, which is the flip side people skip. Shoulder season, snowmelt crossings, frosty mornings, short days where a soaked foot stays soaked until you are in your sleeping bag.
When the risk is cold feet rather than damp feet, dry-and-slow beats wet-and-fast every time. The Salomon XA Pro 3D V9 GTX (men’s · women’s) is the clearest example of that build: a Gore-Tex membrane, a Contagrip outsole, and a Quicklace system you can cinch with cold fingers. If you have decided you want the membrane, when a waterproof low-cut shoe is genuinely the right call works through the specific conditions.
Whatever you pick, the sock is half the system. Wool socks over a mesh upper manage moisture and blister risk better than any membrane manages it, and blisters from wet mesh are a real risk you handle rather than a reason to avoid the shoe. The field rule is short enough to remember: in a wet climate buy the shoe that drains, in a cold one buy the shoe that blocks. The mistake is buying waterproof by default because that is what boots taught you to do.
Fit, Sizing and the Transition That Wrecks Achilles Tendons
Two things go wrong when people switch to trail runners, and neither is the shoe’s fault. They buy their normal size and lose a toenail on the first real descent. Or they swap stiff boots for zero-drop and load full mileage the same week, and their Achilles files a formal complaint around day ten. Both are completely avoidable, and almost nobody spells out how.
Why You Size Up, and How Much
The measurement you want is a thumb’s width, roughly 10mm to 12mm, between your longest toe and the end of the shoe. Check it standing up, fully laced, wearing the trail socks you will actually hike in, because all three of those change the answer.
For most hikers that means going a half size to a full size up from your street or road running size. Buying trail runners in your normal sneaker size is the leading cause of black toenails among people new to the category, and it happens because the shoe feels perfect in the store. It is not supposed to feel perfect in the store. It is supposed to fit the foot you will have at mile fourteen, when it has swollen from heat and impact and mileage.
Toe-Bang on Descents and the Lacing Fix
Here is the mechanism, because knowing it makes the fix obvious. On a sustained downhill, gravity drives your foot forward inside the shoe with every step. Without that thumb’s-width buffer, your toes hit the front of the toe box, over and over, for the entire descent. Hikers call it toe-bang, and it produces black toenails and sometimes a nail you lose entirely a few weeks later.
The instinctive fix is to crank the laces tighter, which does not work and creates pressure points on the top of your foot instead. The actual fix has two parts: enough length in the shoe, plus a heel-lock using the extra eyelet up near the ankle. Also called a runner’s loop, it pins your heel into the back of the shoe so your foot cannot slide forward even with a roomy toe box.
Length without heel-lock just gives your foot more runway to build speed. Together they solve it. The pattern where hikers report a black toenail after their first big descent, then discover they should have sized up, is close to universal, and why black toenails keep happening even in a shoe that felt roomy in the store goes through the other contributing causes.
Try shoes on in the late afternoon, never first thing in the morning. Your feet swell over the course of a day, so an afternoon fitting is far closer to the foot you will have deep into a hike. The pair that feels snug and perfect at 9am is the pair that costs you a toenail at mile twelve.
Transitioning to Low or Zero Drop Without Getting Hurt
Every millimeter of heel lift you remove is a millimeter of slack you take out of your calf and Achilles complex. That is the entire injury mechanism, stated plainly. A raised heel has been doing part of that job for you, possibly for decades, and a zero-drop shoe hands the work back all at once.
Plan on 8 to 12 weeks of gradually increasing mileage, with about 10 weeks being realistic for most people coming out of stiff boots. A research-backed transition protocol recommends 8 to 12 weeks to safely adapt to a lower-drop shoe, and the number that should stop you skimming is this one: 86% of people who rushed the first six weeks got injured. That is not a cautious disclaimer, it is most people who tried to shortcut it.
Mileage alone is not the whole protocol. Add calf and Achilles strengthening twice a week during the window, single-leg calf raises and eccentric heel drops being the standard pair. You are asking those tissues to take on load they have not carried, and the strengthening is what lets them adapt instead of fail. Skipping it is why some people do the slow mileage build and still end up hurt.
Learn to read the signal correctly, too. Calf soreness in the first few weeks is normal load adaptation if it fades within a day or two. Sharp pain, or soreness that is still there after three days, or anything in the Achilles tendon itself, is a stop sign rather than something to push through.
The most-reported version of this failure is somebody going cold turkey from a stiff high-drop boot straight into a zero-drop shoe on a twelve-mile day, and it goes badly with impressive consistency. If you want the schedule laid out week by week, the full week-by-week transition plan has it.
When Trail Runners Are the Wrong Call
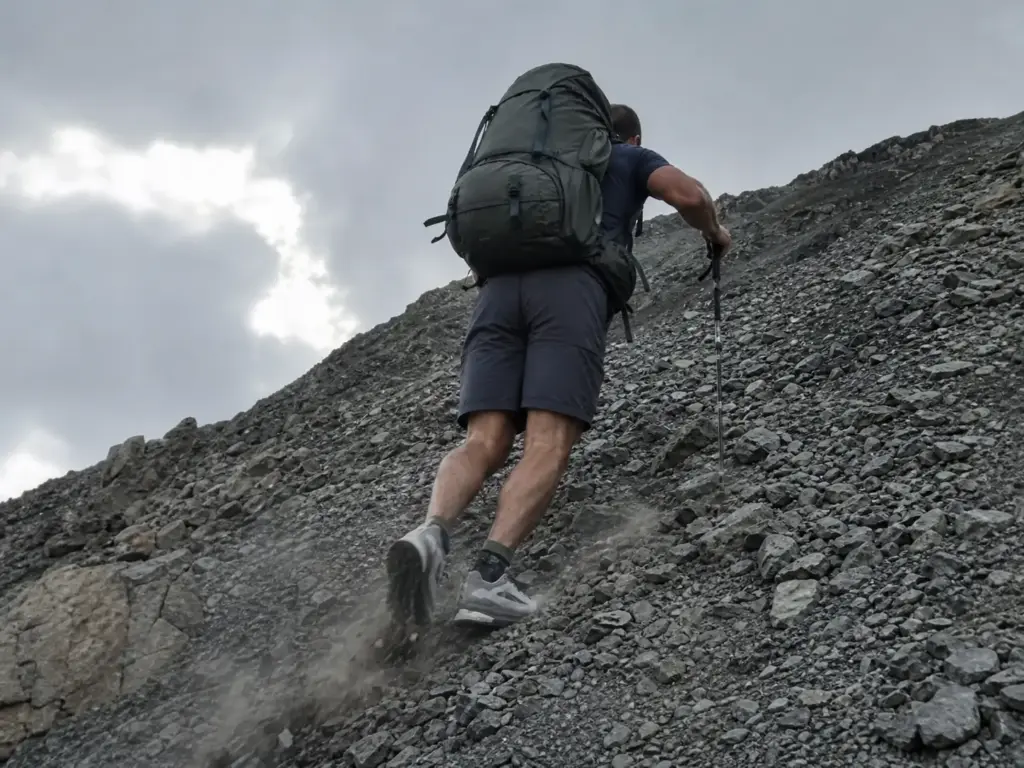
Everything above is the case for trail runners. Here is the case against, stated as flatly as it deserves, because the version of this article that only sells you the upside is the version that gets somebody hurt on loose rock with a forty-pound pack.
Heavy loads on technical ground. Above roughly 35 pounds, on loose talus, scree, boulder fields or sustained side-hilling across a slope, the flexibility that makes a trail runner comfortable stops working in your favor. This is load-bearing terrain, and the shoe was not designed for it.
Your foot is being asked to stabilize a load it cannot stabilize, on ground that shifts under you, in a shoe with no shank and no collar. A rock plate helps against stone bruising and does nothing about a rolled ankle, and stiffer footwear genuinely does resist ankle roll better. This is the single clearest case for keeping the boots.
A history of ankle injuries. If your ankle has a habit, the flexible low-cut shoe is a bad bet no matter how good the weight savings look. The strengthen-your-ankles argument assumes an ankle without a pre-existing pattern of giving out, and yours does not qualify.
Cold and wet shoulder season. There is a temperature below which fast-drying mesh stops being an advantage and starts being a way to get cold feet that stay cold. If overnight lows mean a soaked shoe will still be soaked and frozen at dawn, the fast-drying logic no longer applies. Trail runners are honestly three-season hiking footwear, and pairing them with low gaiters buys you some margin in grit and light snow without solving the cold problem.
Mid-transition with a big trip booked. If you have not put in the 8 to 12 weeks of zero-drop adaptation, the start of a thru-hike is the worst possible place to begin it. This is where the transition math turns into a straight go or no-go decision: either you did the work beforehand or you hike this trip in the footwear your legs are already adapted to.
The complication is that trail runners can be right on high-mileage trips despite the load, when the trail is maintained and the terrain is not technical, which is why so many thru-hikers use them and why the advice sounds contradictory. It is not contradictory, it is terrain-dependent, and how thru-hikers weigh this trade over thousands of miles shows the other side of the same decision.
Trail Runners Worth Knowing by Name
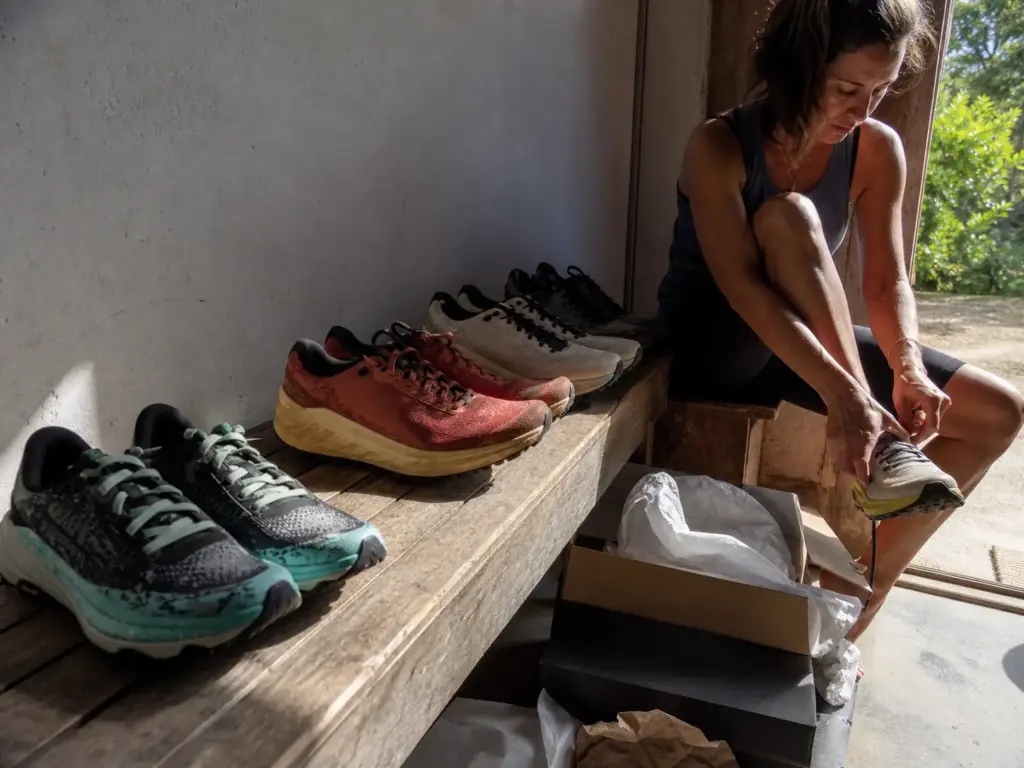
These are examples across a spectrum rather than a leaderboard. Each one is the clearest illustration of a different answer to the questions above, which is more useful than a ranking when the deciding factor is which section of this article described your situation.
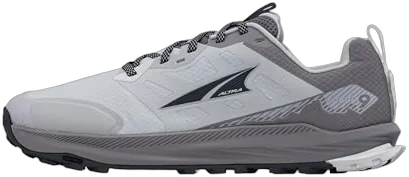
The Altra Lone Peak 9 is the zero-drop and wide-toe-box case, and the shoe most worth knowing if the sizing and transition section was the part that landed. If you want to compare it against the rest of that category, how zero-drop models compare against each other goes deeper on the subset.
The HOKA Speedgoat 6 is the maximum-cushion answer, for rocky ground and long days where your feet give out before your legs do. The Saucony Peregrine 16 (men’s · women’s) is the budget-tier pick that still has a rock plate and real traction. The Salomon XA Pro 3D V9 GTX (men’s · women’s) is the waterproof example for cold-and-wet conditions. The Brooks Cascadia 19 (men’s · women’s) is the durable all-rounder with a familiar 8mm drop and no adaptation period.
One practical note that trips people up constantly: nearly all of these come in gender-specific lasts, not just different colorways, so landing on the wrong product page means a shoe shaped for a different foot. Check which version you are looking at before you buy.
Two honest limits on any list like this. Models cycle yearly, and last season’s version is usually the same shoe for meaningfully less money once the new one launches. And lug depth is terrain-specific in a way a general recommendation cannot capture, so if your real use case is half pavement and half dirt, shoes built for the road-and-trail mix are a different category with different priorities.
Above all: the shoe that fits your foot beats the shoe that won a roundup. That is the thing veteran hikers repeat most often in gear threads, and it holds up because nobody’s favorite shoe survives contact with a foot it does not fit. Buy the one that fits, even if it was nobody’s top pick.
Conclusion
A trail running shoe is a low-cut, flexible, aggressively lugged running shoe, and choosing one over a boot means trading ankle stability and durability for weight savings and drying speed. Whether that trade is smart depends on your pack weight and your terrain, not on which camp you join online.
Run the cost-per-mile math before you decide trail runners are cheap or boots are expensive. At weekend mileage the runners usually win. At thru-hike mileage a resoled boot can close the gap entirely.
Size up a half to a full size, lock your heel with a runner’s loop, and give a zero-drop switch the full 8 to 12 weeks. The two failures that send people back to boots are both avoidable, and both get skipped by people in a hurry.
Before you buy anything, take the shoes you already own out on your usual trail and pay close attention to exactly where they fail you. Sliding on descents, sore soles after rocky ground, soaked and staying soaked. That diagnosis will pick your next pair better than any roundup can, because it starts from your feet and your terrain instead of somebody else’s.
Frequently Asked Questions
01Can I use my trail running shoes for hiking?
Yes. For day hikes and lighter loads on maintained trail, trail runners are a legitimate choice that plenty of experienced hikers prefer. The limits are pack weight and terrain: above roughly 35 pounds, or on loose talus and off-trail scrambling, that flexibility stops protecting your ankles.
02What is the difference between a hiking shoe and a trail runner?
A hiking shoe is stiffer and heavier for load carrying, with a supportive shank and a durable upper; a trail runner is a flexible running shoe with aggressive lugs, a mesh upper and often a rock plate instead. You feel the difference in weight and flex.
03Is it okay to wear trail running shoes for walking?
It works, but it costs you. Expected lifespan drops roughly 20% when a shoe is worn mostly on pavement instead of soft trail, so everyday walking burns the 300-to-500-mile life you would rather spend on dirt. Keep a separate pair for town.
04What trail running shoes are good for hiking?
The ones that fit your foot, which is a real answer rather than a dodge. Beyond fit, pick by the trait you need: a wide toe box and zero drop for natural foot position, high stack height for long cushioned miles, deep lugs for mud, non-waterproof mesh for wet climates.
05How long does it take to get used to zero-drop trail runners?
Plan on 8 to 12 weeks of gradually increasing mileage, with 10 weeks realistic for most people coming out of stiff boots. Research on low-drop transitions found 86% of those who rushed the first six weeks got injured. Add calf and Achilles strengthening twice weekly.
Risk Disclaimer: Hiking, trekking, backpacking, and all related outdoor activities involve inherent
risks which may result in serious injury, illness, or death. The information provided on The Hiking Tribe is for
educational and informational purposes only. While we strive for accuracy, information on trails, gear, techniques,
and safety is not a substitute for your own best judgment and thorough preparation. Trail conditions, weather, and
other environmental factors change rapidly and may differ from what is described on this site. Always check with
official sources like park services for the most current alerts and conditions. Never undertake a hike beyond your
abilities and always be prepared for the unexpected. By using this website, you agree that you are solely
responsible for your own safety. Any reliance you place on our content is strictly at your own risk, and you assume
all liability for your actions and decisions in the outdoors. The Hiking Tribe and its authors will not be held
liable for any injury, damage, or loss sustained in connection with the use of the information herein.
Affiliate Disclosure: We are a participant in the Amazon Services LLC Associates Program, an
affiliate advertising program designed to provide a means for us to earn advertising fees by advertising and linking
to Amazon.com. As an Amazon Associate, we earn from qualifying purchases. We are also an official affiliate partner
of Black Diamond Equipment via the AvantLink network. If you click on a Black Diamond affiliate link and make a
purchase, we may earn a commission at no additional cost to you. We also participate in other affiliate programs and
may receive a commission on products purchased through our links. Additional terms are found in the terms of
service.