In this article
It’s week four. The shoes still look fine from the outside, tread’s there, no blown-out mesh, and every rock underfoot suddenly feels like it’s coming straight through to the bone. Nothing broke. The cushioning just quietly died somewhere around Damascus and nobody warned you.
That’s the reality behind the best trail runners for thru-hiking, and it’s why 77% of 2025 Appalachian Trail thru-hikers started in trail runners while 87% wore them for most of the hike. This is the majority choice now, not a fringe experiment, and the people making it have opinions about which pairs survive. Below: which six shoes are worth the money, how many pairs the trail will actually eat, and how to size them so week two doesn’t wreck your toes.
The Six Trail Runners Worth Your Money on a Thru-Hike
The trailhead version of this conversation takes about ninety seconds. Someone asks what they should buy, and the honest answer is three or four names, each for a different foot and a different trail. Anyone who tells you there’s one best shoe hasn’t watched enough people limp into a hostel.
So here’s the shortlist, and then the reasoning behind it.
Comparison Table at a Glance
Two numbers do most of the work in this table: drop and stack. Drop is the height difference between the heel and the forefoot. Stack is the total foam under your foot, and worth knowing that stack height is measured on an empty shoe, not with your weight in it, which is why two shoes with identical stack numbers can feel nothing alike after twelve miles.
| Model | Drop | Key Spec | Best For |
|---|---|---|---|
| HOKA Speedgoat 6 | 5mm | Max cushion, Vibram Megagrip | Long days, heavy pack, rocky tread |
| Altra Lone Peak 9 | 0mm | Wide FootShape toe box, Vibram Megagrip | Swelling feet, zero-drop hikers |
| Saucony Peregrine 16 | 4mm | PWRRUN foam, reinforced abrasion zones | Rotation pairs, abrasive trail |
| Brooks Cascadia 19 | 6mm | Rock plate, TrailTack rubber | Mixed terrain, one-shoe generalists |
| Salomon XA Pro 3D V9 GTX | 11mm | GORE-TEX, Contragrip outsole | Cold, wet, shoulder-season sections |
| Merrell Moab Speed 2 | 6mm | Vibram TC5+, full-length rock plate | Budget builds, shorter trails |
Notice what’s missing from that table: price. Not an oversight. Sticker price is the wrong number to shop on for a thru-hike, and the section on cost per mile below explains why in detail.
HOKA Speedgoat 6, The High-Mileage Cushion Pick
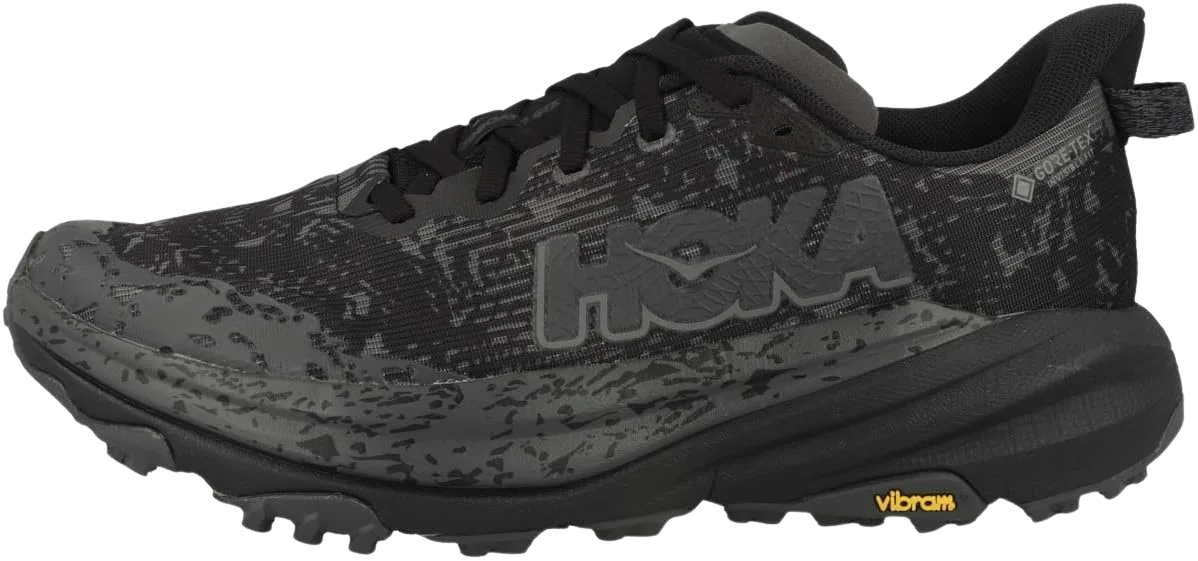
Big cushion is not a comfort luxury on a thru-hike. It’s a fatigue-management tool. Somewhere in the back half of a long day, the muscles that normally absorb impact stop doing their share of the work, and whatever foam is left underfoot picks up the slack. That’s the exact window where the Speedgoat separates itself from a firmer shoe.
The tradeoff is real, though. All that stack sits you further off the ground, and on sidehill traverses or wet root gardens you feel less of what’s under you. Hikers with weak ankles or a history of rolls tend to bounce off this shoe for that reason alone. It’s also the pick where hikers most often report the foam feeling flat before the outsole looks worn, since more cushion means more foam to compress, and compression is the failure mode that ends most pairs.
Get the Vibram Megagrip working for you and it holds surprisingly well on slick granite. What it doesn’t do is bite deep mud. If your trail is the Northeast in June, keep reading.
Altra Lone Peak 9, The Most-Worn Shoe on the AT
The popularity isn’t hype. Pull up the most recent Appalachian Trail thru-hiker footwear survey and the Lone Peak sits at the top by a wide margin, year after year. When thousands of people walking the same 2,190 miles converge on one shoe, that’s a signal worth taking seriously.
Now the part the roundups skip. Popularity and durability are separate questions. Plenty of hikers report Lone Peak uppers going soft and coming apart around the 700-mile mark, which is respectable mileage but nowhere near “buy one pair and finish the trail.” The shoe wins on fit, not on longevity, and if you buy it expecting both you’ll be disappointed at exactly the wrong moment.
Women get the GTX version in this pairing, which changes the calculation slightly. A membrane means slower drying, so read the waterproof section below before assuming that’s an upgrade.
One more thing worth saying out loud, because the SERP won’t. The premium end of this category runs into carbon-plated racing builds like the Altra Mont Blanc Carbon or the cottage-brand Norda 001, and hikers absolutely chase them. For a single thru-hike, that’s money in the wrong place.
A carbon plate is a road-racing and short-course technology; over 2,000 miles of loaded walking it buys you very little that a mid-tier shoe doesn’t already deliver, and it dies on roughly the same schedule. Spend the difference on your second and third pair instead.
How Many Pairs a Thru-Hike Actually Eats
Nobody plans this until they’re standing in a resupply town with 400 miles on a dead pair and no backup. Then it becomes the only thing they can think about. The hikers who finish comfortably treated shoe swaps exactly like food drops: scheduled, mailed, boring.
The Math by Trail (AT, PCT, CDT)
A pair of trail runners gives you 300 to 500 miles before the cushioning stops doing its job. That’s the whole equation, and it’s brutal arithmetic once you multiply it out.
The Appalachian Trail runs 2,190 miles. Divide by that window and you’re looking at four to seven pairs. The Pacific Crest Trail at 2,650 miles wants five to nine. The Continental Divide Trail, 3,100 miles of frequently untracked ground, will take six to ten.
Call it three to six swaps on any of them, which is a logistics problem, not a shopping problem.
Where you land inside those ranges depends on three things: your own weight plus pack weight, how abrasive your trail is, and whether you rotate. A 130-pound hiker with a 20-pound pack on the PCT’s smooth tread will land at the top of the range. A 220-pound hiker with 40 pounds on the AT’s rock scrambles will be at the bottom, wondering what went wrong.
Nothing went wrong. Foam compresses under load, and load is load.
The practical move is to build the schedule before you leave. Pick your swap towns by mileage, not by vibe, and put them in the same spreadsheet as your food drops.
Buy your second pair before you start, in the same size you started in, and leave it with whoever is mailing your boxes. Sizes sell out mid-season, and the model you love in April can be gone by July. Nothing derails a swap plan faster than your shoe getting discontinued at mile 900.
Mail Ahead, Don’t Carry Spares
Carrying a spare pair is two extra pounds of dead weight for hundreds of miles so you can avoid one post office visit. The math never works. Mail the fresh pair to a hostel or general delivery in the town where your mileage says the current pair will be finished, and swap there.
Time the drop slightly early rather than slightly late. Shoes that arrive a hundred miles before you need them cost you nothing but a small box fee. Shoes that arrive a hundred miles after you needed them cost you a week of walking on dead foam, which is how people end up with plantar fasciitis in Pennsylvania.
Since you’re already packing that box, the same rotation logic applies to socks. Fresh pairs go in alongside the shoes, and the old ones get thrown out at the same time. One box, one decision, two problems solved.
If you can swing two pairs in play at once, alternate them and give each one a day or two off. Compressed EVA partially rebounds when it’s unloaded, so a rotated pair holds usable cushion noticeably longer than a pair walked into the ground every single day. Section hikers get this almost for free.
There’s a version of this that goes wrong, worth naming. Some hikers plan swaps around how the shoe looks, waiting for visible wear before pulling the trigger on a mail drop. By the time the outsole looks used, the foam has been gone for weeks.
Swap on mileage. The shoe’s appearance is not evidence.
Cost per mile is the metric that makes the whole thing click, and it’s the number experienced thru-hikers actually argue about. Take the price, divide by the mileage you realistically get, and compare that. A shoe that dies at 300 miles is not cheaper than one that reaches 500 just because it cost less at checkout. It’s more expensive per mile walked, and you eat an extra swap on top. That framing also explains how the same shoes hold up under full pack weight, because pack weight is the single biggest variable pushing you toward the bottom of the mileage range.
Saucony Peregrine 16, Built for the Abrasion That Ends Most Pairs
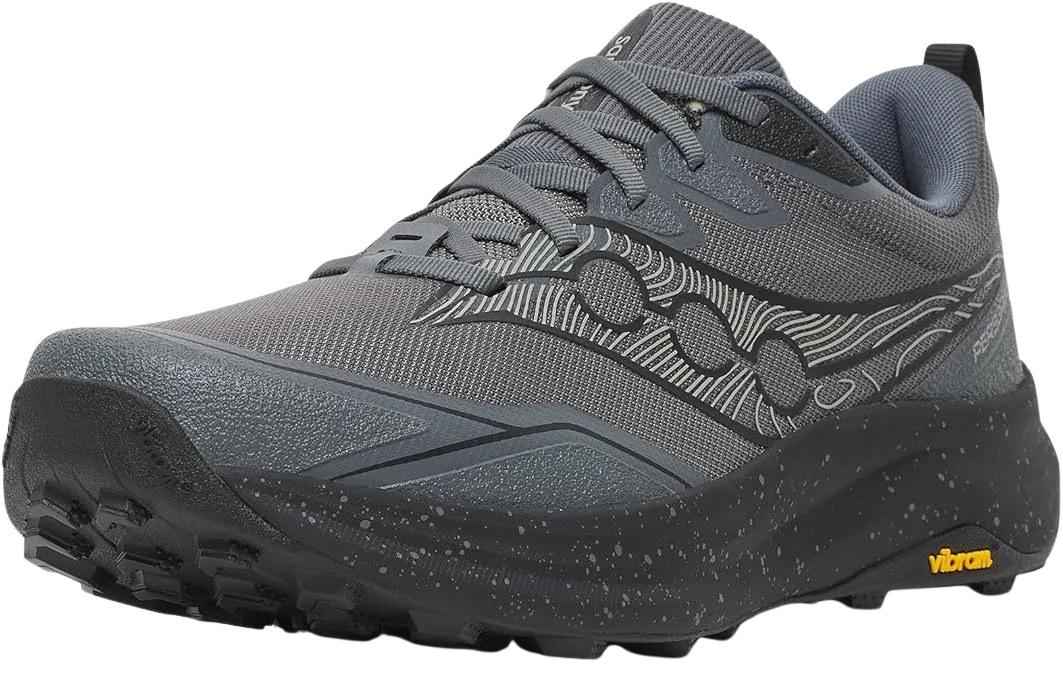
The gaiter D-ring deserves more attention than it gets. Trail gaiters clip to it directly, no aftermarket velcro tab glued to the heel, and gaiters are the single cheapest way to extend a shoe’s life on gritty trail. Keep sand and scree out of the shoe and you’re not just more comfortable, you’ve removed the abrasive that grinds the mesh from the inside.
The PWRRUN midsole runs firmer than the Speedgoat’s, which reads as less plush on day one and more supportive on day ten. That firmness is also why the Peregrine holds its feel longer: denser foam has less air to release, so it flattens more slowly. Hikers who want to feel the trail rather than float above it tend to land here and stay.
Not the shoe for you if you want maximum cushion under a heavy pack. It’s the shoe for you if you’ve watched a pair of uppers blow out at 350 miles and decided never again.
Why Trail Runners Die at 300 Miles (The Part Nobody Explains)
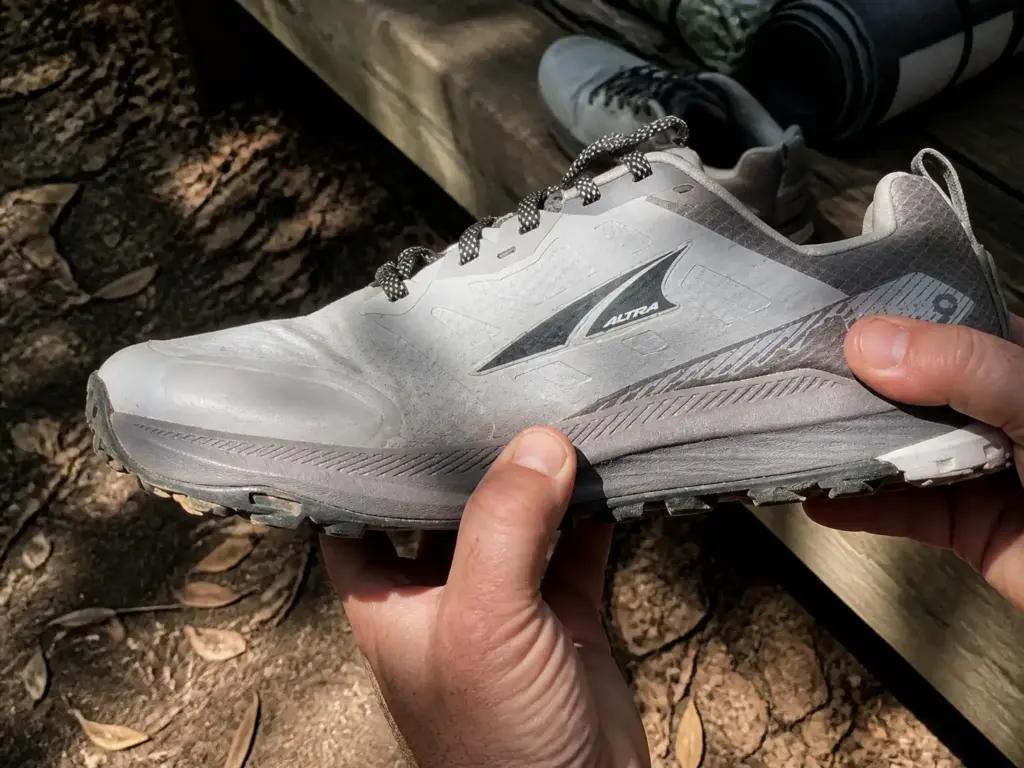
Every gear roundup on the internet will tell you trail runners last 300 to 500 miles. Almost none of them tell you why, which means almost none of them can tell you how to get more. Three things break, on three different schedules, and once you can name them you can slow all three down.
It helps to know what a trail runner is actually built from before we take it apart: a mesh upper stitched and glued to an EVA midsole, with a rubber outsole underneath and sometimes a rock plate sandwiched in between. Each of those joints is a failure point.
The Foam Goes Flat Before the Shoe Looks Worn
EVA midsole foam is a matrix of tiny gas-filled cells. Every foot strike squeezes them, and every squeeze releases a little of that trapped air permanently. Nothing tears. The foam just gets progressively less able to spring back, and you feel it as the trail slowly getting harder underfoot.
This isn’t a hunch, it’s measurable. Peer-reviewed research on compression fatigue in EVA foam midsoles puts foam under repeated loading cycles and images what’s left, and by roughly 466 miles of running the cell structure shows visible wrinkling and holes where uniform foam used to be. The shoe hasn’t broken. It’s been quietly deflating since mile one.
Which brings us to the most useful sentence in this article: tread depth is a terrible replacement signal. Outsole rubber is more durable than midsole foam, so on plenty of pairs the lugs still look fine long after the cushioning is finished. Hikers who wait for bald tread are walking on a dead shoe for hundreds of miles.
The reliable signal is feel, specifically on rock. Ask around any hostel common room and the story is the same one: week four, shoes that felt broken-in and perfect in week one now transmit every stone straight through. Nothing looks different. Everything feels different.
That’s your swap trigger, and it usually arrives well before the tread does.
Grit Is the Quiet Killer of the Upper
The second failure mode has nothing to do with mileage in the abstract and everything to do with what you’re walking through. Sand, decomposed granite and trail dust work their way into the mesh weave and sit there. Then every step flexes that mesh against the embedded grit, and the fabric is sanded from the inside out.
You’ll see it first at the flex crease behind the toe box, where the shoe folds hardest every stride. A pinhole becomes a tear becomes a blown-out panel. On the PCT’s desert sections this can take a shoe apart faster than any amount of rock scrambling.
Rinse your shoes with plain water at the end of a muddy or salty day and let them air-dry. No soap, no scrubbing, just enough to flush the grit out of the mesh before it starts grinding. Thirty seconds at a spigot buys more mileage than any spray-on treatment you can carry.
How to Stretch a Pair’s Life (And What Actually Shortens It)
The third failure is adhesive. The upper is bonded to the midsole with glue, and repeated wet-dry cycles work that bond loose over time. Glue delamination is the industry term, and it’s slow and undramatic. You notice a gap at the toe or a soft spot where the sidewall used to feel solid, and then one day the sole is peeling.
The fastest way to cause it is heat. Machine-drying wet trail runners is the mistake that comes up over and over in gear threads, usually from someone who did it once in a hostel laundry and watched their sole separate two hundred miles later. Tumble heat cooks the adhesive and cooks the foam at the same time. Same story with leaving them on a car dashboard or too close to a fire.
Stuff them with newspaper or a dry shirt overnight instead. Pull the insoles so both sides can breathe. It’s slower and it works.
Everything else on the life-extension list is small and cumulative: rotate pairs so foam rebounds, rinse the grit, use gaiters on sandy trail, loosen the laces before yanking them off so you don’t stress the heel counter. None of it doubles a shoe’s life. Together they might buy you an extra fifty to a hundred miles per pair, which across a full thru-hike is one fewer mail drop.
Before any of that matters, though, you need to know the shoe is right for you at all. Take the pair out and shake down a pair before you commit to them on a loaded overnight, because a spec sheet cannot tell you where a shoe will rub at mile eighteen with a full pack.
Sizing for Feet That Will Not Stay the Same Size
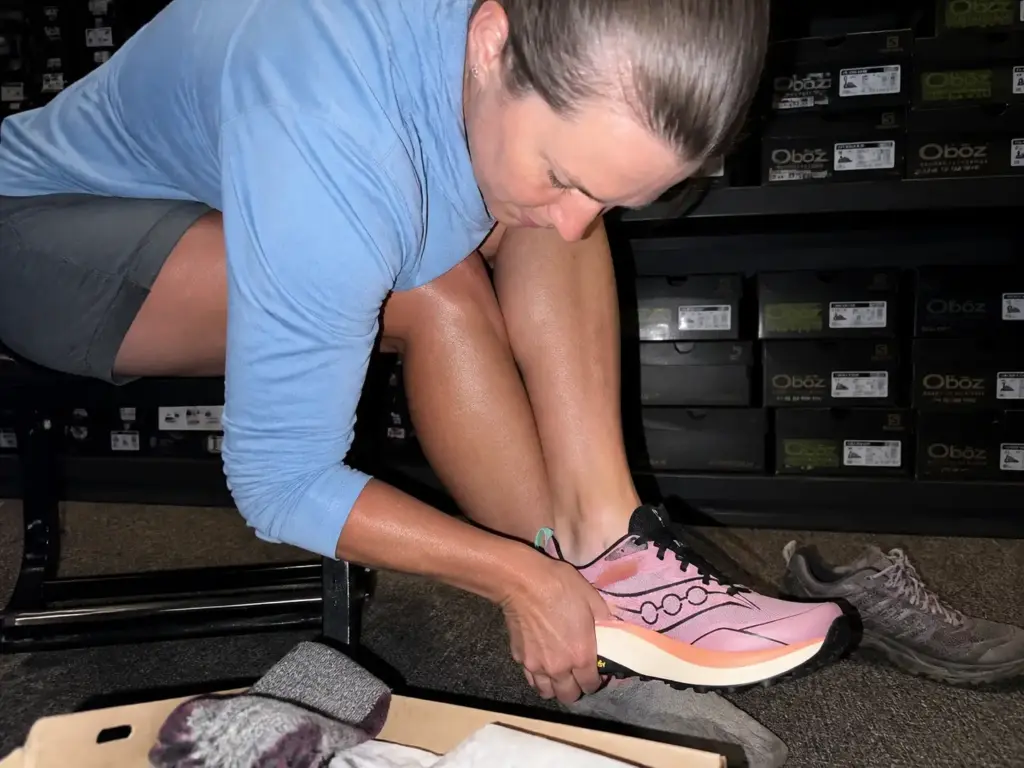
The shoes that fit beautifully in the store are the shoes that will feel two sizes too small by Damascus. Feet on a thru-hike are a moving target, and sizing has to aim ahead of where they are today.
This is where more thru-hikes get derailed than by any gear failure. Not because sizing is complicated, but because the fit you’re optimizing for doesn’t exist yet on the day you buy.
The Half-Size-to-Full-Size Rule and Why It Exists
Buy trail runners a half size to a full size larger than your road running or street shoe size. That’s not one brand running small. It’s category-wide standard practice, and it exists for two separate reasons that happen to point the same direction.
Reason one is descent clearance. On a steep downhill your foot slides forward inside the shoe every single step, and if there’s no room at the front your toes take the impact. Reason two is swelling, which we’ll get to. Both want more length than your street shoe gives you.
The sizing up conversation gets confused because people treat it as a comfort preference. It isn’t. A shoe that’s too short doesn’t feel too short on day one. It feels fine, and then it removes a toenail in Virginia.
If you’re weighing the decision carefully, this breakdown of when sizing up is the right call and when it backfires covers the cases where going bigger creates its own problems, because a shoe that’s too roomy slides and blisters just as effectively.
The Swelling Timeline, Week One to Week Three
Here’s the progression nobody maps out.
Day one to about day four, your feet swell during the day and mostly recover overnight. Heat and circulation push fluid into the foot, and a single long hiking day can add up to half a shoe size, roughly a 5 to 10% volume increase. Morning fit feels normal. Evening fit feels tight.
You blame the socks.
Week two is where the recovery stops keeping up. The swelling starts carrying over from one day to the next, and the shoe that fit at the trailhead now feels snug even at 6am. This is the window where hikers who bought their street size discover the problem, and it’s also when the blisters and black toenails start showing up in trail journals. The foot has nowhere left to expand, so pressure goes into whatever tissue is closest.
By week three and beyond, most hikers settle into a new baseline that’s bigger than where they started, and it tends to stay there. Feet also spread, not just swell. The arch flattens slightly under months of loaded miles and the forefoot widens. Some thru-hiking veterans report going up close to two full sizes by the end of a long trail.
Swelling is only half the blister equation, and the other half is moisture, friction and how fast you catch a hot spot. Getting sizing right removes the biggest cause, but the rest of the foot-care system that keeps blisters off your feet is what handles the rest.
The practical framework: size up a half size at purchase, then reassess at your first real resupply. If the shoe still fits with room at the toe, hold. If it’s tight in the morning, your next mailed pair goes up another half size. Don’t buy all your pairs at once in the same size.
Toe-Bang Is a Different Problem Than Width
Toe-bang is the community term for toes jamming into the front of the shoe on steep descents, and it gets confused with swelling constantly. They’re separate problems with separate fixes.
Swelling is a volume problem: the whole foot gets bigger and needs more room in every direction, which is a width and instep issue as much as a length one. Toe-bang is a length-and-lacing problem: the foot is sliding forward on a grade, and no amount of toe-box width helps if there’s nothing stopping the slide.
The fit check takes ten seconds and needs no tools. Sit down, push your foot forward until your longest toe touches the front, and check the gap at your heel. You want about a thumb’s width of space between your longest toe and the end of the toe box when the foot is seated back normally. Do it in the afternoon, not first thing in the morning, and do it with the socks you’ll actually hike in.
If you’ve got the length right and toe-bang still happens, the fix is a heel lock lacing pattern, not a bigger shoe. Use the top eyelet to build a lace loop on each side, thread the opposite lace through, and cinch. It anchors the heel and the sliding stops.
Zero-Drop or Traditional Drop, and Who Each One Suits
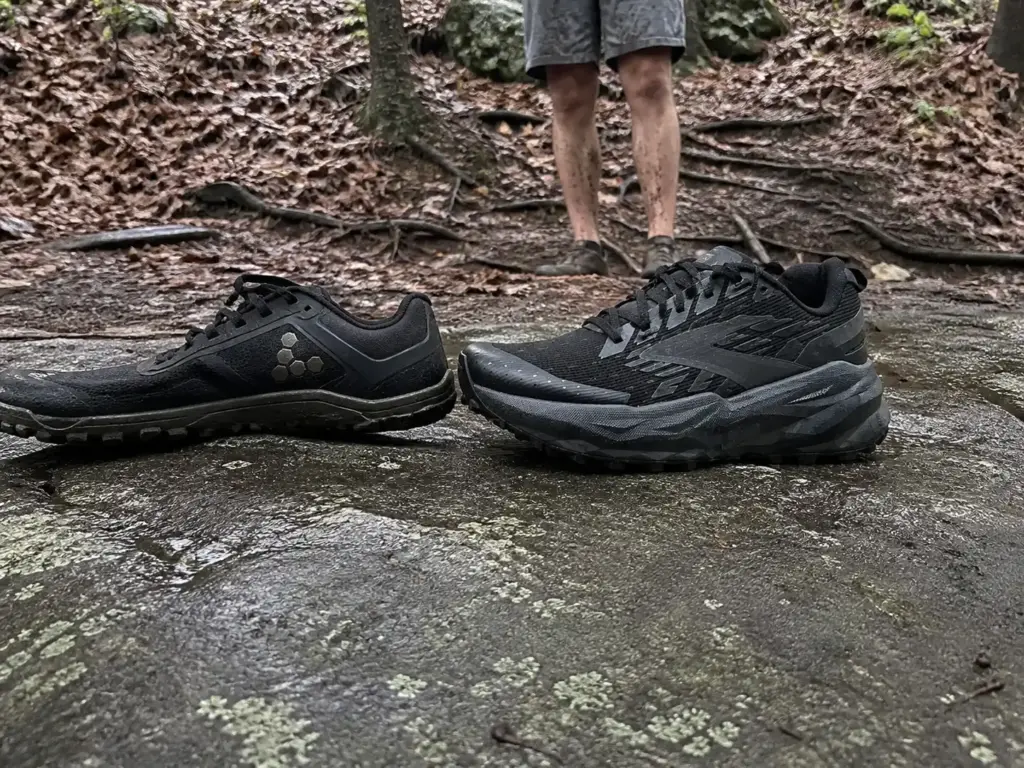
Zero-drop is the most argued-about number in trail footwear, and most of the argument comes from people who switched three days before a big hike. The number isn’t the problem. The transition is.
What Drop Actually Changes Underfoot
Heel-to-toe drop is the height difference between the heel and the forefoot of a shoe. A 5mm drop means the heel sits 5mm higher. Zero-drop means the foot is flat, the way it sits when you stand barefoot.
That difference sounds trivial and isn’t, because it changes where load lands in your leg. A raised heel takes tension off the calf and Achilles by keeping the ankle in a slightly shortened position, and that’s most of why traditional running shoes have had a drop for decades. Flatten it and that tension comes back, transferred to the calf, Achilles and the plantar fascia underneath.
Neither one is correct. They’re different distributions of the same total work. What matters is whether your legs have adapted to the one you chose, and adaptation takes time your thru-hike may not have.
The Transition Period Nobody Budgets For
Coming from a traditional 8 to 10mm drop shoe into zero-drop, your calf and Achilles are suddenly doing work they haven’t been asked to do. The tissue adapts, but the timeline is measured in weeks, not days, and it doesn’t care about your start date. Worth separating this from the break-in period people expect with boots: the shoe isn’t softening to your foot here, your legs are rebuilding to the platform.
The honest signal that you got this wrong isn’t pain on day one. Day one usually feels great, which is exactly the trap. It’s the calf tightness that shows up on the third consecutive high-mileage day and doesn’t clear overnight. You wake up, the calves are still ropy, and mile three feels like mile fifteen.
That’s the point where a transition became an injury schedule.
A thru-hike is the worst possible place to run this experiment. You cannot take a rest week at mile 400 without blowing up your resupply plan, and you cannot back off the mileage without falling behind your weather window. If zero-drop appeals to you, do the switch at home months out and follow a phased transition protocol if you’re coming from traditional shoes rather than winging it on trail.
The community word for testing this properly is shakedown, and it exists precisely because gear that feels right in a parking lot behaves differently on day three of loaded miles.
Picking a Platform for a Thru-Hike Specifically
For most readers this comes down to Lone Peak versus Speedgoat: zero-drop against 5mm. Here’s how to pick without agonizing.
Go zero-drop if you already wear low-drop shoes daily, if your priority is toe splay and forefoot room, or if you’ve had trouble with shoes that feel like they tip you forward. Go traditional drop, meaning 4 to 8mm, if you’re coming from regular running shoes, if you’ve had Achilles or calf trouble before, or if your start date is close enough that a transition isn’t realistic.
If you’re genuinely undecided, take the traditional drop. It’s the lower-risk choice for a trip where an injury ends the hike, and nobody has ever failed a thru-hike because their shoe had a 5mm heel. For readers who land firmly on the flat side, zero-drop shoes compared by terrain gets more specific about which flat-platform models suit rocky ground versus smooth tread.
Waterproof or Breathable, and Why Picking Wrong Means Hiking Wet
Everyone’s instinct is to buy the waterproof pair. Then they hit their first calf-deep crossing, water pours in over the collar, and now they’re carrying a shoe that’s very good at keeping water in.
What a Membrane Buys You and What It Costs
A GORE-TEX membrane is a barrier laminated into the upper. It stops liquid water from getting through the fabric while letting some vapor out. Against splash, dew-soaked morning brush and steady light rain, it works exactly as advertised, and your feet stay dry for hours longer than they would in mesh.
The catch is that it only guards one direction of entry. Water that comes in over the collar (a crossing, a downpour running down your legs, a misjudged step in a bog) is now inside a shoe specifically engineered to resist water movement. Drying goes from hours to a day or more, and every wet mile in the meantime is a mile of macerated skin.
Non-waterproof mesh does the opposite. It soaks instantly and it drains and dries fast, often within a couple of hours of walking on a warm day. A DWR coating on the outer fabric buys you a few minutes against light drizzle and then wets out, so treat it as a nice extra rather than a reason to pick a shoe. That’s the tradeoff that decides this question over hundreds of miles, and it’s why the Appalachian Mountain Club’s own comparison of boots versus trail runners for backcountry travel keeps landing on drying speed as the deciding factor for long-distance travel rather than water resistance.
Wet and drying beats wet and staying wet. On a trail with regular crossings, that’s the entire argument.
When Waterproof Is Genuinely the Right Call
There are real cases for a membrane, and dismissing them is its own kind of dogma.
Cold is the big one. In shoulder season, on early-season snowmelt, or on a section where the temperature is in the 30s and it’s raining sideways, wet feet aren’t a comfort issue anymore. They’re a heat-loss issue, and a membrane genuinely helps. The AT’s Northeast in mud season, where the water comes from above and from shin-deep puddles rather than over your collar, is exactly the terrain a GTX shoe was built for.
The Continental Divide Trail in early June, with snowfields melting all day, is another. So is any section where you’ll be walking through cold, wet vegetation for hours without a real crossing.
Here’s the anti-sell, though, because you deserve it: a membrane pair as your only pair for a full summer thru-hike is the wrong call for most hikers. Buy it as a section-specific tool, mail it to the resupply town where you’ll need it, and mail it home when you’re past that stretch. That’s a smart use of one pair in a rotation you were already planning. If you’re still weighing footwear categories entirely, how this same tradeoff plays out against boots is the next question worth answering, since a boot changes the collar-height math significantly.
Salomon XA Pro 3D V9 GTX, The Membrane Pick Worth Owning
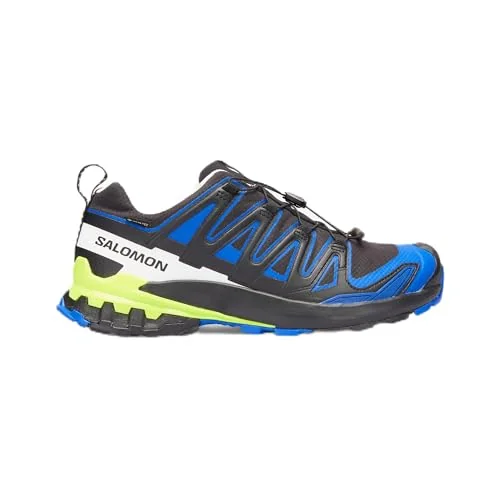
The 11mm drop on this one is worth flagging, since it’s the biggest on the list by a wide margin. Coming out of a zero-drop shoe into an 11mm platform mid-hike is a jolt in the opposite direction, and calves that adapted to flat will notice. If you’re running a Lone Peak as your main shoe, don’t make the XA Pro your rainy-section swap without a few loaded miles in it first.
The Quicklace system splits opinion. It’s fast, it never comes untied, and it distributes pressure evenly across the instep. It also gives you almost no ability to lace differently in different zones, so the heel-lock trick from the sizing section isn’t available to you here. Feet that need custom lacing are better served elsewhere.
Traction and Terrain, or Why the AT, PCT and CDT Are Not the Same Hike
A shoe that’s perfect in the Sierra can be the wrong tool in Maine. Anyone who’s hiked both will say the same thing, and almost no gear list admits it. “Thru-hiking” gets written about as one generic bucket, and then hikers wonder why the shoe everyone recommended is falling apart on their particular trail.
Three trails, three different ways to destroy footwear.
The AT, Roots, Wet Rock and Abrasion
The Appalachian Trail eats uppers. It’s a rock-and-root corridor for most of its length, frequently wet, with the Northeast delivering a specific kind of punishment: rock scrambles in New Hampshire and Maine where you’re using your feet like hands, and mud sections where the trail is a trench.
Two things matter here more than anywhere else. First, a rock plate or equivalent underfoot protection, because pointed rock and root ends transmit straight through a thin midsole and bruise the plantar surface of your foot. Second, abrasion-resistant mesh, because rock scrambling grinds the sides of a shoe against granite constantly.
Soft, sticky rubber compounds are the correct call on the AT. Wet rock is the default condition in the Northeast, and a softer compound conforms to the rock’s micro-texture and holds. It wears faster than a hard compound, which is the trade you make.
The PCT, Desert Grit, Granite and Heat
The Pacific Crest Trail’s first 700 miles run through desert, and the stressor there isn’t impact, it’s heat and abrasive dust. Decomposed granite gets everywhere, and as covered above, that grit inside the mesh is what takes uppers apart.
The build that wins here is breathable and quick-drying, with gaiters to keep the sand out. Deep aggressive lugs are close to useless on hardpack and granite slab, where the outsole’s overall shape and rubber contact area do the actual gripping. Heat management matters more than water resistance, which is exactly backward from most people’s instincts.
Your feet also swell harder in desert heat than anywhere else, which pushes the sizing conversation up a notch for PCT hikers specifically. Plan the shoe with that in mind alongside planning water carries through the desert stretch, since the two decisions land in the same planning window.
Then the Sierra arrives and everything changes: granite slab, snow travel in June, and creek crossings that make waterproofing pointless. This is the strongest argument on the whole trail for a mailed-ahead section swap.
The CDT, Where Off-Trail Miles Punish Everything
The Continental Divide Trail is only partially a trail. Long stretches are cross-country navigation over talus, deadfall, and bushwhacking through willow, and there’s no maintained tread to spare your shoe.
That’s a durability problem more than a traction problem. Everything wears faster because nothing is smooth. Sidewalls get scraped, outsole lugs shear on talus edges, and uppers take direct hits from deadfall. The most protective, most robustly built shoes on your shortlist earn their place here, and CDT hikers land at the high end of the pair count for a reason.
Lug depth and rubber compound trade off against each other in a way worth knowing. Deep, widely-spaced lugs bite mud and loose dirt by penetrating the surface and shedding what they pick up. Shallow, densely-packed lugs in a soft compound maximize surface contact for friction on rock.
You can’t max both, and any shoe claiming to is compromising somewhere. If underfoot protection is your main concern across trail types, where speed hiking shoes fit against trail runners covers how rock plate stiffness and stack height interact under load.
Brooks Cascadia 19, The Mixed-Terrain Middle Ground
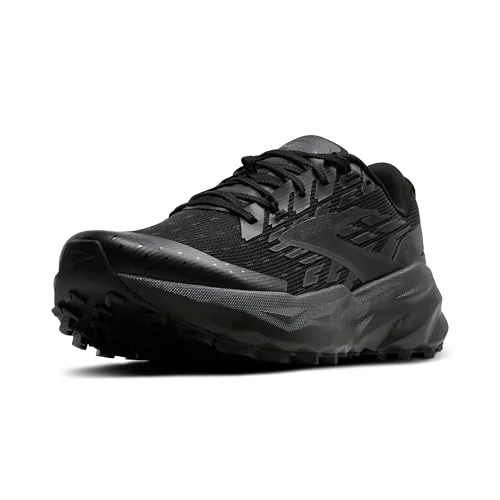
The Cascadia’s real selling point is that it doesn’t have a weakness. It won’t out-cushion a Speedgoat on a twenty-five mile day, it won’t out-grip a Salomon on greasy rock, and it won’t give you Lone Peak toe room. It also won’t fail you on any of those fronts, which on a trail that changes character every week is worth more than any single specialty.
There’s a specific hiker this shoe is right for: the one whose route crosses multiple terrain types and who doesn’t want to run a two-shoe rotation. If you’re hiking the AT end to end, or doing a CDT year with everything from desert to talus, the Cascadia is the shoe that stays reasonable in all of it.
The 6mm drop lands in the middle of the pack, which makes it an easy shoe to rotate in and out of without a calf adjustment. That’s a quiet advantage nobody advertises.
The Budget Pick, and What You Give Up Under $130
Resupply costs, town stops and permits already eat the budget. Telling someone their only options start at $145 when they’ll destroy the shoes in 400 miles is how gear advice loses people. And this whole SERP has the same problem: the roundups cluster in the $145 to $295 range with heavy premium-brand bias, as if nobody planning a thru-hike ever had a spending limit.
Plenty do. Here’s the honest version of that conversation.
What a Budget Build Actually Gives Up
Cheaper trail runners cut costs in three predictable places, and knowing which cuts hurt lets you shop intelligently instead of just shopping down.
First, rubber compound. Budget outsoles use harder, cheaper rubber that lasts a long time but grips wet rock noticeably worse. On a dry trail you’ll never notice. On wet Northeast granite you’ll notice on your first slip.
Second, mesh reinforcement. Premium builds put extra material specifically at the abrasion zones: the flex crease, the medial sidewall, the toe bumper. Budget builds run uniform mesh, which means the shoe fails at the first weak point rather than holding out.
Third, and most consequential, midsole foam quality. Better foams resist compression fatigue longer, which is the entire mileage question from earlier in this article. A budget foam that flattens at 250 miles rather than 400 is where the savings quietly evaporate.
What you don’t want to lose is the rock plate. Underfoot protection is the difference between a shoe you can hike loaded miles in and a shoe that leaves your feet bruised after a rocky day. That’s the line to hold when shopping down, and trip length shifts it. Whether you’re section hiking or going end to end changes how much durability you actually need to buy, since a 500-mile section and a 2,650-mile trail are not the same purchase.
The budget tier where a real rock plate and a decent outsole compound still come standard sits just below where the roundups start looking. Go much cheaper than that and you’re generally buying a road shoe with tread stuck on it.
Merrell Moab Speed 2, The Honest Value Pick
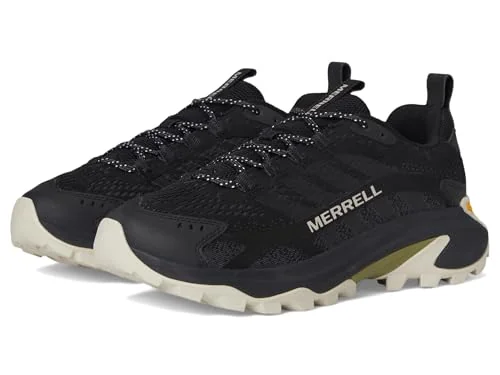
Now the caveat, and it’s a real one. Reviewers who put serious mileage on this shoe consistently flag that it wouldn’t hold up long-term on the Appalachian Trail. That’s not a knock on the design, it’s the budget tradeoff showing up exactly where the theory said it would: the upper and the foam give out before the protection does.
Which makes the Moab Speed 2 a smart call in specific situations and a poor one in others. It’s the right shoe for a shorter trail, a first thru-hike where you’re not certain you’ll finish, or PCT sections where grit rather than rock abrasion is the dominant stressor. It’s the wrong shoe for a full AT haul or a CDT year where you need every pair to survive off-trail scrambling.
Run the cost-per-mile math before deciding. If the cheaper shoe reaches 300 miles and the mid-tier one reaches 500, the mid-tier shoe is cheaper per mile and saves you a mail drop on top of it. The savings are real when the cheaper shoe reaches similar mileage on gentler ground, and imaginary when it doesn’t.
Where the Premium Tier Stops Being Worth It
At the other end, the category tops out around $220 to $295 for carbon-plated racing builds. The Altra Mont Blanc Carbon and the Norda 001 are the shoes people covet, and there’s genuine engineering in both.
There’s also a mismatch. Those shoes are built for fast, unloaded running over relatively short distances, and a thru-hike is slow, loaded walking over an enormous one. A carbon plate returns energy at running cadence, which is not what your legs are doing at 2.5 miles an hour under a 30-pound pack. And they compress on the same schedule as everything else, so you’re paying double for a pair that dies at the same mileage.
The framing that clears this up: you’re not buying one pair, you’re buying four to seven. Spend at the tier where cost per mile is best and put the difference toward pairs three and four. Money spent on the second pair does more for your hike than money spent making the first one fancier.
Conclusion
Buy for the trail you’re actually hiking. The AT chews through uppers on wet rock, the PCT sandblasts them in desert grit, and the CDT punishes everything off-trail. Those are three different shoe problems wearing the same label.
Budget for pairs, not a pair. Four to seven on the AT, five to nine on the PCT, mailed ahead to resupply towns on a mileage schedule you set before you leave. The hikers who get caught out are the ones who waited for a shoe to look worn.
Size up half a size at purchase and reassess at your first resupply. Feet swell, spread, and don’t fully go back. The shoe can’t change, so the shoe has to start with room.
Take whichever pair you’re leaning toward on a loaded weekend shakedown before you commit to it for 2,000 miles. Two days with a full pack tells you what your calves think of the drop and where the toe box actually sits, which is more useful information than any spec sheet will ever give you.
Frequently Asked Questions
01Are trail running shoes good for thru-hiking?
Yes, and they are now the majority choice rather than the alternative one. 77% of 2025 AT thru-hikers started in trail runners and 87% wore them for most of the hike, reporting the highest satisfaction of any footwear category. The tradeoff is lifespan: expect 300 to 500 miles per pair.
02What are the best trail running shoes for hiking?
For high-mileage hiking, the HOKA Speedgoat 6, Altra Lone Peak 9 and Brooks Cascadia 19 cover most feet and most terrain between them. Pick by platform first, meaning zero-drop versus a traditional 4 to 5mm drop, and toe-box width second. Those two decide comfort over hundreds of miles more than cushioning does.
03What are the best trail runners that can also be used for hiking?
Any trail runner with a rock plate and a grippy outsole compound handles both jobs, and the Saucony Peregrine 16 and Brooks Cascadia 19 are the clearest dual-purpose picks. Underfoot protection is what separates a running-only shoe from one that hikes well. Without a rock plate, loaded miles over rocky trail get punishing fast.
04Are trail runners or hiking boots better for hiking?
For long-distance hiking, trail runners win on weight, drying speed and comfort, which is why only 12% of AT hikers start in boots and just 5% still wear them at the finish. Boots still make sense for heavy loads over snow and early-season postholing. For a summer thru-hike on maintained trail, trail runners are the default.
Risk Disclaimer: Hiking, trekking, backpacking, and all related outdoor activities involve inherent
risks which may result in serious injury, illness, or death. The information provided on The Hiking Tribe is for
educational and informational purposes only. While we strive for accuracy, information on trails, gear, techniques,
and safety is not a substitute for your own best judgment and thorough preparation. Trail conditions, weather, and
other environmental factors change rapidly and may differ from what is described on this site. Always check with
official sources like park services for the most current alerts and conditions. Never undertake a hike beyond your
abilities and always be prepared for the unexpected. By using this website, you agree that you are solely
responsible for your own safety. Any reliance you place on our content is strictly at your own risk, and you assume
all liability for your actions and decisions in the outdoors. The Hiking Tribe and its authors will not be held
liable for any injury, damage, or loss sustained in connection with the use of the information herein.
Affiliate Disclosure: We are a participant in the Amazon Services LLC Associates Program, an
affiliate advertising program designed to provide a means for us to earn advertising fees by advertising and linking
to Amazon.com. As an Amazon Associate, we earn from qualifying purchases. We are also an official affiliate partner
of Black Diamond Equipment via the AvantLink network. If you click on a Black Diamond affiliate link and make a
purchase, we may earn a commission at no additional cost to you. We also participate in other affiliate programs and
may receive a commission on products purchased through our links. Additional terms are found in the terms of
service.