


















You buy the shoes everyone recommends, wear them on a real hike that weekend, and by Wednesday your calves feel like someone tightened a bolt behind each ankle. That’s not a defective shoe, and it isn’t weak feet. It’s the single most-repeated story in zero-drop transition threads, and it’s the exact outcome podiatrists write protocols to prevent. Most articles hand you a list of zero drop shoes and call it a day. This one covers what zero-drop actually changes about your stride, which models are worth buying by terrain and budget, the month-by-month transition plan nobody publishes, and the three situations where the honest answer is don’t.
What Zero-Drop Actually Means for Your Stride
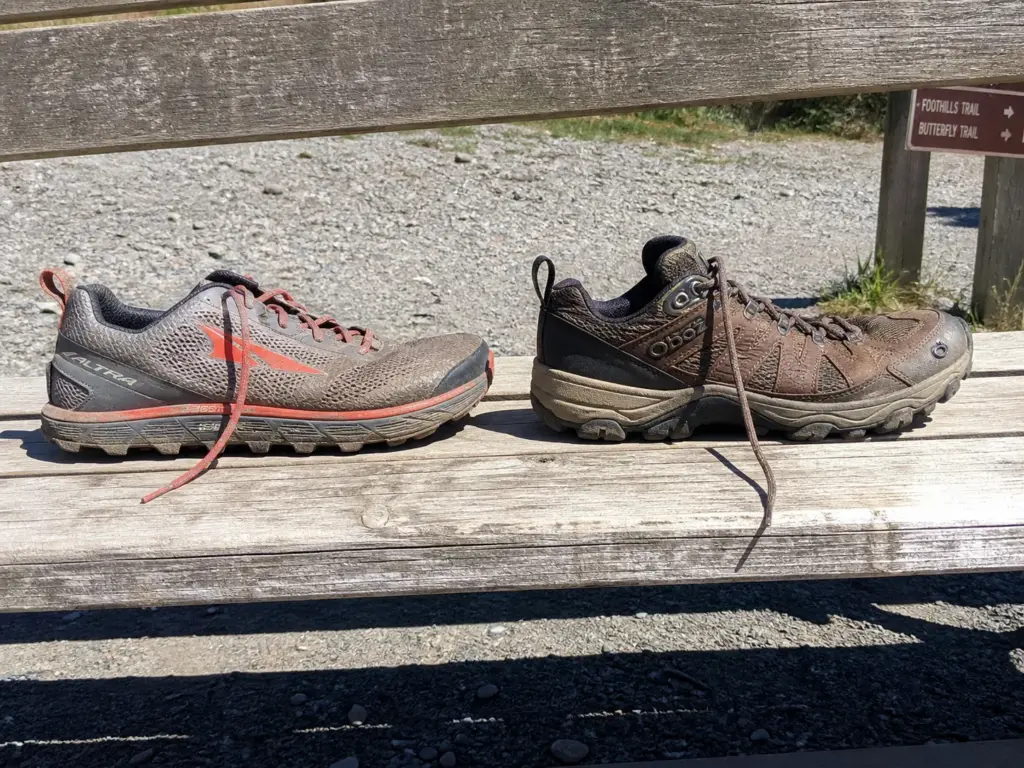
Stand in any shoe wall and pick up two hiking shoes that look identical from the outside. Same height, same tread, same general shape. One of them has a heel sitting 10mm higher than its forefoot and the other doesn’t. That difference is invisible from three feet away, and it’s the one spec that changes how you walk.
Heel-to-toe drop is the height difference between the heel and the forefoot of a shoe, measured in millimeters. Zero-drop means exactly that: 0mm. Your heel and the ball of your foot sit at the same distance from the ground, the way they do when you stand barefoot on a floor. Traditional hiking shoes and boots typically run 8 to 12mm, which means the heel is quietly propped up on a wedge you never see and never think about.
Mechanically, that wedge does work you don’t notice. It pre-shortens the calf and Achilles chain and it tips your weight forward slightly, which encourages the heel to land first and hard. Take the wedge away and the foot lands flatter, the ankle sits in a more neutral position, and the load moves down the chain: less through the knee on impact, more through the calf and Achilles on every push-off. That flatter platform is what the category means by a natural stride: closer foot alignment to how you stand barefoot, and a natural gait your legs have to relearn rather than one they get handed. The American Academy of Podiatric Sports Medicine’s position on barefoot and minimalist footwear (read it here) treats this as a real change in lower-limb loading rather than a marketing distinction, and that framing matters. You aren’t buying a philosophy. You’re redistributing where the work happens, and something downstream has to absorb it. If you want the full spectrum rather than just the zero end, we broke down what heel-to-toe drop does to your knees separately.
Here’s the confusion that trips up almost everyone in this category: zero-drop is not the same thing as minimalist. An Altra Lone Peak with 25mm of foam under it and a Vivobarefoot Primus with about 4mm are both zero-drop shoes. They feel nothing alike. One is a cushioned trail runner that happens to be flat; the other is barely more than a rubber sock. Drop tells you the angle of the platform. Stack height tells you how much shoe is between your foot and the rock, and stack height is a separate spec from drop in every meaningful way. Two shoes can share a drop number and belong in completely different worlds.
The wide toe box causes the third piece of confusion. Nearly every zero-drop maker also builds a wide, foot-shaped toe box, so readers reasonably assume the two are one feature. They aren’t. Width is about letting your toes splay under load. Drop is about the angle of the platform. A shoe can have one without the other, and plenty of conventional trail runners now offer a roomier forefoot without touching their 8mm drop. Toe spring, the upward curl built into the front of the midsole, is a third variable again, and a shoe can be zero-drop while still curling your toes upward at rest. Altra’s term “foot-shape fit” has drifted into generic use in forums, which is part of why the two specs got welded together in people’s heads.
Before you buy anything, find the drop and stack numbers on the spec sheet, not on the product photo. A chunky-looking zero-drop shoe and a sleek-looking 8mm shoe photograph almost identically. The only way to know what you’re holding is the two numbers, and plenty of retailers list stack height but bury drop three tabs deep.
There’s a detail that tells you the adaptation is physical rather than a placebo. Hikers who spend a few months fully transitioned and then put their old boots back on describe the same sensation almost word for word: they feel pitched forward, tipped downhill on flat ground, like the floor is sloping away from them. Your nervous system recalibrates to a flat platform faster than you’d expect, and the old wedge stops feeling neutral. Nobody talks themselves into that feeling. It just shows up.
Why the Switch Hurts: The Achilles Mechanism Nobody Explains
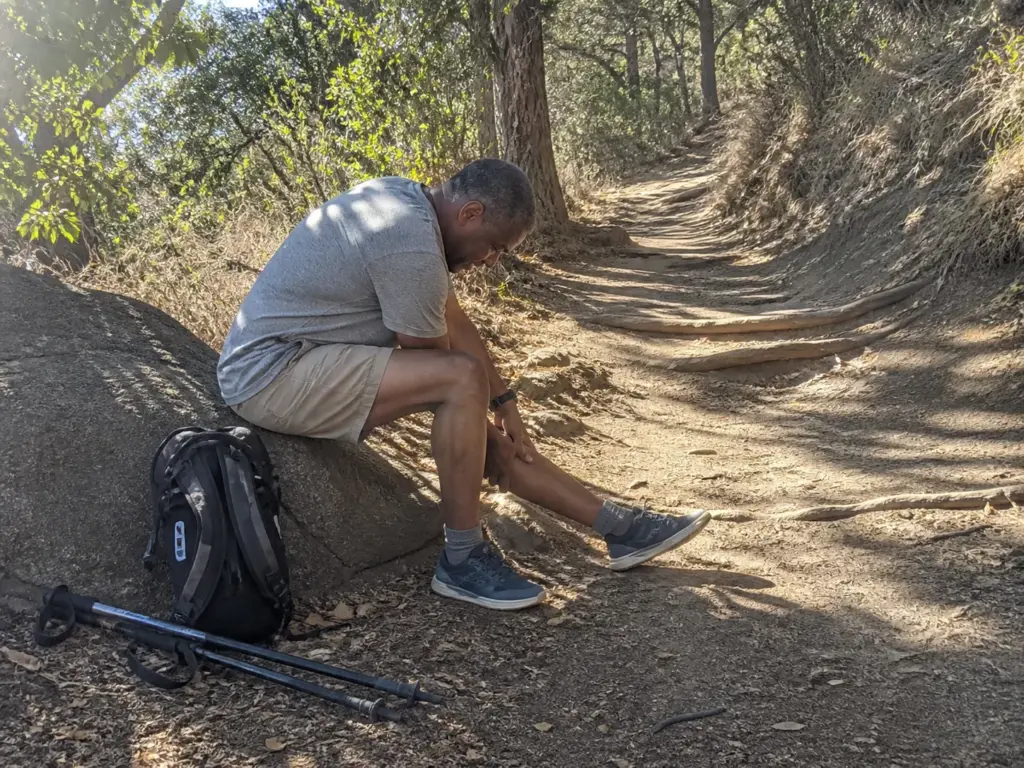
Every guide on the internet tells you to go slow. Almost none of them tells you what’s actually happening in there, which is why “go slow” sounds like generic caution instead of a specific warning about a specific tendon. Once you know the mechanism, the advice stops being vague and starts being obvious.
Your Achilles tendon and calf complex adapt to whatever length you keep them at. Spend 20 or 30 years walking around in shoes with a heel 8 to 12mm above the forefoot and the tissue settles into a shortened resting length. That’s not damage. It’s normal, healthy adaptation to a normal, constant load. The heel wedge was quietly doing part of the calf’s job, holding the tendon in a slightly slackened position through every step of your day.
Now drop that heel to 0mm. The wedge is gone, and the tendon has to elongate through a range it hasn’t visited in years. Not once, not during a stretch, but under your full weight on every single step. A five-mile hike is thousands of loaded elongations of a tissue that spent decades avoiding exactly that. This is why the transition hurts, and it’s why the pain shows up in the calf and the back of the heel rather than in the arch or the toes where people expect it.
The timing is what fools people. Tendon and muscle soreness of this type usually peaks 48 to 72 hours after the load, not during it. So the hike feels fine. The drive home feels fine. Two mornings later you get out of bed and your calves have turned to concrete, and because the hike is now three days in the rearview, the connection doesn’t register. You file it under “slept funny” or “long week” and you go out again on Saturday. That’s how a manageable adaptation becomes an injury. A systematic review of methods for transitioning to minimal footwear found that the transition method itself drives the injury rate, which is the clinical way of saying the shoe wasn’t the problem. Your calendar was.
Use the morning-after test as your stop signal. Calf tightness that clears within a few minutes of walking around is adaptation. Calf tightness that’s still there when you lace up for the next session, two or three days later, means the tissue hasn’t recovered and you’re stacking load on top of load. Back off a week before you have to back off a month.
The mistake that shows up over and over in forum accounts is filing that tightness under a break-in period. A break-in period is a real thing for leather boots. It is not a thing for a tendon. People push through heel soreness and calf tightness the way they’d push through a stiff upper, and several accounts describe tearing calf fibers within two to four weeks of doing exactly that. A torn calf costs you a season. Backing off for seven days costs you seven days.
The Backpacking Light forums carry a case that’s worth repeating because it compounds two errors at once. A hiker jumped from 15mm-drop boots straight to zero-drop, skipping any intermediate step, and pulled his arch-support insoles out in the same week. Hip and knee pain arrived within three weeks. Achilles tendinitis followed after that. The lesson isn’t that zero-drop shoes are unsafe. It’s that he changed two structural variables simultaneously and then had no way to know which one was hurting him or what to reverse. Change one thing at a time. If you want the deeper treatment, we wrote a full guide on transitioning to minimalist shoes without hurting yourself.
The Transition Plan: Month by Month, Not “Go Slow”
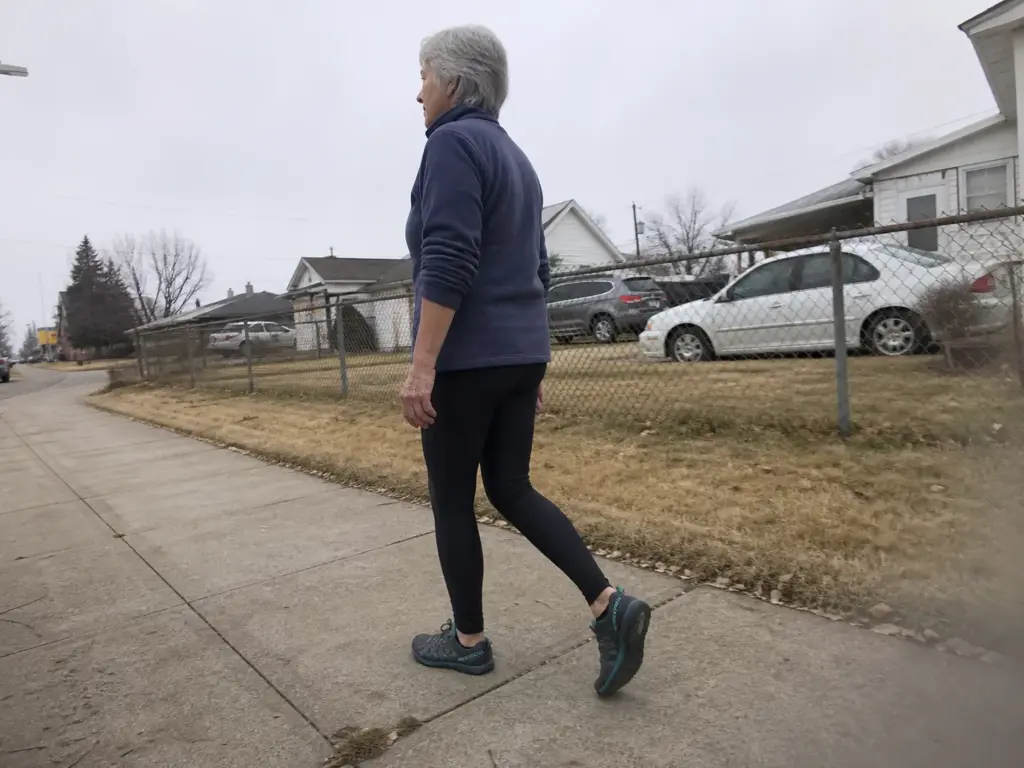
Advice becomes a plan the moment it has numbers in it. What follows is built on a podiatrist’s complete breakdown of making the switch, converted into a calendar you can actually follow. Screenshot it if that helps. The whole point is that the transition period should be boring.
Month 1: Pavement and the House
Walking only. Thirty minutes a day, maximum, on flat ground. Pavement, sidewalks, the kitchen, the office. No trail, no elevation, no pack.
That sounds absurdly conservative for a shoe you just spent real money on, and it is exactly the point. You aren’t training your legs here. You’re giving a tendon a low-stakes environment to lengthen in, where the surface is predictable and nothing forces a sudden load.
Start at 20 to 30 minutes a day and hold there for the first week. Then apply the 10% rule: never increase your time in the shoes by more than 10% per week. In practice that means adding 10 to 15 minutes per week, which gets you to roughly an hour a day by the end of the month. Wear your normal shoes the rest of the day. This is a supplement to your week, not a replacement for it.
Watch for the stop signal from the section above. Morning calf tightness that hasn’t cleared by the next session means you hold at your current duration for another week instead of climbing. Repeating a week is not failure. Repeating a week is the plan working.
Month 2 to 3: Flat Trail, Then Elevation
Now you add dirt, and you add it in small doses. Start with roughly 10% of your weekly hiking mileage in the zero-drop pair, on flat, maintained trail. If you’re doing 20 miles a week, that’s two miles. Not a two-mile section of your big Saturday hike, either. A separate, short, easy walk.
Elevation comes last, and it comes deliberately. Climbing loads the calf and Achilles through their deepest range, and descending loads them eccentrically, which is the hardest thing you can ask of a tendon that’s still adapting. Every mile of flat trail you bank before you start climbing buys you tolerance for the climbing.
Keep your old higher-drop shoes in rotation through this entire window. This is the tip that gets skipped most often, usually out of enthusiasm. Your longest and hardest hikes for these two or three months belong in the shoes your legs already know. Don’t retire them cold. Rotating between drops during a transition is not cheating, and having a fallback pair in the car has saved more than a few weekends.
If the jump from 10mm to 0mm feels aggressive, there’s a legitimate middle step almost nobody mentions: transition through a 4 to 6mm drop shoe first. Zero-drop is a destination on a spectrum, not a single leap. Spending a couple of months at 4mm before going to 0mm splits one big adaptation into two small ones, and for anyone coming out of stiff boots it’s the smarter path.
Month 3 to 12: Full Mileage and the Prehab That Makes It Stick
Months 3 through 6, build to 25 to 50% of your total hiking mileage in the zero-drop pair. Months 6 through 12, go to full mileage if and only if you’ve been symptom-free. The realistic floor for basic adaptation is 8 to 16 weeks. A complete switch, where these are simply the shoes you hike in, runs 6 to 12 months for most people.
Passive time isn’t enough on its own, though, which is the other half of what podiatrists prescribe. Eccentric heel drops are the core exercise: stand with the balls of your feet on a step, heels hanging off, rise up on both feet, then lower slowly on one leg until your heel drops below the step. Three sets of 15, twice weekly. Add single-leg calf raises and isometric calf holds, roughly 30 to 45 seconds each. This is what actually builds the tendon’s capacity for the load you’re about to hand it, and it’s the difference between adapting and just hoping. Foot strength builds on the same schedule as the tendon, which is the honest reason the calendar runs in months rather than weeks.
Do the heel drops on the days you are not wearing the zero-drop shoes. Stacking a full eccentric session on top of a day of adaptation walking is how people give themselves the exact tendon soreness the protocol exists to avoid. Alternate them and the two stop fighting each other.
One more half-step worth knowing about: keeping an arch support insole in the zero-drop shoe for the first stretch of the transition is legitimate, not a compromise. Forum users routinely run a Green or Carbon Superfeet inside a Lone Peak for the first couple of months, blending some arch support with the flatter platform instead of throwing every variable out at once. You pull it later, once the foot has adapted, and you’ve turned one shock into two manageable ones. If you’re weighing which one, our roundup covers an arch-support insole as a bridge step in detail.
Matching Stack Height to Your Terrain
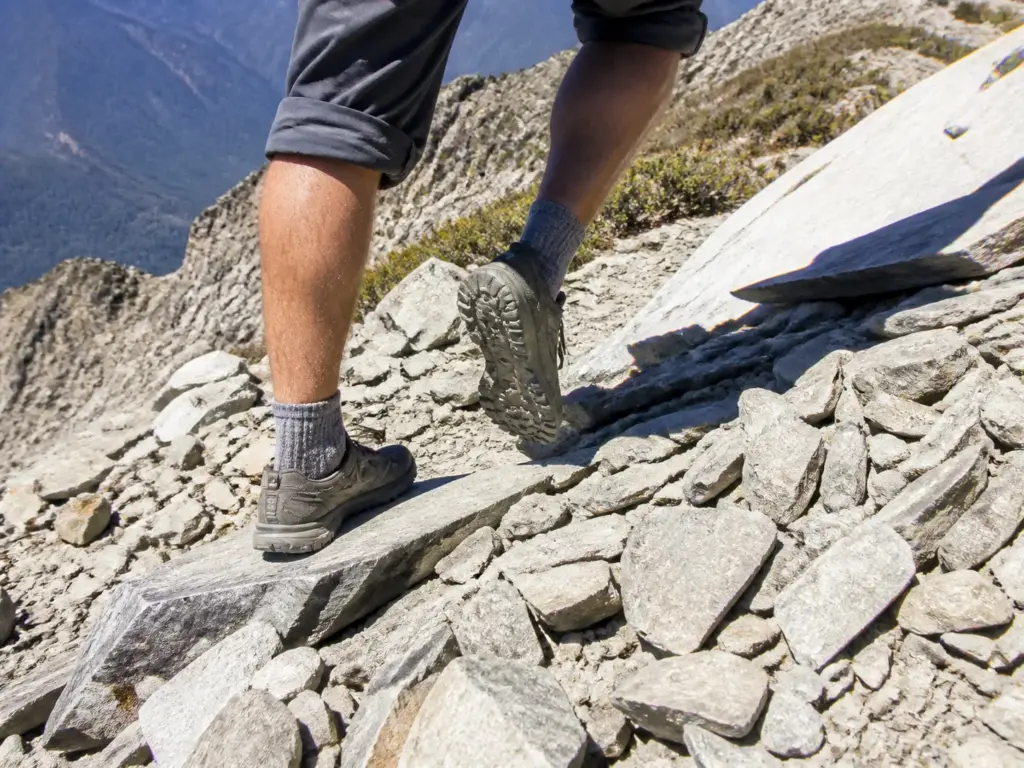
A stack number on a spec sheet means nothing until you translate it into what happens when you step on a sharp rock at mile nine. Here’s the translation, and it’s simpler than the spec sheets make it look. Everything in this category is a subset of trail runners for hiking, and the same stack logic applies across the whole category.
Think in three buckets. Under 15mm is minimalist: maximum ground feel, minimum protection, and a sole thin enough that you’ll read the trail through it. From 15 to 28mm is balanced, and this is the correct bucket for most day hiking on mixed ground. Over 28mm is maximalist territory, where you get real cushion and usually a rock plate, at the cost of feeling anything at all.
From there the decision rule is three lines long. Smooth, maintained trail: thin is fine. Rocky, rooty, exposed ground: go thicker. Long days with real mileage: go thicker than your instinct says, because your instinct is calibrated to how the shoe feels in the store at mile zero, not to how your feet feel at hour six.
Lug depth is the other half of the answer and it gets ignored constantly. Roughly 3mm of lug handles hardpack and maintained trail just fine. Mud, wet grass, and loose ground want 6mm or more, and the difference between those two on a greasy descent is not subtle. Traction also degrades meaningfully once lugs wear below about 2mm, which happens sooner than you’d think on thin-soled shoes because there’s less rubber there to begin with. Look at the outsole of your current pair before you shop for the next one. If the lugs are rounded over, that shoe was making decisions for you.
Measure lug wear with a penny instead of guessing. Stand the coin in the deepest lug channel in the forefoot. If more than about a quarter of the penny’s edge disappears, you still have usable tread. If the lug barely bites the coin at all, you are hiking on a slick, and that shows up first on wet rock and off-camber dirt.
So what does ground feel actually buy you? Proprioception, mostly. A thin sole lets you feel the edge of a root, the angle of a slab, the moment a rock rolls under your forefoot, and your ankle reacts to that information before you consciously process it. On technical ground, that’s genuinely useful, and it’s why experienced minimalist hikers place their feet better than the cushion crowd. It is also why the first pair of thin shoes feels so alive.
What it costs you shows up at hour six. A thin sole transmits every sharp rock straight into a foot whose intrinsic muscles are now tired, and tired feet lose the ability to modulate impact. The same sole that felt precise in the morning turns into a liability on a rocky descent in the evening, when your foot placement is sloppy and there’s nothing between you and the granite. Underfoot and forefoot protection is a separate conversation from cushion, and we broke down toe bumper, rand, and rock plate protection if you want the specifics.
The pattern in the community is consistent enough to name: people over-index on ground feel and under-buy protection on their first pair. Threads are full of “stack” and “ground feel” as shorthand, and the shoes that get the most enthusiastic first posts are frequently thinner than what the poster’s actual terrain justifies. If you’re choosing between two shoes and you’re honestly unsure, the thicker one is the one you’ll still be happy with in October.
The Zero-Drop Hiking Shoes Worth Buying
Everyone’s list is the same four brands. What’s usually missing is which one is right for the hike you’re actually doing this month, and an honest note on where each one stops working. These are organized by use case, and the anti-sell is included on purpose.
Best All-Around: Altra Lone Peak 9
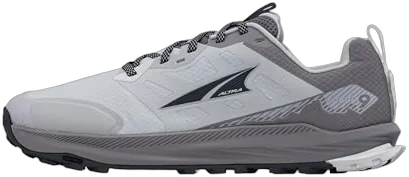
The Altra Lone Peak 9 is the shoe most people mean when they say they’re trying zero-drop, and there’s a reason it keeps showing up. A 25mm EGO foam stack with a 4.5mm multi-directional lug pattern, plus the FootShape toe box, puts it right in the middle of the balanced bucket. Day hiking, light backpacking, mixed ground that alternates between dirt and rock: this is the terrain it was built for, and it handles all of it without asking your feet to be strong yet. There’s a reason it dominates conversations about what thru-hikers actually put miles on.
Now the anti-sell, because two things are worth saying plainly. First, this is not a minimalist shoe. If you came here chasing maximum ground feel, the Lone Peak will feel muted and slightly disconnected, and you’ll spend the whole hike wondering what everyone was excited about. That’s a mismatch of expectations, not a flaw. Second, it’s the shoe that gets recommended reflexively, sometimes without anyone asking what terrain you hike. It genuinely is the best default. It just isn’t automatically the best answer for you, and “everyone recommends it” is not the same as “it’s right for your feet.”
Durability is the honest caveat Lone Peak wearers raise most often. The upper mesh and outsole both wear faster than a traditional hiking shoe’s, which is the trade for a light, flexible trail runner. That matters most if you’re putting big consecutive mileage on them.
Best Lightweight Everyday-to-Trail: Xero Shoes Prio
If the Lone Peak’s 25mm feels like more shoe than you want, the Xero Shoes Prio (men’s · women’s) sits considerably lower on a 5mm FeelTrue sole with a genuinely wide toe box. This is the shoe for smooth, maintained trail where you want to actually feel the ground, and it crosses over to street wear better than anything else here.
Its real strength is versatility rather than trail performance. It’s the pair you can wear to the trailhead, hike a well-groomed six miles in, and then wear into town afterward. For someone doing short local walks plus some easy trail, that flexibility is worth more than a specialized outsole.
The limit is terrain. On sharp rock or extended rooty ground, 5mm is not much of a buffer, and the Prio’s tread is built more for varied surfaces than for grip in mud. Take it up a scree field and you’ll be reminded exactly what stack height buys.
Best for Technical and Wet Terrain: Xero Shoes Mesa Trail Waterproof
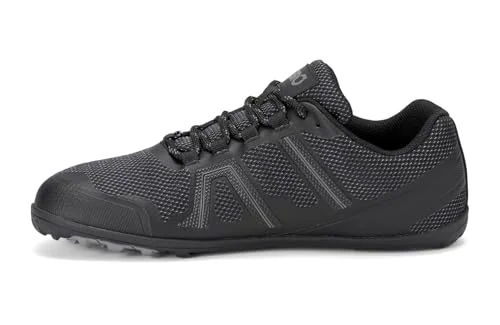
Wet rock is where thin minimalist shoes get genuinely humbling. You need rubber that grips a slick slab and an upper that doesn’t turn your sock into a sponge in the first stream crossing, and those two requirements are exactly what a 4mm barefoot shoe cannot structurally deliver. The Xero Shoes Mesa Trail Waterproof (men’s · women’s) exists for the shoulder-season hiking that mesh-upper trail runners handle badly: mud season, wet rock, cold morning grass, the kind of trail where staying dry is the difference between eight comfortable miles and four miserable ones.
The anti-sell here is the one every waterproof shoe deserves and rarely gets. A membrane keeps water out until water comes in over the collar, and then it keeps that water in. Step into a stream deeper than your ankle and you are now hiking in a sealed bucket that will take dramatically longer to dry than a mesh shoe would. For a wet trail, waterproof wins. For repeated deep crossings in warm weather, drainage beats waterproofing every time, and a non-membrane shoe is the smarter pick. Know which day you’re planning for.
For Hikers Who Already Transitioned: Vivobarefoot Primus Trail II FG, Merrell Vapor Glove 6, and Vibram FiveFingers V-Trail 2.0
This is the true-minimalist end, and it carries a boundary that needs stating flat out: these are shoes for readers who finished the transition in the section above, not for readers starting it. Buying one of these as your first zero-drop pair is the fastest route to the calf injury this whole article is trying to help you avoid. If you’re at month two of a twelve-month process, come back later.
The Vivobarefoot Primus Trail II FG (men’s · women’s) is the reference point for the category, running roughly 4mm of stack over a Michelin rubber outsole. The Michelin compound is the reason it works on real trail rather than just on lawns: you get genuine grip and firm-ground traction while feeling essentially everything under your foot. It sits at the premium end of the price range and it’s the shoe that finally makes people understand what “ground feel” meant all along.
If you want a second option so you’re not locked to one brand, the Merrell Vapor Glove 6 (women’s) runs a 6mm total stack on a Vibram EcoStep outsole, which is about as close to barefoot as a conventionally shaped shoe gets. The extra 2mm over the Primus is barely perceptible on trail but the fit and the last are noticeably different, and for some feet that matters more than the spec.
At the far edge, the Vibram FiveFingers V-Trail 2.0 (men’s · women’s) uses individual toe pockets on a 4mm sole for the maximum ground feel available in a shoe you can buy. Your toes splay and grip independently, which is either revelatory or deeply strange depending on the person, and there is very little middle ground in how people react to them. Give yourself a genuine adjustment period with the toe pockets specifically, separate from the drop adaptation.
Worth naming for context: the Lems Boulder Boot is the packable minimalist boot the community consistently cites for multi-day hiking and camp-shoe duty, mostly because it collapses down to almost nothing in a pack. It’s the reference everyone reaches for in those conversations even when it isn’t what they end up buying, and if your interest is multi-day rather than day hiking it’s a name worth knowing. For anything you’re actually putting trail miles on, the three shoes above are the ones with live options and the ones this section recommends. If the whole minimalist end appeals to you, the wider barefoot hiking shoe field covers more models and more of the tradeoffs.
Fit, Sizing, and What a Loaded Pack Changes
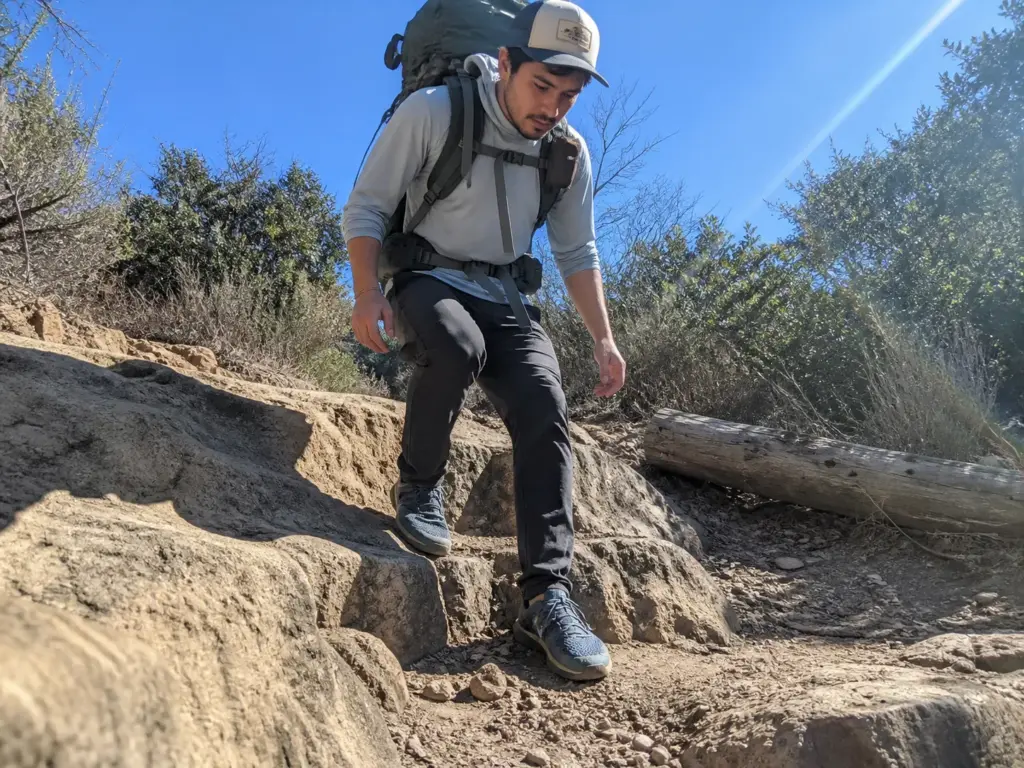
Wide toe box gets treated as the whole answer to fit. It isn’t. Width solves splay. It does nothing about length, and length is what wrecks your toenails on a loaded descent.
Those are two genuinely different problems. Splay is what your toes do when weight comes down on them: they spread outward, and in a tapered shoe they have nowhere to go, which is where hot spots and long-term toe deformity come from. A wide toe box solves that completely. But splay happens across the foot, and the descent problem happens along it, which is why a shoe can be beautifully wide and still destroy your big toenail. If you’re sorting through what “wide” even means on a box, why “wide” on the box isn’t a width untangles the last-shape half of the question.
Brand quirks are real and they don’t transfer. Sizing runs large at several zero-drop makers, a couple hold a noticeably narrow heel pocket despite the roomy forefoot, and your size in one brand tells you close to nothing about your size in another. Heel security matters as much as forefoot room here: a shoe that fits your toes perfectly and lets your heel float is still the wrong shoe. Treat every new brand as a fresh measurement. Buy from a retailer with a real return window, put them on with your actual hiking socks, and walk around indoors on carpet before the shoe touches dirt. The return window is part of the purchase, not a fallback.
Now the mechanism nobody connects to fit advice. A loaded pack shifts your center of mass forward, and you lean into that shift to keep the whole system over your feet. That forward lean is modest on flat ground and pronounced on descents, where you’re already tipping downhill. Add those two angles together and every step down drives your foot forward into the front of the shoe with substantially more force than day hiking ever generates. The result is that the same shoe, in the same size, fits differently at 30 pounds than it does empty, and it fits differently going down than going up. This is why sizing advice that ignores pack weight is incomplete, and it’s the reason backpackers need to size for length more aggressively than a day hiker in the identical model. If you’re carrying real weight, trail runners under a heavy pack is the deeper version of this conversation.
The community calls the outcome toe-bang, and the name is accurate. Toes hammering the front of the shoe repeatedly on a descent, mile after mile, and the result shows up two days later as a black toenail that eventually falls off. It’s the single most common footwear complaint on a first loaded trip, and the cause is almost always the same: the buyer sized for how the shoe felt standing still in the store, empty, on flat carpet.
Test sizing on a staircase with a loaded pack before you commit. Lace the shoes properly, put 25 to 30 pounds on your back, and walk down two full flights at hiking pace. If your toes touch the front even once, the shoe is too short for backpacking regardless of how it feels standing still. Two minutes on stairs beats finding out at mile eleven.
The baseline test is a thumb-width of space ahead of your longest toe with the shoe fully laced, but treat that as the starting point rather than the verdict. The staircase test above is what confirms it. And if the length is right but your heel is still sliding forward on descents, the fix is usually the lacing rather than a different size. Lacing that stops your heel from sliding on descents locks the heel back into its pocket and takes the pressure off the toes without changing anything about the shoe.
Who Should Skip Zero-Drop Entirely
This is the section a gear blog is supposed to skip, because it talks people out of a purchase. It’s also the section that makes the other six worth trusting. Some readers should not switch, and that’s a real answer rather than a hedge.
An active plantar fasciitis flare is the clearest case. The fascia running along the bottom of your foot is already inflamed and overloaded, and removing heel elevation increases fascial stretch further, which is precisely the wrong direction to push tissue that’s currently irritated. Podiatric guidance is consistent on this, and the podiatric breakdown of zero-drop risks states it directly. This isn’t a permanent disqualification. It’s a timing rule: let the flare settle completely, then transition slowly and ideally under guidance. If you’re hiking through one right now, hiking boots that actually help plantar fasciitis is the more useful read for this month.
A history of Achilles tendinopathy, chronically tight calves, or flat feet moves you into the “get an opinion first” group. Not “don’t ever,” but “don’t wing it.” A gait analysis or a conversation with a sports medicine professional before you switch costs you one appointment. Finding out afterward, from the tendon itself, costs you a season and involves the same appointment anyway. This is the one category of reader for whom the eccentric heel drop protocol should probably start weeks before the shoes arrive.
Ankle instability and a history of rolled ankles is more nuanced than the internet lets on. Less material underfoot means a lower platform and a shorter lever, and some hikers with unstable ankles genuinely do better on that lower platform because there’s less shoe to roll over. Others do worse, because they’ve lost the cushion that was absorbing bad foot placements. There is no blanket answer here. Pair the decision with the terrain rule from earlier: on smooth, maintained trail, a low platform is likely fine. On loose rock and off-camber ground with a pack, it’s a harder sell.
There’s a counter-story worth carrying alongside all the enthusiasm. Hikers who spent years in minimalist shoes have developed insertional Achilles tendinitis and Haglund’s deformity, a bony enlargement at the back of the heel, and ended up back in higher-drop shoes for pain management. Zero-drop is a tool that suits certain feet and certain terrain. It is not a cure, and it is not a moral upgrade over the shoes you already own. Anyone selling it as one is selling something. If you read this section and decided the category isn’t for you, that’s a good outcome, and starting from a standard hiking shoe instead is the honest next step rather than a consolation prize.
The Budget Honesty Note
There’s one more group this section serves: readers who want to test whether zero-drop even suits their feet without committing premium money to the experiment. That’s a completely reasonable position, and budget barefoot shoes are a real option here rather than a token gesture.
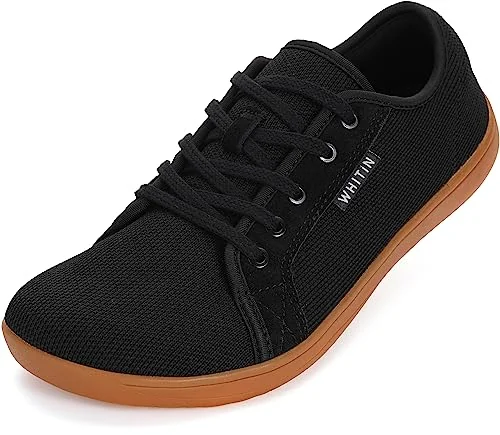
The WHITIN Minimalist Barefoot Trail Runner (men’s · women’s) genuinely delivers zero-drop and a wide toe box, which happens to be the entire specification that Month 1 of the transition requires. You’re walking on pavement for thirty minutes a day. A budget shoe does that job as well as a premium one, and if you discover after six weeks that flat platforms don’t agree with your feet, you found out cheaply. The SAGUARO Barefoot Shoes do the same job in a slightly different last, which is useful if the WHITIN shape doesn’t fit you.
Here’s what you give up, stated plainly rather than buried under a discount code. Outsole rubber wears faster and the compound grips wet rock less confidently. Lug geometry is simpler and clears mud less effectively. Upper construction, stitching, and overlays hold up over months rather than years, and the difference shows on rough terrain long before it shows on pavement. That’s a fair trade for a transition pair and a poor one for a shoe you plan to put five hundred trail miles on. Buy budget to answer the question. Buy properly to hike the answer.
Conclusion
Zero-drop is a spec, not an upgrade. Drop and stack height are two separate decisions, and the terrain picks the stack: thin for smooth maintained trail, thicker for rock and roots, thicker still than your instinct says for long days.
The shoe isn’t the risk. The transition is. Eight to sixteen weeks minimum, pavement first and elevation last, one variable at a time, with eccentric heel drops doing the work that waiting alone won’t do.
And if your plantar fascia is flaring right now, or your Achilles has a history, this is not your month. That’s a real answer, not a hedge, and there are better shoes for the hiking you want to do between now and then.
Start the clock indoors this week. Twenty minutes a day on flat ground, in whatever zero-drop pair matches your terrain, and let the calendar do the work your enthusiasm wants to skip.
Frequently Asked Questions
01Is a zero drop shoe good for hiking?
Yes for most healthy feet on the right terrain, provided you transition gradually over 8 to 16 weeks instead of switching cold. Match stack height to your ground: under 15mm for smooth maintained trail, 15 to 28mm for mixed rocky terrain and longer days.
02What do podiatrists say about zero drop shoes?
Podiatrists generally support zero-drop for healthy feet but are consistent that the transition method drives the injury risk, not the shoe itself. They advise a gait analysis or a sports medicine consult first if you have tight calves, an Achilles tendon history, or flat feet.
03What are the downsides of wearing zero drop shoes?
The real downsides are the long adaptation window, reduced underfoot protection at low stack heights, and genuine contraindications. Calf and Achilles strain is common when people rush it, and active plantar fasciitis or a rolled-ankle history can make the switch a poor idea entirely.
04Are zero drop shoes really better?
Better for some feet and some terrain, not universally. The evidence supports that reduced drop changes how load is distributed through the lower leg, which suits many hikers, but marketing claims about stronger feet and fewer injuries run well ahead of what research actually shows.

I've spent more than a decade researching hiking gear and trail technique. I read the specs, the forum threads and the long-term reviews, and every pick here comes with what it gets wrong.
End of the trail
You read every mile of this one. Here's where the trail goes next.