
















It’s day three. The shoes that felt like clouds in the store parking lot now feel like flat rubber slabs, every rock on the descent is coming straight through, and your pack is still holding four days of food. Ask anyone who’s hiked a loaded resupply carry and they’ll tell you the same thing: the shoe didn’t fail, the weight on your back changed what the shoe was. Trail runners are the default backpacking footwear now, with 87% of 2025 Appalachian Trail thru-hikers wearing them for the majority of their hike, so the useful question isn’t whether to switch. It’s which pair still holds its shape when you’re carrying real weight. Below are six picks sorted by what a loaded pack does to them, plus the sizing, drop, and durability math that decides whether any of them work for your feet.
What Pack Weight Actually Does to a Trail Runner
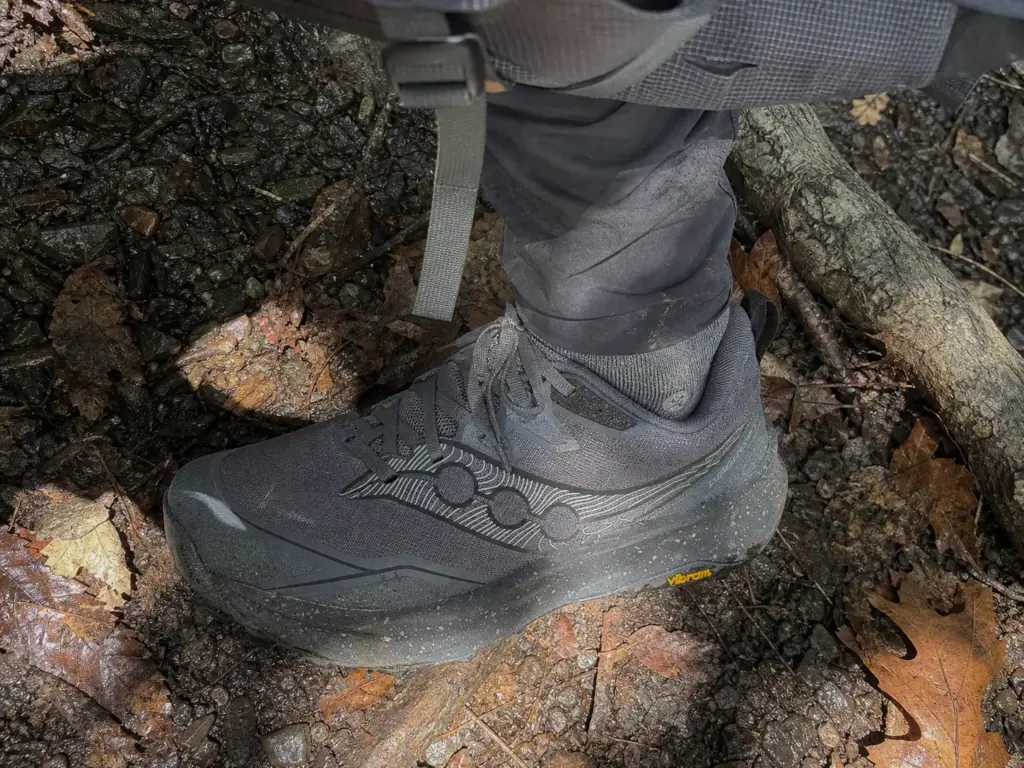
The outfitter store is a lie, and not on purpose. You try shoes on standing still, on carpet, with nothing on your back, and everything in the wall feels incredible. Then twenty-five pounds and three consecutive days do something to that shoe that no in-store lap can predict. This section is the lens the rest of the article runs on.
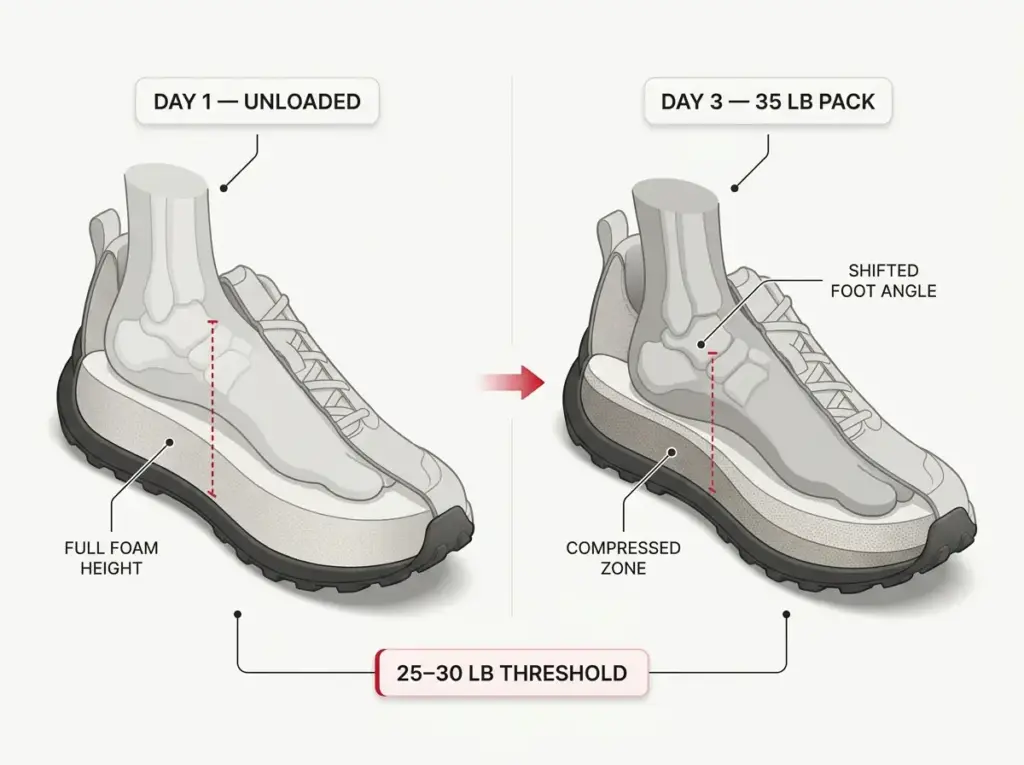
Foam compresses faster under load than it does under you alone
Every spec sheet you’ll read measures stack height on an empty shoe sitting on a bench, which is worth remembering when you compare numbers, and the pillar guide on what stack height actually buys a hiker walks through how those millimeters translate to ground feel. The moment you strap on a loaded pack, the shoe under you is not the shoe in the measurement. Midsole foam stiffens roughly 20 to 40% across meaningful wear cycles, and a pack accelerates that clock rather than simply riding along with it. There’s a PRISMA-guided review of footwear technology and biomechanical adaptation in ultramarathon and long-distance running that documents both the material degradation and the gait changes that follow it.
In plain English: the cushioning you paid for is not the cushioning you’ll have at mile 30. Hikers call this packing out, and it isn’t the temporary squish that bounces back overnight. It’s permanent flattening from cumulative load, and once the foam is gone it doesn’t come back with a rest day.
The mistake that shows up in trail threads every season runs like this. Someone buys the bounciest shoe on the wall because it felt like walking on a mattress, loves it for the first weekend, and finds it dead underfoot by day five of the first real trip. The shoe wasn’t defective. It was tuned for a 160-pound runner doing an hour at a time, not a 160-pound hiker plus a 30-pound pack doing eight hours a day.
The 25 to 30 lb threshold matters more than trip length
Most people frame this as a trip-length question, and that’s the wrong axis. Three nights out at 20 pounds is a far safer trail-runner scenario than two nights at 40. Duration wears the shoe down; weight changes how it behaves right now, on this step.
Somewhere around 25 to 30 pounds, softer foam compresses far enough that it changes where your foot actually sits inside the shoe. The midsole deforms sideways as well as down, your foot rolls a little further before anything stops it, and on off-camber or rocky ground that extra travel is what turns a stumble into a rolled ankle. Below that threshold, most well-built trail runners hold their shape well enough that the difference is academic.
So the practical rule is embarrassingly simple and almost nobody does it: weigh your pack fully loaded, with water and food, before you decide the shoe. Not the base weight from your spreadsheet. The number you’ll actually pick up at the trailhead on day one, which is usually four to six pounds heavier than people expect.
Weigh the pack on a bathroom scale the way you’ll actually carry it: full water bladder, full food bag, the two liters you top off at the last road crossing. Stand on the scale holding it, then stand on it without. That difference is the number that picks your shoe, and it’s almost always higher than the one in your gear spreadsheet.
Firm beats plush when there’s weight on your back
This is the part that reads as counterintuitive if you’ve been shopping by feel: cushioned does not mean durable-under-load. Those are two different properties, and the market rewards the first one because it’s what you can evaluate in thirty seconds on carpet.
TPU-blended and firmer-tuned midsoles hold their geometry better under body weight plus pack weight than highly compressible EVA or the hyper-expanded superfoams that dominate road running right now. Those superfoams are engineered for energy return at running cadence under a single body. Add a pack and the same compliance that makes them feel fast makes them feel vague.
The tell isn’t how the shoe feels in the store. It’s how it feels on the second consecutive loaded day, which is the first time the foam has been asked to recover overnight and hasn’t fully managed it. That’s the moment a shoe either holds up or reveals itself, and it’s the reason a single shakedown day hike doesn’t tell you much.
The comparison table every pick comes from
Before the individual write-ups, here’s the whole roster on one screen so you can rule out four of them in ten seconds and read only the two that fit your feet. The last column is our judgment rather than a spec-sheet number: how much pack weight each shoe still feels composed under.
| Shoe | Drop | Outsole | Rock protection | Best for | Load ceiling |
|---|---|---|---|---|---|
| HOKA Speedgoat 6 | 4mm | Vibram Megagrip, 5mm lugs | Deep stack, no plate | Long cushioned miles | Comfortable to about 35 lb |
| Brooks Cascadia 19 | 8mm | TrailTack Green | Rock plate | Stability and rocky trail | Composed past 35 lb |
| Altra Lone Peak 9 | 0mm | MaxTrac | StoneGuard | Wide feet, zero drop | Best under about 30 lb |
| Saucony Peregrine 16 | 4mm | PWRTRAC | Rock plate | Value with real protection | Solid to about 30 lb |
| La Sportiva Bushido III | 6mm | FriXion sticky rubber | Rock guard | Technical, scrambly ground | Composed past 35 lb |
One filter worth applying before anything else: if a shoe you’re considering runs shallower than about 4mm lugs or uses generic unbranded rubber, its traction budget is a day-hike budget, so treat it as a day-hike shoe. It may be a wonderful day-hike shoe. It is not a loaded-backpacking shoe, and the wet-rock descent on day two is where you find that out.
Best Overall for Loaded Miles: HOKA Speedgoat 6
This is the shoe that keeps winning these roundups, and it deserves it more than most perennial winners do. It’s also the shoe with the most honest reason to skip it, which we’ll get to.
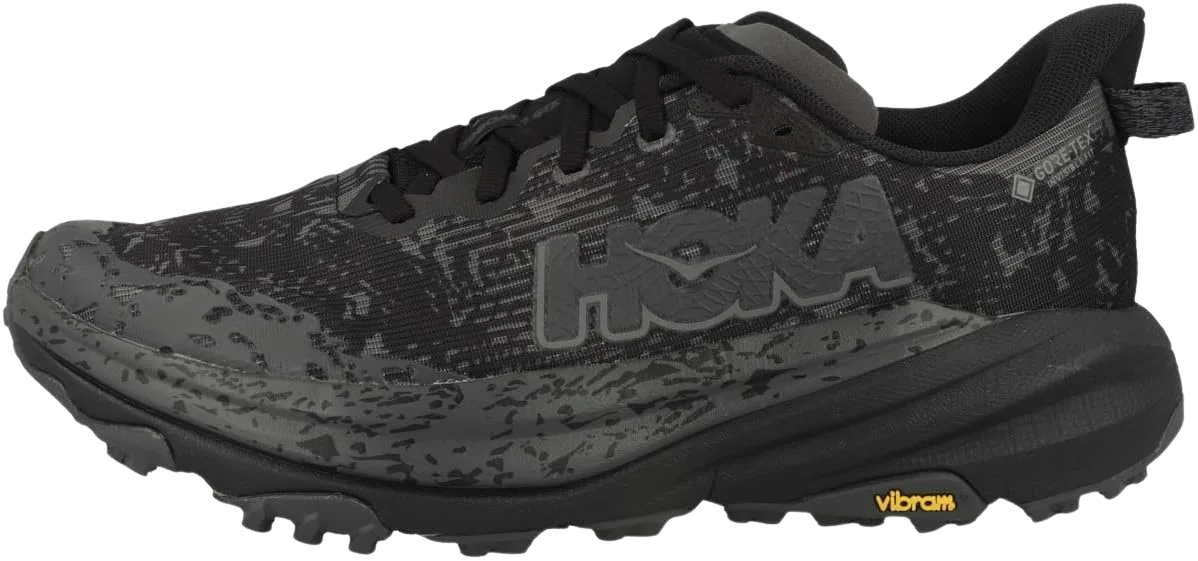
The reason the Speedgoat works under load comes down to one thing the section above already set up. Every trail runner’s foam firms up as it accumulates miles, so the shoe you finish a trip in is always less cushioned than the one you started in. What separates this pick is that the stack is deep enough that partial packing-out still leaves you with meaningful protection. A thinner shoe that firms up by the same percentage has nothing left to give.
The Vibram Megagrip outsole with 5mm lugs is doing real work too, particularly on the wet-rock and root sections where a loaded pack punishes any slip harder than an unloaded one would. It’s the same combination that shows up over and over in the shoes that dominate thru-hiker foot surveys, which is a decent proxy for durability data nobody publishes formally.
Now the honest part. All that stack sits you high off the ground, and height is the enemy of stability. On off-camber traverses or anything approaching a scramble, a heavy pack riding above a tall midsole gives you a lever arm working against you, and the shoe feels tippier than a lower-profile alternative. If your typical route involves talus, exposed ridgelines, off-trail hiking, or genuine hands-on-rock sections, read the Bushido section before you commit here. No trail runner gives you the ankle support a stiff boot cuff does, so on that terrain the shoe’s own stability is the entire safety margin.
One more thing worth knowing before you shop. The newer Speedgoat 7 exists and several competing roundups have already moved to it, but its Amazon inventory is thin to nonexistent across nearly every size and colorway right now. The 6 is still fully stocked, still excellent, and is the safer buy today.
Best Stability Under Load: Brooks Cascadia 19
This is the shoe for the hiker whose complaint isn’t cushion. It’s feeling every single rock through the sole by mile fifteen while the pack drives their foot down harder onto each one.
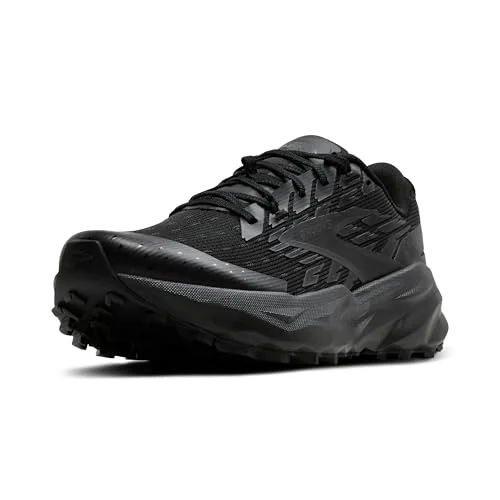
A rock plate is a thin, stiff layer sandwiched into the midsole, and it’s underrated for backpacking specifically because of simple physics. Pack weight drives your foot down onto every rock with more force than body weight alone, so the same trail that felt fine on a day hike starts bruising by the afternoon of day two. The plate is what sits between your metatarsals and that pointed granite.
The wider platform matters for a related reason. A loaded pack raises and shifts your center of gravity, so every small correction your ankle makes is fighting more leverage than it would unloaded. A broader base under the foot gives those corrections something to push against, which is where stability matters more than pure weight savings in the trail-runner category.
Then there’s the 8mm drop, which is the quietly important spec on this shoe. It’s the closest number here to what a boot wearer’s calves are already adapted to, which makes the Cascadia the least demanding switch of the five if you’re crossing over from stiff footwear. That connects directly to the transition section below, and it’s the reason this shoe gets recommended to boot converts more often than the flashier picks.
The anti-sell is the flip side of that same number. If you’ve already adapted to a low-drop shoe, the Cascadia will feel like the least natural option in this lineup, with a heel that sits noticeably higher than you’re used to. This is also the direct successor to the Cascadia 18 that the earlier version of this guide recommended, so if you liked that shoe the upgrade path is straightforward.
Best Zero-Drop, Best Budget, and Best for Technical Ground
Three shoes, three completely different problems. Nobody needs all three. Find the one that names your actual complaint and skip the other two.
Altra Lone Peak 9 (zero-drop and wide feet)
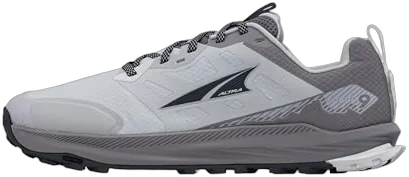
Toe-bang is the term you’ll see in trail threads, and if you haven’t experienced it yet, it’s the repeated slamming of your toes into the front of the shoe on long descents. Under a pack it gets substantially worse, because the extra weight drives your foot forward harder on every downhill step, and the swelling that builds over multi-day trips means your foot is bigger by the time the worst descents arrive. The FootShape toe box is the most consistently recommended structural fix for it. If width alone doesn’t solve the problem, when a roomy toe box still isn’t enough covers the fit paths that go further.
Now the caveat, stated up front rather than buried at the bottom where these usually live. Zero drop is not a shoe choice. It’s a training commitment, and what zero drop actually changes about how your foot lands is worth reading before you order. Do not buy this shoe for a trip that starts in three weeks if you’ve spent the last decade in boots. That’s not caution for its own sake; the transition section below explains what actually goes wrong and why the timeline is measured in months.
Saucony Peregrine 16 (the honest budget pick)
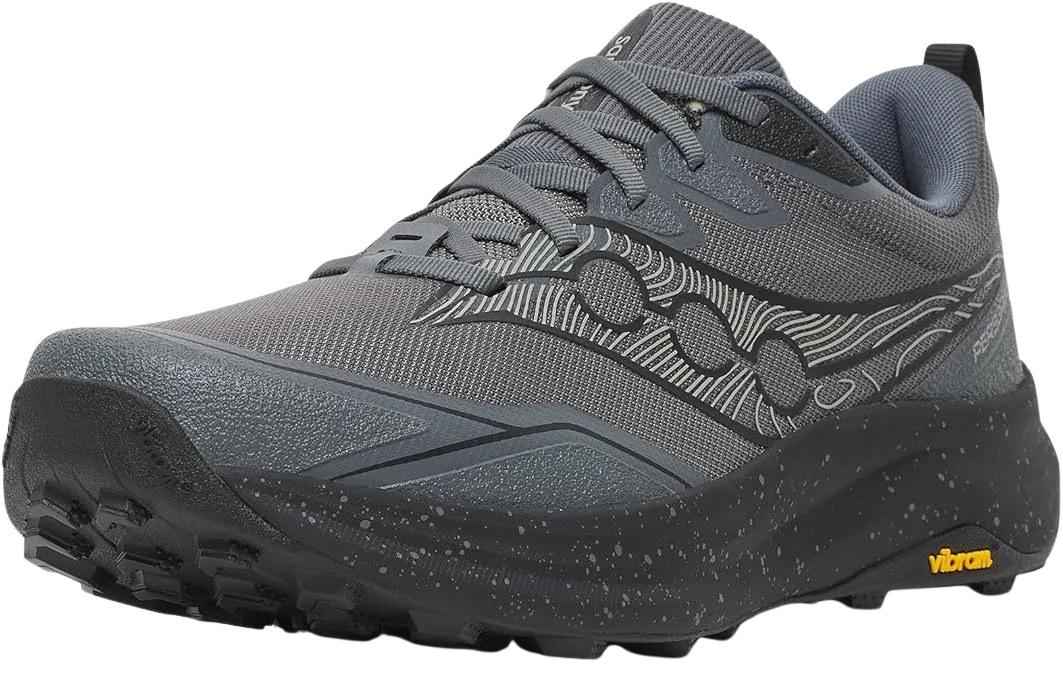
Here’s the thing about budget picks that roundups almost never say out loud: the cheap shoe is usually also the one that wears out fastest, and for a backpacker racking up miles quickly, that changes the actual economics rather than just the sticker. A pair that costs meaningfully less but needs replacing after 300 miles instead of 450 isn’t automatically the cheaper option over a season. Run those numbers against your own mileage before you assume you’re saving money, and read the cost-per-mile section below if you’re planning something long.
So why is this still the recommendation? Because of what it doesn’t cut. Budget trail runners typically save money by removing the rock plate, thinning the outsole rubber, and using a softer, cheaper foam. The Peregrine keeps the plate, which is precisely the feature that matters most under pack weight, and pairs it with a PWRTRAC outsole that grips well beyond its price bracket. You’re trading longevity for protection, which is a much better trade than the reverse.
La Sportiva Bushido III (technical terrain)
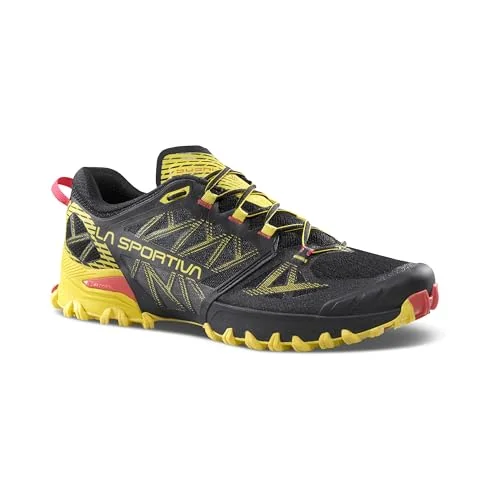
This shoe is built on the opposite theory from the Speedgoat, and understanding that is most of the buying decision. Where HOKA’s answer to rough ground is to put more material between you and it, La Sportiva’s answer is to put you closer to it with better rubber and tighter control. On genuinely technical ground with a loaded pack, the second approach usually wins, because what threatens you there isn’t impact fatigue, it’s your foot ending up somewhere you didn’t intend.
The terrain that justifies this pick is specific: Sierra High Route style cross-country travel, the rockier stretches of the Colorado Trail, anything where you’re placing feet deliberately instead of cruising. On smooth graded trail the Bushido is more shoe than you need and you’ll feel the miles more than you would in the Speedgoat.
The anti-sell is straightforward. Precise midfoot fit is a polite way of saying narrow. If your foot is wide, or if it swells substantially on multi-day trips, this shoe will punish you for both. Read the Lone Peak section instead.
Coming From Boots? Don’t Skip the Transition
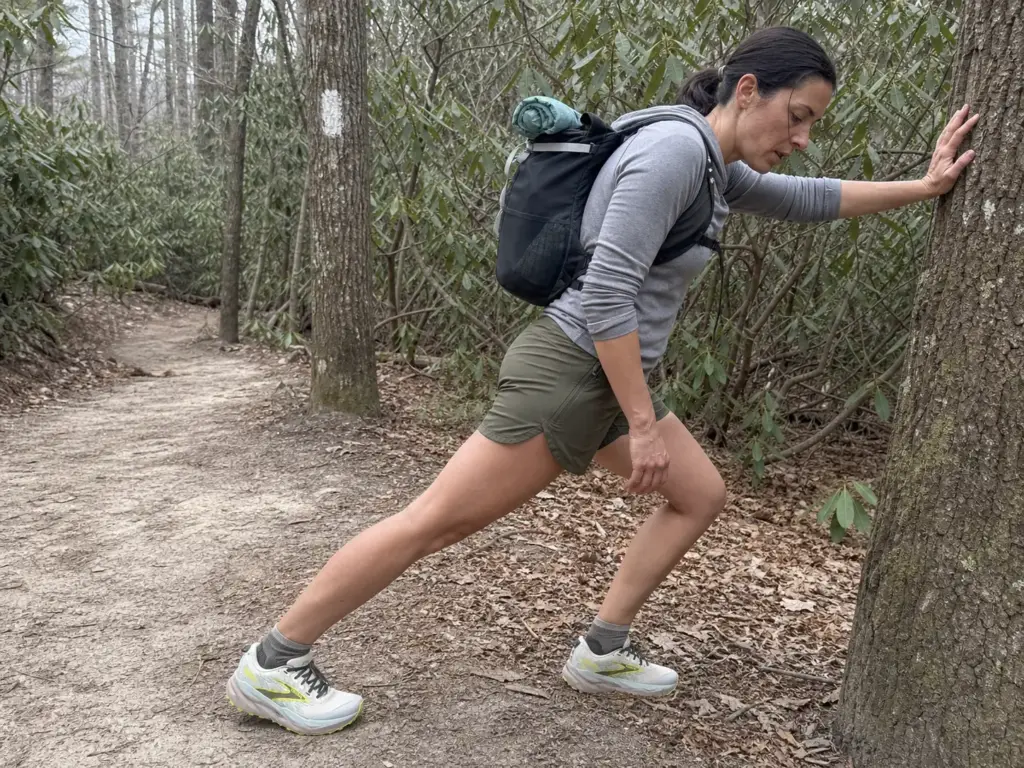
Most people reading a guide like this are boot hikers thinking about downsizing, and here’s the uncomfortable part: the shoe is rarely what hurts them. The calendar is.
Why your calves, not your feet, are the problem
Dropping from a high heel-to-toe drop boot to a low- or zero-drop trail runner changes the geometry of every single step. Your heel sits lower relative to your forefoot, which means your Achilles tendon and calf complex are loaded through a longer range, thousands of times per day, in a way they’ve never been asked to handle. Your feet feel fine. Your calves quietly accumulate damage.
Adaptation research on minimalist footwear transitions points to a window of roughly 8 to 16 weeks of progressive loading for the tissue to remodel properly, and a 12-week minimalist-footwear transition study found Achilles tendon loading changes significantly during the adaptation period rather than immediately. That’s the number nobody puts in a shoe review, and it explains why zero drop wrecks calves on the descent and not on the sidewalk where most people do their testing.
The failure pattern is depressingly consistent in trail forums. Someone buys new low-drop shoes, does one break-in day hike over a weekend, declares them comfortable, and then gets blindsided by Achilles soreness in week one or two of an actual trip, hundreds of miles from a rest day they can afford to take. The shoes were comfortable. The tissue just hadn’t been given time.
The transition protocol worth actually following
The principle underneath this is broader than footwear: injury risk in endurance activity is driven mostly by how quickly training load increases, not by the equipment itself. New shoes are a load change. Treat them like one.
Eccentric calf loading spread across roughly six weeks gives the tendon time to remodel, and it’s the specific work that pays off here rather than general fitness. Slow heel drops off a step, progressing gradually, done consistently, are worth more than another shakedown hike.
The sequencing that works looks like this: unloaded walking in the new shoes first, then day hikes, then day hikes carrying the pack weight you’ll actually be under, then the trip. The rule that keeps people out of trouble is to add weight and add miles, but never in the same week. Change one variable, let it settle, change the next. If you want the full transition schedule, week by week, it runs the progression in detail.
And if you’re short on time, there’s an honest shortcut that beats rushing: pick a higher-drop trail runner instead. The Cascadia 19’s 8mm sits close enough to boot geometry that the adaptation demand is small. Compressing a zero-drop transition into four weeks because your permit date is fixed is how people end up hiking with a tendon problem for a month.
Wear the new shoes for everything that isn’t hiking first. Groceries, dog walks, the commute. Those are unloaded, low-consequence miles that still count toward tendon adaptation, and they cost you nothing on the training calendar. By the time you start loaded day hikes, your calves have already banked several weeks of quiet work.
It’s a reversible decision, not a commitment
One thing that gets lost in the intensity of gear debates: you are not locked in at the trailhead in either direction. A meaningful share of hikers start long trails in boots and switch to trail runners partway through, and it works out fine.
The pattern that shows up constantly in trail journals is the hiker who mails their boots home from the first or second trail town, usually because their feet kept swelling past what a fixed-volume boot could accommodate. That’s a good decision made with better information than they had at home, not a planning failure.
The reverse happens too. Someone on rough terrain with a heavier-than-expected load decides partway through that they want more underfoot and swaps to something burlier. Both directions are normal, and knowing that should lower the stakes on this purchase considerably.
Sizing, Fit, and the Foot-Shape Problems Nobody Covers
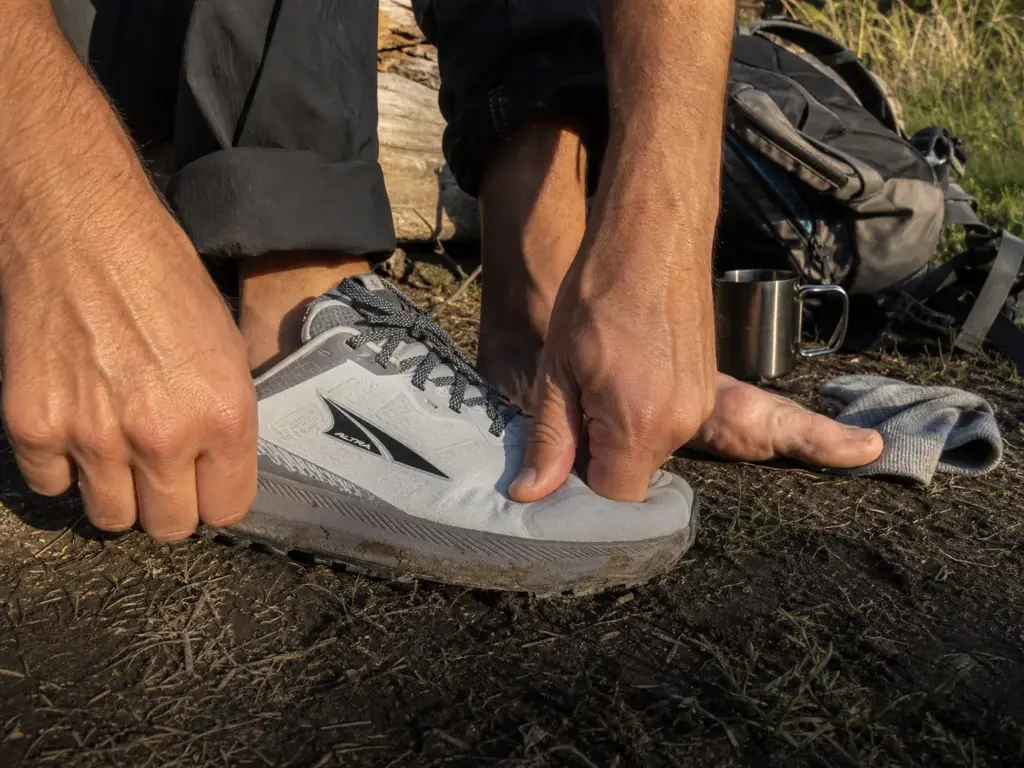
Nearly every sizing mistake in this category traces back to one thing: trying shoes on with fresh, unswollen feet in a well-lit store at eleven in the morning. The fix costs nothing.
Size up, and try them on at the wrong time of day
Feet swell under load across multiple days, and the effect compounds rather than resetting overnight. Sizing to your street-shoe number gets you crushed toes on the long descents, which is exactly when you can least afford them.
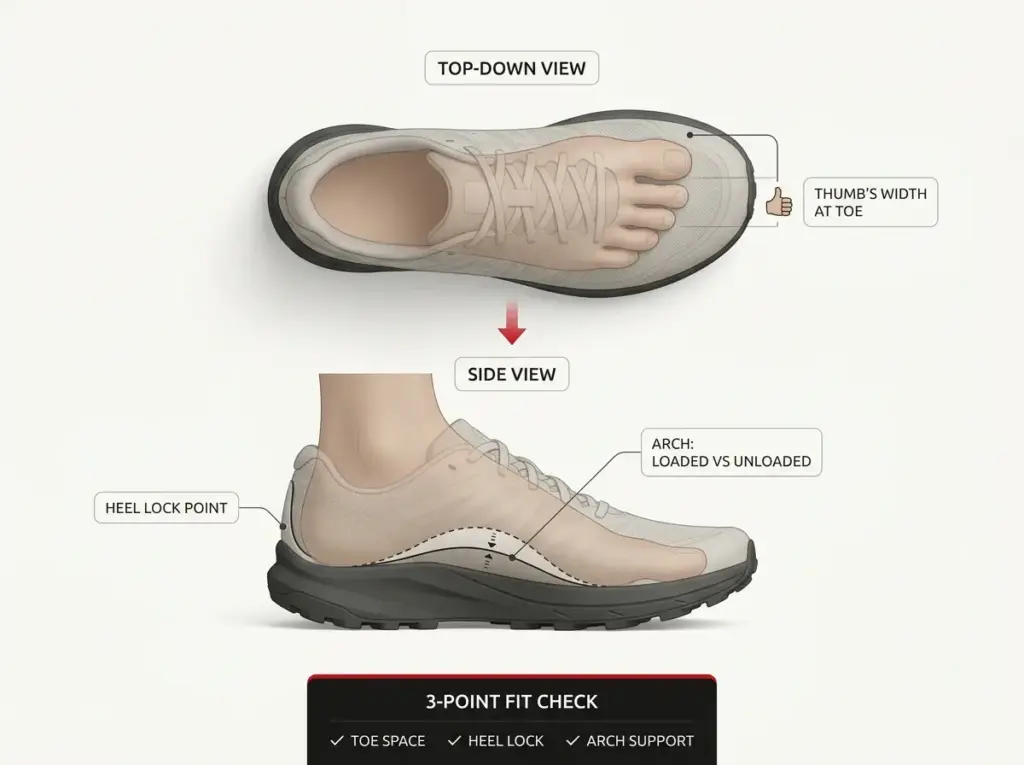
Half a size up is standard practice among experienced backpackers and one of the most routinely skipped steps by first-timers. Some hikers go a full size on trips longer than a week. The check itself is simple: a thumb’s width of space between your longest toe and the front of the shoe, with the shoe laced normally.
The part that matters more than the number is when you perform that check. Do it with feet that are already swollen from a full day of walking, in the afternoon or evening, not first thing on a Saturday morning at the store. Plenty of hikers describe the same realization, that a shoe they’d sized carefully in the morning was clearly too small once they tried the same pair on after a real day of miles.
Heel lock is what actually stops blisters
A slightly loose heel counter is a non-issue on a day hike and a blister factory by day three. The difference is repetition, plus the fact that your foot is wetter, more swollen, and softer than it was at the start.
Two things to check. First, your heel shouldn’t lift when you walk up a ramp or a set of stairs with the shoe laced. Second, and this is the one people miss, that lockdown needs to hold after the upper softens up, because it will. New shoe uppers are stiffer than they’ll be at mile 100, and a heel hold that depends on stiffness is temporary.
If your heel feels fine in the store but is slipping by mile 10, the problem is the shoe rather than your socks. Different socks are worth trying and occasionally help, but a shape mismatch doesn’t get fixed by a sock. When the issue is a genuinely narrow heel, heel slip has its own fix that goes beyond lacing tricks.
Overpronation gets worse with weight on your back
Here’s the gap almost every roundup leaves open. They cover toe-box width thoroughly, and then stop, as if width were the only way a foot can be non-average.
Overpronation, the inward roll of the foot past neutral during the gait cycle, is associated with elevated rates of plantar fasciitis, Achilles tendinitis, and general arch and calf fatigue, and there’s solid podiatry guidance on arch support for overpronation that covers the mechanism. What almost nobody connects is what a pack does to it. Pack weight adds vertical load through the arch on every step, which exaggerates the collapse compared to unloaded running. A hiker who barely notices any pronation on a five-mile day run can feel it plainly under 30 pounds on day two, and by then it’s presenting as arch ache, calf tightness, or general foot fatigue rather than anything they’d recognize as a pronation problem.
The practical implication runs against the usual advice. For backpacking specifically, prioritize firmer medial support or a stability-oriented shoe over whatever’s currently popular in running circles, because the running recommendation was made for a use case with roughly a third less load going through the same arch. The same logic explains why flat-footed hikers do better in a stiff shoe than a soft one.
Before you buy a different shoe, try a supportive aftermarket insole in the one you have. It’s the cheap first test, it takes one loaded day hike to evaluate, and for a decent number of people it resolves the issue entirely.
Waterproof or Mesh for Multi-Day Trips
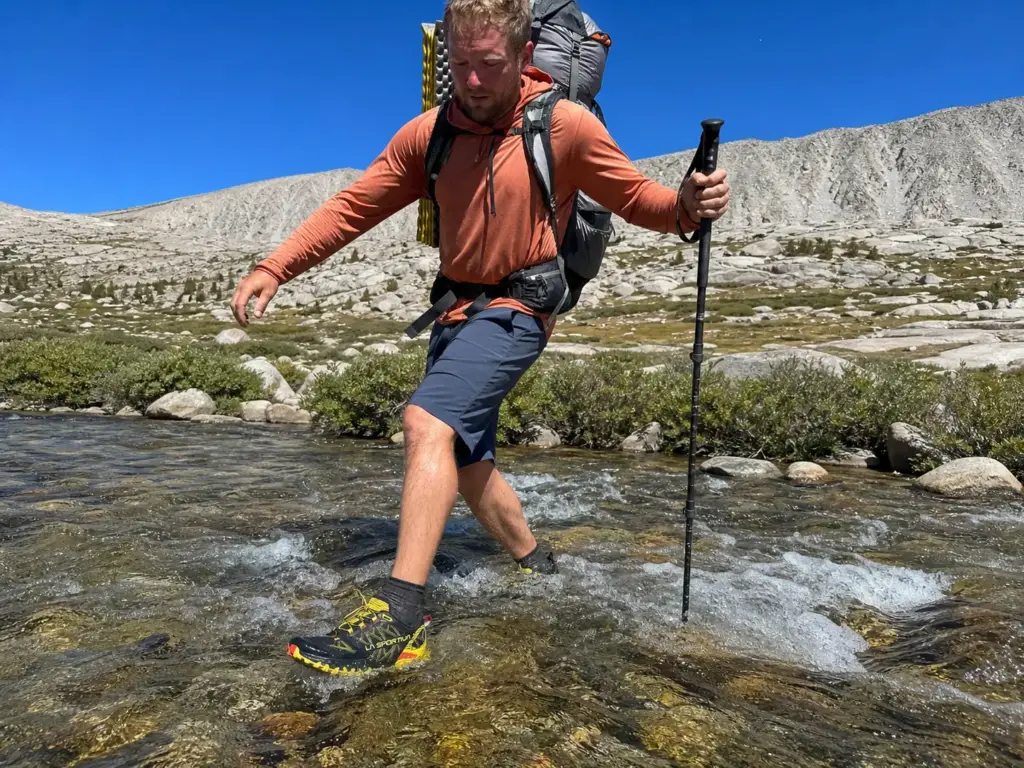
The waterproof question gets settled differently for backpacking than for day hiking, and it comes down to a single variable: how long until the shoe can dry?
The core trade is that a membrane keeps water out until it doesn’t, and after that it keeps water in. On a day hike, that barely matters, because you go home, the shoes come off, and they dry on the porch overnight. On day four of a five-day trip, you’re putting the same wet shoe back on in the morning, and a membrane turns a one-day problem into a four-day one.
Mesh behaves the opposite way. It soaks through almost immediately in a stream crossing or a sustained rain, and then it dries while you keep walking, often within an hour or two of the rain stopping. The wet period is more frequent but dramatically shorter, which is the right trade when your shoes never come off for a full drying cycle.
Breathability is the other half of it. A membrane traps the sweat your foot produces all day, and sweat-soaked is functionally identical to rain-soaked once you’re twelve miles in. This is why the membrane version of a shoe can end up wetter inside than the mesh version on a hot day with no rain at all, and the breathability cost of a waterproof membrane is worth understanding before you pay extra for one.
So the honest split looks like this. Shoulder season, consistently cold and wet, shorter trips where you’ll be back at a car or a hut: the membrane can genuinely win, because staying dry longer matters more than drying fast, and cold wet feet are a real problem rather than a comfort complaint. Summer, frequent stream crossings, longer trips: mesh, most of the time.
If your actual complaint is grit and trail debris rather than water, a pair of low gaiters does more for you than any membrane, weighs almost nothing, and doesn’t cook your feet on a hot climb. Most people who think they need waterproof shoes are describing a debris problem.
What They Actually Cost per Mile
Everyone repeats that trail runners are the cheaper option. That’s true at the register and stops being true fairly quickly after that, and if you’re budgeting a long trail it’s worth doing the arithmetic before you build a plan on the assumption.
The arithmetic, done out loud
Trail runners last somewhere in the 300 to 500 mile range, shorter if you’re on consistently wet or muddy trail or abrasive technical terrain. A resoleable leather boot runs closer to 800 miles before it needs work, and can go considerably further with a resole or two.
Divide either category’s typical price by its mileage and the result surprises people: the trail runner comes out higher per mile despite the lower sticker price, roughly in the neighborhood of 35 to 40 cents per mile against 27 to 30 for boots. The gap isn’t enormous on a weekend trip. Across a 2,000-mile thru-hike on something like the Pacific Crest Trail, it’s four or five pairs of shoes versus one pair of boots plus a resole.
The takeaway is not “buy boots.” It’s that what you’re actually buying with trail runners is weight savings, breathability, and zero break-in time, which are all worth paying for. You’re just not buying savings, and knowing which thing you’re purchasing changes how you budget the trip. If you want the full cost-per-mile arithmetic against a resoled boot, that comparison runs the numbers in more depth than makes sense here.
There’s a second cost that never shows up in these comparisons, and it’s the one this whole article is about: what pack weight costs your body over a multi-day trip. Saving a pound and a half on your feet is worth real money to most hikers, and that’s the honest case for trail runners rather than the per-mile math.
Set the odometer at 300 miles
Long-distance hikers commonly start watching their shoes around 300 miles and plan on replacement by 500, rather than waiting for something to actually fail. That’s a habit worth borrowing even for weekend trips, because shoe failure on day three of a five-day trip is a genuinely bad afternoon.
What “watching” means in practice is three specific things. Creasing on the midsole sidewall, visible as horizontal wrinkle lines that weren’t there when the shoe was new. Lugs rounded flat in the heel strike zone, which usually goes first on the outside edge. And that dead, flat feeling underfoot that no insole fixes, because the problem is below the insole.
Trail communities call this runner life or trail runner life, as in “I’ve got maybe 80 miles of runner life left in these,” and it’s a useful mental unit. If you’d rather find a shoe’s limits deliberately than discover them mid-trip, finding a shoe’s limits before the trip finds them for you is the shakedown approach.
Replacing a pair mid-trail without carrying spares
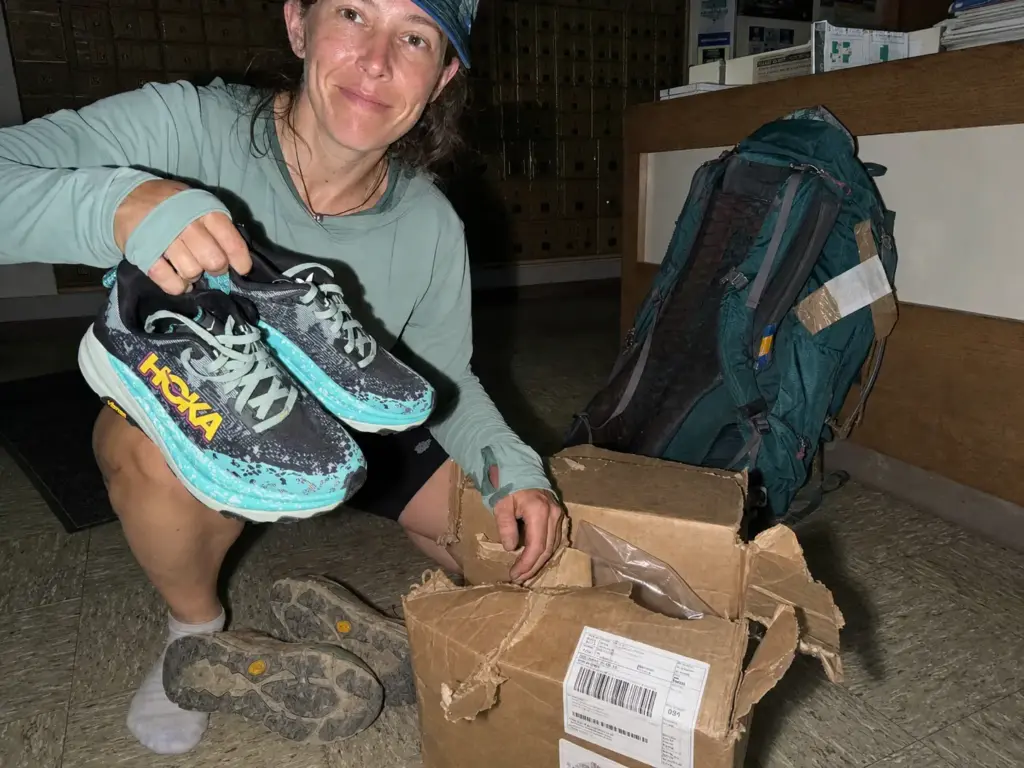
The standard solution is a send-ahead, sometimes handled through a bounce box: you mail a fresh pair to a post office or hostel in a trail town you’ll reach in a few weeks, and swap there. You never carry spares, and you never have to shop in whatever gear store happens to exist in a town of 400 people.
The timing is where people get burned. Order and mail the replacement before the current pair feels dead, because trail town logistics run on their own schedule, and post office hours in small towns are not designed around hikers. A package that arrives two days after you leave is worse than no package.
One more piece of advice that sounds boring and saves trips: buy the same model when it’s working. Switching to an untested shoe mid-trail means running a footwear transition on top of a body that’s already tired and already accumulating load. That’s the same adaptation problem from the transition section, arriving at the worst possible moment.
Conclusion
Three things to carry out of this, in order of how much trouble they’ll save you.
Weigh the pack before you pick the shoe. Twenty-five to thirty pounds is where soft foam starts working against you rather than for you, and that number decides more about your footwear than the trail name does.
If you’re coming from boots, the calendar matters more than the shoe. Give the switch 8 to 16 weeks of progressive loading, or pick a higher drop like the Cascadia’s 8mm and skip the adaptation problem entirely.
Size up, check heel lock with swollen feet at the end of a real day, and set a mental odometer at 300 miles so replacement is a plan instead of an emergency.
Then do the one thing that beats every roundup, this one included: take whichever pair you’re leaning toward on a loaded day hike before the trip. Same pack weight, same socks, real miles, real descent. One afternoon of that tells you more about whether a shoe works for your feet than any amount of reading.
Frequently Asked Questions
01Can you use trail runners for backpacking?
Yes, and it is now the default rather than the exception: 87% of 2025 Appalachian Trail thru-hikers wore trail runners for most of their hike. The real constraint is pack weight, not the activity. Above roughly 25 to 30 pounds, softer midsoles compress enough to change how your foot sits on uneven ground.
02Are hiking boots or trail runners better for backpacking?
For maintained trail under 30 pounds, trail runners win on weight, breathability, and no break-in period at all. Boots make more sense for heavy winter loads, off-trail scree, or anyone who has not done the calf adaptation a low-drop shoe requires. It is also reversible, and plenty of hikers switch mid-trail.
03What are the best trail runners for backpacking in 2026?
The HOKA Speedgoat 6 for maximum cushion under load, the Brooks Cascadia 19 for stability and a boot-friendly 8mm drop, and the Altra Lone Peak 9 for wide feet and zero drop. The Saucony Peregrine 16 covers the value slot with a rock plate, and the La Sportiva Bushido III handles technical rock.
04Is Salomon or Merrell better?
Neither leads this category for loaded backpacking specifically. Salomon’s Speedcross runs aggressive-lug and narrow, which suits mud and running more than multi-day carrying, and Merrell sits closer to the hiking-shoe side than the trail-runner side. The picks here solve the load problem more directly.
05How much should I size up trail runners for backpacking?
Half a size up is the common starting point, checked with a thumb’s width of space at the toe. Try them on in the afternoon or evening with feet already swollen from a day of walking, since sizing with fresh morning feet is where most crushed-toe complaints on long descents originate.

I've spent more than a decade researching hiking gear and trail technique. I read the specs, the forum threads and the long-term reviews, and every pick here comes with what it gets wrong.
End of the trail
You read every mile of this one. Here's where the trail goes next.