In this article
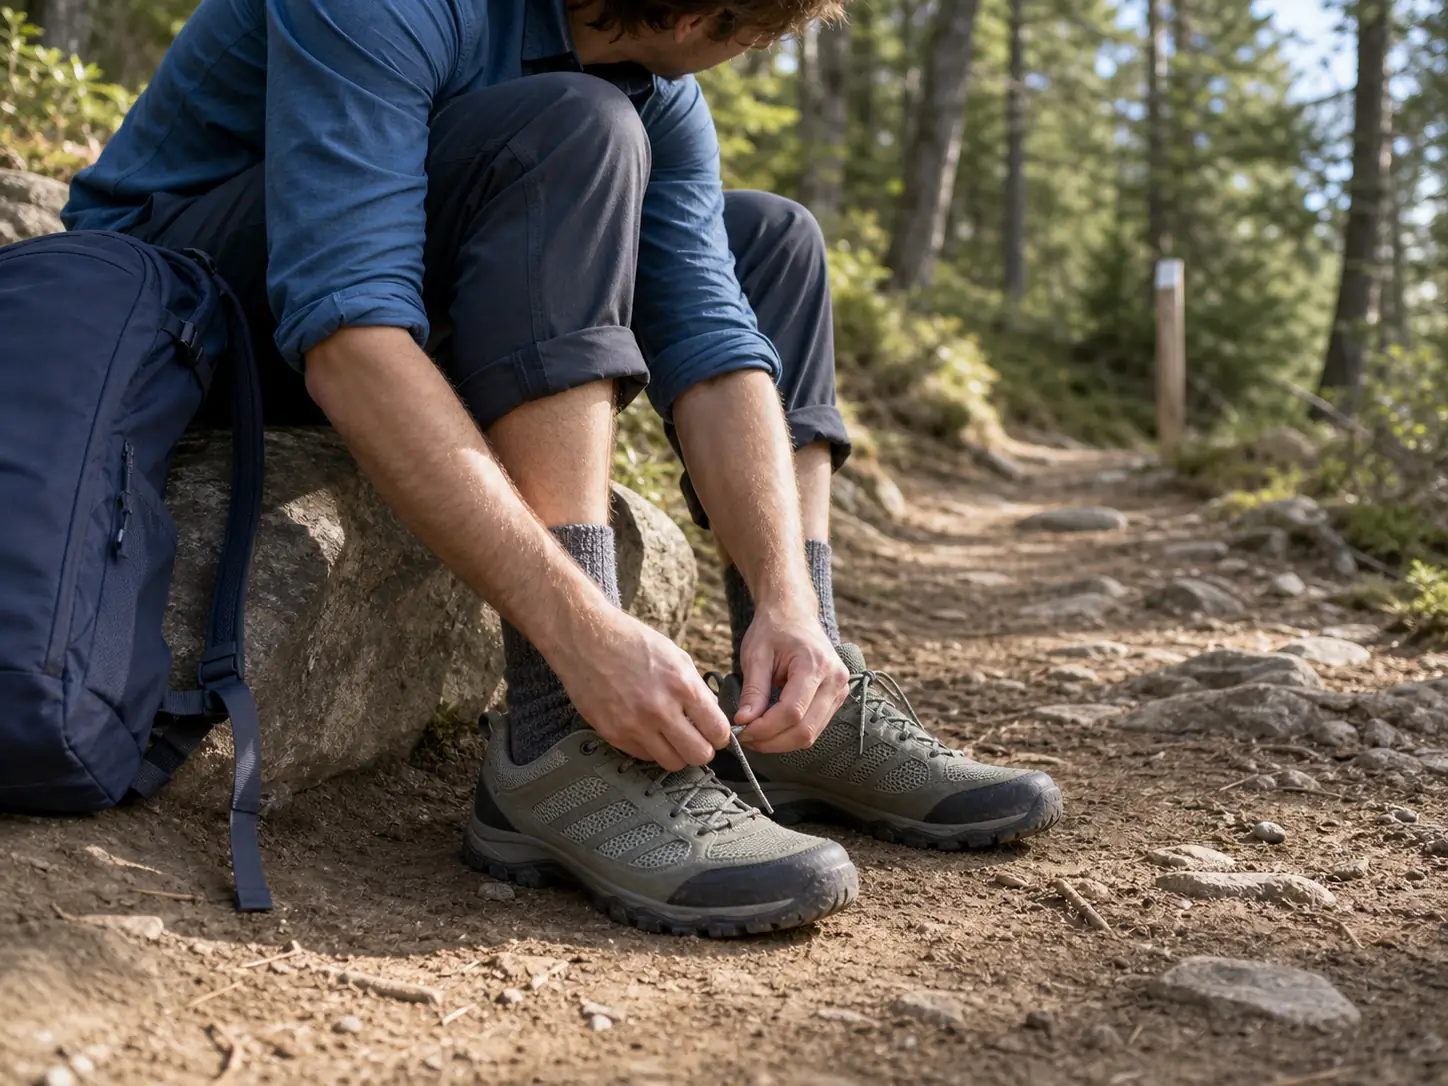
The climb up feels great. Then the trail turns downhill, and every single step drives your toes into the front of the shoe, and by the time you reach the parking lot two toenails are already going purple. Those shoes felt fine in the store. Here is the part almost nobody tells a first-time buyer: in studied hiking groups, blisters show up in anywhere from 29% to 95% of participants, and the shoe is usually not the culprit that gets blamed for it. So this guide starts where the failures start, with fit and feet, and only then gets to which hiking shoes for beginners are actually worth your money.
Hiking Shoes, Boots or Trail Runners: What a Beginner Should Actually Buy
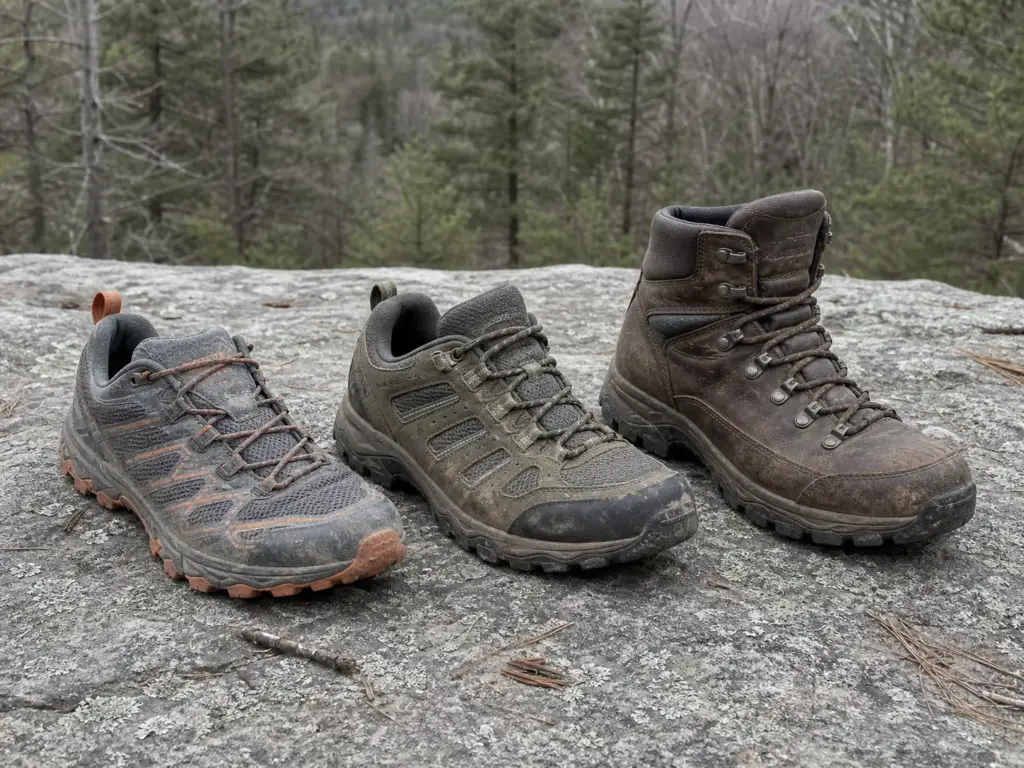
Someone walks into a gear shop wanting footwear for a flat three-mile lakeside loop. They walk out with stiff mid boots, because a salesperson said the words ankle support. They hike twice, both times uncomfortably, and quietly decide hiking is not for them. That conversation happens every weekend, and it is the reason this section goes first instead of the product list.
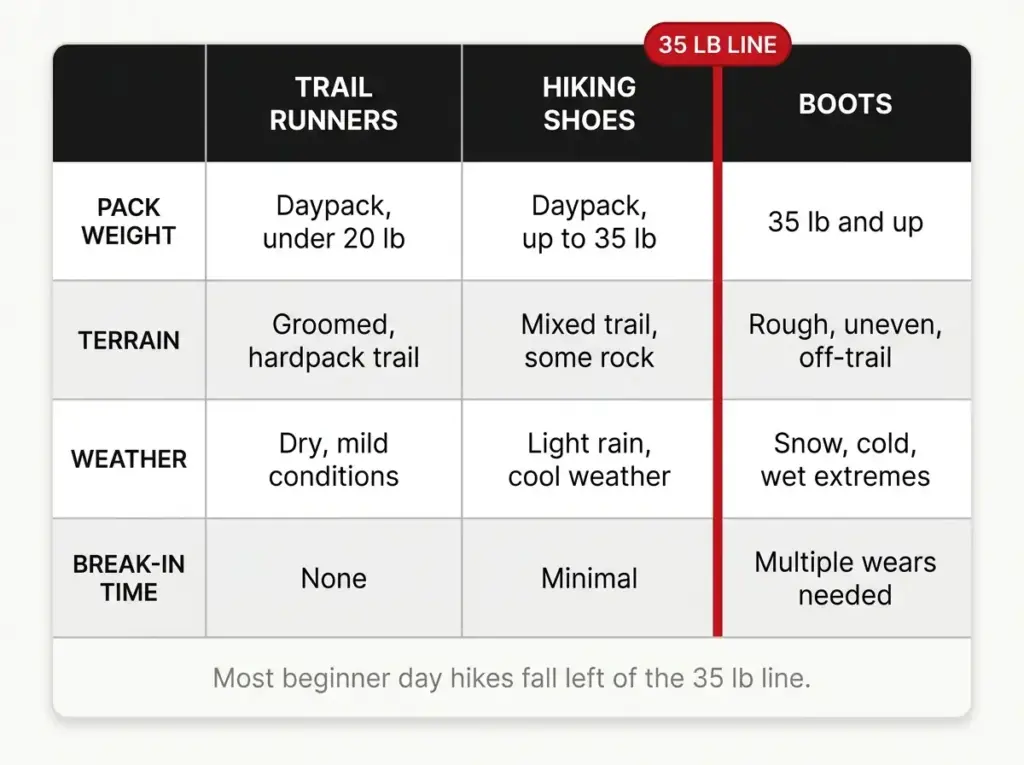
There is a clean line here, and it is not a matter of opinion. The American Hiking Society names three conditions that call for a boot: weak or previously damaged ankles, snow and cold, or a pack over 35 pounds. If none of those describe your hiking, you are in low-cut territory, and the American Hiking Society draws the line at a 35-pound pack for a reason worth reading in full. Most beginner hiking involves a daypack with water, snacks and a jacket. That is nowhere near 35 pounds.
The practical difference between the categories comes down to weight, stiffness and time. Low-cut hiking shoes are lighter, cooler, and essentially ready to hike out of the box. Hiking boots are heavier and stiffer, and a traditional leather upper demands a break-in you have to earn before it stops hurting. That trade makes real sense once you move into backpacking with overnight weight on your back, and very little sense on a day hike. If you want the full side-by-side, the shoes versus boots breakdown covers the tradeoffs case by case, and it is worth understanding why low-cut shoes beat boots on most trails before you spend anything.
Trail runners are the third door, and they are a legitimate one. Trail outsole, running shoe weight, no break-in at all. We will open that door properly in the next section, because for a lot of beginners it is the honest answer.
One last thing on that ankle support claim. It is the most repeated line in this entire category and the least supported one. A boot cuff sits above the joint that actually rolls, and stiffening your ankle does not stop your foot from landing badly on a loose rock. More on that shortly.
You Might Not Need Hiking Shoes at All Yet
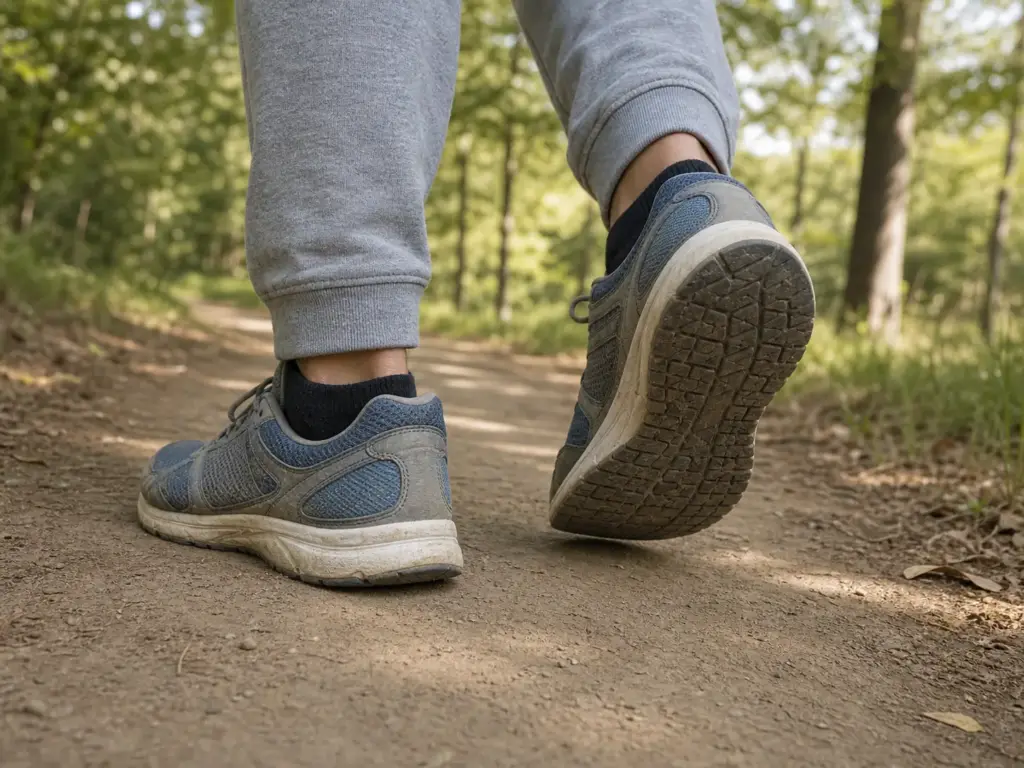
Nobody else in these search results is going to say this, so here it is before anything gets sold. The running shoes already sitting in your closet are a legitimate first answer for easy, dry, short trails with a light daypack. If you have hiked twice and you are not sure you will hike ten more times, the smarter first purchase is thirty dollars of decent socks, not a hundred and thirty dollars of shoes.
The real dividing line is load and surface, not the label on the box. Light pack on smooth, dry, hard-packed path means your existing shoes are fine. Heavy pack on rock, root and mud means you want a hiking shoe. Everything in between is judgment, and judgment gets easier once you have actually hiked a few times.
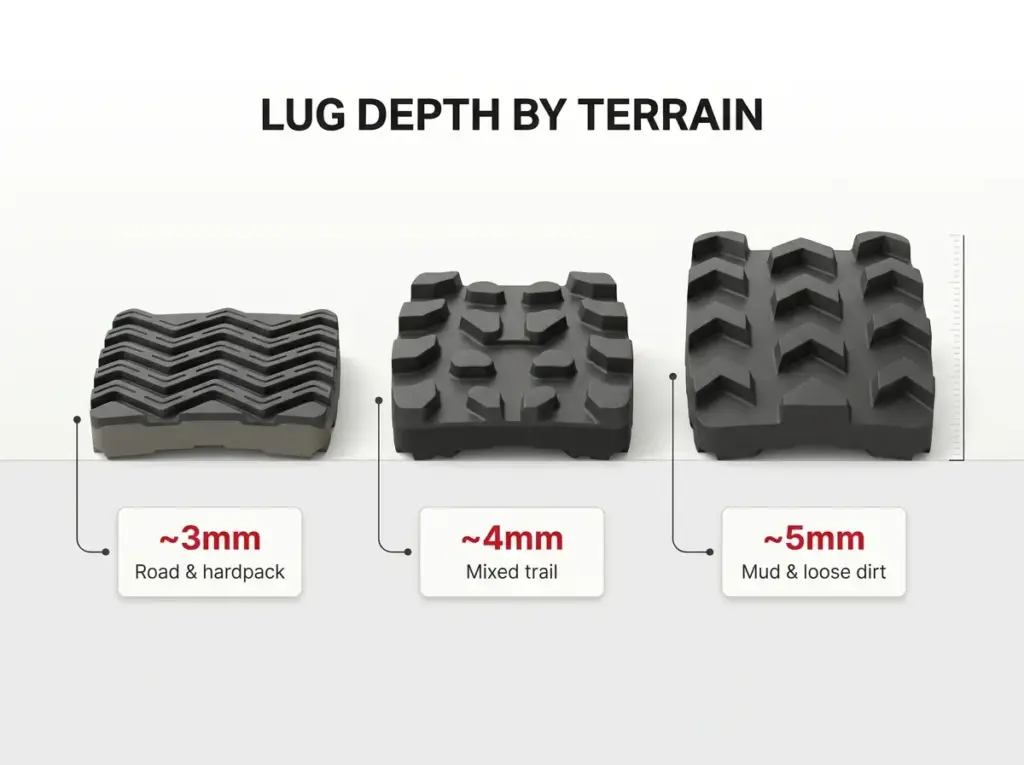
There is one honest caveat, and it is specific rather than vague. Road running outsoles run roughly 3 mm lugs. Trail-specific shoes run 4 to 5 mm and use softer rubber compounds. That gap is not about support or protection, it is about traction on wet grass, wet rock and loose dirt, and you feel it the first time a descent turns greasy. Most of what gets sold as walking footwear is really a road shoe in earth tones, which is exactly why most walking sneakers are really road shoes is a distinction worth knowing before you buy.
Trail runners sit neatly between the two. You get the trail outsole and the rock protection without the weight or the break-in. For someone whose hiking looks like well-maintained trails in dry conditions with a light pack, a trail runner covers the ground a hiking shoe covers and weighs less doing it.
So when does the honest answer flip? Three moments. When you start carrying overnight weight. When your regular trails include steep, loose descents. And when you find yourself hiking often enough that a purpose-built shoe stops being an expense and starts being equipment.
Until one of those happens, spend the money on socks and see whether you stick with it. That advice will not sell you a shoe, but it is the truth.
How to Fit a Hiking Shoe So It Doesn’t Wreck Your Feet
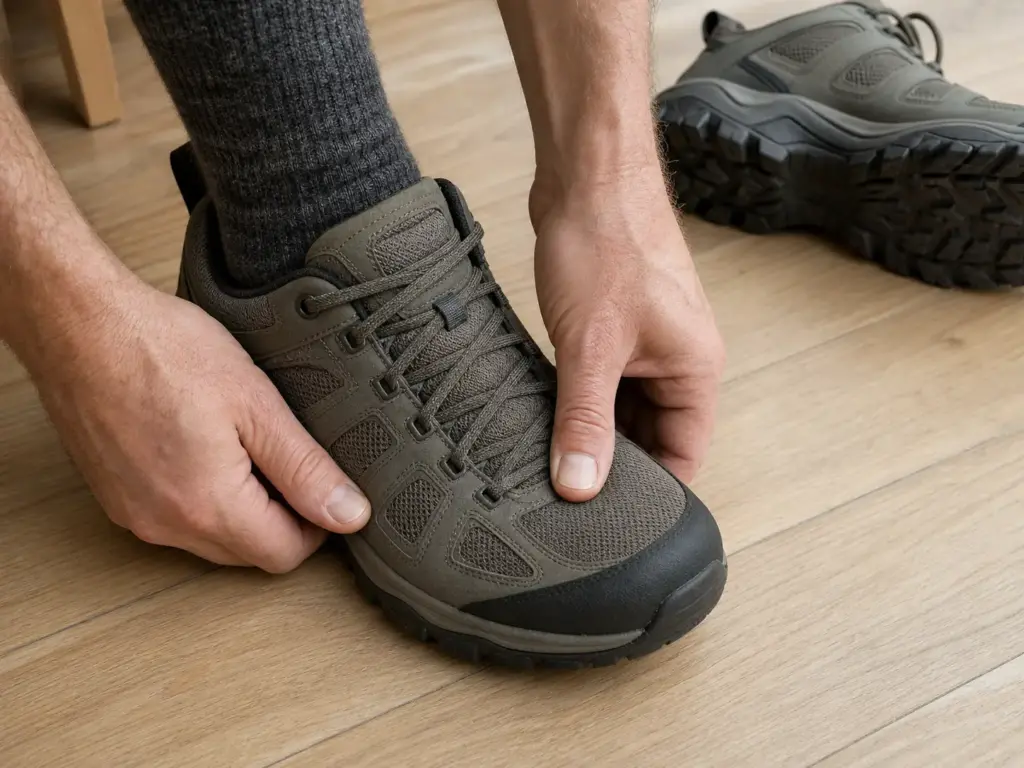
Correct toe room feels absurd in the store. Roughly half an inch of space in front of your longest toe when you stand up is a properly fitted hiking shoe, not a sloppy one, and almost nobody buys hiking shoes too big. The instinct that a shoe should feel snug and locked-in is the same instinct that produces black toenails on the first real descent.
Size Up, and Shop in the Afternoon
Hiking footwear commonly runs a half size to a full size larger than your street shoe size. That is not a manufacturing quirk to work around, it is the correct fit for a foot that is going to swell, slide forward on descents and spend six hours under load.
Your feet also swell as the day goes on, by up to half a size by evening. A shoe approved at ten in the morning, on carpet, in thin cotton socks, is a genuinely different shoe at mile six in the afternoon. Try shoes on late in the day, in the actual hiking socks you plan to wear, and walk in them for more than thirty seconds.
Measuring at home against a standard size chart is where most people go wrong. The chart gives you your street size, and your street size is usually too small for a trail. If you want the full logic on when going up is right and when it backfires, when sizing up is the right call and when it isn’t goes through it properly.
The Half-Inch of Toe Room
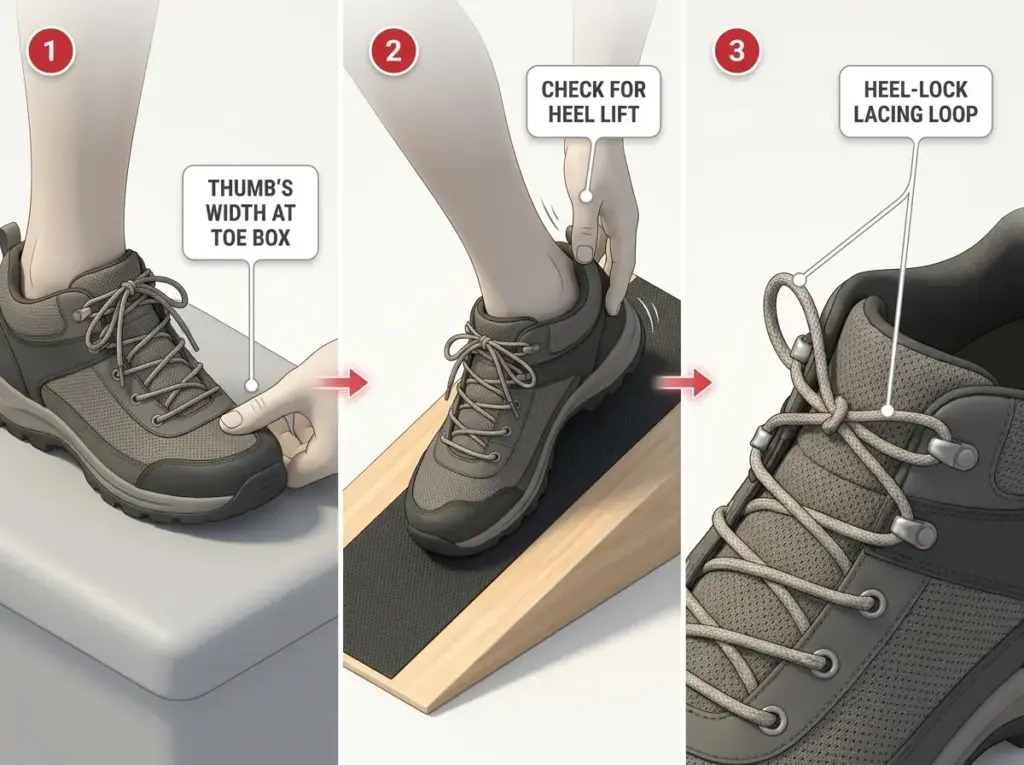
Leave about a thumb’s width, roughly half an inch or 12 mm, between your longest toe and the end of the shoe. Note that your longest toe is not always your big toe. Check.
This single measurement is what prevents black toenails. On a descent your foot slides forward with every step, and that half inch is the runway that absorbs the slide. Without it, your toes hit the front of the shoe a few thousand times on the way down, and the bruising under the nail follows.
The Heel Test That Predicts Blisters
Your heel has to lock in place. If it lifts and drops as you walk, what hikers call a piston, no amount of break-in will fix it. That is a different shoe, and you should put it back on the shelf. The American Hiking Society is direct about this too: the shoe should lock your heel firmly into place from the first fitting.
Before you give up on a shoe that otherwise fits, try heel-lock lacing. Thread the lace through the top eyelet to form a loop on each side, cross the laces through the opposite loops, then tighten. It cinches the ankle without squeezing the forefoot, and it fixes a surprising amount of heel movement for free.
The lacing system is the most underused adjustment on a hiking shoe. Most people pull the laces tight in a straight line from toe to ankle and never touch them again, when the whole point of separate eyelet rows is that you can run the forefoot loose and the ankle tight, or the reverse. Relacing costs nothing and solves more fit complaints than any accessory you can buy.
Every decent gear shop has an incline board in the corner. Use it. Walk UP it with a hand on your heel collar to feel for lift, then walk DOWN it and see whether your toes touch the front. Two minutes, and it catches both of the fit failures that end beginner hikes.
What Actually Goes Wrong on Your First Few Hikes
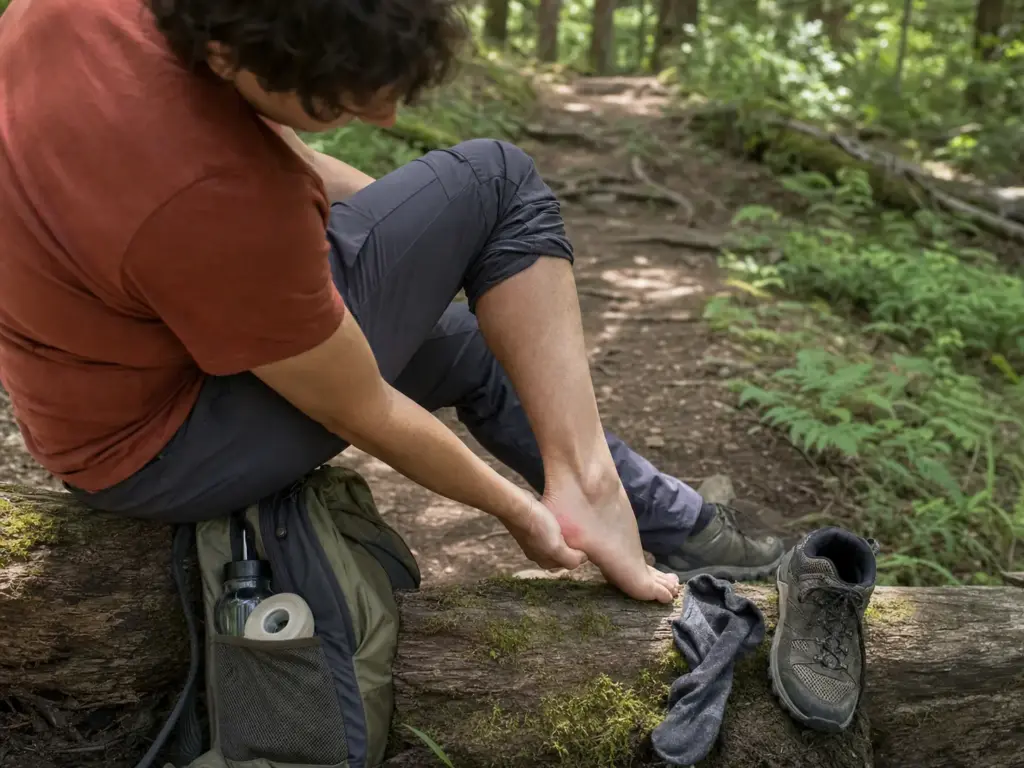
Blisters are not bad luck and they are not a toughness problem. They are the predictable result of friction plus moisture on skin that has never done this before, and they are astonishingly common: studied hiking groups report them in 29% to 95% of participants. Assume you will get one at some point, and plan so that it does not end your hike.
What follows are the three things that most reliably ruin a beginner’s first outings, what causes each one, and what actually fixes it. Veterans rarely deal with these, not because their feet are tougher in some mystical sense, but because their gear has already been filtered by exactly these failures.
The Heel Blister
The mechanism is two things stacked. First, heel movement inside the shoe, the piston from the previous section. Second, moisture. Skin hydration level is directly associated with blister occurrence, which is a clinical way of saying that sweat-softened skin tears far more easily than dry skin.
A heel that moves a little inside a dry shoe is usually fine. The same heel inside a damp shoe blisters within a few miles.
The fix order matters, and it goes cheapest first. Lace it properly with a heel lock. Then change the sock, which is the single highest-return change you can make and gets its own section below. Only then consider that the shoe is wrong for your foot.
There is also a warning system, and beginners routinely ignore it. Before a blister there is a hot spot, a warm, slightly irritated patch that tells you friction is winning. That is a ten-minute warning, not an inconvenience to push through, and the difference between stopping to tape it and walking two more miles is the difference between a good day and a limp back to the car. If you want the full mechanism, that warm spot on your heel is a ten-minute warning is worth reading before your next hike.
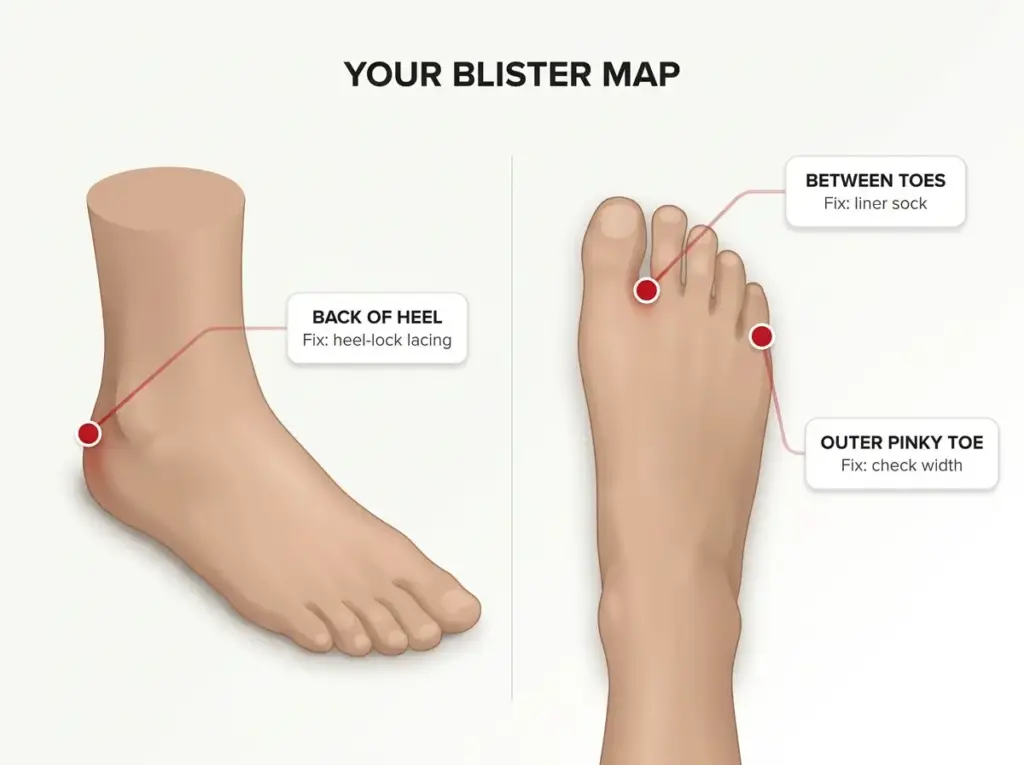
It also helps to know your own blister map. The back of the heel is a lacing and fit problem. Between the toes is a moisture and sock problem, usually solved by a liner. The outer pinky toe is almost always a width problem, and no lacing trick fixes a shoe that is too narrow.
Tape the hot spot, not the blister. Once the blister has formed you are managing an injury for the rest of the hike. Carry a strip of kinesiology tape or a couple of blister patches in a pocket, not buried at the bottom of your pack, because the whole point is that stopping has to be easier than pushing on.
The Black Toenail
Also known as hiker’s toe, and frequently worn as a badge of honor by people who should be fixing their shoes. Clinic sources treat it as what it is: a fit and lacing problem.
The cause is simple. On a descent your foot slides forward, and if the shoe is too short or laced too loosely, your toenails take the impact repeatedly. Bruising builds up under the nail, the nail darkens, and in bad cases it comes off weeks later.
The fix was already covered above, which is exactly why it was covered above. Half an inch of toe room gives the slide somewhere to go. A proper lace lock stops most of the slide from happening in the first place. Together they eliminate almost every case of this.
The Ankle-Roll Fear
The fear is real and reasonable. Rolling an ankle on loose ground hurts, and it is the thing most beginners are actually buying protection against. The problem is that the boot is the wrong answer to it, and the ankle support argument doesn’t hold up once you look at what a cuff can and cannot do.
The American Hiking Society threshold from earlier is the useful filter: damaged ankles, snow, or a pack over 35 pounds. Outside those three, what actually reduces rolls is a wider, more stable platform underfoot, deliberate foot placement on loose ground, and slowing down on descents instead of letting gravity set your pace.
Here is the part that reorders everyone’s priorities. In the research literature, blisters make up between 8 and 33 percent of all reported hiking injuries, which puts them ahead of every joint problem people actually shop for. Skin, not joints, is the statistically dominant hiking injury. Most beginners spend their entire footwear budget solving the rare problem and none of it solving the common one.
The Best Hiking Shoes for Beginners, Pick by Pick
Every shoe below is here because it solves one specific first-pair problem. Read the problem line first. If it is not your problem, skip the shoe and keep moving, because the worst thing a roundup can do is talk you into a shoe built for someone else’s feet.
No individual prices appear here, deliberately. They move constantly, and the section further down tells you what the category should cost, which is the number you actually need to budget with. Every shoe is offered in men’s and women’s versions built on different lasts, so pick the one that matches your foot shape rather than assuming they are the same shoe in different colors.
Best Overall First Pair: Merrell Moab 3
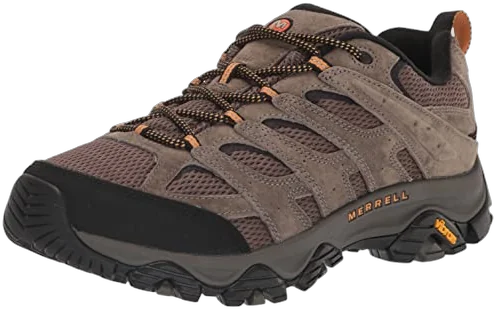
The Moab has been the answer to this question for something like fifteen years, and the reason is boring in the best way. It fits a wide range of foot shapes without demanding anything from you. There is no stiff plate to soften, no leather to mold, no two-week negotiation before it stops rubbing. You can buy it on a Thursday and hike six miles on Saturday, which is exactly what beginners do whether or not anyone advises it.
The version to buy first is the non-waterproof mesh, not the membrane version, for reasons the waterproofing section below covers in detail. The tradeoff is honest: wet grass in the morning and any creek crossing will soak straight through. It also dries fast, which matters more than most people expect.
Where it falls short is durability at the extremes. If your hiking involves sharp volcanic rock or thirty-mile weeks, the Moab wears out faster than a stiffer shoe. That is not the beginner use case, which is precisely why it tops this list and not a thru-hiking one.
Best Budget: Columbia Crestwood Waterproof
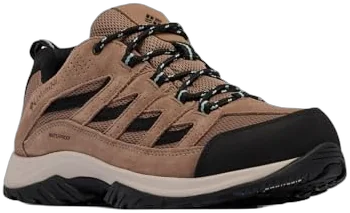
Budget picks in this category are usually a trap, because the cheap shoe is cheap in the places that produce blisters. The Crestwood is the exception that has held up for years, and the reason it works for beginners specifically is the wide-width availability, which is where most budget lines simply give up.
Be clear-eyed about what you are giving up. The cushioning is less refined than the mid-tier picks, the upper materials wear faster, and it will not last as many miles. If you hike a dozen times a year on moderate trails, none of that will matter to you. If you hike weekly, you will outgrow this shoe inside a season.
There is also a real argument for buying this one first on purpose. Spending less on pair one, then learning what your feet actually want, then buying pair two with real information beats guessing expensively on day one.
Best Waterproof and Best for Wide Feet: KEEN Targhee 4 Low
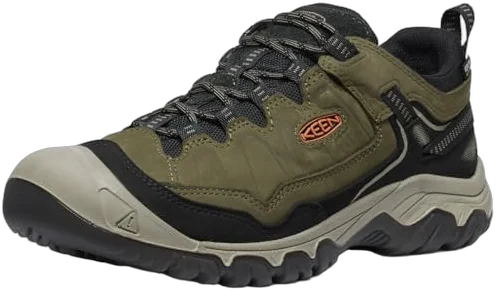
If you have spent your whole life buying shoes that hurt along the outside edge of your foot, this is the one to try first. KEEN builds on a noticeably wider last than almost anything else at this price, and for a lot of people that single change eliminates the pinky-toe blister permanently.
The waterproofing here is genuine rather than decorative, which makes it the pick if your hiking involves dewy mornings, shoulder-season mud or actual rain. It also means the shoe breathes less than a mesh Moab on a hot August afternoon, so choose based on your weather rather than on which sounds safer.
The obvious limitation: a wide last on a narrow foot is its own problem. Your foot swims, your heel lifts, and you get the exact blister you were trying to avoid. If roomy still is not roomy enough for you, when roomy still isn’t roomy enough covers the dedicated wide-fit options.
Best Support Out of the Box: Oboz Katabatic LT Low GTX
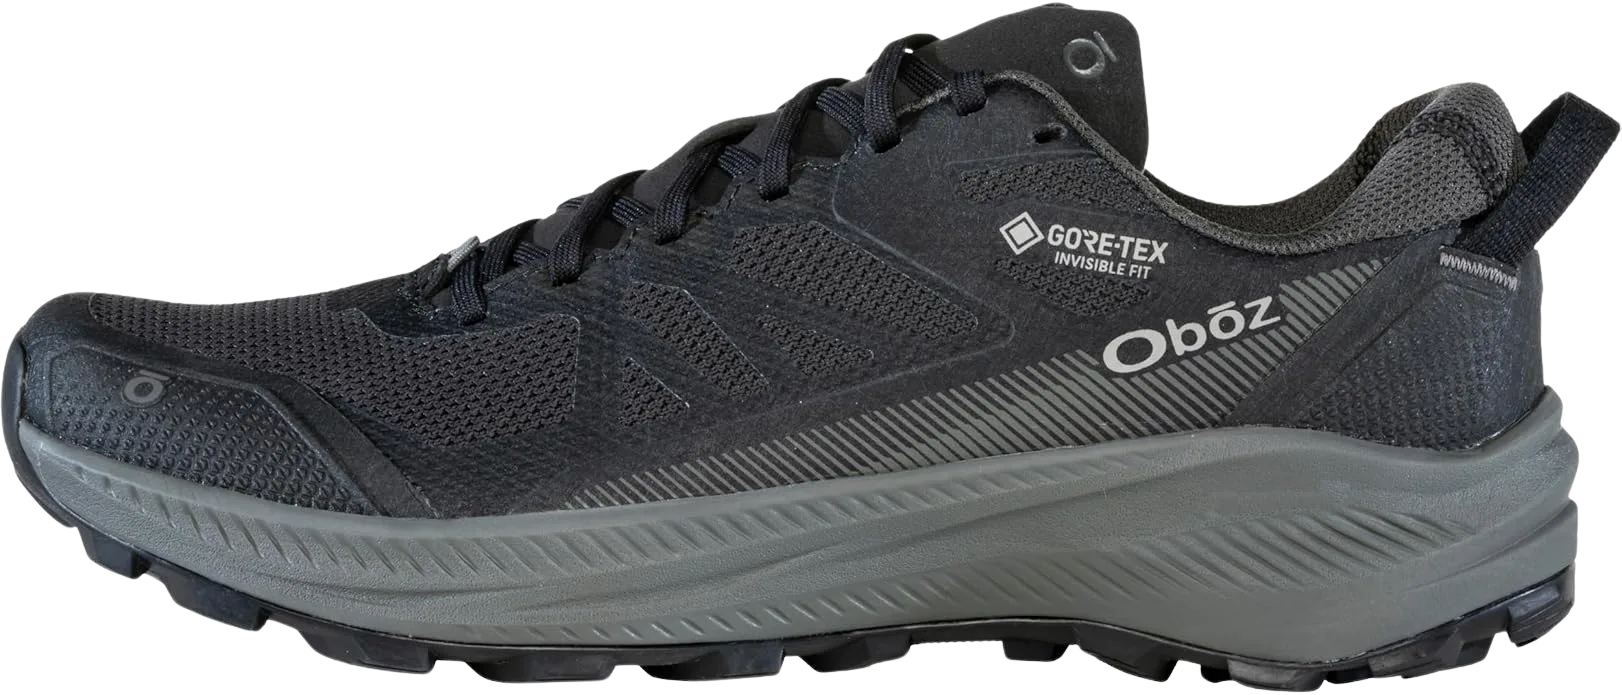
Arch fatigue is the quiet beginner complaint that nobody names correctly. It shows up around mile four as a dull ache through the middle of the foot, and people usually blame their fitness. Often it is a flat foam insole doing nothing while the arch collapses a few thousand times.
Oboz solved that by putting a real insole in the box, and once you have paid for a fifty dollar aftermarket insole a couple of times you understand why that is worth something. If you already know you have low arches or flat feet, flat feet want a stiff shoe, not a soft one explains why this pick behaves the way it does.
It sits at the top of the sensible price band, and the GORE-TEX lining pushes it further. For a hiker with no arch complaints and dry summer trails, it is more shoe than the situation requires.
Most Cushioned: HOKA Speedgoat 6
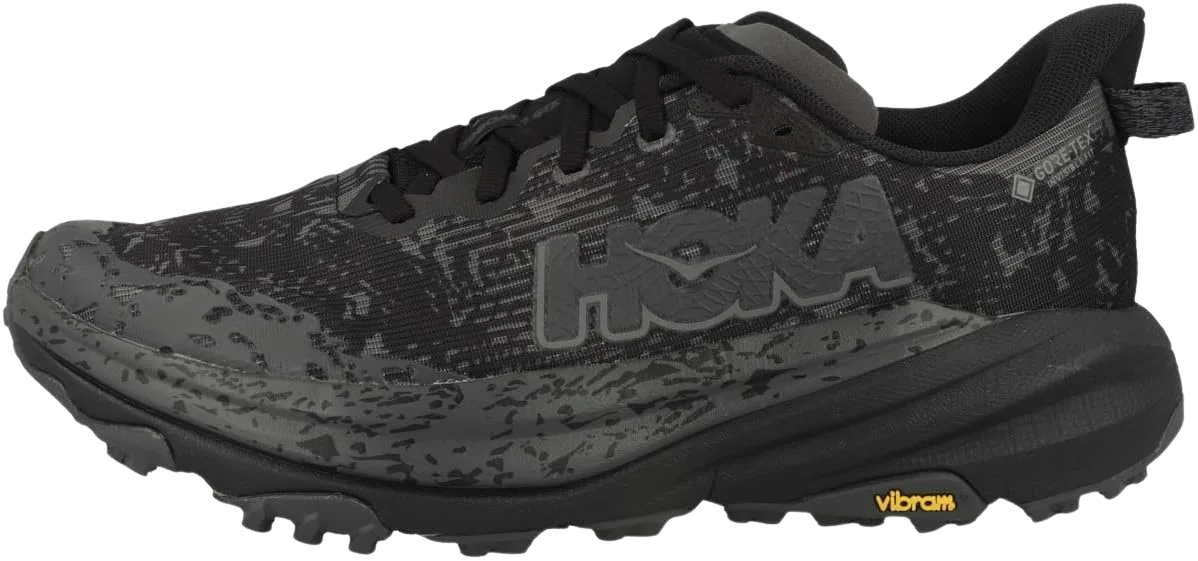
The day-after soreness that makes people say hiking is not for them is mostly impact, not distance. Feet, calves and knees that have never done six miles on uneven ground take a beating that a conditioned hiker’s simply do not, and shock absorption is the most direct way to reduce it while your legs catch up.
That is the specific case for a maximalist shoe as a first pair, and it is a better case than it gets credit for. It applies double if you are carrying more weight than you would like to be, because impact scales with load.
Two specs describe what is happening under your foot here, and they are worth knowing before you shop. Stack height is how much material sits between your foot and the ground. Heel-to-toe drop is how much higher the heel sits than the forefoot, usually somewhere between 0 and 12 mm. A zero drop shoe puts your foot flat, which some people love and which asks a lot of a calf that has never worked that way.
The catch with a tall stack is stability. Putting your foot further from the ground makes off-camber and rocky ground feel tippy until you adapt, so give it a few short hikes before judging it. On genuinely technical terrain with loose rock and constant foot placement decisions, a lower shoe gives you more feel and more control.
The Trail Runner Alternative: Saucony Peregrine 16
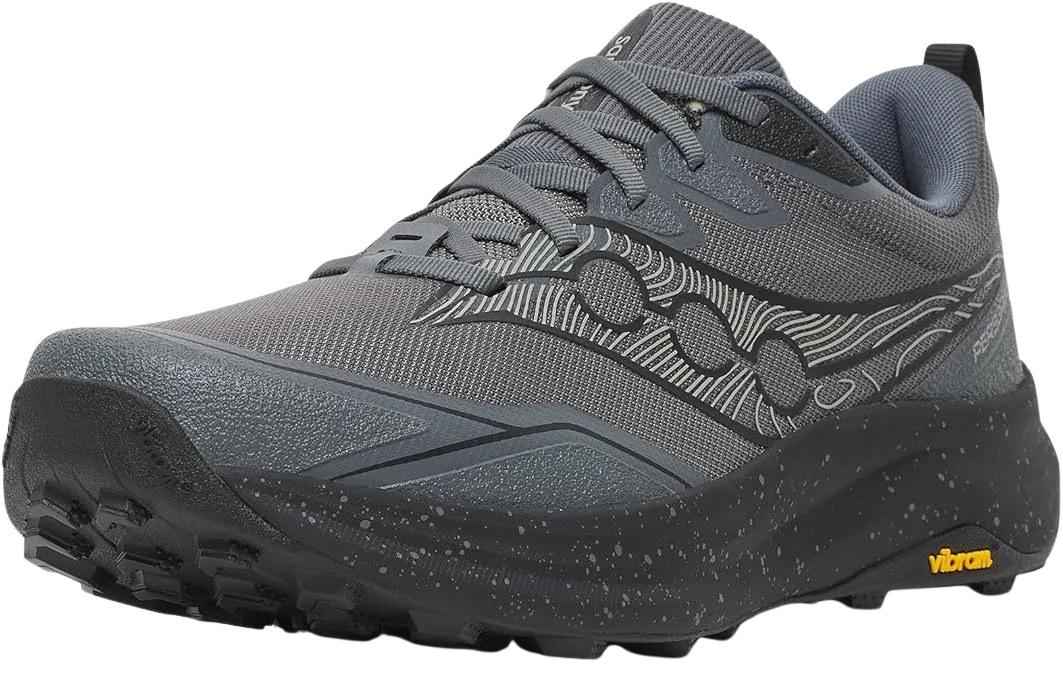
Every ounce on your foot costs more energy than an ounce in your pack, and over ten miles the difference between a trail runner and a hiking shoe is noticeable. For dry trails and a light daypack, the Peregrine does everything a beginner needs a hiking shoe to do, and it does it lighter.
It also has 5 mm lugs and a rock plate, which are the two things ordinary running shoes lack. That means it fixes the exact limitation raised earlier about road outsoles without asking you to adapt to a stiffer shoe.
What you give up is real. The upper is thinner and wears out faster, there is no waterproofing at all, and the whole shoe has a shorter service life than any of the picks above. Buy it knowing you are trading durability for weight, not because it looks faster.
Waterproof or Breathable: Which One a Beginner Should Buy
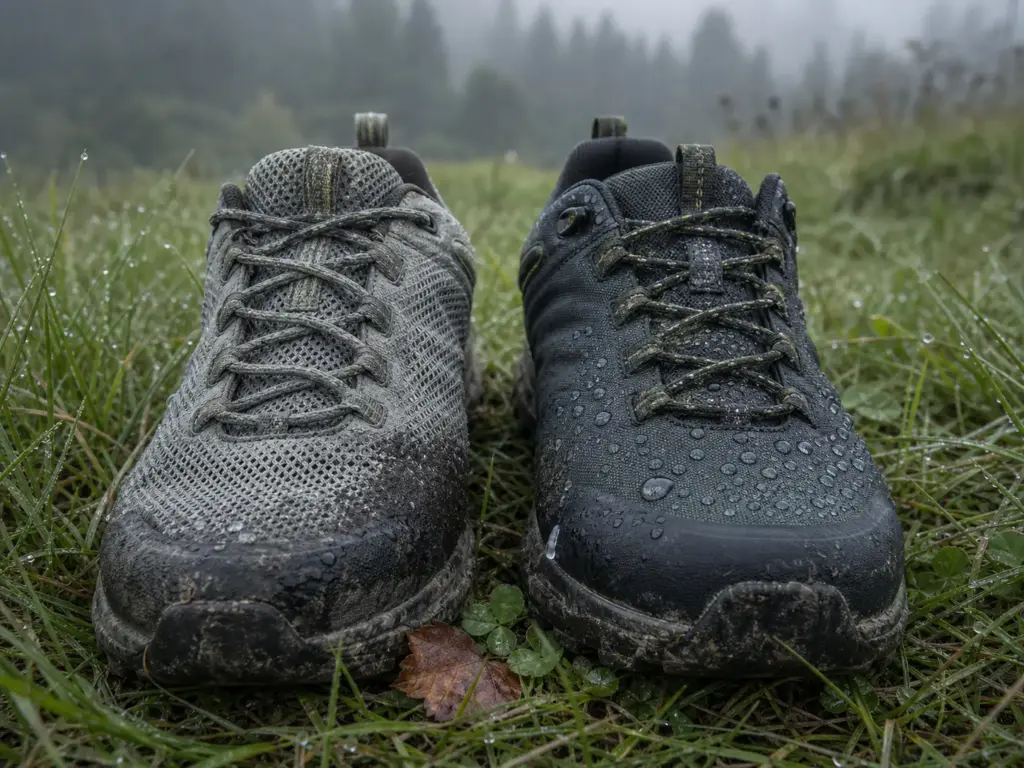
Waterproof sounds like the safer choice, and defaulting to it is one of the most common beginner mistakes in this entire category. A membrane that keeps water out also keeps sweat in, and the moisture inside the shoe is the moisture that matters for your skin.
That is not a comfort preference, it is the blister mechanism. Skin hydration level is directly associated with blister occurrence, and sweat-softened skin is what actually starts the blister rather than friction alone. A waterproof shoe on a hot, dry August afternoon can blister you just as reliably as a creek crossing can.
There are conditions where waterproofing genuinely earns its place. Dewy grass on early mornings, mud season on shoulder-season trails, snowmelt, and cold rain where wet feet become a warmth problem rather than a comfort one. If most of your wet-weather hiking happens in those conditions, buy the membrane and do not feel clever about it.
Watch the wording on the box, because there is a real difference between waterproof and water-resistant. Waterproof means a membrane, a sealed construction and usually a gusseted tongue stitched to the sides so water cannot pour in through the lace gap. Water-resistant usually means a coating on the fabric that sheds a light sprinkle and gives up in a puddle. The second one costs less and is sold with the same photography.
A mesh upper wins on hot, dry, dusty summer trail, which is when most beginners actually hike. It also has a quiet advantage nobody advertises: when a mesh shoe does get soaked, it dries in hours. A soaked waterproof shoe holds the water in and can take a day or more, which is genuinely worse on a multi-day trip.
The membrane also adds cost, and for a first pair that money often buys more comfort somewhere else. If you want the full picture on what a membrane trades away, what a waterproof membrane really costs you in breathability goes deeper than the marketing does.
Traction, Lug Depth and the Ground You’ll Actually Walk On
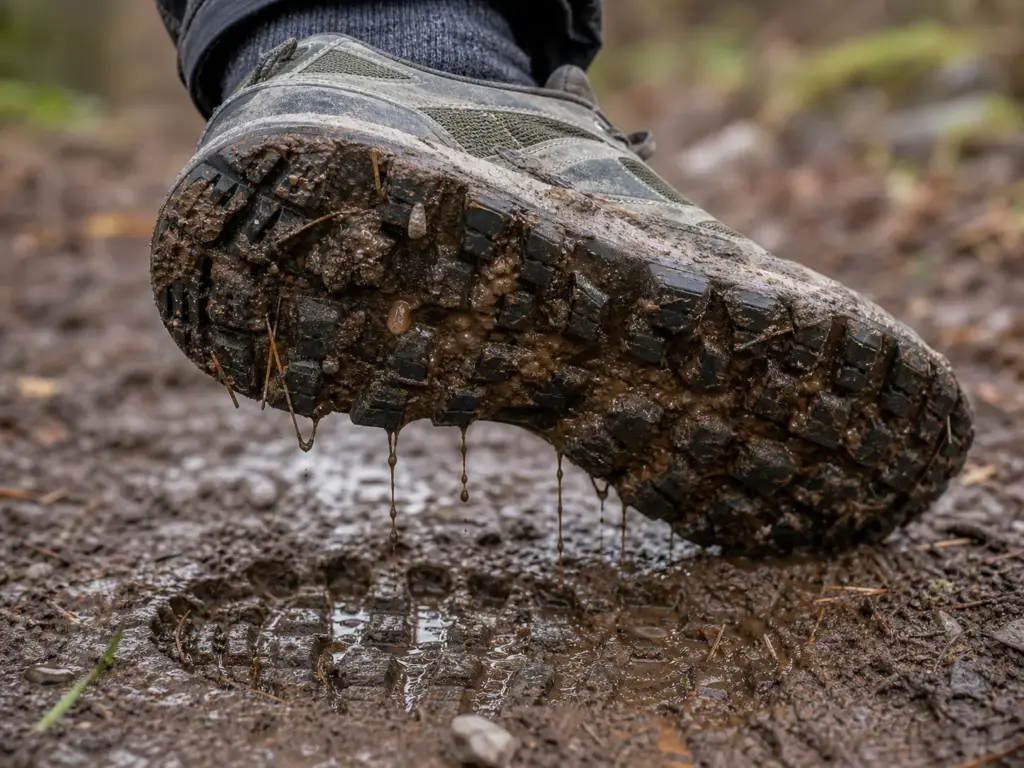
Deep lugs look serious on a shelf and feel awful on a paved approach trail. Most beginner hiking happens on hardpack and gravel, not on the muddy alpine slope in the product photography, and buying grip you do not need costs you comfort you do.
Lug depth is the one spec you can read at a glance. Shallow lugs suit hardpack and rock, where contact area matters more than bite. Deep lugs, 4 to 5 mm and up, are for mud and loose dirt, where you need the tread to sink in and find something solid. The mistakes this produces on real descents are worth understanding, and the lug-depth mistakes that wreck muddy descents covers what happens when you get it wrong in either direction.
Rubber compound matters more than lug depth on wet rock, and this is the part nobody can read off a box. The picks in this article use Vibram TC5+, Vibram Megagrip, KEEN’s own compound, Omni-Grip and PWRTRAC, and Salomon’s Contagrip shows up on most of the trail shoes you will see next to them. Those behave differently on wet granite even at identical lug depths. A soft, sticky compound with a shallow tread will outgrip a hard compound with deep lugs on a wet slab every time, because smooth surfaces need contact area, not bite.
One layer up from the outsole sits the midsole, which is the foam slab that does the cushioning and sets how stiff the shoe feels underfoot. Almost everything at this price point uses some form of EVA foam, and a firmer midsole protects your feet better on rock while a softer one feels kinder on hardpack. This is also the part that wears out invisibly: the outsole can still look fine while the foam underneath has gone flat and stopped doing its job.
The beginner-useful version of all of this: pick for the ground you hike most weekends, not for the trip you imagine taking next year. If your trails are dry and firm, do not buy the mud shoe.
Socks, Insoles and the Break-In Nobody Does
Someone buys good shoes, wears the cotton gym socks already in the drawer, and gets a heel blister at mile two of an easy four-mile loop. The shoe gets blamed. The shoe was fine. This section covers the three cheap decisions that change the outcome more than the shoe choice does.
Socks Change the Outcome More Than the Shoe
This sounds like an exaggeration until you look at the research. In a controlled study on low-difficulty, short hikes, the share of hikers finishing without foot lesions was significantly higher among those wearing technical, non-cotton socks. That is on easy hikes, where you would expect sock choice to matter least. A controlled study of short, easy hikes found technical socks measurably reduced foot lesions, which is about as clean a result as you get in this field.
Wool or synthetic, always. Cotton absorbs sweat and holds it against your skin, and softened skin is the blister mechanism from earlier in this article. Two pairs of decent wool or synthetic hiking socks will change your hiking more than a hundred dollar upgrade in shoes. Any reputable brand works here, so buy what fits and feels right rather than chasing a specific model. If you want to compare properly, which hiking socks are actually worth buying breaks down wool against synthetic.
The real trick is the liner sock. A thin liner worn under your hiking sock moves the friction away from your skin and into the space between the two socks, where it cannot hurt you. It is the cheapest meaningful upgrade in a beginner’s entire kit.
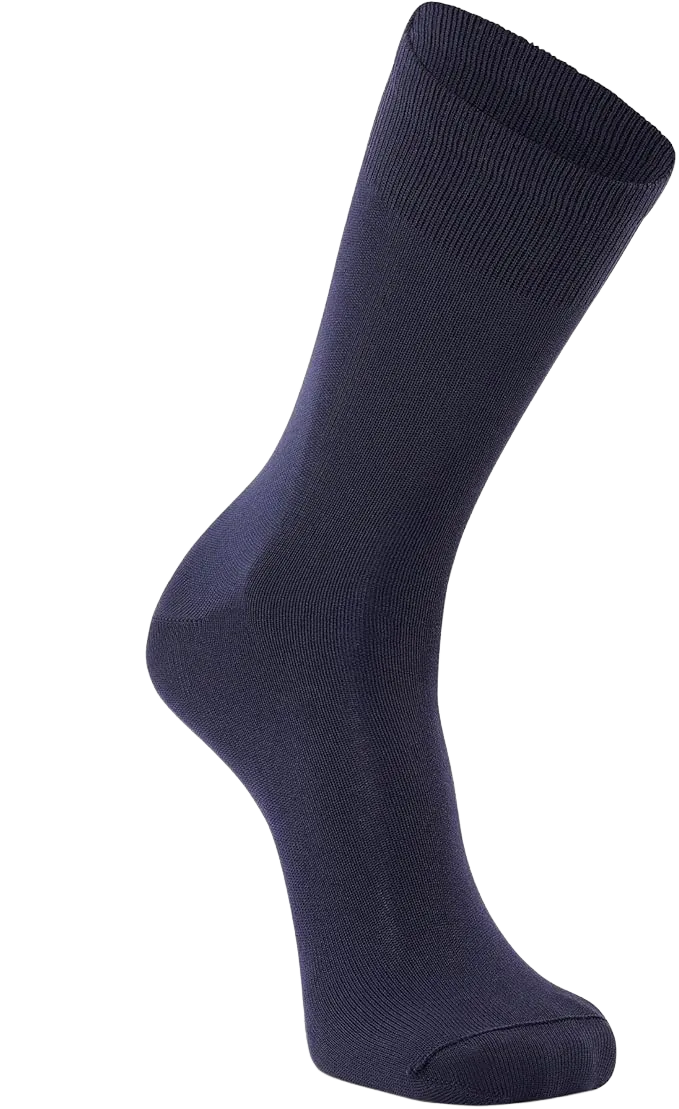
Carry a dry spare pair of hiking socks in your pack on any hike over about four miles. Swapping socks at the halfway point resets the moisture that causes blisters, and it feels far better than it has any right to. It is the closest thing to a free upgrade on the trail.
Insoles: When They Help and When to Skip Them
Most beginners do not need aftermarket insoles on day one, and it is worth saying that plainly in an article that could easily just sell you a pair. The stock insole in a decent hiking shoe is adequate for a lot of feet on a lot of hikes.
There are two situations where they genuinely earn the money. The first is flat feet or arch fatigue in a shoe that otherwise fits well, where extra structure fixes a real problem. Overpronation, where the foot rolls inward as it lands, falls in the same category, and so does a history of plantar fasciitis, the heel and arch pain that tends to announce itself on the first steps of the morning. The second case is a stock insole that has packed out and gone flat, which happens well before the outsole wears out.
Worth naming clearly: an off-the-shelf insole is not the same thing as prescribed orthotics. One is a better-shaped piece of foam and plastic you buy for the price of a decent dinner. The other is made for your specific foot by someone qualified to assess it. If your feet hurt in a way that does not track with a specific shoe, that is a conversation for a professional, not a shopping problem.
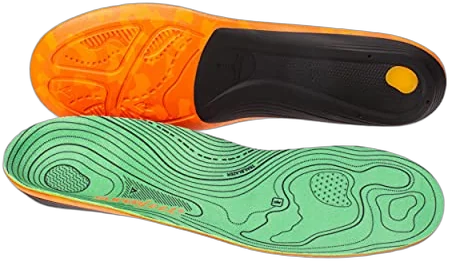
One caveat worth repeating: if you bought the Oboz pick above, it already ships with a supportive insole. Buying another one is spending money to solve a problem you already solved.
Break-In, the Part Everyone Skips
The American Hiking Society recommendation is to start with one to two miles and lengthen gradually, and almost nobody does it. The new shoes come out of the box on a Saturday and go straight to a six-mile trailhead debut, which is the classic first-hike mistake.
The version that actually works is unglamorous. Wear the shoes around the house. Wear them to the grocery store. Wear them on dog walks and errands for about two weeks before they see a trail. Two weeks of errands beats every break-in hack anyone has ever posted, and the reason nobody talks about it is that there is no video in it.
Modern mesh shoes need far less break-in than stiff leather boots, and all six picks above are close to ready out of the box. Less is not none, though. Your feet still need to learn the shoe, and the shoe still needs to take the shape of your foot. If you did go with something stiffer, a step-by-step break-in that doesn’t cost you a blister lays out the schedule properly.
What a Fair Price Looks Like for a First Pair
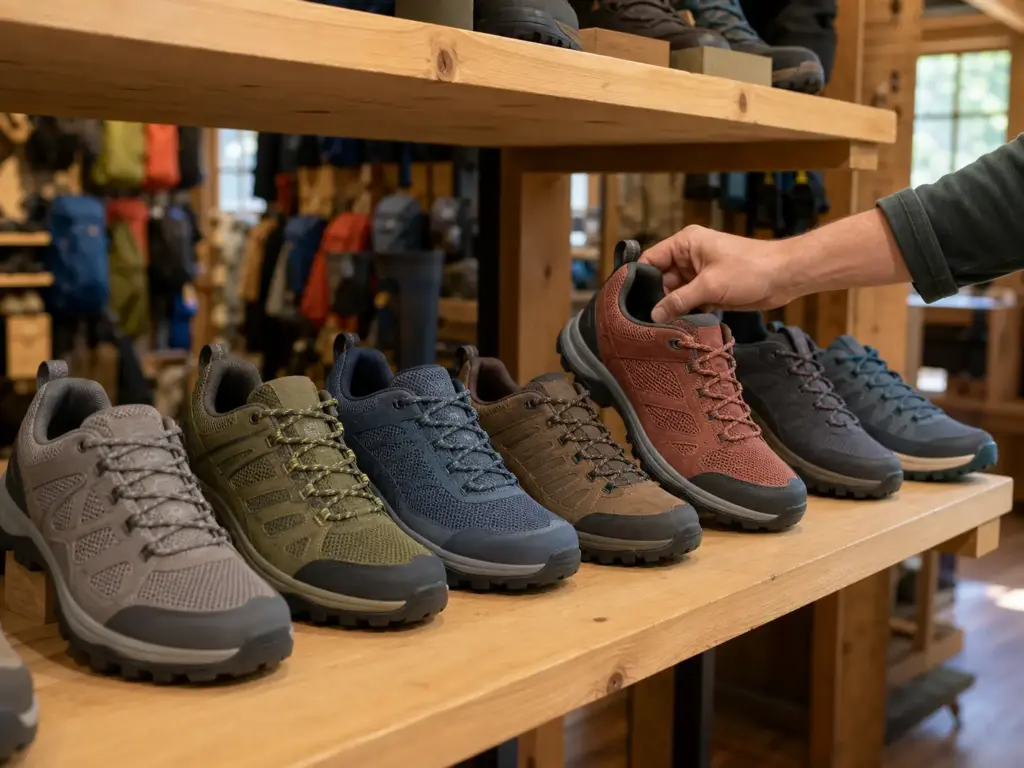
The number that matters is not what any single shoe costs today. It is where the curve flattens, the point past which more money stops buying meaningfully more comfort or durability for the kind of hiking you actually do.
In round category numbers, entry-level waterproof low-cut hiking shoes start around $80 to $90. The mainstream quality band runs roughly $100 to $150, and premium GORE-TEX models push $180 to $200. Those are category ranges, not specific models, and they move around with sales and model years.
For a beginner, the curve flattens somewhere in the $90 to $130 zone. Above that you are mostly buying weight savings and materials that pay off on a thru-hike, not on a Saturday loop. Below it you start losing the things that prevent blisters, which is a false economy.
What the extra money genuinely buys higher up the range is worth naming part by part. A lighter build. Better membranes that actually breathe. Outsole rubber that lasts more miles before it goes smooth. Higher-grade midsole foams with more energy return, meaning the foam springs back instead of just squashing.
And better abrasion resistance in the upper, which is what stops a mesh shoe from blowing out at the toe crease after one season. Those are all real, and they all matter if you hike a lot.
What it does not buy is a better fit for your foot. A $200 shoe on the wrong last is worse than a $90 shoe on the right one, every single time. And much of what drives the price difference is spec labels that tell a first-time buyer almost nothing, which is why why hiking shoe technology labels tell you almost nothing is worth ten minutes before you shop.
The Real Cost of Getting Started
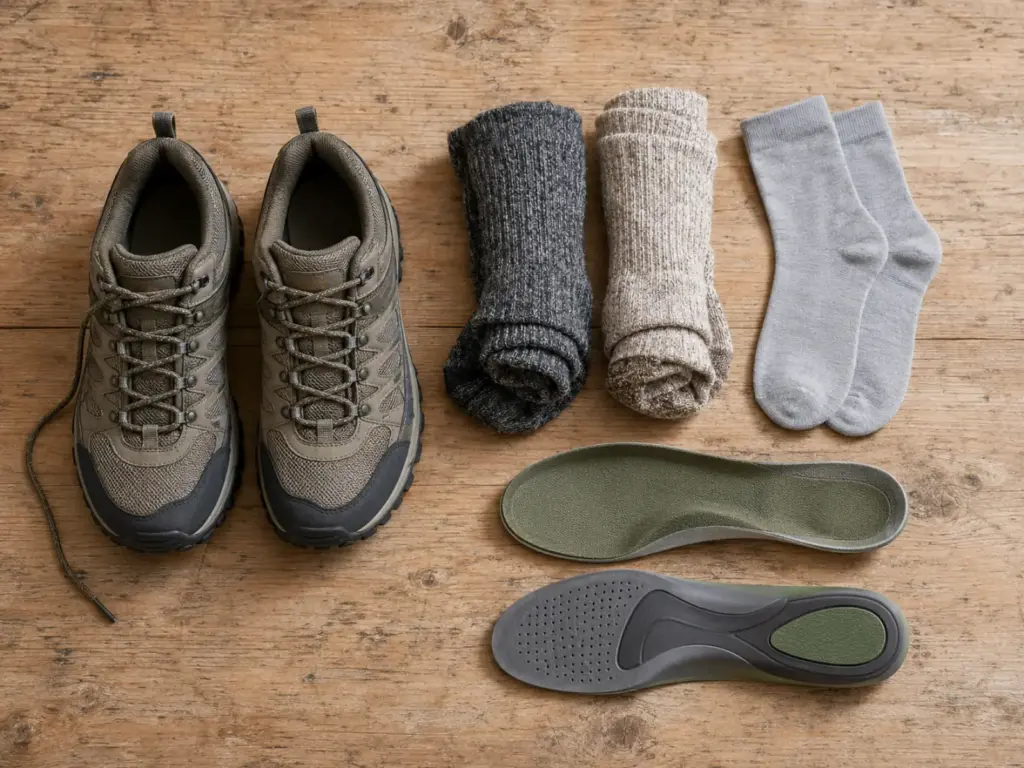
Nobody buys just shoes. They buy shoes, discover on the first hike that the socks were the problem, buy socks, then wonder about insoles a month later. Three separate trips, three separate surprises, and a running total that never got planned. So here is the whole number up front.
The honest footwear math looks like this. The shoe itself sits in that $80 to $150 sensible band. Two pairs of wool or synthetic hiking socks add roughly $20 to $40 total. Liner socks are about $12, and they are the best value in the list.
Insoles run around $50 and are genuinely optional on day one for most people. Call it $110 to $200 all in for footwear that will not sabotage your first season.
Zoom out and the picture gets more useful. A single self-guided day hike with new shoes and socks lands somewhere in the $60 to $180 range depending on what you already own. A complete ten essentials starter setup, bought strategically rather than all at once, runs about $300 to $500. If you want the buying order rather than just the total, the rest of the beginner kit, in order of what to buy first sequences it so you are never buying the wrong thing next.
Here is the counterintuitive part, and it is the single most useful thing in this entire article. At the margin, sock money beats shoe money. Moving from a $90 shoe to a $140 shoe changes your experience less than moving from cotton socks to wool socks with a liner, and the sock upgrade costs a fraction as much. The research backs this up, and so does anyone who has watched a friend’s first hike fall apart at mile two.
That suggests a staged approach for anyone not yet sure they will stick with hiking. Buy proper socks now and hike in the shoes you own on easy, dry trails. After about ten hikes you will know your foot shape, your typical terrain, your weather and whether you actually enjoy this. Then buy shoes with real information instead of guesses.
There are also things to deliberately not buy yet, and the list is longer than people expect. Gaiters, aftermarket insoles, a second waterproof pair for wet days, and anything described as a system. None of those solve a problem a beginner has. They solve problems experienced hikers have, and you will know when you get there.
Buy the socks in the same order as the shoes, not after. If you fit the shoes wearing thin cotton socks and then hike in thick wool ones, the shoe you bought is now half a size too small. The socks are part of the fit, so they need to be on your feet in the shop.
Buying for a Kid or a Hiking Partner Who Isn’t Sold Yet
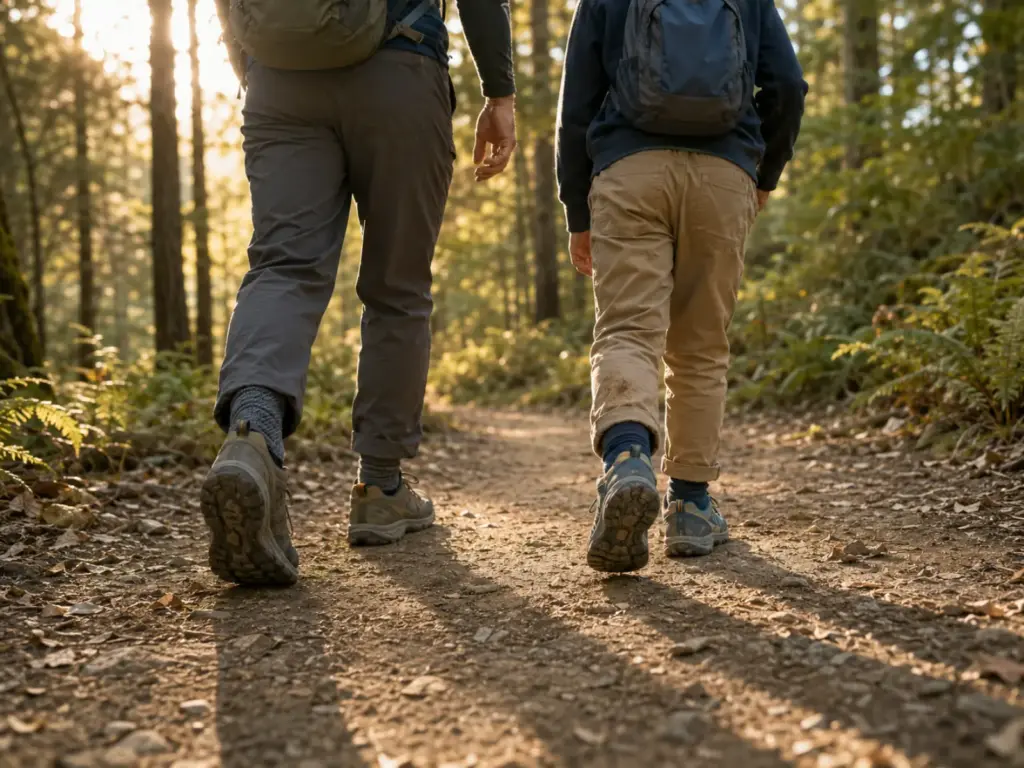
Buying one pair for yourself is the easy version of this problem. Buying for a partner who is not yet convinced they like hiking, plus a kid whose feet will outgrow anything within eight months, is the purchase most beginners are actually making. Nobody writes that guide, so here it is.
Kids flip the budget logic entirely. Buy cheap and current rather than durable and roomy, because durability is worthless on a foot that will be a size larger by spring. The temptation to buy a size up so they grow into it is exactly the mistake to avoid, since an oversized shoe produces the heel piston and the sliding foot that this whole article has been warning about. A kid in shoes two sizes too big gets blisters and black toenails for the same mechanical reasons an adult does.
Check a growing child’s fit every few months rather than once a season. Feet grow in unpredictable spurts, and the thumb-width toe room test works exactly the same on a small foot as on yours. Get the child to stand up while you check, because a seated foot is shorter than a loaded one. If you want the full breakdown of what to look for, how to pick footwear for young hikers covers sizing, closures and when a boot makes sense for a small hiker.
A reluctant partner needs a completely different optimization than you do. Their first pair should be chosen for zero break-in and immediate comfort, not for spec superiority or long-term value. One painful first hike is what ends most people’s hiking careers before they start, and no amount of technical excellence in a shoe compensates for a bad first afternoon.
In practice that usually points at the non-waterproof, no-break-in pick from the roundup above. Comfort now beats capability later for someone who has not yet decided they want to be a hiker. You can buy them the technical shoe on hike twenty, once they are asking for it.
The last piece is about the hike itself rather than the footwear. Match the route to the weakest link in the group, not to your own legs. A four-mile loop everyone finishes smiling produces more future hikers than an eight-mile push that half the group endures, and the footwear only has to be good enough for the hike you actually choose.
Putting It All Together
Fit decides everything. Half a size up, half an inch of toe room, and a heel that does not lift. Check those three and the brand on the side matters far less than the marketing suggests.
Buy the socks with the shoes. The cheapest item in the kit changes your outcome more than the most expensive one, and the research on that is clearer than the research on almost anything else in hiking footwear.
Start low-cut. Unless your pack is over 35 pounds or there is snow on the ground, the boot is a solution to a problem you do not have yet.
Wear the new pair around town for two weeks before the first real hike, then start with something short. The shoes will tell you whether they fit long before the trail does, and that conversation is much cheaper to have on a sidewalk than at mile four.
Frequently Asked Questions
01What is a good beginner hiking shoe?
A good beginner hiking shoe is low-cut, fits with about half an inch of toe room, and needs essentially no break-in. The Merrell Moab 3 is the default answer for a reason. Beyond that, match the shoe to your actual problem: wide feet, flat arches or a tight budget each point somewhere different.
02Can I hike in regular running shoes?
Yes, on easy, dry, non-technical trails with a light daypack. The real limitation is grip: road running outsoles carry around 3 mm lugs against 4 to 5 mm on trail shoes, so they slide on wet or loose ground. Once you carry overnight weight, that gap starts to matter.
03What to wear as a beginner hiker?
Low-cut hiking shoes and wool or synthetic socks, plus non-cotton layers you can add or shed. Cotton is the thing to leave at home, since it holds sweat against your skin. Everything else on a beginner gear list matters less than what is on your feet.
04What is the best trail shoe for a beginner?
For a first pair, the Saucony Peregrine 16 makes the most sense: 5 mm lugs, a rock plate and no break-in. Choose it over a hiking shoe when your trails are dry and your pack is light. Choose a hiking shoe when you carry real weight or hike through mud.
05Do I need to size up when buying hiking shoes?
Usually yes. Hiking footwear commonly runs a half to a full size larger than your street shoe size. Feet swell up to half a size by evening, so try shoes on in the afternoon in the socks you will actually hike in. Almost nobody buys hiking shoes too big.
Risk Disclaimer: Hiking, trekking, backpacking, and all related outdoor activities involve inherent
risks which may result in serious injury, illness, or death. The information provided on The Hiking Tribe is for
educational and informational purposes only. While we strive for accuracy, information on trails, gear, techniques,
and safety is not a substitute for your own best judgment and thorough preparation. Trail conditions, weather, and
other environmental factors change rapidly and may differ from what is described on this site. Always check with
official sources like park services for the most current alerts and conditions. Never undertake a hike beyond your
abilities and always be prepared for the unexpected. By using this website, you agree that you are solely
responsible for your own safety. Any reliance you place on our content is strictly at your own risk, and you assume
all liability for your actions and decisions in the outdoors. The Hiking Tribe and its authors will not be held
liable for any injury, damage, or loss sustained in connection with the use of the information herein.
Affiliate Disclosure: We are a participant in the Amazon Services LLC Associates Program, an
affiliate advertising program designed to provide a means for us to earn advertising fees by advertising and linking
to Amazon.com. As an Amazon Associate, we earn from qualifying purchases. We are also an official affiliate partner
of Black Diamond Equipment via the AvantLink network. If you click on a Black Diamond affiliate link and make a
purchase, we may earn a commission at no additional cost to you. We also participate in other affiliate programs and
may receive a commission on products purchased through our links. Additional terms are found in the terms of
service.