
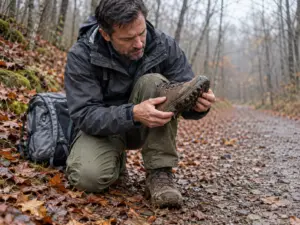
















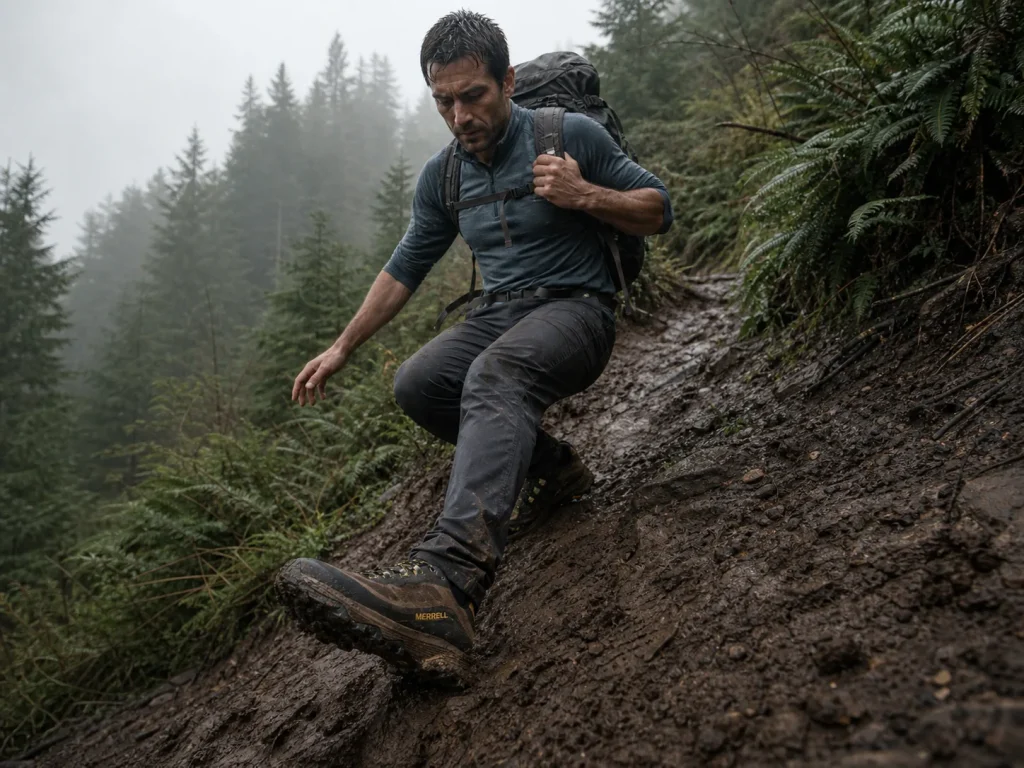
You’re forty minutes into the descent, the trail turns to slick brown soup, and your back foot goes out from under you. Not because your shoes were cheap. Because of a spec you never checked, on ground the spec sheet never mentioned. Lug depth is the number that decides whether tread bites into a muddy slope or just skates across the top of it, and almost every article you’ll find about it was written for someone running on flat ground with no pack on. You’re not. So here’s what the millimeters actually do, what they can’t do alone, and the four places hikers lose traction on a loaded descent.
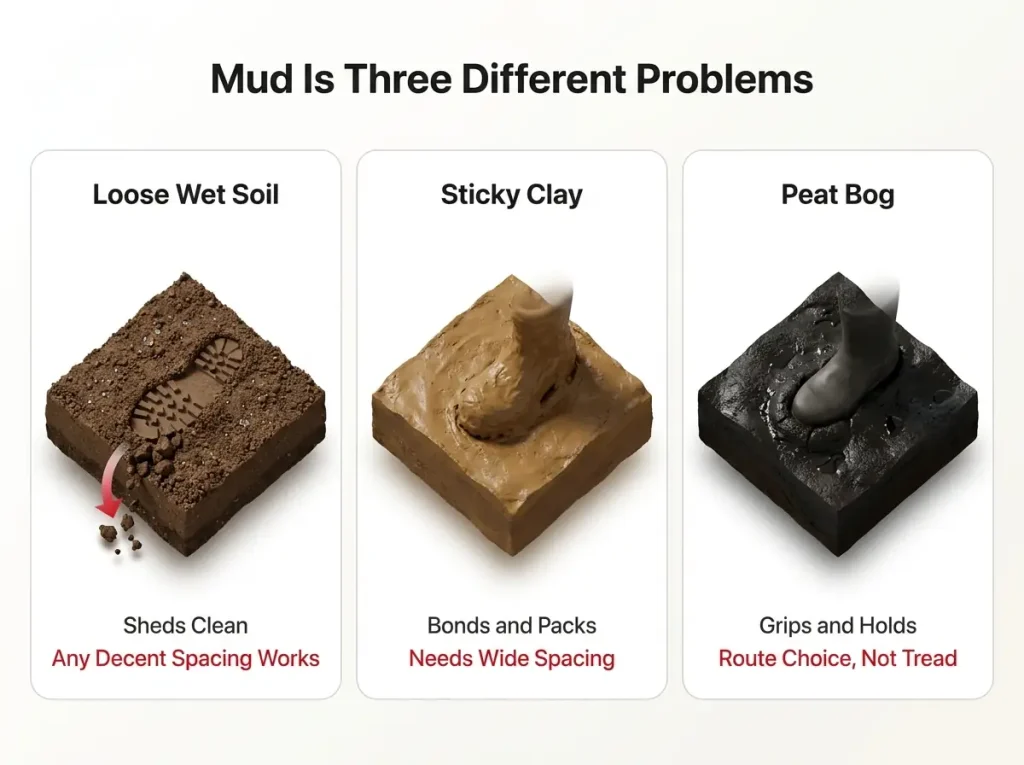
Start with the ground you’re standing on, because “mud” is at least three different problems and only two of them have a footwear answer.
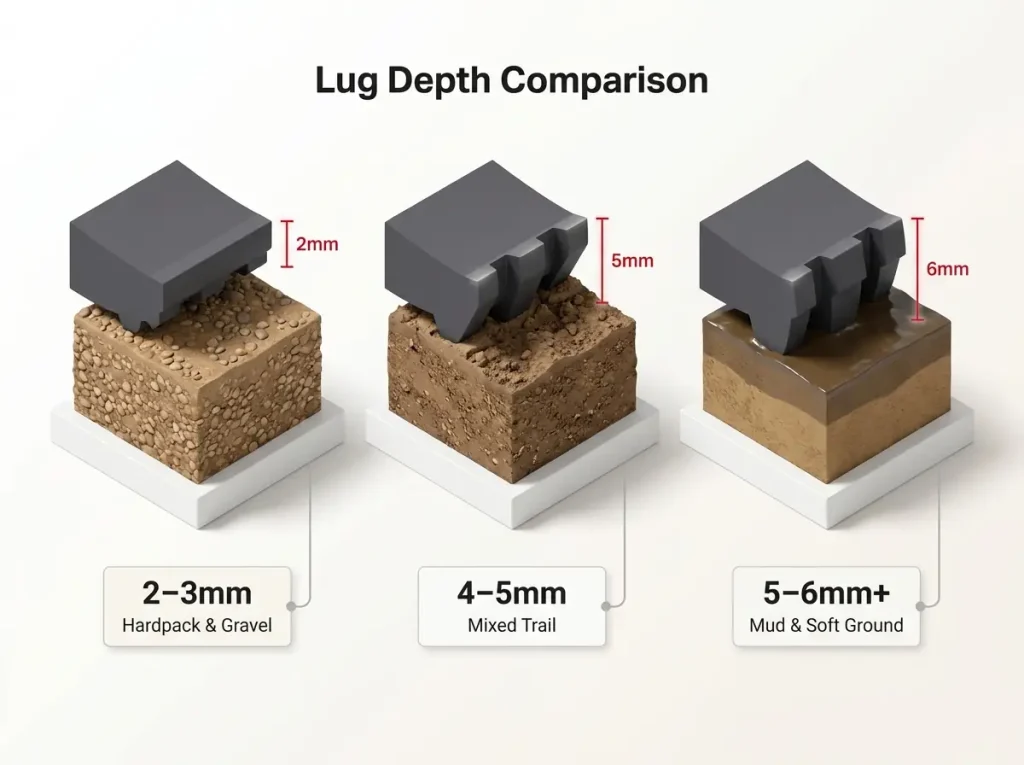
| Terrain | Lug Depth | Why |
|---|---|---|
| Hardpack and gravel | 2–3mm | Nothing to bite into. Shallow tread rides the surface and saves weight. |
| Mixed trail | 4–5mm | The working range. Clears the mud-effective bar without the penalty of a specialist. |
| Soft ground and real mud | 5–6mm+ | Deep lugs cut through the wet surface layer to firmer soil underneath. |
| Sticky clay | Depth won’t save you | Clay bonds to rubber. Lug spacing decides this one, not millimeters. |
| Peat bog | No lug solves it | Saturated peat grabs and holds. This is a route problem, not a tread problem. |
Lug Depth in Millimeters and What Each Range Does
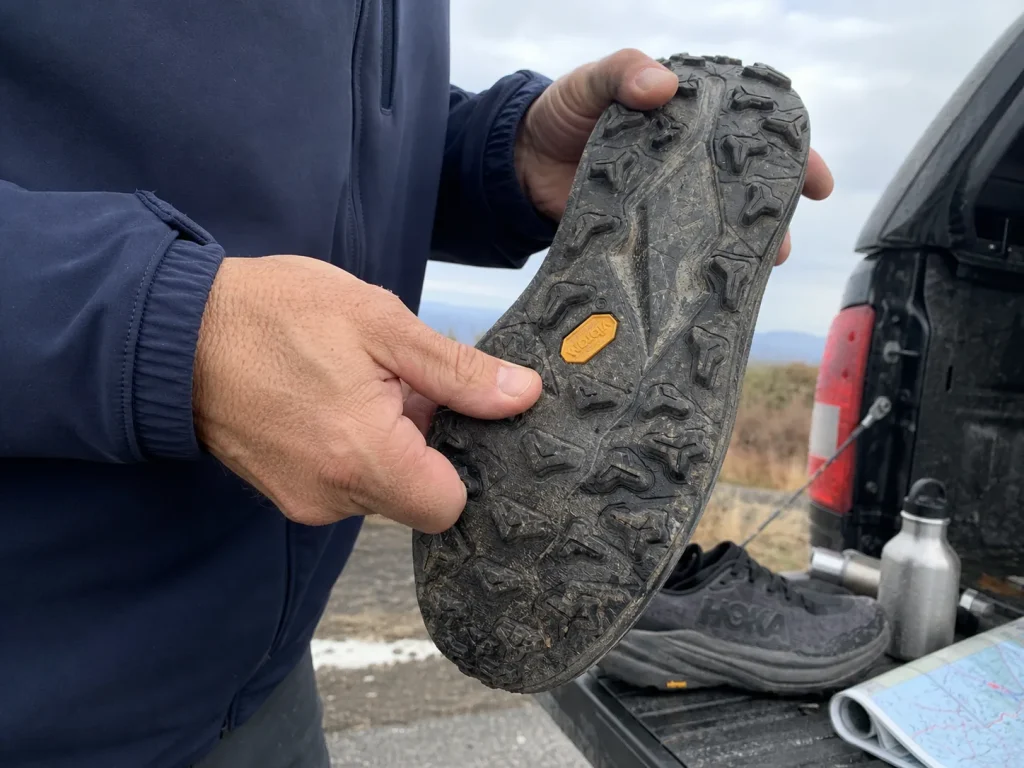
Every hiker has stood in a shop, turned a shoe over, and guessed. The numbers that would settle it exist, but almost nobody prints them on the box.
Here’s the yardstick, so you can stop guessing.
Shallow Lugs (2–3mm) and Where They Belong
Shallow lugs are built for ground that doesn’t yield. Hardpack, gravel, packed dirt, pavement on the way to the trailhead. On those surfaces there’s nothing for a deep lug to sink into, so depth buys you nothing but weight and a wobblier platform.
The trouble starts when a shoe like this meets mud. Under roughly 4mm you’re borrowing traction you don’t have: the tread rides on the slick surface layer instead of cutting through it. If you look at your shoes and the tread reads nearly flat, no footwork technique saves you once the trail turns. This is exactly why most walking sneakers sold for trail use run about 2.9mm of road tread and then fail on the first wet section, which catches out more hikers than any other footwear mismatch.
Mid Lugs (4–5mm), the Trail Sweet Spot
The 4–5mm range is where most genuine trail shoes live, and it’s the honest answer for most hikers most of the time. It clears the mud-effective bar. It handles hardpack without feeling like you’re walking on marbles. It doesn’t wear out in a season.
If you hike a mix of conditions and you’re buying one pair, this is the range to buy in. The deep-lug specialists below are better in mud and worse at everything else.
Deep Lugs (5–6mm and Up) for Soft Ground
Past 5mm you’re into purpose-built territory: mud, soft soil, snow, technical ground where the tread needs to cut rather than grip. These shoes are noticeably worse on rock and pavement, and they trade durability for bite.
If your hiking genuinely lives in soft ground, the HOKA Speedgoat 6 (men’s · women’s) sits at the deep end with roughly 5mm of Vibram Megagrip in an aggressive multidirectional pattern. The Megagrip compound is the part people cite most often for wet-surface grip, and the lug geometry is spaced widely enough to actually shed what it picks up, which as you’ll see in a moment matters more than the depth number itself.
The Benchmark Numbers to Measure Against
Two shoes are worth memorizing as reference points. The Salomon Speedcross runs 5.8mm. The Saucony Peregrine ST runs 6.5mm. Both are marketed specifically at mud and soft ground, so those are the numbers a genuine deep-lug shoe hits.
That gives you something to hold the marketing against. When a listing calls a tread aggressive and gives you no number at all, assume mid-range at best.
The Three Things That Have to Happen for Mud Traction
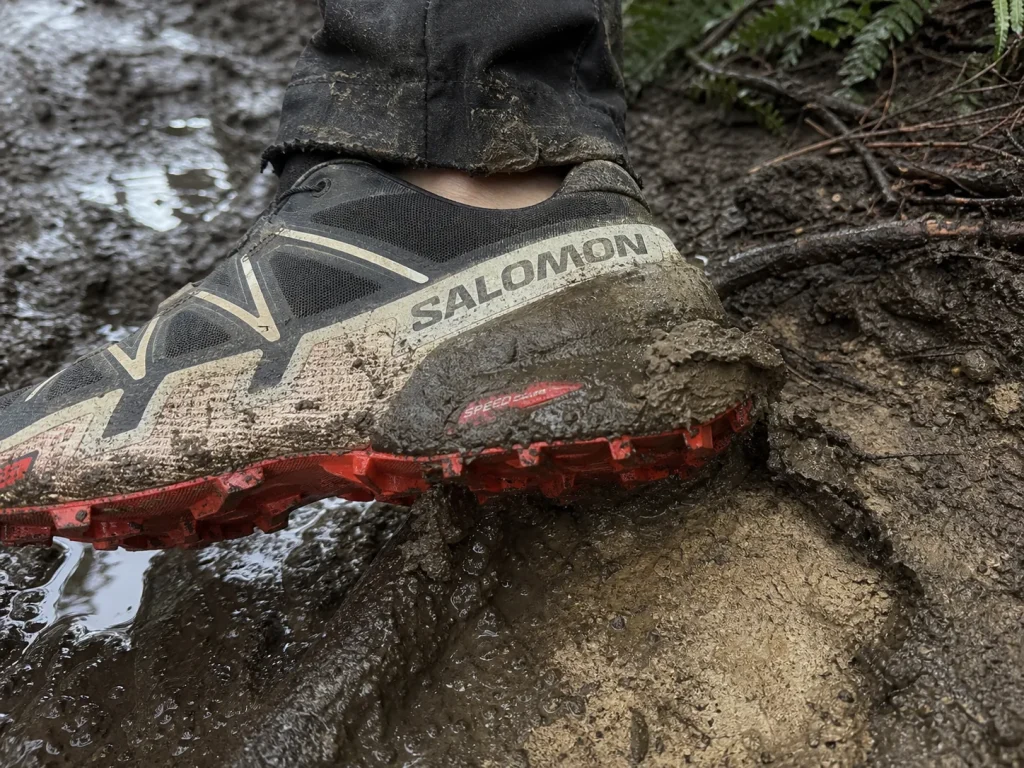
Here’s the thing that confuses people: a shoe can grip wet rock beautifully and still dump you in mud. Those aren’t the same skill. Rock grip is friction against a hard surface. Mud grip is a shovel edge cutting into a soft one, and it depends on three separate things happening in sequence, every step.
Step One, Breaking the Slip Layer
Wet mud has a thin, slick surface layer sitting on firmer ground underneath. The lug tip has to punch through that layer. This is what depth buys you, and it’s the only part of the sequence depth solves. A 2mm lug on a slick surface never gets past step one; it rides the film and slides.
Step Two, Shedding Before the Next Step
The lug has to clear itself before it lands again. A lug packed full of mud isn’t a lug anymore, it’s a flat spot on a plate. This is the step nobody checks and the one that decides most muddy descents, which is why it gets its own section below.
Step Three, Reaching Something Firm to Push Against
Finally the lug has to reach a layer solid enough to push against. This is mechanical interlocking: the rubber isn’t sticking to anything, it’s physically hooking into ground that won’t move. On deep saturated mud there may be no firm layer within reach at all, and no tread on earth fixes that.
The tell is in the sound and the feel. A shoe running all three steps makes a distinct suck-and-release with each step, and you can feel the bite set. A shoe that’s stopped shedding goes quiet and starts sliding, and by the time you notice the silence, the tread is already a flat disc.
Mistake 1, Buying Depth and Ignoring Lug Spacing
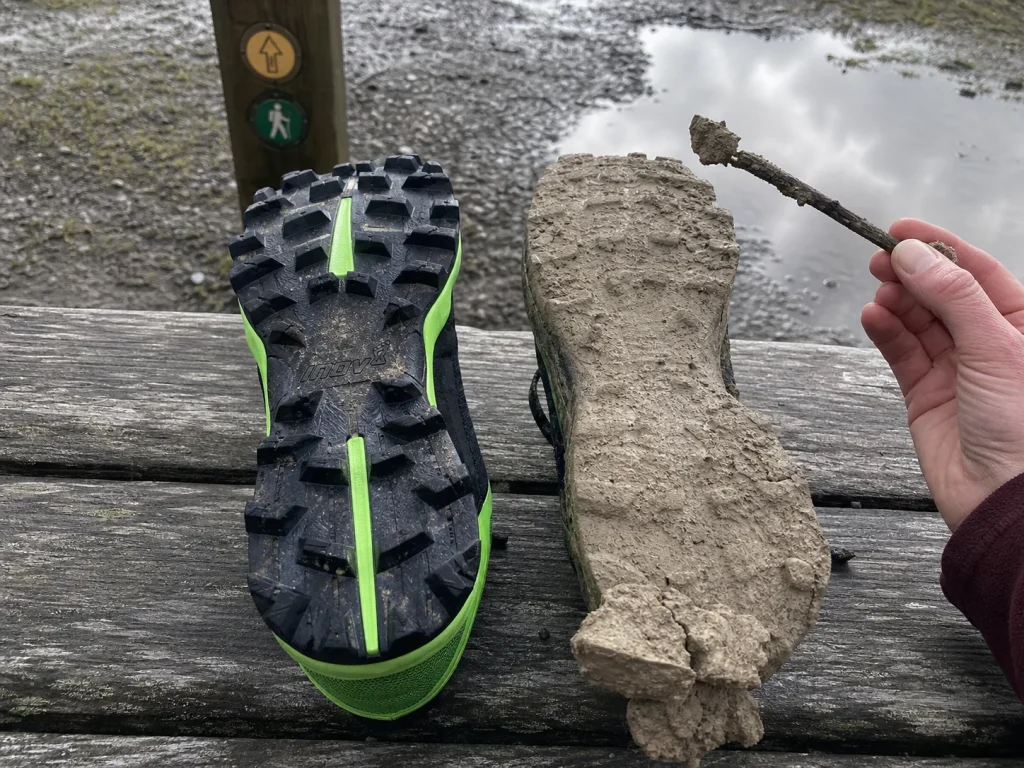
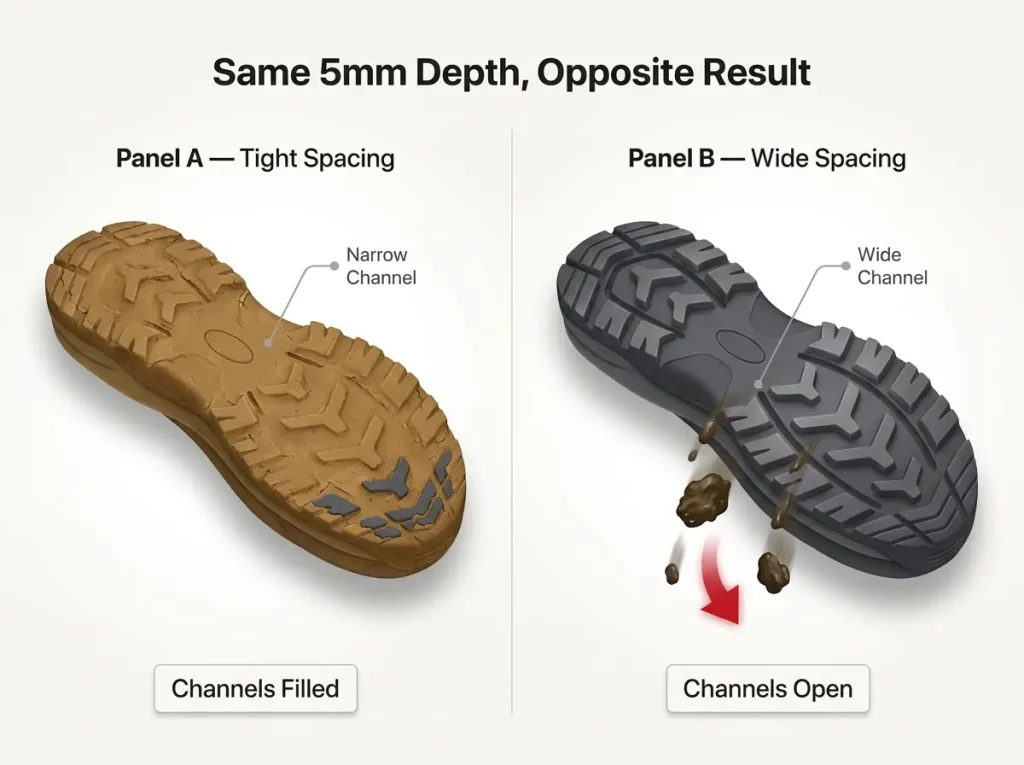
Two shoes with identical lug depth can perform in completely opposite ways in the same mud. The tread that looks meanest hanging on the wall is often the one that turns into a clay brick by mile two. Lug spacing decides this, not millimeters, and it’s the single most useful thing you can check in a shop.
How Self-Cleaning Lugs Actually Shed Mud
Self-cleaning lugs work through flex. As your sole bends through the step, the channels between lugs open and close, and mud gets squeezed out and drops clear. Wide channels give the mud somewhere to go. Narrow channels don’t, so the mud packs in and stays.
This is the same terrain logic behind why approach shoes give up mud performance to get sticky rubber on rock: tread geometry is always a trade, and the shoe that’s optimized for one surface is quietly worse on another.
Why Y-Shaped and Widely-Spaced Patterns Win
The lug pattern that sheds best is a chevron lug or Y-shaped geometry with genuinely wide channels between the lugs. The shape matters because it gives mud an exit path rather than a pocket. Tightly-packed lugs, however deep, fill flush and stop working within a few hundred yards.
Once that happens the physics flip on you. A clogged 6mm tread performs worse than a clean 3mm one, because at least the shallow tread still has edges. Yours is now a smooth plate with a layer of clay between you and the ground.
The Balled-Up Tread and the Five-Pound Shoe
Sticky clay makes this vivid. On a shoe with poor mud-release tread, clay can pack on until it adds an estimated five pounds of mud per shoe. That’s not an annoyance. Five extra pounds per foot changes your gait, burns energy fast, and does it right when you need your footing most.
The community calls the caked-up result “balled up” tread, and it’s the thing regulars notice on a bog stretch: one hiker’s shoes staying readable step after step while a beginner’s cake into two useless bricks. Neither of them chose that on purpose. The outsole did.
In the shop, turn the shoe over and try to fit your little finger sideways into the channel between two lugs. If it goes in easily, the tread will shed. If the channels are so tight you’d need a twig to clear them, that’s exactly what you’ll be doing at the trailhead, on your knees, with a stick.
Soft Rubber vs Hard Rubber and the Grip You Pay For
There’s no free lunch on this spec, and the shops won’t tell you that.
Why Sticky Rubber Grips Wet Surfaces
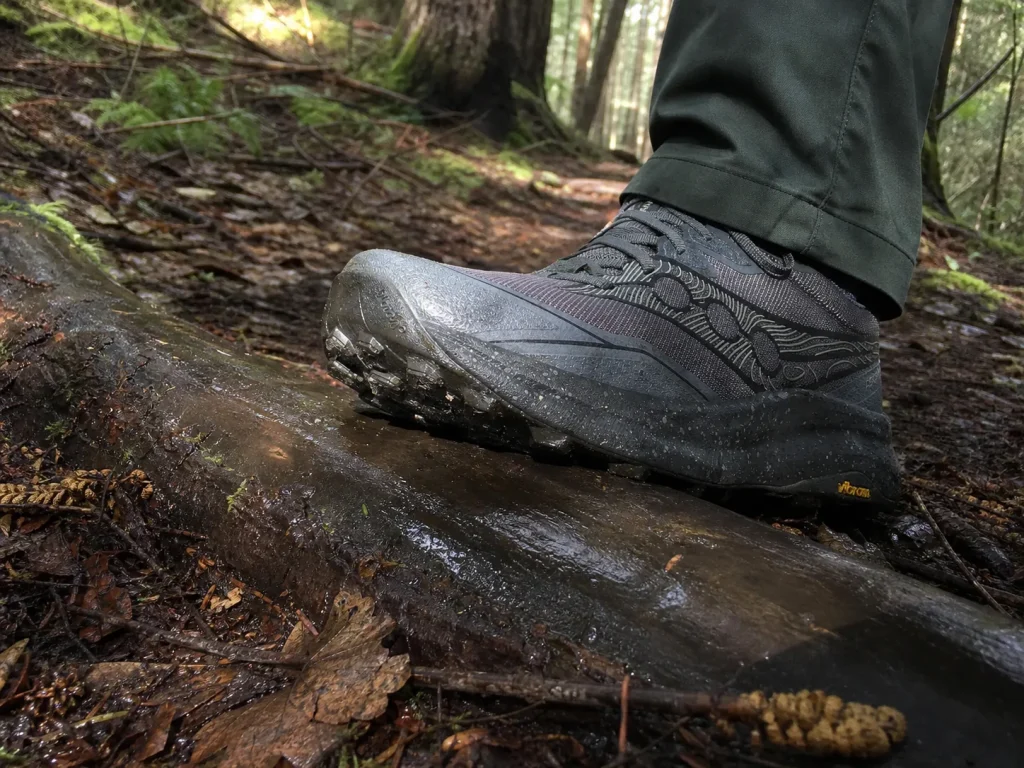
Softer rubber compound deforms around surface texture and grips better when things are wet. Harder compound stays rigid, lasts longer, and gives up grip the moment water gets involved. That’s the whole trade, and every brand sits somewhere on it.
The compounds worth recognizing on a spec sheet are Vibram Megagrip, Vibram TC5+, and Saucony’s PWRTRAC. The Saucony Peregrine 16 (men’s · women’s) is a clean example, since PWRTRAC is Saucony’s own stated wet-grip compound paired with an aggressive lug. Worth knowing before you shop on brand name alone: Vibram is a licensor, not a single compound, and the same name spans 65 to 80 Shore A, so two shoes wearing the same logo can behave nothing alike.
What Soft Rubber Costs You in Wear
Soft rubber wears fast. That’s not a defect, it’s the mechanism. The same deformation that grips is the same deformation that abrades, which means outsole durability and wet grip are pulling against each other on the same spec.
Buying the softest compound available for a trail you hike twice a year is how people end up looking at a resole on gear they barely used. If your mileage is mostly hardpack with occasional mud, a harder compound and good spacing serves you better than sticky rubber you’ll grind off on gravel.
Where Compound Actually Decides a Muddy Step
In mud specifically, compound matters less than depth and spacing. It decides one thing, but it’s an important one: what happens the instant your lug finally reaches the rock or root hiding under the mud. That’s the moment you either stick or go down.
Compound also feeds back into the shedding problem. Some rubber surfaces let clay bond more readily than others, which makes a spacing problem worse independent of geometry. Soft and sticky is not automatically better in mud, and that surprises people.
Waterproof Membranes and the Mud Trade-Off
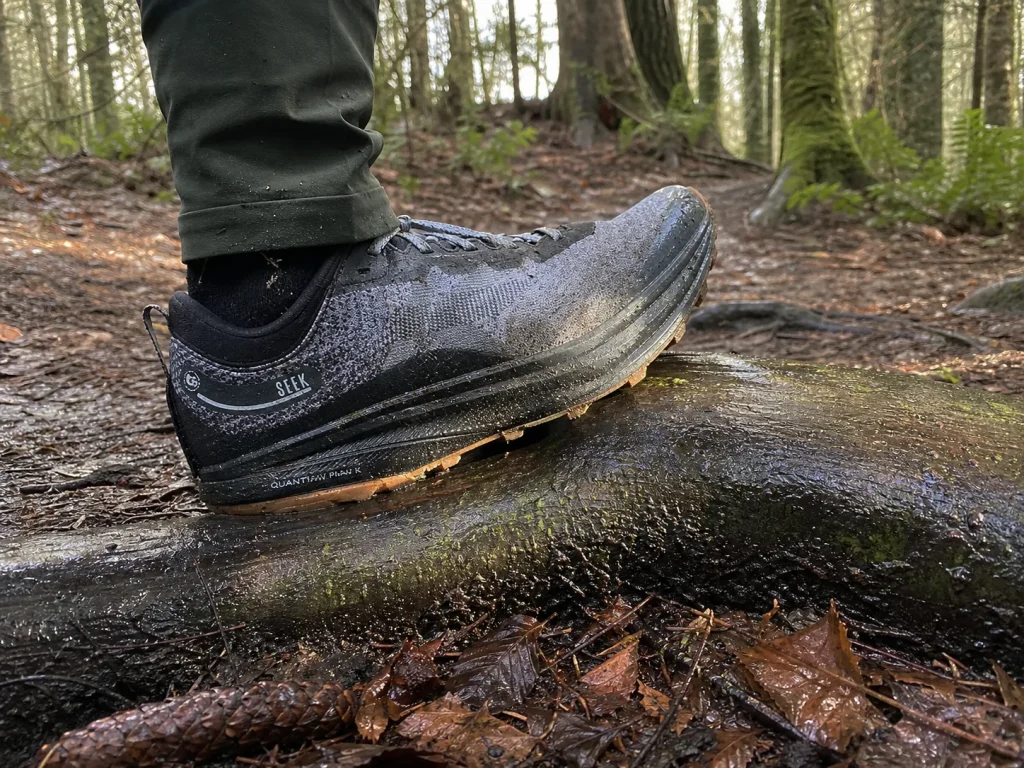
Waterproof sounds like the obvious answer for mud. It’s the answer to a different question, and it comes with a bill.
What a Membrane Actually Buys You in Mud
A waterproof membrane protects against splashback and shallow mud, and on a cold wet day that’s genuinely worth having. Dry feet in near-freezing weather are a comfort and a safety margin, not a luxury. For short muddy stretches in the cold, Gore-Tex wins cleanly.
The Bucket Problem on a Long Wet Day
The problem is what happens after the membrane is breached, and it always gets breached eventually: over the heel collar, through the breathable upper, or from your own sweat. Now the layer that kept water out keeps water in, and the shoe cannot drain. That’s the mechanism behind why Gore-Tex shoes still feel wet inside, and it compounds on a climb, when your feet are working hardest and breathing least.
You can feel the moment it flips. The first crossing where water comes in over the collar, and every step after that is a sloshing reminder that the membrane is now a bucket wall.
How to Decide for Your Trail
Short cold muddy stretches, membrane. Full day of saturated ground and repeated crossings, a shoe that drains beats a shoe that seals, every time. The decision isn’t about the shoe’s quality, it’s about how long the water gets to stay.
Mistake 2, Taking Trail Runner Advice Into a Loaded Hiking Shoe
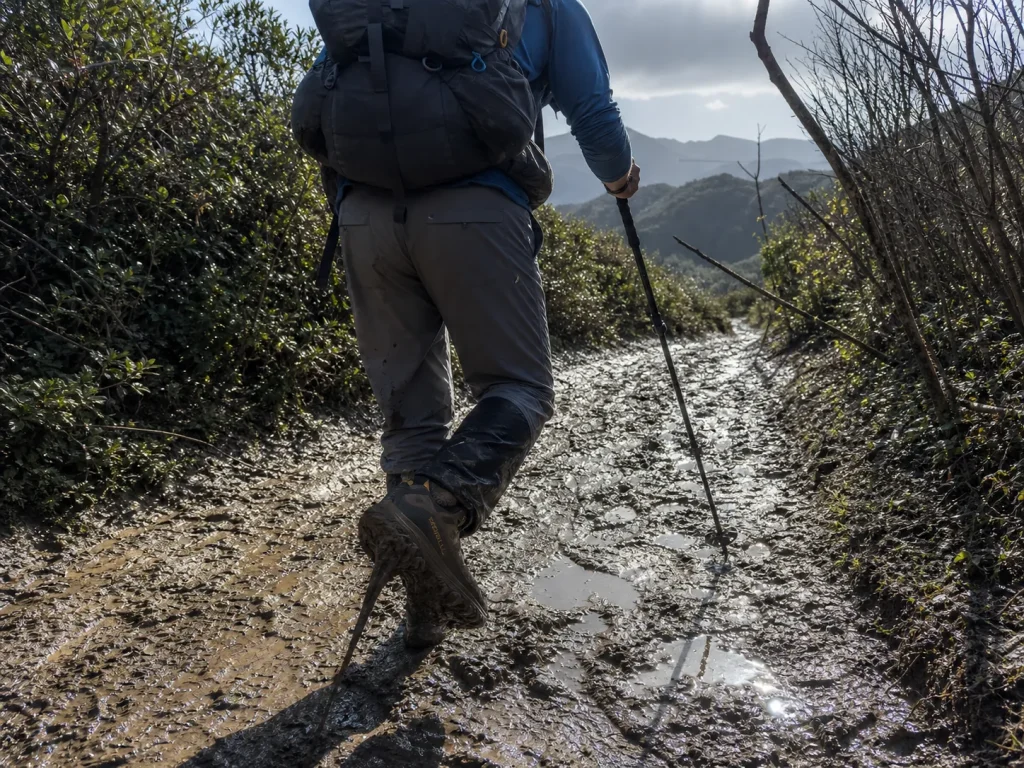
Nearly everything written about lug depth was written for trail runners. That advice is fine for runners. You’re not running, you’ve got a pack on, and that changes what the tread has to do.
Your shoe sits in an awkward middle. It isn’t a hiking boot and it isn’t a racing flat, and this is exactly where low-cut hiking shoes beat boots on most trails while quietly refusing to behave like the trail runners they resemble. Most of the ankle support argument people have about this category is beside the point on mud anyway. What holds you on a slick grade is the platform under your foot, not the height of the collar around it.
Why a Stiffer Sole Holds the Lug Angle
A low-cut hiking shoe generally carries a stiffer sole, more torsional rigidity, and a firmer platform than a flexible trail running shoe. That stiffness does something for you in mud that nobody explains.
The lug’s leading edge works like a shovel blade. It cuts best at a consistent angle through the whole stance phase. A stiff platform holds that angle. A flexible running sole rounds it off mid-step once weight is on it, and the lug stops cutting and starts smearing. Torsional rigidity is what keeps the platform from twisting under you, and on a slick sidehill it’s doing more work than the tread pattern.
What Pack Weight Does to Every Step
A runner plants light, midfoot-first, at high cadence, and is off the ground before the mud can do much. You plant slow and heavy, with your weight plus your pack driving through a flatter, longer contact.
Same mud, different physics. It also means soft midsoles bottom out under a pack, which drops your effective lug angle even further. The shoe that felt sharp on a day hike goes vague under load.
Choosing Depth for a Hiking Shoe, Not a Racing Flat
Here’s the practical translation: a hiking shoe at 4–5mm can out-perform a trail runner at 5mm+ under a pack, because the platform holds the lug angle when the runner’s doesn’t. The number on the spec sheet lost to the thing under it.
The Merrell Moab Speed (men’s · women’s, Moab Speed 2) is the shape of that answer: hiking-shoe heritage rather than running heritage, a moderate 4–5mm Vibram TC5+ tread, and a firmer platform under load. It’s also the most budget-friendly of the shoes named here, which makes the point neatly. You don’t need the specialist to hold a muddy trail. If you want the fuller version of this comparison, hiking shoes and trail runners split along more lines than tread.
Mistake 3, Ignoring Lug Orientation on the Descent
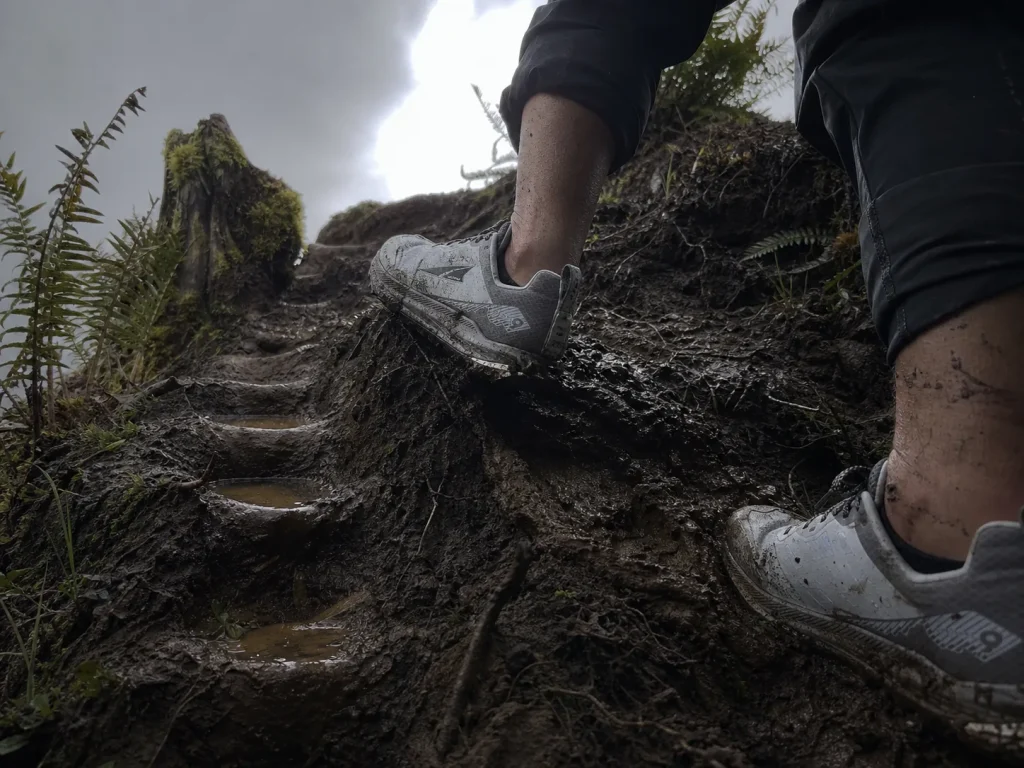
The keyword says slopes. Every article ranking for it treats mud like it’s flat. Flat mud is a nuisance; mud on a grade is where people actually go down, and the fix is half tread and half footwork.
Why Directional Lugs Matter More Going Down
Directional lugs and chevron patterns bite hardest in one direction. Multidirectional lugs trade some of that bite for all-around versatility. On flat ground that trade barely registers.
On a descent it decides everything. A directional lug pointed against the slope acts as the shovel edge the whole system depends on. Pointed the wrong way, the same lug skims. This is why descent traction and uphill traction are genuinely different specs on the same shoe, and why a tread that felt planted on the climb can turn loose on the way back down.
The Plunge Step and How to Brake With Your Heel
Heel-braking, the plunge step, is the technique, and it’s the thing most hikers have never been taught. Angle your toe up toward your shin. Land heel-first, deliberately, letting the heel cut a step into the slope. Then roll heel-to-ball after contact to spread the impact and turn your leg into a brake.
Your weight plus your pack drives through that leading heel lug, which is a completely different load path than a runner’s light midfoot strike. It’s also why the platform under the tread matters here. The Altra Lone Peak 9 (men’s · women’s, Waterproof Low) is worth a look for this specifically: the wide platform gives more stable ground contact for a loaded heel-brake than a narrow last, and the zero heel-to-toe drop changes how the heel meets the slope in the first place. Worth noting that low drop and low stack height aren’t the same spec, and it’s the drop that governs your heel angle here, not how far off the ground you’re sitting.
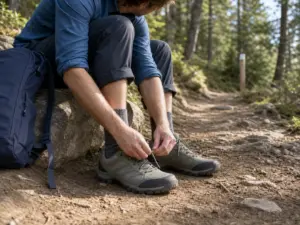
Tighten your laces fully before the muddy section starts, while they’re still clean, visible and reachable. Sticky mud works a loose shoe off your foot a little more with every step, and the place you find out is ankle-deep in it, one-legged, holding a pole and trying not to put a sock down.
Edging, Zigzagging, and the Lace Check Nobody Does
Three more things that hold a muddy grade together. On steep loose sidehill, turn your feet across the slope and edge, the same principle as snow: you’re using the side of the shoe, not the tread. Zigzag steep muddy descents instead of taking the fall line, which cuts both the strain and the slip risk. And use trekking poles as a third and fourth point of contact rather than as decoration.
One piece of kit worth the space on a genuinely slippery trail: low gaiters. They won’t add a millimeter of traction, but they stop the mud that your lugs throw from packing in over the collar, and a shoe full of grit fits worse and drains slower for the rest of the day.
One more, and it goes against instinct: walk through the mud, not around it. American Hiking Society’s trail etiquette is blunt on this because skirting the edge widens the trail and speeds up erosion, creating a bigger muddy patch for the next hiker. It’s also the safer line. The edge of a mud patch is the undercut, unconsolidated part, which is precisely where a foot goes out from under you.
Not All Mud Is the Same, and Your Tread Can’t Tell
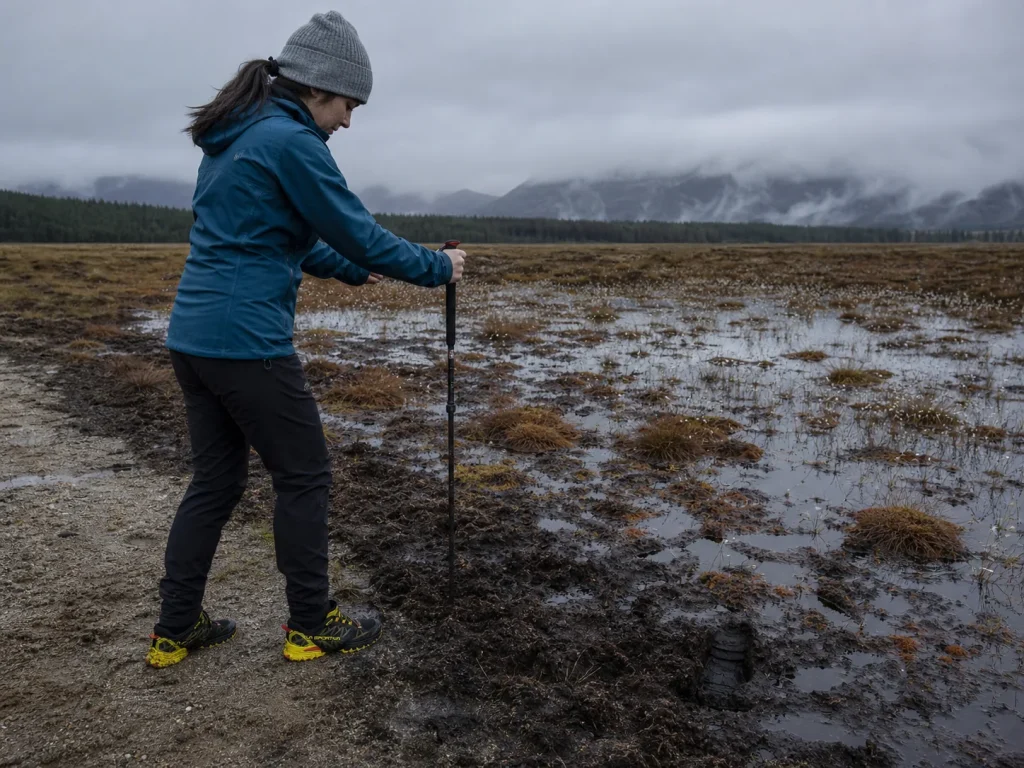
Hikers say “mud” like it’s one thing. The trail knows better. Three surfaces, three completely different failure modes, and one of them isn’t a footwear problem at all. Terrain matching is the actual skill here: reading which one you’re standing in before you commit your weight.
Loose Wet Soil, the Easy Case
Loose soil with water in it sheds easily from almost any reasonable spacing, because the particles don’t cohere strongly to each other or to rubber. It squeezes out of the channels on its own.
This is the mud most tread advice is written for, and it’s the easy case. If your only experience of mud is this, you’ll think your shoes are better than they are.
Sticky Clay and Why Depth Won’t Save You
Sticky clay is the failure case. Clay particles bond to each other and to your outsole, which is a different problem entirely. This is the five-pounds-per-shoe surface, and it needs wide lug spacing plus a rubber surface that resists adhesion. Depth alone does nothing at all here. You can have 6mm of the deepest tread made and still walk out on two flat plates.
The community name for it is “shoe-sucking mud,” and it earns it. Clay grabs footwear hard enough to pull a loose shoe clean off, which is the reason that lace check above isn’t optional.
Peat and Bog, Where Tread Stops Being the Answer
Peat bog is a separate hazard, not a harder mud. Deep saturated peat can hold a foot in place hard enough that wrenching free risks an ankle sprain or leaves your shoe behind, and the National Park Service flags this as a hazard in its own right rather than a traction issue. No lug design solves suction. There is nothing to buy that fixes this.
What works is route choice, and the field habit that goes with it: probe the depth with a pole before you commit weight to saturated ground. If the pole goes past the basket easily, find another line. And when there is no other line, as the Park Service puts it, a trail too wet to hike without leaving the tread is a trail to turn back from. Sometimes the correct traction strategy is not hiking that section today, which is an answer the gear-first version of this topic never gives you. On genuinely saturated ground, shoes built to drain rather than seal at least keep you moving comfortably once your feet are wet anyway.
Mistake 4, Hiking on Lugs That Are Already Gone
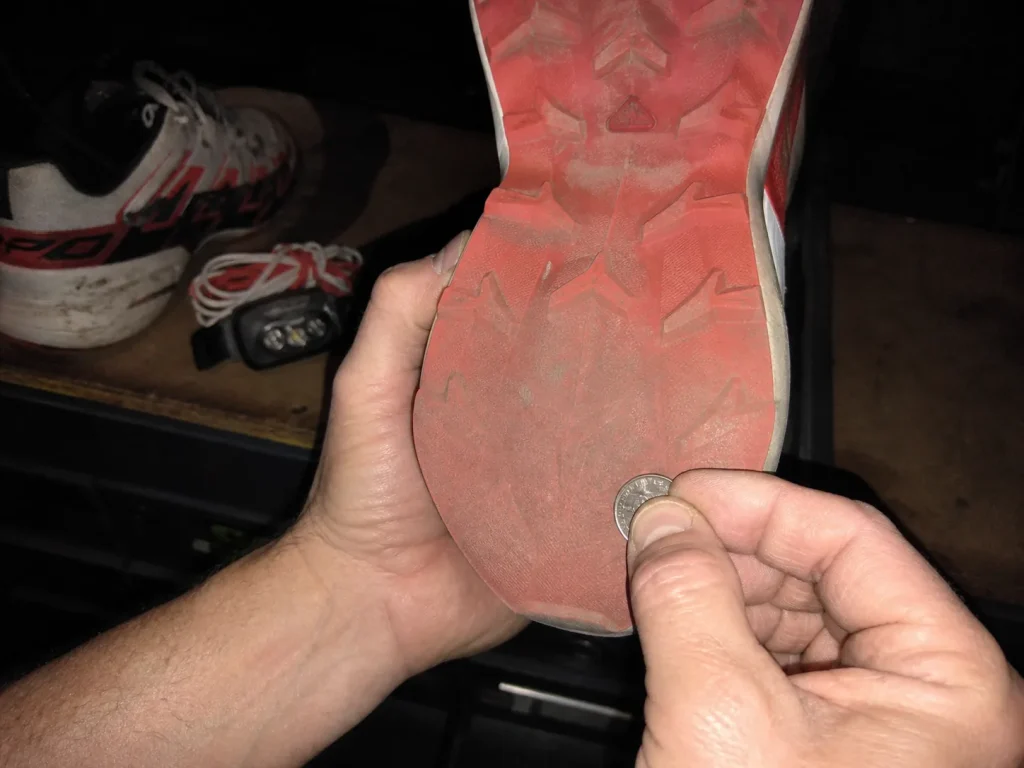
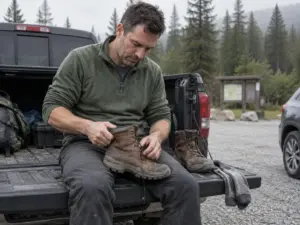
The tread still looks fine from three feet up. That’s the problem. Outsoles die from the top down, and the shoe that got you through last mud season may already be finished without looking it.
The 2mm Line and How to Feel For It
Lugs are functionally gone once they’re worn flush with the outsole. On a shoe that started around 5mm, meaningful mud traction is lost below roughly 2mm of remaining depth, and general replace guidance clusters at 1.5 to 2mm remaining.
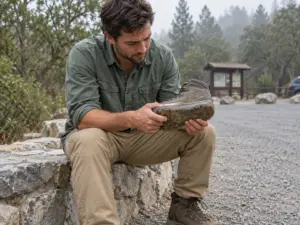
The self-check takes ten seconds. Press a thumbnail or the milled edge of a coin into the lug. If you can’t feel about 2mm of depth left, that shoe has stopped doing its mud job, regardless of how the pattern reads from standing height. Lug wear is a cliff, not a slope: performance holds up reasonably well and then falls off fast in the last couple of millimeters. When you want the fuller version, the press test for a worn-out shoe extends past the outsole to the midsole, which usually dies first anyway.
Where Lugs Wear First (Check the Heel)
Wear isn’t even, and this is where people check the wrong thing. The heel and the outside edge go first. Those are exactly the lugs doing your braking on a descent.
So check the heel, not the forefoot. A shoe with sharp forefoot lugs and a heel worn smooth is not a shoe with most of its life left. It’s a shoe that has already lost the part you need on a muddy slope, while the part you don’t need still looks new.
Run the lug check at home, in good light, the week before the trip. Everyone means to. Almost everyone actually does it at the trailhead, in the dark, by headlamp, at which point the only decision left is whether to go anyway.
What Depth You Actually Need to Buy
Here’s the honest version. A moderate 4–5mm hiking-shoe tread with decent spacing clears the mud-effective bar for the large majority of trails. The deep-lug specialists earn their keep on genuinely soft ground and not much else, and buying one for two muddy weekends a year is the wrong trade.
And the version nobody selling you shoes will say: if your current shoes still have 2mm+ at the heel and channels wide enough to shed, you don’t need to buy anything. Fix the footwork instead. It’s free and it transfers to every pair you’ll ever own.
The Short Version
Depth gets you in the door. 4–5mm handles most trails, 5mm+ is for genuinely soft ground, and under 4mm you’re a passenger the moment it gets wet. But spacing is what keeps the tread working past the first few hundred yards, and it’s the spec nobody checks.
You’re a loaded hiker on a grade, not a runner on flat mud. Directional lugs pointed against the slope plus a heel-first plunge step is the pairing that holds when the trail tilts.
Clay is a spacing problem. Bog is a route problem. Worn-flush lugs are neither, they’re just gone.
Pull your shoes out tonight, run a thumbnail across the heel lugs, and look at the channels between them. That’s a two-minute check that tells you more about your next muddy descent than any spec sheet will.
Frequently Asked Questions
01What does lug depth mean?
Lug depth is the height of the rubber protrusions on a shoe’s outsole, measured in millimeters from the base of the sole to the tip of the lug. It decides whether tread bites into soft ground or rides on top of it: 2–3mm for hardpack, 4–5mm for general trail, 5mm+ for mud.
02What is the lug depth of trail shoes?
Most trail shoes run 4–5mm, with mud-specific models going deeper. Two useful benchmarks: the Salomon Speedcross sits at 5.8mm and the Saucony Peregrine ST at 6.5mm. Brands rarely print the number, so use those as your yardstick when a listing only says the tread is aggressive.
03How do you make shoes more grippy for hiking?
You cannot add lug depth to a worn outsole, but you can fix the two things that cost most hikers grip. Clear the tread channels so they can shed, and tighten laces before the muddy section rather than during it. If your lugs are worn under about 2mm, replacement is the only real fix.
04How do you run in mud without slipping?
Shorten your stride, raise your cadence, and land more directly under your hips. A long reaching stride is what breaks traction in mud. For hikers on a descent the answer flips: heel-first plunge stepping with directional lugs beats a light quick stride once you add pack weight.
05What are the best shoes for a mud run?
A mud run wants deep, widely-spaced lugs and a shoe that drains rather than seals. Skip the waterproof membrane for a mud run specifically, since a sealed shoe becomes a bucket the moment it floods. That is a different problem from a loaded hiking descent, which needs platform stiffness more than raw depth.

I've spent more than a decade researching hiking gear and trail technique. I read the specs, the forum threads and the long-term reviews, and every pick here comes with what it gets wrong.
End of the trail
You read every mile of this one. Here's where the trail goes next.