

















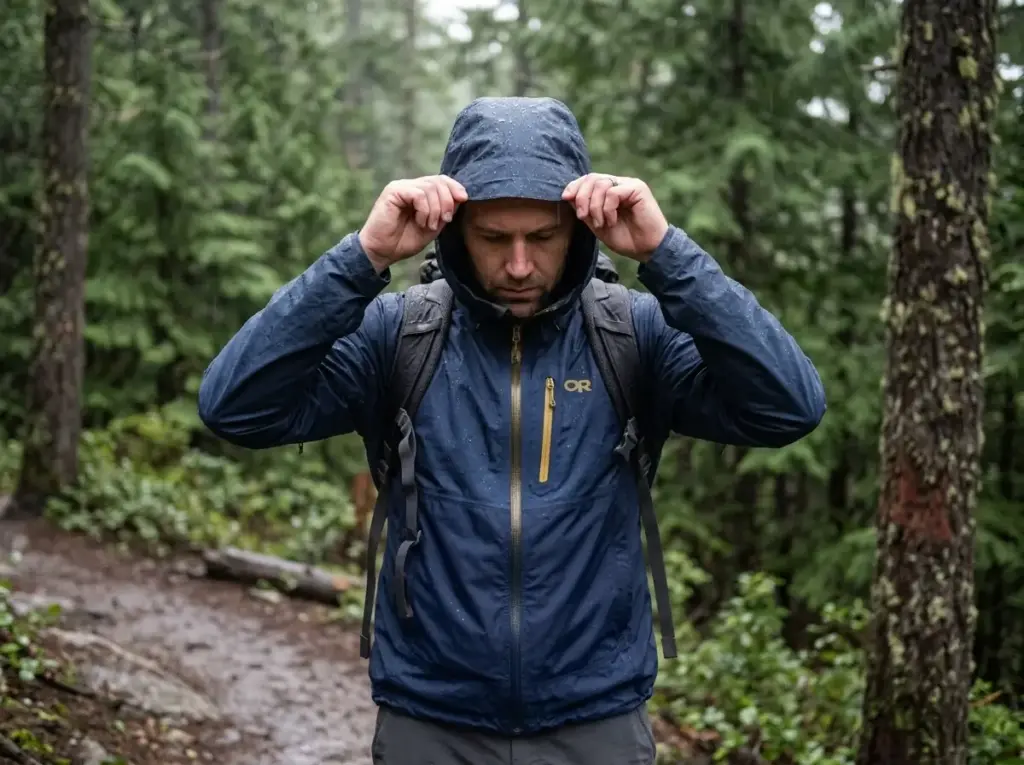
You’re three miles in, it’s been raining for an hour, and the jacket you paid good money for has gone dark and heavy across the shoulders, right where your pack straps sit. Inside, you’re damp and getting cold. Here’s the thing almost nobody selling you a jacket will explain: it probably didn’t leak. It wet out, which is a completely different failure with a completely different fix, and the pattern repeats in gear threads every single rainy season.
Below you’ll find five picks sorted by the job they actually do, plus the part the spec sheets skip: why “waterproof” jackets quit working, how to keep yours going, and where the best rain jacket for hiking fits inside your full rain system.
What Actually Makes a Rain Jacket “Waterproof”
Every hangtag brags a number. None of them tell you what happens when you’re walking uphill in the rain with thirty pounds on your back. There are two numbers that matter, they pull against each other, and that tension is the entire reason buying a rain jacket feels harder than it should.
One number describes how hard the rain has to push before water gets in. The other describes how fast your sweat gets out. Push either one to its limit and the other suffers. Understand both and you can walk into any shop, read any tag, and know within thirty seconds whether that jacket is built for the trips you actually take.
Hydrostatic Head, in Plain English
Hydrostatic head is measured in millimeters, and the test behind it is refreshingly literal: a tube of water is stood on the fabric, and the number tells you how tall that water column gets before it forces its way through. A 10,000mm rating means the fabric held back ten meters of water pressure.
Here’s the scale that matters on trail. Anything below 10,000mm is water resistance, not waterproofing, no matter what the marketing copy says. That’s a shell for light rain or a damp morning, not a day of it.
Around 10,000mm covers general hiking and the kind of weather most people actually walk in. For a sustained downpour, wet snow, or the kind of day where torrential rain just doesn’t stop, you want 15,000mm to 20,000mm or more.
Pressure is the part people miss. Rain falling on your sleeve is a gentle load. A wet pack strap grinding into your shoulder for six hours is not, and neither is sitting down on soaked granite.
The number on the tag describes the fabric’s worst-case resistance, which is exactly why the high-wear contact points fail first on a jacket that’s technically rated for far worse weather. Once you’ve decided on a rating band, it’s worth understanding how those hydrostatic head numbers trade against pack weight, because the two move in opposite directions and the sweet spot is different for a day hiker than for someone counting grams.
MVTR and Why Your Jacket Feels Like a Sauna
MVTR stands for moisture vapor transmission rate, and it’s the number that decides whether you like wearing the jacket. It measures how many grams of sweat vapor pass through a square meter of fabric in 24 hours. Above 20,000g is premium breathability. Around 10,000g is the practical floor for sustained aerobic effort with a pack on, which is a polite way of saying “climbing.”
This number is almost never printed on the hangtag. Waterproof ratings sell jackets, breathability numbers get buried in a spec table on the brand’s website, and the result is a lot of hikers buying the highest waterproof rating on the rack and then wondering why they arrive at the summit soaked anyway.
The distinction gets sharp in gear threads, and hikers describe it in two very different ways. One complaint is “it breathed fairly well but did nothing to keep me dry.” The other is “dry, but soaked from sweat.”
Those are opposite failures, and people constantly conflate them into a single verdict: this jacket sucks. It doesn’t. It’s mismatched. Matching both numbers to the conditions you hike in is the actual fix, and it’s why two jackets with identical waterproof ratings can feel like completely different garments on the same climb.
Before you buy, write down the wettest trip you actually took in the last two years. Not the one you’re planning. The real one. Most people shop for a Fiordland traverse and then hike in Ohio drizzle for the next four seasons, and they pay for waterproofing they never load and breathability they badly need.
Membrane names are the other thing you’ll read on a tag, and they cause more confusion than they deserve. Gore-Tex (including the newer ePE membrane and the burlier Gore-Tex Pro), Pertex Shield, BD.dry, AscentShell, H2No: they all do the same job. A microporous or monolithic layer blocks liquid water from pushing in while letting vapor molecules pass out.
What separates them is where each one sits on the triangle of breathability, durability, and price. Gore-Tex Pro leans hard on durability. Proprietary in-house membranes usually undercut the price. And the differences are real enough that it’s worth knowing how two membranes with the same rating breathe differently before you assume a spec-sheet tie means a real-world tie.
2-Layer, 2.5-Layer, 3-Layer — What You’re Actually Buying
Layer count describes construction, not warmth. It’s the single most useful thing on a spec sheet once you know what it means.
A 2-layer shell bonds the membrane to the outer face fabric and hangs a loose mesh or fabric liner inside to protect it. Cheap to build, comfortable against skin, and heavier and bulkier than the alternatives. You’ll see these at the low end and on casual rain jackets.
A 2.5-layer shell skips the hanging liner and prints or sprays a protective texture directly onto the inside of the membrane instead. That half layer is the whole trick: it saves real weight and packs down small, which is why 2.5-layer construction dominates the ultralight end of the market. The tradeoff is that the printed surface can feel clammy against bare arms, and it wears out sooner than a fabric liner would.
A 3-layer shell sandwiches the membrane between the face fabric and a bonded inner scrim. No loose liner, nothing to peel, everything laminated into one piece of material. It’s the most durable construction and the one to carry through brush, over rock, and under a heavy pack season after season. It’s also the heaviest and the priciest of the three.
The practical version: 2.5-layer for a shell that lives in the lid of your pack and mostly stays there, 3-layer for a shell that works for a living. Where that decision gets genuinely interesting is in where an ultralight shell gives up durability, because the gram savings come from somewhere specific and it helps to know which corner got cut.
Best Rain Jackets for Hiking, by Category
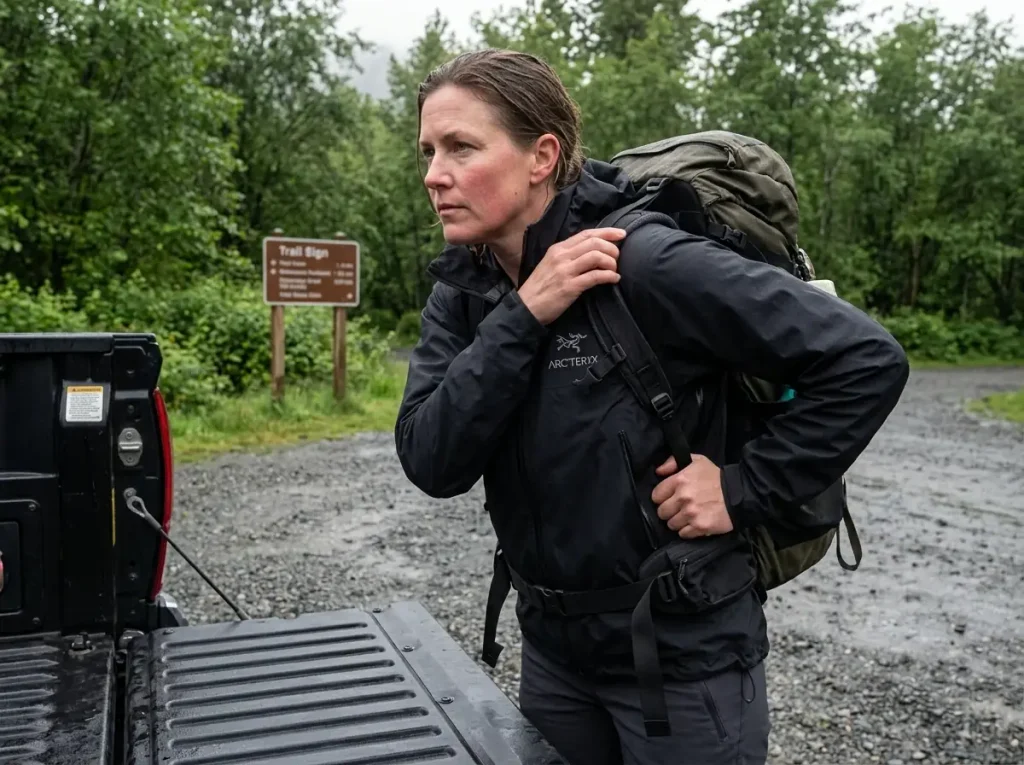
Five jackets, five different jobs. Most readers need exactly one of these and can safely ignore the other four, so instead of pretending each one suits everyone, here’s who each pick is for and who should walk past it. Every jacket below comes as a men’s and women’s pair, and every one gets an honest con, because a roundup where all five picks are wonderful is a roundup nobody should trust.
Best Overall — Outdoor Research Helium
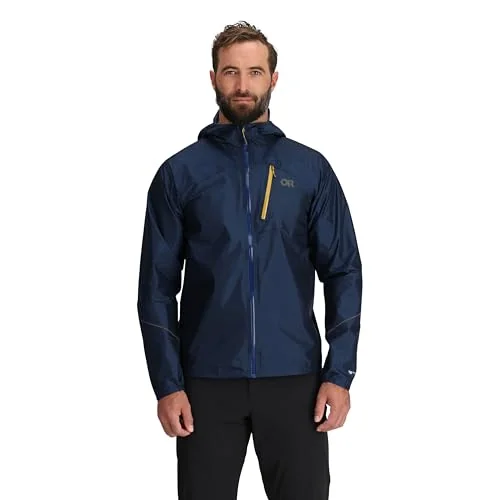
The Helium wins because of what it doesn’t make you decide. A shell that weighs roughly what a deck of cards plus a bit weighs is a shell that lives in your pack all summer, whether or not the forecast says you need it. That matters more than any single spec, because the jacket that keeps you dry is the one you brought, and hikers leave heavy shells at home constantly.
The Pertex Shield 2.5-layer build is genuinely capable in the weather most people hike in. Fully taped seams, an adjustable hood that turns with your head, and a body that stuffs into its own chest pocket into something roughly the size of a small water bottle. For day hikes, weekend overnights, and shoulder-season trips where rain is a possibility rather than a promise, it does the job without an argument.
Now the honest part, and it’s the same thing the community says about it directly: this is a fair-weather-rain jacket. Hikers who put it through back-to-back days of sustained rain report the same result, that it just wets out, even though it performs fine on shorter outings.
That’s not a defect. It’s a 2.5-layer ultralight shell being asked to do a 3-layer job. If your typical trip is a wet week in the mountains rather than a wet afternoon, look further down this list. Also worth knowing: men’s stock on this model moves in and out, so if you find your size available, that’s the moment to act rather than bookmark.
Best Budget — Marmot PreCip Eco
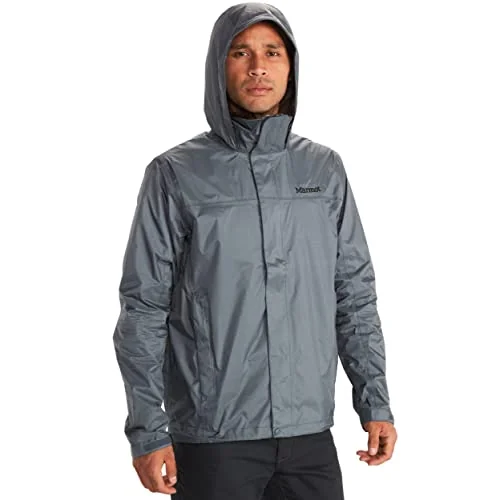
Budget rain jackets have a reputation problem, most of it earned by the twelve-dollar poncho aisle. The PreCip Eco is the reason that reputation shouldn’t apply to the whole tier. It is fully seam-taped, which is not a given at this price and is the single feature that separates an actual rain jacket from a garment that leaks at every stitch line. It has PitZips, which is the highest-value venting feature there is and one that plenty of pricier shells skip to save weight and cost.
The face fabric is 100% recycled nylon in a ripstop weave, with a PFC-free DWR treatment over Marmot’s NanoPro membrane. The PFC-free part matters beyond environmental preference: newer PFAS-free coatings generally need more attentive care to keep beading well, which makes the maintenance section further down this article more relevant to this jacket, not less.
The honest con is where the money went. A thinner face fabric abrades faster, and it abrades first at the pack-strap contact zones on the shoulders and at the hip belt. You’ll notice the DWR quitting on those two zones months before the rest of the jacket shows any wear. That’s fixable, and knowing it’s coming means you can stay ahead of it instead of assuming the jacket failed.
Best Ultralight on a Budget — FROGG TOGGS Ultra-Lite2
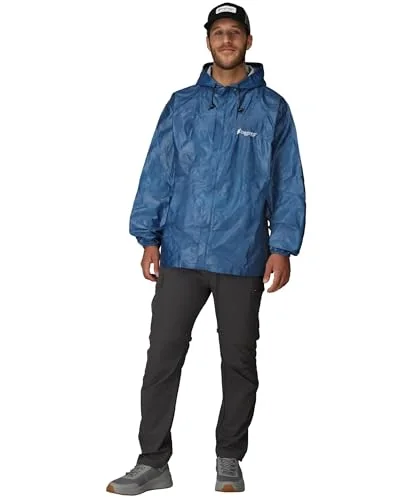
If you hike a handful of times a year and the rest of this article is starting to feel like an expensive homework assignment, stop here. The Ultra-Lite2 is the honest answer to a question nobody in the gear industry wants asked out loud: how much do you actually need to spend to not get rained on?
The construction is unusual. Instead of a woven face fabric with a membrane laminated behind it, this is a non-woven polypropylene bi-laminate with welded seams. There’s no DWR coating on the outside, which means there’s nothing to wear off and nothing to reproof. The wetting-out problem that dominates the rest of this article barely applies to it, and that’s a genuinely interesting property for something this cheap.
The honest con is durability, and it’s a big one. It tears. Push through wet brush or catch a sleeve on a branch and you’ll open a hole that no repair tape fully solves.
Treat it as semi-disposable gear, not as a jacket you’ll own for a decade. Bushwhacking will end it, sitting on rough granite will end it, and a snagged zipper pull can end it. For a shell that lives in an emergency kit or covers the occasional weekend, that’s a fair trade.
A semi-disposable shell earns its keep as your second jacket, not your only one. Experienced hikers keep the cheap one permanently stashed in the car or the daypack that never gets unpacked, so the day the forecast lies to you, there’s always a shell within reach. The one you keep swapping between bags is the one that stays home on the day you need it.
Best Premium — Arc’teryx Beta AR
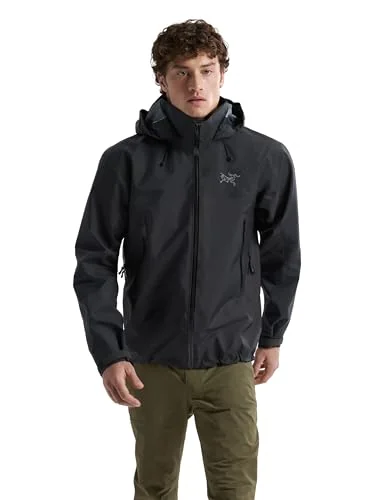
The Beta AR is worth understanding even if you never buy one, because it shows you exactly what premium money buys and, by omission, what it doesn’t.
The interesting detail is the dual-weight face fabric. Arc’teryx uses a lighter N40p-X Gore-Tex Pro across the main body and a heavier N80p-X at the shoulders and forearms. Those are the two zones where pack straps grind and where brush scrapes as you push a branch aside.
Instead of building the whole jacket out of heavy fabric, or building it all out of light fabric and accepting the wear, they put the durability precisely where the abrasion happens. That is a structural fix for the same failure that budget jackets address with a can of reproofing spray, and it’s the clearest example in this roundup of engineering you can actually point to rather than marketing you have to take on faith.
Everything else follows from the alpine brief: 3-layer Gore-Tex Pro, a helmet-compatible hood, a RECCO reflector for search and rescue, and articulation built for reaching overhead with a pack on.
The honest con is uncomfortable to write in a section that links to a product page, so here it is plainly: most weekend hikers do not need this jacket. You’d be buying durability you’ll never use up, in a shell built for exposure you’ll never sit in.
That’s not a knock on the jacket, which is excellent at its job. It’s a knock on the assumption that the most expensive pick is the best pick, and the whole next section is about that assumption. Women’s sizes on this one tend to run thin, so check availability rather than assuming your size will be there next month.
Best for Scrambling — Black Diamond Highline Stretch
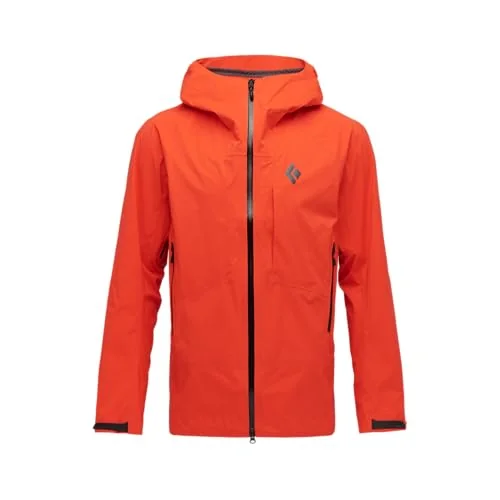
Anyone who has tried to make a high step in a stiff hardshell knows the feeling: the jacket reaches its limit before your leg does, the hem rides up, and you end up choosing between the move and the layer. The Highline solves that with a mechanical stretch nylon face fabric laminated over BD.dry, which means the stretch fabric itself gives when you reach rather than transmitting the whole load to the seams and the hem.
You feel it in three specific places. Reaching overhead for a hold. Rotating your shoulder to look back down a gully. And stepping high onto a block, where a rigid shell wants to pull the hem out from under your harness or hip belt.
The helmet-compatible hood and pit zips are standard-issue for the category, but the stretch is what you’re paying for.
The honest con is scope. This is a niche pick. If you never scramble, never wear a helmet, and never do a move that requires a full extension, the mobility premium buys you exactly nothing over a comparable shell that costs less.
It’s the clearest example in this roundup of a feature being right for a task rather than right in general. Stock on both variants tends to be thin, so treat availability as part of the decision rather than an afterthought.
Those are the five. If you want to go deeper on a specific fit, there’s a deeper men’s-specific breakdown by budget tier that covers more options at each price point, and the women’s fit guide gets into shoulder width, sleeve length and hip shaping in the detail those differences deserve. But the picks above cover the overwhelming majority of real hiking, and the rest of this article is about the part that decides whether any of them keeps working.
Why Your “Waterproof” Jacket Stops Working
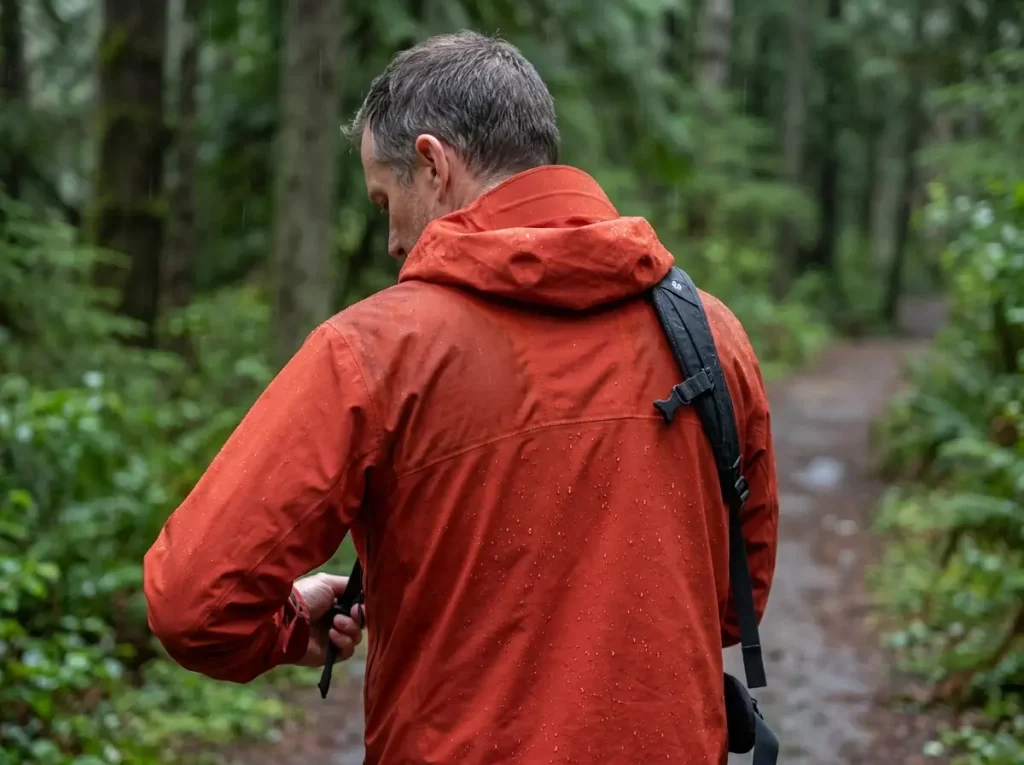
The jacket didn’t break. That’s the part almost nobody understands, and it costs people money in both directions: they replace shells that were fine, and they keep carrying shells that are done.
Here’s the failure in one sentence. The coating on the outside wore off, water stopped beading and started soaking into the outer fabric, and from the inside that feels exactly like a leak. Same clammy shoulders, same cold damp patch, same conclusion. But one of those is a maintenance job and the other is a funeral, and telling them apart is the most useful skill in this entire article.
DWR Is a Coating, Not the Waterproof Layer
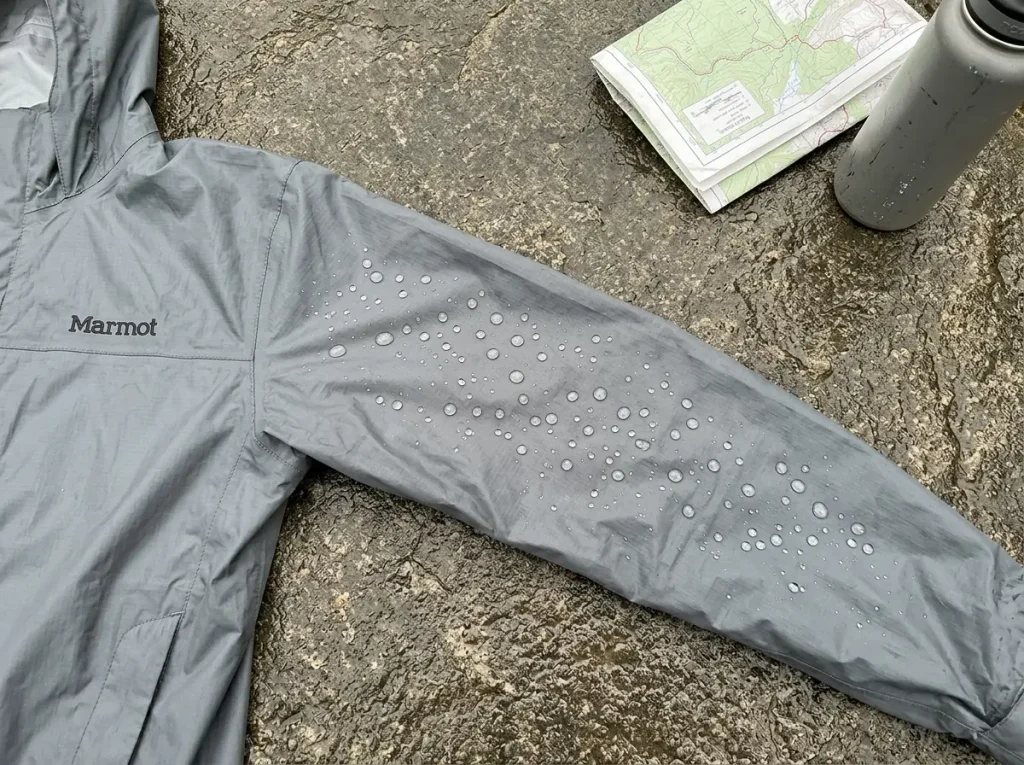
DWR stands for durable water repellent. It is a hydrophobic treatment applied to the outer face fabric, and it works by forming microscopic spikes on the fabric surface. Water lands, can’t wet the peaks and valleys of that texture, and beads up into the droplets you see rolling off a new jacket. That beading is the visual proof the DWR is alive.
DWR is not what makes your jacket waterproof. The membrane underneath does that, and it’s a separate component doing a separate job. The DWR’s actual purpose is to keep the face fabric itself from absorbing water, so the membrane can keep doing its job of passing your sweat vapor outward.
When those microscopic spikes get bent, crushed, or contaminated, they stop repelling. Water no longer beads. Instead it spreads across the face fabric and soaks in.
The membrane behind it is completely intact and still blocking every drop of rain from reaching you. And you still end up wet.
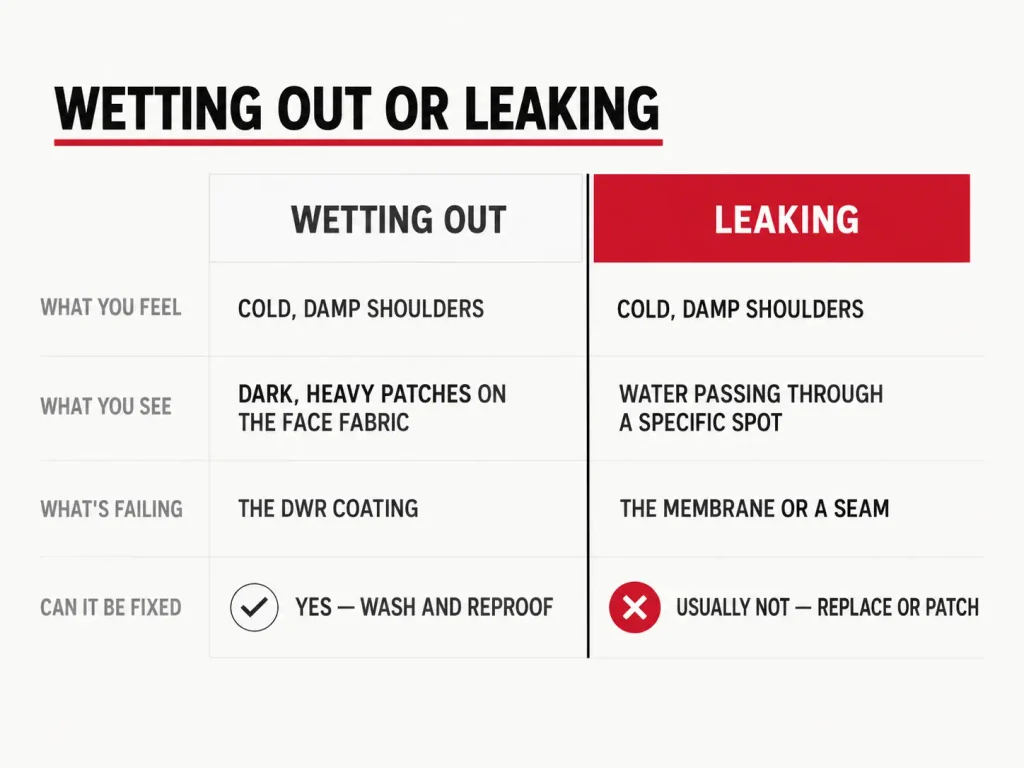
Wetting Out vs. Leaking — Two Different Failures
This is the distinction the whole section exists for.
Wetting out is the face fabric saturating. Water fills the outer fabric, and a soaked outer fabric can’t pass vapor. Your sweat has nowhere to go, so it condenses on the inside of the membrane and runs down your arms. The rain never got in. You’re wet from your own sweat, trapped by a fabric that’s holding water like a sponge. Look at the outside of the jacket and you’ll see it: dark, heavy patches where water sits flat on the fabric instead of beading.
Leaking is the membrane itself failing. Delamination, pinholes, a seam tape that has lifted, a worn spot pushed through by years of strap pressure. Water is physically passing through the jacket. From the inside, on a cold day, at mile eight, these feel identical.
They are not identical. Wetting out is fixable. Wash the jacket properly, restore the DWR, and a shell that seemed finished comes back. Leaking usually is not fixable, or is only patchable at a seam.
So before you buy a replacement, it’s worth running three tests that tell you whether it’s actually done, because the answer decides whether you’re spending an evening with a bottle of tech wash or an afternoon with a credit card.
Why the Shoulders Always Go First
DWR degrades from a specific and boring list of causes: abrasion, washing, compression in a stuff sack, body oils, sunscreen, and bug spray. Notice that most of that list is just normal use. This is mechanical wear, not a manufacturing defect, and no jacket at any price is exempt.
Abrasion is the biggest one, and it explains the pattern everyone sees. Pack straps sit on your shoulders and grind with every step. A hip belt does the same at your waist. Thousands of small rubbing motions per mile, on the two spots that carry all the load.
That’s why the shoulders and hips go first, and why the sleeves and lower back stay beading long after the rest has quit.
Compression matters more than people expect. Stuffing a shell into a tight pocket in your pack lid crushes the DWR texture flat. It usually recovers with heat, which is the single most useful thing to know about maintenance, but a jacket that lives permanently compressed in a stuff sack is a jacket whose coating is being ironed down every day of the trip.
Here’s the anchor case, from a thread that comes up in some form every rainy season. A hiker had a two-year-old Mountain Hardwear Quasar Lite, sprayed it heavily with Nikwax, and the shoulders still wet out fast. His question, and it’s the one every jacket owner eventually asks: is it worth trying more spray, or is it never gonna be the same?
The honest answer is both. Reproofing buys back a lot, often more than people expect, and a shell that seems finished can perform close to new after a proper wash and reproof.
But it does not buy back everything, and it buys back the least at the shoulders, because what’s worn there isn’t only the coating. The face fabric fibers themselves have been abraded by years of strap pressure.
A new coating on damaged fibers doesn’t grip the way it does on new fabric. It’ll bead again. It won’t bead as long.
If you want the fix done right rather than done twice, the heat-first protocol for reactivating DWR is where to start, because most people skip the heat step and then conclude the reproofer didn’t work.
Run the shoulder test at home before every wet season. Hold the jacket under a running tap and watch just the shoulder panels. If water beads and rolls, you’re fine for another season. If it darkens and spreads while the sleeves still bead, that’s your reproofing window, and catching it there means one wash instead of a ruined trip.
There’s an escape hatch worth knowing about, and hikers track it closely because it isn’t marketing. Non-absorbent face constructions, the ShakeDry style where the membrane itself is the outer surface, have no DWR coating to wear off and no face fabric to saturate. They genuinely don’t wet out the way conventional shells do.
The cost is durability, because that exposed membrane is fragile in ways a nylon face fabric isn’t, and price, because the construction is expensive. It’s a real tradeoff, not a free upgrade.
Whichever direction you go, the DWR question is a schedule problem more than a product problem. Getting on a washing and reproofing schedule for PFAS-free shells does more for how your jacket performs in year three than anything you can buy in year one.
Budget vs. Premium: What You’re Actually Paying For
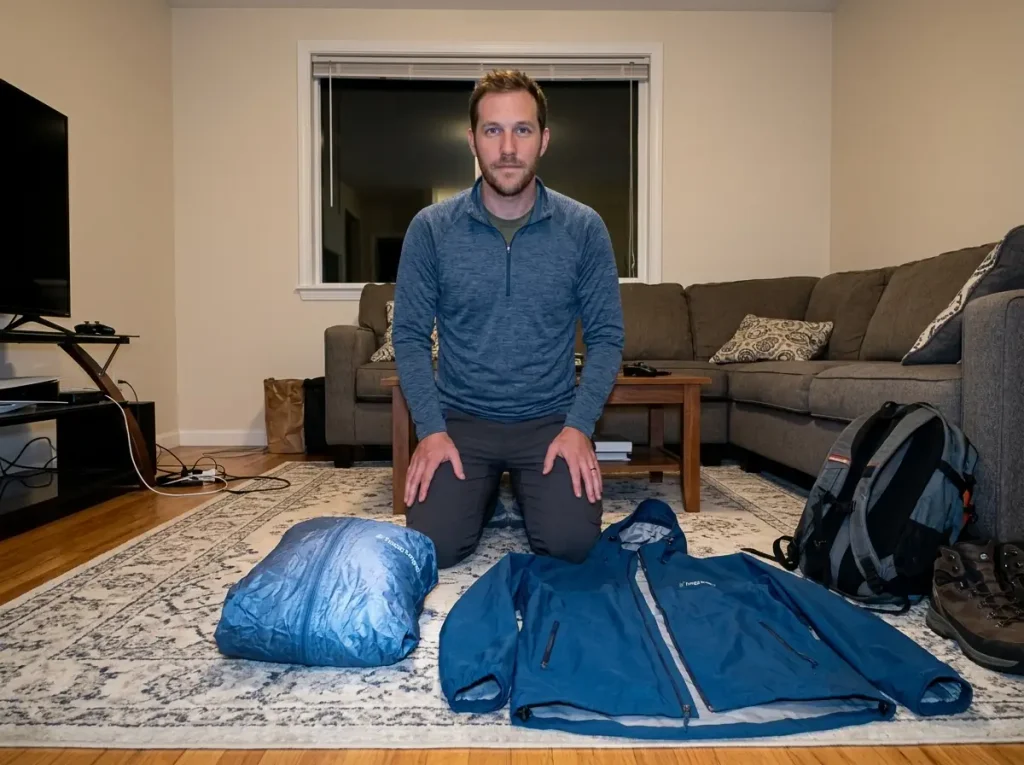
Every gear roundup puts a budget pick and a premium pick side by side and quietly lets you draw the obvious conclusion. More money, more better. That conclusion is wrong often enough to be worth attacking directly, because a lot of hikers are buying durability they will never use up.
What the Extra Money Actually Buys
Four things, and it’s a shorter list than the price gap suggests.
Face fabric durability. Higher denier fabrics, and in the best cases dual-weight construction like the Beta AR’s heavier panels at the shoulders and forearms. This is real and it’s the biggest single item on the list. It’s also the one that only pays back over years of hard use.
Articulation and cut. Premium shells are patterned to move. Sleeves that don’t lift the hem when you reach, shoulders that rotate, a body that doesn’t bind under a pack. You feel this immediately in a fitting room and continuously on trail.
Hood engineering. Helmet compatibility, a stiffened brim that holds its shape in wind, and adjusters that let the hood turn with your head instead of leaving you staring at the inside of the fabric.
Service life before the DWR question turns terminal. A tougher face fabric abrades slower, which means more reproofing cycles before the fibers themselves are worn.
Notice what isn’t on that list: waterproofing. A premium shell does not keep rain out better than a mid-tier shell in any way a day hiker will perceive.
Both are membranes. Both are seam-taped. Both stop rain. The money buys longevity and mobility, not dryness.
When a Budget Shell Is Genuinely Enough
The budget tier is not a compromise on the fundamentals, and the PreCip Eco is the proof. Fully taped seams and real pit zips are the same construction logic as shells several times the price. The face fabric is thinner. That’s the difference.
So the honest call: if you day hike a few weekends a month in temperate rain, a budget or mid-tier shell will comfortably outlast your interest in it. You’ll want a different jacket for reasons that have nothing to do with failure. A better fit, a color you like more, a new trip that changed your priorities. The jacket will still be working.
This is the part of the article that costs money to write, so here it is without hedging. If the trips in your actual calendar are day hikes and the occasional overnight, buy the budget or mid-tier shell, put the difference toward better rain pants or a trip, and revisit the question when your hiking changes. That’s not a compromise. That’s matching the tool to the job.
When Premium Earns It
There’s a real counter-case, and it comes from the same community threads. Hikers running back-to-back days of prolonged rain report their everyday mid-tier shell just wets out, even though it performs fine on short outings. That’s not a complaint about a bad jacket. It’s a lighter shell reaching the end of what it was built for.
If your trips look like that, the upgrade is genuine. Premium earns its cost in four situations specifically: sustained multi-day rain where the shell never gets to dry out, bushwhacking and off-trail travel where abrasion is constant, alpine exposure where the shell is also your wind layer for hours at a time, and helmet use, where hood geometry stops being a preference and starts being a requirement.
Everyone else is buying insurance against a trip they aren’t taking.
And here’s the thing nobody puts in a buying guide: a worn-out premium jacket performs worse than a new budget one. Over the life of a shell, maintenance beats price tier, and it isn’t close.
A five-year-old flagship that’s never been washed with tech wash and never been reproofed will wet out on the shoulders faster than a properly cared-for budget shell in its second season. The most expensive jacket on this page loses to a can of reproofer and twenty minutes of attention. Which is why the care habits that decide how long any shell lasts are a better investment than the upgrade, for most people, most of the time.
Beating the Sauna Effect: Venting Before You’re Soaked
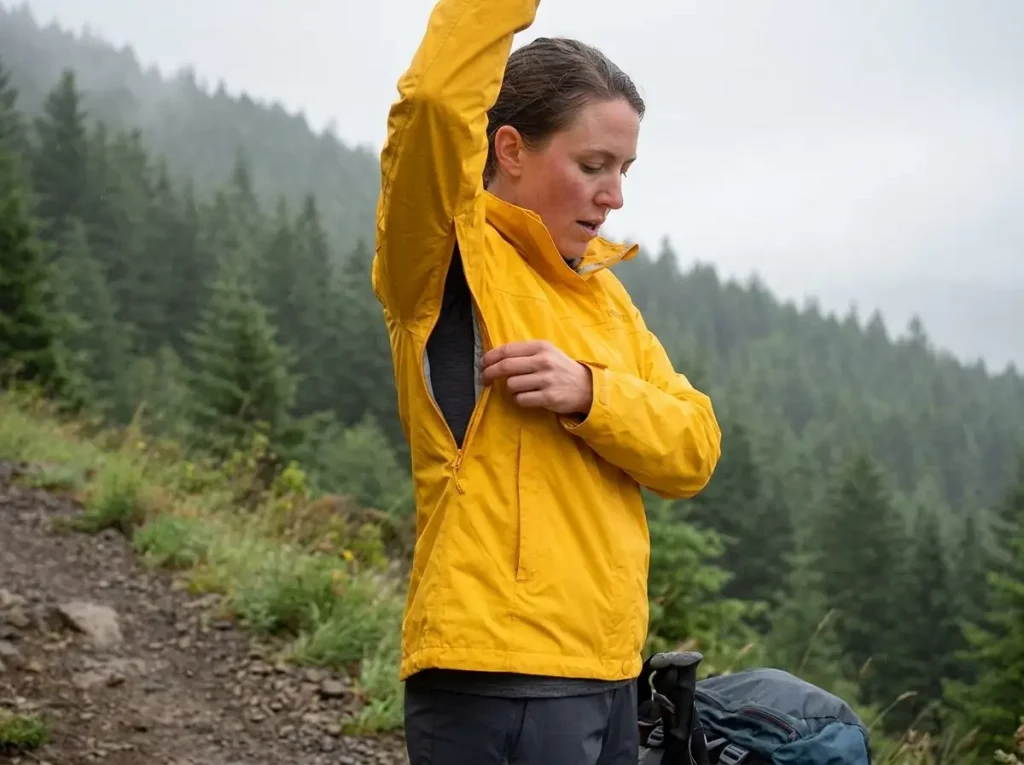
Every competitor names breathability as a spec. Almost nobody tells you it’s a skill.
Here’s the rule that changes how a rain jacket feels: you vent before you’re sweating, not after. Once you’re wet inside, no membrane on earth catches you up. That single habit does more for staying dry on a climb than any fabric upgrade you can buy, and it costs nothing.
Vent Before the Climb, Not at the Top
A membrane moves vapor at a fixed rate. That’s the whole physics of it. Every jacket has a ceiling on how many grams per square meter it can pass in an hour, and that ceiling doesn’t care how hard you’re working. When your sweat output climbs above that ceiling, the excess has nowhere to go, and it starts condensing on the inside of the shell.
The critical part: once you’ve out-produced the membrane, you’re behind for the rest of the day. That vapor is now liquid water sitting on the inside of your jacket and soaking into your base layer. The membrane can’t un-condense it. It can only pass vapor, and now you’re carrying water.
So the technique is preventive. Open the pit zips at the bottom of the climb, before you’re warm, before you feel the first bead of sweat on your back. It feels wrong the first few times because you’re cold for the first two minutes. Then you climb, and you stay ahead of it, and at the top you’re dry instead of steaming.
The same logic runs in reverse at the top. Zip up before you stop, not after you’ve cooled down. Getting cold and then adding insulation means warming a wet base layer with body heat, which is slow and miserable. Closing up while you’re still generating heat means you keep it.
Pit Zips vs. Pocket Vents — Different Jobs
Marketing treats every vent as equivalent. Field use doesn’t.
Pit zips, or pit vents if the brand prefers that name, are a climbing tool. They sit directly over the hottest, wettest part of your torso, and they open a channel where air moves as your arms swing. They work while you’re moving, under load, going uphill. That’s the exact moment breathability matters most and the exact moment a membrane is most likely to be overwhelmed.
Pocket vents, the mesh-backed hand pockets that unzip for airflow, are a rest-stop tool. A detailed field review of the REI Drypoint GTX makes the distinction precisely: ventilated pockets work for dumping heat when you’re stationary, and they work best in conjunction with unzipping the main zipper. That’s a description of a break, not a climb. With a hip belt buckled over them and your arms swinging past, hand-pocket vents move very little air while you’re actually walking.
Both are useful. They’re just not substitutes. A jacket with pocket vents and no pit zips will feel fine in the shop and let you down on the first hot climb, which is why the absence of pit zips is the single most common reason an otherwise good shell ends up unworn at the back of a closet.
Pace and Layers as Ventilation
Two more controls, and neither one is on a spec sheet.
Pace is a venting control. Slowing down on a climb in a shell does more for staying dry than any fabric upgrade. Your vapor output scales with effort, so backing off ten percent on the uphill can drop you back under the membrane’s ceiling. Experienced hikers do this instinctively in rain and don’t think of it as gear management, but that’s exactly what it is.
Layer count under the shell matters more than most people think. A thick fleece under a shell traps vapor before it ever reaches the membrane, in the dead air between the fabrics. The membrane can’t move what never arrives. In cool rain with sustained effort, a thin base layer under the shell often keeps you drier than a base plus a mid layer, because you’re generating enough heat to stay warm anyway and the vapor has a clear path out. Getting the layers under the shell right is at least half of what people think is a jacket problem.
The hood and hem are vents too, and they’re free. Dropping the hood on a sheltered climb releases a surprising amount of heat, since your head is a major radiator and a hood traps everything against your neck. Loosening the hem drawcord lets air move up from below as you walk. On a climb through trees where the rain is light and mostly stopped by canopy, the combination of dropped hood, open pit zips and loose hem turns a sauna into something wearable.
Features That Actually Matter on Trail
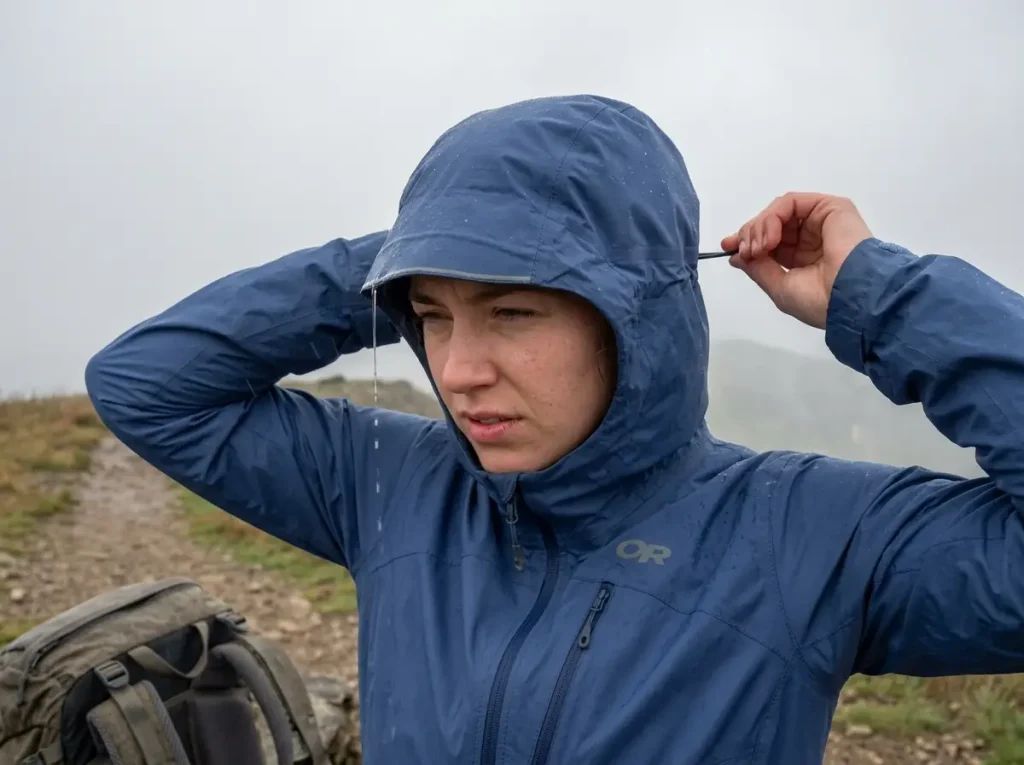
A jacket’s feature list is written by marketing. The short version from people who walk in these things: the hood, the pit zips, and where the pockets sit relative to a hip belt. Almost everything else is noise on a spec sheet.
The Hood Decides Whether You’ll Wear It
The hood is the feature that determines whether the jacket stays on. A bad hood is genuinely infuriating in a way no other feature manages.
You turn your head to check the trail and the hood doesn’t turn with you, so you’re staring at the inside of the fabric. Rain drips off the front edge straight onto your face. You give up, push it back, and get a wet head.
Three things separate a good hood from a bad one. A brimmed hood with a stiffened edge that holds its shape in wind and sheds water forward instead of onto your nose. Rear volume adjustment, usually a cord or tab at the back, which is what makes the hood grip your head enough to turn with it. And side adjusters that pull the opening in around your face without closing your peripheral vision.
Here’s the counterintuitive part that gets missed. A helmet-compatible hood is not automatically the better hood. It’s a bigger hood, designed to fit over a climbing or ski helmet. On a bare head, that extra volume is dead space that flops, catches wind, and cinches down into an odd shape.
If you don’t wear a helmet on the terrain you hike, a well-shaped standard hood beats a helmet-compatible one every time. That’s the whole logic behind the Highline and the Beta AR being niche picks rather than universal ones.
Pit Zips and Pocket Placement
Pit zips got their full argument in the previous section, so the short version: they’re the highest-value feature on the jacket for anyone who climbs with a pack, and their absence is what makes an otherwise good shell unwearable on a hot ascent.
Pocket placement is the detail spec sheets never flag and hip belts punish immediately. Hand pockets positioned at the natural hip line sit directly under a loaded hip belt. With a pack on, you cannot get into them, and anything already in them is being pressed into your hip for the next eight miles. That’s the single most common design failure in hiking-branded rain jackets, and you can’t detect it in a shop unless you try the jacket on with a pack.
What works instead: a chest pocket, which stays clear of both the hip belt and the pack straps, and hand pockets mounted higher than a fashion jacket would put them, so the opening clears a buckled belt. Some shells also use one interior mesh dump pocket, big enough for a hat and gloves, which is more useful on trail than two badly placed hand pockets.
Try any shell on with your loaded pack before you commit. Buckle the hip belt, reach overhead, turn your head twice with the hood up, and try to open both hand pockets. Four moves, thirty seconds, and they catch every fit problem that only shows up on mile three. Shop staff will not find this weird.
Seams, Cuffs and Hems — the Boring Ones That Matter
Taped seams are the difference between a rain jacket and a wind jacket with ambitions. Every stitch line is a row of needle holes through a waterproof fabric, and tape is what seals them. The main zipper needs the same treatment, either a waterproof zipper (a YKK AquaGuard zipper is the one you’ll see named most often) or a storm flap covering a standard one. Both work. A bare zipper with neither is where water walks in. This is nearly universal now, but the distinction between fully taped and critically taped is real and it’s easy to miss. Critically taped means only the seams the manufacturer considered high-exposure are sealed. Fully taped means all of them. Only one of those is waterproof everywhere, and on a long wet day the untaped seams are where the water finds you.
Cuff adjusters matter more than they look like they should. A cuff that seals down over a glove keeps water from running down your forearm every time you raise your arm to a trekking pole or a hold. A loose cuff funnels it straight to your elbow.
The hem adjuster is the quiet hero. Without a hem drawcord, a shell balloons in wind and pumps cold air up your back with every gust, which undoes the wind resistance you’re wearing the jacket for. Cinch the hem and the whole garment settles down and works. It’s a two-second adjustment that most people never make.
A drop hem, cut longer at the back than the front, does the same job from a different direction. It keeps your lower back covered when you lean forward under a pack, which is exactly when a level hem rides up and exposes the one part of you that’s hardest to warm back up.
All three of these are also the parts that suffer most from bad washing habits. Tape lifts when it’s washed too hot or with the wrong detergent, and elastic dies in a machine dryer set high. If you’re going to own a technical shell for years, washing a Gore-Tex shell without wrecking it is the difference between a jacket with a decade in it and one with three seasons.
Fit and Layering: Getting the Size Right
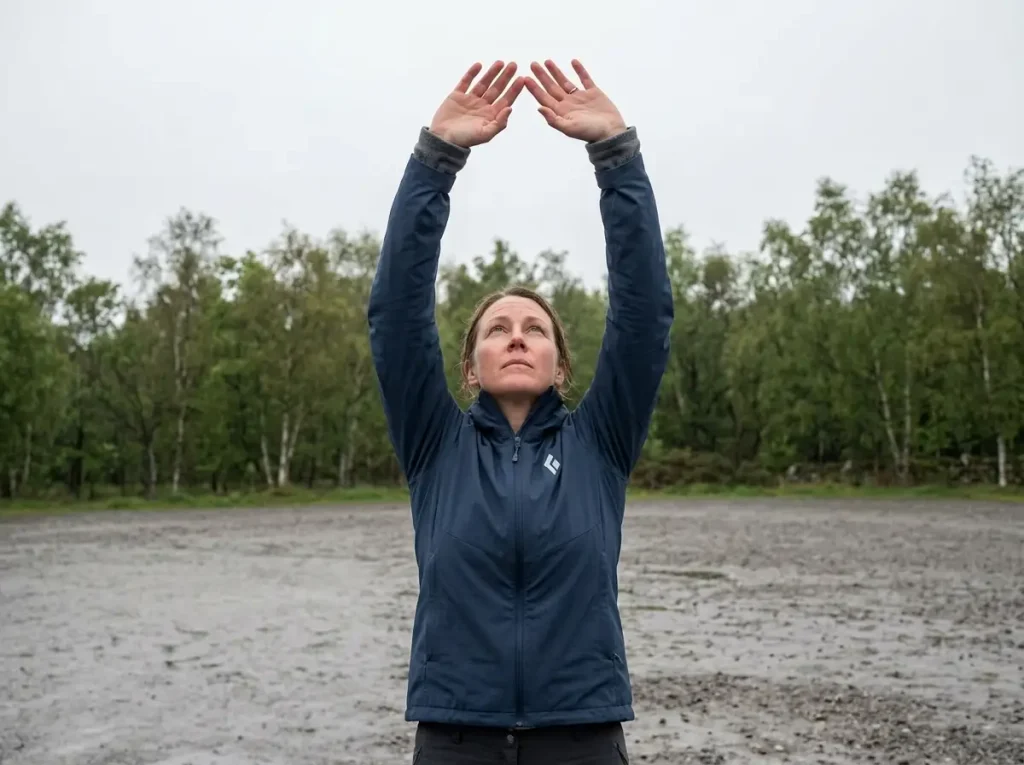
The jacket fits perfectly in the shop over a t-shirt. Then it’s October, you put a fleece under it, and you can’t lift your arms. That’s the whole sizing problem in one sentence, and it explains most of the shells sitting unworn in closets.
The starting point is understanding what the shell’s job is inside the system. The American Hiking Society recommends a packable, low-insulation outer shell as your primary defense against changing weather, which is a precise way of saying the shell is not supposed to keep you warm.
Insulation comes from underneath. The shell keeps rain and wind off the insulation so it can do its job. Which means sizing the shell is really about sizing around everything else in your layering system, whether that’s a single base layer or a base plus a fleece or a puffy jacket.
Size for Your Coldest Layer, Not Your Warmest Day
Standard practice among experienced backpackers is to size the shell one notch up specifically so a base layer plus a mid layer fits underneath without compression. Not two notches, which gives you a flapping tent that catches wind and hangs badly. One.
The failure mode people miss is compression of insulation. A puffy or a fleece works by trapping air in loft. Squash that loft flat under a too-tight shell and you’ve lost most of the warmth you’re carrying, while still carrying all the weight. The shell’s job includes leaving the loft alone, and a jacket that’s slightly too small quietly cancels the insulation you packed.
There’s a real tradeoff on the other side. A roomier shell has more dead air inside it, which takes longer to warm and moves more when you walk. That’s a small cost against the alternative of a shell you physically can’t wear in the conditions you bought it for.
The Reach Test
Two moves in a fitting room, done with whatever you’d actually wear underneath.
Raise both arms straight overhead. Watch the cuffs and watch the hem. If the cuffs slide up past your wrists, the sleeves are too short, and every time you reach on trail you’re exposing bare forearm to rain that then runs down inside the sleeve. If the hem lifts above where your hip belt sits, the body is too short, and you’ve just found the gap where rain gets in and where your lower back gets cold.
Then twist. Rotate your torso as if you’re looking back down a trail, and reach across your body. If the fabric binds across the shoulders or pulls the hem sideways, the cut is wrong for you regardless of what the size label says.
Good shells solve this with articulated sleeves and gusseted underarms, which is patterning that builds the bend into the garment so the fabric doesn’t have to stretch to accommodate it. You can feel the difference in ten seconds. There’s more to get wrong here than most people expect, and four sizing mistakes that leave you cold covers the ones that show up at the worst possible moment.
Athletic vs. Roomy Cut
Athletic fit, sometimes called a trim cut, hugs the body. Less dead air, less flap in wind, better vapor transport because the fabric sits closer to your base layer. It’s the right call if you’ll mostly wear the shell over one thin layer, which describes summer hiking, trail running, and fast-and-light days.
Roomy fit, or a boxy fit at the extreme, leaves space. It’s the right call if a fleece under the shell is your normal configuration, which describes shoulder season, alpine trips, and anyone who runs cold.
Neither is better. They’re answers to different questions, and the question is what you’ll wear underneath most of the time.
One last thing on fit, and it’s not a marketing exercise. Women’s-specific cuts differ in shoulder width, sleeve length, torso length, and hip shaping, and those are structural differences that change how a shell wears under a pack. A women’s shell isn’t a men’s shell in different colors, which is exactly why every pick in this article comes as a pair rather than as a single unisex recommendation with an apology attached.
When You Might Not Need a Rain Jacket At All

Here’s the section no gear roundup writes, because it doesn’t sell jackets. Sometimes the shell makes you wetter than the rain would.
Warm Rain Is the Case Against the Shell
Run the physics. In warm rain with little wind, climbing hard, your vapor output can exceed what any membrane can move, by a lot. The membrane hits its ceiling, the excess condenses inside, and you arrive at the top soaked.
You would have been soaked without the jacket too, from rain instead of sweat. But the sweat-soaked version is hotter, heavier, and smells worse, and you spent the climb inside a plastic bag to get there.
That’s the calculation experienced hikers make without announcing it. On a warm summer afternoon, light steady rain, no wind, moving uphill: the shell often loses. So they hike in a base layer, accept being wet, and keep the jacket accessible for the moment the situation changes.
Two things make this work rather than reckless. First, you have to actually be warm, generating heat, and moving. Second, the shell has to be somewhere you can reach it in fifteen seconds, not buried at the bottom of the pack under the food bag.
Thru-hikers take a version of this bargain deliberately. They accept getting wet and cold on some stretches in exchange for weight savings, and they know that’s what they’re choosing.
That framing is what separates a gear list from a decision. The question was never “is a rain jacket good.” It’s “what is this specific jacket doing for me on this specific afternoon,” and sometimes the answer is “not enough to justify wearing it.”
The Wind Layer Alternative
If the shell is losing on breathability but you still want something on, there are two real alternatives that a jacket-only framing hides.
A wind shell is the first. A few ounces of tightly woven nylon with no membrane, it blocks wind and sheds light precipitation for a while, and it breathes far better than any waterproof fabric because it isn’t trying to be waterproof. For light drizzle in cool air, or for the specific problem of wind stripping heat off a wet base layer, a wind shell is often the better tool. Something in the neighborhood of a breathable softshell does the same job with more warmth and more abrasion resistance, at more weight.
The second is stranger and works better than people expect. On exposed, low-angle trail without much wind, an umbrella instead of a shell keeps rain off your head and torso while leaving you completely open to airflow. No sauna, no wetting out, nothing to reproof.
It fails immediately in wind, it’s useless when you need both hands on rock, and it looks ridiculous. It also keeps people dry on long rainy road walks and desert stretches where a shell would cook them, which is why it survives in ultralight circles despite the mockery.
Where This Stops Being True
This whole section has an expiration condition, and it’s worth stating as flatly as possible: it only works while it’s warm.
Once wind enters the picture, the math flips hard. Wind on a wet base layer strips heat at a rate that has nothing to do with how hard you’re working, and it does it fastest at exactly the moment you stop moving. Once air temperature drops, the margin that made “just get wet” a reasonable choice disappears.
The tell is simple. If stopping for five minutes would make you cold, you’re already past the point where hiking wet is a comfort decision. Put the shell on. At that point it isn’t about staying comfortable, and that’s what the next section is about.
Rain Gear as a Safety Call, Not Just a Comfort Call
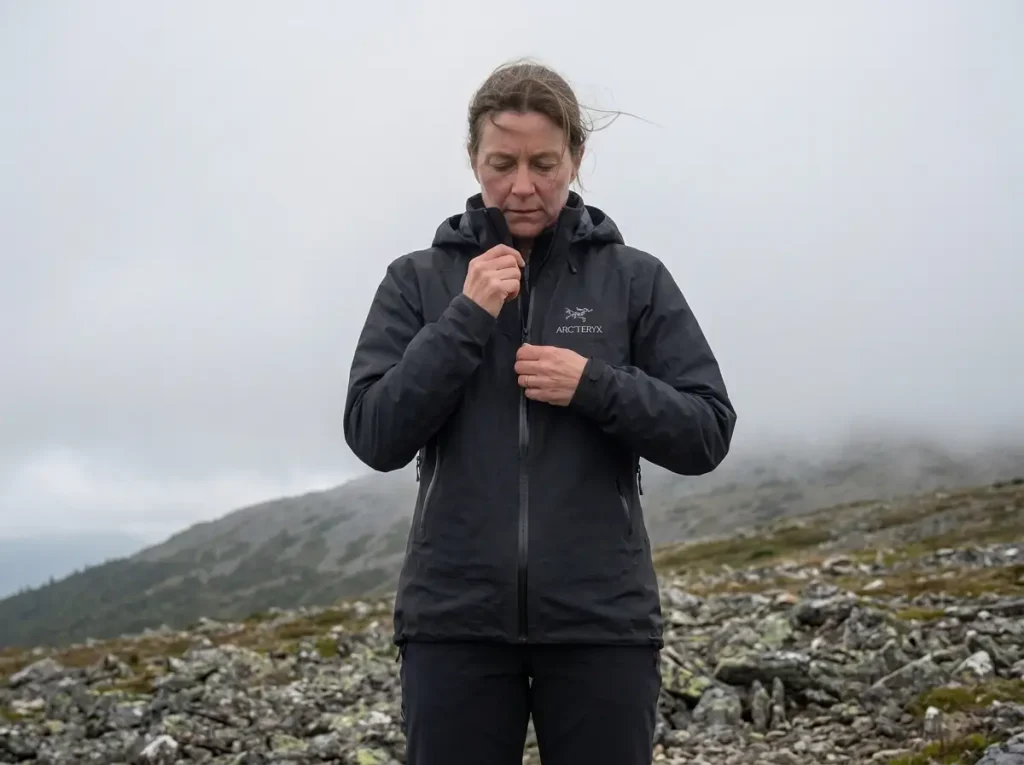
Weather changes fast above treeline. Sunny to hail in twenty minutes is not an exaggeration, it’s a Tuesday in the mountains, and it’s the reason the shell in your pack is not the same category of item as the snacks next to it.
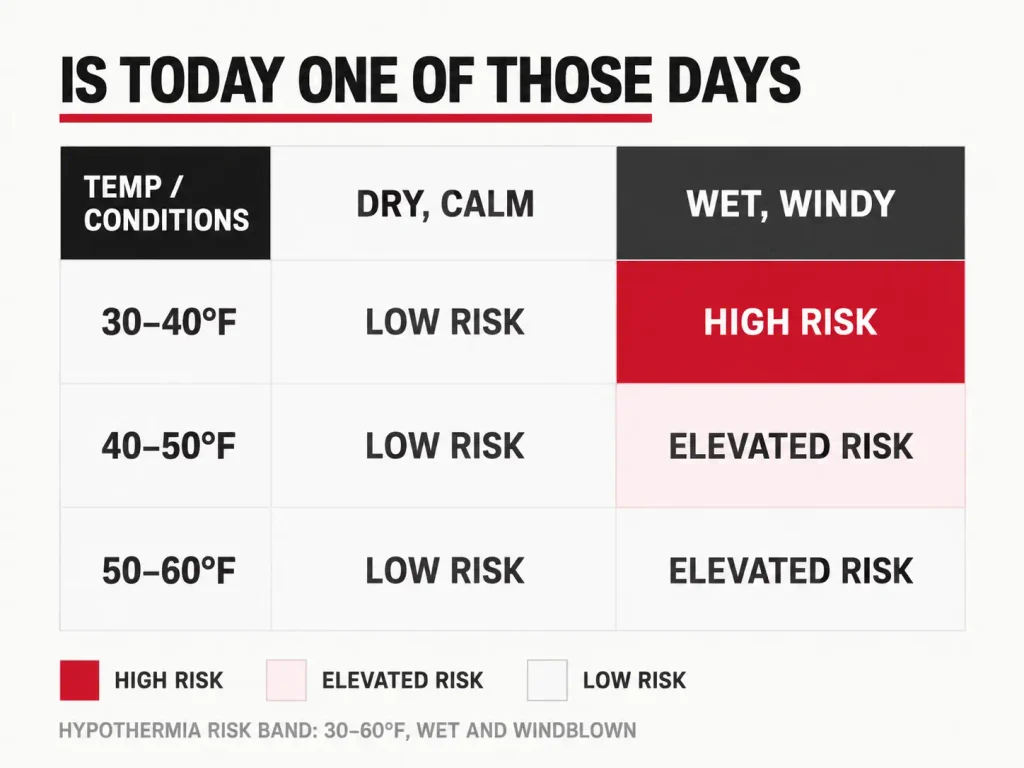
Most hikers have the risk intuition exactly backwards. A 50°F drizzle with wind is a worse situation than a dry 20°F day, and almost nobody believes that until they’ve been cold in the wrong one.
Wet Plus Wind Beats Cold Alone
The number that reframes this: hypothermia can set in at temperatures as mild as 50°F when rain and wind are involved. The risk band runs roughly 30°F to 60°F when wet and wind are in play. Not below freezing. Fifty degrees, in the rain, in a breeze.
Cold alone isn’t the trigger. Wet plus wind is. Dry air at 20°F is a known quantity you dress for, and everyone does. Wet clothing at 45°F with a 15 mph wind pulls heat out of you far faster than dry air at 20°F, and hardly anyone dresses for it, because it doesn’t feel like a serious day when you’re standing at the trailhead in the sun.
Wind chill is the accelerator. Wind chill can turn a survivable temperature into a frostbite risk within minutes, and the mechanism is straightforward: moving air strips away the thin layer of warmed air your skin maintains and replaces it continuously with cold air. At 0°F with no wind, exposed skin takes over half an hour to reach frostbite risk. Add 15 mph and the same air behaves like -19°F, and the time to risk drops to minutes.
Above treeline, there’s no canopy, no windbreak, and nothing to duck behind. That’s the environment where the shell stops being a rain layer that also blocks wind and becomes a wind layer that also handles rain.
A Wet-Out Jacket Stops Blocking Wind
This is where the maintenance section from earlier becomes a safety section, and it’s the single most useful connection in this article.
A jacket that has fully wet out is carrying water in its face fabric. That saturated fabric is in direct contact with wind, and wet fabric against wind is an efficient heat exchanger, pulling warmth out of you through a shell you’re wearing specifically to prevent that.
The membrane underneath is still technically waterproof. It’s still blocking rain. And you’re losing heat anyway.
Now remember where a jacket wets out first. The shoulders, where the pack straps wore the DWR off. That’s directly over your upper torso, at the top of your core where you lose heat fastest.
So the failure chain runs: pack straps abrade the DWR, the shoulders wet out, the wet panels stop insulating against wind, and you get cold from the inside of a jacket that is functioning exactly as designed. On a valley trail in July that’s an annoyance. At 11,000 feet in a 40°F squall, it’s the thing that turns a hard day into a serious one. The reproofing job you’ve been putting off is not a cosmetic issue.
Carrying It Even When the Forecast Looks Fine
Two practical rules follow, and both mirror the venting logic from earlier.
The shell lives in the top of the pack, in the lid or the outside pocket, where you can get it without taking the pack off and without unpacking anything. A jacket at the bottom of the bag under the tent is a jacket you will not put on until you’re already cold, because getting it out means stopping, kneeling in the rain, and digging.
And it goes on before you’re cold, not after. Same proactive principle as venting: once you’re cold and wet, you’re spending body heat you don’t have to spare on warming a soaked layer. Adding the shell while you’re still warm means it holds what you’ve got.
This is also why “do I really need to carry it” has a different answer above treeline than on a shaded valley trail in July. Down low, in trees, in summer, with a car two miles away, the answer is often genuinely no. Above treeline, on a ridge, hours from shelter, with a forecast that was written before this morning’s convection got going, the answer is yes, and it stays yes on the day nothing happens. The rest of the system matters too: the rain system below the waist is what stops wet legs from feeding the same heat loss, and keeping the contents of your pack dry is what guarantees the dry layer you’re carrying is still dry when you actually need it.
Conclusion
Three things to carry out of this, and one job for the weekend.
Match both numbers to the trips you actually take. Waterproof rating tells you what the fabric survives, breathability tells you whether you can stand wearing it uphill, and buying the highest rating on the rack solves one problem while creating the other.
Your jacket will stop beading water long before it stops being waterproof. That’s the DWR, it’s a coating, and it’s fixable. Knowing the difference between wetting out and leaking is what saves you from replacing a jacket that had years left.
Above treeline, this is a wind layer that also handles rain. Pack it on the days the forecast looks fine, keep it where you can reach it, and put it on before you’re cold rather than after.
Here’s the job. Before your next hike, take last season’s jacket into the yard and run water over the shoulders while you watch. If it beads and rolls, you’re set. If it darkens and soaks in while the sleeves still bead, you have a reproofing job on your hands, not a shopping problem, and it’ll cost you an evening instead of a paycheck.
Frequently Asked Questions
01What is the best waterproof jacket for hiking?
For most hikers, the Outdoor Research Helium is the best all-around pick: light enough to always carry, durable enough for regular use, and capable in the weather most people hike in. The right answer depends on trip length and conditions, not on the highest waterproof rating available.
02Is anything better than Gore-Tex?
Yes, for specific jobs. Competing membranes match or beat Gore-Tex on breathability or stretch, and non-absorbent constructions beat it on wetting out because there is no DWR coating to wear off. Gore-Tex Pro still leads on durability, and the alternatives usually cost you something there.
03What should I wear when hiking in the rain?
A moisture-wicking base layer, an optional mid layer for warmth, and a waterproof shell over both. Size the shell to fit that mid layer without compressing it, and skip cotton entirely, since wet cotton holds water against your skin and pulls heat out of you.
04How do I stop my rain jacket from wetting out?
Wash it with a technical cleaner, then reactivate the DWR with low heat or a spray-on reproofer. The honest limit: once the face fabric itself is abraded at the shoulders by pack straps, reproofing only buys back part of the performance, and it never lasts as long there.

I've spent more than a decade researching hiking gear and trail technique. I read the specs, the forum threads and the long-term reviews, and every pick here comes with what it gets wrong.
End of the trail
You read every mile of this one. Here's where the trail goes next.