In this article
There’s a hunter on the Rokslide forums who owns two complete sets of the same rain gear. Same gear, two sizes, because the smaller set fits perfectly over a couple of midweight layers and turns into a straitjacket the moment a big puffy goes underneath. If you’ve ever stopped at a windy viewpoint, pulled an insulated layer on under your shell, and felt the shoulders go from fine to fighting you, you know the problem.
Nobody solves it, because every piece of advice on rain jacket sizing for layering stops at “size up,” which is not a number and not a method. Here’s the process instead: measure over the layers you really hike in, add the right number of inches, test the fit moving, and know when sizing up costs more than it buys.
Why Your Normal Jacket Size Fails Over Layers
Nothing breaks, which is the confusing part. The jacket was this size in the store and it’s this size at mile six, but somewhere between the parking lot and the ridge it stopped working. You added a fleece at the first cold gust, then a puffy when you stopped moving, and the shell that fit fine over a t-shirt is doing a job it was never measured for.
Most people buy a rain jacket the way they buy a hoodie: they know their letter, they grab that letter, they leave. That’s the most common sizing error there is, because the shell gets bought in isolation instead of as the outermost piece of a layering system. Understanding how the pieces of a rain gear system fit together changes the question from “what size am I” to “what size is my stack.”
Because layers don’t add a little. A base layer plus a midweight fleece adds roughly 2 to 4 inches of effective chest circumference, and a puffy jacket on top of that puts you at 4 to 6 inches or more. That’s not a rounding error the fabric absorbs. On most brand charts, 6 inches is a full size.
Then there’s the bulk nobody counts: everything worn between the layers and the shell. One poster on that hunting forum, listing what his rain gear goes over, mentioned “jackets, puffins, sometimes bino harness,” and the thread’s author replied flatly: “I didn’t even think about a bino harness.” A bino harness is hunting kit, but it translates. For a hiker it’s pack shoulder straps and a loaded hip belt in the same space, and a bare-chest measurement accounts for none of it.
The fit you evaluate standing still in a fitting room is not the fit you hike in. A trim cut looks sharp in the mirror and reads as “the right size” precisely because standing motionless is the one activity it’s good at. Raise your arms before you look in the mirror, not after.
The stake isn’t comfort, which is where most sizing advice quietly stops. Washington Trails Association makes a point worth sitting with: hypothermia usually arrives as a secondary problem, after something else has gone sideways and stretched your exposure time. A twisted ankle turns a three-hour hike into a six-hour one, and that’s when how quickly wet, restricted layering can tip into hypothermia stops being theoretical. A shell you can’t fit a dry fleece under can’t do its half of the job.
Measure Over the Layers You Actually Hike In
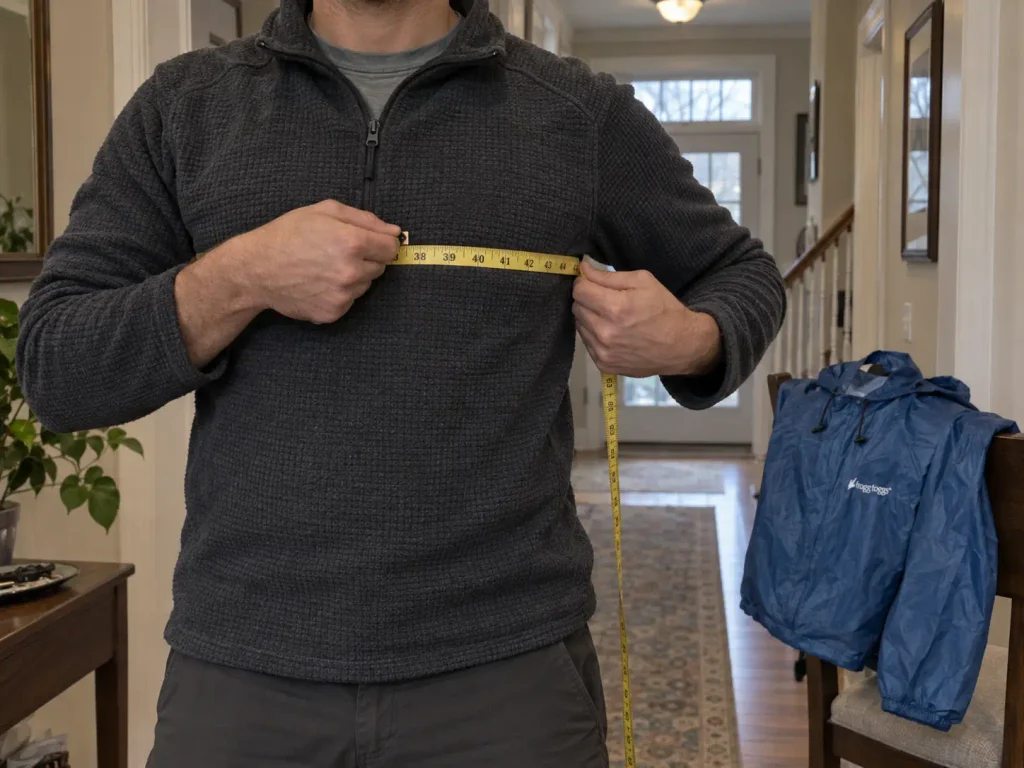
Everyone measures bare-chested in a bathroom, then buys a jacket they’ll never once wear over bare skin. Measure the way you’ll use the thing.
Put the Stack On First
Wear the real combo. Not the theoretical one where you own a thinner fleece or plan to buy a better midlayer next season. The base layer and fleece in your closet right now, in the weight you actually carry, are what the tape goes around. If you’re still working out which midlayer you’ll actually be stacking under the shell, settle that first and come back with a tape measure.
Measure at the fullest part of the chest, arms hanging down, tape level all the way around, and have someone else hold it if you can. Reaching around yourself puffs your chest out and reading the number at an angle shaves off half an inch, which is the gap between two sizes on some brand charts.
One note on sourcing: the inch framework below is adapted from angler-focused sizing guidance, the only place in this topic where anybody publishes concrete numbers. The sport doesn’t transfer. The layering physics do, because a fleece takes up the same space whether you’re holding a rod or a trekking pole.
The Numbers to Add
Light layering, a base layer alone or a base plus a thin sun hoody, puts you 2 to 4 inches over your bare chest measurement. That’s summer layering and warm shoulder season, the regime where people accidentally buy correctly and get burned in October.
Midweight, base plus a mid layer fleece, is the working default for three-season hiking, and 4 inches is the safe center of that range. If you remember one number from this article, make it that one.
Heavy cold weather layering, base plus fleece plus puffy, starts at 4 to 6 inches and climbs with the loft of your insulation. Plan for a full size jump rather than “a little roomier.” A 6-inch swing dressed up as a vague preference is how people end up with a jacket that fits nothing.
The practical consequence of that spread is that your layering weight changes by season, and your correct size changes with it. Seasonal layering is the reason one jacket can feel right in May and wrong in November without anything about the jacket changing.
Then find that total on the brand’s actual chest circumference chart, not the letter on the label. The letter is a marketing decision. The inches are a measurement.
The Chest-Grab Check
With no tape measure, there’s a faster version. Layers on, arms at your sides, pinch the fabric at your chest and see what you can grab.
A small handful of excess fabric at the chest, roughly 2 to 3 inches of grabbable slack over your layers, is correctly sized. Can’t get a pinch? Too tight. Getting a full fistful, 4 to 5 inches or more? You overshot, and you’ll feel it every time the wind picks up.
It’s crude and it works, which describes most useful field checks. Do it in the store, in the trailhead parking lot, and before you cut the tags off anything.
Why the Same Number Feels Different in Two Shells
Two jackets can hit the same chest measurement and fit nothing alike, because what’s between you and the rain changes how the fabric moves.
A 2-layer construction shell bonds a waterproof breathable membrane to an outer face fabric and hangs a loose mesh or taffeta liner inside it. That free-floating liner slides over your midlayer, so the jacket tends to feel roomier than its number suggests. 2.5-layer construction replaces the liner with a printed or sprayed coating on the inside face, which saves weight and packs down small, but the coated surface grabs at a fleece instead of sliding across it. That’s why the same measurement can feel tighter in a lighter jacket.
3-layer construction laminates a real backer fabric to the membrane, making one stiffer, more durable panel. The breathability is usually better and the durability is much better, but a stiff laminate doesn’t drape around a puffy the way a soft 2-layer does. The upshot: on a 3-layer shell, run the movement tests below twice before trusting the number, because the fabric gives you less than the chart implies.
None of this changes the inches you add. It changes how much margin you want on top of them, and how hard you should look at the drawcords.
Three more specs are worth knowing by name while you read spec sheets. Denier describes the yarn thickness of the face fabric, so a low-denier ultralight tears more easily than a burly one. Seam-taped means the stitch holes are sealed, which every real rain shell should be.
The third is the durable water repellent finish, or DWR: the coating that makes water bead off the outer fabric. When it wears out, the face fabric saturates and the jacket feels wet even though the membrane is still doing its job, which is what people mean by wet-out. For how the membranes themselves compare, the breathability difference between membrane types is its own rabbit hole.
The Two Movement Tests That Beat a Tape Measure
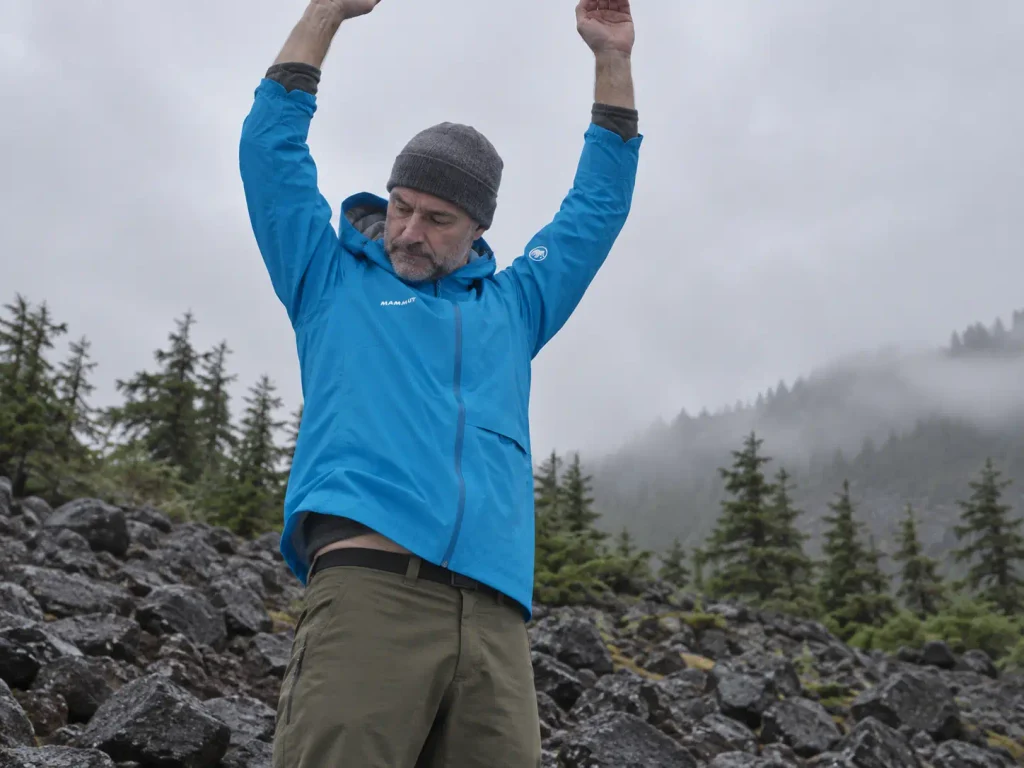
A jacket can pass every static check and still yank its own hem up to your ribs the first time you plant a pole on a steep descent. The try-on happens standing still. Hiking doesn’t.
The Pole Plant Test
Layers on, extend both arms forward like you’re planting trekking poles ahead of you on a descent. Hold it and look at your wrists.
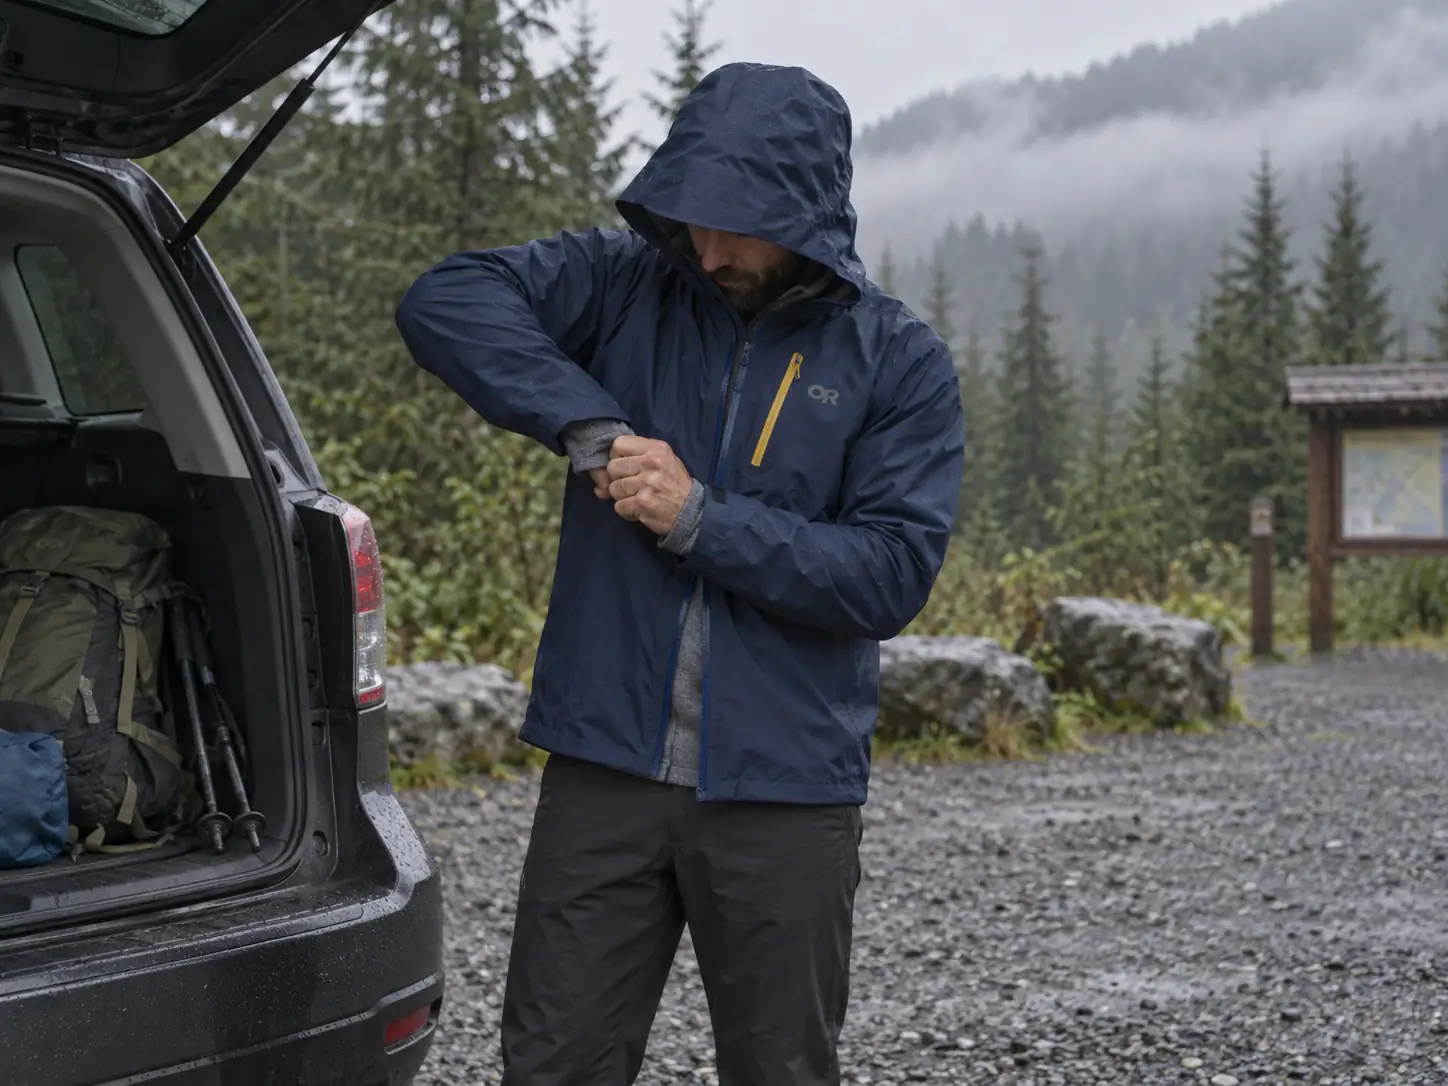
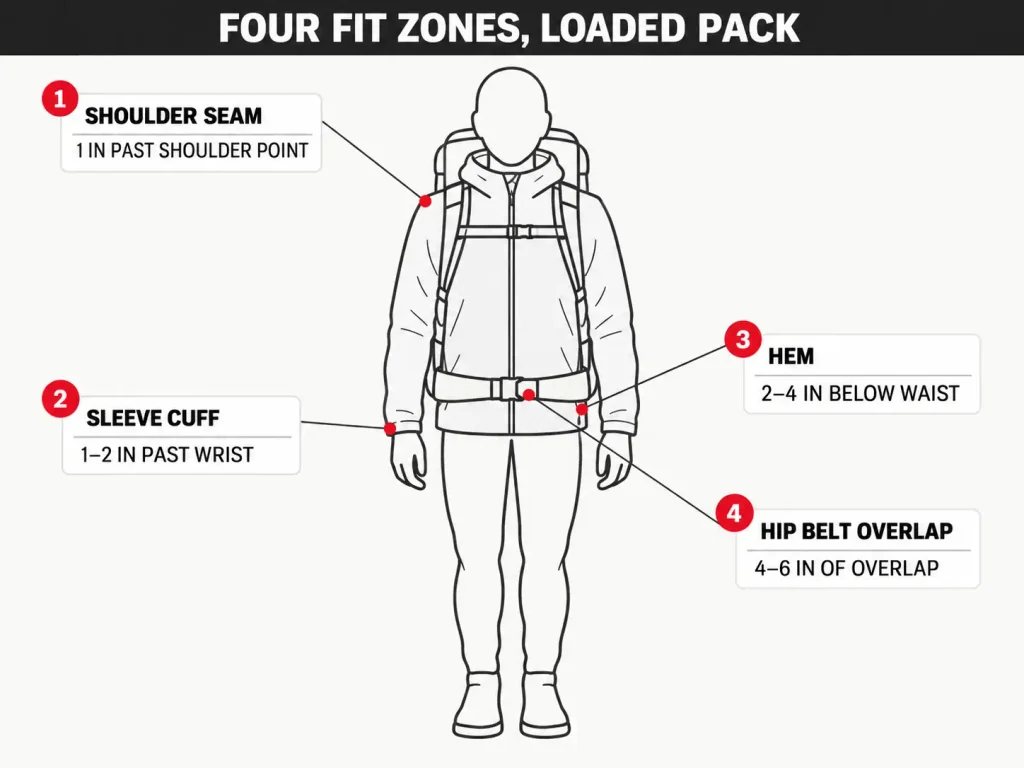
Sleeves should still reach 1 to 2 inches past the wrist bone in that position, not just hanging at your sides. A sleeve that looks perfect at rest rides up the second you reach, and the gap it opens sits exactly where rain runs down your forearm into the cuff.
While your arms are out there, check the shoulder seams. They should sit about an inch beyond your natural shoulder point. If a seam is parked right on the bone, every arm rotation drags the whole jacket tight across your chest and you’ll spend the descent fighting fabric instead of watching your feet. That’s the most common reason a correctly-measured jacket still feels wrong.
The Overhead Reach Test
Now reach straight overhead, like you’re grabbing a branch above a step-up or a handhold on an easy scramble, and watch the hem.
If it lifts above your waistline, you’ve lost coverage where water is already heading, and that’s a fail regardless of the chest number. Repeat the motion five or six times, not once. A jacket that “feels fine” during a 30-second try-on often turns restrictive after repeated arm-raising, which is why testing fit standing still sits at the top of the list of sizing mistakes. Motionless approval is not a mobility test.
What to Sacrifice When Your Proportions Fight You
Sometimes chest, sleeves and torso refuse to agree and no size in the run gets all three right. Long arms, short torso, broad shoulders on a narrow frame: the chart was built for an average nobody actually is.
When you can’t get chest, sleeve and torso length all right at once, prioritize chest and shoulder fit every time. Restriction there costs you real mobility for the whole hike, and an undersized fit across the chest turns into chafing at the shoulder seams by mile six. A sleeve that runs long can be cinched at the cuff, and a hem that runs long can be pulled in at the drawcord. Neither of those ruins a day. A tight chest does.
That runs opposite to what you want from the layer touching your skin. Snug underneath, roomy at the shell. If the ordering feels backwards, the fit philosophy for the layer sitting closest to your skin explains why compression works down there and fails up here.
The Pack Strap Problem Nobody Warns You About
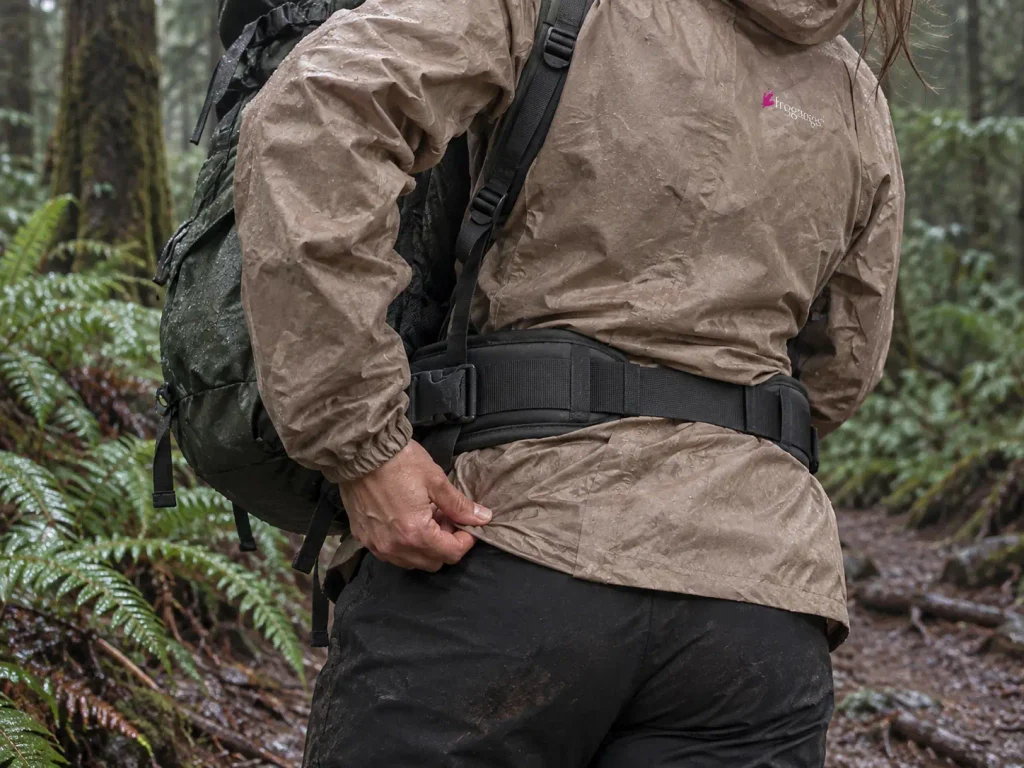
So you solved the layering problem and created a new one. The pack is the variable hiking adds that no angler or hunter has to size around, which is why no source covering rain gear sizing has an answer for it.
Where the Hip Belt and the Hem Fight
Start with where the load goes. REI’s own guidance on getting 80-90% of pack weight onto your hips is the target for a fitted hip belt, and the padding extends past your front hip points to do it. Read that again with a jacket in mind: the belt occupies exactly the real estate a hem needs.
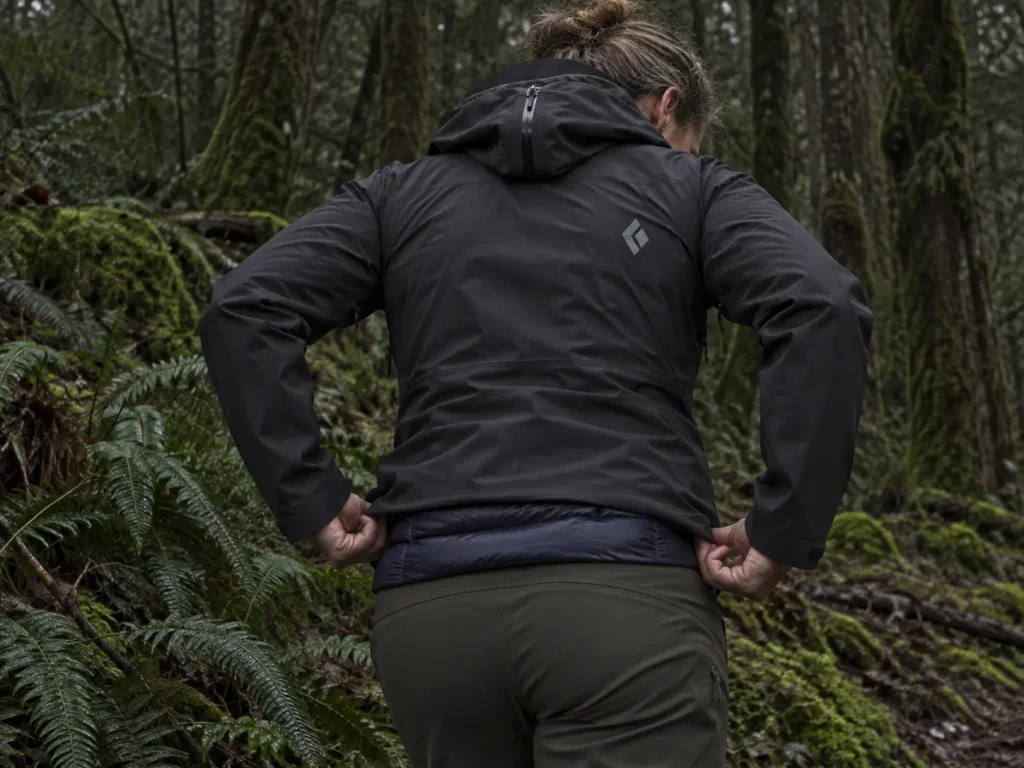
A hem ending 2 to 4 inches below your natural waistline keeps hem coverage when you bend forward, holding 4 to 6 inches of overlap with the belt zone. A short hem rides above the belt line the first time you crouch for a dropped pole basket or step down a stream bank, opening a gap right where water runs off the shell toward your waistband. That gap is the most common point of water intrusion on an otherwise waterproof jacket.
Too bulky is its own failure, and it’s the one people walk into after reading “size up” and stopping there. Extra fabric bunched under a loaded belt makes a pressure point, and a pressure point under 30 pounds doesn’t announce itself at the trailhead. It shows up at mile ten, and you can’t fix it without dropping the pack and re-dressing.
Bulk Under the Shoulder Straps
Same physics higher up, worse consequences for the jacket. Fabric gathered under a loaded shoulder strap doesn’t only feel wrong, it’s the spot that abrades through first, because the strap grinds the same fold of material against your shoulder for every mile of every trip.
Both problems are solvable at once, and there’s tested proof rather than a guess. Hands-on testing of the REI Rainier found its arms allow full extension without pulling, and that it fits well under a backpack without constriction. One shell, roomy enough to layer and clean enough to wear loaded. That’s the target, and it means “size up until it’s baggy” was never the right instruction.
It also reframes what keeps you dry. A jacket with a five-figure hydrostatic head rating that’s grinding under a strap and gapping at the hip loses to a moderately-rated shell that fits, which is the argument behind why pack straps beat waterproof ratings for keeping you dry.
Size Up or Stay True to Size
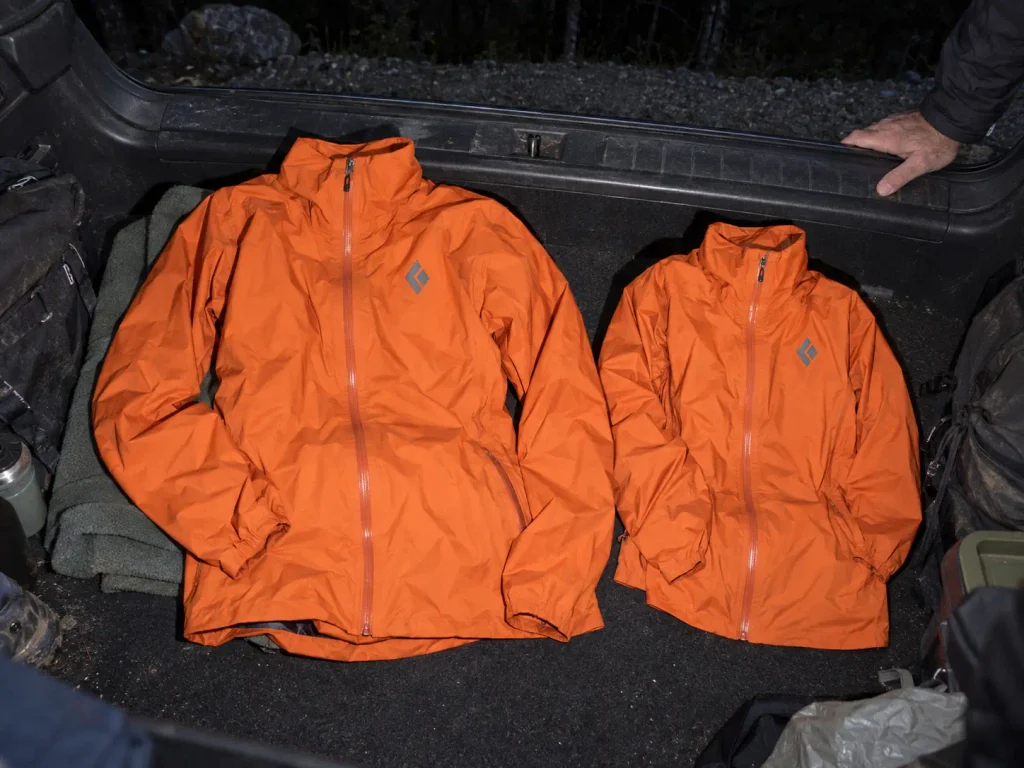
This is the question every forum thread asks and none of them finish. The honest answer isn’t “size up.” It’s size for your worst case, then use the jacket’s own adjustments to shrink it back down for everything else.
Size for the Coldest Trip You’ll Actually Take
Sizing for your average condition guarantees failure on your worst one. On a mild day a slightly snug shell is an annoyance. On a cold, wet, windy day at elevation with a puffy you can’t get underneath it, it’s the difference between having a system and having a jacket. And “actually” is load-bearing in that heading: not the winter traverse you might do in three years, the coldest thing on your real calendar.
Now the counterweight, because oversizing has costs nobody mentions when they type “just size up” into a thread. An oversized fit flaps in wind, adds bulk under pack straps, and carries weight you didn’t need. The hood, sized proportionally, swims and pivots independently of your face, so you turn to look at something and end up staring at the inside of it.
Then Shrink It Back With the Adjustments
Here’s what resolves the tension. A hem drawcord, adjustable cuff closures and pit zips cover roughly one to two sizes of fit variation between them, which is the whole gap between your layered size and your bare-layer size, handled by hardware you already paid for.
A drawcord cinch at the hem and the flapping stops. Tighten the cuffs and the sleeves quit swallowing your hands. Open the pit zips and the extra volume becomes ventilation instead of dead air. One jacket, two regimes, thirty seconds of adjustment between them.
Which gives you a buying rule: a minimalist ultralight shell with no adjustments forgives far less sizing error than a fully-featured one. If you’re between sizes, take the risk on the jacket with real adjustments — the stripped-down one has nothing to give back.
What the Forums Actually Do
That Rokslide thread is a hunting forum, not a hiking one, and it’s still the most useful conversation on this topic anywhere, because eight people with real field time argue it out instead of reciting advice. Six of the eight replying hunters size up at least the top.
One sizes up both pieces and accepts the trade openly: “It is a slight penalty in weight and bulk between sizes but worth it to me.”
Another splits it, with reasoning sharper than any blanket rule. “I size up top, true size bottom. I’ve found a top that is a little baggy doesn’t bother me but baggy rain pants drive me insane. They are louder and catch on more stuff.”
A third lands in the same place. Translated to hiking, where you’re brushing past wet vegetation instead of stalking quietly, the noise argument softens and the snagging one holds. That’s why how the same call plays out for rain pants is worth deciding separately from the jacket.
Then there’s the reframe that changes the math. One poster put it this way: “I like rain gear with plenty of room under it for insulation, so it is baggy in warm weather and just right with a lot of insulation as a wind layer.”
A rain shell isn’t only a rain layer. It’s a wind layer over insulation on cold dry days, and nobody counts those days when weighing how often the roomy size feels too roomy. Count them, and the shell you worried was oversized on mild afternoons is correctly sized on every cold, windy ridge you walk in a year.
How Cut Varies by Brand and What It Costs You
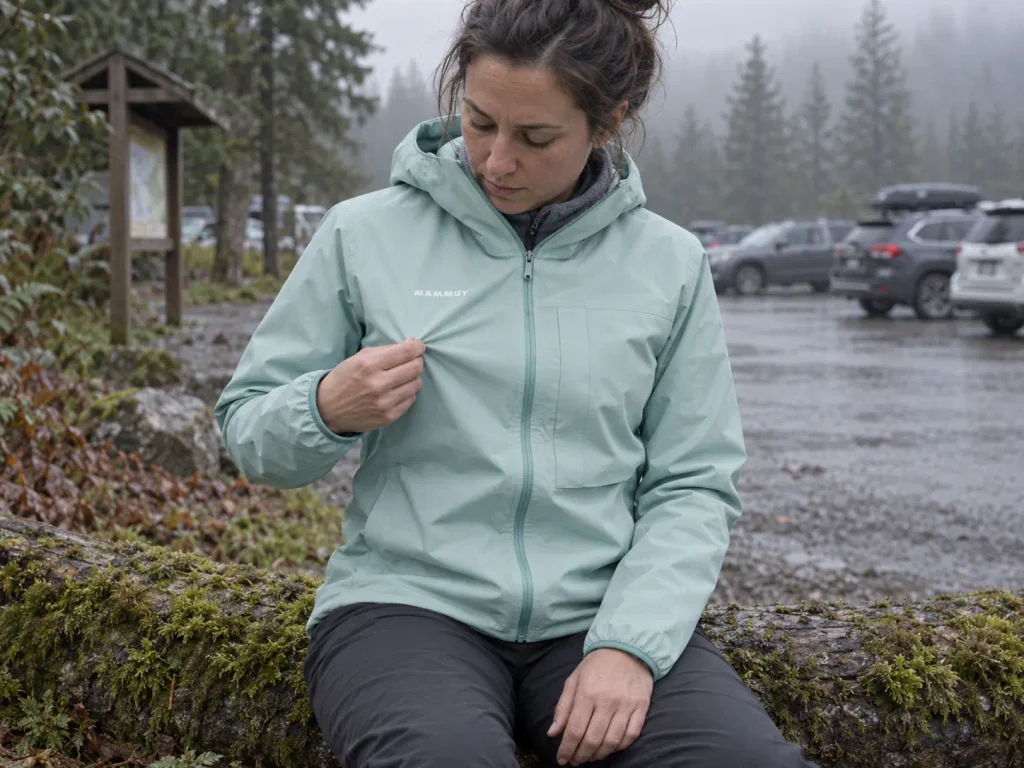
One brand’s Large is another brand’s XL. Brand sizing variation makes the letter on the tag the least reliable number in this process, and it’s the one most people base the decision on.
Read the Chart, Not the Letter
Brand size labels are not interchangeable. Before you order anything, open the brand’s own size chart and find the chest-inch range, then compare it against your layered measurement. Two minutes of reading a table beats a return shipping label every time.
The trim-cut trap has a second edge that catches experienced buyers. Sizing up by reflex on a slim-cut shell fixes the torso squeeze and leaves the arms baggy, because athletic fit shells often run tight through the torso while the sleeves and hood already fit at your true size. That’s a balance problem, not a case of running small — one size up solves half of it while creating the other half. Watch the shoulder width and sleeve length on the size chart, not just the chest column.
The forum answer, from Brian Fahs on Rokslide, is to own two different cuts rather than force one to do both jobs: athletic fit for light layers, a bigger cut for insulating layers. Two jackets isn’t the right call for most hikers, but it clarifies what you accept when you buy one shell for everything.
Generous Cuts, Trim Cuts, and the Stretch Alternative
“Cuts vary by brand” is useless until you see the range, so here it is.
The forgiving end is where you want to be if you’d rather the jacket absorb your sizing error than punish it. The FROGG TOGGS Ultra-Lite2 Waterproof Breathable Rain Jacket (men’s · women’s) is a budget-friendly 2.5-layer construction shell with a generous cut that doesn’t fight a fleece underneath. It won’t survive a decade of brush, but a roomy shell you sized casually beats a precise one you sized wrong.
The opposite end is the counter-example. The Outdoor Research Helium Rain Jacket (men’s · women’s) is an ultralight 15D ripstop nylon shell with an athletic cut and minimal adjustment features. That combination demands the size-up treatment when you layer heavily and leaves the least margin to fix a near-miss, so sizing it against your real layered number instead of the label matters more here than anywhere else. It’s also a fair illustration of what you give up when a shell gets ultralight: every gram they cut came from somewhere, and some of it came from the drawcords that buy forgiveness.
A third path isn’t sizing at all. The Black Diamond Fineline Stretch Rain Shell (men’s · women’s) uses a 4-way stretch face fabric, which the brand positions as reducing the need to size up for range of motion. The fabric moves with your overhead reach instead of making you buy volume you don’t want. Treat it as an alternative to sizing up, not a substitute for measuring: stretch buys mobility, it doesn’t create room for a puffy that was never going to fit.
At the top end, the Mammut Ducan Light HS Hooded Jacket (men’s · women’s) is a premium 2.5-layer shell that packs into its own pocket, cut on an athletic mountain fit. Same logic as the Helium: the cut makes the label a suggestion and your layered chest number the real input. Premium construction buys durability and packability, and buys nothing at all if you order the wrong size.
Once you know your number, picking between shells gets much easier, and the full rundown of shells that hold up in sustained rain is the next stop.
The Short Version
Measure over the layers you actually hike in, add 4 inches for a base-plus-fleece stack, and check that total against the brand’s chest-inch chart rather than the letter on the tag.
Test it moving. Arms forward like a pole plant, arms overhead like a scramble reach, repeated a handful of times. Watch the sleeves at the wrist and the hem at the waist, because those are where the fit lies to you standing still.
Size for the coldest trip you’ll really take, then cinch the drawcord and the cuffs for everything milder. The adjustments let one jacket cover both regimes, which is why a featureless ultralight shell is the risky buy when you’re between sizes.
Before your next cold-weather trip, put the whole stack on at home. Base layer, fleece, puffy, shell, loaded pack, in the living room. Run both movement tests with the belt buckled. Five minutes on the carpet beats finding out at a wet trailhead with no second option in the car.
Frequently Asked Questions
01Should you size up in rain jackets?
Usually yes for the top, but only after measuring over your real layers. Size up when a fleece or puffy goes underneath, when the cut is trim, or when the shell has no drawcord or adjustable cuffs to take up slack. Stay true to size if you only wear a base layer and the cut is already generous.
02Should I size up for layering?
Size for the heaviest layering you will realistically use, then use the jacket’s adjustments to shrink it back on milder days. A base layer plus fleece adds roughly 2 to 4 inches to your chest; add a puffy and you are at 4 to 6 inches, usually a full size.
03What is the difference between a 2.5 layer and a 3 layer rain jacket?
A 2.5-layer shell has a coating printed on the inside face instead of a separate liner, making it lighter and cheaper but clammier against skin. A 3-layer bonds a real inner fabric to the membrane, so it lasts longer and feels better. For sizing, 3-layer shells feel stiffer, so the mobility tests matter more.
04Does a rain jacket need to fit over a backpack or under it?
Under it, always. The shell goes on first and the pack rides on top, which is why hem length matters. The hip belt sits in the same zone as the jacket hem, and a short hem rides above the belt when you bend, opening a gap where water runs in. Aim for 2 to 4 inches below your waistline.
Risk Disclaimer: Hiking, trekking, backpacking, and all related outdoor activities involve inherent
risks which may result in serious injury, illness, or death. The information provided on The Hiking Tribe is for
educational and informational purposes only. While we strive for accuracy, information on trails, gear, techniques,
and safety is not a substitute for your own best judgment and thorough preparation. Trail conditions, weather, and
other environmental factors change rapidly and may differ from what is described on this site. Always check with
official sources like park services for the most current alerts and conditions. Never undertake a hike beyond your
abilities and always be prepared for the unexpected. By using this website, you agree that you are solely
responsible for your own safety. Any reliance you place on our content is strictly at your own risk, and you assume
all liability for your actions and decisions in the outdoors. The Hiking Tribe and its authors will not be held
liable for any injury, damage, or loss sustained in connection with the use of the information herein.
Affiliate Disclosure: We are a participant in the Amazon Services LLC Associates Program, an
affiliate advertising program designed to provide a means for us to earn advertising fees by advertising and linking
to Amazon.com. As an Amazon Associate, we earn from qualifying purchases. We are also an official affiliate partner
of Black Diamond Equipment via the AvantLink network. If you click on a Black Diamond affiliate link and make a
purchase, we may earn a commission at no additional cost to you. We also participate in other affiliate programs and
may receive a commission on products purchased through our links. Additional terms are found in the terms of
service.