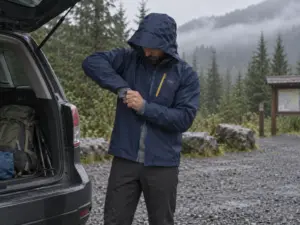

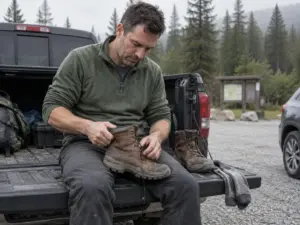


















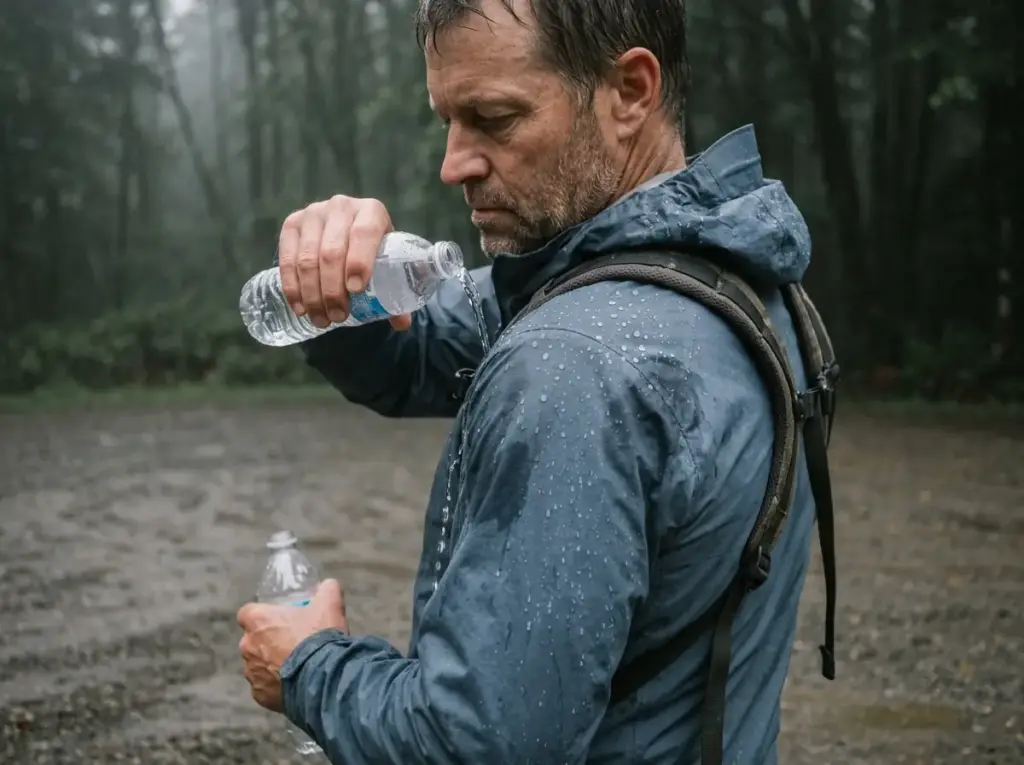
You are three miles in, the rain is light, and your shoulders feel damp in a way you keep blaming on sweat. Nothing is leaking. The membrane is doing its job perfectly, and the outside of the jacket has quietly stopped shedding water, which is a different failure with a different fix.
Gear shops see this constantly: someone walks in with a “broken” two-year-old shell expecting a warranty claim, and what it needs is a wash and twenty minutes in a dryer. Rain jacket care comes down to three windows, the wash window, the reproof window, and the pre-trip check. Get those right and the mechanics take care of themselves.
Why Your Rain Jacket Care Schedule Starts With the DWR
Nothing about a maintenance schedule makes sense until you know which layer is failing. Most people assume a wet-feeling shell means the waterproof part gave out. It almost never does. What gives out is the coating on the outside of the fabric.
That coating is supposed to give out. It is a consumable.
What DWR Actually Does (and What It Is Not)
DWR stands for durable water repellent, a thin chemical finish bonded to the face fabric on the outside of your hardshell. It is not the waterproofing. The waterproofing is the membrane laminated underneath, the Gore-Tex or eVent or in-house equivalent that blocks liquid water while letting vapor escape. DWR sits on top of that membrane like wax on a car hood, and its only job is to make raindrops bead up and roll off before they soak in.
That makes DWR sacrificial by design. It wears off. A jacket losing its DWR is behaving exactly as built, not defecting, which is the most freeing thing to understand about rain jacket care.
You maintain it on a rhythm, forever. If the vocabulary here is new, how the pieces of a rain system work together covers the membrane ratings and layering logic this article assumes you already have.
Wetting Out, Explained the Way You Experience It
When the coating gives up, rain stops beading and starts soaking into the face fabric, the outermost woven layer. Hikers call this wetting out. The waterproof breathable membrane behind it is still doing its job, so no rain reaches you directly, but now a saturated sheet of nylon is pressed against the membrane’s outer surface.
Water vapor cannot cross that. Your sweat has nowhere to go, so it condenses inside the shell and runs down your back. The feeling is not a leak.
It is a slow clamminess that most hikers blame on overdressing, right up until the shoulders go cold and heavy under the pack straps. Ask anyone who has spent a wet October weekend in an old shell: realizing it is the jacket and not your base layer stings, because the fix took twenty minutes at home and you skipped it.
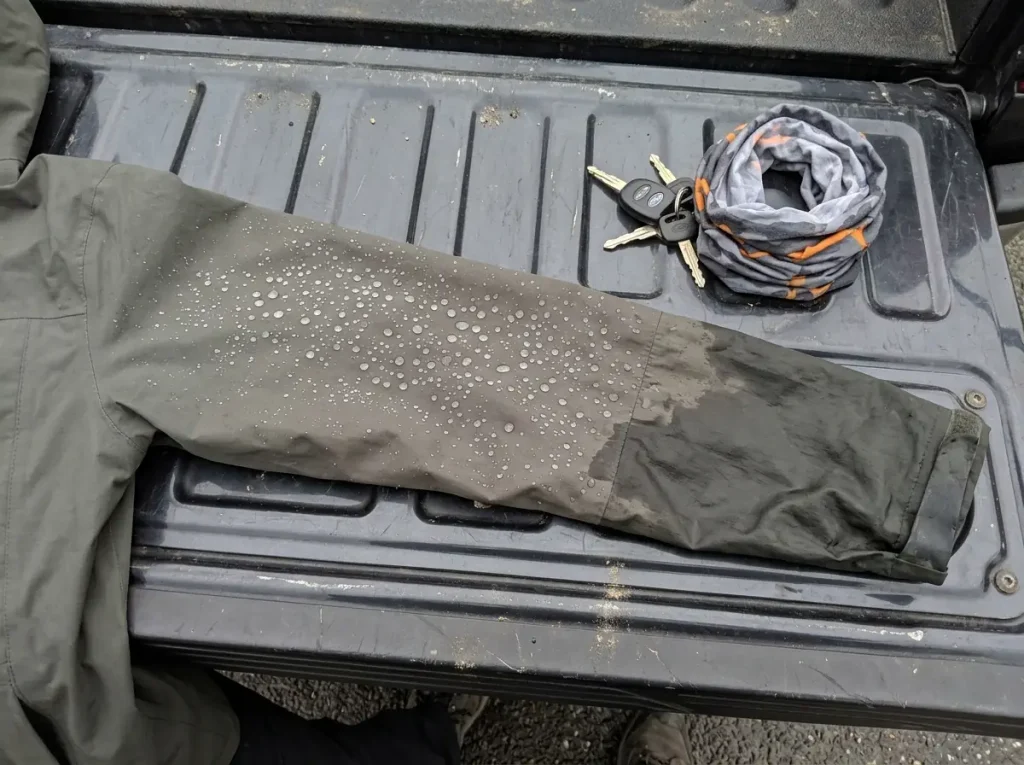
A shell that has wet out looks different from ten feet away. The dry, beading panels stay light and matte; the wetted-out panels go dark and glossy. On a jacket that is halfway gone you can read the whole wear map at a glance in the parking lot: dark shoulders, dark forearms, light everywhere else.
What Strips the Coating Off
Three things wear DWR down, and age by itself is not one of them. Dirt is first: trail grime, campfire smoke, and sunscreen embed in the face fabric and give water something to cling to. Body oils are second, which is why collars and cuffs fail on jackets that have barely seen rain. Abrasion is third and the most brutal, since pack straps grinding across your shoulders for eight hours do more damage in a weekend than a month in a closet.
A jacket that stops shedding water also stops working as insulation in cold, wet conditions. A soaked face fabric pulls heat off you fast, and cold plus wet plus wind is how an uncomfortable day turns hazardous. None of this requires panic, just a bead test now and then, which lines up with REI’s own DWR care guidance treating the coating as a maintainable consumable rather than a permanent treatment.
The Bead Test That Decides Everything
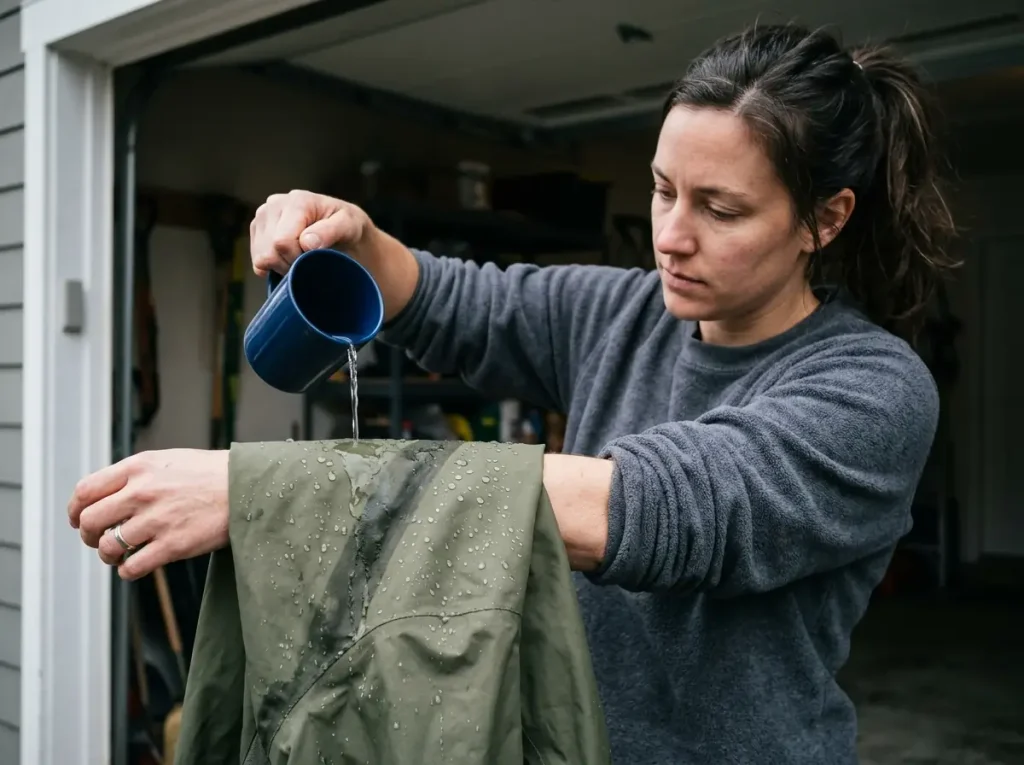
Every calendar in this article is a reminder. The fabric is the only thing that gets a vote, and it will answer you in about as long as it takes to fill a glass at the kitchen sink. Get in the habit of asking it, and the rest of the schedule becomes a backstop rather than a rule you follow blindly.
How to Run the Bead Test
Hold the jacket under a tap or flick a handful of water across the shoulder panel. Watch what the drops do in the first two seconds.
- Water balls up into tight beads and rolls off: the DWR is alive. Do nothing.
- Water spreads, the fabric darkens, and the patch stays wet: the coating is gone in that zone.
- Water beads in some spots and soaks in others: partial failure, which is the most common result on a jacket a season or two old.
That third outcome is the one that trips people up. Partial failure means you caught it early, and a wash plus a targeted spray on the failing panels will bring it back without a full wash-in treatment.
Why the Shoulder Is the Honest Spot
Test the shoulder, not the chest. The chest panel on most jackets is nearly untouched. Nothing rubs it, nothing loads it, and it will happily bead water long after the rest of the shell has given up. Testing there tells you the jacket is fine when it isn’t.
The shoulders take the pack straps, and loaded straps grinding into coated nylon strip DWR faster than anything else you do to the garment. It is the same mechanism behind why pack straps beat the rating on the hangtag: a well-specced shell fails first in the zone where a 30-pound load rubs it, whatever the spec sheet promised. That makes the shoulder the honest spot, because it fails first and tells you first. Cuffs, the front zip flap, and the hip-belt contact points are the other three worth checking when you have the jacket out.
Wash First, Test Second
This is the ordering almost everyone gets backwards, and getting it right saves real money. A failed bead test does not automatically mean you need a reproofing treatment. Very often it means the jacket is dirty, and dirt alone is enough to stop water from beading.
So the sequence is: bead test, then wash with technical detergent, then bead test again. A surprising number of shells bead perfectly well after a clean, and you just saved yourself a bottle of DWR treatment and an hour. Only when a clean jacket still fails the test does it actually need reproofing.
This is also the reason scheduled re-waterproofing is a mistake rather than a virtue. Gear shops that see this daily call it out directly: reproofing on a fixed date treats the calendar as the authority when the fabric is the authority. A jacket worn hard for three wet weekends can fail before one that sat in a closet for three months, and neither of them cares what month it is.
Window One, The Wash Window
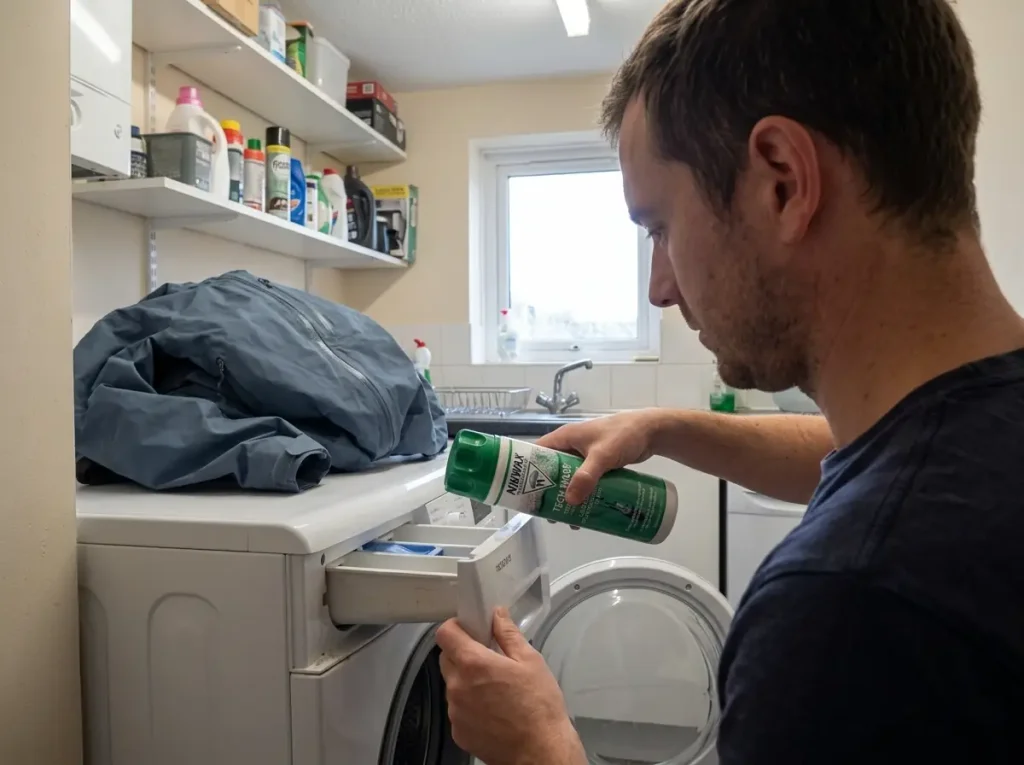
Most people wash a rain jacket far too rarely and then blame the jacket. The instinct is understandable, since washing feels like wear and tear, but it runs exactly backwards. Washing is not what wears the shell out. It is what keeps the coating working.
How Often, By How Much You Actually Hike
The usable number is every 4–6 weeks for someone out most weekends with the jacket on each time. That is the closest thing to a real cadence anyone in this space commits to, and it comes from actual use frequency rather than a vague “when it looks dirty.”
Visible dirt overrides the calendar, always. Dirt and body oils are the two things stripping DWR, so a filthy jacket at week two gets washed at week two. Nobody has ever regretted washing a rain shell early.
What a Correct Wash Cycle Looks Like
Empty every pocket, close every zip, and fasten the velcro tabs before anything goes in the machine. Open velcro is the quiet destroyer here. It will find the face fabric and pill it.
Run a gentle or delicate cycle, cold or lukewarm. Put a technical detergent in the drawer, never poured directly onto the fabric. Nikwax Tech Wash is the default for a reason: it cleans without leaving the surfactant residue regular detergent leaves behind, and it does not attack the DWR still on the jacket.
Use a front-loader if you have the choice, since top-loaders with a center agitator are harder on seams and laminates. For the Gore-Tex-specific version, the full Gore-Tex wash walkthrough goes through the cycle step by step, and both the cadence and the detergent spec line up with Mountain Equipment’s official wash-and-reproof steps.
The Extra Rinse Nobody Runs
When the cycle ends, run one more rinse. No detergent, just water.
It feels paranoid. It is the cheapest insurance in this article. Leftover detergent residue attracts water by nature, which means a wash you ran specifically to restore repellency can end up doing the opposite. Thirty extra minutes of machine time removes that risk.
If your machine has a rinse-and-spin setting, that is the one.
Window Two, The Reproof Window
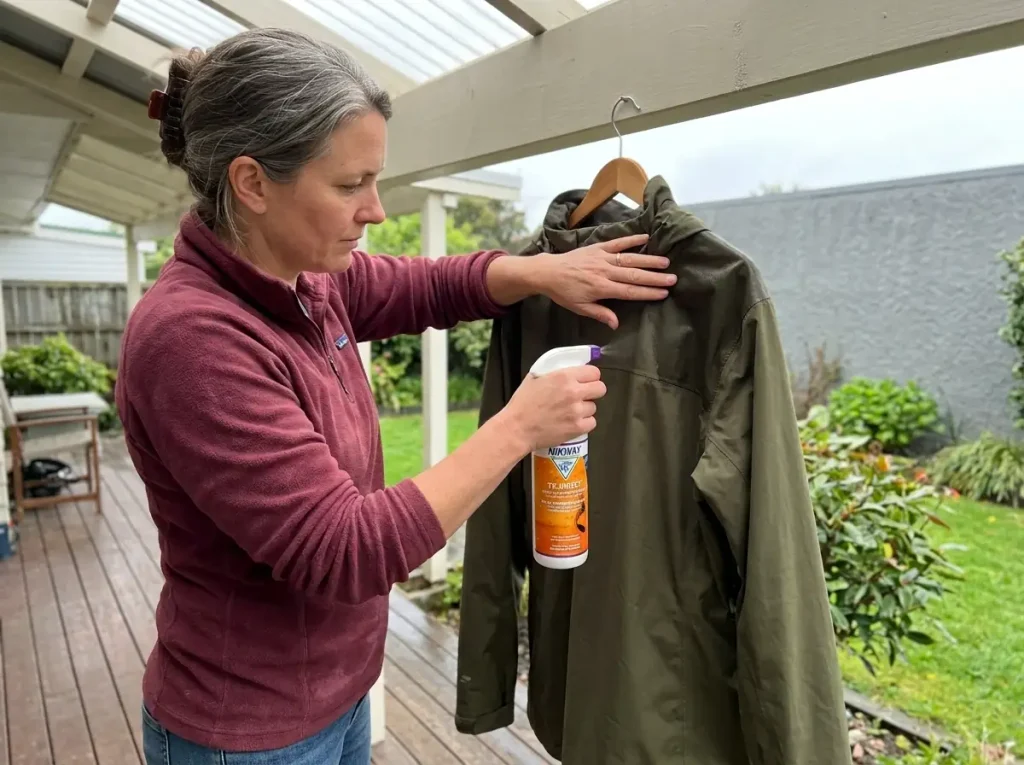
Reproofing is the step people either skip for three years or do every month for no reason. Neither is right, and the difference between them is not effort. It is knowing what the trigger is.
What Actually Triggers a Reproof
The trigger is a failed bead test on a clean jacket. That is the whole rule. Everything else is planning.
The calendar numbers are still worth carrying as planning anchors, because they tell you roughly when to expect the test to fail. Regular use puts you around every 3–4 months. Heavy, sustained rain exposure pulls that in to every 2–3 months. Occasional use stretches to twice a year.
Treat those as a heads-up to go check, never as an instruction to go treat. And whatever the test says, clean the jacket first, because reproofing over trail dirt seals the dirt in and gives the new coating nothing clean to bond to. For the full procedure rather than the schedule view, the restore step most hikers skip covers the deep version.
Wash-In or Spray-On
Two methods, and the choice is situational rather than one being better.
Wash-in treatment goes in the machine and coats everything: face fabric, zips, seams, pocket interiors. It is the most thorough option and the least fussy, since the machine does the work. Nikwax TX.Direct Wash-In is the standard pairing with Tech Wash, and the two together are what most people mean by the full treatment.
Spray-on goes onto the hanging jacket from a bottle. It uses less product, takes ten minutes, and treats only the exterior. Nikwax TX.Direct Spray-On is the common pick, with GEAR AID Revivex DWR Spray + Wash-In covering both formats in one bottle and Grangers Performance Repel Plus as a third option if the others are out of stock. They all work. Brand loyalty in DWR treatments is mostly habit.
The one case where the choice is not a coin flip: if your jacket has a wicking or brushed breathable lining, go spray-on. Wash-in coats that interior surface too, and that surface is what moves sweat off your base layer. Treating it is not a disaster, but you lose a little of what you paid for.
Spray the jacket while it is still damp from the wash, hanging over the tub. The fabric takes the treatment more evenly wet than bone dry, you can see exactly which panels you have already hit because they darken, and the whole thing goes straight from the hanger into the dryer without an extra drying cycle in between.
Where to Aim the Spray
Blanket-coating the whole jacket is a waste of half the bottle. Abrasion strips the coating in specific places, and those places are predictable: the shoulders where the straps sit, the upper back panel under the pack body, the elbows, the forearms, and the seams that run through those zones.
Hit those first and hit them properly, until the fabric is visibly wet rather than lightly misted. Then give the rest of the jacket a lighter pass. A bottle treated this way covers two or three sessions instead of one, and the panels that actually failed get the coverage they need.
The Heat Step Almost Everyone Skips
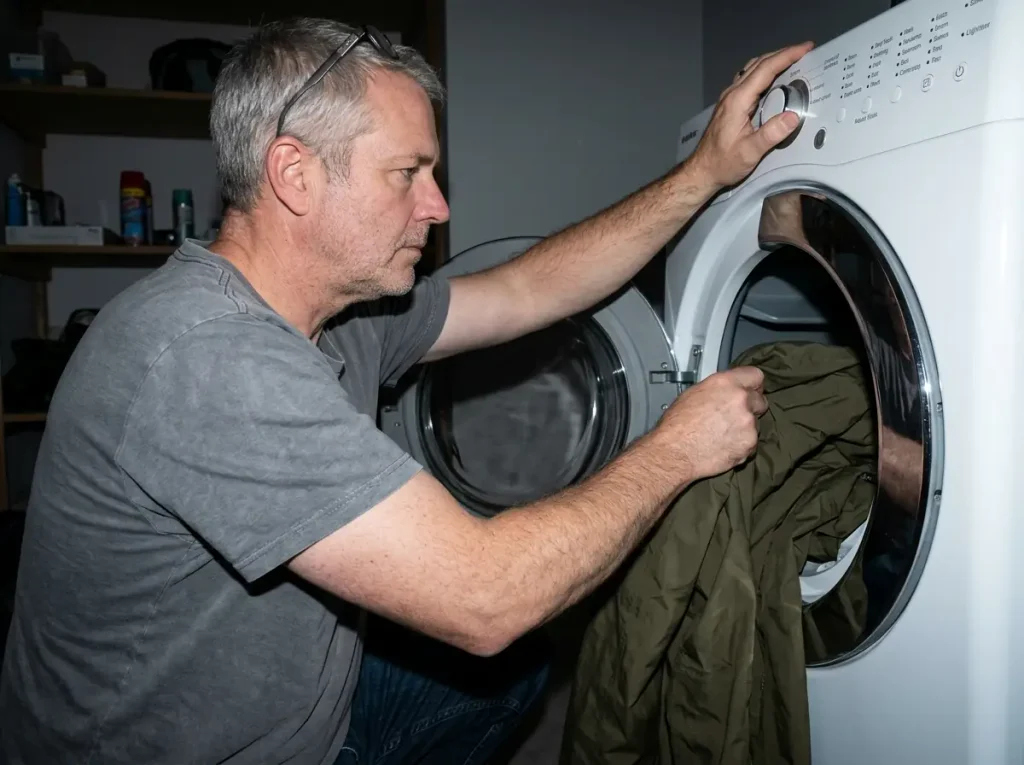
This is the step that feels redundant. You just washed the thing and treated it, so why bake it? And it is exactly the step that does the real work.
Why Heat Reactivates the Coating
Microscopically, DWR forms tiny upright structures on each fiber that hold a water drop above the surface instead of letting it spread. Washing and wear flatten those structures. Gentle heat softens the finish enough for it to stand back up and re-bond to the fiber.
Tumble dry on low to medium for 20–30 minutes once the jacket is clean and treated. That is the default and it is enough. It is also the most commonly skipped step across every source that covers it, precisely because it feels like an extra after the real work is done. Skip it on a treatment that needs it and you have paid for a bottle to get half the result.
One caveat before you plug in the dryer: not every product needs heat. Several modern wash-in and spray-on formulas cure on their own as the jacket air dries. The bottle tells you. Read it instead of assuming.
The No-Dryer Methods
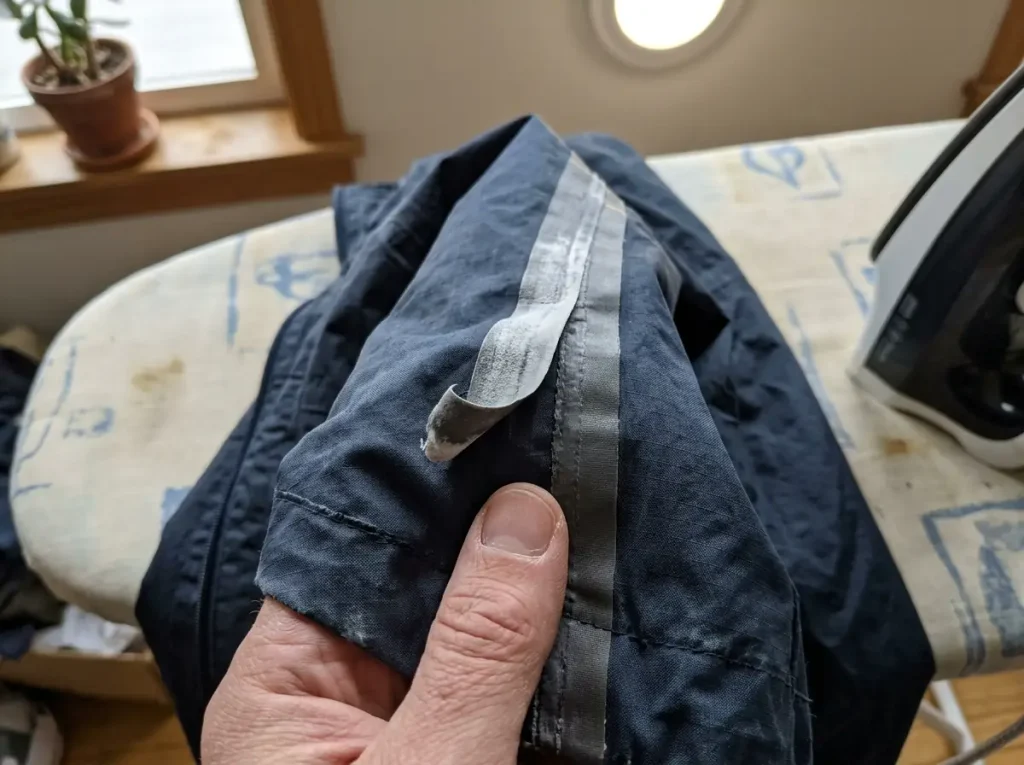
Plenty of people do not own a dryer, and the jacket does not care. Air dry it completely, then iron on the lowest setting with a thin cloth or pillowcase between the iron and the shell. The barrier is not optional, since direct iron contact will glaze or melt a face fabric and that damage does not come out. Work slow passes over the shoulders and upper back.
A hairdryer is the second option, held a few inches off the fabric and moved constantly over the high-wear zones. It takes longer than an iron and is harder to get wrong, which makes it the better choice if you are nervous about heat near a jacket you like.
Where the Heat Ceiling Sits
Low and slow is the instruction because heat is what damages a shell over time, not the number of wash cycles. Face fabrics distort, and the seam tape inside is glued on. Every high-heat dryer session works on that glue a little. The failure mode is a strip of tape lifting at a shoulder seam two years later, at which point the jacket leaks in a way no reproofing fixes.
Twenty to thirty minutes on low is nowhere near that threshold. An hour on high, repeatedly, eventually is. The same logic applies to drying gear without cooking the glue on the footwear side, where adhesives are even less forgiving.
Your PFAS-Free Shell Needs Care 3x More Often
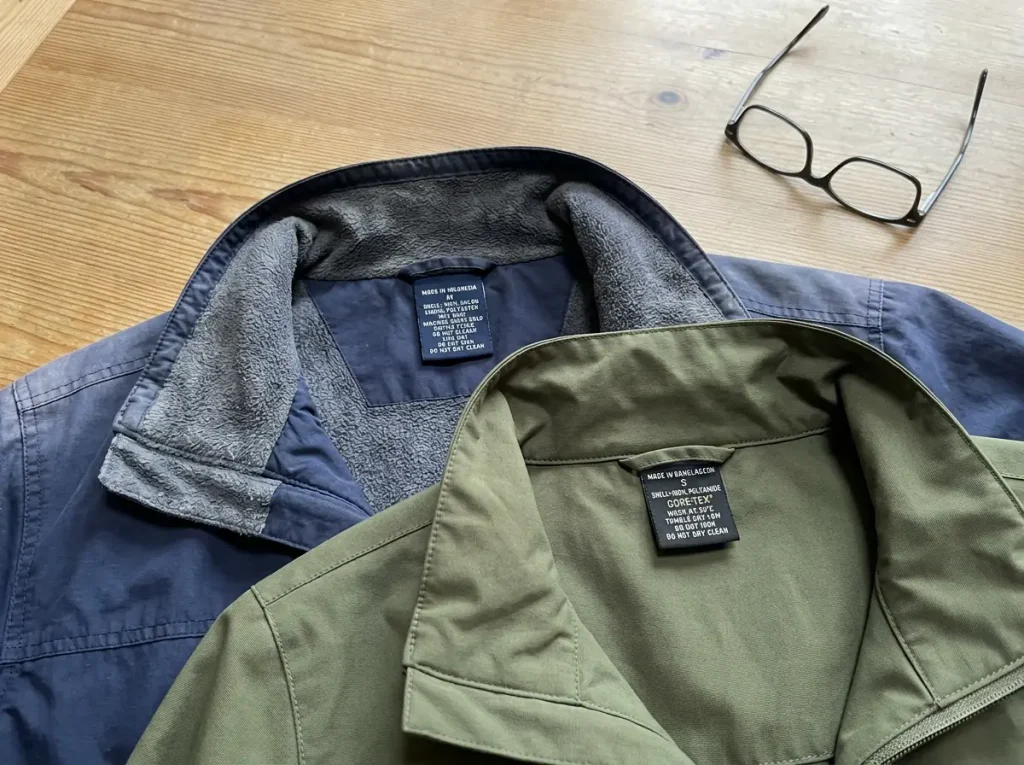
The chemistry underneath all of this changed in the last few years, and almost nobody was told. People are applying a mental schedule built on a decade-old jacket to a shell that cannot hold up to it, then concluding the new jacket is junk.
What Changed in the Bottle
Legacy DWR was built on fluorinated compounds, the PFAS family, sometimes written C6 or C8 in industry shorthand. They repelled water extraordinarily well and lasted a long time. They also persist in the environment essentially forever, which is why regulators came for them.
California’s AB 1817 and a parallel New York law banned PFAS in apparel starting January 2025, with Maine’s ban landing by 2030. Most of the industry moved ahead of those deadlines rather than up against them, which is why the shift hit shelves before most buyers noticed. The replacement chemistry is PFC-free or C0 DWR, and the phase-out sits inside the EPA’s ongoing PFAS phase-out guidance on these compounds more broadly.
The performance trade is narrow and specific. Fresh C0 DWR repels water about as well as the old stuff. It simply does not last as long between treatments.
The Wear Counts, Side by Side
Here is the part that matters for your schedule. Old PFAS-based DWR held up for roughly 30 wears before needing attention. PFAS-free DWR needs attention after 5–7 washes, 7–10 wears of heavy use, or one long trip, whichever comes first.
That is not a small adjustment. It is the difference between treating a jacket once a season and treating it several times a season. Run the old mental math on a new shell and you will be hiking on dead DWR for most of the year without ever knowing why the jacket feels worse than the one it replaced.
This is the root of most “my expensive new shell failed in one season” complaints. The shell did not fail. It hit its service interval three times over while its owner waited for a date that made sense on the last jacket.
How to Tell What Your Jacket Has
If you bought it in 2024 or later, assume PFAS-free. It is the mainstream chemistry now, not a niche eco upgrade, and the assumption costs you nothing if you are wrong. You would just be washing a durable jacket more often than strictly required.
For anything older, check the hangtag language if you still have it, or the brand’s product page. PFC-free, fluorocarbon-free, C0, and non-fluorinated all mean the same thing. Jackets from the years just before the bans are a coin flip depending on the brand, since several moved early and voluntarily.
Two practical notes. First, a PFAS-free shell is not worse in the rain when it is fresh, so there is no reason to hunt down old stock. Second, the same chemistry shift hit rain pants, and the same chemistry shift hit rain pants in exactly the same way, on the same timeline, with the same shortened service interval that nobody mentioned at the register.
The Maintenance Calendar, By How You Actually Hike

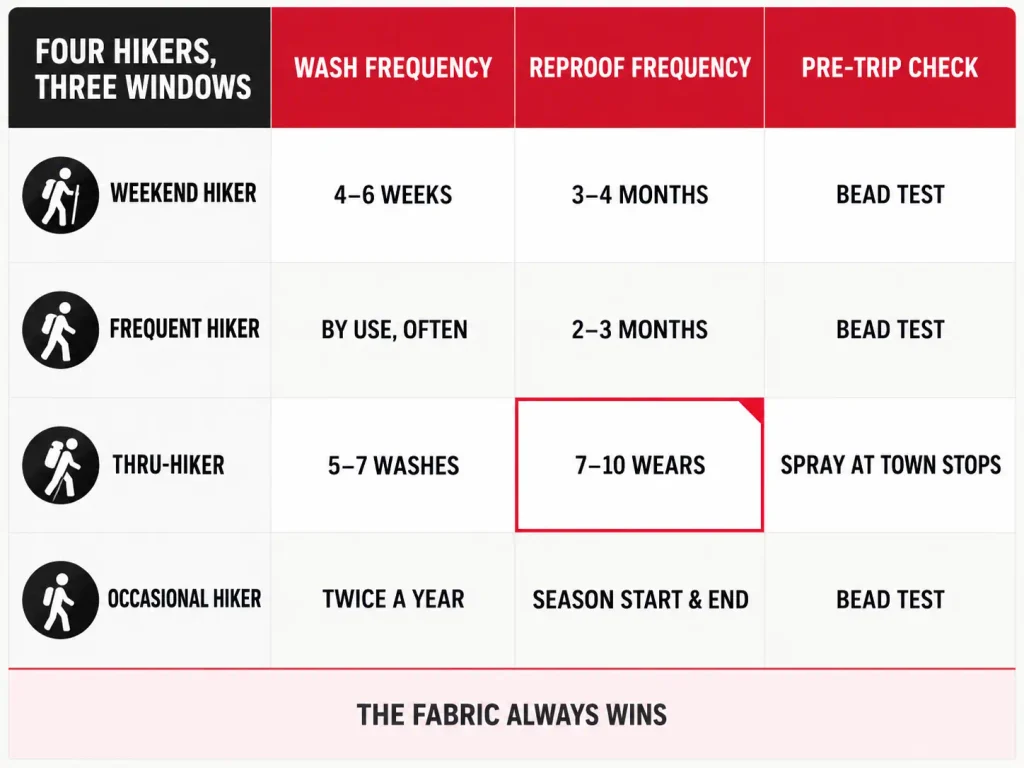
Nobody waits for the tread to vanish before checking their boots. You look at them before a trip, decide, and move on. A rain jacket deserves the same treatment, serviced on a rhythm you set rather than in reaction to being soaked at mile eight. Here is what a year looks like for four different hikers.
The Weekend Hiker’s Year
You are out most weekends and the jacket comes along whether or not you wear it. This is the pattern the 4–6 week wash cadence was built for, so run the wash roughly monthly through your active season and let visible dirt pull it earlier.
Reproofing lands every 3–4 months at this pace, which works out to three or four times across a full year of hiking. Anchor two of those to the calendar deliberately: one before your wet season starts, one when it ends. The pre-season treatment means you enter the worst weather with the jacket at full strength instead of discovering a problem during it. The end-of-season one means the jacket goes into storage clean, and stored dirt is what eats coatings over a quiet winter.
Then run the bead test before any trip where getting wet would actually matter. That is the whole system.
The Frequent and Thru-Hiker’s Counter
If you are out constantly, in real rain, on multi-day trips, stop counting months and start counting uses. Reproofing lands every 2–3 months at this intensity, and on a PFAS-free shell you will often hit the wear threshold first: 5–7 washes, 7–10 hard wears, or one long trip.
A thru-hike compresses this brutally. Ten days of sustained rain with a loaded pack does more to the shoulders of a jacket than a year of day hikes, which is why shells that seemed bulletproof at home start wetting out halfway through a long trail. Carry a small spray bottle if the route is genuinely wet and treat the shoulders at a town stop. It weighs a few ounces and it is the difference between a functional shell and a wearable sponge for the back half of the trip.
Which shell you are maintaining matters here too. Ultralight fabrics carry thinner face fabrics and less DWR to begin with, and which shell fails first on the trail gets into how that trade-off plays out over a season of hard use.
The Occasional Hiker’s Two Dates
If the jacket comes out a handful of times a year, mostly for day hikes and mostly in light weather, you need two dates on the calendar and nothing else.
Wash and reproof at the start of your rainy season. Wash and store it clean at the end. For genuinely light use, a few walks a year and rarely in real rain, once annually is defensible.
The one thing that does not work is skipping both and assuming a jacket that mostly sits in a closet stays factory-fresh. Body oils from the handful of times you did wear it are still sitting in the collar and cuffs, doing their work.
One long trip is a threshold on its own, which cuts across all three patterns above. A single two-week backpacking trip in the Pacific Northwest moves a weekend hiker into thru-hiker maintenance territory for that month. Count the trip, not the season it happened in. When you get home, that jacket has earned a wash and a bead test regardless of what the calendar said two weeks ago.
The honest caveat on all of this: the calendar is a floor and a reminder, never a substitute for the bead test. A jacket used hard for three weekends can fail before one that sat untouched for three months. If the numbers here and the fabric disagree, the fabric wins.
The Pre-Trip Ritual
Before any shoulder-season trip, run the bead test. Not because the calendar says you are due, but because shoulder season is where wet-out hurts most: temperatures low enough to matter, rain likely enough to count on, and nobody carrying a full winter kit as backup.
If it fails, you have two options depending on how much time is left. A full wash and wash-in treatment needs an evening plus dryer time, so that is the two-days-out move. If the trip is tomorrow, ten minutes with a spray-on treatment aimed at the shoulders and forearms will get you through the weekend. Nikwax TX.Direct Spray-On is the usual bottle for exactly this, hung over the bathtub the night before while you pack everything else.
Neither option is a substitute for the routine schedule. Both beat finding out at mile eight.
Can You Wash a Rain Jacket Too Much?
This worry stops people from washing a jacket that badly needs it, which produces the exact outcome the worry was trying to prevent. It deserves a straight answer rather than a reassuring line.
What Washing Actually Wears Out
The ceiling is not the DWR. That coating is built to be refreshed constantly, so wearing it down is the normal cycle rather than damage. You cannot “use up” a jacket’s DWR in a way that matters, because DWR is replaceable by definition.
The real ceiling is mechanical, and it lives in two places. Seam tape degrades with repeated wash stress, particularly hot water and aggressive cycles, until the adhesive lets go along a seam. And face fabric thins and distorts under high heat and agitation over enough cycles. Those are the failures that end a jacket, and neither of them is reversible.
Here is the reassuring part: normal maintenance-schedule washing does not get near that ceiling. Even a thru-hiker washing every few weeks through a long trail is well inside safe territory. Reaching the mechanical limit takes seasons of hot cycles, high dryer heat, and heavy agitation, not a monthly delicate wash in cold water. If you are following the cadence in this article, the jacket will age out of fashion before it washes out of function.
Why Under-Washing Costs You More
The fear is not just misplaced, it is backwards. Under-washing strips DWR faster than washing ever will.
Dirt and body oils are the primary mechanism destroying the coating. Leaving them in the fabric means they sit there, grinding into the fibers every time you move, giving water something to wick into. A jacket washed four times a year with technical detergent will hold its repellency longer than the identical jacket washed once, because the thing wearing the coating down is not the machine, it is the grime.
What does accelerate real damage is a short list worth memorizing: hot water, aggressive cycles, high dryer heat, and fabric softener. Avoid those four and wash as often as the jacket looks like it needs it. The same logic runs through the same care logic across the rest of your kit, where under-maintenance beats over-maintenance as the more expensive habit almost every time.
The Two Laundry-Room Mistakes That Ruin DWR Fastest
Most “my jacket failed early” stories end in the laundry room rather than on the trail. Two mistakes cause the majority of them, and both feel completely reasonable at the time.
Regular Detergent and What It Leaves Behind
Standard laundry detergent is engineered to break the surface tension of water so it can carry dirt away from fibers. That is the opposite of what you want on a shell whose entire function depends on high surface tension.
Worse, detergent leaves surfactant residue in the fabric even after a normal rinse. That residue pulls water into the face fabric and blocks a new DWR treatment from bonding. Wash a jacket in regular detergent, then reproof it, and you have paid for a treatment that cannot stick.
On the budget question: technical detergent costs about as much as two coffees and lasts several washes. That is the real trade-off, a few dollars a season against degrading a jacket that cost a couple hundred. There is no clean DIY substitute worth recommending, and the cheap option and the right option are close enough that it is not much of a decision.
Fabric Softener, the Expensive Mistake
Softener is worse, by a wide margin.
It works by depositing a thin waxy film on fibers, which is what makes cotton feel soft. On a rain shell that film coats the face fabric, blocks the membrane’s outer surface, and actively repels the DWR treatment you are about to apply. A jacket that has been through a softener cycle can need two or three technical washes before a new treatment will bond at all.
Together with regular detergent, this pair is the fastest way to ruin a shell’s water repellency, and neither announces itself. The jacket comes out looking great and simply stops working.
Same rule for dryer sheets. Same film, different route.
The Rest of the Five-Minute Service
While the jacket is out on the table and dry, two more things are worth doing. You are servicing the jacket, not just laundering it, and the difference is what you catch.
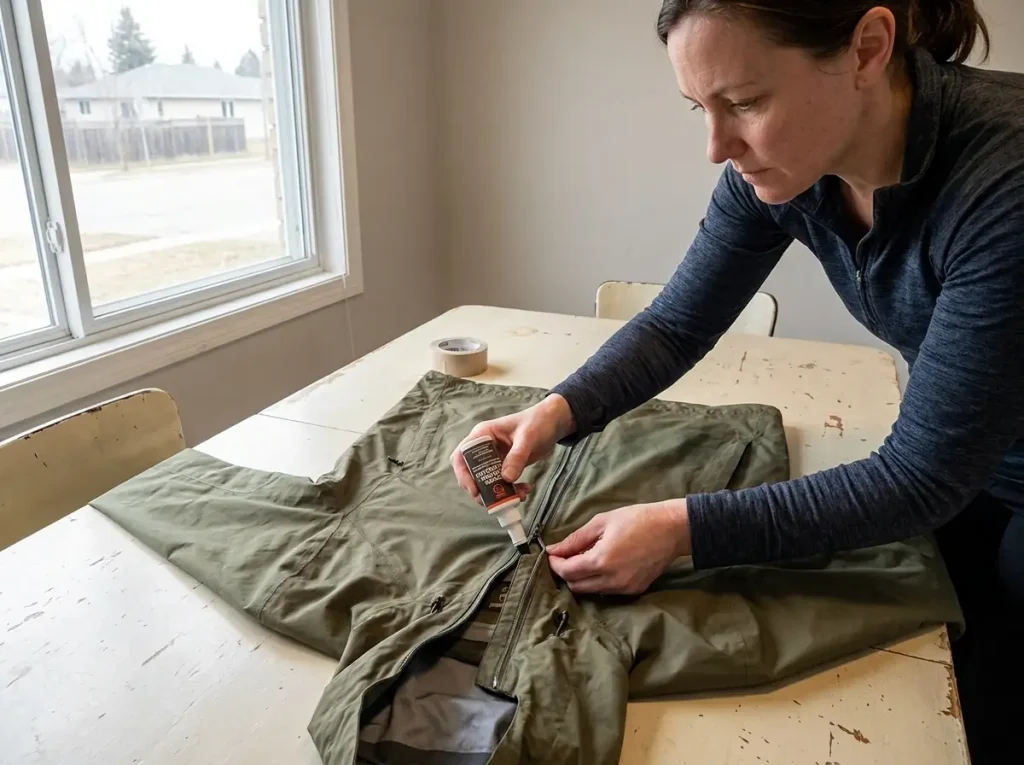
Clean and lubricate the zips. Grit in a zipper is what eventually breaks it, and a failed main zip on a rain shell in the rain is a real problem. Run a damp cloth down the teeth, let it dry, then work a purpose-made zipper lubricant like GEAR AID Zipper Cleaner & Lubricant along the track and cycle the slider a few times. Sixty seconds.
Then look the shell over for small tears and pinholes, especially where a branch caught it or a strap rubbed through. Patch them now with a strip of repair tape like GEAR AID Tenacious Tape while the fabric is clean and dry, because tape applied at a kitchen table holds far better than tape applied to a wet jacket in a tent. If what you find is bigger than a patch, meaning delamination, a spreading seam failure, or face fabric worn through at the shoulders, then when a jacket is past reproofing walks through telling the difference between a shell that needs work and one that is done.
Run the wash-and-service on a weeknight, not the night before a trip. Everything about this goes better unhurried: the extra rinse happens, the dryer cycle runs long enough, and any tear you find gets patched properly instead of taped over at 11pm with the pack half-loaded by the door.
Conclusion
The bead test decides. The calendar reminds. Never the other way around, and never a treatment applied because a date arrived rather than because the fabric asked for one.
A PFAS-free shell needs care roughly three times more often than the jacket it replaced. If you bought it in 2024 or later, that is almost certainly what is hanging in your closet, and the old schedule in your head no longer applies to it.
Wash more than you think, dry with low heat, and keep the softener out of the room. Under-washing costs more jackets than over-washing ever has.
Go run the bead test on the shoulder of whatever is hanging by your door right now. It takes thirty seconds, and it tells you which of the three windows you are actually in.
Frequently Asked Questions
01How often should you reproof a waterproof jacket?
Reproof when the bead test fails, which for most hikers lands every 3 to 4 months of regular use or every 2 to 3 months in heavy rain. Occasional users manage on twice a year. Your jacket’s chemistry matters more than the calendar does.
02How to restore waterproofing on a rain jacket?
Wash with a technical detergent first, apply a wash-in or spray-on DWR treatment, then reactivate with low heat if the product calls for it. Skipping the wash is the most common error, because reproofing over dirt seals the dirt in and the treatment cannot bond.
03What is the best waterproofing spray for rain jackets?
For most hiking shells, a PFC-free spray-on treatment aimed at the high-wear zones does the job. Nikwax TX.Direct Spray-On is the common default, with Gear Aid Revivex and Grangers Performance Repel Plus as equal alternatives. Choose spray over wash-in when your jacket has a wicking lining.
04How to reactivate waterproofing?
Tumble dry on low to medium heat for 20 to 30 minutes once the jacket is clean and treated. Without a dryer, air dry fully then iron on low with a cloth barrier, or run a hairdryer over the shoulders. Check the label, since several formulas need no heat.

I've spent more than a decade researching hiking gear and trail technique. I read the specs, the forum threads and the long-term reviews, and every pick here comes with what it gets wrong.
End of the trail
You read every mile of this one. Here's where the trail goes next.