






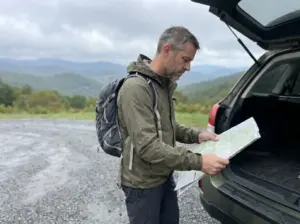





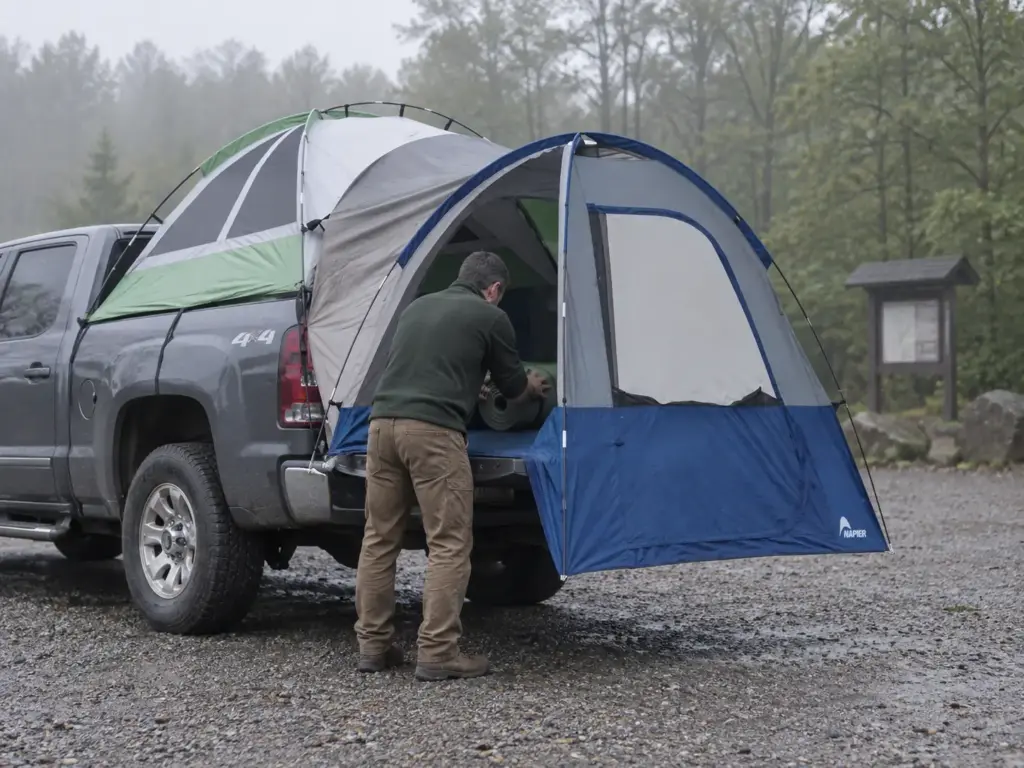
Search “pickup truck bed tent” and half of what comes back tries to sell you a rooftop tent instead. Different product, different mounting hardware, different price tier, and it has nothing to do with the empty space behind your cab. The questions hikers actually ask about a truck bed tent in gear threads are simpler and more practical than any of those roundups admit: will it fit my bed, and can I still drive to the next trailhead once it’s up. This guide answers both, plus the part nobody prices honestly, and it ends with four picks that earn their spot for different trips.
What a Pickup Truck Bed Tent Actually Is (and What It Isn’t)
You probably have four browser tabs open right now and two of them are selling roof rack systems. Let’s clear that up before you spend another twenty minutes comparing products that don’t belong in the same conversation.
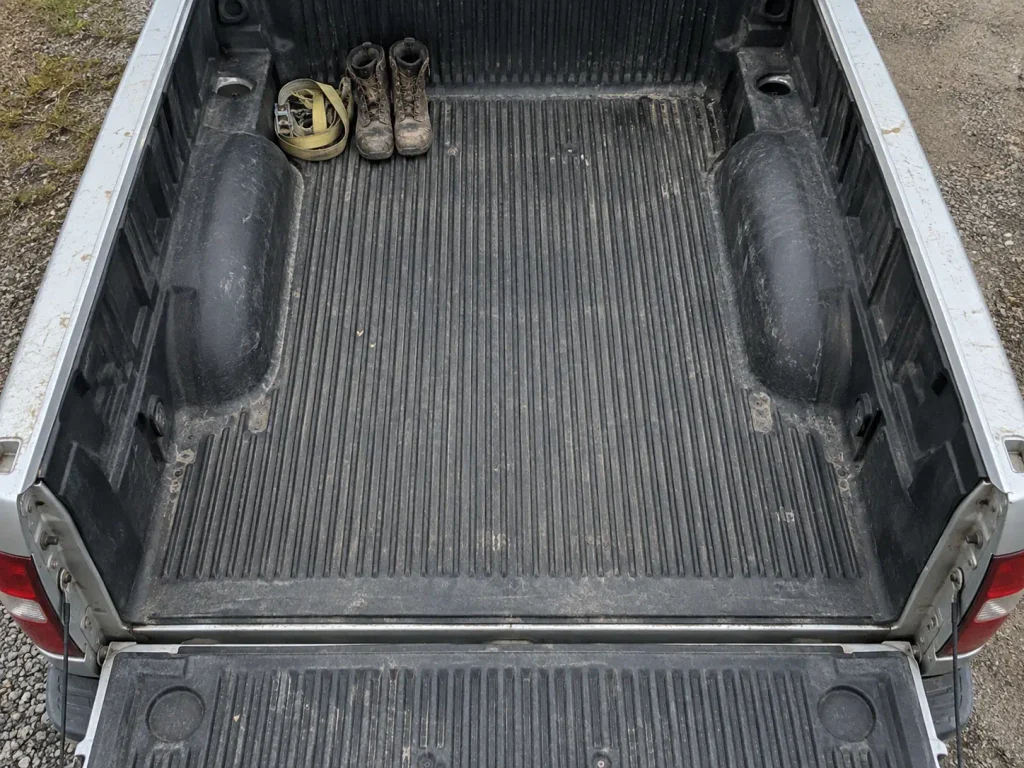
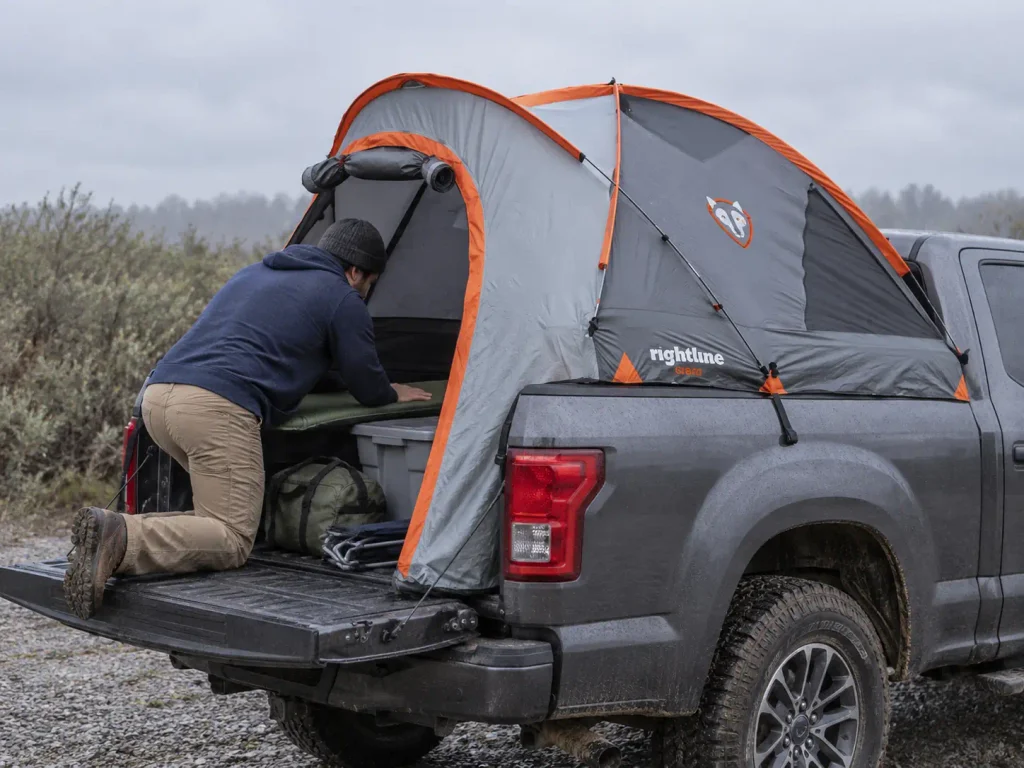
A pickup bed tent pitches inside the bed. The bed walls and the open tailgate are its structural anchor points, and the tent straps to them. No drilling, no roof rack, no permanent mounting hardware. You unroll it into the cargo area, seat the poles, strap it down, and the sides of your truck do the work that stakes and guylines do on the ground.
The sleeping platform is the bed floor itself, which is flat, raised, and immune to the root that would otherwise land under your hip. That off-the-ground platform is the whole appeal, and it also explains how truck tents change the way you pick a campsite compared to hunting for level dirt at every stop.
A rooftop tent is a different animal entirely. Roofnest, Thule and Topoak build shells that bolt to a crossbar rack on the roof and fold or pop open above the cab. That product has its own static load rating and dynamic load rating, its own effect on your center of gravity, and a price tier that sits well above most bed tents.
It also leaves your bed free, which is exactly why some people choose it. The two categories get blended in the same roundups constantly, and that’s how buyers end up pricing a rack system they never needed.
Why the rack confusion costs you money
Here’s the practical consequence. If you read a roundup that lists a rooftop wedge next to a Napier bed tent and you compare them on price alone, the bed tent looks like an obvious steal. It isn’t a steal, it’s a different product solving a different problem.
The rooftop tent buys you a bed you can still load with gear and a rig you can drive with the tent folded. The bed tent buys you a cheap, rack-free shelter that consumes the cargo area and pins the truck in place. Neither is better until you know which constraint you’re actually fighting.
What it will not work with
A bed tent needs the open bed cavity. That means a tonneau cover, a camper shell or a topper is a hard conflict, because those fill exactly the space the tent wants to occupy. Some hinged or folding covers can be removed or folded fully forward, but clearance varies enough between models that manufacturers hedge on it.
Napier’s own documentation on the question amounts to “it depends,” and that’s an honest answer rather than a dodge. Nobody in this category has published a clean compatibility matrix for covers and racks, so treat any claim that yours “should work” as untested until you test it.
There’s a regulatory line worth drawing too, because these categories get conflated in exactly the same way. Permanently mounted hard-side truck campers, the slide-in units that live in the bed semi-permanently, fall under NHTSA’s vehicle safety standards, which cover hard-side truck campers but not soft bed tents. Those standards require weight-rating labels and loading manuals because a loaded camper changes how the truck handles.
A fabric bed tent you strap in at camp and pack out in the morning is not that product and is not governed by it. If you’ve seen the two discussed together and wondered whether you needed some kind of certification, you don’t.
If a product page shows the tent draped over a closed tailgate or sitting on a rack, close the tab. Real bed tent photos always show an open tailgate and a sleeve or flap extending over it. That one visual check filters out most of the miscategorized listings before you read a single spec.
How to Measure Your Truck Bed Before You Buy Anything
“F-150” is not a size. Neither is Tacoma, Silverado or Ram 1500. The same model year ships in multiple bed trims, and tent manufacturers size their products by truck bed length, not by the badge on your tailgate. Buying by model name is the most repeated mistake in this category, for one reason: the badge feels like enough information and it never is.
The three bed size classes, plainly
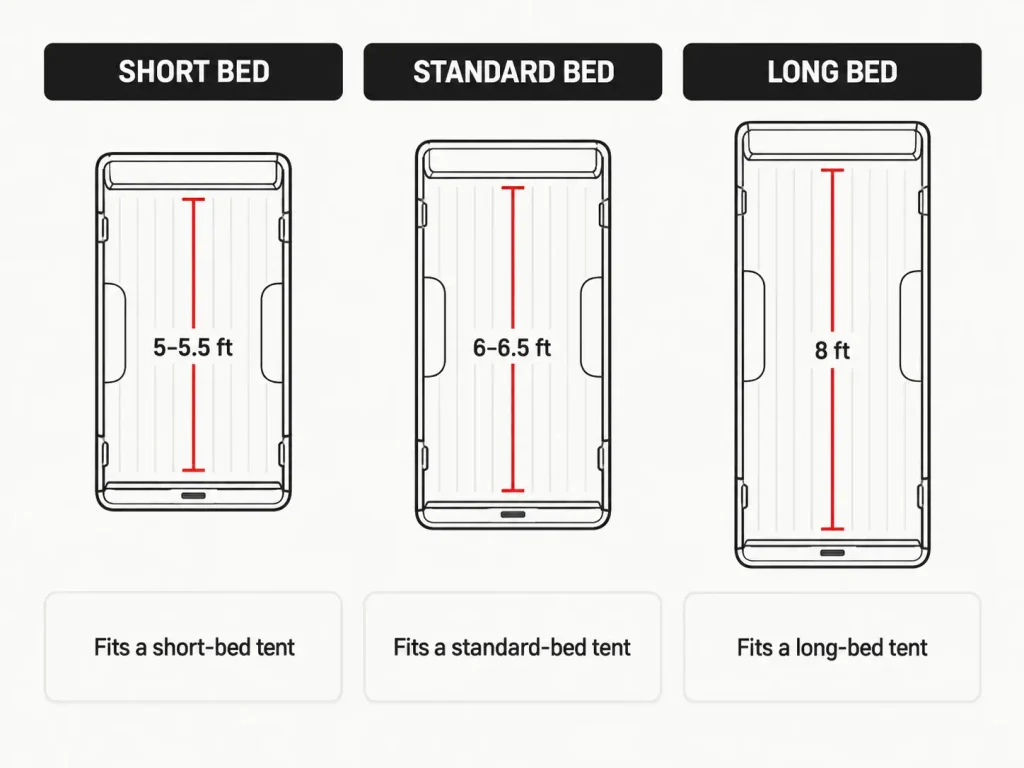
Nearly every truck bed tent on the market is built for one of three classes. Short bed covers roughly 5 to 5.5 feet. Standard bed runs 6 to 6.5 feet. Long bed is the full 8 feet.
Some manufacturers add a mid-size class for smaller trucks, which overlaps the 5 to 6 foot range with narrower interior dimensions.
The number that matters is the interior measurement from the bulkhead, the front wall of the bed against the cab, straight back to the inside face of the closed tailgate. That bulkhead to tailgate measurement is the whole ballgame. Tape measure, on the truck, not a spec sheet you found in a forum post.
[CREATOR NOTE] Infographic Suggestion: A truck bed size chart — the three classes (short 5–5.5 ft, standard 6–6.5 ft, long 8 ft) with the bulkhead-to-tailgate measurement line drawn on a plain top-down bed outline, and a column showing which tent size class matches each. The section photo shows a tape measure in a bed; it cannot show three size classes side by side with their numbers, and the text lists them sequentially where a reader wants to compare at a glance. This is a size/fit chart: it shows what the classes ARE, with no steps, no sequence and no mounting shown.
Write it in your phone. You will need it again for the fitment chart, and you will forget whether it was 5’5″ or 5’8″ by the time you’re comparing products.
Why a tapered bed breaks the math
Plenty of modern beds are tapered, wider at the rail than at the floor. A tent rated for your exact bed length can still sit badly, because the floor it has to cover is narrower than the opening it measures against. You end up with a tent that’s technically the right class and practically loose at the corners, with fabric pooling where you wanted a taut wall.
This is the same gap between listed capacity and real usable floor width that trips people up on backpacking tents. The number on the box describes the outer envelope. The number that decides whether you sleep well describes the floor. Check the manufacturer’s vehicle fitment guide, which lists specific makes, models and trim years rather than a length range, before you order anything.
Bed liners, drop-ins and what actually gets in the way
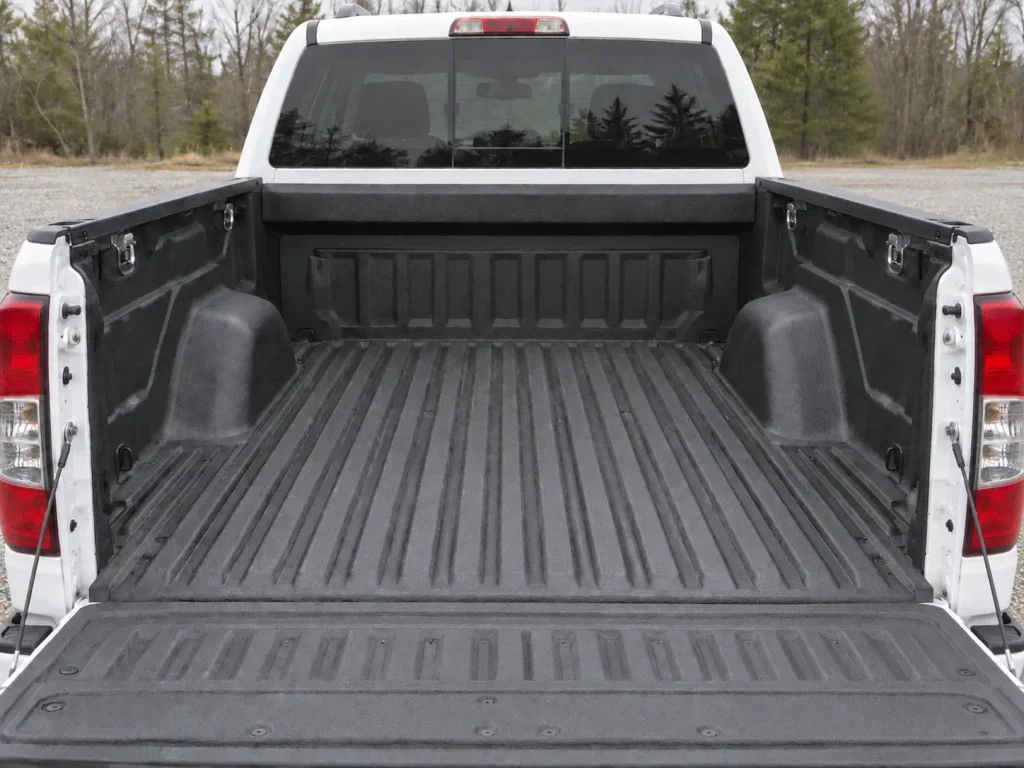
A spray-in liner is a non-issue. It’s a coating, it doesn’t change your dimensions, and it adds grip that keeps a tent floor from sliding. A drop-in plastic liner is a different story, because it has raised ribs, a lip at the rail, and sometimes a bulkhead profile that eats an inch or two of usable length. Measure inside the liner, not the bare bed you saw at the dealership.
Toolboxes, a bed organizer or a truck bed drawer system, and cargo dividers are straightforward: they occupy space the tent needs, and the tent needs the whole cavity. A crossbed toolbox or a bed rack generally rules out a sewn-floor tent entirely and complicates even a floorless one. A truck topper or camper shell rules out both, since the tent needs the cavity the shell is filling. Know what’s in your bed before you shop, because the honest answer for some setups is that the toolbox comes out or the tent doesn’t go in.
Getting the size wrong is more than a comfort problem. An undersized tent gets stretched and dragged across the bed rails during setup, which is how paint gets scratched and thin sheet metal gets dented. An oversized one never pulls taut, so its wind resistance collapses: it flaps, works its straps loose over a night, and can detach. Both failure modes come from the same two-minute measurement nobody wants to take.
Floorless or Sewn Floor, the Choice That Changes Your Whole Camp Routine
Every comparison table in this category puts “sewn-in floor” in one row and “floorless” in another, marks one of them with a checkmark, and moves on. That table tells you nothing about the decision you’re actually making, because the floor design doesn’t change how the tent performs. It changes what you do every morning.
What a sewn floor buys you
A sewn-in floor is a sealed fabric panel between you and the bed. It keeps grit, leaf litter and whatever else lives in your truck out of the sleeping area. It gives you a clean, continuous surface to lay a pad on. It seals the perimeter against the bed walls, so wind-driven rain that gets past the rail has nowhere to run.
The price is structural: the bed has to be empty, or close to it, before the tent goes in. You cannot pitch a sealed floor over a cooler, a pack, a spare tire or a cargo mat with anything sitting on it.
It’s the same floor-protection tradeoff that drives the footprint debate, just relocated. You’re adding a layer of fabric to protect the sleeping surface and paying for it in weight, packed bulk and setup constraint. The logic is identical. Only the surface changed.
What floorless buys you
A floorless tent has no floor panel. The tent pitches up off the bed surface, walls anchored to the rails, and whatever is on the bed floor stays on the bed floor. A liner, a cargo mat, a gear tote pushed against the bulkhead, all of it just sits there while the tent goes up over it.
That is the entire gear-loading argument, and it’s a bigger deal than the spec line suggests. If you run a bed that’s semi-permanently loaded, with a mat, a fuel can, a recovery kit and a couple of dry bags that live back there, a floorless design means you never unpack your rig to sleep in it. You clear the sleeping rectangle, you pitch over the rest, and you’re in your bag in ten minutes.
The morning-routine test that settles it
Forget the spec table and run this instead. Picture your bed exactly as it looks right now, loaded the way you actually drive it. Now picture pitching a tent in it at dusk after a nine-mile day, and striking that tent at six the next morning in the cold.
With a sewn floor, everything in that bed comes out at setup and goes back at teardown, twice a day, every day of the trip. With floorless, most of it never moves. That’s the whole decision.
If your bed lives empty, the sewn floor is comfortably the better sleeping surface and the constraint costs you nothing. If your bed lives loaded, the floorless design saves you two unpacking cycles a day and the grit is a solvable problem.
There’s a second consequence that matters more than it looks. A floorless tent leaves air moving under the sleeping area instead of sealing a fabric skin against the bed metal, which is a condensation lever, not just a convenience one. That’s the next section, and it’s the part beginners get blindsided by on their first cold night.
Match the tent to your cycle, not to your truck. Canvas and sewn-floor tents are the ones people pitch once and leave standing for days. Polyester pole-and-sleeve tents are the ones actually built for the strike-and-relocate rhythm a trailhead hiker runs. Buy for the rhythm of the trip you take most often.
Why You Wake Up Damp, and What the Fabric Has to Do With It
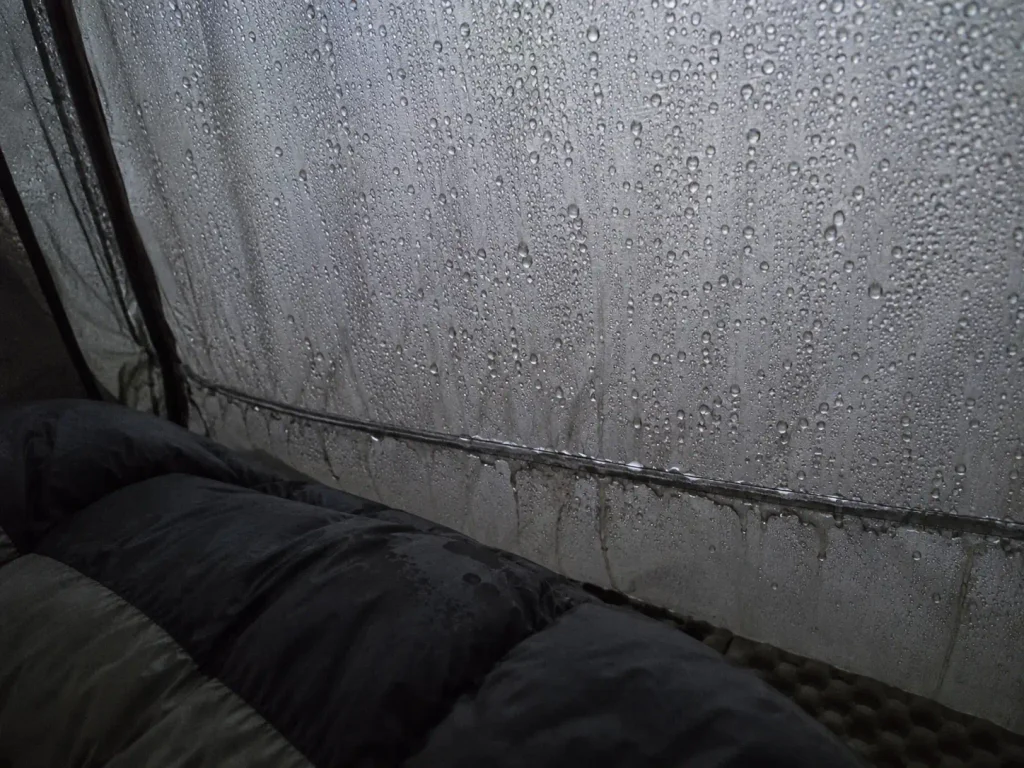
You wake up at five, the inner wall is beaded with water, the foot of your bag is cold and wet, and you spend the drive home convinced the tent leaked in the night. It didn’t. That was you, and the story repeats itself constantly in truck-camping gear discussions because the mechanism is genuinely counterintuitive.
Canvas, and why the weave matters
A sleeping adult puts out a meaningful volume of water vapor over eight hours through breath and skin. That vapor rises, hits the first cold impermeable surface it meets, and condenses into liquid there. In a sealed tent on a cold night, the first cold impermeable surface is the inner wall two feet from your face.
Cotton duck canvas behaves differently, and this is physics rather than a brand claim. The weave is vapor-permeable, so moisture passes continuously through the fabric itself instead of stacking up against it. The wall never becomes the condensation surface because the vapor doesn’t stop there. Canvas tents report less morning dampness than sealed polyester in cold, humid conditions for exactly that reason, and it’s the single most defensible argument for paying the canvas premium.
Sealed polyester and the trapped-vapor problem
Polyester taffeta, polyester oxford, nylon oxford and ripstop polyester with a PU coating are the opposite by design. The coating is what makes them waterproof, and waterproof from the outside means impermeable from the inside. The vapor has nowhere to go, so it condenses, runs down the wall, and collects at the lowest point it can reach.
A sewn floor in a sealed bed compounds that. The bed is metal or a plastic liner, the floor is coated fabric, and the whole assembly is effectively a closed container with a warm wet person in it.
Moisture pools under the pad where you won’t notice it until you pack up and find the underside of your mattress soaked. Floorless designs sidestep this by a different route than canvas does. They don’t move vapor through the fabric, they move air under the sleeping area, and the result at dawn is similar.
The ventilation habit that fixes most of it
If you own a sewn-floor polyester tent, you’re not stuck with wet mornings. You just have to fight your instinct, which on a cold night is to zip everything shut.
Crack a window or a roof vent overnight, ideally two on opposite walls so air actually crosses rather than sitting.
Yes, it feels colder. It is colder by a degree or two, and your sleeping bag handles that far better than it handles being damp, because wet down loses most of its loft and wet synthetic isn’t far behind. Mesh windows with storm flaps exist precisely so you can do this in weather, and a gear loft or lantern hook overhead keeps damp kit off the floor where the air moves least. The buildup difference between a sealed tent and a cracked-vent tent on the same night is obvious enough that you only need to try it once.
If your wall is still wet after that, the problem is airflow geometry rather than the amount of opening, and the full physics-based fix for a wet tent wall walks through the rest of it.
The Mobility Penalty Nobody Puts on the Spec Sheet
The tent’s up, the bags are in, dinner’s done, and someone says let’s go look at the other trailhead for tomorrow. That’s the moment you find out what you actually bought.
What “10-minute setup” really costs you
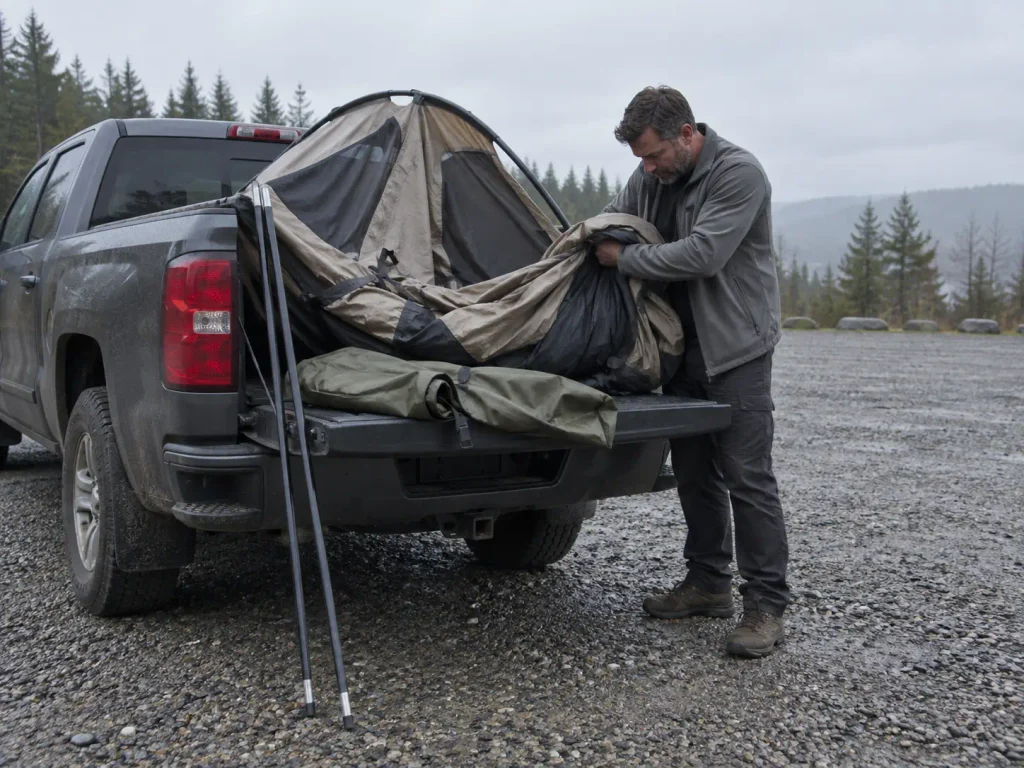
Napier and Rightline Gear both advertise setup in the 10 to 15 minute range with color-coded aluminum poles and sleeves, while the budget end of the category runs fiberglass poles or a steel tube frame instead, and those numbers are honest for the second or third pitch. What the marketing leaves out is that the number runs in both directions.
Once the tent is pitched, the truck is parked. The tailgate has to stay open because the tent extends over it, the straps run to the bed rails, and there is no quick-disconnect on a pole-and-sleeve system, and no pop-up tent shortcut in this category either.
You cannot drive with it up. So a ten-minute setup is really ten to fifteen minutes to strike, plus the drive, plus ten to fifteen minutes to re-pitch in the dark when you get back. Call it thirty to forty minutes of work around a five-minute errand. That’s the mobility penalty, and it’s the number nobody puts on a spec sheet.
Add the friction nobody counts: repacking a tent wet, restaking in the dark, and doing it while tired. The arithmetic gets worse the more tired you are, which is exactly when you most want to just drive somewhere.
Trips where the penalty is free
Some trip shapes pay nothing for this. One trailhead, several days, a car-accessible basecamp you return to each evening. You pitch on Thursday night, you hike out and back Friday, Saturday and Sunday, and the truck never needs to move until you leave. The penalty exists on paper and never touches you.
That’s the trip a truck bed tent is genuinely great at. Flat platform off the ground, shelter that goes up in the bed you already drove in on, no hunting for a level site in a crowded campground, and your gear ten feet from your pillow. If that’s your pattern, stop worrying about this section.
Trips where it isn’t worth it
Chaining trailheads is the obvious failure case. So is shuttling a point-to-point hike where your truck has to be at the finish. So is any trip where water, fuel or a resupply run is a drive rather than a walk. In all three, the tent turns every logistical decision into a camp-breaking decision, and after two days of that you’ll be looking at the ground tent in your gear closet with real affection.
The honest comparison is blunt: a standard backpacking tent you can leave standing while you drive out gives you back every bit of that flexibility. You lose the flat raised platform and you gain a vehicle you can actually use. That’s the trade, stated plainly, and for a lot of hiking trips the ground tent wins it.
And on the right night, in the right conditions, skipping the tent entirely is a real option. A truck bed with a pad and a bag under a clear forecast is a fine place to sleep with no tent at all, and the truck stays drivable. Not every problem needs more gear thrown at it.
The Floorless Pick That Skips the Unloading Ritual
If your bed already carries a liner, a mat and half your gear, this is the design that doesn’t make you undo all of that before you can sleep.
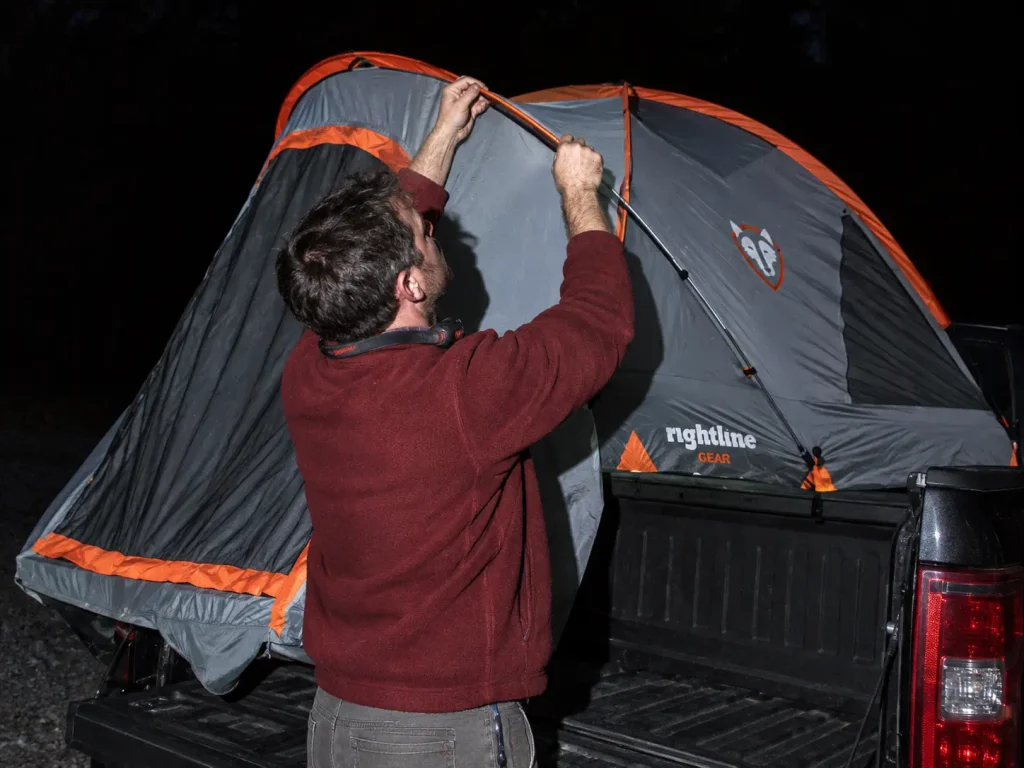
Rightline Gear Full-Size Short Truck Bed Tent
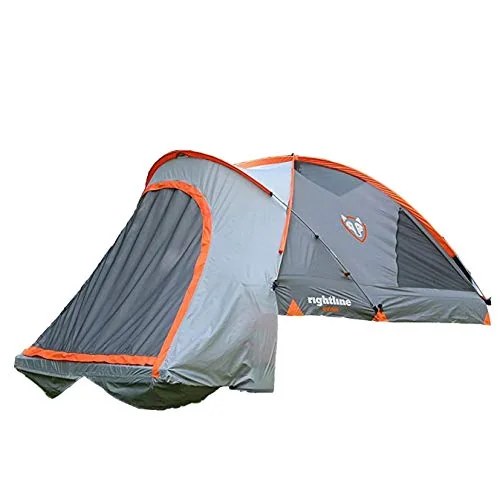
The 2000mm PU coating with taped seams is the spec worth understanding here. A coating rating describes how much water pressure the fabric holds before it wets through, and 2000mm is the regular-use tier: sustained rain, not just a squall that passes in twenty minutes. Taped seams matter just as much, because a stitch line is a row of holes through a waterproof fabric and tape is what closes them.
Plenty of budget tents coat the panels and leave the seams raw, which is how a tent with a respectable rating leaks anyway. If you want the fuller version, what taped seams and a PU rating actually buy you covers the whole waterproofing chain.
The color-coded poles are a small thing that stops mattering after the second pitch and matters a lot on the first. Pole-and-sleeve assembly in fading light with four identical shock-corded sections is a genuinely annoying puzzle, and color coding removes it.
Now the honest limitation, because floorless is a tradeoff and not a free upgrade. No floor means the bed surface is your sleeping surface. Grit, the ribbed texture of a drop-in liner, the cold of bare metal at 4 a.m. and anything you didn’t clear out are all part of the deal.
Bring a real sleeping pad or a foam mattress, not a thin foam sheet, and sweep the sleeping rectangle before you pitch. Do those two things and the tradeoff disappears into the background. Skip them and you’ll spend the night learning why the floor exists on other models. If you ever doubt a seam, a water test in the driveway with a hose and a fresh pass of seam sealer costs an afternoon and settles it.
Test-pitch it in the driveway before the trip. Two things surface on a first assembly and only on a first assembly: poles that won’t stay seated in their pockets, and the realization that this is comfortably a two-person job. A campsite at dusk is the worst possible place to discover either one.
The Budget Sewn-Floor Pick Most Hikers Start With
This is the tent most people buy first, and for a couple of weekends a year that’s the right call. It also gives us the cleanest place to say where “budget” stops being a bargain and starts being a bad night.
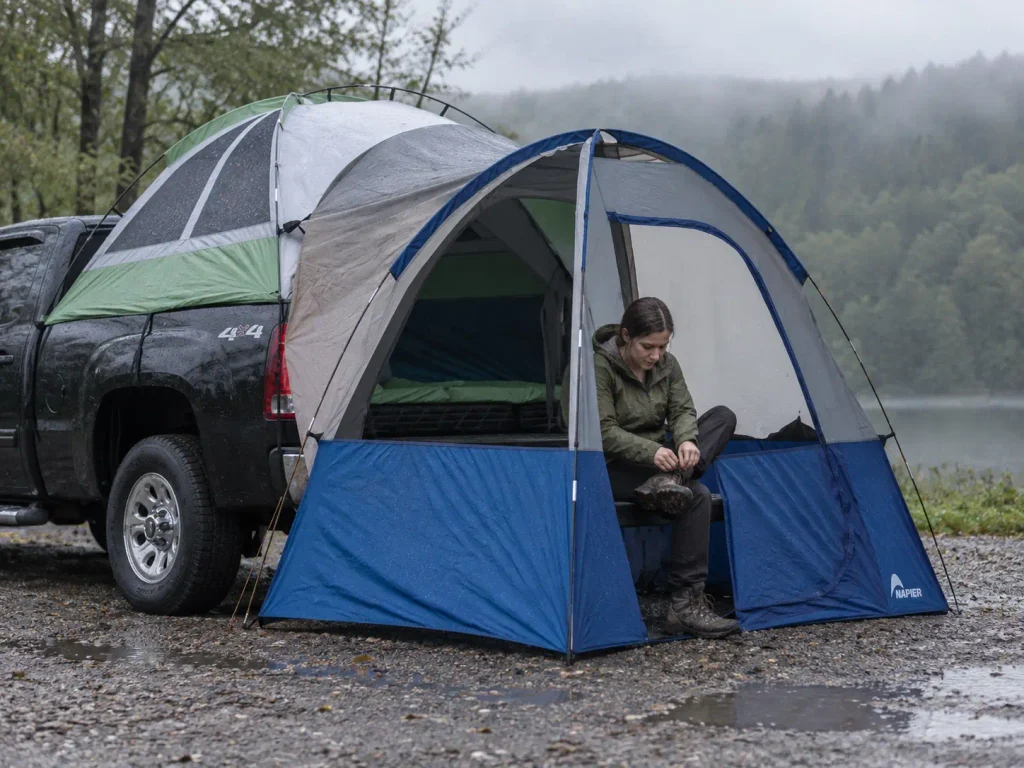
Napier Backroadz 13 Series with Sportz Link
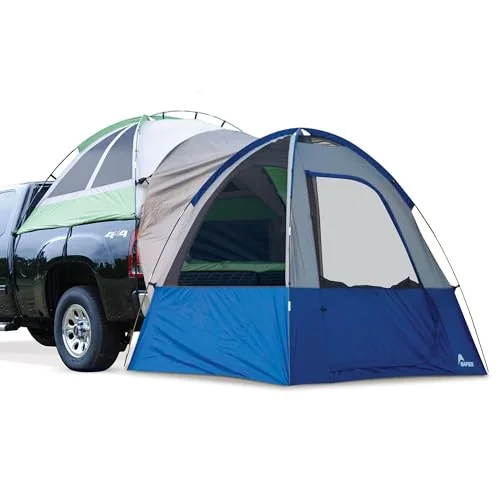
The Backroadz sizing is full-size short bed, 5’5″ to 5’8″, which is a tighter window than the round “5.5 ft” marketing number suggests. Measure before you order. That three inches is the difference between a taut pitch and fabric you’re fighting with straps.
The bundled Sportz Link deserves a sentence of its own. It’s an attached shelter that extends off the open tailgate, which gives you a covered area to stand in, pull boots off in, and park wet packs in without dragging them into the sleeping area. On a rainy trip that’s the difference between a tent and a camp.
Now the anti-sell, because this is where cheap tents get people. Waterproof ratings in this category run in a predictable ladder: 1500mm handles light rain, 2000mm handles regular use, and 3000mm and above handles sustained heavy rain. Do not buy anything rated under 1500mm if you camp more than a weekend a year.
It will wet out in a real storm, and by wet out I mean the inner wall starts transmitting water to the touch well before morning. Cheap polyester is rated for “it rained on me,” not for “it rained on me for six hours straight.”
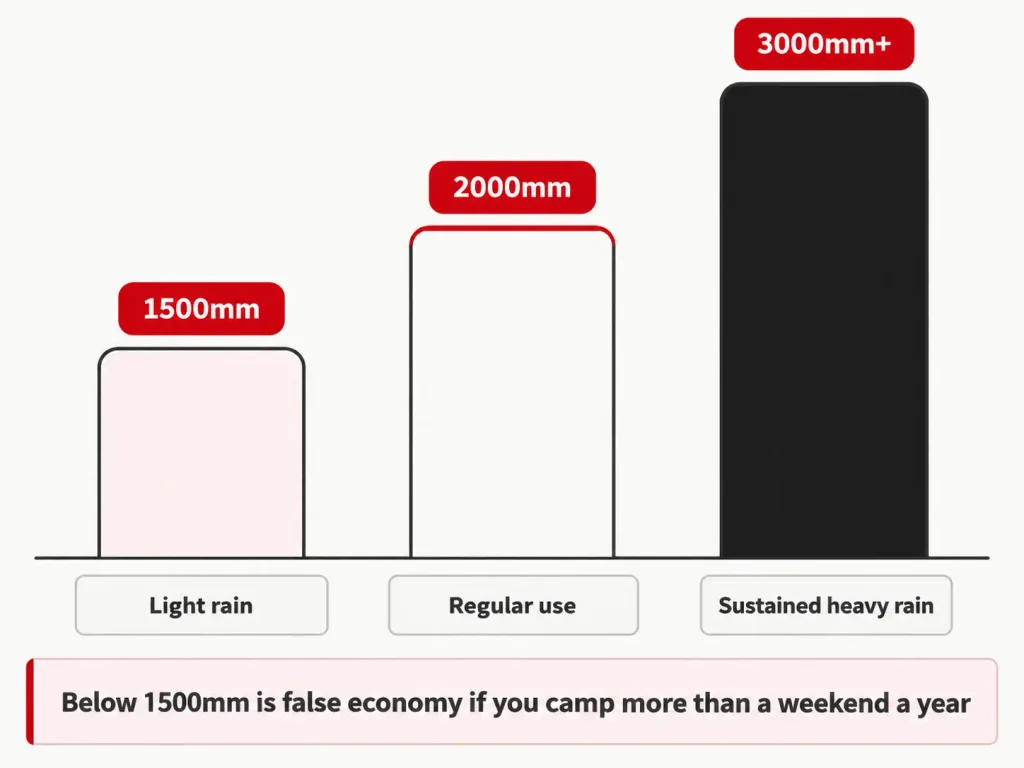
That ladder is the same seasonal rating logic that separates a three-season tent from a four-season tent, the split covered in a 3-season tent from a 4-season one, expressed in millimeters instead of a season label. Either way you’re answering one question: what weather am I actually going out in, and am I buying for that or for the weather I’d prefer.
The floor here is sewn, so the routine cost applies at full price. For a two-night weekend that’s fine. For five days with a loaded bed, run the morning-routine test again before you commit.
When the crew cab changes the math
Crew cab trucks pair a big cab with a short bed, which is a geometry problem for tent makers. Most of the market adapts a full-size design and lets the cab end sort itself out. One doesn’t.
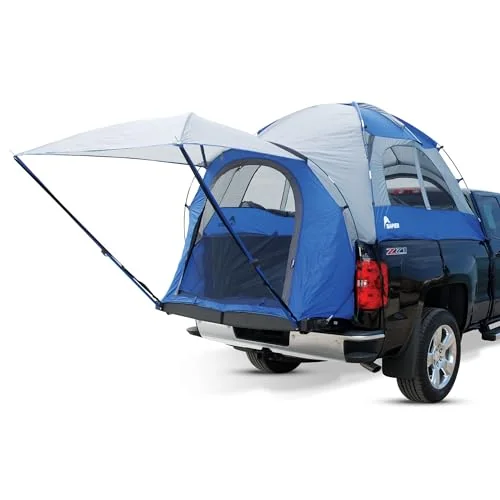
The peak interior height past 5.6 feet is the spec that changes daily life in a tent more than any other. You cannot stand fully, but you can kneel upright, change layers without lying down, and sit on the tailgate edge without ducking. On a rainy morning, when getting dressed happens inside, that is a substantial quality-of-life difference.
The awning is the other argument, and it does the job a vestibule does on a ground tent. Four feet by four feet of covered space off the tailgate gives you somewhere to be out of the weather that isn’t the sleeping area, which matters more than it sounds like it should.
Wet gear stays out there. Boots come off out there. The sleeping area stays a sleeping area instead of becoming a mudroom.
The sewn floor carries the same routine cost as the Backroadz, and the crew cab bed is short to begin with, so you have less room for compromise on what stays loaded. Plan on an empty bed with this one.
The Canvas Basecamp Pick for Multi-Day Trips
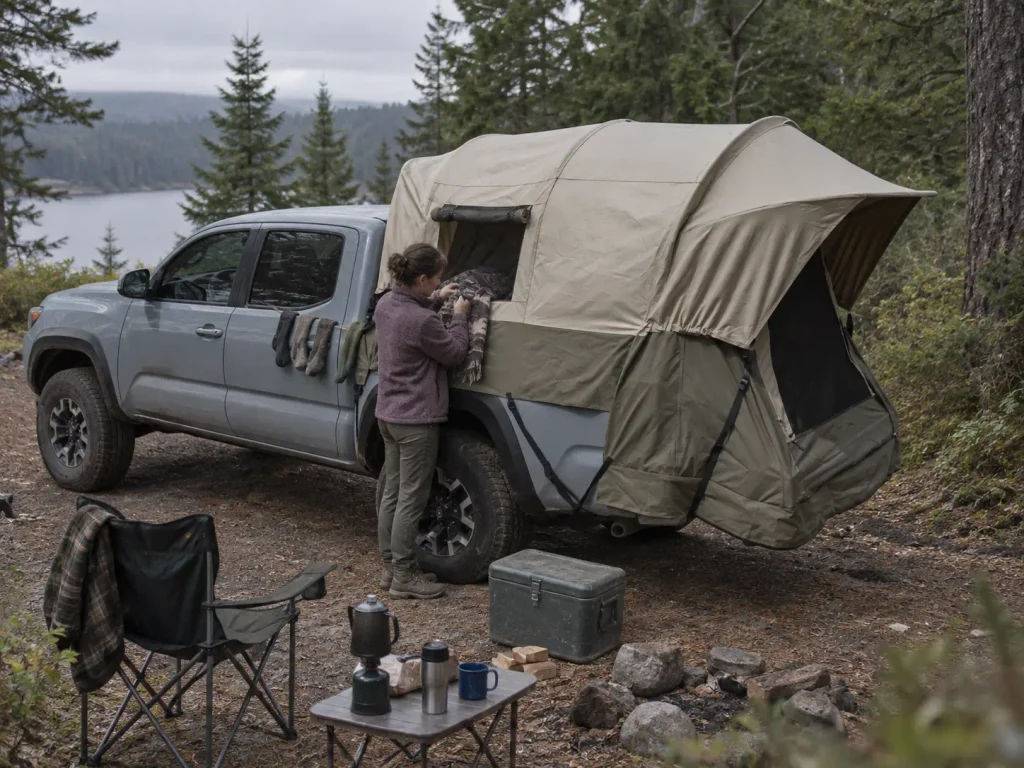
This is not the tent you pitch and strike every night. It’s heavy, it’s slow, and it is exactly the right answer if you’re parking once and hiking out from that spot for four days.
Kodiak Canvas Truck Tent, Mid-Size
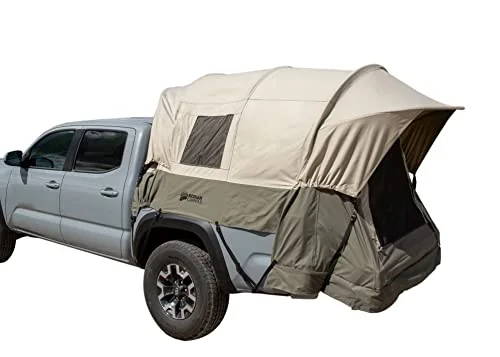
Everything from the condensation section shows up here in physical form. Hydra-Shield cotton duck canvas is treated to shed liquid water from outside while the weave still passes vapor from inside, which is the combination that gets you a dry wall on a cold humid night. That’s the premium you’re paying, and unlike most premiums in outdoor gear it’s a mechanism you can explain rather than a feeling you’re sold.
The cab-access window is a genuinely good design detail. It lets you reach into the cab without going around the truck in the rain, which sounds trivial until you’ve done the barefoot lap at 2 a.m.
Five windows with no-see-um mesh mean you can run real cross-ventilation on a warm night and still keep the bugs out.
The weight is the honest cost. Canvas is several times heavier than coated polyester for the same footprint, and this one packs down large. That weight is also why it lasts: canvas resists UV degradation and abrasion far better than thin polyester, which goes brittle after a few seasons in the sun. It’s the same calculation running through every shelter material decision, and how shelter fabrics trade weight against lifetime covers the ultralight end of the same spectrum.
Interior peak height sits around five feet, so this is a sit-up tent rather than a stand-up one. Combine that with the weight and the slower pitch and you get a clear verdict: this is basecamp gear you leave standing. Own that instead of pretending otherwise.
Which means the mobility penalty is at its absolute maximum with this tent, and so is packed weight. Four days, one trailhead, and that penalty costs you nothing at all. Four trailheads in four days, and this is the wrong tent by a wide margin.
Before you build a trip around parking once and staying put, check the park’s backcountry camping regulations before you assume a truck bed tent exempts you from permit requirements. Sleeping in your truck instead of on the ground is not a workaround for designated-campground or permit rules, and land managers have heard that argument before.
Sizing note, because it’s a different class from the other two picks: this is the mid-size fit for a 5 to 6 foot bed. Mid-size trucks have narrower beds than full-size trucks at the same length, so the length match alone won’t tell you what you need. Back to the tape measure.
This is also not a first truck tent. Heavier setup, more commitment, more storage space required at home, and it rewards one specific trip shape. If you’re still figuring out whether you like sleeping in your bed at all, start cheaper and upgrade when you know.
What to Do Before You Open a Single Product Page
Three things decide whether this purchase works, and only one of them is about the tent.
Measure bulkhead to tailgate with an actual tape measure. The badge on your truck is not a size, and the same model ships in bed lengths that take completely different tents. Write the number down.
Pick your floor by your morning routine, not by the spec table. Floorless if your bed stays loaded and you’d rather not unpack the rig twice a day. Sewn floor if you want a clean sealed surface and an empty bed doesn’t cost you anything.
Price the mobility penalty honestly before you buy. One trailhead for several days, it costs you nothing and a bed tent is a great answer. Chaining trailheads or shuttling a point-to-point route, it costs you the flexibility that makes those trips work, and a ground tent wins.
Go measure your bed this week, before you shop. Two minutes with a tape measure is the one number that decides everything else, and it’s the step people skip right up until the return shipping label. If that measurement sends you back toward a ground setup instead, how the same sizing questions play out for backpacking tents is the next thing to read.
Frequently Asked Questions
01Are truck bed tents worth it?
Worth it if you basecamp from one trailhead for several days and want to sleep off the ground on a flat surface. Not worth it if your trip involves driving between trailheads, because the tent has to come down before the truck moves. The mobility tradeoff is the whole question.
02Are truck bed tents safe?
Safe sleeping in a truck bed comes down to being parked. You are in a fabric shelter on a raised platform, structurally no different from a ground tent. The real hazards are fit-related: an undersized tent can scratch the bed during setup and an oversized one can work loose in wind. Never drive with it pitched.
03Can I legally sit in the bed of a truck?
Whether it is legal to ride in a truck bed depends on your state, and those rules govern a moving truck rather than sitting in a parked one at a campsite. Roughly 20 states have no restriction for adults, New York, New Jersey and Arkansas prohibit it outright, and states like California require a secured restraint system. Check your state rule.
04What is the best truck tent for an F-150?
There is no single answer, because F-150 is not a size. The same model year ships in short-bed and long-bed trims. Measure bulkhead to tailgate first, then match that number to a tent size class. A 5.5 ft short bed and an 8 ft long bed take completely different tents.
05Can you use a truck bed tent with a tonneau cover?
Generally no. A bed tent needs the open bed cavity to pitch in, and a tonneau cover, camper shell or topper fills exactly that space. Some hinged covers fold fully forward or come off, but clearance varies enough by model that manufacturers hedge. Check your specific cover and tent combination.

I've spent more than a decade researching hiking gear and trail technique. I read the specs, the forum threads and the long-term reviews, and every pick here comes with what it gets wrong.
End of the trail
You read every mile of this one. Here's where the trail goes next.