
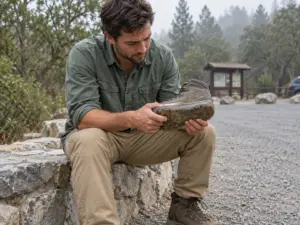
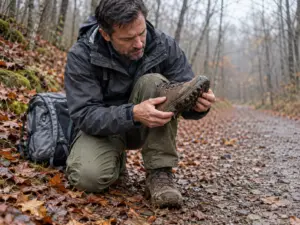
















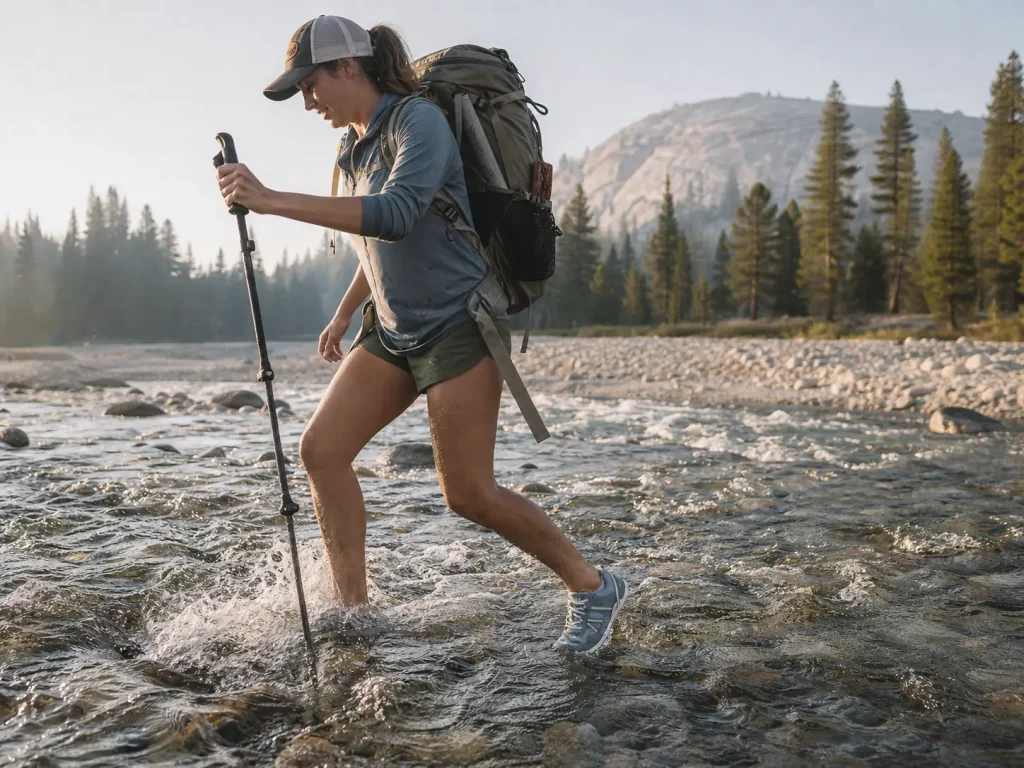
You are standing shin-deep in a creek in the boots you bought specifically for this, and the water is already an inch over the collar. The membrane that was supposed to keep water out is now doing an excellent job of keeping it in. Ask anyone who hikes desert canyons or portages in the Boundary Waters and you get the same pattern back: the people who cross the most water carry the least waterproofing. This guide covers how drainage holes actually move water out of a shoe, why an expensive membrane is the wrong tool at a creek crossing, what the three drainage designs cost you, and how to pick hiking shoes with drainage holes for wet crossings based on how often your feet actually go in.
How Drainage Holes Actually Move Water Out of a Shoe
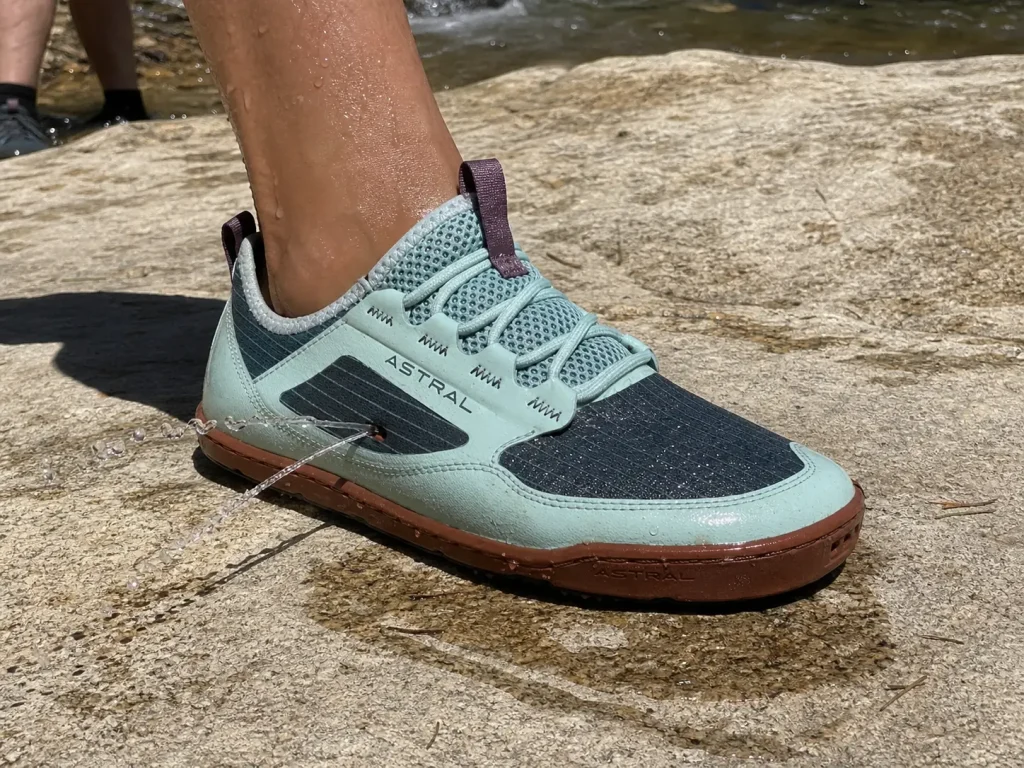
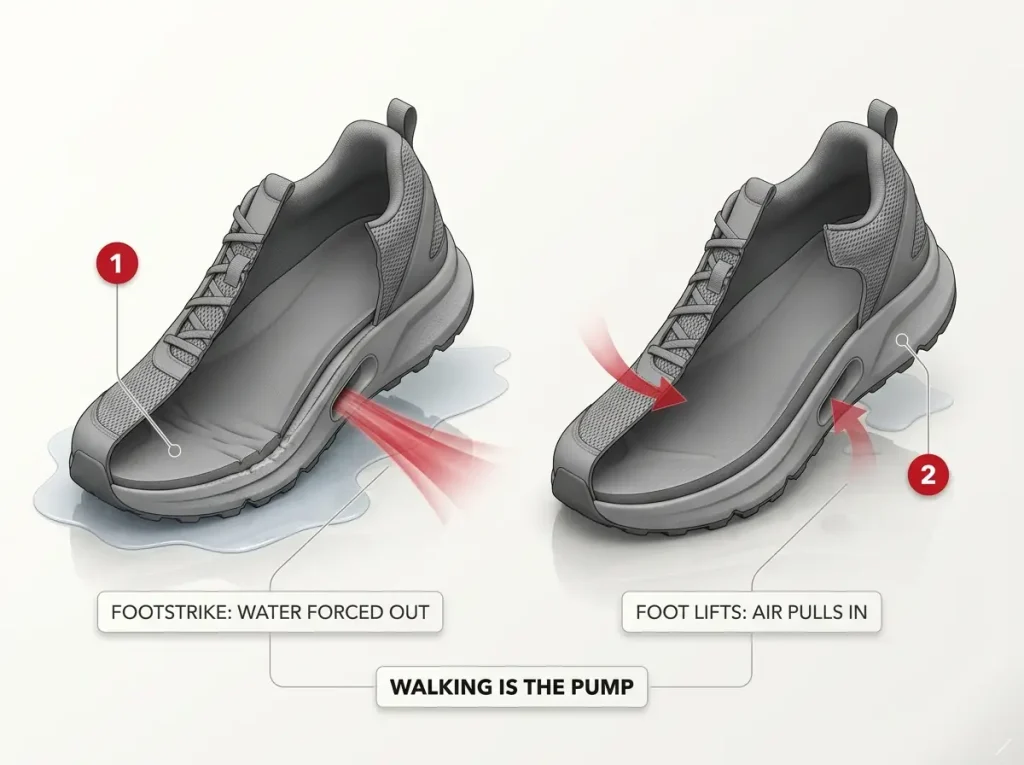
Most people picture a draining shoe like a bucket with a hole punched in the bottom: stand still, let it run out, carry on. That is not what happens. Walking is the pump. Each time your foot lands, the midsole and upper compress and build positive pressure inside the shoe, and the water leaves through the drainage ports in visible sideways jets. The first ten steps out of the water do more than ten minutes of standing on the bank wringing socks.
That means the holes are only half the system. A shoe with generous ports and a thick absorbent lining still squelches for hours, because the materials themselves are holding the water the ports just tried to expel. Hydrophobic mesh and a quick-drying lining are what let the pumping action finish the job. Non-absorbent uppers are the difference between a shoe that is briefly wet and a shoe that is waterlogged all afternoon.
Where the ports sit changes the behavior too. Midsole ports clear the footbed, where the water pools under your arch. Toe and side holes clear the upper. Some shoes skip formal ports entirely and drain through the whole mesh panel, which is how a plain ventilated trail runner manages to keep up with purpose-built water shoes on a shallow ford. None of these approaches keep water out, and that is the point: once you accept your feet are getting wet, the spec you care about flips from keeps water out to gets water out fast.
You can hear when a shoe is draining properly. The squelch goes quiet within a few hundred yards instead of following you down the trail all afternoon.
Stop sitting down to wring out your socks after every ford. On a canyon route with a dozen or more crossings, that stop-and-wring routine is what eats the daylight, and the shoes are back to full soak two minutes later. Walk them dry instead and save the sock ceremony for camp.
Why Waterproof Boots Turn Into Buckets at a Crossing
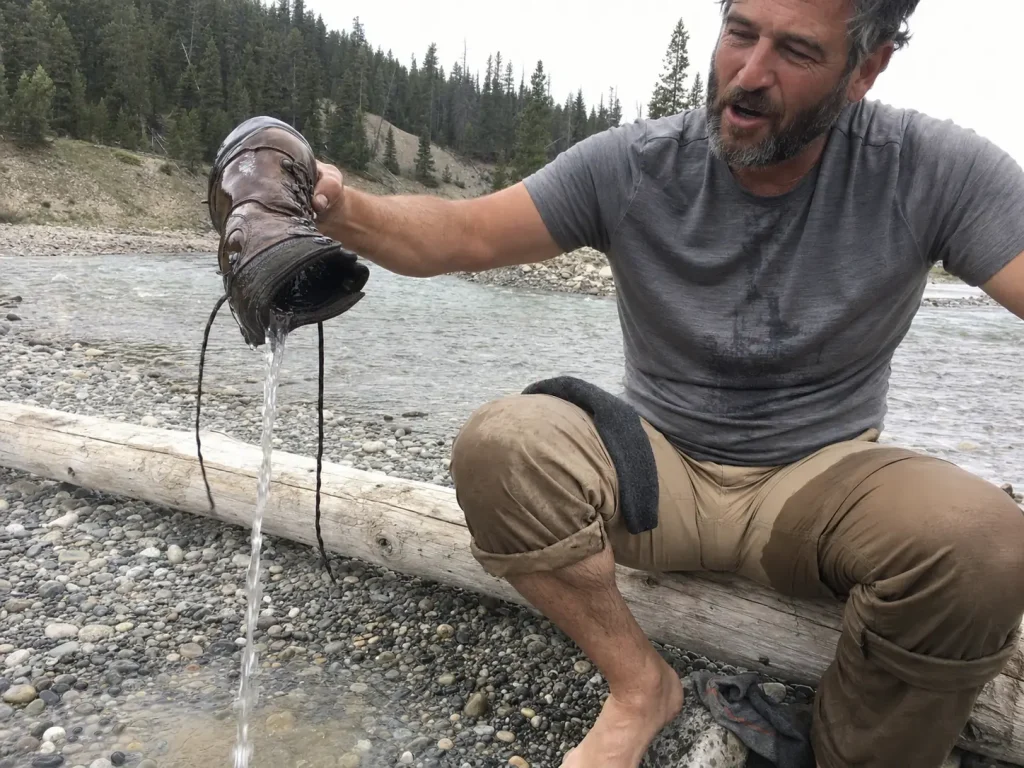
This is the part that stings, because the boot in question is usually the most expensive thing in the gear closet. The membrane is not defective. It is doing exactly the job it was built for, in the one scenario where that job runs backwards.
Hikers call it the bathtub effect. At any crossing deeper than the boot collar, water pours in over the top, and the same membrane that blocks water from the outside now blocks it from leaving. A premium Gore-Tex boot becomes a worse choice than a cheap mesh shoe the moment the water tops your ankle, and it stays that way until you sit down and physically empty it. You are also carrying that water. A flooded boot is extra weight swinging on the end of your leg, and unlike pack weight you cannot shift it to your hips or shed it at the next break.
Then there is the drying penalty, which is where multi-day trips fall apart. A waterproof membrane blocks airflow by design, so the overnight drying time of a soaked waterproof boot runs far longer than that of a breathable non-waterproof shoe, which is the breathability trade-off you accept with any waterproof membrane. One wet afternoon is survivable. Three mornings in a row of shoving your foot into yesterday’s cold, still-saturated boot is how a trip stops being fun, and how hot spots become blisters that do not heal on trail.
The classic mistake follows directly from all this. People rock-hop hunting for a dry line, slip on wet stone, and take a fall to protect boots that were going to flood twenty minutes later at the next ford. Committing to the wet-foot method and walking straight through is usually both the faster and the steadier call.
None of that makes the membrane useless. It earns its place in cold mud, dew-soaked morning grass, shallow slush and winter trails where the water never rises above the collar. That is a real use case with real gear behind it, and if it describes your hiking more than crossings do, start with our guide to where waterproof shoes genuinely earn their place instead.
The Three Drainage Designs and What Each One Costs You
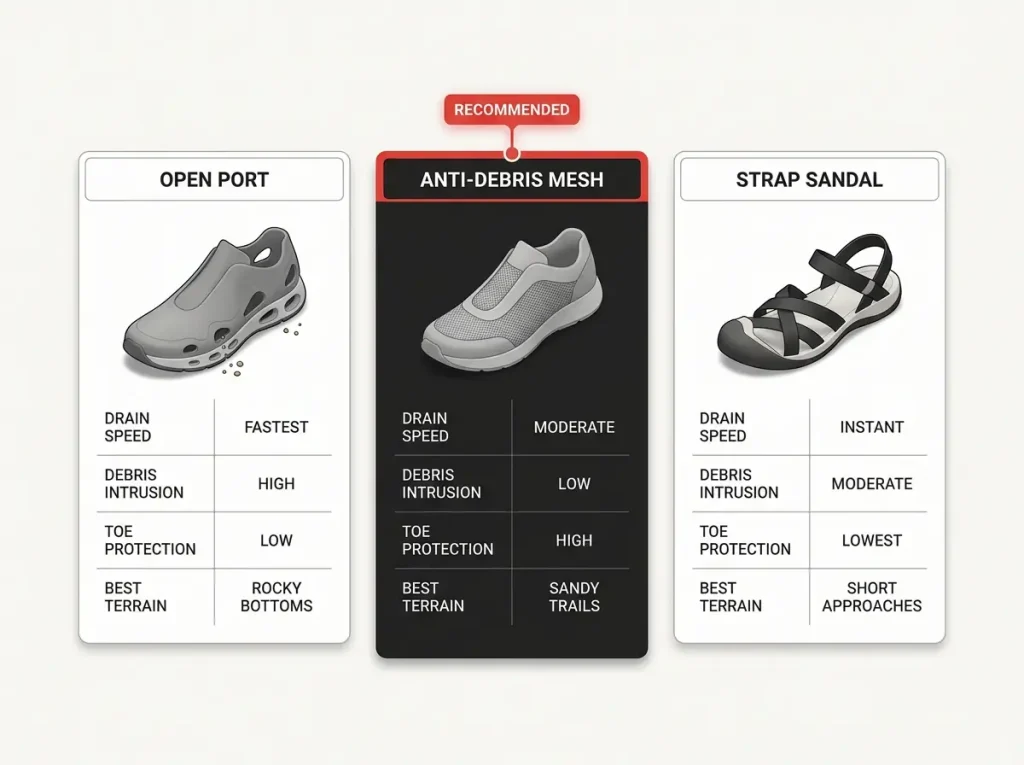
Every shoe in this category claims it drains. Almost nobody writes down what the difference actually costs you. Shoes that drain fast tend to fill your sock with grit. Shoes that stay clean take longer to empty. That trade-off is the entire decision, and it flips depending on what the bottom of your creek is made of.
Open-Port Designs: Fastest Drain, Most Grit
Large open ports through the midsole, heel and toe empty a shoe almost instantly. This is the construction Astral and Xero Shoes build around, and in the water it feels close to magic: step out, take two strides, and the shoe is already just damp rather than full.
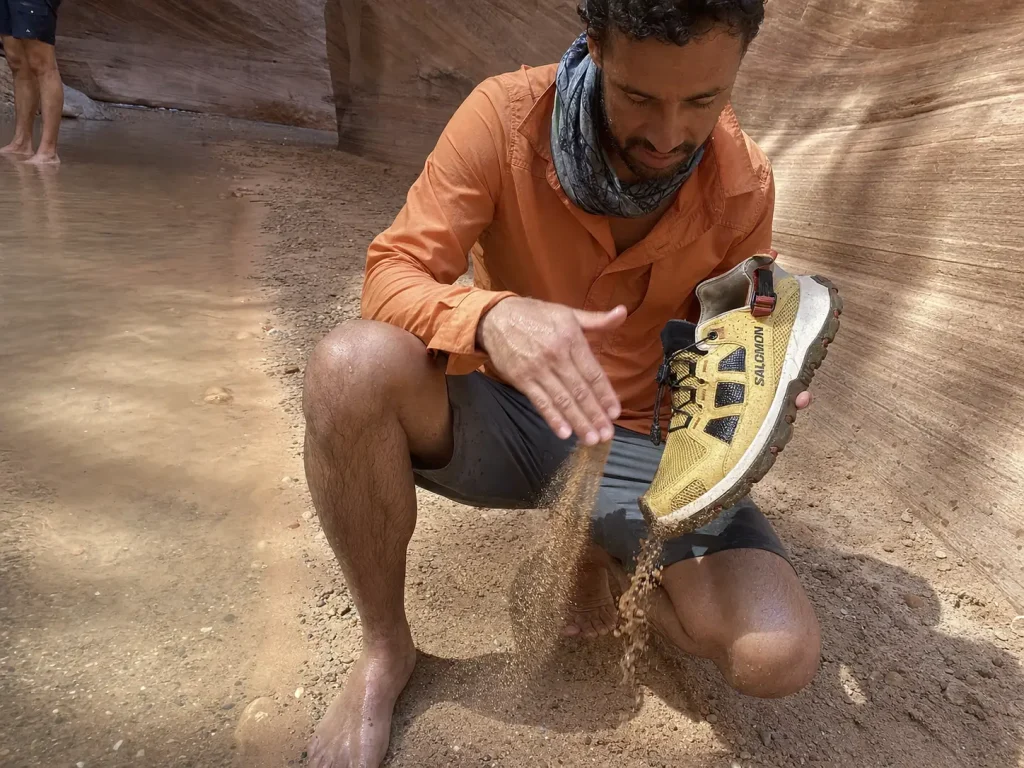
The cost is debris. Sand, silt and small gravel come in exactly as freely as the water goes out, and once they are under your arch they behave like sandpaper between your sock and your skin. On a decomposed-granite trail or a sandy desert wash, that is the failure mode that ends the day, not wet feet. Low gaiters help a little on dusty trail, but they do nothing once the sand arrives through the ports underwater. Open-port shoes shine on clean rocky bottoms, on portages, and for anyone who wants drain speed and ground feel above all else.
Anti-Debris Mesh Designs: Slower Drain, Cleaner Foot
Tight hydrophobic mesh drains a few seconds slower and filters most of the grit out on the way through. Salomon’s Techamphibian line is the clearest example of this approach among amphibious shoes, and the closed-mesh quick-dry family that the Columbia Drainmaker IV made familiar to most hikers works on the same logic: let water pass, keep sand outside.
The cost is a slightly longer squelch and a bit more water retained in the lining. In exchange you stop taking your shoes off every mile to shake them out. For sandy terrain and long days, that trade is worth making without much thought.
Strap Sandals With Closed Toes: Maximum Flow, Least Protection
The third approach barely has an upper at all. Closed-toe hiking sandals with strap-and-frame construction, the design family the KEEN Newport H2 and the Teva Hurricane Drift made recognizable, drain essentially instantly because there is nothing left to hold water in the first place.
What you give up is protection and security. A heel strap is doing all the work an upper normally does, straps hold grit directly against skin, toe stubs on submerged rock hurt considerably more, and loose scree or steep dirt feels far less stable underfoot than it does in a closed shoe. These earn their place on short approaches with heavy water time, camp-and-crossing duty, and warm weather where the hiking between crossings is easy.
Across all three, the same physics decides your wet traction: a siped rubber outsole beats deep lugs on wet rock. Siping is just the slotting cut into the tread, and softer rubber with those slots flexes into the microtexture of a slick stone, while an aggressive, hard-compound lug pattern skates across it. Your grip on wet rock is a compound question long before it is a tread-depth question. If you have only ever shopped by tread depth, it is worth understanding why softer rubber compounds grip wet rock better than hard, deep-lugged ones before you spend money on the wrong spec.
There is a reason slot canyon hikers and Boundary Waters portagers keep arriving at opposite answers here. The bottom of the water they cross is not the same. Match the design to what is underfoot on your trail, not to a review written for somebody else’s terrain.
Pick Your Shoe by How Often You Actually Cross
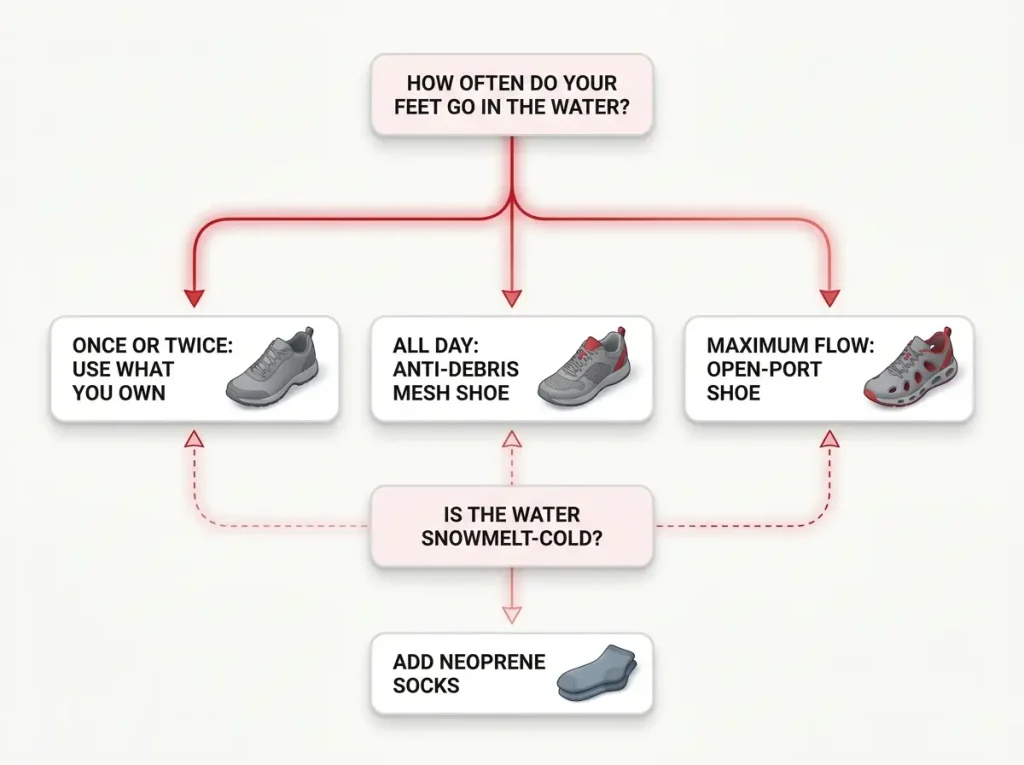
The honest answer for most readers is that you probably do not need to buy anything. One creek per hike and forty crossings in a canyon day are different problems, and the gear answer flips completely between them. Before you shop, it helps to have read the wider case for low-cut hiking shoes over boots, because the crossing decision is one branch of that larger choice.
You Cross Once or Twice a Hike
Use the breathable, non-waterproof trail shoe you already own. Any trail runner with a breathable mesh upper and no membrane drains and dries acceptably after a single knee-deep ford, and you will be dry-ish inside a mile of walking. Buying dedicated footwear for two crossings a season is solving a problem you do not have.
If you already run trails in the Xero Shoes Prio (men’s · women’s), you are finished here. The quick-dry mesh upper and zero-drop FeelTrue sole handle an occasional ford without any second purchase, which makes it the budget-friendly answer in this whole article.
You Cross All Day, Every Day
Once crossings become routine, a dedicated drainage shoe earns its place: multi-crossing canyon routes, portage trips, shoulder season trails that are half creek by mid-morning. This is the tier where the anti-debris mesh design wins, because managing grit over eight hours matters more than saving four seconds of drain time.
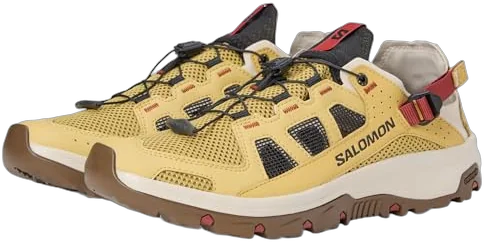
The Salomon Techamphibian 5 is the shoe to reach for when your route sheet says the trail crosses the creek eleven times. The anti-debris mesh is the specific feature doing the work: it keeps the sandpaper problem from ever starting, which on a long sandy day matters far more than raw drain speed. The ContaGrip FD outsole is siped and soft enough for slick submerged stone, and the reinforced toe covers you for the rocks you cannot see. The honest trade-off is that it holds a little more water in the lining than an open-port shoe, so it stays cool and damp longer on a hot afternoon.
You Want the Fastest Drain and Real Ground Feel
This tier is for the portage and canyon crowd: people who want the shoe empty before their second stride and want to feel the rock they are standing on while the current pushes at their shins.
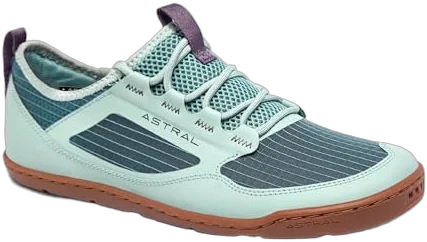
Two honest caveats on the Astral Loyak AC. The first is grit, as covered above. The second is cushioning: a minimalist platform that feels precise and connected on a day hike gives you none of the protection a cushioned midsole buys, and it can bottom out painfully under a loaded multi-day pack, especially on rocky trail between crossings. If you have never hiked in zero-drop footwear, read up on zero-drop and barefoot-style shoes before committing, because the adaptation is real and it is not instant.
The Water Is Snowmelt Cold
This one is not a shoe problem at all. It is a sock layering problem. Pull 2mm neoprene socks over whatever drainage shoe you own, with a thin merino liner underneath, and the crossing becomes tolerable rather than breathtaking. Repeated snowmelt crossings on a cold, windy day pull real heat out of you, and hypothermia starts with the extremities you stopped noticing.
Neoprene works like a wetsuit. It lets a thin layer of cold water in and then traps it so you warm it up and keep it there. It does not keep your feet dry, and expecting it to is the misunderstanding that sends people back to the store annoyed. Waterproof socks are a different tool solving a different problem, and they only make sense paired with a sealed boot rather than a shoe full of holes.
Size your drainage shoe with the neoprene socks already on your feet if you plan to use them for spring runoff. A 2mm sock eats noticeably more room than merino, and a shoe that fits fine in the store turns into a tourniquet at the third cold ford of the morning.
What to Check on a Drainage Shoe Before You Buy
The shoe wall makes this look complicated. Five things matter, and two of them you can check with your hands before you pay.
- A siped, soft-compound outsole. Wet rock is the real hazard at a crossing, and slotted soft rubber outperforms deep hard lugs on it every time. If you have been shopping by tread aggression, note that lug depth is the wrong spec to chase on wet rock.
- A secure fit against moving water. Current tugs hard at a loose shoe. Heel-lock lacing and a snug fit through the midfoot keep it on your foot, and a shoe that swims is a shoe you will eventually watch float away.
- A closed, reinforced toe. You cannot see the rocks you are kicking underwater. This is exactly where what a real toe bumper does versus a cosmetic one stops being a detail and starts being the reason you can still walk.
- Soaked weight. Pick the shoe up wet if the store lets you. Heavy absorbent linings punish you for every mile after the water.
- Enough midsole support for your pack. Minimalist shoes that feel wonderful empty can bottom out badly under a loaded multi-day carry.
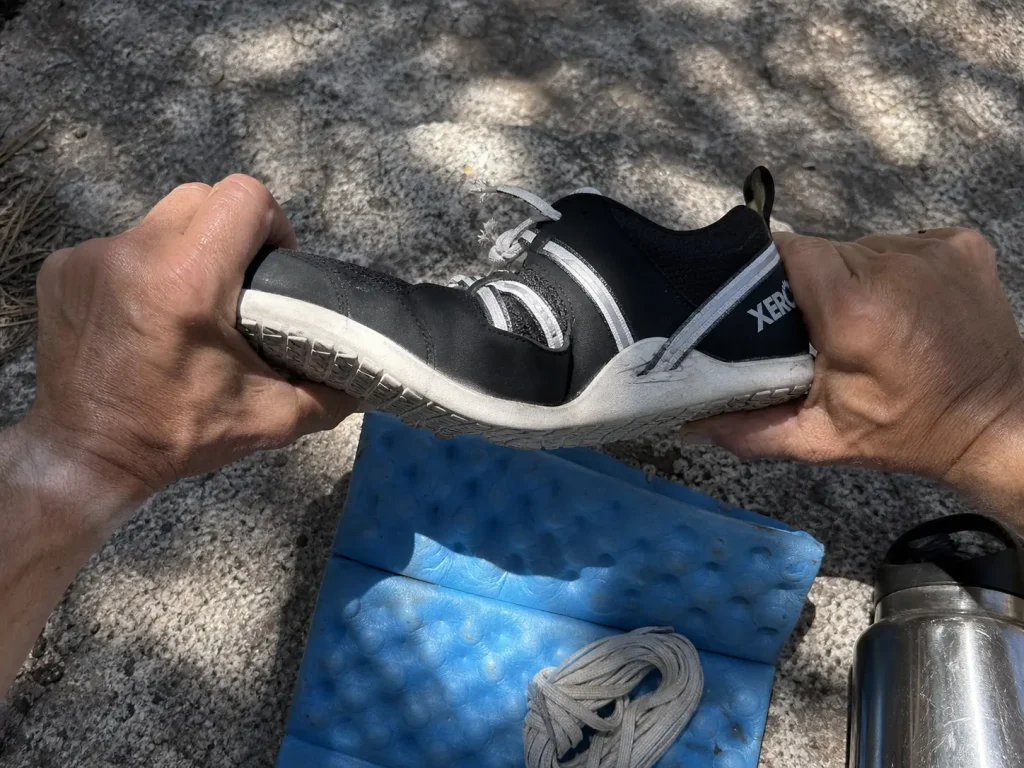
The field check people repeat is the hand test. Hold the shoe at heel and toe, twist it, then press your thumb into the midsole. If it folds in half like a slipper, it will not carry a pack across slick rock no matter how quickly it drains.
Lace a drainage shoe one notch tighter than feels natural on dry ground. Wet mesh relaxes and stretches, and the lacing you set at the trailhead is looser than you think by the time you are mid-channel with water pushing on your ankle.
The Crossing Itself Matters More Than the Shoe
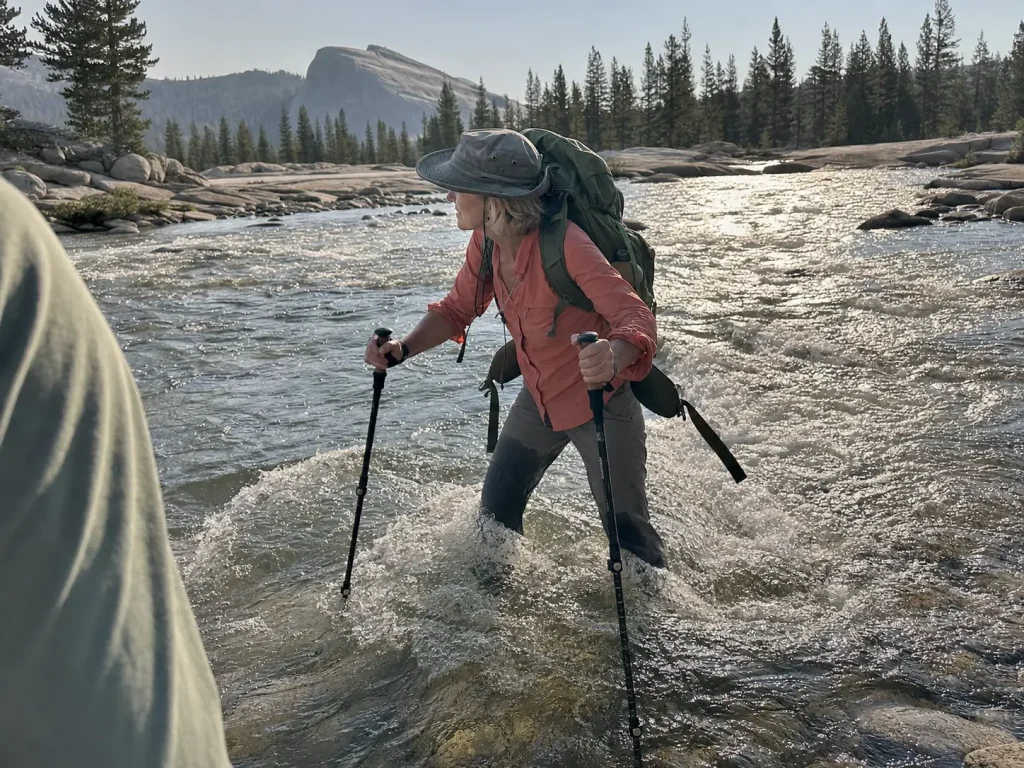
No shoe saves you from a poor crossing decision. The gear conversation is the easy half. Reading the water is the half that actually protects you, and it is the half almost nobody writing about drainage shoes bothers to cover.
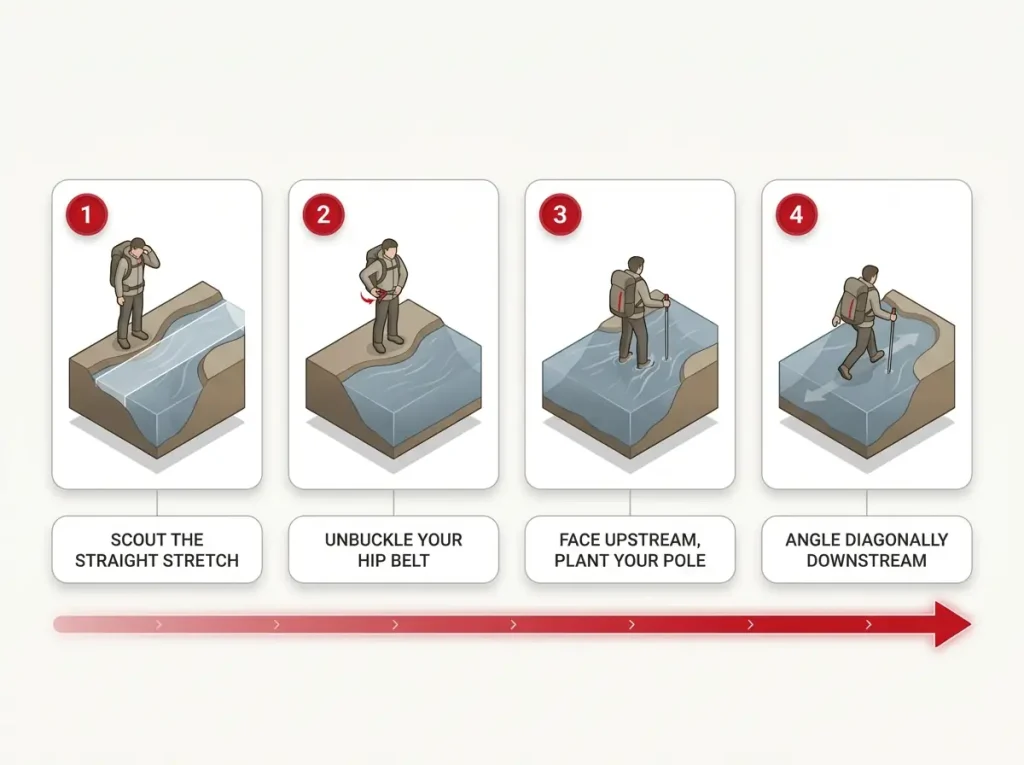
Start with the National Park Service’s Plan-Pick-Assess-Check method for crossing safely. Scout from the bank before you commit. Pick the straight stretch between bends, where the current is most predictable, rather than the narrow-looking spot on the outside of a curve. Keep two points of contact on the bottom at all times. And use the floating-stick test: if a stick tossed in outruns a walking pace, the channel is telling you to find another line or another hour.
Technique matters as much as line choice. The Pacific Crest Trail Association’s guidance on facing upstream while fording is to turn into the current, lean into it slightly, and shuffle diagonally downstream, letting the water help carry you across instead of fighting it broadside. Trekking poles are worth carrying for this alone: one planted upstream gives you a third point of contact and doubles as a probe: tap the bottom ahead of your foot to read depth and find the holes you cannot see through moving water.
Then there are the two rules that never bend. Unbuckle your hip belt and sternum strap before you step in, every time, even for a crossing that looks trivial, because a pack you cannot shed is what turns a stumble into a water-related emergency. And if you do go down in current, get on your back with your feet up and pointed downstream instead of trying to stand. Foot entrapment, where a foot wedges between submerged rocks while the current pushes your weight over, is the mechanism behind most serious river crossing incidents.
One more that comes up in every “how bad could it be” story: never cross barefoot. The bottom is invisible, glass and sharp rock are common at road-adjacent crossings, and a cut foot ends a trip that wet socks never would.
Cross at the trail, too, rather than wandering the bank hunting for a prettier line. Braiding new paths through the vegetation at the water’s edge is where braiding a new path along the bank does real damage, and the established crossing is usually the one that was chosen for good reasons in the first place.
Keeping Wet Feet Healthy Over Several Days
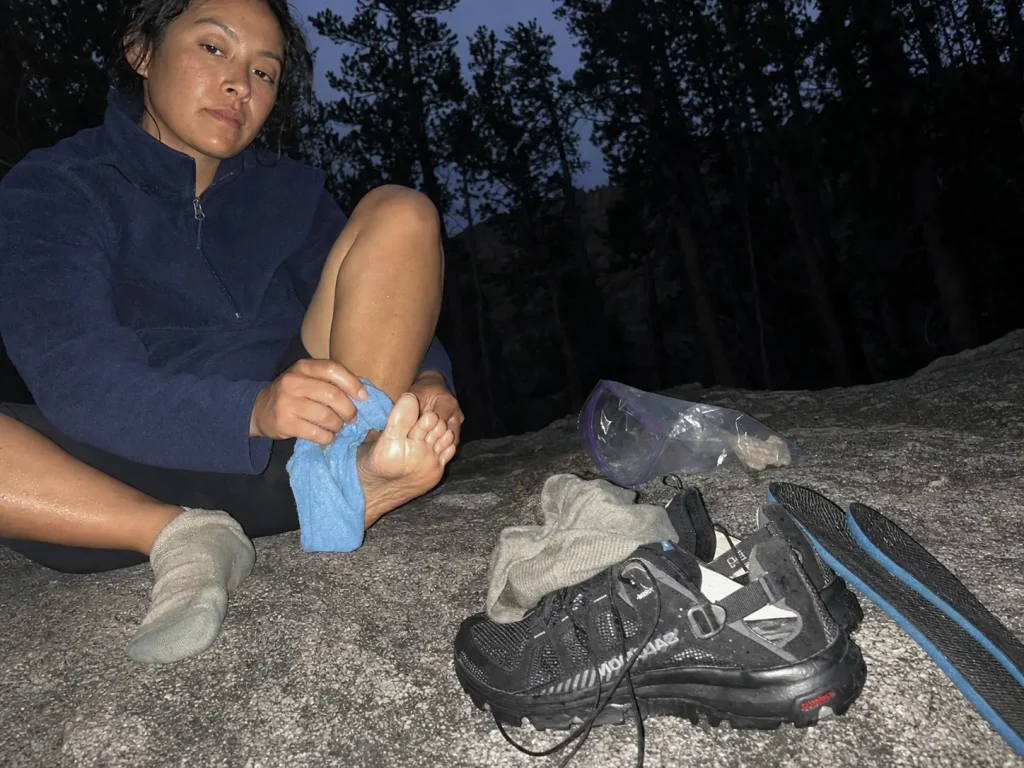
One wet day is nothing. Day three is where people learn what maceration is, usually by feel, and usually too late to fix on trail.
Constant immersion softens and swells the outer layer of skin into pale, pruned skin that never quite firms up between crossings. That skin loses its normal friction resistance, so blister prevention gets harder exactly when you need it most and blisters form under loads that dry feet would shrug off, and hot spots appear in places you have never had trouble before. Left unaddressed across several days, it progresses toward trench foot, which is a slow-healing injury rather than an inconvenience, and it is the reason the veterans on portage trips plan the nightly routine before they plan the menu.
The fix is unglamorous and it is medical. The CDC’s guidance on preventing immersion foot comes down to three habits: dry your feet thoroughly, change into clean dry socks at least once every 24 hours, and never sleep in wet ones. That is the whole protocol, and skipping it is what turns a wet week into a limp.
In practice that means running a two-sock system. One pair of dry camp socks lives sealed in a plastic bag and never touches the trail. The day pair stays wet and you accept it, because the alternative is a second wet pair by lunchtime. Dedicated dry camp shoes finish the system, and that evening footwear swap is what lets your feet actually recover overnight instead of steaming inside the same shoe you forded in.
Small habits buy real time during the day. Wring out socks and air your feet for a few minutes at a genuine break, not after every ford, and the skin never stays fully saturated hour after hour. Liner socks under merino wool socks cut the friction that softened skin cannot handle on its own. And loosening the laces and pulling the insoles out overnight gets a shoe from soaked to barely damp by morning, which is a meaningfully better start than soaked.
If you are planning a genuinely long wet stretch, it is worth borrowing from the long-trail foot care routine that thru-hikers run every single night, because they solved this problem across months rather than a weekend.
The Bottom Line on Drainage Shoes for Wet Crossings
Water gets in over the collar no matter what you paid. The only spec that matters at a crossing is how fast it gets back out.
Match the drainage design to what is underfoot: open ports for clean rocky bottoms, anti-debris mesh for sand and long days, and the mesh trail shoe already in your closet if you only cross once or twice a hike.
Your crossing technique and your nightly dry-out protect you far more than your footwear does.
Next time the map shows a creek on your route, plan to walk through it instead of around it. Pick your line from the bank, unbuckle the hip belt, and see how much faster the day goes once you stop protecting your feet from water they were always going to meet.
Frequently Asked Questions
01Do water shoes need drainage holes?
Not always, but a shoe without them needs hydrophobic mesh doing the same job. What matters is that water can leave and the materials do not hold it. A padded absorbent lining with drainage ports still stays wet for hours.
02What shoes are best for wet weather?
For wet ground and rain, a breathable non-waterproof trail shoe usually outperforms a membrane boot because it dries between soakings. Save waterproof footwear for cold mud, dew and slush, where water never rises above the collar.
03Are trail runners good for water crossings?
Yes. Non-waterproof trail runners are what most long-distance hikers actually cross in. They drain through the mesh and dry fast, and the only real gap versus a dedicated drainage shoe is grit management and wet-rock outsole compound.
04Should I take my shoes off to cross a creek?
No. You cannot see the bottom, and a cut foot ends a trip faster than wet socks ever will. Cross in your shoes, or in dedicated crossing footwear if you carried it.
05How do you dry hiking shoes overnight on a multi-day trip?
You mostly do not, so protect your feet instead. Keep one sealed pair of dry camp socks that never touch the trail, dry your feet thoroughly at camp, and accept that the day pair goes back on wet. Loosening laces and pulling the insoles helps a little.
I've spent more than a decade researching hiking gear and trail technique. I read the specs, the forum threads and the long-term reviews, and every pick here comes with what it gets wrong.
End of the trail
You read every mile of this one. Here's where the trail goes next.