In this article
You finally swap the boots for trail runners, float through the first six miles feeling like you left a brick at the trailhead, and then your calves start screaming somewhere on the descent. Nothing is wrong with the shoe. That exact story shows up in every boot-to-trail-runner thread on the internet, and the fix is almost never a different pair, it’s a timeline nobody told you about.
Most buying guides for trail running shoes hand you a ranked list and skip the part where your legs and tendons have to catch up to the geometry. This guide covers what trail runners actually are, the four specs that change how you hike, where they stop working, how to make the switch without hurting yourself, and what the whole thing costs over a season.
What Trail Runners Actually Are (And How They Differ From Boots)
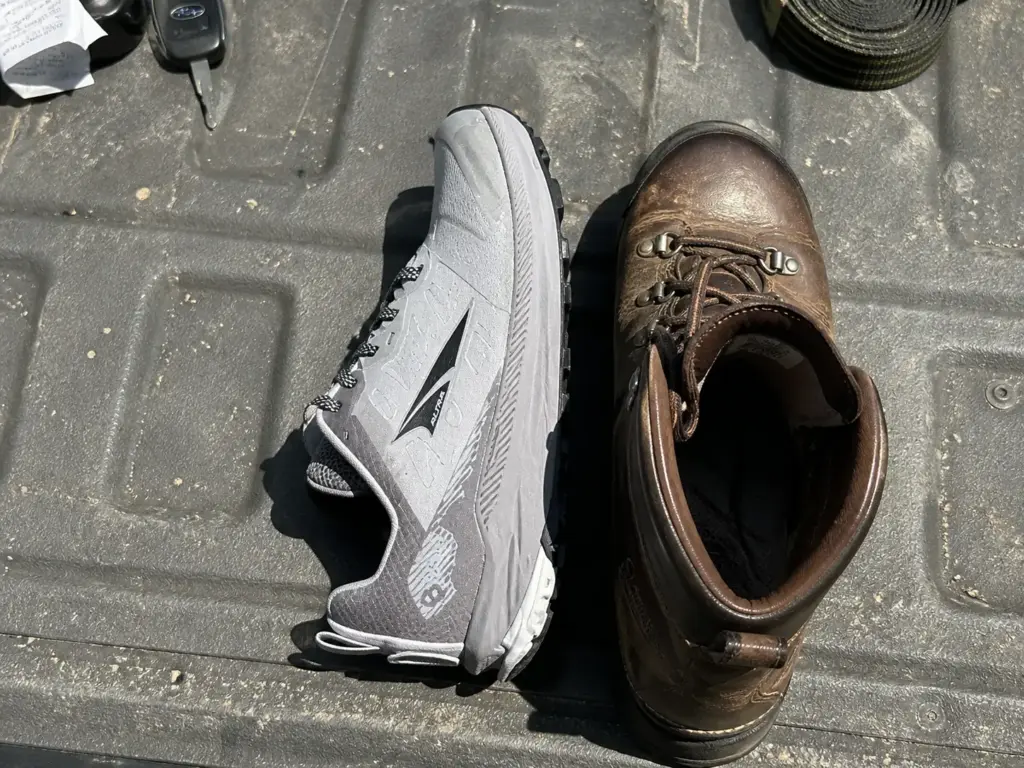
Ask why half the thru-hikers walked past you in what look like gym shoes and you’ll get some version of the same answer: they’re not running shoes with a hiking sticker on them. They’re built around a different set of problems. A boot is designed to protect a foot from the outside in. A trail runner is designed to let a foot move, drain, and cool, and it accepts more contact with the ground as the price of that.
How a Trail Runner Is Built Differently Than a Boot
Start with weight, because it’s the difference you feel in the first mile. A mid-height leather boot commonly runs somewhere north of two pounds for the pair; a mainstream trail runner sits closer to a pound and a half or less. The upper is engineered mesh instead of leather or heavy synthetic, so it flexes with your foot instead of resisting it, and it dries in hours instead of days.
The collar stops below the ankle bone. The midsole is running-shoe EVA foam rather than a stiff shank-and-board setup, which is why the whole shoe twists in your hands. If you want the full breakdown of what trail running shoes actually are when you use them for hiking, that’s the companion piece to this section.
The structural difference that matters most is the one nobody advertises: break-in. A leather boot needs miles to mold to your foot, and those miles are the ones that raise blisters. A trail runner is finished on day one. What you feel in the store is what you’ll feel at mile eight, which cuts an entire category of misery out of a new-gear purchase.
That cuts both ways, though. A shoe that’s done molding is also a shoe that never gets stiffer, never develops a supportive shape around your ankle, and never toughens up over the season. What you buy is what you get, for all 400 miles of it.
The Main Types of Trail Runners
There are four families inside the category, and mixing them up is how people end up with a shoe that fights them. Cushioned trail shoes stack a lot of foam under you and prioritize descent comfort over feedback, and the top of that range now runs on supercritical foam that returns more energy per step than standard EVA.
Rugged or technical models trade some of that foam for a firmer platform, a rock plate, and aggressive lug pattern geometry meant for loose dirt, steep ground, and technical terrain. Zero-drop shoes level the heel and forefoot to the same height, which changes your stride whether you want it to or not. And waterproof-membrane versions of all three add a Gore-Tex liner that changes the shoe’s entire wet-weather personality.
Those four aren’t a quality ladder. A max-cushion shoe isn’t better than a technical one, it’s a different tool with a different failure mode. Buy the one that matches the ground you actually walk on, not the one that matches the ground in the ad.
Where Trail Runners End and Hiking Shoes Begin
The line between a trail runner and a low-cut hiking shoe is fuzzier than the marketing suggests, and the honest test is stiffness. Pick the shoe up and twist it. A trail runner gives; a hiking shoe resists; an approach shoe resists more and adds sticky climbing rubber and a smooth toe patch for edging on rock. Hiking shoes usually carry more upper reinforcement and a heavier outsole, which buys durability and costs breathability.
Where you land depends less on the label and more on load and terrain, which is exactly how the three footwear categories actually compare once you strip away the brand language. The category’s most reliable beginner mistake, one the community calls the noob trap, is defaulting to heavy over-built boots without ever asking whether the terrain or the load requested them. Plenty of people carry two extra pounds on their feet for years for a set of conditions they never actually encounter.
Why Hikers Switch From Boots to Trail Runners
There’s a line that comes up over and over in switch threads, some version of a hiker calling their old boots big giant clunky things, and it’s always said in the past tense. Nobody notices the weight they’re carrying until it’s gone. That first day back at the car with legs that still have something left is what converts people, and it converts them fast.
The Weight Argument, Honestly
Weight on your feet costs more than weight in your pack. You lift each foot thousands of times per mile, and every one of those lifts is a small rotational cost paid by your hip flexors. The old rule of thumb in hiking circles puts a pound on your feet somewhere in the neighborhood of five on your back, and while the exact multiplier is argued about endlessly, the direction is not: shaving a pound off the pair is the cheapest energy you’ll ever buy.
The switch-thread anecdote most often names one shoe family, the max-cushion Altra Olympus 6 (men’s · women’s), a zero-drop shoe with a rock plate and a lot of foam. It’s a premium pick and it comes with the zero-drop caveat covered later in this guide, but it’s the model people keep pointing at when they describe that “I didn’t know how much dead weight I was carrying” moment.
Here’s the honest counterweight before this reads like a sales pitch: there’s a load and a terrain where the trade goes bad, and a whole section below exists to say exactly where.
Breathability and Wet Feet
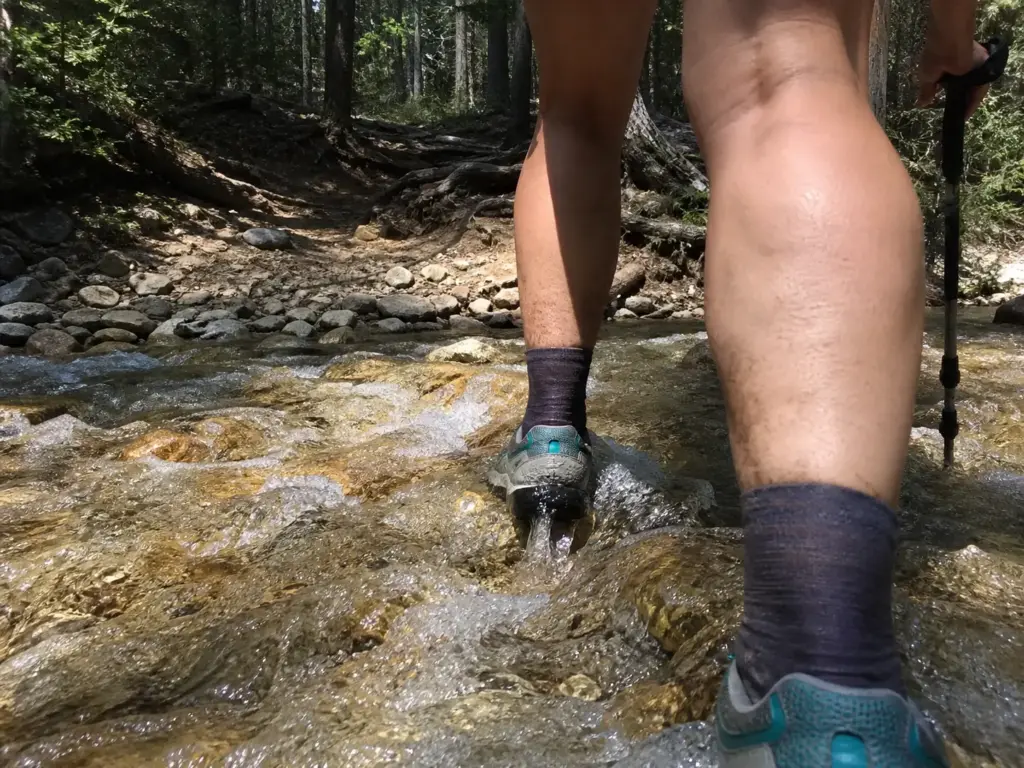
A quick-drying mesh upper soaks through in a stream crossing and then dries as you walk. A leather boot resists the water at first, and once it loses that fight, it holds every ounce it took on for the rest of the day and probably overnight. Ask anyone who’s finished a wet Cascades traverse in boots what their socks felt like at camp.
Upper materials are where the money goes at the top of the range. TPU overlays replace stitched-on reinforcement at the flex points, and the lightest race-oriented shoes use a Dyneema upper that resists abrasion at almost no weight. A carbon plate, borrowed from road racing, shows up in a few trail models and is the one spec most hikers can safely ignore, since it is tuned for propulsion at running cadence rather than for walking under a pack.
Dry feet are more comfortable, but the real payoff is skin integrity. Waterlogged skin gets soft, soft skin blisters at friction levels dry skin shrugs off, and a blister at mile four is a trip that ends early. A shoe that drains and dries is doing blister prevention work all day long, quietly.
No Break-In, Fewer Blisters
Blister prevention in a boot is a project. You wear them around the house, you take them on short walks, you tape the hot spots, and you hope they’ve molded by the time your trip starts. A trail runner skips that entire process, which is why the switch so often reads as a comfort revelation rather than a gear upgrade.
Fit still decides everything, though. An ill-fitting trail runner will raise blisters exactly as fast as an ill-fitting boot, and no amount of mesh saves you from a shoe that’s a half size short. This is why the American Hiking Society’s advice to try on footwear with your actual hiking socks matters more than any category debate: the sock changes the volume, and the volume changes the fit.
The other objection that always surfaces here is ankle support, and it deserves a straight answer rather than a dismissal. It’s worth knowing whether boot ankle support does what people think it does before you decide the cuff is what’s keeping you upright.
The Four Specs That Change How You Hike
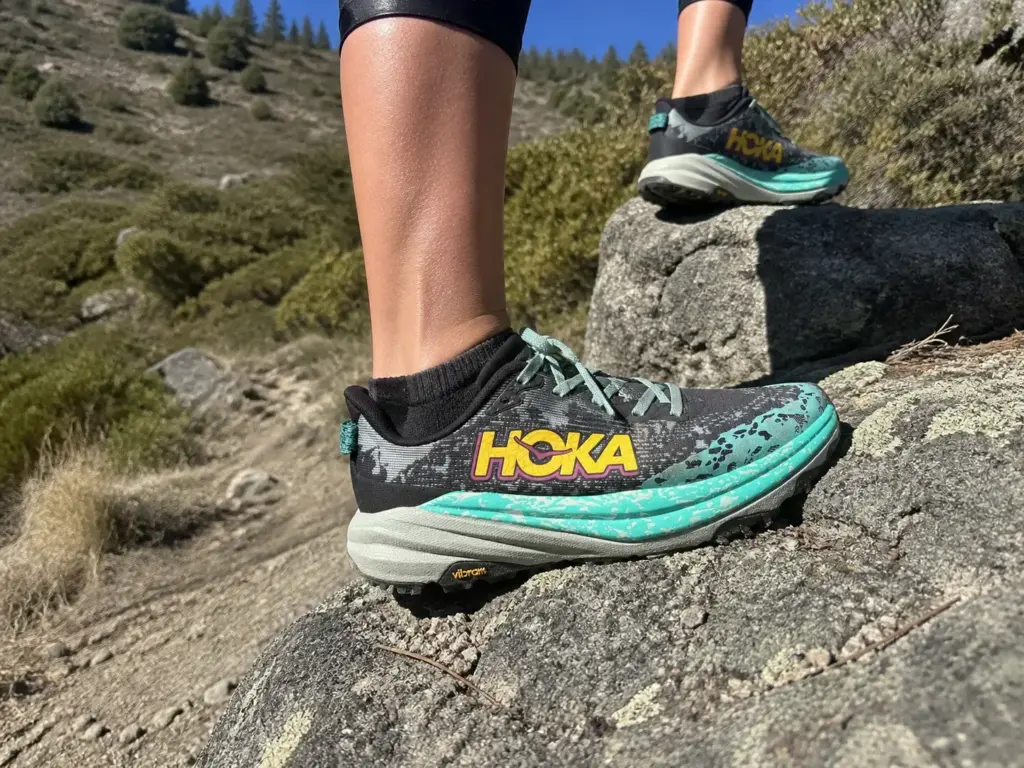
Every guide prints these numbers. Almost none of them tell you that the numbers decide which muscle gets tired first, which is the only thing about them that matters on trail. Stack height, heel-to-toe drop, rock plate, and lug depth aren’t a spec table. They’re a set of decisions about where the work goes.
Stack Height — Cushion Versus Trail Feel
Stack height is how much material sits between your foot and the ground. More of it absorbs more of the pounding on a long descent, which is exactly why max-cushion shoes have taken over thru-hiking. Twelve miles of downhill puts a lot of repeated load through your knees and heels, and foam eats a real share of it.
You pay for that in two currencies. The first is trail feel: with 40mm of foam underfoot you stop reading the ground through your soles, and you lose the early warning that tells your ankle a rock is about to move. The second is geometry, because you’re now standing higher off that rock. A higher platform gives a rolled ankle more leverage, and that risk climbs on uneven ground as the stack goes up.
Cushion level is the spec people shop by and the one they understand least. It is not a comfort dial that goes from worse to better. It is a trade of impact absorption against stability, and where you want to sit on it depends entirely on whether your miles are smooth and long or rough and short.
Stack height is measured on an empty shoe sitting on a table. Put 25 pounds on your back and your foot presses deeper into that foam on every step, so the effective platform you’re standing on is softer and lower than the number on the box. If a max-cushion shoe feels perfect on a day hike and vague and wobbly on a loaded overnight, that’s the mechanism, not your imagination.
The max-cushion reference point most hikers compare everything else against is the Speedgoat, which pairs a very tall stack with grippy outsole rubber instead of the soft-and-slick combination that used to define the cushioned category.
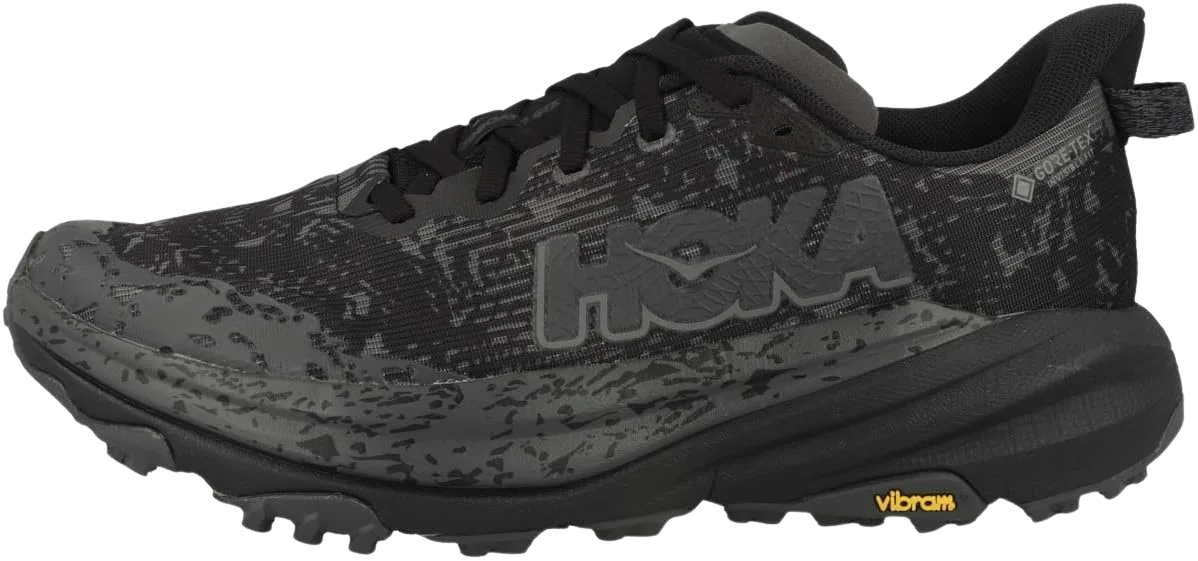
A shoe like that earns its place if your hiking is long-mileage days on maintained trail with real elevation loss. If most of your miles are off-camber, rocky, or off-trail, a lower stack that lets you feel the ground will keep your ankles happier than any amount of foam.
Heel-to-Toe Drop — Which Muscles Pay
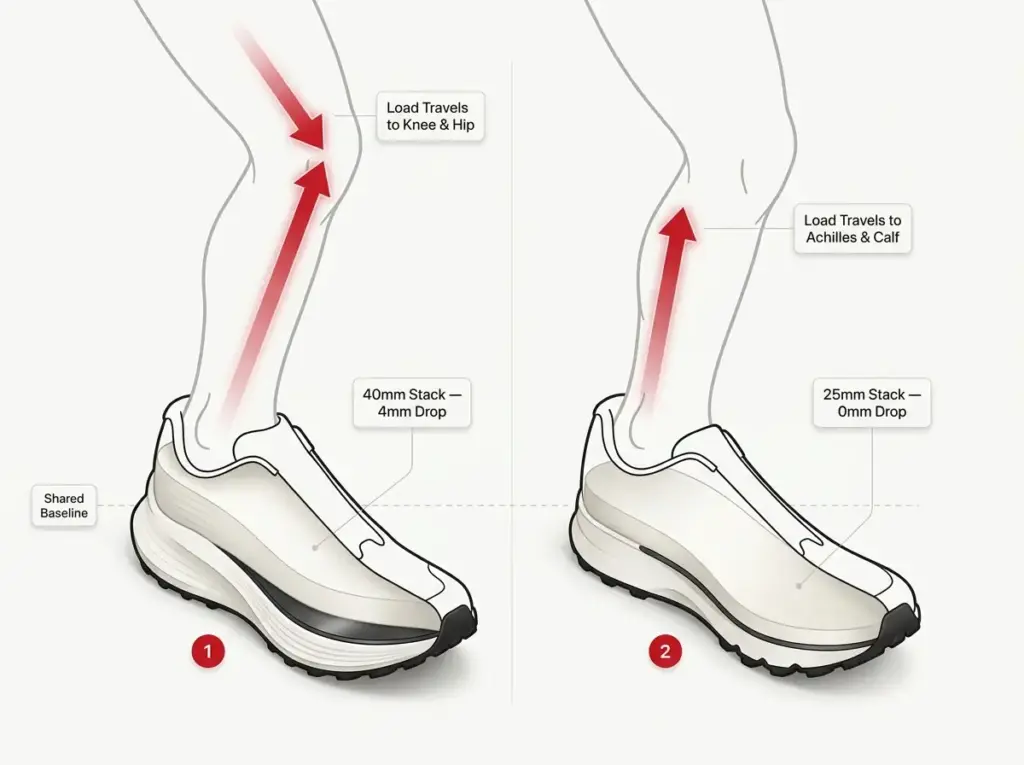
Drop is the height difference between the heel and the forefoot of the shoe. A traditional boot or a cushioned runner sits around 10 to 12mm, which tilts you slightly forward and shifts load toward the knees and hips. Take that wedge away and go to zero or near-zero drop, and the same load moves down the chain to the Achilles and calf.
That single sentence explains most of the pain in week one of a switch. Your knees have been doing that work for years and your calves have not, so the first zero-drop hike hands an untrained tissue a job it isn’t strong enough for yet. The calf engagement goes up immediately, the Achilles strain goes up with it, and the soreness that follows gets blamed on the shoe roughly every time. It isn’t the shoe, and the deeper mechanics of what heel-to-toe drop means for your knees are worth reading before you commit to a number.
There’s a fatigue signature worth recognizing on long days too. When calves and Achilles run out late in a big day, forefoot push-off is the first thing to fade, and a low-drop shoe stops feeling the way it did at mile two. That’s a message to shorten your stride and back off the pace. It is not evidence that the shoe failed.
Rock Plates and Lug Depth
A rock plate is a thin sheet of firmer material sandwiched into the midsole to stop a pointed rock from bruising the bottom of your foot. On sharp granite talus or a chunky, rooty trail it’s the difference between a normal evening and a foot that aches for two days. What it costs you is feedback, since a plate flattens out the texture of the ground the same way a thick stack does.
Lug depth and pattern get oversimplified into “deeper is grippier,” which is wrong in a specific and expensive way. Deep, widely spaced lugs bite into mud, soft dirt, and snow because they can penetrate and shed. On slickrock, wet granite slab, and hardpack, those same lugs put less rubber in contact with the surface and act like tiny stilts, so they perform worse than a shallower, denser pattern with sticky compound. Match the outsole to the ground you’re on, not to the most aggressive-looking option in the store.
The plate-and-lug equation shifts again if you’re moving fast with a light load, which is how speed hiking shoes change the same equation without changing the underlying physics.
Traction, Waterproofing, and the Wet-Feet Debate
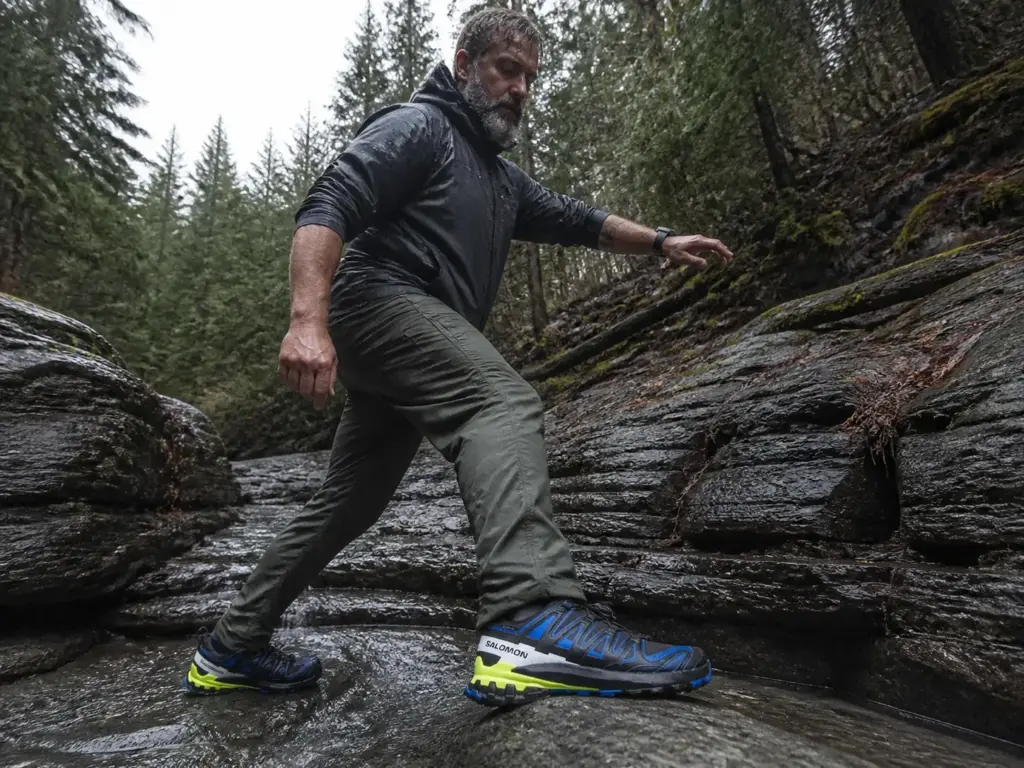
The waterproof argument gets settled the first time you take a full-boot dunk in a stream crossing. A membrane shoe keeps water out until it doesn’t, and the moment water comes over the collar, the same membrane that was keeping water out is now keeping it in. You finish the day sloshing.
Reading an Outsole for Your Terrain
Two rubber compounds come up by name often enough to be worth knowing. Vibram Megagrip is the softer, stickier standard that most premium trail runners advertise, and it’s noticeably better on wet rock than generic outsole rubber. Salomon’s Contagrip is the house alternative, tuned by model, and the technical versions grip wet stone and loose ground well while lasting a little longer than the softest compounds.
For terrain, the pattern is straightforward once you stop thinking in “aggressive versus not.” Deep lugs at 4 to 5mm with open spacing shed mud and hold in loose dirt, and they’re what you want through mud season and in soft spring ground. Shallower, closer-packed lugs give you more rubber contact for hardpack and slabby wet rock, which is dry season terrain in most of the West. Scree wants a firm platform and a defined heel edge more than it wants tread depth, because you’re braking with the whole shoe.
Snow traction is where the whole category runs out of road. Lugs of any depth skate on packed snow and ice, so shoulder-season hikers add microspikes rather than shopping for a grippier outsole. Terrain versatility in a trail runner means covering dirt, rock and mud well, not covering everything.
Ground feel is the other axis nobody puts on the box, and it runs the full range from max-cushion down to nearly nothing. If reading terrain through your soles appeals to you, it’s worth understanding what happens when you strip the shoe down further before you buy at either extreme.
Waterproof Membranes — What You Trade
A Gore-Tex liner buys you two specific things: cold puddles and light rain stay out, and your feet stay warmer. That’s genuinely worth having in shoulder season, snowmelt, and cold mud, where wet feet stop being a comfort issue and start being a hypothermia and maceration issue.
What you trade is breathability all summer and drying speed forever. A mesh shoe that soaks through is dry in a couple of hours of walking; a membrane shoe that fills up is wet until you find a fire. For most three-season hiking, a shoe that drains and dries beats a shoe that traps, and that’s the call most experienced hikers land on after they’ve tried both.
The exception is worth naming, because it’s a real one. If your terrain is technical and wet, cold, or both, a waterproof shoe with a serious outsole is a coherent choice rather than a compromise. The Salomon XA Pro 3D V9 GTX (men’s · women’s) is the version of that argument most hikers have seen on trail, pairing the membrane with an aggressive Contagrip outsole and a midfoot wrap that locks your foot down on off-camber ground. It’s more shoe than a summer trail day needs, which is exactly the point.
Gaiters and Debris
Low-cut shoes let grit in over the collar, and grit is a blister factory. Trail gaiters for runners are the light kind, a stretchy ankle sleeve that clips to the laces and attaches to a small hook or velcro patch at the heel. They weigh almost nothing and they solve the single most annoying failure mode of the category.
Check whether the shoe is gaiter-compatible with an attachment point at the heel before you buy, because retrofitting one with adhesive velcro works about as well as you’d expect on a shoe that gets soaked weekly. Repeated water crossings peel an adhesive patch off inside a week. Fine sand and scree country is where this stops being optional. Ten minutes of digging pebbles out of your shoe every few miles wears people down faster than the terrain does.
Where Trail Runners Stop Working — Pack Weight, Terrain, and Your Ankle History
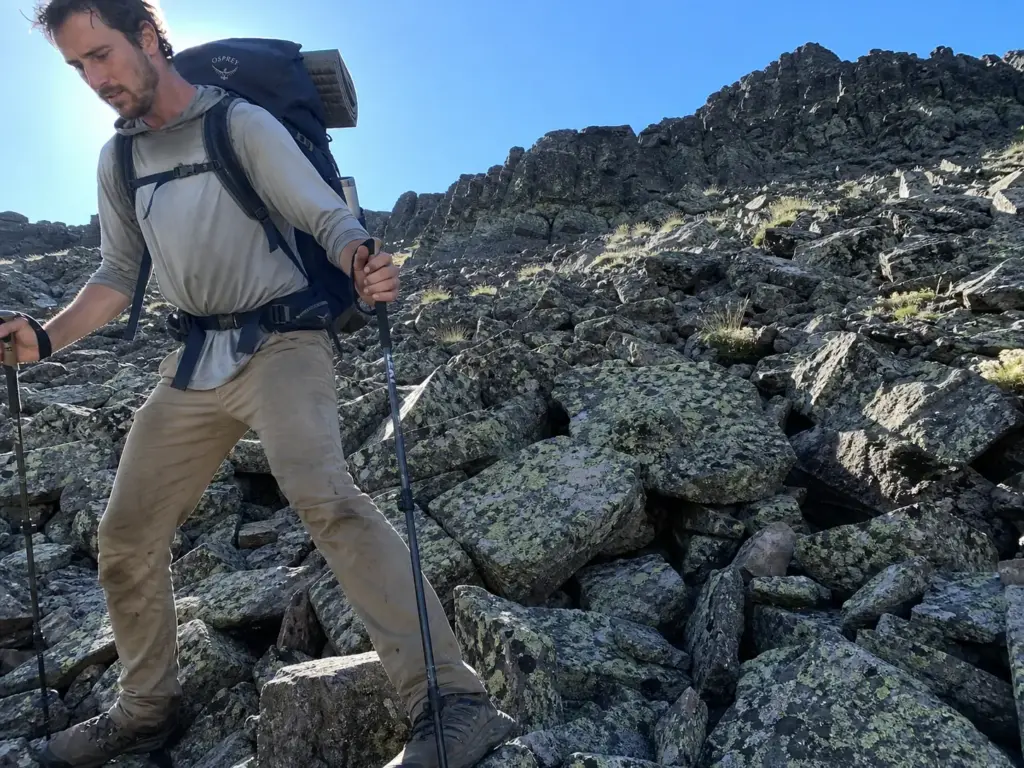
This is the anti-sell. Somebody has to say out loud that there’s a load and a terrain where the shoe stops matching the job, and the buying guides in this space almost never do, because the shoes convert better when the limits go unmentioned.
The Pack Weight Ceiling
Start with the numbers, since nobody else prints them. Fastpackers who want efficient running form generally cap their load somewhere around 15 pounds, and past that the running mostly stops. For general hiking, a trail runner stays comfortable for most experienced, ankle-healthy hikers up to roughly 30 pounds.
Past 30, the shoe’s low structure stops matching the load, your foot works harder to stabilize a mass it can’t control, and boots start making a real argument again. That ceiling is also why ultralight backpacking and trail runners grew up together: get your base weight down and the shoe stops being the limiting factor. This is the same threshold question covered in more detail in where the boots-versus-trail-runners line falls under a real backpacking load.
Treat those numbers as a zone, not a cliff. REI’s guidance on how pack weight should shape your footwear choice frames the same relationship: as total load climbs, the case for underfoot structure climbs with it. A 32-pound pack doesn’t sprain your ankle at the trailhead. It just means every stumble has more momentum behind it and less shoe to absorb it.
The practical move if you live near that ceiling is to buy structure rather than plushness, because a firmer, wider, plated platform handles load far better than a soft one. There’s a whole category of trail runners built to hold up under a heavier pack that sits between a light runner and a boot.
Your Ankle History Matters More Than the Number
Here’s the filter that works better than pack weight, and it’s personal rather than numerical: whether you’ve already sprained that ankle. Two hikers under identical 25-pound packs can need different footwear, because a joint that’s been sprained has measurably worse proprioception and a looser envelope than one that hasn’t. The number on the scale says nothing about that.
If you’ve rolled an ankle badly in the last couple of years, that’s the strongest single argument for either staying in boots on rough ground or spending the season on sprain prevention work before you switch. Balance work on one foot, ankle eversion strength, and gradual exposure to uneven ground do more for you than a cuff does.
The most common load mistake is backwards from what you’d expect. People grab their lightest, lowest-stack, most flexible shoe for a loaded overnight because it feels great empty, and then wonder why their feet are wrecked by camp. Match shoe structure to the load you’re carrying, not to how the shoe feels in the parking lot with nothing on your back.
Terrain That Still Calls for Boots
Sustained off-trail travel over talus and scree is the clearest case. Loose blocks shift under you constantly, the edges are sharp, and a stiff sole with a real rand does work that mesh cannot. Add a heavy pack to that and the argument gets stronger, not weaker.
Technical scrambling with a load is the second case, since edging on small footholds asks for a stiff platform, and a shoe that twists in your hands twists on the rock too. Deep spring snow is the third: postholing wet snow all morning in mesh is how people end up with cold, macerated feet before noon.
The ankle-support conversation deserves nuance in both directions. The claim that boots prevent sprains is oversold, since a mid-height cuff on a soft flexible boot restricts less motion than the marketing implies. But the group that genuinely benefits from real structure exists, it’s just smaller than boot advertising suggests, and it’s defined by injury history and load rather than by preference.
How to Switch From Boots Without Hurting Yourself
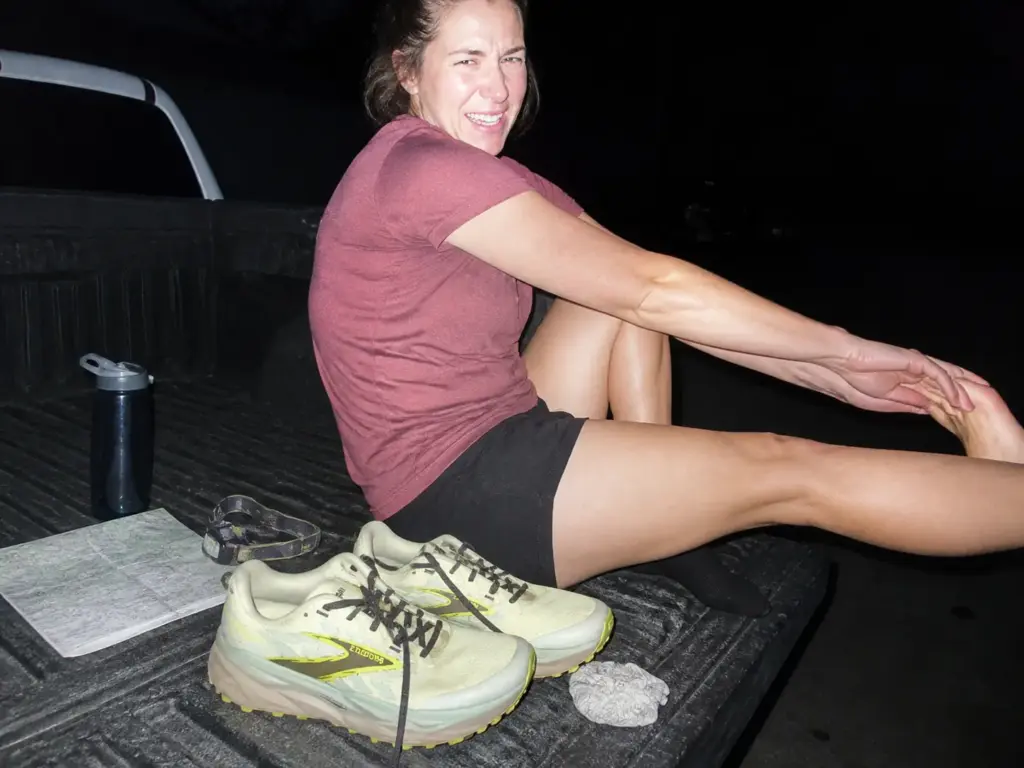
Week-one calf burn after a first zero-drop hike is not a shoe problem. It’s an undertrained tendon, and it is the single most common reason people give up on the category and go back to boots convinced trail runners hurt their legs.
What Week One Actually Feels Like
Day one is euphoric. Your feet are cooler, your legs are lighter, and you’re faster than you expected. Day two is when the calves report in. Soreness in the calf belly and a tight, tender Achilles the next morning are the standard experience for anyone dropping several millimeters of heel height at once, and it can persist for weeks as the tissue adapts.
Sharp, localized pain is a different signal from diffuse muscle soreness, and it’s the one to respect. Rushing a low-drop transition is associated with plantar fasciitis, shin splints, Achilles tendonitis, and stress fractures, which is exactly the list of injuries people blame on trail runners. Almost all of them are transition-speed injuries rather than shoe injuries.
The other thing week one demands is calf and arch endurance you don’t have yet. Forefoot-strike mechanics load those tissues on every step, so burning calves at mile three means build strength before adding distance. It does not mean return the shoe.
A Phased Plan That Doesn’t Break You
The honest timeline is unwelcome: a low-drop transition commonly takes a number of months before your pre-transition mileage feels sore-free again. Plan a season, not a trip. The dedicated version of the full transition timeline for minimalist shoes breaks the phases down further, but the shape of it is simple enough to remember.
Start with short local hikes, three to five miles on familiar ground, and pay attention to the next morning rather than to how you feel at the car. Move to a moderate drop before you consider zero drop. Build weekly mileage in small increments instead of doubling on the first good weekend. Add the loaded pack last, once unloaded mileage stopped generating soreness, because weight amplifies whatever your tissues are already struggling with.
The moderate-drop step is where most first-time switchers should live for a while, and the Brooks Cascadia 19 (men’s · women’s) is the shape of shoe that step calls for: an 8mm drop that stays close to what your legs already know, a rock plate, and balanced cushioning that doesn’t commit you to either extreme. It’s a landing spot rather than a destination, which is a legitimate thing to buy.
Never let a big trip be a new pair’s first real outing. A short, low-mileage shakedown hike surfaces hot spots, heel slip, and lacing problems while you’re still an hour from your car and able to do something about them. The National Park Service’s recommendation to break in new footwear on short hikes first applies to zero-break-in shoes too, because what you’re testing is the fit, not the leather.
Don’t Start at Zero Drop
Going from a 12mm boot straight to a 0mm shoe is a 12-millimeter change in ankle geometry applied to every step you take for the rest of the day. Nothing else in your gear closet changes your mechanics that much that fast. Step down through 8mm, then 4mm, and give each step weeks rather than days.
Zero drop is a genuinely good place to end up for a lot of hikers, and a bad place for some. Which group you’re in depends on Achilles history, calf strength, and how much your feet have been doing outside of hiking, which is the honest version of who should actually go zero-drop and who should skip it.
The trail-specific version of the question adds a wrinkle worth understanding, since a zero-drop trail shoe can still carry a very tall stack. Level does not mean minimal, and how zero-drop geometry works in a trail shoe specifically is where drop and stack stop being two separate specs and start being one combined feel.
Sizing, Fit, and the Toe-Bang Problem
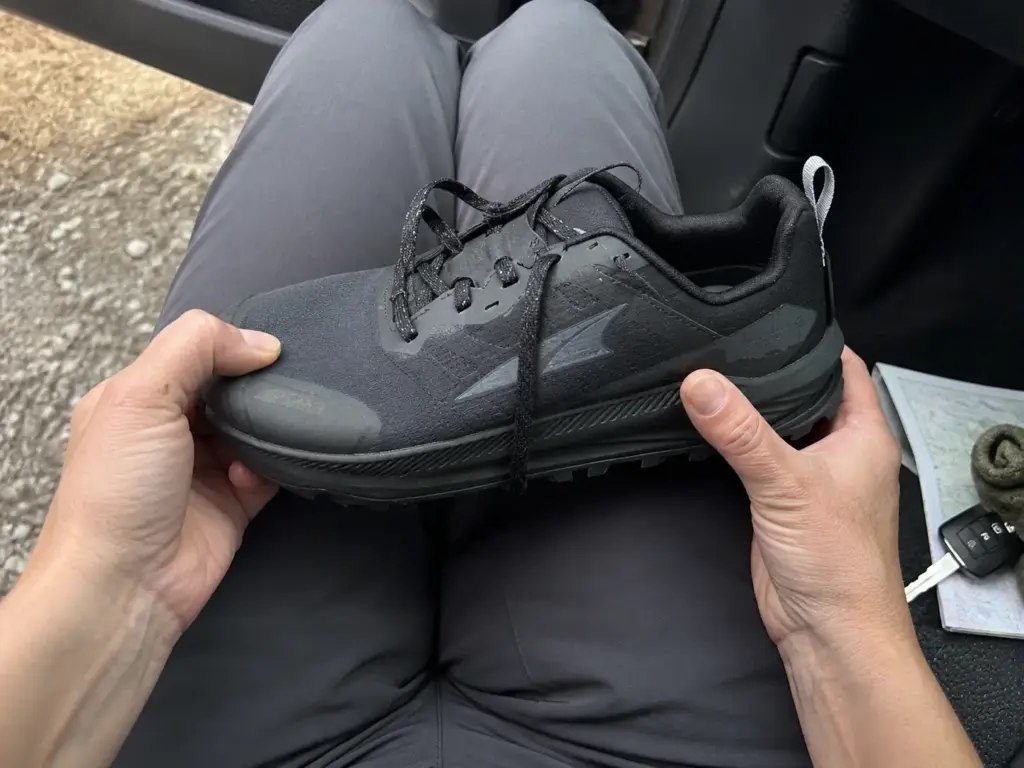
Your feet at mile fourteen are not the feet you bought the shoe with. Size for the swollen version, because the swollen version is the one doing the descent.
Size for the Feet You’ll Have at Mile Fourteen
Foot swelling on long days is real and predictable. Heat, sustained impact, and a full day upright push fluid into your feet, and experienced thru-hikers routinely size up a half to a full size over their street shoe as a result. Someone whose feet fit perfectly at the trailhead often finds the same shoe uncomfortably tight by afternoon on day three.
Sizing up isn’t a free move, though, and going too big trades toe-bang for heel slip and a sloppy midfoot. The right amount depends on the shoe’s shape, your typical mileage, and how much swell you actually get, which is the substance of when sizing up is the right call and when it isn’t.
The practical test is a thumb’s width of space in front of your longest toe with your hiking sock on, checked with your heel seated back in the shoe. Do it late in the day when your feet are already a little swollen, not first thing in the morning.
Toe Box Width and Who It Suits
Toe-bang is community shorthand for toes jamming into the front of the shoe on a steep descent, over and over, for a couple of thousand steps. Trail runners are especially prone to it because the soft upper doesn’t stop your foot from sliding forward the way a stiff boot does. The consequence isn’t subtle, and what repeated toe-bang does over a long descent is a bruised nail bed and a toenail you may lose a month later.
A wide toe box attacks the problem from the other direction: give the toes room to splay and they spread the load and grip better on the descent instead of stacking up against a tapered point. Toe splay also does real work for foot stability, which is a large part of why the wide-shaped shoe became a thru-hiker favorite long before the mainstream brands caught on.
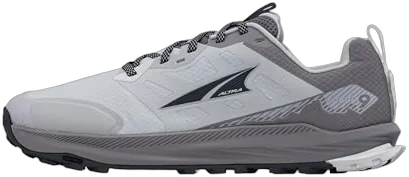
Wide isn’t universally better, and wide width sizing is a different thing from a wide-shaped last: one adds volume across the whole shoe, the other only changes the shape of the toe box. Narrow feet and low volume feet get too much space in a wide-last shoe, and the foot slides inside it on descents, which produces the exact toe-bang the wide box was supposed to prevent. If that’s you, the reasoning behind the wide-toe-box case in boots is worth reading mostly so you can recognize why it doesn’t apply to your foot.
Heel Lock and Lacing Fixes
Heel slip is a lacing problem far more often than a sizing problem, and the reflex fix, cranking the whole shoe tight, is the wrong one. Over-tightening the forefoot restricts swelling and creates pressure points across the top of your foot without doing anything about the heel.
Use the top eyelet instead. Nearly every trail runner has an extra hole at the top of the lacing that most people never touch, and threading a heel lock through it, a loop on each side made by running the lace back into its own eyelet, then passing the opposite lace through that loop, pins your heel down while leaving the forefoot roomy. Lace the lower section loosely, lock the top, and the shoe suddenly behaves.
For low-volume feet the fix often has to go further, adding a thicker sock, a thin volume-filling insole, or a different lacing pattern altogether, which is the territory of how narrow feet should approach heel slip.
What They Cost, How Long They Last, and When to Replace Them
Thru-hikers don’t talk about sticker price. They talk about cost per mile, because they know exactly how many pairs a trail eats, and that framing is what makes an expensive shoe occasionally the cheaper one.
How Many Miles You Actually Get
Mileage per pair runs 300 to 500 for a trail runner, against 600 to 900 or more for a well-built boot. If you hike 30 miles a month, that’s roughly a pair a year. On the Pacific Crest Trail, the Appalachian Trail or the Continental Divide Trail you’re buying four or five pairs to finish, and the resupply plan has to account for the boxes.
Treat 300 to 500 as a planning budget rather than a hard cutoff, because the number swings with your weight, your load, the terrain, and the specific foam. Sharp rock and heavy packs shorten it. Smooth dirt and a light kit stretch it. This mileage math is the whole subject of which pairs go the distance on a thru-hike, and the durability-per-dollar angle carries further into shoes chosen for thru-hike mileage specifically.
Run the math before you flinch at a price tag. A premium shoe that reliably delivers 500 miles can cost less per mile than a cheap one that’s flat at 250, and it does it while your knees are still fresh.
The Midsole Dies Before the Tread Does
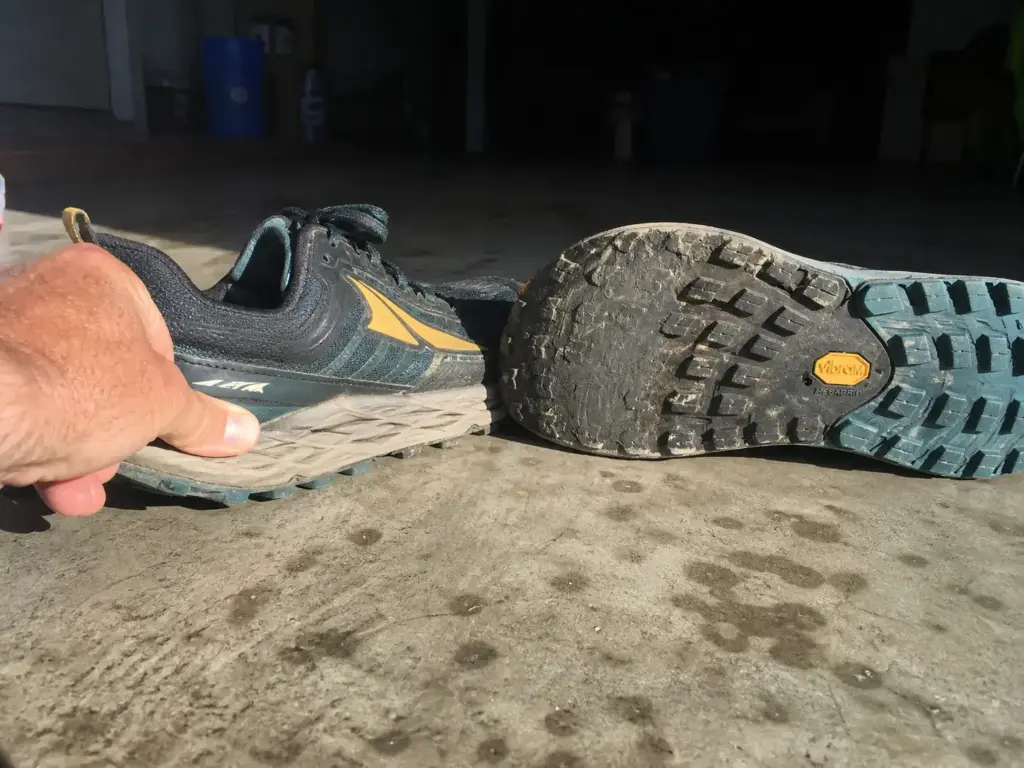
Here’s the replacement signal almost nobody uses. Everyone checks the tread, because worn lugs are visible from across the room, and the tread is not what retires most trail runners. The midsole foam compresses long before the outsole goes bald, and once it does you’re walking on a flat, dead platform that transmits every impact straight into your joints while the shoe still looks fine.
Two checks catch it. Look at the midsole sidewall in raking light for horizontal creasing and wrinkling, which is foam that’s collapsed and stopped rebounding. Then press a thumb hard into the foam under the heel and the forefoot: if it doesn’t spring back, the community verdict is blunt and correct, the foam is dead.
A pair with good-looking lugs and a dead midsole is done, and walking it another 100 miles is how people acquire shin splints they blame on the trail. Energy return is the thing you actually lost, and it goes quietly. If you want the full checklist for calling a pair done, it covers the upper and outsole failure modes too.
Rotate two pairs on a long trip instead of wearing one into the ground. Foam recovers a meaningful amount of its rebound over 24 hours of rest, so alternating days gets you more total usable miles out of two pairs than wearing them consecutively would. It also means a catastrophic failure at mile 400 doesn’t end your trip.
The rotation trick works on a weekend schedule too, not just on long trails, and why rotating two pairs stretches both of them further explains the recovery mechanism in more detail.
What to Spend and Where Budget Picks Land
Every roundup in this category skews to premium gear, and the readers asking for affordable options in the comments generally get no answer. So here’s one. Capable trail runners exist in the lower price band from mainstream running brands, and expect to spend roughly $50 to $100 for a serviceable pair, well under what the flagship models everyone reviews command. The Merrell Moab Speed is the usual name that comes up as the budget-side alternative to the premium cushioned picks, and it’s a real shoe rather than a consolation prize.
What you actually give up at the lower band is specific and worth knowing: less sophisticated foam that compresses sooner, generic outsole rubber instead of a named sticky compound, and less refined upper construction that wears through at the flex points earlier. The fit and the basic geometry are usually fine. It’s longevity and wet-rock grip that thin out.
The honest budget calculus depends on your mileage. If you hike a few weekends a month, a shoe from that lower band that lasts 300 miles is perfectly rational. If you’re putting in serious mileage on rock, the premium shoe’s better foam and grippier rubber often win on cost per mile, and they definitely win on the descents.
Conclusion
Three things to carry out of this. The specs matter because of what they do to your legs, not because of the numbers on the box, and stack height and drop are the two that decide which muscle gets tired first. There’s a load and a terrain where boots win the argument back, and your ankle history predicts that line better than any weight number does. And switching is a season-long project rather than a purchase, because rushing it produces the exact injuries people then blame on the shoe.
Pick one short local hike this week. Wear the pair you’re considering with the socks you actually hike in, keep it under five miles, and pay attention to your calves the next morning rather than to how your legs feel at the car. That single data point tells you more about whether these shoes suit you than any spec table will.
Frequently Asked Questions
01Can trail runners be used for hiking?
Yes. Trail runners are the default footwear for most thru-hikers and a large share of day hikers, because they weigh less, need no break-in, and dry fast. They fit best under packs below about 30 pounds on established trail. Sustained talus or scrambling still favors boots.
02Are trail runners better than hiking boots?
Neither is better as a category. The right choice depends on pack weight, terrain and your ankle sprain history. Under roughly 30 pounds on trail, trail runners usually win on weight and comfort; past that ceiling, or on loose technical ground, boots do more work.
03How many miles do trail runners last for hiking?
Plan on 300 to 500 miles per pair, compared with 600 to 900 for boots. Use the number as a budget, not a cutoff. The real signal is the midsole: press a thumb into the foam, and if it stays compressed, the pair is done regardless of tread.
04What should you not wear while hiking?
Skip cotton socks, footwear with a dead midsole, and anything brand new on a big trip. Cotton holds moisture against your skin and raises blisters, flat foam stops absorbing impact, and untested shoes hide their pressure points until you are hours from the car.
05Are there good budget trail runners for hiking?
Yes. Mainstream running brands sell capable trail shoes in the $50 to $100 band, well under the flagships most roundups cover. You trade foam quality, outsole rubber and upper durability, not basic fit. For a few weekends a month, that trade is reasonable.
Risk Disclaimer: Hiking, trekking, backpacking, and all related outdoor activities involve inherent
risks which may result in serious injury, illness, or death. The information provided on The Hiking Tribe is for
educational and informational purposes only. While we strive for accuracy, information on trails, gear, techniques,
and safety is not a substitute for your own best judgment and thorough preparation. Trail conditions, weather, and
other environmental factors change rapidly and may differ from what is described on this site. Always check with
official sources like park services for the most current alerts and conditions. Never undertake a hike beyond your
abilities and always be prepared for the unexpected. By using this website, you agree that you are solely
responsible for your own safety. Any reliance you place on our content is strictly at your own risk, and you assume
all liability for your actions and decisions in the outdoors. The Hiking Tribe and its authors will not be held
liable for any injury, damage, or loss sustained in connection with the use of the information herein.
Affiliate Disclosure: We are a participant in the Amazon Services LLC Associates Program, an
affiliate advertising program designed to provide a means for us to earn advertising fees by advertising and linking
to Amazon.com. As an Amazon Associate, we earn from qualifying purchases. We are also an official affiliate partner
of Black Diamond Equipment via the AvantLink network. If you click on a Black Diamond affiliate link and make a
purchase, we may earn a commission at no additional cost to you. We also participate in other affiliate programs and
may receive a commission on products purchased through our links. Additional terms are found in the terms of
service.