In this article
You have the Bear Mountain Inn lot pinned on your phone, a forecast that finally cooperates, and a trip report from 2024 saying the Major Welch Trail is back open. Two of those three still hold up. The status here comes off the NY State Parks page and the Appalachian Trail Conservancy’s own trail updates, both checked while writing this, because a two-year-old trip report is exactly how people end up in a parking lot reading a construction sign. Below: what the detour changes about your day, then the whole loop, scramble to summit to stone steps.
Major Welch Trail Status Right Now, and Why 2024 Reports Are Wrong
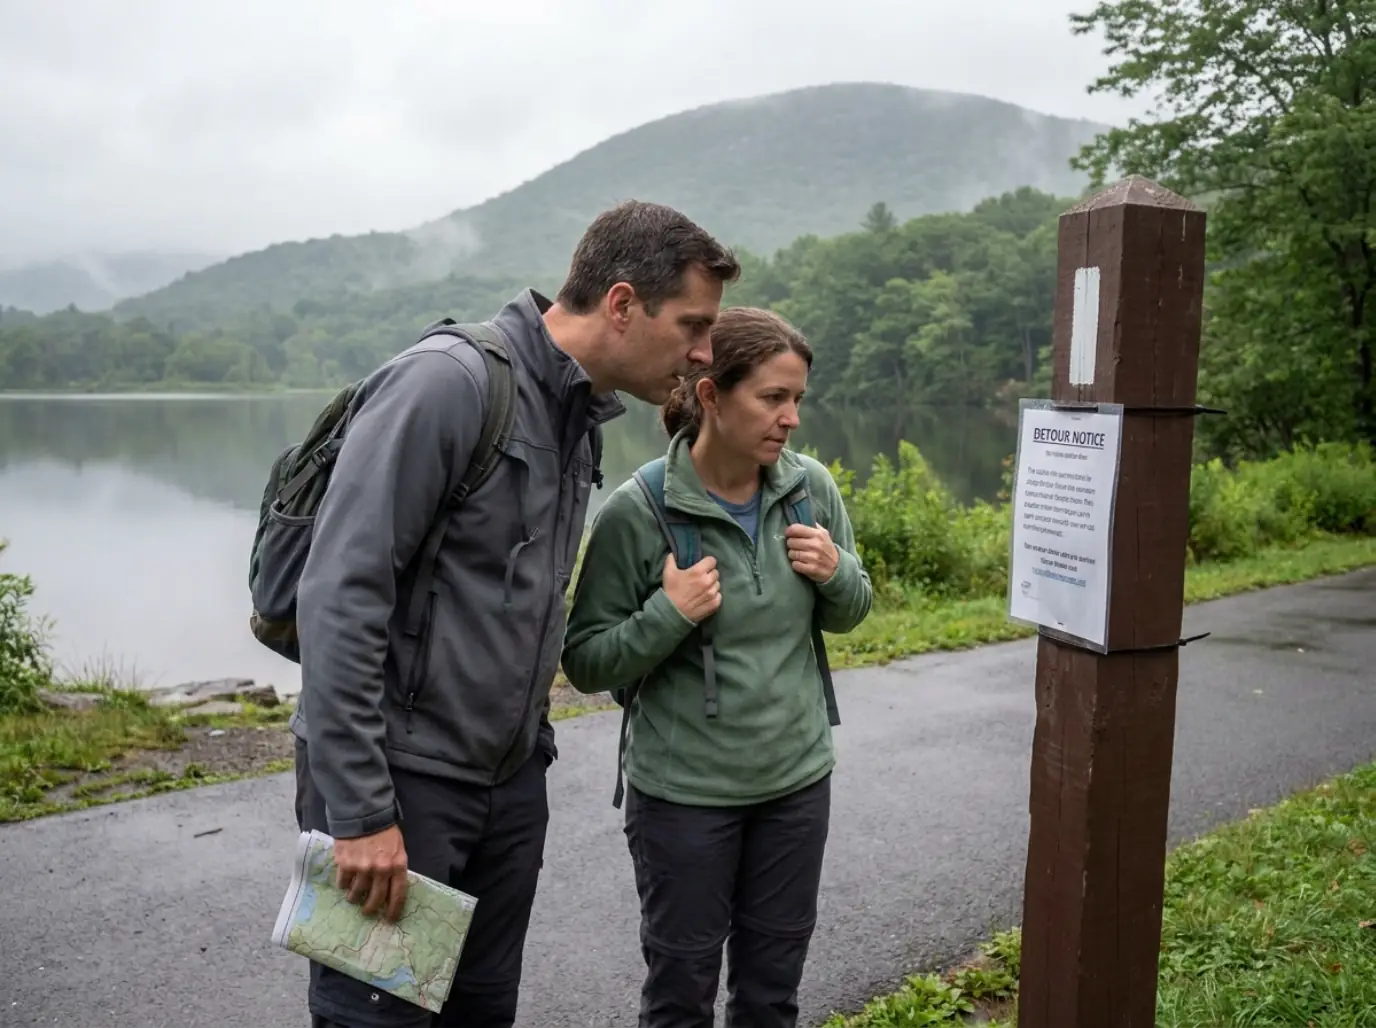
Almost everyone arrives with the same mental model: it closed after the storm, it reopened, done. That milestone is real and two events out of date. The trail is open. The way you get to it is not the way you remember.
What the Detour Changes About Your Approach
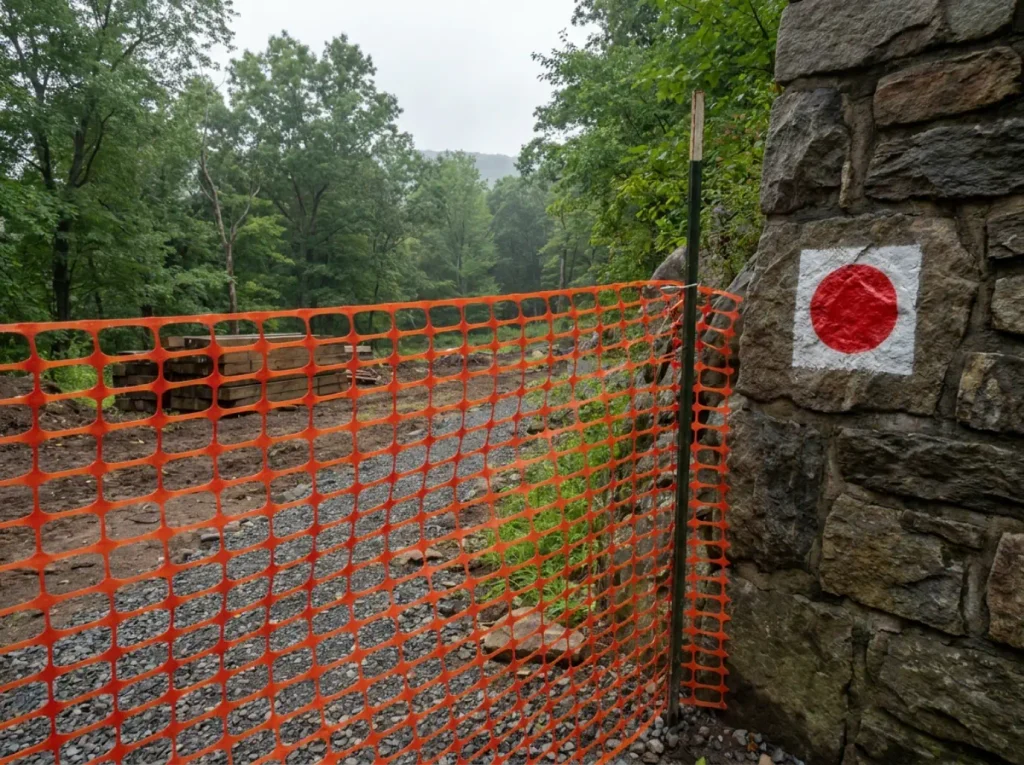
Construction near the Bear Mountain Inn has rerouted the approach for three trails at once: the Suffern-Bear Mountain, the Appalachian Trail, and the Major Welch. This is not a closure. What changed is the stretch between where you park and where the trail actually begins, and the official Bear Mountain State Park page confirms the detour is still active with the work expected to wrap in Summer 2027.
The detour route is blazed, not improvised. White A.T. blazes and red Major Welch blazes carry you around the north end of the Hessian Lake picnic area instead of dumping you straight at the trailhead from the Inn.
On weekends only, a passageway through the construction zone near the Inn is open, which shortens the walk. Midweek, you take the long way around the lake.
Practically this costs time and nothing else. Call it an extra stretch of walking on the front end, plus whatever you lose at a junction deciding whether the blaze you are looking at is the detour or the trail. Build it into your turnaround math rather than your patience.
Follow blazes, not memory, on the first half mile. Detour blazing gets added and removed as construction phases finish, so the route that worked for someone in April may not be the route painted on the rock in October. If a blaze contradicts your GPS track on the approach, the blaze wins.
Why “It Reopened in 2024” Keeps Getting Repeated
Here is the timeline nobody separates properly. Storm damage in 2023 forced a trail closure here. Those repairs finished and the trail reopened around Memorial Day 2024. That is a real event, and every guide reporting it is reporting something true.
The trail is named for Major William A. Welch, the engineer who built out this park system a century ago, which is a nice piece of trivia and no help at all with the current situation.
Then a separate project started. The current trail detour has nothing to do with storm damage and everything to do with construction work around the Inn area, and the Appalachian Trail Conservancy’s own trail-updates page corroborates the same construction timeline: some sections reopened in spring 2026, with the remaining work running through summer 2027. Two agencies, independently, telling hikers the same thing.
So the pages saying “reopened Memorial Day 2024” are not lying. They are frozen. Reopened and detour-free are two different states, and a trail can sit in the first while the second quietly stops being true. That is how stale trail information survives for years: nobody publishes a correction to a fact that was accurate when they wrote it.
How to Check Status the Day Before You Drive
Ninety seconds. That is the whole cost of not being surprised.
The night before you drive, check the New York-New Jersey Trail Conference’s trail alerts page before you drive out and cross-reference the state park page. NYNJTC maintains this trail system and posts detour specifics (which lot, which blazes, which phase) that shift as construction moves through 2027. If the two sources disagree, assume the more restrictive one is current.
Do this for every trail on your shortlist, because the Hudson Highlands are unusually active right now. Breakneck Ridge is closed outright until mid-2027, a categorically different answer from “yes with a detour” and worth knowing before you build a two-trail day around it.
The biggest planning mistake on the Major Welch right now is not underestimating the scrambles or the steps. It is trusting a status you read two years ago.
Trail Stats, Difficulty, and Who Should Skip It
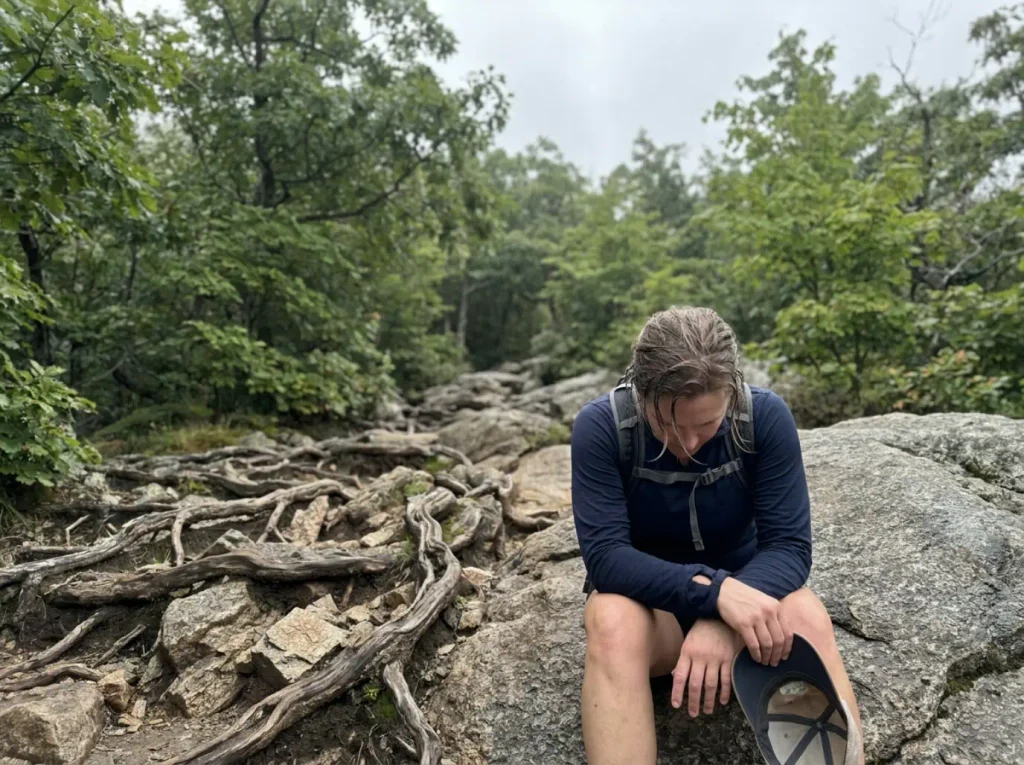
“Moderate” is the word that gets people hurt here. The loop looks casual on paper and is steep enough to make stairs unpleasant for three days. The gap between those two facts is this whole section.
The Numbers, and Why Sources Disagree
The loop runs roughly 3.9 to 4.5 miles depending on whose track you trust, with about 1,150 to 1,340 feet of elevation gain, and 3 to 4 hours of moving time. Every source that assigns a rating calls it Difficult or Hard. None of them call it moderate. As day hike difficulty goes in the Hudson Highlands, this sits near the top of what a half-day outing asks of you.
The disagreement is measurement, not sloppiness. GPS drifts under tree cover, the detour adds footage older tracks never recorded, and people start the clock in different places: the Inn lot, the trailhead proper, the far end of Hessian Lake. Stack those and you get half a mile of honest disagreement.
Plan for the top of the range. Four and a half miles with 1,300 feet of gain leaves you margin, and margin is what you actually spend on a trail with scrambling. If you are weighing this against the other routes up the same mountain, the full difficulty breakdown for Bear Mountain’s other routes lays out how the gentler approaches compare on the same numbers.
Who This Loop Is Actually Hard For
Hikers who consider themselves reasonably fit routinely report hurting for days afterward. Not “felt it a bit.” Hurting. That shows up over and over in trip logs, and it is a better difficulty rating than any star system.
The no-go signals are specific. Fresh knee or ankle trouble, because the descent is an hour of repeated impact with no soft version. No scrambling experience combined with wet rock in the forecast, because inexperience and moisture compound instead of adding. And a group moving slower than the daylight allows, which is a math problem disguised as a fitness problem.
If you read that and thought “not yet,” that is a useful answer, not a failure. The gap closes faster than people expect with the specific strength work that makes scrambling terrain feel easier, mostly single-leg strength and the stabilizer work nobody does because it looks unglamorous in a gym.
Bringing Kids or a Dog
This is a dog-friendly trail with real limits, and a fit dog on a leash handles the loop. Dogs must be leashed at six feet or under and are not allowed in park buildings, picnic areas, swimming areas, walkways, or the Trailside Museum and Wildlife Center. The trail is fine; the post-hike lake stroll and zoo stop are not.
The slabs are the real filter for both. A dog that has never climbed rock will figure it out or refuse, and neither is a problem you want to solve mid-scramble with a leash in one hand.
Same with kids. A confident nine-year-old who scrambles for fun will love this; a reluctant one gets stuck at the first slab and the group’s day becomes a negotiation. If either is an unknown on rock, take the plain A.T. approach up.
Parking, Fees, and the Arrival Window That Decides Your Day
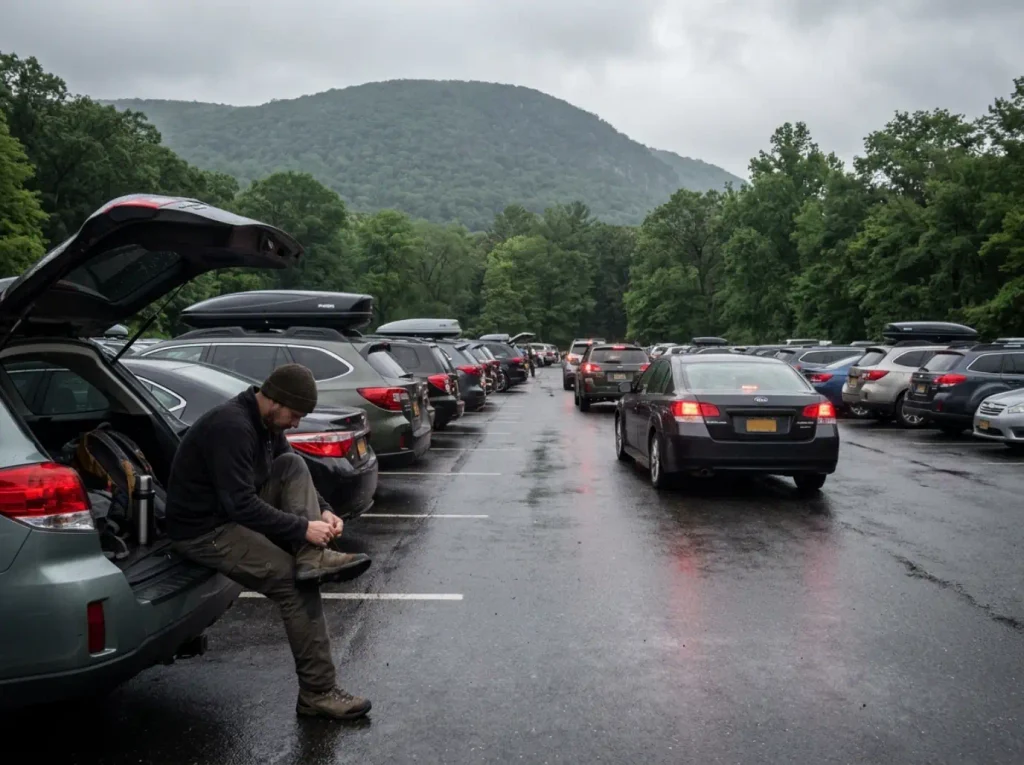
This is the mountain where your hike gets decided at 9:15am in the parking lot. Not by fitness. By whether a space is left.
What You Pay and When They Collect
The vehicle parking fee is $10 per vehicle, collected year-round: weekends and holidays from 8am to 5pm, weekdays from 8am to 4pm. That is the official figure as of 2026, and the park page is where to confirm it later. Ten dollars is not the part of this that ruins anyone’s day.
The 8am Rule
Arrive before 8am on any weekend, and on any fall foliage day regardless of the day of the week. This is not crowd-avoidance advice. It is access advice. The lot fills, and when it fills your options are a much longer walk from wherever you end up, or driving away.
One quirk: the booth opens at 8am, so a 7:30 arrival that beats the crowd sometimes beats the collection window too. Do not treat that as a savings strategy. The lot still fills by mid-morning either way, and the ten dollars was never the constraint.
A pre-8am start is also the best scrambling window you will get, and not for the reason people assume. Early means the north-facing slabs are still holding overnight condensation. So arrive early for the parking, then let the first hour of sun work on the rock while you handle the detour walk and the lower trail. You reach the exposed sections at roughly the right time by accident.
Have a Backup Trail Picked Before You Drive
Bear Mountain is reported as extremely crowded, worst on fall foliage weekends, with full lots the normal outcome rather than the unlucky one. The fix is a named second option before you pull out of your driveway, so a full lot costs you fifteen minutes instead of your morning.
Fahnestock is the quiet twin worth having in your back pocket: similar drive, a fraction of the traffic, enough trail for a real day. Cold Spring is twenty minutes north with its own trail options, with a town attached for when the hike gets abandoned in favor of lunch.
And if you are planning the whole region rather than one Saturday, the full Sam’s Point guide covers parking, trails and the same arrive-early math that governs every popular trailhead in this part of New York. The arithmetic does not change from park to park. Only the hour the lot fills does.
And remember the detour walk. Add it to the front of your day, not the back, because the back of your day is where daylight lives.
Why You Hike This Loop Counter-Clockwise
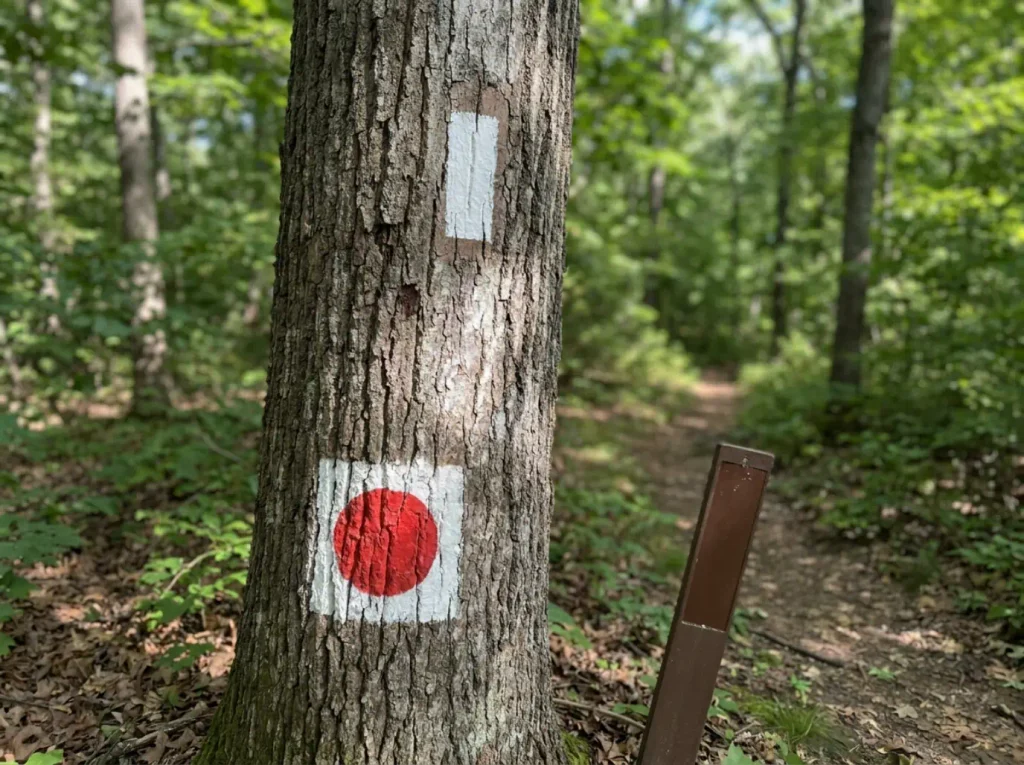
Every experienced source tells you to go up the Major Welch and down the A.T. Almost none say why. The why is the part worth having, because it makes the call for you on the next unfamiliar loop too.
Up the Red Blazes, Down the White
The counter-clockwise loop runs up the Major Welch Trail, marked with red-circle-on-white blazes, and down the Appalachian Trail, marked with plain white blazes. Two blaze systems, two very different kinds of terrain, all of it inside the Palisades Interstate Park trail network this loop belongs to, managed by the Palisades Interstate Park Commission.
Learn both blazes before you start walking. On the detour approach you will see them painted near each other, which is exactly where people follow the wrong color confidently for a quarter mile.
Why Down-Climbing Rock Is the Part That Hurts People
Climbing exposed rock is meaningfully safer than down-climbing it, and the mechanism is how your weight sits.
Going up, you see every hold before you use it. Your weight stays over your feet, your eyes sit inches from the rock, and your hands reach into your field of view. If a hold feels wrong you have committed almost nothing, so backing off costs one step.
Coming down, all of that inverts. Your weight sits behind your heels, your feet reach for holds you are blocking from view, and your hands are above you hanging on rather than pulling. You feel for a foothold with a toe, find nothing, and now you are holding a position instead of moving through one. That is where people get committed to a move they cannot reverse, and why the slab that felt casual on the way up feels like a problem coming down.
The consistency of the advice is itself the signal. When effectively every experienced source picks the same direction on the same loop, that is not preference. That is people independently discovering the same thing about the same rock.
What Going Counter-Clockwise Costs You
The safe direction is not free, and pretending otherwise is how guides lose your trust.
Counter-clockwise hands you the entire stone staircase as a descent: an hour of stepping down, absorbed by your quads and knees one impact at a time with no way to spread the load. Go the other way and you climb those steps instead, which is aerobically harder and mechanically much kinder.
So the trade is real. You swap a hard hour on the lungs for a hard hour on the joints, and you take the joints because the alternative is down-climbing slabs. Correct for almost everyone, still a trade, and knowing which half hurts lets you prepare for the right one.
The Scramble Sections and What Your Hands Are Actually Doing
Hikers call the Major Welch ascent “spicier” than the plain A.T. approach. That word does a lot of work and nobody unpacks it. What it means in practice is rock scrambling, short stretches of hands-on movement over slab and boulder scramble rather than a continuous walk-up.
Here is the unpacking, including the part where Hudson Valley granite goes slick in ways you cannot see.
Three Points of Contact, and Why It’s the Default
The slabs are exposed rock face that goes hands-free in genuinely dry conditions, and plenty of people walk straight up them. The standard guidance is still three points of contact throughout, two hands and a foot, or two feet and a hand, always anchored.
Treat that as the default rather than the wet-weather exception, because you get no reliable warning: a slab reads dry from standing height and is not. Three points means that when one foot goes you are already holding on with three other things instead of reacting. Reaction time on rock is not a resource you have.
Your palms take a beating on that movement. Granite is abrasive, and pushing off it repeatedly leaves you picking grit out of your hands at the summit. A cheap non-technical glove solves it: the Mechanix Wear Original Work Gloves are budget-friendly, with a synthetic leather palm and a touchscreen fingertip so you are not stripping a glove off to check the map. If you scramble often enough that hand protection is a recurring line item, a dedicated scrambling glove if you’re on rock often enough buys better dexterity and knuckle coverage.
For the same skill one difficulty step up, the Lemon Squeeze at Mohonk turns the same mistakes into a real problem. Same rock, same rules, less room for a sloppy foot.
The Wet Rock Problem Nobody Explains
Every guide says slippery when wet. None of them say why Hudson Valley granite is specifically bad about it, or how to tell.
Two mechanisms. First, morning condensation sits longest on north-facing slabs, which get the least direct sun and hold the temperature difference that keeps dew on the rock hours after south-facing sections have dried. You can be on dry rock, turn a corner onto a north aspect, and be on wet rock with the weather unchanged.
Second, the mica. Granite around here carries mica that gives the surface a faint sheen, and that sheen reads identically whether the rock is dry or holding a film of moisture. From three feet away, dry-with-mica and damp-with-mica look the same. That is the real reason “it looked fine” shows up so often in accounts of slips on this terrain.
So here is a concrete go/no-go rule instead of a vague caution. If it rained in the last twelve hours, or it is before 10am on a north-facing slab, or your flat palm leaves a visible print on the rock, treat it as wet: three points of contact, no hands-free walking, no committing to a move you cannot reverse. If it passes all three and still feels off, believe the feeling. Learning reading rock quality before you commit your weight to a hold is the skill that turns that vague feeling into a decision you can explain.
The palm test costs two seconds and settles the argument. Press a flat hand on the slab and lift it. Dry granite leaves nothing. Rock holding a moisture film leaves a print that fades as you watch. Do it once at the base of the first slab and you know what you are dealing with for the rest of the aspect, instead of guessing at every step.
What Your Boots Need to Do Here
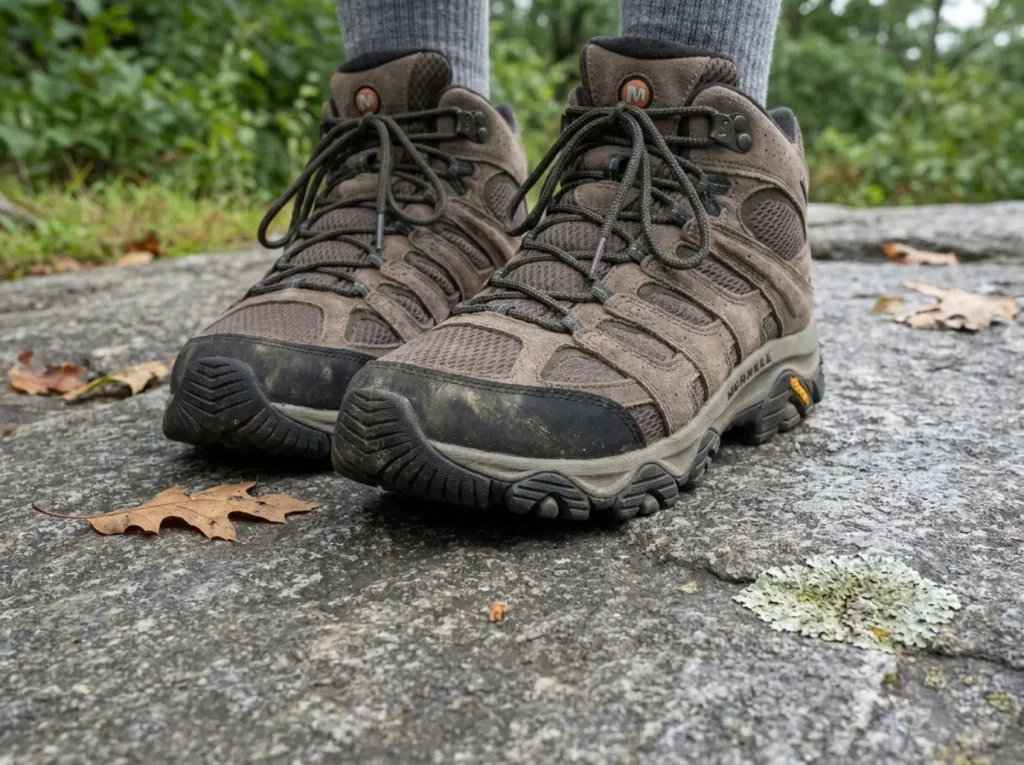
Footwear is the actual variable here, and the spec that matters is the sticky rubber outsole compound, not tread depth.
What your feet are doing on a slab is smearing, pressing flat sole against rock and relying on friction rather than hooking an edge. The flat forefoot rubber doing that work is the smearing zone, and it is the part of the sole that decides this hike.
Deep aggressive lugs do nothing for that; they are built to bite soft ground. On smooth rock a lug is just less rubber touching the surface. The compound holds you, and the contact area decides how much of it is working.
Vibram Megagrip is the compound worth knowing by name: engineered for grip on wet and dry rock, paired with multi-directional lugs, and a genuine spec you can read off a box rather than marketing language. Merrell’s own spec sheet lists the Vibram Megagrip outsole rather than leaving you to guess. The Merrell Moab 3 Mid Waterproof (men’s · women’s) is the mid-range version: Megagrip outsole, 5mm lugs, waterproof membrane, and enough ankle support that the descent does not punish a tired foot placement. It is the default boot pick here for Hudson Highlands rock for one reason, which is the compound on the bottom.
The alternative is the approach shoe. Lower, stickier, less protective, built by climbers for exactly this walk-then-scramble profile, and approach shoes handle this kind of rock without a shoe swap if you want grip without carrying two pairs. The trade is ankle support and waterproofing, which matter more on the stone steps than on the slabs.
Whatever you wear, check the sole before you drive out. Worn-smooth rubber on a slab behaves like worn-smooth rubber anywhere else, and the boots that got you up here last year may not be the ones you want on wet mica this year.
Where to Bail Out If the Scrambles Aren’t Working
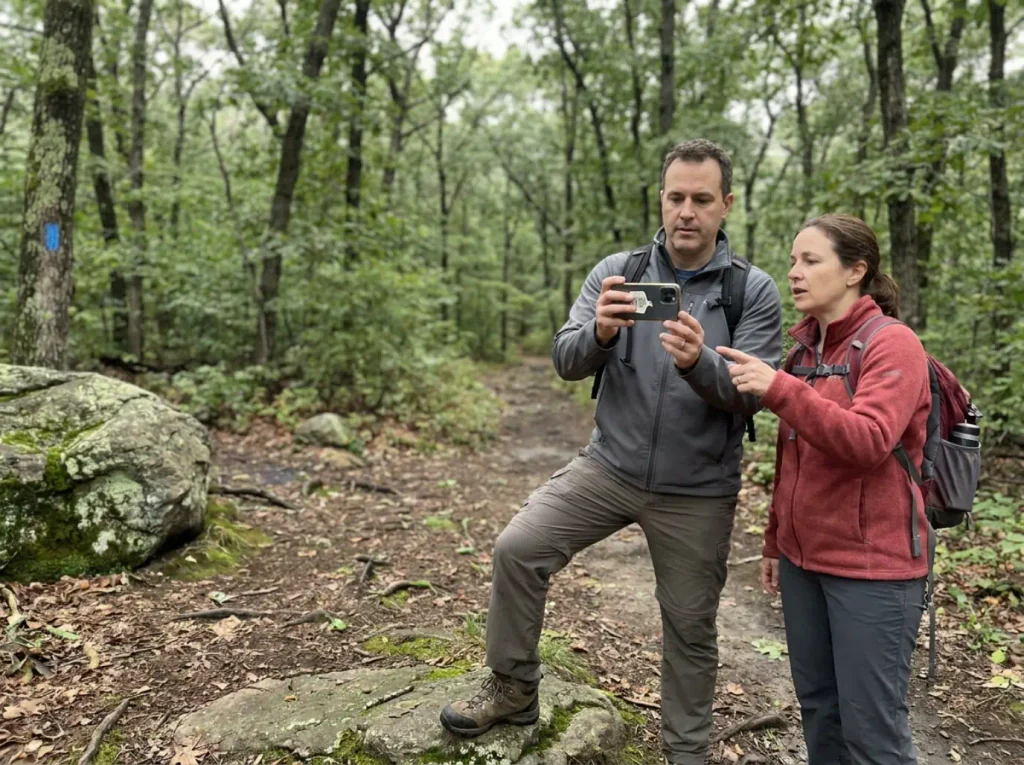
Nobody writes this section, because writing it admits the trail beats people. It does. The useful guide tells you the exit exists before you need it.
The Turnaround Time You Set Before You Start
Set a hard turnaround before you start walking. Not when you are behind. Not when it gets dim. Before.
The rule that works: halve your realistic remaining daylight, and that is your outbound budget. Starting at 2pm in October with sunset around 6, you turn at 4pm wherever you are. Halved rather than two-thirds, because this loop’s descent is slower than its climb, which inverts the usual assumption that down is fast.
Hikers here make the same mistake constantly: no turnaround at all, then racing daylight on the stone steps, the worst place on this mountain to be moving fast. The full version of that decision is in the decision framework for when to turn back on a scramble.
The mistakes that wreck a Storm King hike run on the same pattern: a late start, no water plan, and a descent that takes longer than anyone budgeted.
Backtracking Down What You Climbed Up
You go back the way you came, and it is harder than the climb was. Up-climbing gives you sight of your holds and your weight over your feet; reversing it takes both away. Everything from the down-climbing section applies: weight behind you, feet you cannot see, and the move you flowed up thirty minutes ago now reversed on tired legs.
Which is why you plan the bail before you are above the move you do not want to reverse. The scrambles are front-loaded, so the “is this too much” moment usually arrives while backtracking is still cheap. The base of a slab is the right place to decide, not the top of it.
If you do turn around, face the rock on anything steep. Facing out feels natural and is how people end up sitting down on a slab and sliding, which works right up until the friction changes.
The Connectors and the Road
Blue-blazed trail junctions and the wider park network give you connectors off the ridge. Know which one you are near rather than committing blind, which means checking a map at each junction on the way up instead of only when something has gone wrong. The offline map counts. The one you did not download because there was signal in the parking lot does not.
Then there is the option most backcountry trails do not offer: Perkins Memorial Drive. The summit is drivable in season, so a partner or a rideshare can change your plan mid-hike. Someone who is done can wait at the tower and get picked up instead of taking the stone steps on legs that are already gone. Not glamorous, and far better than the alternative.
Perkins Tower, the Summit, and the Crowds You’ll Share It With
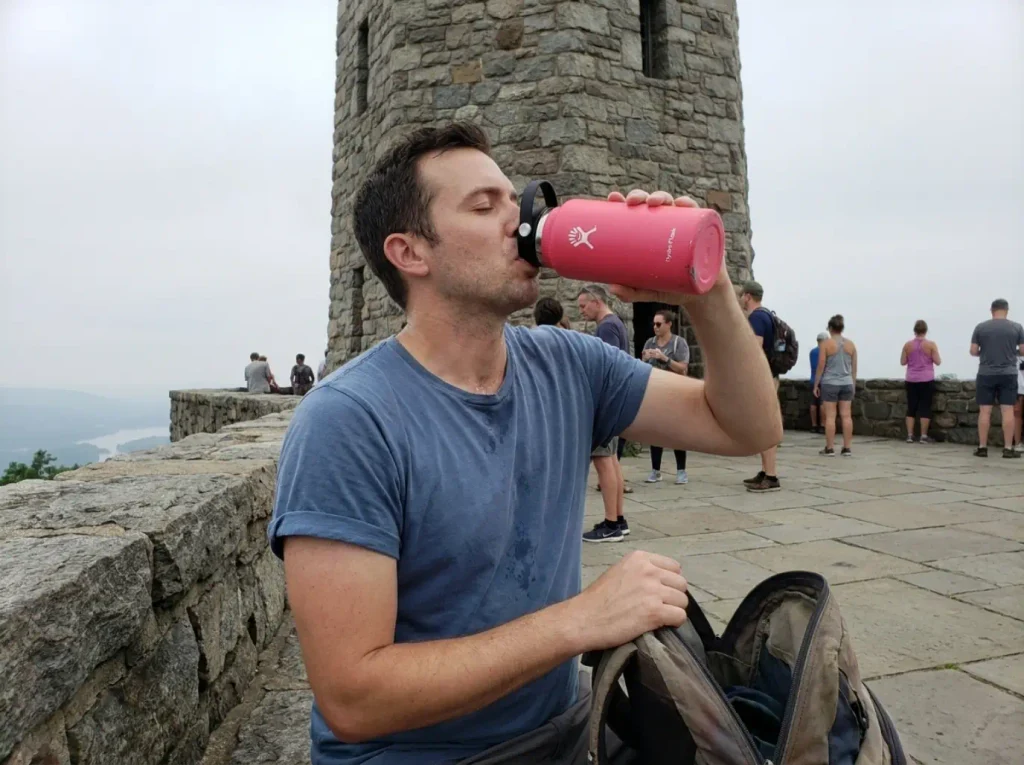
The summit of Bear Mountain is not a wilderness summit. There is a road, a tower, a parking area, and on a good Saturday a couple hundred people. Not a complaint, just information you need before arriving expecting solitude.
When the Tower Is Actually Open
The seasonal closure here is generous but real: Perkins Memorial Tower and Perkins Memorial Drive operate April 1 through November 30, weather permitting, daily from 8:30am to 5:00pm, and the park’s own hours page lists the tower’s operating season.
“Weather permitting” is doing real work there. A wet or cold forecast can close the road and the tower inside the operating season, which matters most if you were counting on the drive as your bail-out. Check it the night you check the trail alerts, and treat the road as a bonus, not a guarantee.
What You Can See From Up There
On a clear day the view covers the Hudson, the Bear Mountain Bridge, Anthony’s Nose across the water, Iona Island in the marshes below, the ridgelines of Harriman State Park running southwest, and the Manhattan skyline when the haze cooperates. That last one is more conditional than people expect. Summer humidity eats it completely, and the crispest skyline days are cold, clear, and windy enough that nobody lingers.
If you are collecting summits that see the city, the skyline-view hikes across the line in North Jersey cover the other side of the same viewshed, several with a fraction of the traffic.
The road means people who did not hike arrive at the viewpoint you just earned, wearing sandals, eating a sandwich. Reframe it before you get there: the crowd is the price of a summit with a tower on it. Nobody built a road to a view nobody wanted.
Seasonally the trail carries mountain laurel in early summer and blueberry bushes up high, both nice and neither the reason you came. Stay on the rock and the tread where they grow: Leave No Trace on a slab mostly means walking on durable surfaces instead of cutting the corner through vegetation that took decades to root there. Fall foliage weekends take the crowd problem from noticeable to severe, and turn the 8am rule from advice into the only version of the plan that works.
Water, Because There Isn’t Any Up Here
There is no water source on this mountain. Everything you drink, you carried up. The summit is where people discover they underestimated, which is the worst place to find out, because an hour of stone steps is still ahead of you and dehydration on a descent is how tired legs become careless legs.
Carry more than you think you need in mild weather, and meaningfully more in summer heat or if you are slow or bringing a dog. A hydration reservoir covers the bulk of that hands-free, which matters on a climb where you want both hands available. The Hydro Flask 32 oz Wide Mouth covers a liter of that insulated, which on a July afternoon is the difference between water and tea. The wide mouth matters more than it sounds: it takes ice and refills fast at a spigot in the lot.
Drink on a schedule, not on thirst. On a climb with hands-on sections, thirst arrives late because you are busy, and by then you are already behind.
The Stone Step Descent, and the Number Nobody Agrees On
This is the part people talk about afterward. Not the scramble. The hour of stone steps that turns your quads to concrete. And there is a small mystery attached to it that every guide gets wrong in a different direction.
An Hour of Stepping Down
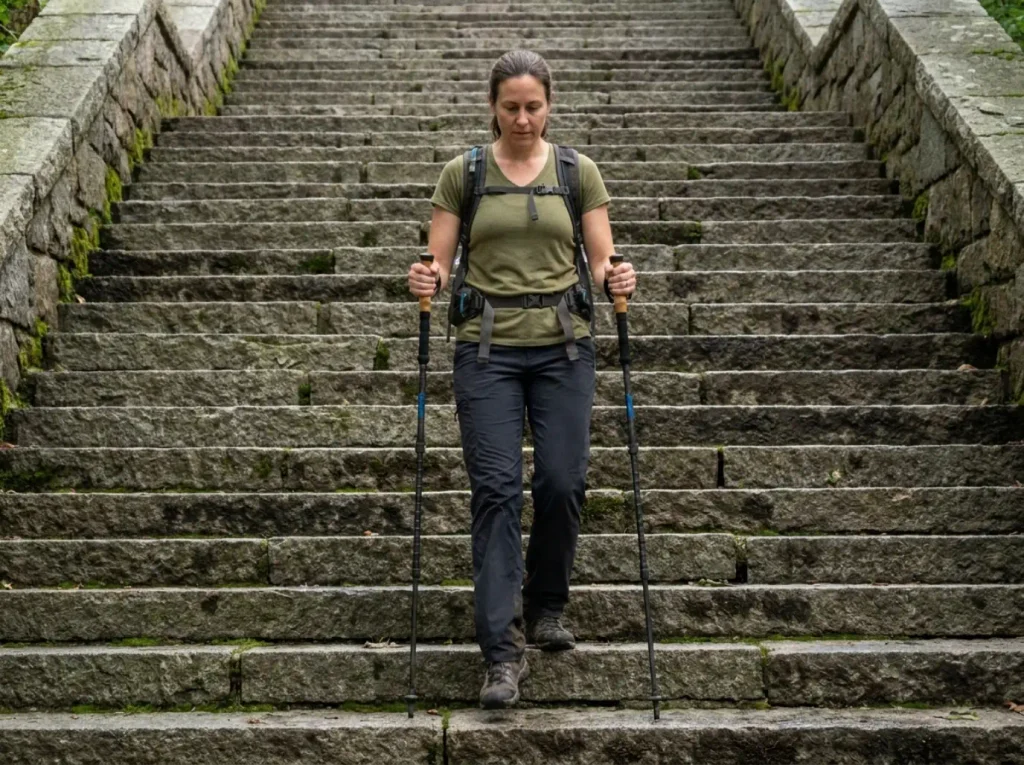
The descent runs down a stone staircase on the Appalachian Trail, roughly an hour of continuous stepping with some sections hikers describe as very steep. Beautiful trail work, and relentless, because a staircase does not let you vary your stride the way a rocky footpath does. Every step lands the same way, at the same height, on the same joints.
That sameness is the whole problem. On normal descent terrain your legs vary angle and load constantly, spreading the wear. A staircase removes that. One movement, repeated somewhere in the high hundreds of times, fatigue accumulating in exactly one place.
Kaaterskill’s own stone staircase punishes the same way, for the same reason, if you want a shorter place to learn how your knees respond.
716, 800, or Over 1,000
Nobody knows how many steps there are. That is the honest answer, and more useful than the confident wrong ones.
Trail signage cites “over 1,000.” Published guides say “over 800.” A hiker who hand-counted them on the way down got 716. Three sources, three numbers, no reconciliation anywhere, and every guide picks one and states it like a fact.
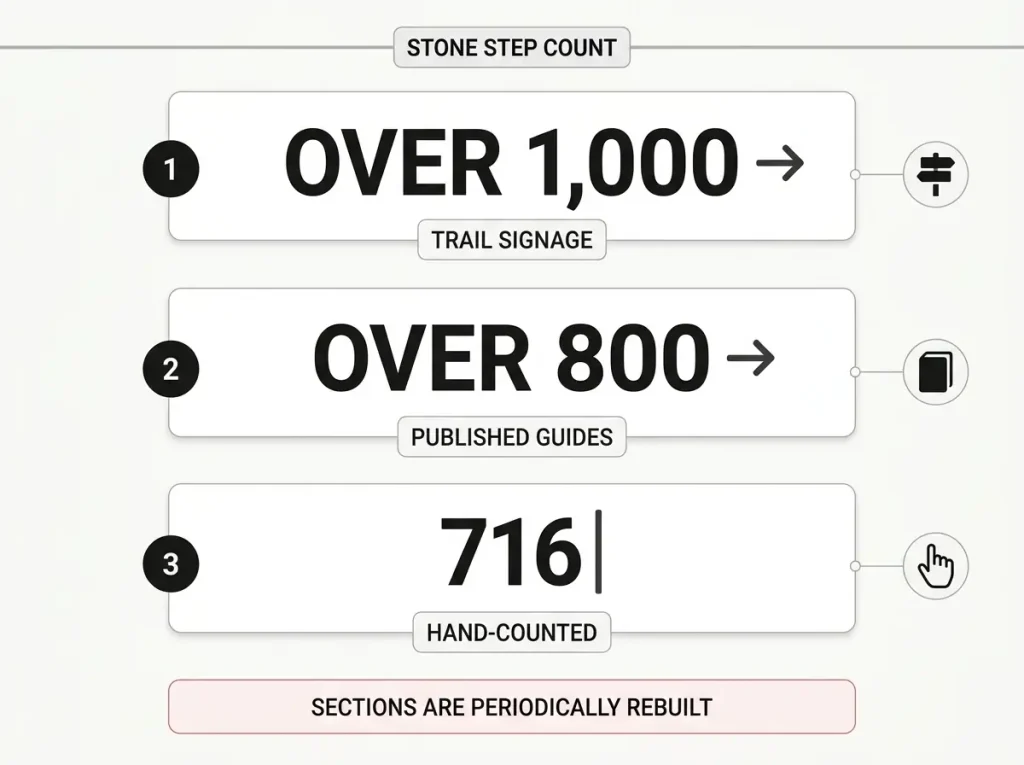
The count varies because the staircase is not a fixed object. Sections get rebuilt and rerouted, steps get added where erosion took the trail out, and what counts as a step is genuinely ambiguous where trail work blends stairs into footpath. A number that was right one decade is not wrong now so much as measuring something that changed.
So the honest range is roughly 800 to 1,000-plus, and the planning version is “about an hour of stepping down.” That is the number that affects your day.
It is not the only stale figure in the region that everyone repeats without checking. The same thing happened to Verkeerder Kill Falls’ published height, copied from source to source long after the original measurement stopped being accurate. Numbers propagate. Corrections do not.
What Saves Your Knees
Hikers report consistently that the descent hurts more than the climb, and specifically that it is the knees. The climb burns lungs. The staircase bills your joints. Hiker knees are the currency this trail actually charges in.
The most-repeated field tip for this trail is a pole for the descent. Not for the whole hike, because you want your hands free on the ascent slabs, but for the hour after the summit. A pole takes a real share of the impact off each step and gives you a third point of stability on stone that is wet, uneven, or both. Hikers credit it directly with saving their knees here, and it comes up more than boots in trip reports about this descent.
The Cascade Trekking Poles suit this pattern because they are carbon fiber and collapsible: they ride on the pack through the scramble and come out at the summit weighing almost nothing. The rubber tips are the right call on stone stairs, where a bare carbide tip skates.
Lengthen the poles for the descent before your first step down, not four hundred steps in when your knees start complaining. Descending length is noticeably longer than walking length, and adjusting mid-staircase means stopping in a spot with people behind you. Set it at the tower while you are already standing still.
Two other things help more than they should. Take the steps one at a time rather than dropping two, because impact scales with drop height. And land on a soft knee instead of a locked one, which sounds like running advice and is just how you stop sending the full load into the joint.
The Short Version
The trail is open. The approach is detoured through Summer 2027. Check the day before you drive, not the year before.
Go counter-clockwise. Up the rock where you can see your holds, down the steps where a pole earns its weight.
Wet granite is the variable that decides whether this is a good day or a careful one. Sole compound and three points of contact, every time, and the palm test at the base of the first slab.
The night before your drive, pull up the trail alerts page and see what has changed. That ninety seconds is the difference between the hike you planned and the parking lot you did not.
Frequently Asked Questions
01Is Bear Mountain still closed?
No. Bear Mountain State Park and the Major Welch Trail are open. What remains in effect is a construction detour near the Bear Mountain Inn affecting the Major Welch, Appalachian, and Suffern-Bear Mountain trails, with work expected to finish in Summer 2027. Follow the marked blazes around the north end of Hessian Lake.
02Is Bear Mountain a tough hike?
Yes. The Major Welch loop is rated Difficult, with roughly 1,150 to 1,340 feet of gain packed into about four miles. Hikers who consider themselves reasonably fit routinely report soreness for days afterward, mostly from the stone-step descent rather than the climb.
03How long does it take to hike the Major Welch Trail loop?
Budget 3 to 4 hours of moving time for the full loop, plus extra now for the construction detour around Hessian Lake. The descent alone eats close to an hour of continuous stepping, so a plan built only around the climb will run late.
04What are the best hikes in Bear Mountain State Park?
The Major Welch loop paired with the Appalachian Trail descent is the classic and the most demanding of the popular options. The park also has gentler lakeside walking around Hessian Lake and connections into the wider Harriman State Park network for distance without the scrambles.
05Do I need trekking poles for the Major Welch Trail?
For the ascent, no. You want your hands free for the rock slabs. For the descent, a pole is the single most-repeated recommendation from hikers who have done it, specifically for the stone staircase, where repeated impact is what hurts knees.
Risk Disclaimer: Hiking, trekking, backpacking, and all related outdoor activities involve inherent
risks which may result in serious injury, illness, or death. The information provided on The Hiking Tribe is for
educational and informational purposes only. While we strive for accuracy, information on trails, gear, techniques,
and safety is not a substitute for your own best judgment and thorough preparation. Trail conditions, weather, and
other environmental factors change rapidly and may differ from what is described on this site. Always check with
official sources like park services for the most current alerts and conditions. Never undertake a hike beyond your
abilities and always be prepared for the unexpected. By using this website, you agree that you are solely
responsible for your own safety. Any reliance you place on our content is strictly at your own risk, and you assume
all liability for your actions and decisions in the outdoors. The Hiking Tribe and its authors will not be held
liable for any injury, damage, or loss sustained in connection with the use of the information herein.
Affiliate Disclosure: We are a participant in the Amazon Services LLC Associates Program, an
affiliate advertising program designed to provide a means for us to earn advertising fees by advertising and linking
to Amazon.com. As an Amazon Associate, we earn from qualifying purchases. We are also an official affiliate partner
of Black Diamond Equipment via the AvantLink network. If you click on a Black Diamond affiliate link and make a
purchase, we may earn a commission at no additional cost to you. We also participate in other affiliate programs and
may receive a commission on products purchased through our links. Additional terms are found in the terms of
service.