In this article
Four miles of dirt to reach the rock, a few hundred feet of hands-on climbing, then four miles back out. You are standing over an open pack deciding whether to carry a second pair of shoes for the middle part, and every option costs you something. Ask anyone who scrambles regularly and you will get the same argument the forums have been having for years, which is why four of the top nine results for this search are peer threads instead of gear roundups: nobody trusts a review that grades approach shoes on roped climbing ability when the real question is whether they hold on class 3 scrambling terrain with no rope at all. This guide covers what makes an approach shoe work on rock, how to size one, what class 3 and class 4 actually feel like through the sole, which models are worth buying right now, and where the shoe stops being enough.
What Actually Makes a Shoe Work for Scrambling
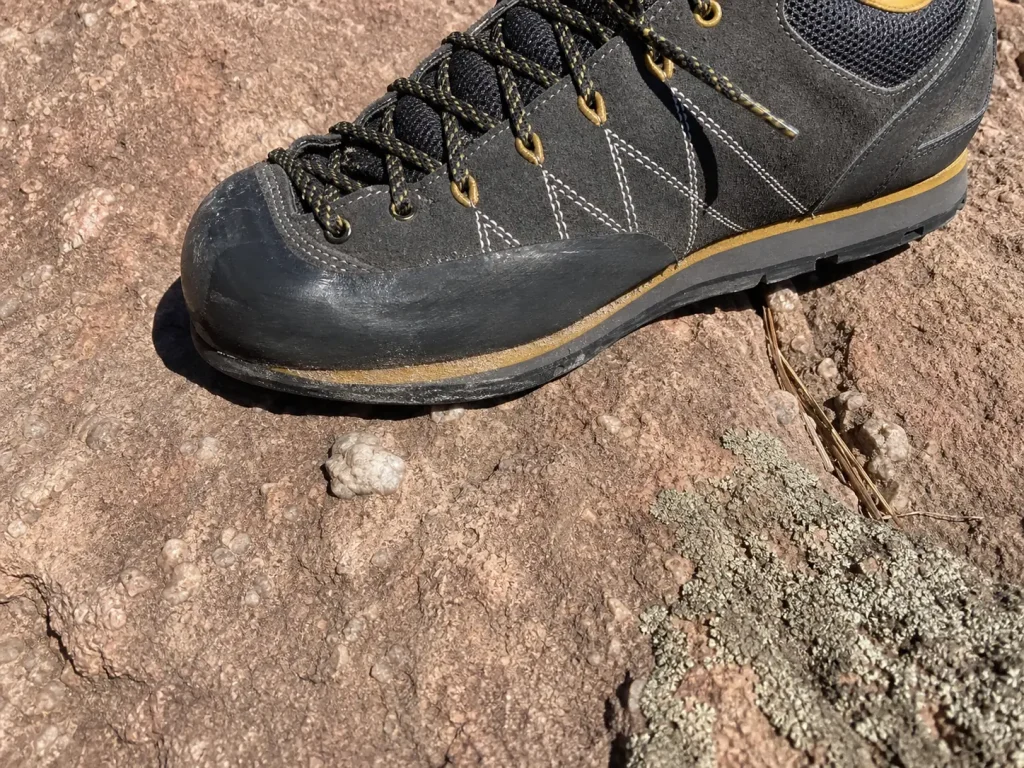
Most people arrive at this category assuming sticky rubber is a marketing phrase. It is not. An approach shoe is a hiking shoe that borrowed a climbing shoe’s front end, and three physical parts do almost all of the work.
The first is the rubber compound itself. Softer rubber deforms into the microscopic texture of stone and holds where a harder trail compound skates. The names you will see printed on outsoles are real formulations with real differences: Vibram Megagrip is the general-purpose sticky standard, Vibram Idrogrip leans toward wet performance, Vibram XS Flash 2 is the newer high-friction compound, and FriXion XF is La Sportiva’s own. Those are not interchangeable badges. Vibram’s own XS Flash 2 technology page confirms the compound was engineered specifically to fix grip loss on loose dirt and log crossings, which matters if your route mixes duff and roots rather than clean granite.
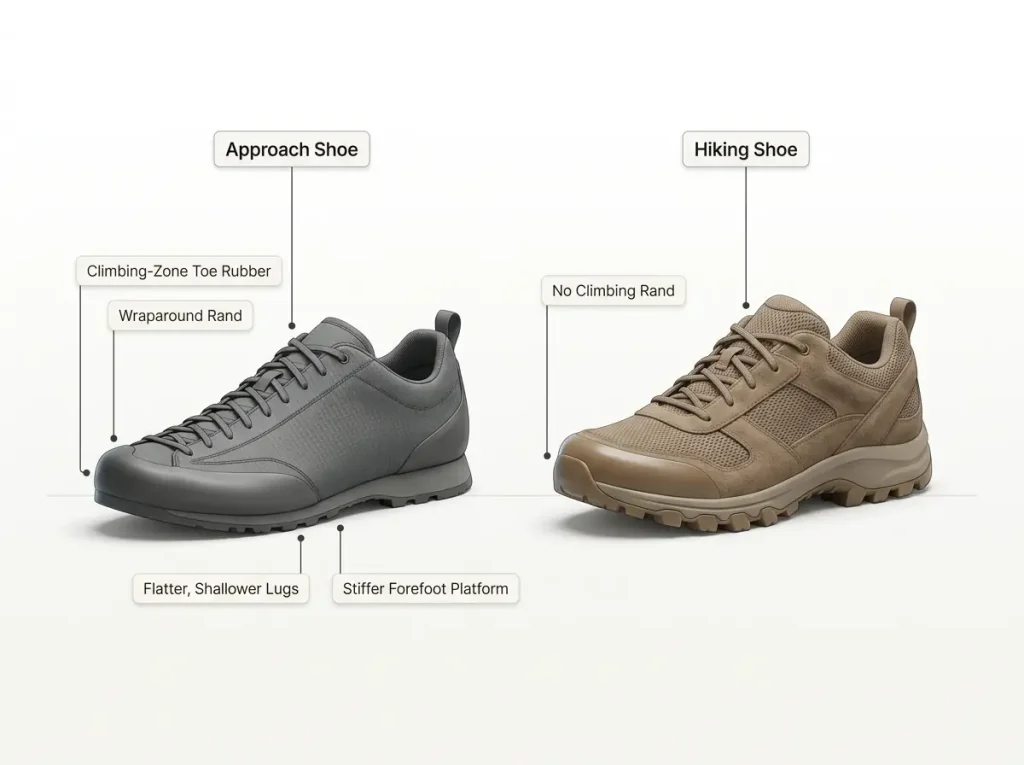
The second part is the rubber rand, the strip of rubber that wraps up and over the toe box instead of stopping at the sole edge. On a hiking shoe the toe bumper exists to protect your foot from rocks. On an approach shoe the rand is a climbing surface. When you jam a toe into a crack or roll onto the inside edge of your foot, the rand is what contacts the stone.
The third is what sits under the forefoot. Approach shoes run a flatter, stiffer platform than a trail runner so the front of the shoe can support your weight on an edge barely wider than a pencil. That stiffness comes from a TPU torsion shank, a firmer dual-density EVA midsole, or both. It also shows up in the heel-toe drop, which sits low in this category compared with a typical cushioned trail shoe, so your foot stays closer to level when you are standing on the front of it.
One more thing the spec sheets never tell you: rock type changes how all of this behaves. Coarse granite and grippy sandstone reward smearing because the surface texture is aggressive enough for soft rubber to key into. Polished limestone gives you far less to work with, and the same compound that felt bombproof on a Sierra slab can feel slick on a worn limestone step. Match your expectations to the stone you actually climb on.
Smearing and edging, defined properly. Every gear roundup uses both words and almost none of them explain either. Smearing means pressing the flat of the sole against a holdless face and trusting friction alone, with no edge to stand on. Edging means weighting the toe or the rand on a distinct lip of rock. Real scrambling movement blends them constantly, which is why scramblers coined smedges, a smear on something that is almost an edge. If you understand nothing else about approach-shoe rubber, understand that smearing needs flat contact area and edging needs a firm platform, and the two pull the design in different directions.
That tension explains lug depth, which is the spec nobody frames correctly. Deep lugs bite mud and soft dirt because they penetrate. On rock they do the opposite: they lift the flat rubber off the stone and shrink the contact patch that smearing depends on. Approach shoes run shallow, closely spaced lugs on purpose, often with a smooth dot-pattern sole under the toe where climbing happens. If you are still deciding whether you need this category at all, it is worth reading how approach shoes stack up against regular hiking shoes on everyday trail before you spend anything.
On a scramble-heavy day, pick the thinner midsole and the named sticky compound over the plusher ride every time. You want to feel what the rock is doing under your forefoot, not be insulated from it. Cushioning is comfort you notice on the walk in and grip is information you need the moment your hands leave the ground.
Fit and Sizing for Scrambling Specifically
This is where first-time buyers get it wrong, and the failure mode is specific. The shoe feels great in the living room and vague the first time you stand on a two-inch edge. That is not a defect. It is a size problem, and it is the single easiest thing to fix before you ever touch rock.
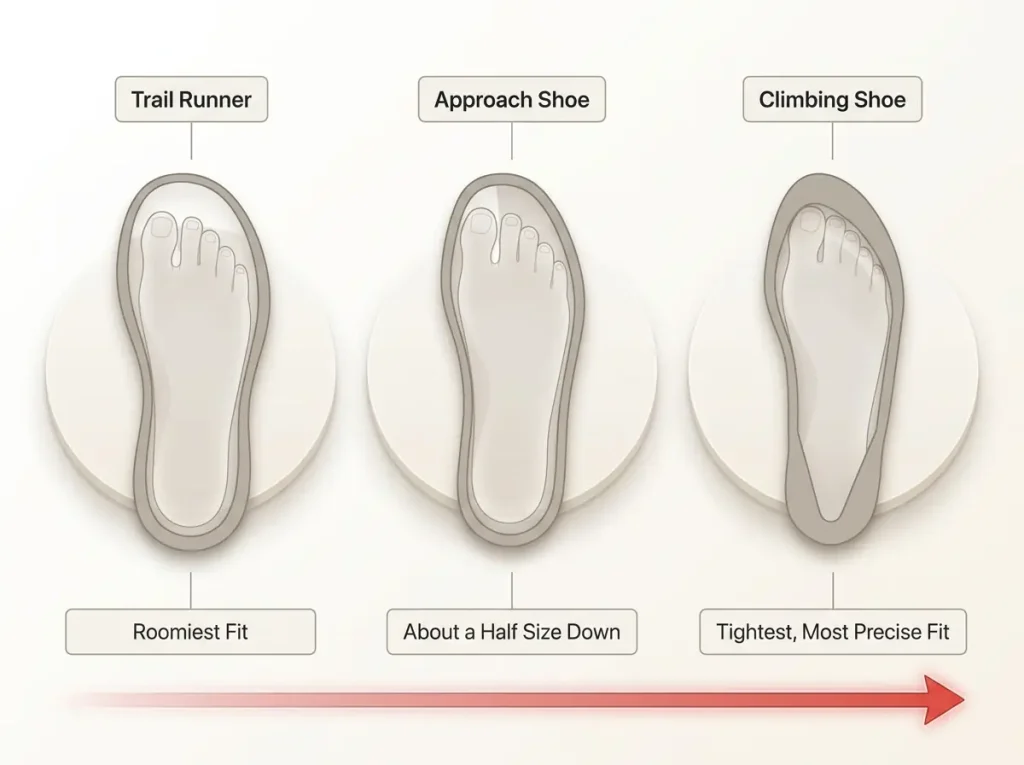
Sizing here sits between two familiar reference points. Trail runners are roomy because your foot swells and slides forward on descents. Climbing shoes are painfully snug fit because precision beats comfort when you are only wearing them for twenty minutes. Approach shoes split the difference, and the working convention is roughly a half size down from your street shoe size. Buy your usual trail-runner size and you will feel imprecise exactly when edge control matters most. This is one branch of the broader question of what shoes to wear when hiking, and it is the branch where the usual advice actively misleads you.
How far can this go? One experienced scrambler in a detailed field write-up wears a 46 in trail runners and drops all the way to a 44 in La Sportiva TX2 approach shoes, two full sizes. Treat that as evidence of direction and magnitude rather than a prescription. It tells you the correction is real and that half a size is a starting point, not a ceiling.
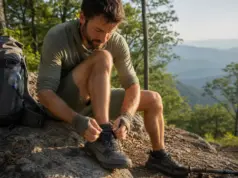
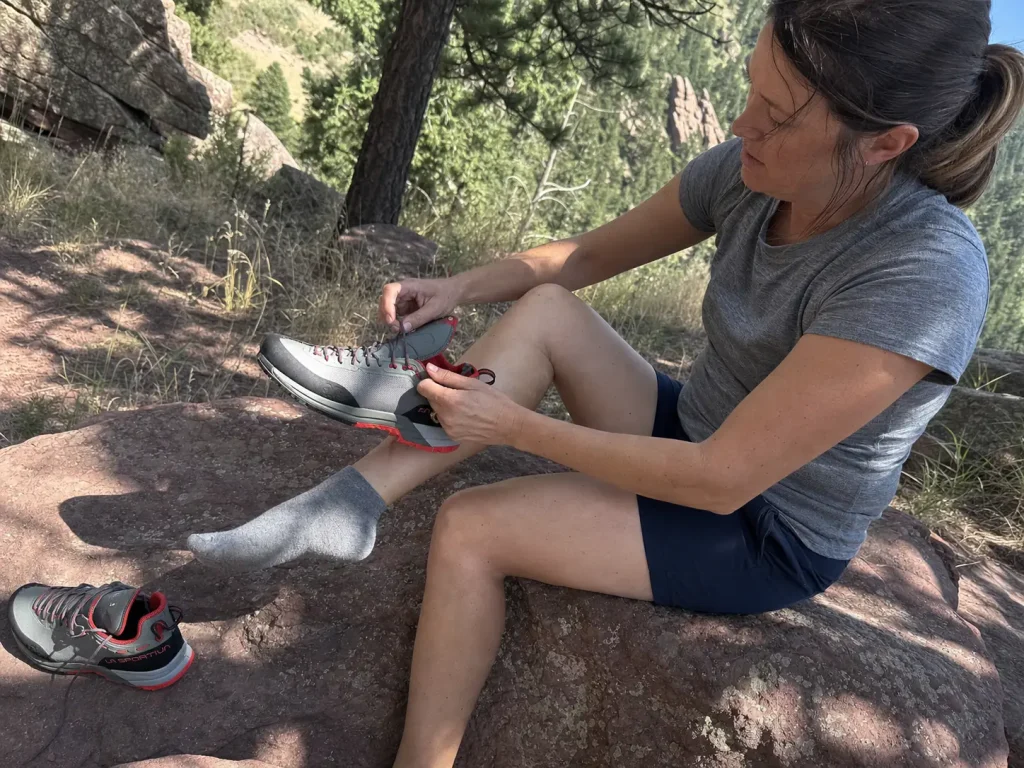
Testing fit at home, in order. Lace the shoe fully and check that your heel locks with no lift when you rise onto your toes. Then check that your toes reach the front of the toe box and touch without curling under. Then, and this is the step nobody does, stand on a stair edge with only the front third of the shoe loaded and put your weight through it. If your foot slides forward inside the shoe or the toes bunch, the shoe is too large for scrambling no matter how comfortable it feels walking the hallway.
The counterweight is real. A shoe sized for edging gets uncomfortable over long trail miles, and hotspot development and ankle rub are the usual complaints. This is where lacing hardware earns its place. Lace-to-toe designs, which both the Scarpa Crux and the La Sportiva TX series use, let you run the forefoot genuinely tight for rock and then slacken the lower eyelets for the hike out. That single adjustment does more for all-day comfort than any midsole.
Last shape matters as much as length, and it varies inside a single brand. The TX4 Evo runs on a wider, comfort-oriented last with more volume through the forefoot. The TX Guide is a precision fit built to keep your foot from moving at all. Same maker, same category, meaningfully different shoes on your foot.
The Durability-vs-Grip Tradeoff
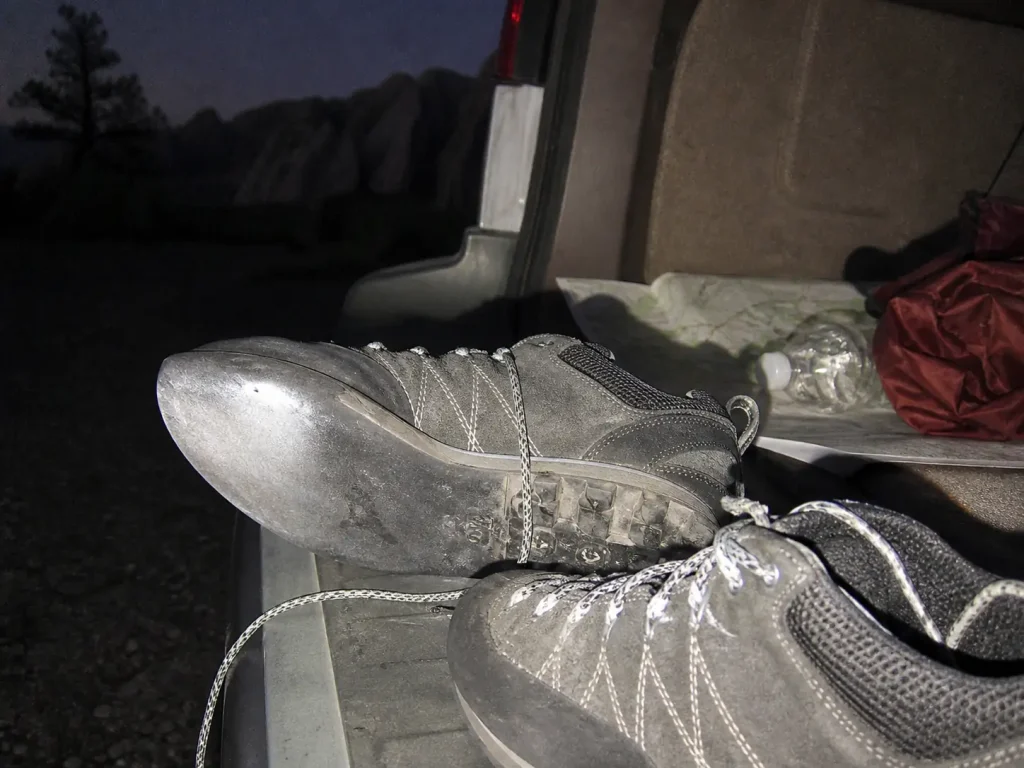
Every roundup names this tradeoff and then walks away from it. The physics are simple enough: softer rubber deforms into rock texture and holds better, and softer rubber wears down faster. A shoe optimized purely for grip is a consumable item with a service life measured in seasons, not years.
What almost nobody tells you is that the industry already engineered an answer, and you can see it on the sole. La Sportiva’s TX line uses a dual compound outsole, with a grippier Megagrip or Idrogrip patch forming a dedicated climbing zone under the toe and a harder, longer-wearing compound covering everything behind it. That is not a marketing story. It is a structural solution to the tradeoff, and it means the rubber that wears fastest is confined to the small area that actually needs to be sticky. When you are comparing models, flip them over and look for two distinct rubber textures rather than reading the feature list. If you want the full comparison, how outsole rubber compounds compare on wet and dry rock goes deeper than this section can.
Rock plate and torsion shank are not the same part. They get used interchangeably in reviews and they do different jobs. A rock plate is a thin 1 to 2 mm layer of plastic, nylon, or carbon sandwiched between midsole and outsole, and its job is stopping a sharp piece of talus from bruising your foot through the shoe. A torsion shank resists twist along the length of the shoe. A rock plate buys you protection on chossy, broken ground and costs you some of the sensitivity that technical moves depend on, which is why the most precise models in this category often go without one. The distinction is worth understanding properly, and what a rock plate actually is and how it differs from a shank covers the construction in detail.
Resoling changes the math on all of this, and most hikers never consider it. Any cobbler who resoles climbing shoes can put fresh rubber on an approach shoe, and on the premium models that is often cheaper than replacing the pair. Whether it is worth doing depends on the upper: if the suede and the rand are still sound and only the sole is worn smooth, resoling makes a shoe you like last a second life. If the upper is blown out, it does not.
At the durable end of the category sits the La Sportiva Boulder X, the model forum threads and gear roundups keep returning to whenever the conversation turns to burly, abrasive approaches. Its full rubber rand and medium-volume last made it the rugged benchmark for years, and it is still the name people reach for as a reference point. It is worth knowing about even though it is not the pick this guide is steering you toward.
If you scramble the same local objective over and over, carry two pairs and switch at the base: trail runners for the approach, sticky rubber only for the rock. It keeps the good compound fresh for the terrain that needs it and cuts wear on both pairs. The honest catch is that this is exactly the shoe swap most of us are trying to avoid, so treat it as a strategy for repeat outings close to home, not for a long day in country you do not know.
What Class 3 and Class 4 Actually Feel Like Underfoot
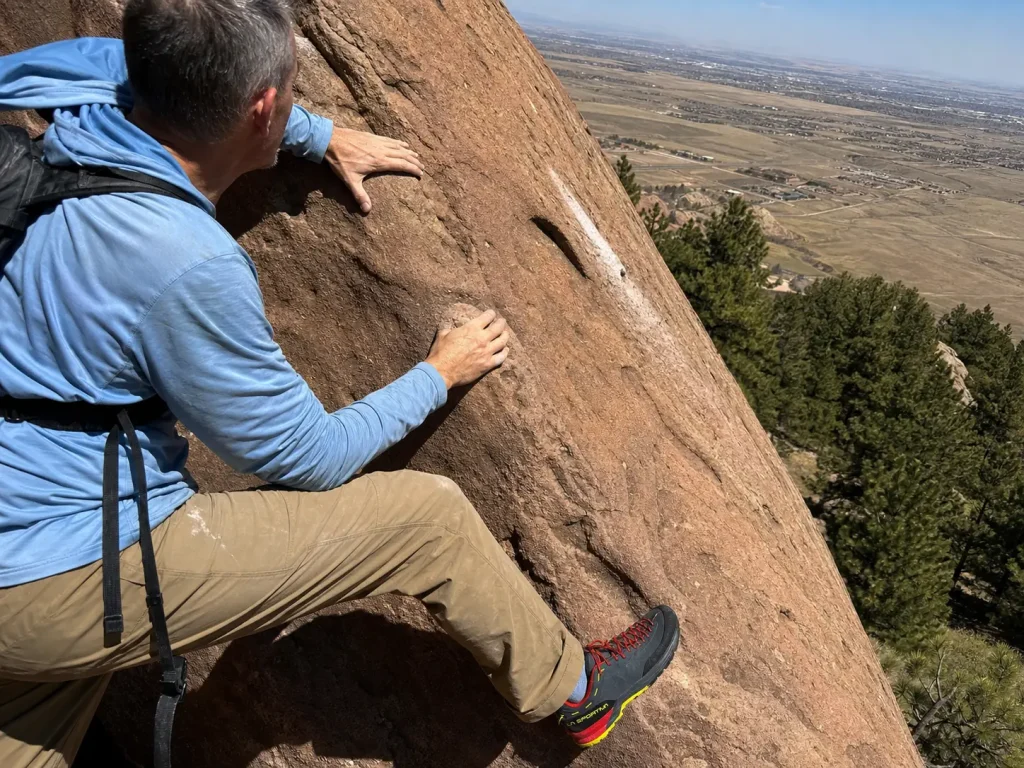
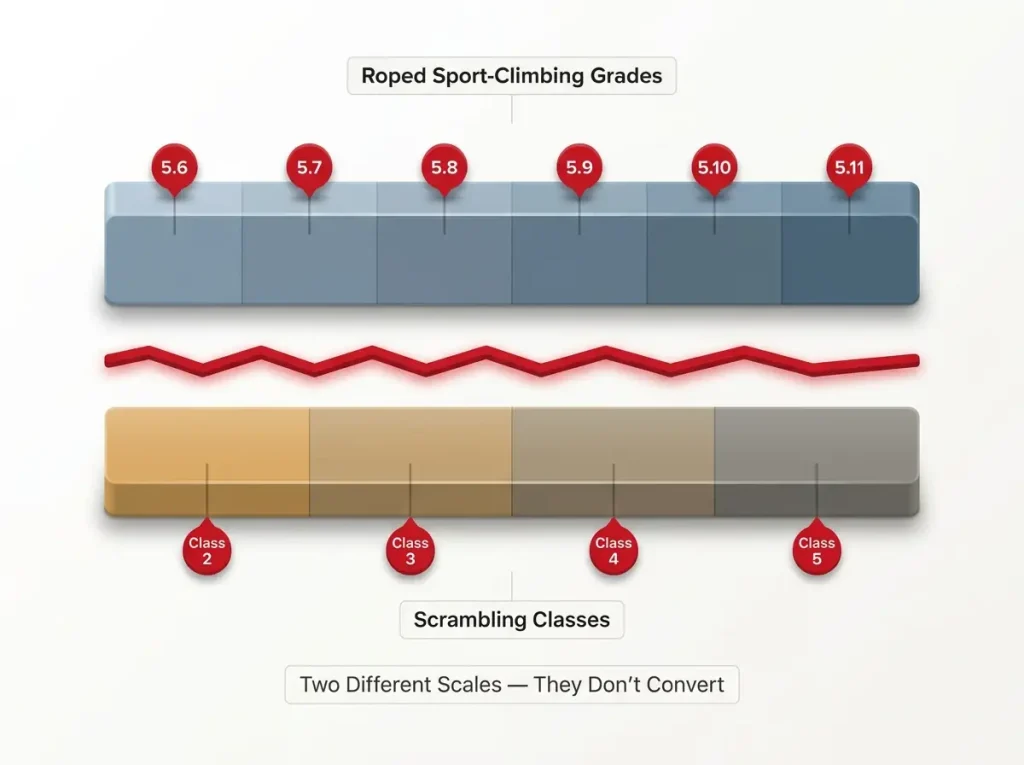
Here is the question the forums are actually asking, and the one the roundups keep answering sideways. Nearly every published test grades an approach shoe by the roped sport-climbing grade a tester could pull off in it, somewhere in the 5.8 to 5.10 range. That number tells you very little about unroped scrambling, because the movement and the consequences are both different.
Start with what the grades mean in movement terms rather than in ratings. Class 3 is terrain where you use your hands for balance and upward progress, where a fall would hurt you badly. Class 4 is steeper and more exposed, and the American Alpine Club recommends roping up even on terrain casually labeled easy fourth class. Above that, low-fifth class is roped climbing by definition, and once a route tips into fifth class the question stops being which shoe and starts being which rope, which is a different article and a different set of skills. If the grading scale itself is new to you, how the Yosemite Decimal System actually grades risk for hikers is the place to start, because this whole article leans on those definitions.
Now the mistake. Treating a review line like “I climbed 5.9 in these” as proof a shoe suits class 4 scrambling misreads what is being measured. Roped climbing is a controlled environment where failure is expected and caught, and the grade being quoted is borrowed from a scale built for a rock shoe on a bolted route. Unroped scrambling is neither of those things.
On a bolted route you are standing still, focused, on clean rock, testing the limit of the shoe. On a class 4 ridge you are moving quickly with a pack on, over rock of uneven quality, making dozens of low-consequence-looking decisions in a row. A shoe that edges beautifully in the first situation can still feel vague in the second, because the demands are not the same demands.
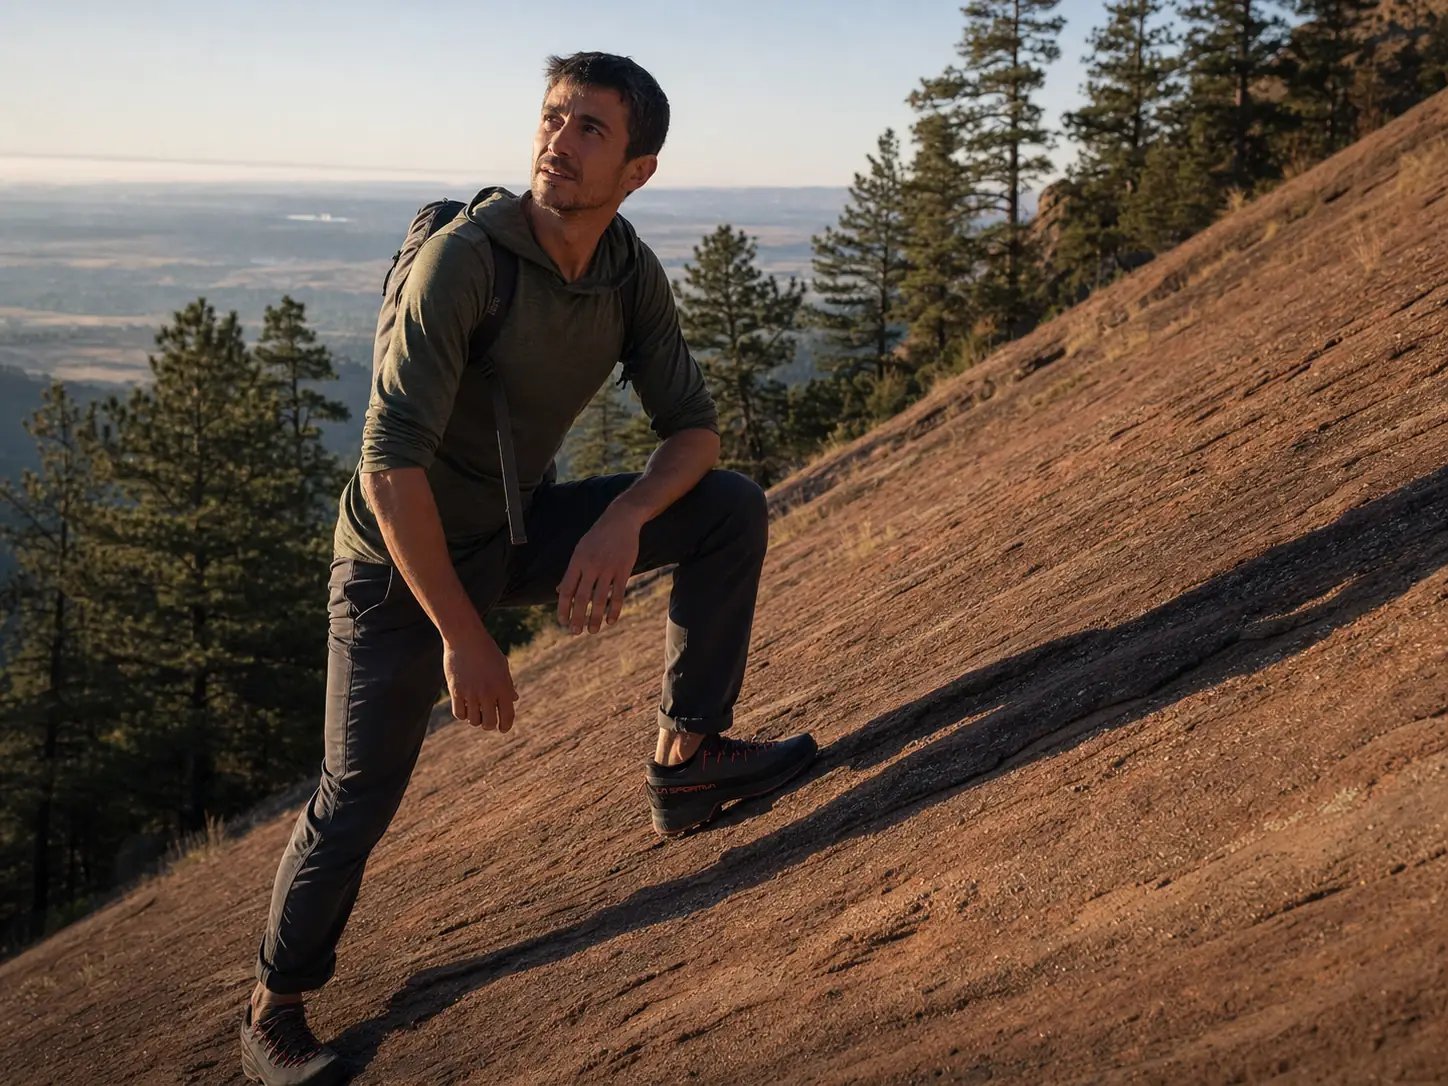
What good rock feel actually is. The property you want is information transfer. When you place a foot, you should be able to tell through the sole whether you are standing on solid, attached rock or on a loose flake sitting on top of it. That signal arrives as a subtle difference in how the surface responds under pressure, a slight give or a hollow feel, and it is the difference between catching a bad hold and finding out the hard way. Thick, cushioned midsoles mute exactly that signal. This is the mechanism behind the whole “thinner is better for scrambling” argument, and it is why a plush, comfortable approach shoe can genuinely make you less safe on technical ground while feeling nicer all day.
The comparative testing backs this up in a way that isolates scrambling from climbing. In hands-on testing across the category, the La Sportiva TX2 EVO earned the closest climbing-shoe control rating on class 3 and class 4 rock among approach shoes, and it is one of the thinnest, most minimal models available. Bulkier, hiking-oriented approach shoes lost on precisely that axis while winning on trail comfort. That is not a contradiction. It is the tradeoff stated plainly, with the same brand on both sides of it.
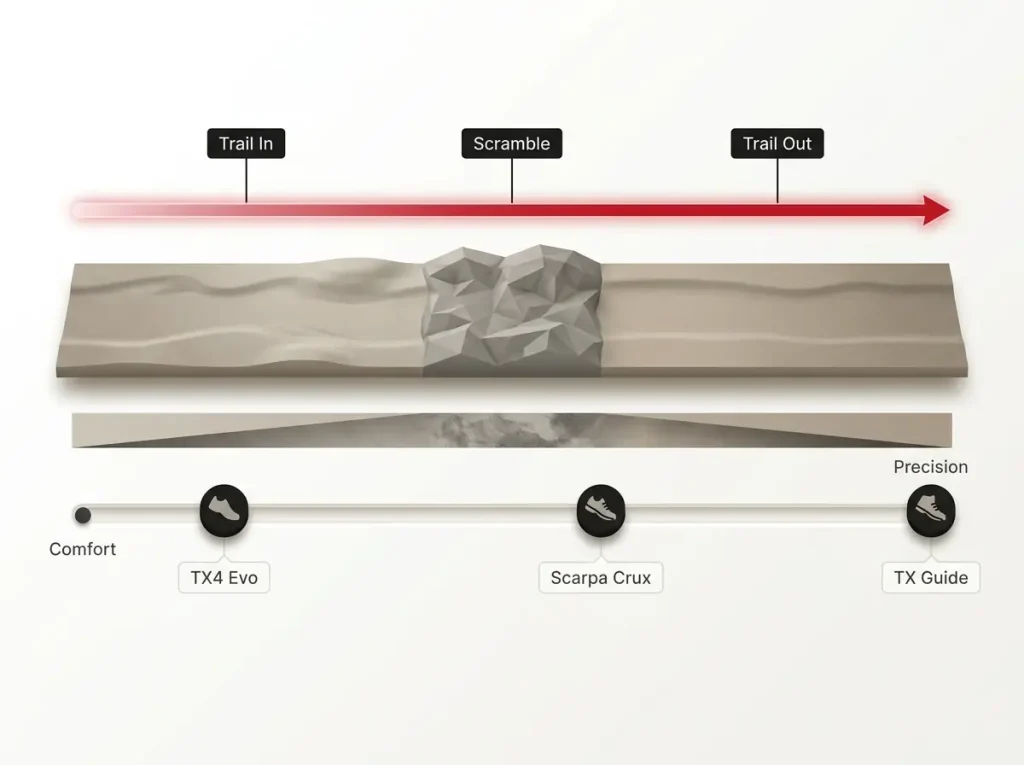
Within this guide’s live shortlist, the model built for exactly this is the La Sportiva TX Guide (men’s · women’s). It pairs a precision last with the dual-compound Vibram outsole described above and a dedicated climbing-zone rand over the toe. It is the least forgiving of the three on long trail miles and the most confident on technical terrain. If class 4 is the point of the day rather than a section in the middle of it, this is the shoe.
One Pair, Whole Day — Hike In, Scramble, Hike Out
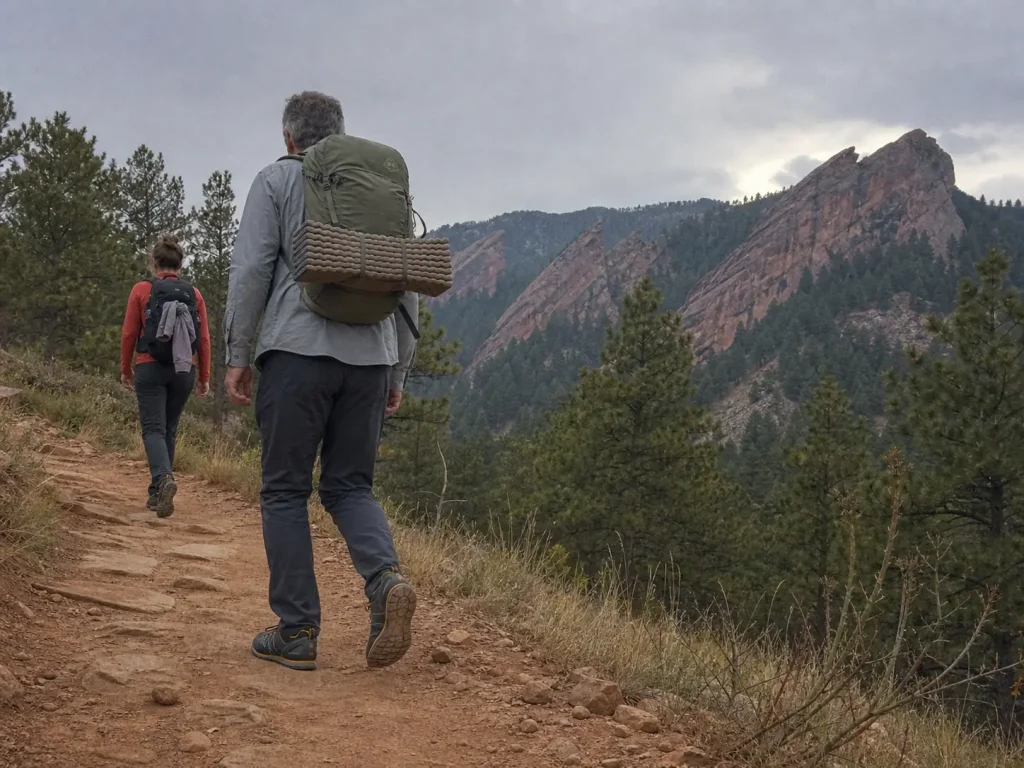
Versatility is the word every brand uses and almost nobody quantifies. There is a real number behind it, and once you see it the decision gets much easier.
Inside a single manufacturer’s approach-shoe line, the comfort-oriented model runs roughly 1 lb 10 oz per pair while the precision-oriented model runs about 1 lb 2.3 oz. That is close to a 50% difference in weight between two shoes sold in the same category, from the same maker, for the same activity. Versatility is not a vague virtue you either have or lack. It is a position on that scale, and picking well means knowing where your day sits.
Map the day honestly, in percentages. If the scramble is fifteen percent of your mileage and the other eighty-five percent is trail, the shoe should be weighted toward the eighty-five. That means more cushioning, a last you can walk in for hours, and enough lug depth to handle a dirt descent with tired legs. If the scramble is the day, with a short walk to the base and a short walk back, invert every one of those priorities. Most people buying their first pair are firmly in the first case and shop as though they are in the second, because the technical shoes review better.
Three use profiles cover almost everyone reading this, and they point at different shoes. A crag approach is short, often steep, sometimes off-trail through talus, with the shoe spending most of its day clipped to a harness rather than on your feet, which is where an ultralight approach shoe earns its keep. Alpine scrambling is a long hike-in, sustained hands-on ground at altitude, and a long walk out, which is the profile the all-day shoe was built for. Casual cragging and general trail use sit in between and forgive almost anything. Decide which of the three describes your year before you decide which shoe describes your foot.
Breathability deserves a mention here because it gets solved backwards. Waterproof membranes make sense on a wet-weather hiking shoe and much less sense on an approach shoe, where the terrain is usually dry rock and the heat is the problem. A suede or woven upper with no membrane dries faster after a stream crossing and runs cooler on a sun-baked slab, and most scramblers end up preferring it.
What actually breaks down over a long day in a scrambling-optimized shoe is worth naming, because it is predictable. Hotspots develop where the snug toe box presses, usually on the outside of the little toe or across the top of the foot. Ankle rub shows up on the descent when your foot finally starts sliding. And your legs cook faster than you expect, because a thin midsole stiffness profile transmits every impact of a rocky hike-out straight into your quads. None of those are defects. They are the invoice for the grip you bought.
Lug depth is the other half of the story and gets ignored almost entirely in scrambling-focused reviews. The shallow, closely spaced lugs that smear so well on granite are the same lugs that skate on a wet dirt descent or a muddy switchback. A genuine whole-day shoe has to survive the trail conditions as well as the rock, and why lug depth changes what a sole can do on soft ground is the part of the equation the rock-focused reviews leave out. If your approach involves shoulder-season mud or a forested descent after rain, weight that half of the decision heavily.
The premium lightweight benchmark in this conversation is the Arc’teryx Vertex Alpine, built around a woven Matryx upper and a Vibram XS Flash 2 outsole. It represents the design argument for driving weight down without surrendering rock grip, using a technical textile instead of suede to save mass. It is a useful reference point for where the category is heading, even if it is not a shoe this guide is pointing you at today.
Before you order, write down the actual mileage split for the three trips you are most likely to do this year. Trail miles versus hands-on-rock miles, honestly counted. Most people discover the scramble is a much smaller fraction of the day than it is of their imagination, and that one number picks the shoe for them.
Best Approach Shoes for Scrambling, Ranked
This is a shortlist, not a survey, and it is worth saying why up front. Approach shoes as a category have unusually thin and unreliable availability on Amazon right now, with several models that competing roundups routinely recommend sitting unbuyable across every listing. A recommendation you cannot act on is not a recommendation, so the three shoes below are the ones a reader can actually get.
Two framings you will see everywhere are missing from this list on purpose. There is no slot for the most durable approach shoe, because the burliest models in that conversation are not reliably purchasable right now, and no slot for a shoe chosen on insole support, because the stock footbeds across this whole category are thin and unremarkable and an aftermarket insole solves that better than a model choice does. What is here instead is a best value approach shoe that you can actually order today.
Each pick is framed by the reader it suits rather than by a score, which is the only framing that survives contact with real terrain. Spec sheets are a poor way to choose here anyway, and why hiking shoe technology labels tell you almost nothing on their own explains the mechanics of that problem. Note also that all three are sold on separate men’s and women’s lasts. That difference is real geometry, not a colorway.
Best Overall for the Whole Day
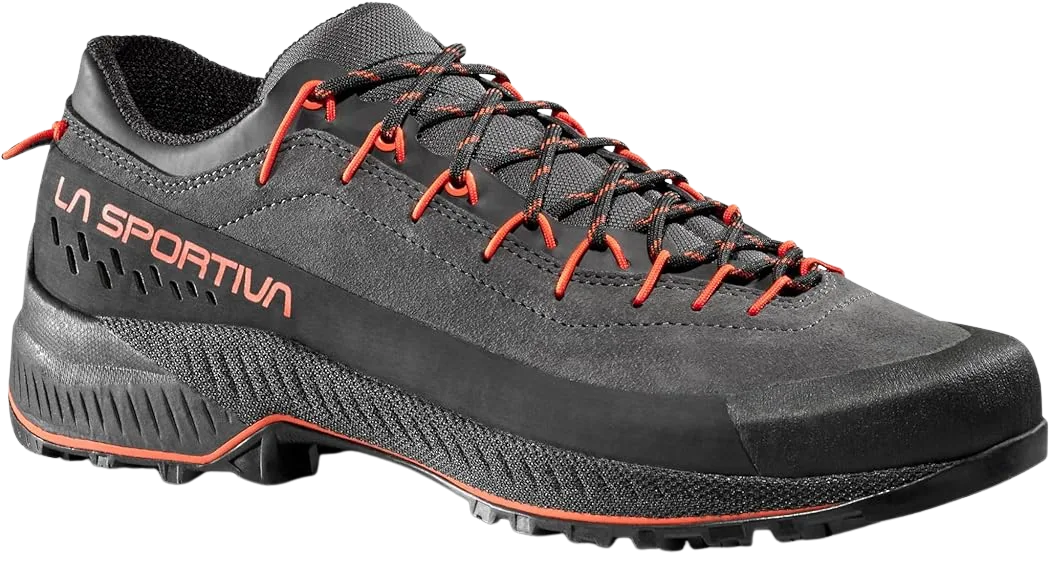
The TX4 Evo is the shoe this guide’s whole argument points toward, and the reasoning is the weight math from the previous section run in reverse. At roughly 1 lb 10 oz per pair it is meaningfully heavier than the minimal end of the category, and that mass is doing work: a thicker dual-density EVA stack under a TPU torsion shank keeps your legs fresh across the approach and, more importantly, across the descent when fatigue does most of its damage.
On rock it gives up some of the sharp feedback the TX Guide delivers. The Megagrip climbing zone under the toe is genuinely sticky and the rand wraps far enough to edge confidently on class 3, but the cushioning between your foot and the stone softens the signal a little. For terrain up to solid class 3 with occasional class 4 moves, that is a trade most hikers should happily make. For a sustained class 4 objective, it is not.
Fit runs on a wider, more forgiving last than the rest of the TX family, which is a genuine advantage if your foot has volume and a genuine drawback if it does not. Size down about a half size from your street shoe and run the lace-to-toe system tight through the forefoot, then slacken it for the walk out. Women’s sizing uses its own last rather than a scaled-down men’s shoe, so order the matching variant.
Best Value That Still Holds on Rock
There is a specific reason the Scarpa Crux occupies this slot, and it is worth being blunt about it. The budget approach shoe that most published roundups steer readers toward is the Butora Mousai, and it is not reliably sold on Amazon in the United States. Follow that advice to a US listing and you hit a dead end. The Crux is the shoe that is genuinely there, and it is a legitimate pick rather than a consolation prize.
What you get is a Vibram outsole, a suede upper, and lace-to-toe closure, which is the feature that matters most at this price. Being able to cinch the forefoot independently of the ankle is what lets a moderately priced shoe feel precise on rock and tolerable on trail, and plenty of pricier models skip it. The suede breaks in and molds to your foot over the first several outings rather than degrading, so the fit gets better before it gets worse.
What you give up is outright precision and some long-term durability at the toe. The rand does not wrap as aggressively as the premium models, so the very small edges that the TX Guide holds comfortably will feel marginal here. For class 3 scrambling and moderate class 4, that ceiling is high enough for most hikers to work well below it. If you are buying your first pair and you are not certain how much scrambling you will actually do, this is the sensible place to find out.
Most Precise on Technical Rock
The La Sportiva TX Guide covered in the class 3 and class 4 section above is the third pick, and the framing there is the framing that matters: a precision last, a dual-compound Vibram outsole, and a climbing-zone rand built for standing on small features. Buy it when the technical ground is the objective rather than the obstacle, and accept that you are trading away trail comfort to get there.
Buy one all-purpose approach shoe first and let the specialized one be your second pair, never your first. Scramblers who have been at this a while say the same thing: you cannot tell what you want from a shoe until you have put real days on rock in something forgiving, and the most technical model in the catalog is the worst possible teacher.
New to Scrambling? Building Confidence Before You Trust the Shoe
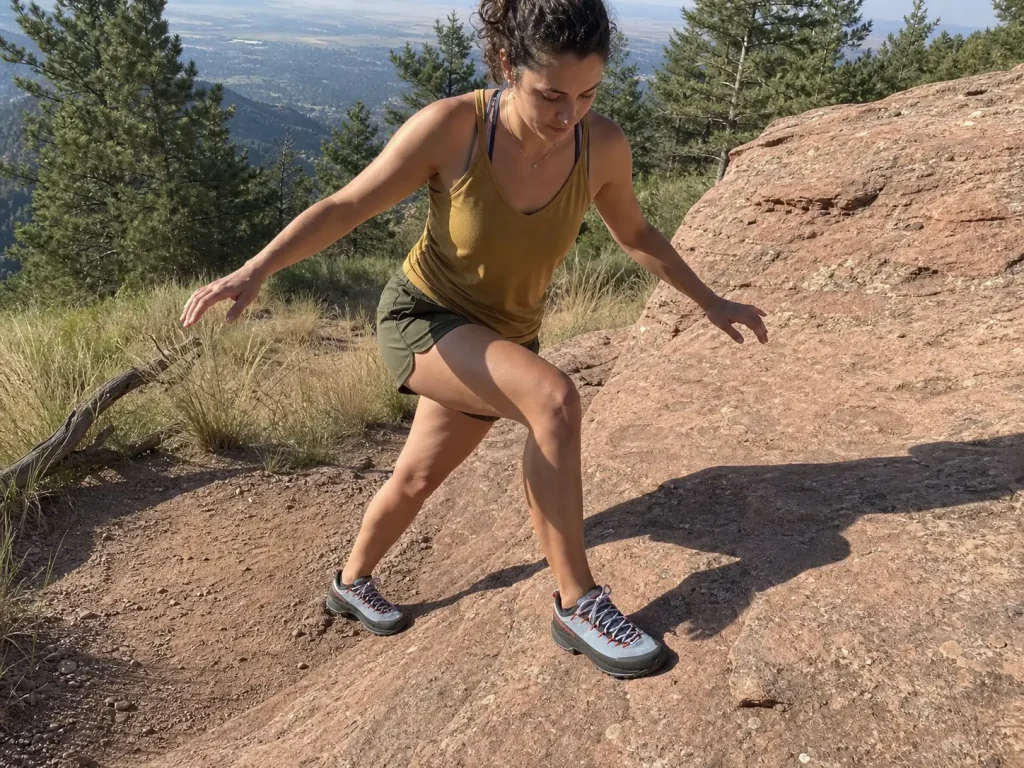
If you are coming from hiking boots and you have never had your hands on exposed rock, this section is the one that matters most. It also barely exists anywhere else. The single competitor that addresses beginners at all does it in one warning box, which is not enough to actually help someone.
Start with the progression, because buying order is the first decision. The clearest field account available describes exactly this arc: begin with one all-purpose approach shoe, put real days on it across varied terrain, and only graduate to a specialized minimal model once you know from experience what you are asking the shoe to do. Buying the most technical shoe first is a common and expensive misread. It gives you less confidence building rather than more, because a precision fit punishes hesitation and a beginner hesitates by design.
Learn what your specific pair does before you need to know. At the base of a route, on rock no higher than your waist, deliberately test the two grip mechanics. Weight the toe on the smallest edge you can find and feel whether the shoe holds or creeps. Then smear the flat of the sole on a low-angle section with no features and press until it slips, so you find out where the limit actually is with your feet six inches off the ground. Ten minutes of that teaches you more about your shoes than any review, and it means the first time you trust the rubber on real terrain is not the first time you have felt it work.
Scramblers have their own concept for managing all of this, and it is more useful than any rating system. The chill level, sometimes called the chill zone, is the range of terrain you are genuinely confident on. It is a self-assessment rather than a grade, it moves with your fitness and your headspace on a given day, and staying inside it is the entire skill. Nobody else can set it for you, and the shoe cannot raise it.
The habit that most often goes wrong for new scramblers is not testing a hold before committing to it. Accident reporting ties falls directly to terrain people assumed was too easy to bother checking, which is precisely the terrain a beginner is most likely to move through casually. A sticky sole does nothing for you if the block it is standing on rotates. Push on a hold before you weight it, look at how it sits, and treat anything that moves as absent. Often the real limiting factor is not the feet at all, and managing fear of heights on an exposed ridge covers the half of this problem that gear cannot solve.
Finally, learn the vocabulary, because it makes forum advice usable. Choss is loose, crumbly, unreliable rock. A tick is a completed objective. A smedge is that blend of smearing and edging described earlier. Knowing five words shortens the learning curve by a season, because it lets you read what experienced scramblers write to each other rather than what brands write to you.
When the Shoe Isn’t Enough
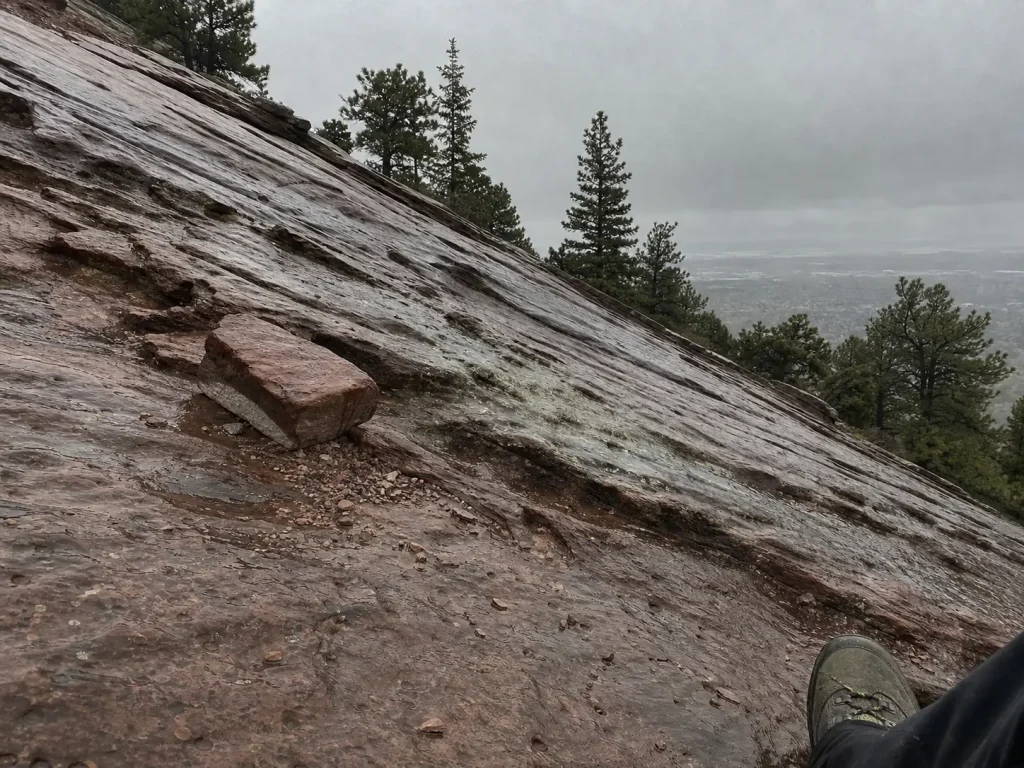
Most roundups treat this as a footnote. It deserves to be a section, because the ceiling on what an approach shoe can do is the thing that actually determines whether your day ends well.
Start with water. One tester’s approach-shoe rubber lost grip while running downhill in the rain, and that account is a useful warning because of how the failure arrives. Sticky rubber is a dry-rock technology first. Wet stone, wet lichen, and polished slab all cut its performance sharply, and the falloff is abrupt rather than gradual. The shoe gives you very little feedback before it goes, which removes exactly the early warning you rely on everywhere else. Note that Gore-Tex and other weatherproofing solve a different problem than the one you have here: keeping your feet dry does nothing for the friction between rubber and wet rock.
Loose rock defeats grip entirely, and no shoe fixes it. Friction between your sole and the stone is irrelevant when the stone itself is what moves. Choss is a route-reading problem, not a footwear problem, and the correct response is to change where you put your feet rather than to trust the rubber harder.
Exposure is the third ceiling, and it is the one people misjudge most. A knife-edge ridge takes terrain you would walk across without thinking at ground level and adds a drop on both sides, and nothing about the rubber under your feet changes on that ground. What changes is you. A long ridge traverse also stacks fatigue on top of that, hour after hour, and tired footwork is sloppy footwork. Any AMGA rock guide will tell you the same thing about traverses: the committing part is not the hardest move, it is the fact that reversing an hour of ground is often harder than finishing it.
Then there is the line the whole sport draws around class 4. The American Alpine Club recommends roping up even on terrain graded easy fourth class, and its accident reporting repeatedly flags falls on ground that parties deemed too easy for a rope. Read that pattern carefully, because it is counterintuitive. The incidents cluster on ground people underestimated, not on obviously hard climbing. Hard terrain gets respect and protection. Easy-looking terrain gets neither, and that is where it goes wrong.
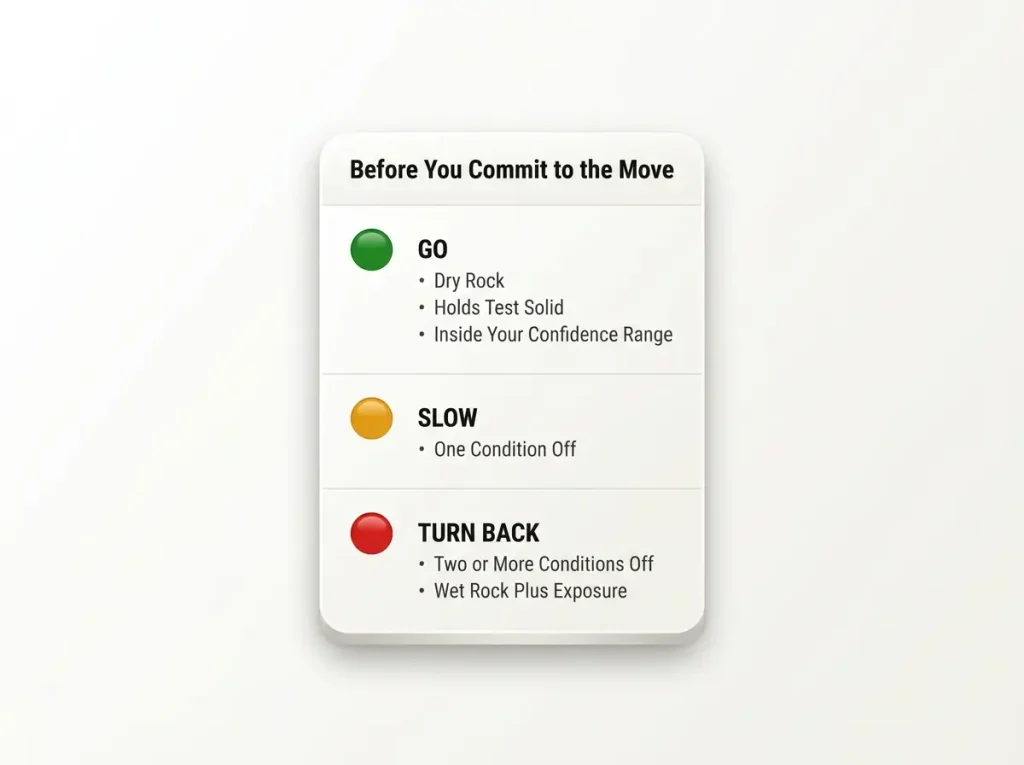
A practical checklist you can actually run mid-route, in the moment, on the rock in front of you:
- The rock is wet, greasy, or covered in wet lichen.
- Holds move when you test them, or the surface is visibly broken and chossy.
- The exposure has outgrown your honest chill level for today, not your best day.
- You are downclimbing ground you would rather not reverse, or cannot see the reversal.
- Weather is arriving, or the light is going faster than your remaining route.
Any one of those is a reason to slow down and reassess. Any two of them together is a strong argument for going back the way you came. The full version of this reasoning, with a repeatable structure for making the call under pressure, lives in a full decision framework for when to turn back on a scramble.
Name the ceiling plainly, because no gear review will. An approach shoe extends the terrain you can move over confidently. It does not extend the terrain where a fall is survivable. Those are two separate boundaries, they do not move together, and the gap between them is where scrambling accidents live. The best rubber in the category cannot substitute for a rope past a certain point, and buying a better shoe does not raise the grade at which you should be roping up.
The Bottom Line
Buy for the day you are actually having. The shoe that carries you through eight trail miles and a scramble is a different shoe than the one that edges best, and the weight gap between those two ends of the category runs close to 50%. Count your mileage split before you count features.
Size down and learn your grip on low, consequence-free rock before you need it. Fit and familiarity do more for your confidence on class 3 than any rubber compound printed on a spec sheet, and both are free.
Know the shoe’s ceiling. Wet rock, loose rock, and exposure past your honest confidence range are turn-around conditions rather than push-through conditions, and the accident data is unusually clear that the trouble hides on ground that looks easy.
On your next outing, find a low, safe slab near the trail and spend ten minutes standing on it. Smear it, edge it, load the toe until something slips. That is the cheapest confidence you will ever buy, and it costs nothing but the stop.
Frequently Asked Questions
01Can you scramble in approach shoes, or do you need climbing shoes?
Approach shoes are built specifically for scrambling, and that is the entire purpose of the category. Climbing shoes are made for roped technical routes and are painful to walk any distance in, which is why almost nobody covers class 3 or class 4 terrain in them.
02What size approach shoe should I buy compared to my hiking shoes?
Order roughly a half size down from your street or hiking-shoe size, snugger than a trail runner and looser than a climbing shoe. Some scramblers go further, so treat half a size as the starting point and let heel lock and edge feel decide the rest.
03What is the difference between smearing and edging?
Smearing uses flat sole friction on a holdless rock face, while edging weights the toe or rand on a distinct lip of rock. Most real scrambling movement blends the two, which is why scramblers call it smedging.
04Are approach shoes good for everyday hiking?
The cushioned models work well for general hiking, though their shallower lugs give up traction on mud and soft ground. The precision-fit models are a poor everyday choice, since they are shaped for standing on rock rather than covering miles.
05Do approach shoes still grip on wet rock?
Much less than on dry rock, and the falloff is abrupt rather than gradual. Sticky compounds are engineered around dry friction, so wet stone, wet lichen, and polished slab all cut grip sharply. Treat wet rock as a reason to reconsider the route.
Risk Disclaimer: Hiking, trekking, backpacking, and all related outdoor activities involve inherent
risks which may result in serious injury, illness, or death. The information provided on The Hiking Tribe is for
educational and informational purposes only. While we strive for accuracy, information on trails, gear, techniques,
and safety is not a substitute for your own best judgment and thorough preparation. Trail conditions, weather, and
other environmental factors change rapidly and may differ from what is described on this site. Always check with
official sources like park services for the most current alerts and conditions. Never undertake a hike beyond your
abilities and always be prepared for the unexpected. By using this website, you agree that you are solely
responsible for your own safety. Any reliance you place on our content is strictly at your own risk, and you assume
all liability for your actions and decisions in the outdoors. The Hiking Tribe and its authors will not be held
liable for any injury, damage, or loss sustained in connection with the use of the information herein.
Affiliate Disclosure: We are a participant in the Amazon Services LLC Associates Program, an
affiliate advertising program designed to provide a means for us to earn advertising fees by advertising and linking
to Amazon.com. As an Amazon Associate, we earn from qualifying purchases. We are also an official affiliate partner
of Black Diamond Equipment via the AvantLink network. If you click on a Black Diamond affiliate link and make a
purchase, we may earn a commission at no additional cost to you. We also participate in other affiliate programs and
may receive a commission on products purchased through our links. Additional terms are found in the terms of
service.