

In this article
It never starts as a leak. Hour three of steady rain, and you notice a cold dampness creeping up the inside of both arms, and by the time it reaches your shoulders you have already decided the jacket is junk.
It probably isn’t. The complaint pattern is the same across every test team that has put these shells through a season, and the mechanism behind it is not a mystery, just something nobody explains at the point of sale. That matters more than comfort, because a soaked hiker on a 40-degree afternoon is looking at the National Park Service’s early warning signs of hypothermia, not an inconvenience. So here is what the best women’s waterproof rain jacket actually comes down to: what number to look for on a listing, why shells seem to fail when they haven’t, how to check fit before you buy something you can’t try on, and five jackets that hold up.
What the Spec Line on a Rain Jacket Label Actually Tells You
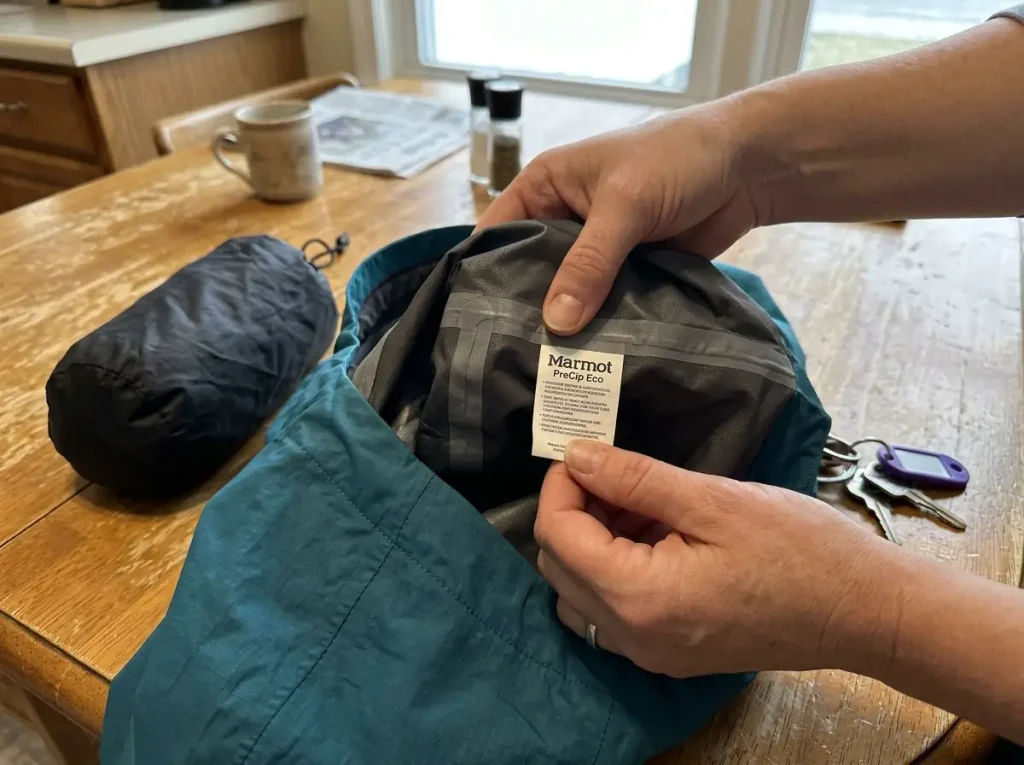
Two tabs open in the Amazon app. Both jackets say “100% waterproof.” One costs a third of the other. Everything separating them lives in the shortest, most jargon-dense line on the page, and once you can read that line you never have to guess again.
The mm rating, in plain numbers
The number you want is the hydrostatic head pressure rating, printed as something like 10,000mm or 20K. It measures how tall a column of water the fabric holds back before liquid pushes through. 1,500mm is the floor a fabric has to clear under British and EU testing standards to be sold as waterproof at all. Anything advertised as a rain jacket that sits at or near that number is a wind jacket with a coating on it.
For three-season hiking, 10,000–15,000mm is the working range, and it covers most of what a day hiker or weekend backpacker will walk through. Above treeline, or on a multi-day trip where you’ll be in a shell for hours at a stretch, 20,000mm and up is where you want to be, though that protection costs weight, and it’s worth understanding how those hydrostatic head numbers trade against pack weight before you pay for a rating you’ll never use. This isn’t spec-sheet trivia either. Dressing correctly for wet conditions sits squarely inside NOAA’s guidance on dressing for outdoor weather safety, which treats it as a safety decision rather than a comfort one.
Why two “20,000mm” jackets perform differently
Here’s where people get burned. The rating is necessary and it is nowhere near sufficient. Two shells can both claim 20,000mm and behave like completely different objects on trail, because the rating describes a swatch of fabric and you are wearing a garment. Taped seams, hood geometry, and whether the zips are covered by a storm flap or built as waterproof zippers (YKK AquaGuard is the one you’ll see named most often) decide whether that fabric rating ever gets a chance to matter.
Water doesn’t hunt for the middle of a panel. It runs down the shoulders into the seam over your collarbone, and it drips off your hood brim into the neck of your jacket if the brim is soft and unwired. If a listing publishes no mm number anywhere, that absence is itself a data point. A brand that has a good number prints it.
2-layer, 2.5-layer, 3-layer and what each one costs you
Layer count is the other half of the spec line, and it predicts how the jacket ages more than any other single figure.
- 2-layer: face fabric plus a waterproof membrane or coating, with a separate mesh liner hanging loose inside. Heaviest, cheapest, tough as boots.
- 2.5-layer: the same face fabric and coating, with a thin protective layer sprayed onto the inside instead of a liner. Lightest, packs to a fist, and that sprayed layer abrades where pack straps ride.
- 3-layer: face fabric, membrane, and a full interior liner all bonded into one laminate. Best breathability, best durability, priced to match.
Match the construction to the use rather than to the budget. 2.5-layer is the daypack shell you carry all season and wear four times. 3-layer earns its price on multi-day trips and in genuinely wet regions. 2-layer makes sense when the money matters and the weight doesn’t.
That last tradeoff runs deeper than most listings admit, and it’s worth knowing where ultralight shells give up durability before you commit a season to one.
The way a 2.5-layer dies is quiet. The inside goes slightly tacky first. Then it starts shedding small flakes right where the shoulder straps sit, and that is the coating leaving.
No wash cycle brings it back. You get a warning, but only if you’re looking.
The mm number tells you what the fabric can do. The pit zips tell you whether you will ever get to use it. A jacket built for hiking has them, whether the listing calls them pit zips or pit vents. A commuter raincoat doesn’t, and no membrane on earth out-breathes a hiker climbing a grade in 90% humidity.
One more thing the spec line hints at without saying: how long the thing lasts. A shell jacket doesn’t usually die from a puncture. It dies from delamination, where the bonded layers separate and the inner face starts lifting away in sheets.
That’s the end of the road on any construction, because nothing re-glues a delaminated laminate. Storage does more damage here than trail time, since a shell folded wet in the bottom of a pack all winter is a shell being slowly cooked.
Rating, layer count, venting. With those three, you can read any listing on the market. If you want the rest of the kit that works with the jacket rather than against it, here is the full rain gear system explained plainly.
Why Your Rain Jacket “Failed” When It Didn’t
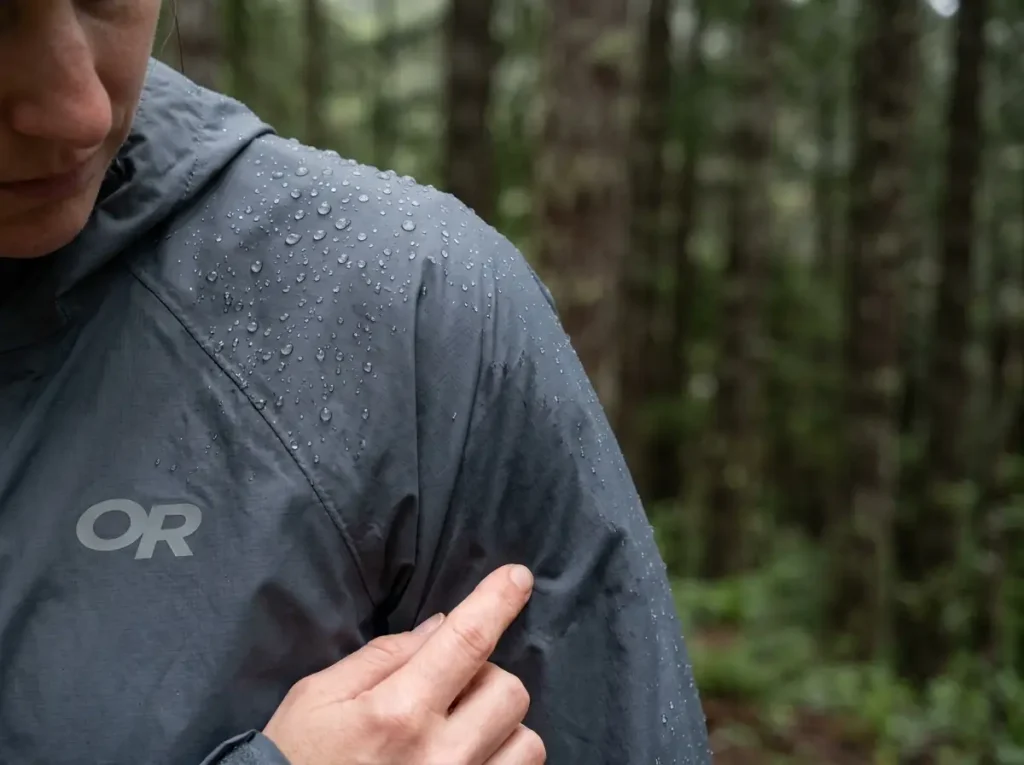
Most returned rain jackets aren’t broken. This section will save somebody a return, a re-purchase, and a genuinely miserable afternoon, because the thing that feels like failure is usually a maintenance job you can do on a Tuesday night.
Wetting out is the DWR quitting, not the membrane
Every waterproof shell has two separate systems doing two separate jobs. The membrane blocks liquid water from getting in. The DWR (durable water repellent) is a treatment on the outer face fabric that makes water bead up and roll off before it ever reaches the membrane.
DWR wears off. Pack straps, trail dirt, skin oils, and UV all grind it down, and when it’s gone the face fabric soaks through and goes dark. That’s wetting out, and the important part is this: the membrane underneath is completely fine.
Its water column rating hasn’t moved a millimeter. Nothing leaked.
What a saturated face fabric does is block the vapor pathway going the other direction. Your sweat needs somewhere to go, and a soaked outer fabric slams that door shut. The moisture condenses on the inside of the jacket, runs down your arms, and feels exactly like a leak.
It isn’t. It’s you.
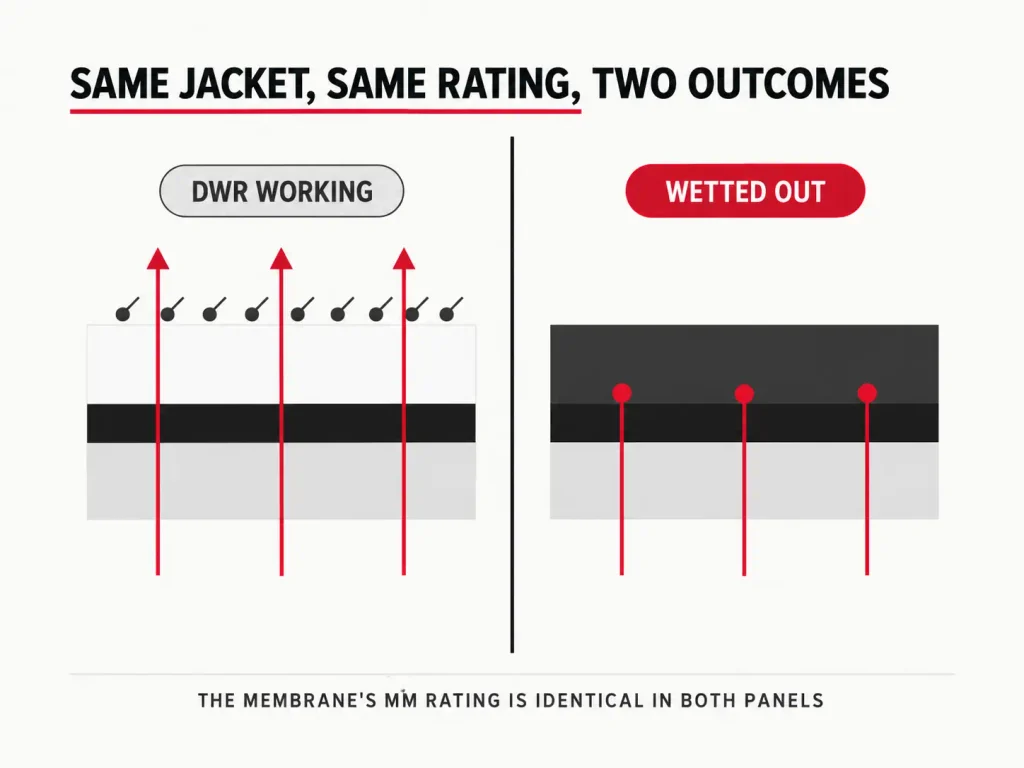
This distinction is the one that trips up experienced hikers as often as new ones, and REI’s field-tested advice on hiking safely in the rain makes the same point about layering underneath: what you wear against your skin decides how much of that condensation you actually feel. Cotton against a wetted-out shell is the worst version of this. Wet clothing gives up roughly 90% of its insulating value, which is how a damp afternoon turns into a real problem.
The 30-second bead test before every trip
Take a spray bottle to the shoulders and forearms of the jacket before you pack it. Water beads up and rolls off, the DWR is alive and you’re good. Fabric darkens and drinks it in, you have a re-treatment job, not a shopping problem.
Run it on the shoulders specifically. That’s where the pack straps have been working the coating down all season, and it’s the panel that fails first while the sleeves still look perfect. If the shoulders soak and everything else beads, that’s a shell asking for help, not one that’s finished. Knowing the difference is worth the ten minutes: there are three tests that tell you whether a shell is actually done, and most jackets people throw out fail none of them.
The classic version of this story is the jacket that sat folded at the bottom of a pack for two seasons and “just stopped working” on the one day it mattered. It didn’t stop working. Nobody ever checked it. If yours darkens under the spray bottle, the fix is restoring DWR with the heat-first protocol, and it takes an evening.
How to Get the Right Fit When You Can’t Try It On
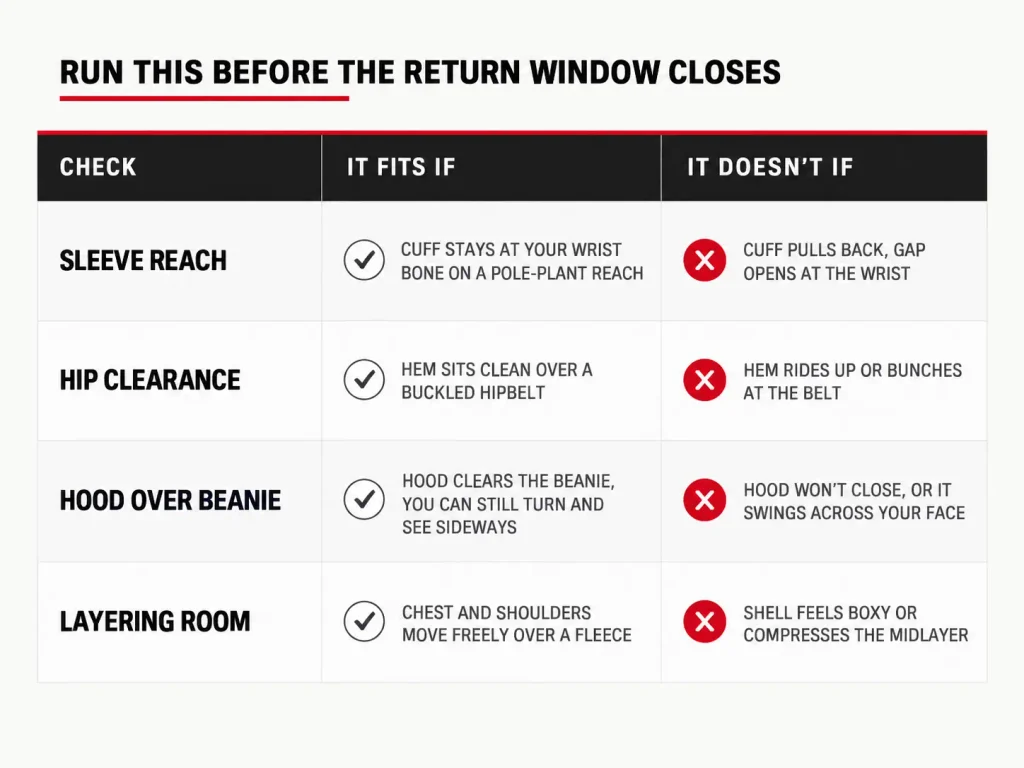
Fit is the spec no listing publishes and no tester quote covers honestly. Every roundup prints one flattering line per jacket. Almost none of them consolidate the three complaints that repeat on nearly every women’s shell on the market, which are the three things you should be checking before the return window closes.
Sleeve length is the complaint nobody warns you about
This is the one that comes up more than any other, and it has an actual cause. Women’s-specific shells are frequently graded from a torso-first pattern, so the sleeve length scales off the chest measurement rather than off arm reach. Add trekking poles, and the mismatch shows up immediately.
Check sleeve length as its own measurement. Buying up a size to fix short sleeves usually gets you a jacket that’s short in the arms and boxy everywhere else, which is why four sizing mistakes that leave you cold are worth reading before you order rather than after.
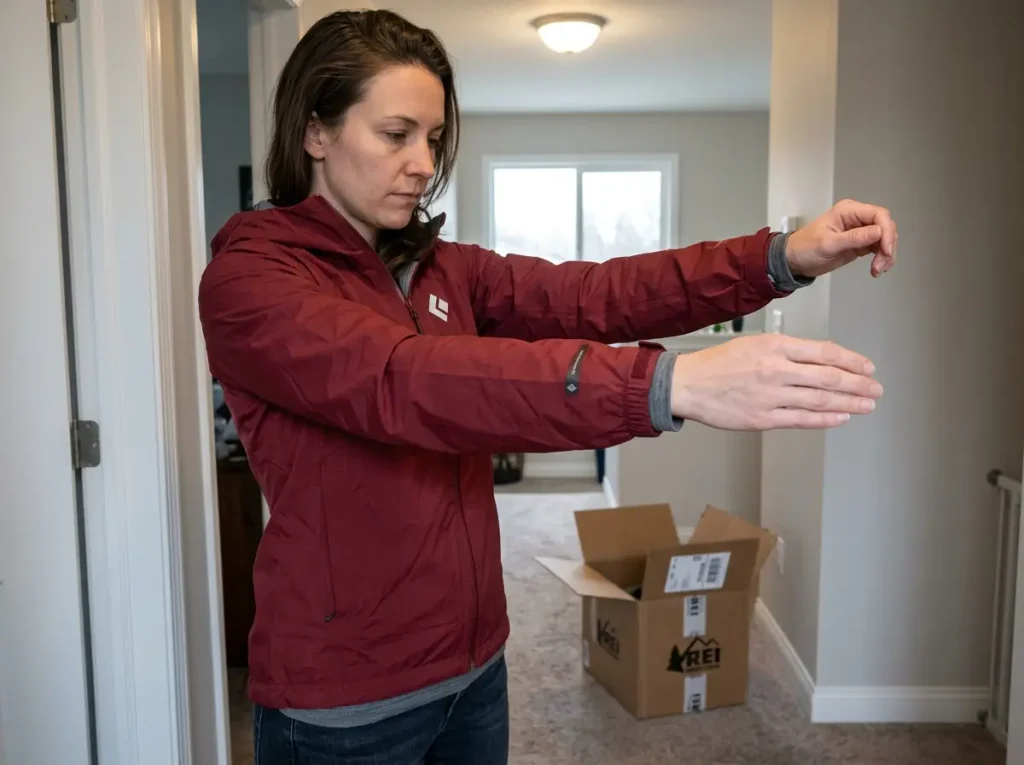
The self-check works in a living room. Stand up, reach forward and up as if you’re planting a pole on a steep step. If the cuff pulls back past your wrist bone, that gap sits open all day, and rain runs down your forearm into the sleeve every time you plant.
Trim vs. boxy, and picking the one that matches your layers
Trim and boxy is a real fork, not a marketing distinction. A trim fit follows the waist and layers efficiently under a hipbelt without bunching. A boxy fit leaves room for a midlayer and drapes over a hipbelt instead of fighting it.
Neither one is correct. They answer different questions. If you hike in a shell over a base layer most of the year, trim wins. If your shell goes on over a fleece in shoulder season, boxy stops being a complaint and starts being a feature.
Decide which question you’re answering before you look at the fit photos, because the photos are shot on a model standing still.
Hood sizing, in both directions
Hoods fail two ways and the listings describe neither. Too large and it swings across your face on uneven ground, so you lose peripheral vision exactly where you need to be watching your feet. Too small and it won’t clear a beanie, which is the shoulder-season problem nobody discovers until October.
A helmet-compatible hood is the tell that a jacket was designed for backcountry use rather than a commute. You may never wear a helmet in it. It still means the hood has real volume adjustment and a brim stiff enough to hold shape in wind.
The four adjustment points that decide daily fit
Beyond the big three, four small features do most of the work, and they’re all printed in the spec list where the fit photos can’t hide them.
Adjustable cuffs are the difference between a sleeve that seals against a glove and one that funnels water down your forearm. Velcro tabs beat elastic here, because elastic relaxes over a season and never tightens back up. An adjustable hem or cinchable hem with a drawcord does the same job at the bottom, pulling the shell in against wind instead of letting it balloon. A drop hem cut longer at the back is what keeps your lower back covered when you lean into a climb with a pack on.
Pockets are the ones people notice too late. Standard hand pockets sit exactly where a hipbelt crosses, which makes them unreachable the moment you buckle up. Hipbelt-compatible pockets are cut higher to clear it. A chest pocket stays usable either way, and an interior drop pocket is where a phone survives a downpour.
Last, the hood. A wired brim holds its shape in wind and keeps runoff off your face. A soft one collapses against your forehead on the first gust and drips straight into your collar.
Sizing beyond the standard grade is worth asking about too. A tall fit or petite fit option, where a brand offers one, solves the sleeve-length problem at the source rather than working around it. Articulated elbows do the same for reach, pre-bending the sleeve so it doesn’t fight you.
Search the spec list for gusseted underarms and stretch fabric rather than trusting the fit photo. Those two features fix the arms-too-short, boxy-through-the-hips pattern more reliably than sizing up ever will, and they are printed in the specs where the marketing copy can’t spin them.
Best Overall, the Marmot PreCip Eco Jacket

The jacket that keeps landing on best-value lists year after year is boring in the way good gear is boring. No signature feature, no proprietary story. Pit zips, a real membrane, and a price that keeps you from being precious about wearing it in weather you weren’t sure about.
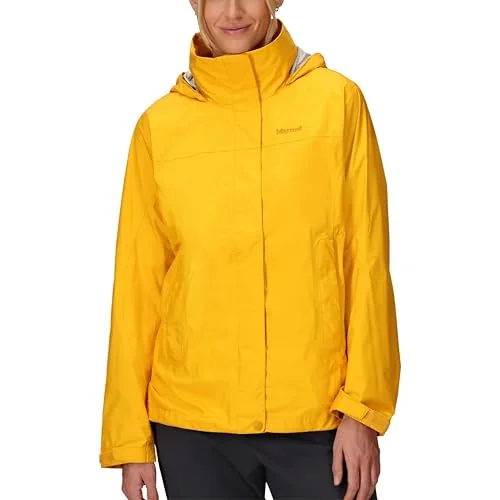
The Marmot PreCip Eco sits in the 2.5-layer slot, which is the construction that covers day hiking and shoulder season for most people most of the time. The NanoPro membrane is Marmot’s own, and it does what a mid-tier membrane should: keeps rain out, moves vapor when you give it a chance to.
Giving it that chance is what the pit zips are for. That’s the line between a hiking shell and a raincoat, and it’s the reason this jacket outperforms shells with better paper specs on an actual climb. The face fabric is recycled fabric at 100% and the DWR is PFC-free, which matters if the sustainability side is part of your decision and is quietly becoming the industry default anyway. The next step past recycled nylon is plant-based nylon, which a few brands have started using in shells, though it’s still the exception rather than the rule.
The honest limit, stated flat: it’s 2.5-layer, so the inner coating will show pack-strap wear before a 3-layer would. Expect the shoulders to be the first place it goes. That’s the trade you’re making for the weight and the price, and for a jacket you carry more than you wear, it’s usually the right trade.
Open the pit zips before you are damp, not after. Once the inside of the shell is humid the membrane is already fighting a losing battle, and you spend the next hour convinced the jacket leaks. Vent at the bottom of the climb, not at the top.
If you want the same buying decision without the women’s-fit lens on it, the gender-neutral rain jacket rankings cover the same ground across a wider set of shells.
Best Budget, the FROGG TOGGS Ultra-Lite2
This is the anti-sell section. This jacket is genuinely good at one job and genuinely bad at another, and saying both out loud is the only thing that makes the recommendation worth anything.
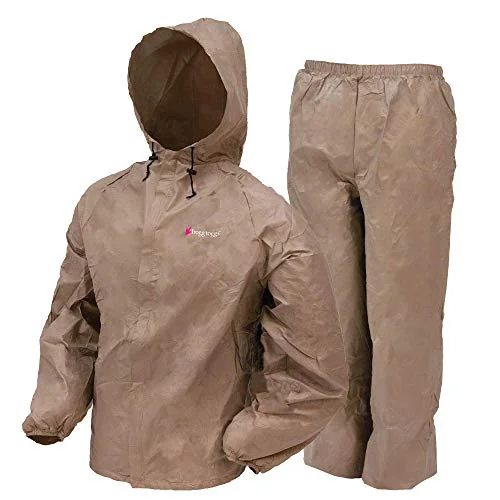
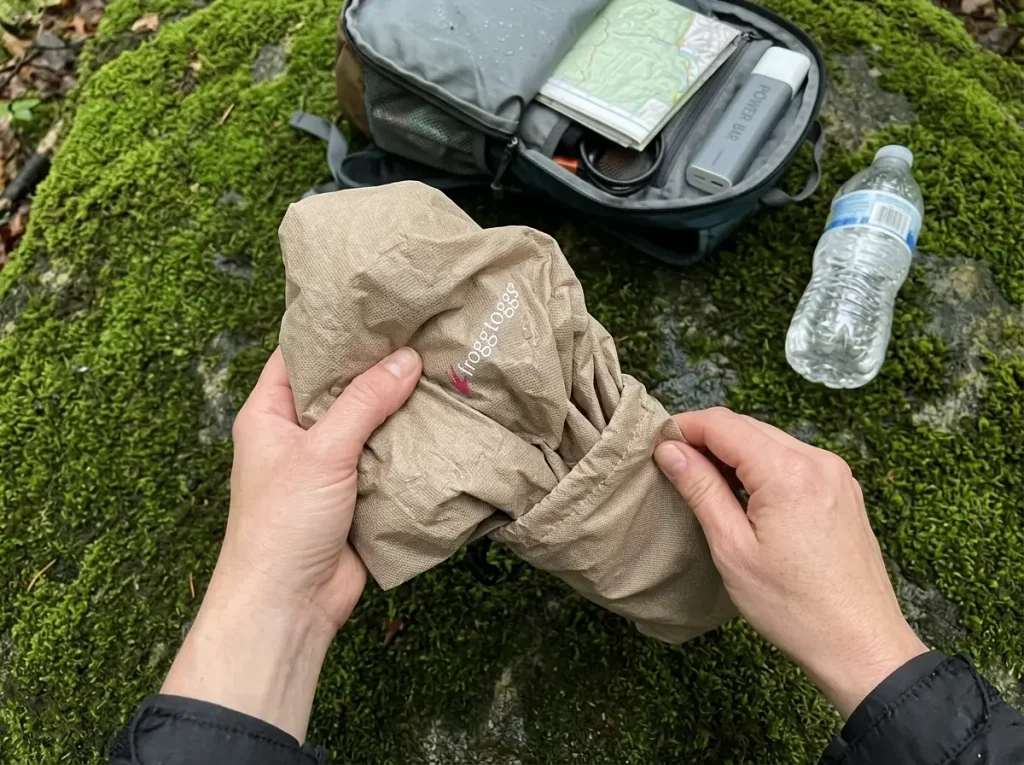
Start with what it is. The FROGG TOGGS Ultra-Lite2 is 2.5-layer non-woven polypropylene, weighs about as much as a granola bar, and packs into its own stuff sack. The waterproofing is real, not a water-resistant bluff dressed up in rain jacket photography. It has been in fishing boats and on trail long enough that its track record is not in question.
Who it’s for: occasional day hikes, the emergency layer that lives in a daypack, and anyone who genuinely doesn’t yet know how much rain hiking they’ll end up doing. Spending premium money on a shell before you know that is how good jackets end up in closets. This is also the right slot to think about whether you need a shell at all for short exposure, since the argument over whether a trekking umbrella beats a shell on weight is more serious than it sounds for anyone hiking below treeline.
Who it’s not for: a full season of heavy pack-strap abrasion, or multi-day exposure where the shell is on for hours at a time. The material is the price. Non-woven polypropylene tears where a woven nylon would abrade, and once it tears you’re patching it with tape.
The framing that keeps this honest is the one to hold onto: it packs tiny, it works, and it won’t survive years of heavy abrasion. That’s not a downgraded 3-layer. It’s a different tool that happens to solve the same problem across a narrower set of days, and inside those days it’s hard to argue with.
Best for Heavy Rain and Backpacking, the Outdoor Research Aspire 3L
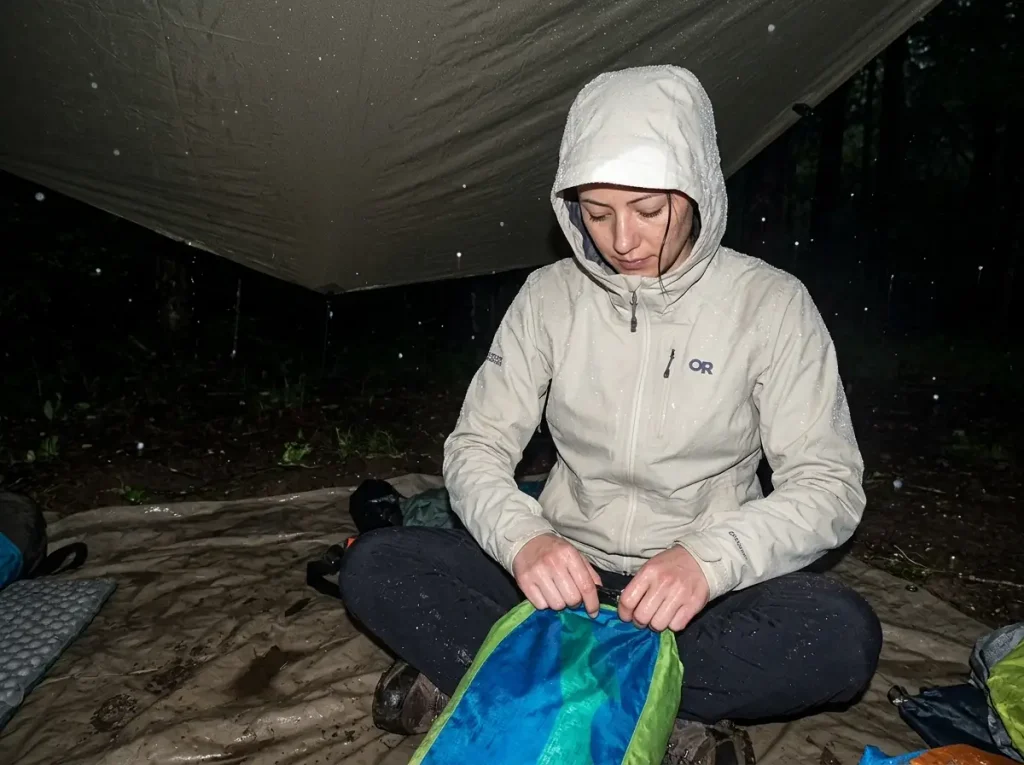
There’s a threshold where 2.5-layer stops being a smart compromise and becomes the wrong tool. It isn’t about how hard the rain comes down. It’s about how long you stand in it.
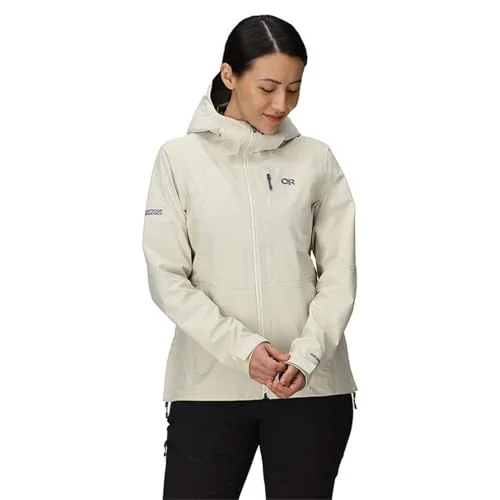
The Outdoor Research Aspire 3L is a full 3-layer with a bonded interior liner, which is the construction that stays breathable and holds its durability through hours of exposure rather than minutes. Competitor test teams name it directly as a top pick for extended rain, and that consensus lines up with what the construction predicts.
The fabric is 40D recycled nylon with mechanical stretch, and it’s fully seam-taped. The stretch is the part that matters for the fit complaints back in the fit section, because a 3-layer laminate is normally the stiffest thing in a gear closet. Mechanical stretch in the weave gets you the reach without the crinkle, and 40D is a real denier count, not a paper-thin ultralight face fabric that snags on a branch.
Honest note, because it should be said before you click: this is a step up in money and in commitment. If most of your hiking is a two-hour loop that might catch rain, the Marmot above is the better buy and you’ll never notice the difference. The Aspire earns its price on the days you’re out in it long enough to stop thinking about it.
The difference shows up around hour three. That’s when a 2.5-layer starts feeling clammy and you honestly can’t tell whether you’re wet from rain or from yourself. A bonded 3-layer keeps moving vapor past that point, which is the whole reason the construction exists. For a full multi-day system, the jacket is only half the equation, and the question of rain pants versus a rain skirt for the rest of the system matters just as much once you’re out for more than a day.
Best for Fit and Mobility, the Black Diamond Fineline Stretch
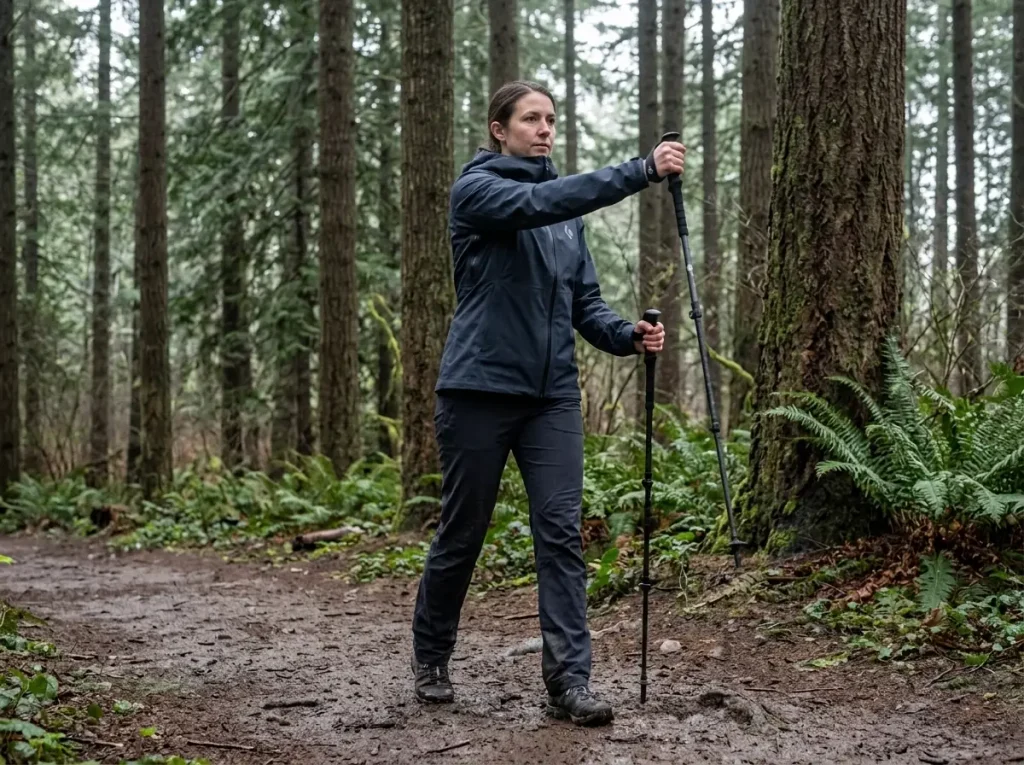
Some readers already know exactly what’s wrong with their current shell. It fits everywhere except where they need to move. The features that fix that are specific, printed in the specs, and checkable before you order, though if mobility is your priority it’s worth asking whether a hardshell is even the right category for you before you shop.
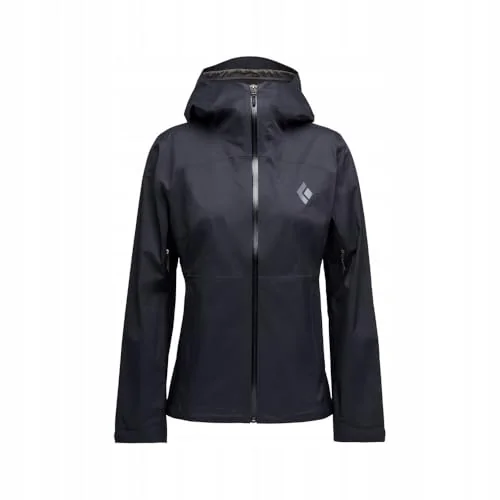
Two features on the Black Diamond Fineline Stretch answer the complaint pattern directly. Gusseted underarms add fabric in the armpit so the sleeve doesn’t drag the hem up when you reach, and stretch fabric lets the whole panel move with you instead of resisting. Together they solve the short-sleeve-and-boxy-hips problem that sizing up only makes worse.
The BD.dry membrane handles the waterproofing, and the helmet-compatible hood is the tell. Black Diamond builds for climbers, so hood volume and brim structure get real attention. That carries over to a hiker in a beanie in late October, helmet or no helmet.
Where this sits against the others: mid-premium, and chosen for how it moves rather than for the highest waterproof rating in the set. That’s a deliberate tradeoff. If your hiking is above treeline in sustained storms, the Aspire is the more protective shell. If your problem is that every rain jacket you’ve owned fought you on climbs and scrambles, this is the trim, mobility-forward answer to that exact question.
The day it arrives, before the tags come off, run the pole-plant reach test from the fit section. Stand up, reach forward and up, and watch the cuff. That test takes eight seconds and it’s the only one that matters for this particular jacket.
Best Packable, the Outdoor Research Helium
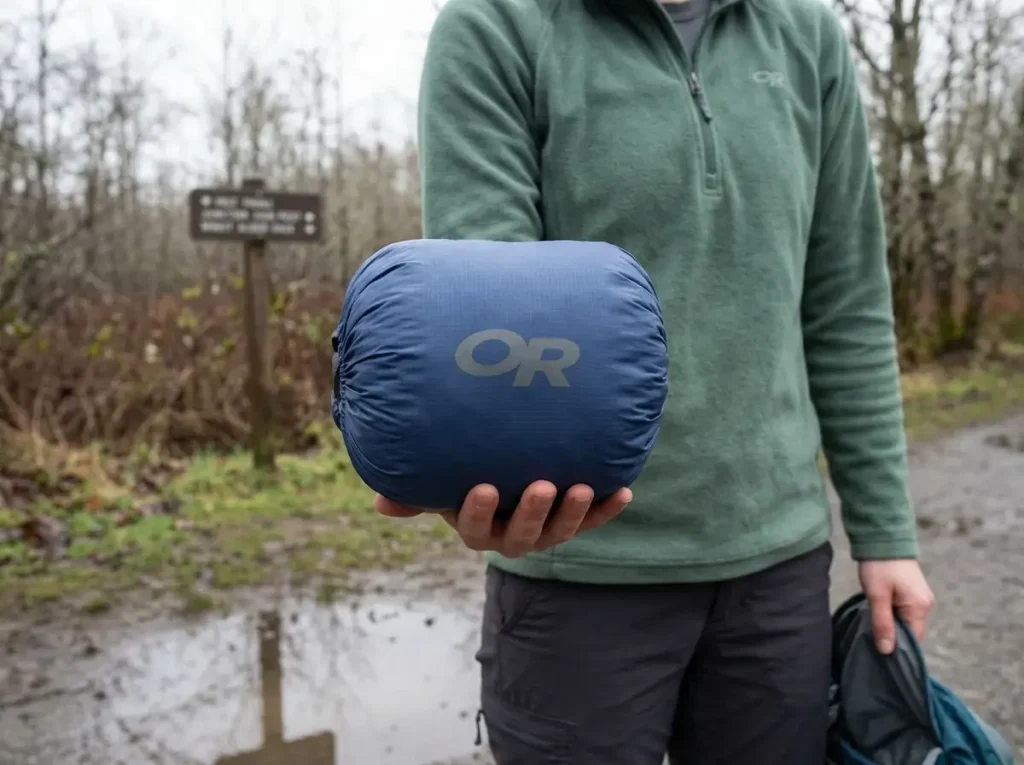
Most rain jackets get carried far more often than they get worn. That single fact should drive the purchase more than it usually does, and for a lot of hikers the right shell is the one that disappears into a pack until the sky changes.
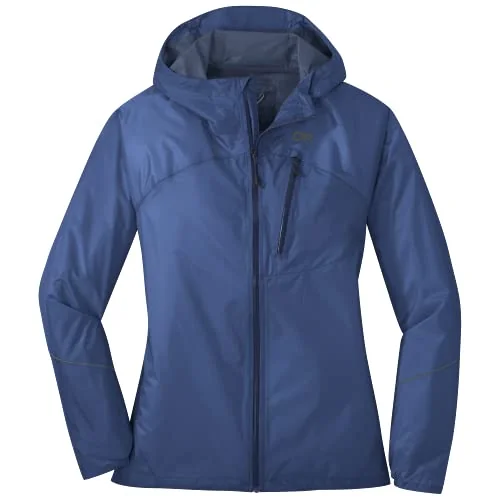
The Outdoor Research Helium is 2.5-layer, packs into its own pocket, and weighs about as much as a spare pair of socks. Those three facts are the entire pitch, and they’re enough.
Be honest about the use case. This is the “forecast said 20%” jacket, not the “I’m hiking all day in this” jacket. It handles a passing squall and a cold summit wind, and it does that job better than a 3-layer would because a 3-layer would have stayed home in the closet. It’s also the shoulder-season answer, when the odds of getting caught out are higher than the odds of sustained rain and the cost of being wrong is a genuinely cold walk back.
The breathability ceiling on any 2.5-layer is real, and it’s the same tradeoff from the spec section: less membrane sophistication, less vapor throughput. If you want to understand why some membranes handle that better than others, how the membranes actually differ on breathability is the deep dive.
The abrasion caveat applies here too. Ultralight face fabric plus daily pack straps equals a shorter life than a heavier shell. That’s the price of the weight, and for a jacket you wear a handful of times a season it’s a price worth paying.
One last thing about this category, and it isn’t about the jacket. The failure mode for a packable shell is leaving it in the pack because pulling it out feels like admitting the weather won. Put it on at the first sustained drizzle. The jacket can’t help you from inside the lid pocket.
Buying a Rain Jacket on Amazon Without Getting Burned
Every tested-and-ranked competitor sends you off to a retailer and stops there. Nobody writes for the person who is actually going to buy this on Amazon, which is most people, and Amazon has two quirks worth knowing before you order a shell you can’t try on.
Check who is actually shipping it
Amazon commingles inventory. Units from different sellers get pooled in the same warehouse bin under a single listing, so a legitimate-looking listing can still ship you a gray-market unit that came into the pool from somewhere else. This is documented and ordinary, not a conspiracy, and it’s manageable once you know it exists. The gray market for outdoor gear runs on exactly this gap, and outright counterfeit gear shows up in the same pool.
The practical filter takes ten seconds. Look at the “Ships from” and “Sold by” lines on the right side of the listing, and favor “Ships from and sold by Amazon.com” or the brand’s own storefront. That’s it. Third-party marketplace sellers are where gray-market risk concentrates, and premium outdoor brands are where the incentive concentrates.
The Amazon return policy is your backstop either way, and it’s the reason ordering a shell sight-unseen is a reasonable thing to do at all.
Scale the paranoia to the price. Nobody is counterfeiting a sub-$60 rain jacket, because the margin isn’t there for the effort. At the $300-and-up tier, checking the seller is worth the ten seconds. The middle of the range is somewhere in between, and a quick look costs you nothing.
Check the listed mm rating against the brand’s own product page before you order. A marketplace listing that contradicts the manufacturer on a basic spec is telling you something about who wrote that listing, and it takes one browser tab to find out.
Use the return window as a fitting room
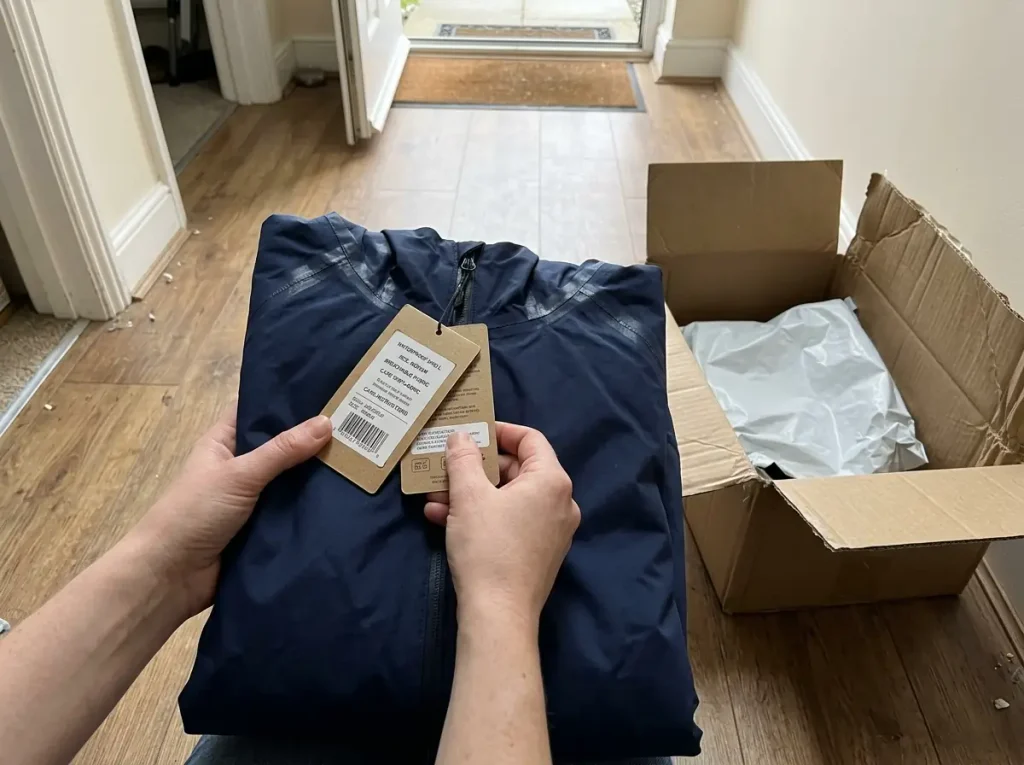
The return window is the fitting room you didn’t get. Treat it that way deliberately instead of letting it expire while the jacket hangs in a closet with the tags on.
The day it arrives, indoors, tags still attached, run three checks. Reach forward and up like you’re planting a pole and watch whether the cuff clears your wrist bone. Put on the pack you actually hike with, buckle the hipbelt, and see whether the hem rides up or sits clean over it. Pull the hood over the beanie you wear in October and check whether you can still turn your head and see sideways.
Any of those three failing is a return, not a compromise you’ll get used to. You won’t get used to it. You’ll just stop reaching for that jacket, which is the most expensive outcome available. If you’re shopping for someone else in the same trip, the men’s counterpart to this roundup runs the same tests against a different set of shells.
Once the jacket is yours and it fits, the maintenance clock starts. The same DWR mechanics that govern this shell govern everything else in your kit, and keeping the DWR alive on everything else you own is a shorter job than most people expect.
Conclusion
Three things worth carrying out of here.
The mm number tells you what the fabric can do. The pit zips and the taped seams tell you whether you’ll ever get to use it, and a shell with a great rating and no venting will still leave you damp on a climb.
A jacket that feels wet inside is usually a DWR problem, and DWR is fixable in an afternoon with a wash cycle and a dryer. Before you replace a shell, find out whether it’s actually finished.
Fit is the one spec you cannot read off a listing. Run the reach test, the hipbelt check, and the hood-over-beanie check the day the box arrives, while returning it still costs you nothing but a trip to the drop-off.
A rain shell sits on the Ten Essentials list for a reason, and it’s the only item on that list whose performance quietly degrades while it hangs in a closet doing nothing. Then go do the thirty-second version of all this on the shell already hanging in yours. Spray bottle, shoulders, watch what the water does. It either buys you confidence for the next wet forecast or gives you a weekend of warning, and both beat finding out at mile six.
Frequently Asked Questions
01What is the best waterproof rating for a rain jacket?
For 3-season hiking, look for 10,000–15,000mm hydrostatic head. A 1,500mm rating only clears the legal minimum to be called waterproof, and 20,000mm+ is mountain-grade for above treeline. The number is necessary but not sufficient: seam sealing and hood design decide whether you stay dry.
02What is a good women’s waterproof jacket for heavy rain?
For sustained heavy rain, a full 3-layer shell like the Outdoor Research Aspire 3L is the construction that holds up: bonded liner, fully taped seams, breathability that survives hours rather than minutes. The threshold is duration, not intensity. A 2.5-layer handles a downpour fine, it just gets clammy by hour three.
03What is the best 100% waterproof jacket?
No hiking shell is meaningfully 100% waterproof as a category claim. Each one is a rated fabric plus seams, zips and a hood that either work or don’t. Want a published mm rating of 10,000mm or better, fully taped seams, and protected zips. A jacket claiming 100% waterproof with no mm number is telling you what it lacks.
04What is the best rain jacket for heavy rain?
Same answer regardless of who wears it: 3-layer construction, 20,000mm or better above treeline, taped seams, and pit zips you can open before you overheat. The mistake isn’t buying too little jacket. It’s buying a shell with no venting, then blaming the membrane when you’re wet from the inside.
05Why does my rain jacket feel wet inside if it isn’t leaking?
That’s wetting out, and it’s a DWR failure rather than a membrane failure. Once the face fabric saturates, it blocks the vapor pathway, so your own sweat has nowhere to go and condenses inside. Re-treat the DWR instead of replacing the jacket, and run the spray-bottle bead test before your next trip.
Risk Disclaimer: Hiking, trekking, backpacking, and all related outdoor activities involve inherent
risks which may result in serious injury, illness, or death. The information provided on The Hiking Tribe is for
educational and informational purposes only. While we strive for accuracy, information on trails, gear, techniques,
and safety is not a substitute for your own best judgment and thorough preparation. Trail conditions, weather, and
other environmental factors change rapidly and may differ from what is described on this site. Always check with
official sources like park services for the most current alerts and conditions. Never undertake a hike beyond your
abilities and always be prepared for the unexpected. By using this website, you agree that you are solely
responsible for your own safety. Any reliance you place on our content is strictly at your own risk, and you assume
all liability for your actions and decisions in the outdoors. The Hiking Tribe and its authors will not be held
liable for any injury, damage, or loss sustained in connection with the use of the information herein.
Affiliate Disclosure: We are a participant in the Amazon Services LLC Associates Program, an
affiliate advertising program designed to provide a means for us to earn advertising fees by advertising and linking
to Amazon.com. As an Amazon Associate, we earn from qualifying purchases. We are also an official affiliate partner
of Black Diamond Equipment via the AvantLink network. If you click on a Black Diamond affiliate link and make a
purchase, we may earn a commission at no additional cost to you. We also participate in other affiliate programs and
may receive a commission on products purchased through our links. Additional terms are found in the terms of
service.