In this article
You are standing at the trailhead in a shoe engineered to keep water out, and your feet are already damp. Nobody warned you about that, because the most common way to finish a hike with soaked socks has nothing to do with the creek. Ask around in any backpacking community long enough and you will hit the same unpopular line: no GTX shoes, they make for prune feet and problems. That opinion is half right, and the half that is right is the half every gear roundup skips. This guide covers the best waterproof hiking shoes worth buying, one pick per situation, plus an honest read on when to skip a membrane entirely and a straight answer on which of our two gender-specific lists actually applies to your foot.
Five picks, five different hikers. Here is the comparison table before we get into why.
| Shoe | Best For | Waterproofing | Who It Fits |
|---|---|---|---|
| Oboz Katabatic LT Low GTX | Best overall | GORE-TEX | Most feet, day hikes through light overnights. Men’s and women’s versions |
| KEEN Targhee 4 Low WP | Wide feet | KEEN.DRY | Broad forefoot, high instep, anyone sized out of standard lasts. Men’s and women’s versions |
| Merrell Moab 3 Waterproof Low | Budget | Merrell Dry | First waterproof pair, wants comfort without a break-in period. Men’s and women’s versions |
| Oboz Sawtooth X Low B-DRY | Loaded packs | B-DRY | Backpackers who need a midsole that holds up under weight. Men’s and women’s versions |
| Danner Trail 2650 GTX | Lightweight | GORE-TEX | Fast hikers who gave up on waterproof because it felt like a boot. Men’s and women’s versions |
How Waterproof Hiking Shoes Actually Work
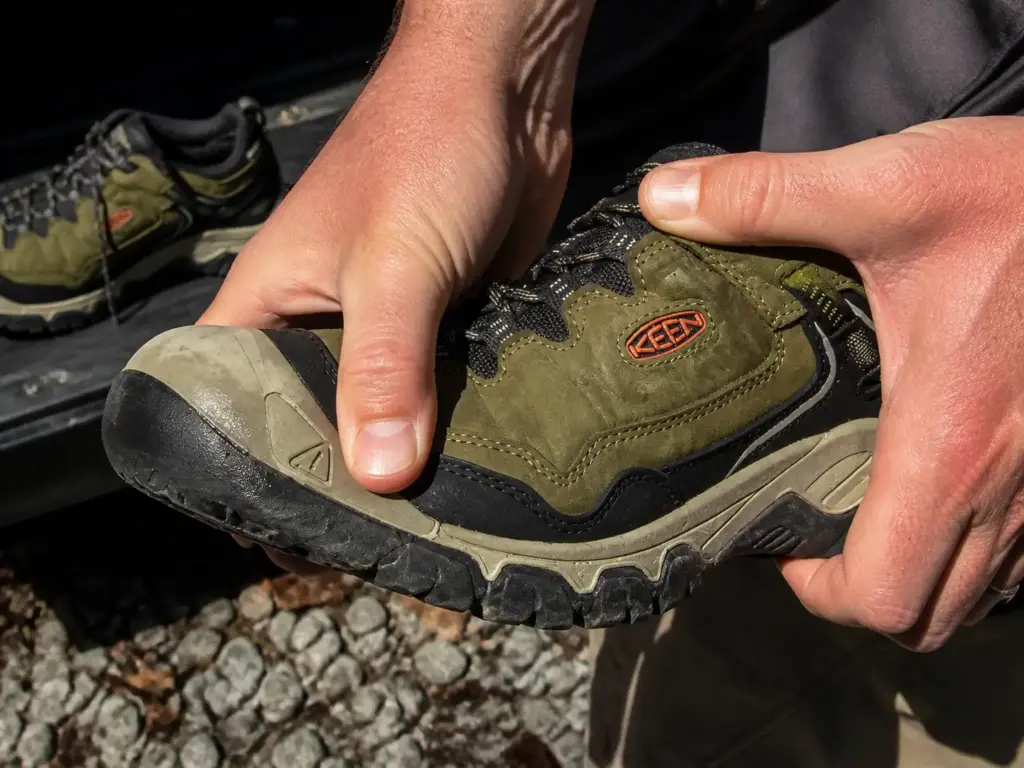
Most buyers think waterproof is one thing. It is two things stacked on top of each other, they fail on completely different schedules, and only one of them is repairable at home. Understanding which is which is the difference between reproofing a good shoe and replacing it for no reason.
The Membrane Is a Vapor Filter, Not a Wall
A waterproof membrane is a thin film with pores sized between two states of water. The pores are too small for a liquid droplet to squeeze through, which is why rain stays outside, and large enough for individual water vapor molecules to pass, which is why the shoe is not a plastic bag. That is the whole trick, and the important part is the second half of it.
The membrane only moves water in the vapor phase. Liquid sweat sitting against your skin inside a closed shoe does not get pumped out. It has to evaporate first, and evaporation inside a saturated sock is slow. The membrane also needs a thermal gradient pushing outward to work at all, so a cold shoe on a cold day breathes better than a warm shoe on a warm day, which is the exact opposite of when you need it.
Breathability gets measured in MVTR, grams of water vapor per square meter per 24 hours. For sustained aerobic effort above roughly 55 °F, 10,000 g/m²/24h is the commonly cited floor. Here is the part worth sitting with: almost no footwear brand publishes an MVTR figure at all. You get a membrane logo on the tongue instead of a number, and the absence of that number across an entire product category is itself the story. If you want the full breathability math behind a GORE-TEX shoe, we broke it down separately, because it deserves more room than one section here.
DWR Is the Outside Coating, and It Dies First
Sitting on the outside of the upper, well above the membrane, is the DWR, short for durable water repellent. It is a treatment sprayed or applied to the outer fabric so that water forms beads and rolls off instead of soaking in. It works alongside the rest of the construction, the seam sealing and the gusseted tongue that stop water from entering at the joins. It is not what makes the shoe waterproof. The membrane does that. The DWR exists so the outer fabric stays dry enough for the membrane to keep breathing.
It is also the layer that fails first, usually by a wide margin. Factory DWR starts fading after a couple of real outings. Once it goes, the outer fabric wets out, meaning it saturates and holds water in the weave itself. The shoe gets heavier, it stops breathing almost entirely, and the inside of the shoe turns into a condensation chamber.
This is where the single most expensive mistake in the category happens. Hikers feel wetness inside a shoe whose DWR has died, conclude the membrane failed, and buy a new pair. The membrane is usually fine. What they felt was their own moisture with nowhere to go. There is a five second test for this, and we get to it at the end of this guide.
GORE-TEX vs the Proprietary Membranes (B-DRY, KEEN.DRY, Merrell Dry)
GORE-TEX is the name everyone knows, and the GTX suffix on a model number just means the version with the membrane in it. But B-DRY from Oboz, KEEN.DRY from KEEN, and Merrell Dry are not downgrades or knockoffs. They are the same category of product from different suppliers, and in the case of the proprietary membranes, the brand owns the spec instead of licensing it.
What the label on the box genuinely tells you is who made the film. What it does not tell you is how the shoe will perform on your foot, in your climate, at your pace, which is a much longer list of variables than the logo can carry. We wrote a whole piece on why the technology label on the box tells you almost nothing, and the short version is that the marketing name has almost no predictive power once you are actually walking.
Practical takeaway: do not pay a premium for GORE-TEX specifically. Pay for fit, outsole rubber, and midsole firmness, and treat the membrane as a yes or no checkbox rather than a ranking.
The Sweat Problem Nobody Puts on the Spec Sheet
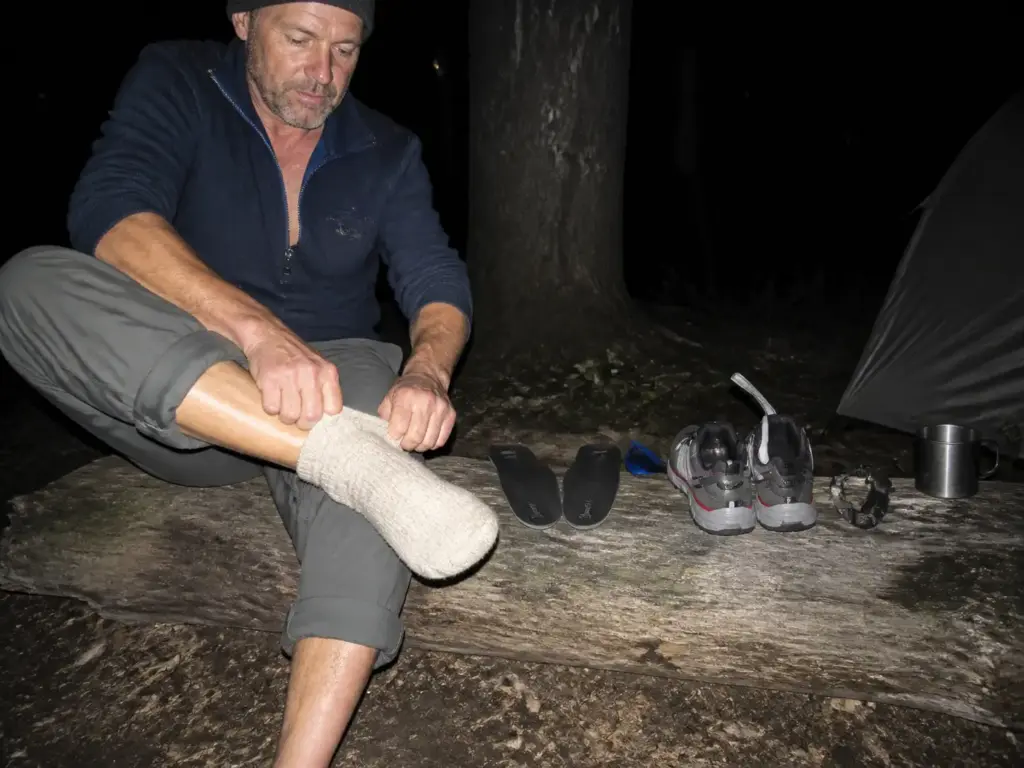
Everyone who has hiked a warm afternoon in a membrane shoe has peeled off a sock and found pale, wrinkled, waterlogged skin. Sweaty feet are the default state in this category, not the exception. Most hikers file it under gross but harmless, the same thing that happens in a long bath. It is not the same thing. It is the first stage of a real progression, and knowing where the clock starts is what separates an annoying evening from a trip that ends early.
Your Feet Produce More Water Than Any Membrane Can Move
The arithmetic closes this argument faster than any amount of debate. A hiker working at a sustained aerobic pace produces roughly 0.8 to 1.4 liters of sweat per hour. A 15,000 g/m²/24h membrane moves about 14 grams of vapor per hour over an area the size of a sock.
Those are not close. Even accounting for the fact that your feet are only a fraction of total output, moisture production inside a closed shoe outruns evacuation on any warm day, at any pace that raises your heart rate. The membrane manages the rate — it does not solve the problem, and no membrane on the market solves the problem, because the limitation is physical rather than a matter of engineering effort.
That is worth repeating in plain terms. On a hot day, a waterproof hiking shoe is a shoe that is slightly better at getting rid of your sweat than a plastic bag would be, and considerably worse at it than mesh. Exactly the same trap shows up in waterproof socks, for exactly the same reason, if you were about to solve this problem one layer down.
Take the shoes off at long breaks. Ten minutes of bare feet in moving air reverses early maceration, and it costs you nothing but the time you were already spending sitting on a log. Hikers who do this arrive at camp with better feet than hikers with better shoes.
Prune Feet Have a Real Name and a Real Clock
The wrinkled white skin has a clinical name: maceration. It appears within hours of continuous moisture, and it is the first genuine stage of tissue damage rather than a cosmetic quirk. Macerated skin has lost structural integrity. It tears more easily, it blisters faster, and it lets bacteria and fungus through a barrier that normally holds them out.
Past maceration, the timeline splits by temperature, and the split matters more than most hikers realize. Cold-water trench foot can progress to a serious stage in 12 to 14 hours of continuous wet. Warm-water immersion foot takes considerably longer, in the range of 48 to 72 hours or more. Read that against your actual hiking: a cold rainy day with soaked feet from breakfast to camp already sits inside the risk window. A hot July afternoon gives you a large margin.
The field protocol is short and it is free. Clean and dry your feet thoroughly at the end of the day. Put on clean dry socks every single day, even when the shoe itself is still wet. And do not sleep in socks, which is not trail folklore but lines up directly with the CDC’s guidance on preventing immersion foot, the same guidance issued after floods and hurricanes for exactly the same physiological reason.
One more detail that gets skipped: on damp days, choose merino over synthetic. Merino wool socks absorb water into the fiber itself, which leaves the surface against your skin drier than a non-porous synthetic that holds the same water on its surface. The sock is not a minor variable here. It is doing moisture wicking work the membrane physically cannot do, and it is the cheapest blister prevention available to you.
Why a Waterproof Shoe Takes Days to Dry Once It’s Wet Inside
Here is the penalty competitors gesture at without naming. The same construction that keeps water from getting in keeps water from getting out. Once the inside of a membrane shoe is genuinely soaked, whether from a deep crossing or from a full day of your own sweat, the shoe dries in days. A mesh shoe in the same conditions dries in hours, often within one afternoon of walking.
That changes the math on multi-day trips more than any spec on the box. A mesh shoe that gets flooded at 10 a.m. is damp by lunch and dry by camp. A waterproof shoe that gets flooded at 10 a.m. is still wet the following morning, and the morning after that, and every hour it stays wet is an hour on the maceration clock. On a three day trip, a single deep step can put you in wet shoes for the entire remaining trip.
Do You Need Waterproof Hiking Shoes at All
This is the section a gear roundup has every financial reason to skip, because the mesh shoe pays less. A friend who actually hikes asks you two questions before recommending anything: where do you hike, and what months. Half the time the honest answer that follows is that you do not need the waterproof one, and you should buy the mesh version of the same shoe and put the difference toward socks.
When Waterproof Earns Its Place
Buy waterproof if your hiking looks like this: shoulder season, mud, slush, persistent morning dew on overgrown trail, temperatures below roughly 60 °F, or crossings that never come above the shoe collar. That is a real and specific set of conditions, and inside it a membrane shoe is genuinely better than the alternative rather than marginally different.
The strongest argument for waterproof is not comfort, though. It is the cold sustained wet case, and it is a safety argument. Untreated trench foot does not stop at uncomfortable.
The clinical progression of trench foot runs through loss of circulation to the tissue, open sores, fungal infection, and in severe untreated cases tissue loss. That is documented medicine, not a scare frame invented to move product. It is the reason a shoulder season hiker in a cold wet climate should own a waterproof pair even if they dislike the way it breathes in August.
Decide by month, not by forecast. A forecast tells you about tomorrow. Your shoe has to be right for the sixty days you will actually wear it, and most people who buy the wrong pair bought it for one memorable wet hike rather than for their normal season.
When Mesh Is the Smarter Buy
Buy mesh if your hiking is hot weather hiking, dry climate hiking, desert hiking, or routes with frequent deep fords where drainage beats resistance. In all three cases the membrane is working against you: it slows drying, it traps heat, it holds sweat, and it costs more for the privilege.
The deep ford case deserves its own sentence, because it is the hard edge of the whole decision. One step above the collar and a waterproof shoe becomes a bucket. The bathtub effect is exactly what it sounds like, and the water that came over the top has no exit path, so it stays for days. Water crossing depth decides the shoe far more reliably than the weather does. If your route has fords that reach mid-calf, shoes built to let water out instead of keeping it out are the correct tool and the membrane is a liability.
The anti-sell pick below is a real, buyable shoe on purpose. Recommending a vague category of mesh shoe would be posturing. This is the identical model to our budget waterproof pick, same last, same Vibram TC5+ outsole, membrane deleted, which makes it the cleanest one-to-one comparison available anywhere in this category.
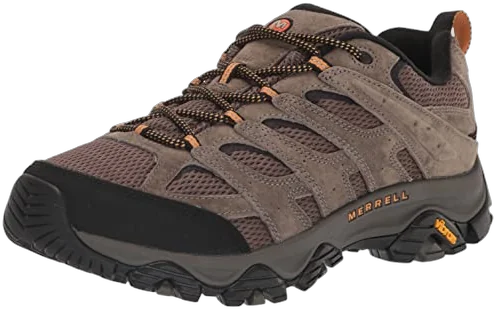
The trade-off is real and worth stating plainly. In cold rain, in wet grass at 7 a.m., in mud season, this shoe soaks through in the first mile and stays soaked. It is not a do-everything purchase. It is the right purchase for a specific climate and a specific set of months, which is precisely the point.
The Two-Pair Strategy Most People Land On Eventually
Experienced hikers usually stop arguing about this and buy both. One waterproof pair for shoulder season, mud, and cold rain. One mesh pair for summer. The price range for quality low-cut waterproof shoes generally runs $120 to $180 as a category, with entry-level options closer to $100 to $120, so two mid-tier pairs are easier to justify than one premium hiking shoe that is wrong half the year.
Most hikers arrive here on their own after a couple of seasons, usually via a specific bad day. The version we hear most often: someone misjudges a creek crossing on day one of a three day trip and goes in calf deep, walks the next two days in shoes that never dried, and watches their partner in mesh have dry feet before lunch. Nobody argues about the two-pair strategy after that trip.
Waterproof Shoes vs Boots vs Trail Runners on Wet Ground
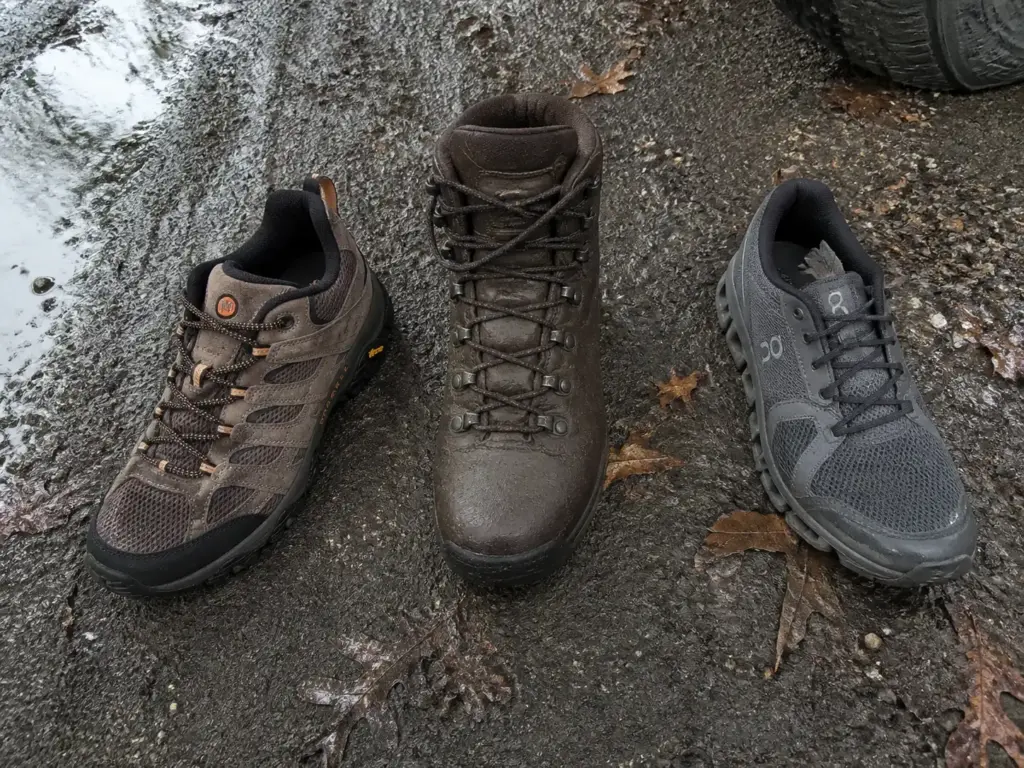
If you searched for waterproof shoes rather than waterproof hiking boots, you have already half-decided against boots and you may not know why. Worth saying plainly: low-cut shoes win for most hikers most of the time, and the exceptions are specific and short.
Low-Cut Waterproof Shoes: the Default for Most Wet Days
The case for the low cut is the same on wet ground as it is anywhere else, and we made it at length in the piece on why low-cut hiking shoes beat boots for most hikes. Lighter on the foot over a full day, less heat, faster to dry, and no meaningful loss of capability on the terrain the overwhelming majority of hikers actually walk.
The wet-specific variable is collar height, and it is the only mechanical difference that matters here. A waterproof shoe protects up to its collar and not one millimeter higher. A boot moves that line up a few inches. Everything else people say about boots on wet ground is either about support, which is a separate conversation, or inherited from a generation that hiked in stiff leather because nothing else existed.
Boots: When the Water or the Snow Is Deeper Than the Collar
There are three situations where a boot genuinely wins on wet ground: water deeper than the shoe collar that you cannot avoid, snow deeper than the shoe collar, and heavy loads over technical terrain where ankle support stops being a preference and becomes a real safety consideration. That last one is the documented trade-off of the low cut, and it is the one place the traditional boot argument still holds without qualification.
Notice that two of those three are about height, not waterproofing. The most common category mistake we see is a hiker buying a boot for waterproofing when the actual need was three extra inches of collar for one specific creek. The route should choose the category, and most routes never demand a boot. If you want the full hiking shoes vs hiking boots breakdown by terrain, we ran it in detail rather than compressing it here.
Trail Runners and the Wet-Foot Method
The hiking shoes vs trail runners question changes shape once the water is constant. On routes with frequent fords, experienced hikers stop fighting it entirely. Mesh trail running shoes with drainage, accept that your feet will be wet, dry out at camp. This is the wet-foot method, and it is a strategy rather than a surrender. It works because the drying time penalty of a membrane is the dominant variable once crossings are frequent, and because a shoe that drains is dry again in an hour while a shoe that seals is wet until Thursday.
The catch is that the wet-foot method requires the rest of the system to be right. Dry camp socks every night, feet out at breaks, and a willingness to walk in wet shoes without treating it as a failure. Hikers who adopt the shoe without the habits end up worse off than they started.
Approach Shoes: the Wet-Rock Specialist
Approach shoes sit in their own corner: sticky rubber, a flat climbing zone at the toe, a stiffer platform for edging. On wet rock and slab they outperform most hiking shoes by a wide margin, and that is a real safety consideration rather than a spec sheet flourish. Wet trail traction is decided by rubber compound, lug pattern, and lug depth, and none of those is predictable from the logo printed on the outsole. Compounds like Vibram Megagrip exist precisely because the rubber, not the tread picture, does the work.
Where approach shoes lose is comfort over long mileage and, frequently, waterproofing, since many of the best ones are unlined. If your wet-ground problem is specifically slab and scrambling rather than mud and puddles, that is the category to look at.
Men’s and Women’s Shoes Are Not the Same Shoe
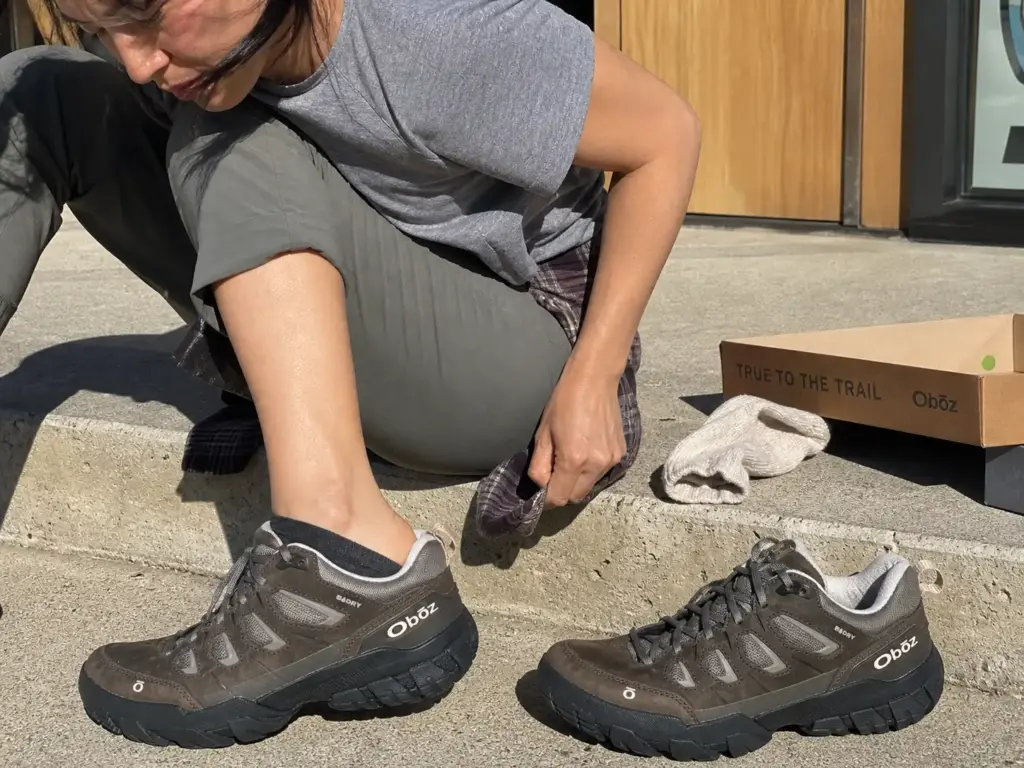
Every hiker has heard someone say to just buy the men’s version and size down two. It sounds efficient. It costs a real number of people a heel full of blisters at mile five, and the case for gender-specific fit is measurable, has been measured, and lands in exactly the places that produce hot spots.
What the Foot-Shape Research Actually Found
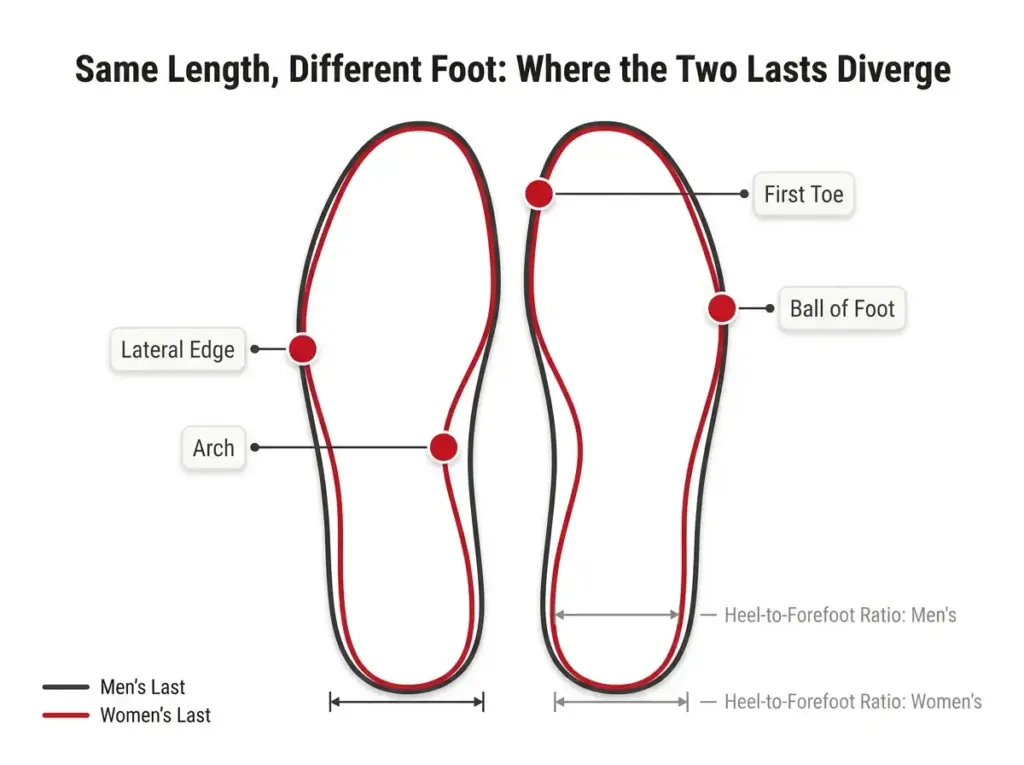
The reference point here is Wunderlich and Cavanagh’s 2001 study in Medicine and Science in Sports and Exercise. They normalized for foot length first, which is the step that makes the finding meaningful, and then compared. After controlling for length, men and women still differed significantly in 2 calf variables, 5 ankle variables, and 4 foot-shape variables, with the differences concentrated in the arch support region, the lateral side of the foot, the first toe, and the ball of the foot.
The paper’s own conclusion is the sentence worth carrying out of this section: women’s feet and legs are not scaled-down versions of men’s. That research on gender differences in adult foot shape found women’s feet aren’t scaled-down men’s feet, which is a structural statement rather than a marketing one.
The consistent average difference across datasets is a narrower heel cup relative to the forefoot in women’s feet, against a more uniform heel-to-toe profile in men’s. Men’s feet also run longer overall, wider through the forefoot, and higher through the instep. None of these are absolutes about any individual person. They are population averages, and population averages are exactly what shoe lasts are built from.
The Heel Slip Failure and Where It Comes From
A women’s last is a lower-volume last, not just a smaller one. That distinction is the whole reason sizing down in a men’s model does not reproduce the fit. Going down two sizes shrinks length and width together while the internal volume stays proportioned for a different foot. You end up with a shoe that is the right length, roughly the right width, and too roomy through the heel cup.
The failure that produces is specific and predictable: heel slip on climbs, and heel blisters that follow it. Every uphill step lifts the heel slightly out of a cup that is not holding it, the sock moves against the skin, a hot spot forms, and the blister arrives somewhere around mile five. It never shows up in the store, because nobody climbs in the store.
We hear a version of this constantly: someone takes the men’s version because her size was sold out in the women’s, everything feels fine on the carpet, and five miles in her heel is lifting out of the cup on every uphill step. The shoe was not defective. It was built around a different foot.
Which of Our Two Lists You Should Be Reading
This is the part that makes this article useful rather than redundant. If you now recognize your foot in the men’s description, go read the full men’s waterproof shoe breakdown, where the rankings are built around that last. If you recognize it in the women’s description, read the women’s-specific list, built around the narrower heel. Both go far deeper into model-by-model ranking than this page does, on purpose.
The mechanical reason to route yourself is better than the marketing reason. You are not picking a list because of the label on it. You are picking the list whose shoes were built on the last your foot actually matches, which is a decision you can now make on the basis of heel-to-forefoot ratio and instep height rather than the color of the box.
Fit, Sizing, and Break-In for Waterproof Shoes
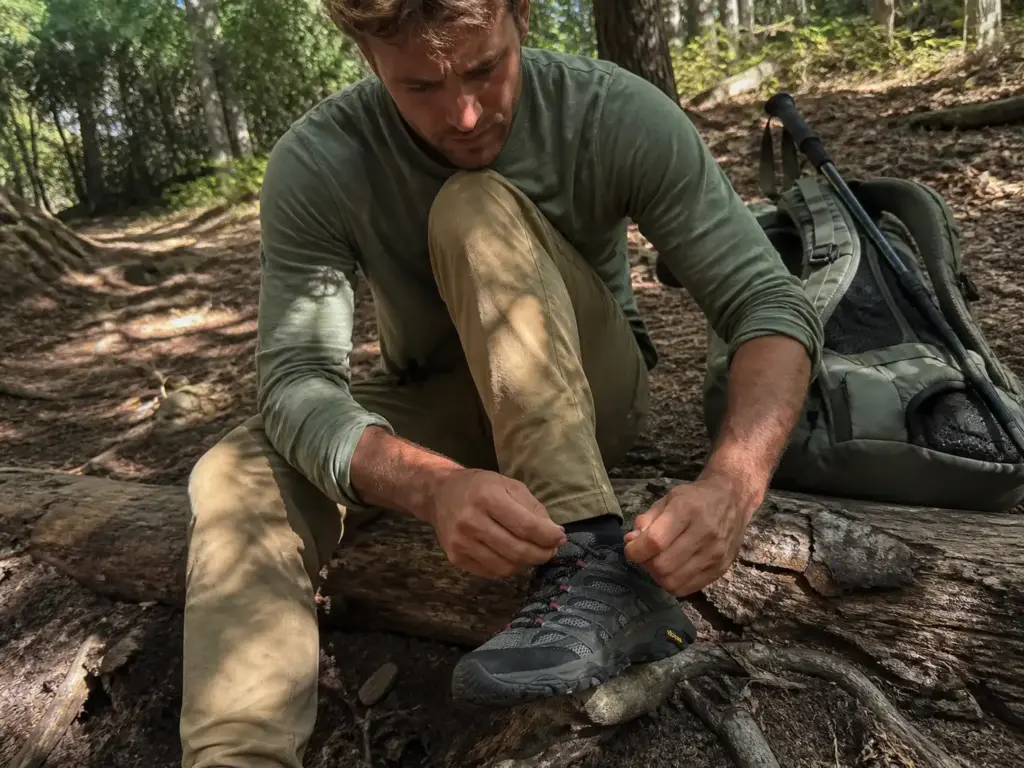
Your shoes fit fine standing in the store. Nobody buys shoes standing still, and nobody loses a toenail standing still either. Sizing failures in this category are boringly predictable and almost entirely preventable, and no amount of cushioning or aftermarket insoles rescues a shoe that is the wrong length, and a membrane upper has less give than a mesh upper, which raises the cost of getting it wrong.
Half a Size Up, and the Finger Test That Confirms It
Half size up from your street size is the convention, and there is a mechanism behind it rather than tradition. Feet swell over a day of hiking, sometimes substantially in heat. On a long descent, an exact-size fit drives your toes into the front of the toe box on every step, and the classic outcome is a lost toenail two weeks later.
The finger test confirms it in about five seconds. Slide your foot all the way forward until your toes touch the front of the shoe, then check the gap behind your heel. One finger fits: correct. Less than that: size up. Two fingers: too big, and you will get heel movement.
The most common sizing error is buying street size because that is the number printed inside your work shoes. Street size was measured on a foot that had been sitting down.
Heel Lockdown: the Lacing Fix for a Shoe That Almost Fits
Before you return a shoe for heel slip, try heel lock lacing. Run the lace through the top eyelet on the same side to form a small loop, cross the laces, thread each one through the opposite loop, and pull down and back rather than up. It cinches the collar around the ankle and locks the heel into the cup without tightening the forefoot.
This is the honest first move for anyone in the heel slip situation from the previous section, and it solves a surprising share of them outright. It will not rescue a shoe that is fundamentally the wrong volume, but it will rescue a shoe that is close, and it costs nothing to try in your living room.
What Break-In Means for a Membrane Shoe
A membrane upper has less stretch than plain mesh, because the film is laminated into the construction and film does not stretch. That changes what the break-in period even means. In a waterproof shoe, break-in is mostly the EVA midsole compressing into your gait and the collar padding softening. The upper is not going to conform to a bunion or a wide forefoot the way an unlined mesh shoe eventually might.
The practical consequence is blunt: a fit problem out of the box tends to stay a fit problem. If your toes are tight on day one in a waterproof shoe, they will be tight in a hundred miles. Return it. For the general timeline, we mapped how long break-in actually takes by upper material, and the differences between nubuck leather, mesh, and laminated uppers are larger than most buyers expect.
Try shoes on at the end of the day, in the hiking socks you actually wear, and walk a downhill if the store has one. Feet at 6 p.m. are closer to feet at mile eight than feet at 10 a.m. are, and the descent is where sizing errors reveal themselves.
Our Top Picks for Wet Trails
Five categories, one shoe per category, men’s and women’s versions together in each entry because the pair is the recommendation. This section is deliberately shorter than our two gender-specific deep-dives. It is the decision layer, not a third exhaustive ranking.
One name deserves mention before the list. The Salomon X Ultra 5 GTX Low is the shoe most reviewers lead with in this category, and pretending otherwise would be dishonest. We are not linking it, because there is no live low-cut listing to send you to right now. It stays a name here rather than a recommendation.
Each entry below says who the shoe is for before it says anything about specs, and names one thing it does worse than the alternatives. A picks section where every shoe is great is worthless.
Best Overall: Oboz Katabatic LT Low GTX
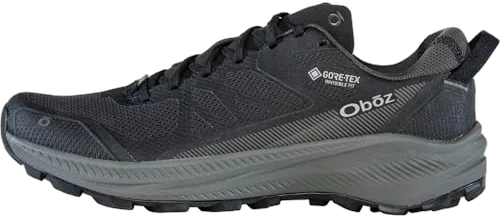
Who it is for: the hiker who wants one waterproof pair to cover day hikes through light overnights and does not have an unusual foot shape. This is the default answer, and defaults exist because they are right most of the time.
The Katabatic LT does the two things that matter on wet ground without asking you to give up much of anything. The GORE-TEX is real GORE-TEX, and the chassis is light enough that it does not feel like a compromise against a mesh shoe on dry sections. Oboz builds a firm heel counter, which pays off on the exact climbs where cheaper shoes let the heel float.
What it does worse: the toe box is on the standard side. If your forefoot is broad, this is not your shoe and the next entry is. It also sits at the mid-range tier rather than the budget end, so if this is your first waterproof pair and you are not sure you will use it much, the budget pick makes more sense.
Best for Wide Feet: KEEN Targhee 4 Low WP
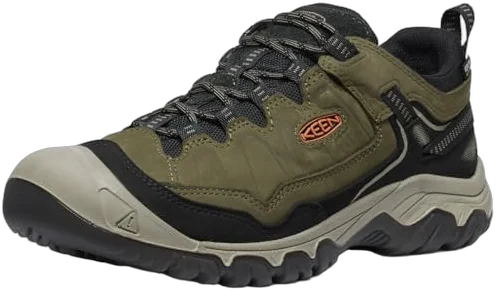
Who it is for: broad forefoot, high instep, or anyone who has spent years sizing up to buy width and paying for it with a sloppy heel. A wide last is a different fix from a bigger size, and once you have hiked in one the difference is not subtle.
The Targhee 4 also happens to be the cleanest example in this guide of the membrane point from earlier. KEEN.DRY is not GORE-TEX, and it is not trying to be. It is KEEN’s own laminate, the shoe is genuinely waterproof, and the absence of a licensed logo on the tongue changes nothing about whether your feet stay dry. If your fit problem goes past what a factory-wide shoe solves, we covered when a wide last still isn’t roomy enough separately.
What it does worse: it is heavier than the Katabatic LT and it feels it after a long day. The Targhee is also a chunky shoe visually, which matters to some buyers and not at all to others.
Best Budget: Merrell Moab 3 Waterproof Low
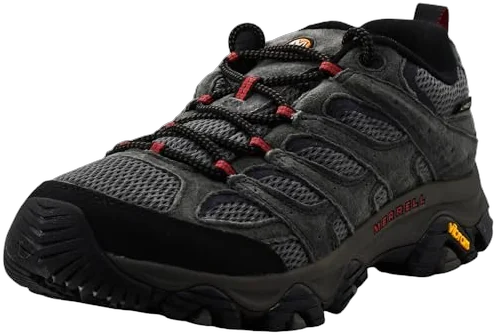
Who it is for: first waterproof pair, or a hiker who wants a wet-weather shoe without committing premium money to a category they might use twenty days a year. It is the best value pick in this guide, and the shoe to buy if you are running the two-pair strategy, since a budget-tier pair twice over is easier to justify than one shoe from the top of the range.
There is a second reason this pick sits here. The Moab 3 exists in a waterproof version and a mesh version built on the same last with the same outsole, which means you can run the do-I-need-waterproof decision from the earlier section against a genuine one-to-one comparison instead of a guess.
What it does worse: it is heavier and softer underfoot than the Katabatic LT, and the softness shows up under a pack. Upper durability over high mileage is also behind the pricier options here. For twenty to forty days a year of general hiking, none of that will bother you.
Best Under a Loaded Pack: Oboz Sawtooth X Low B-DRY
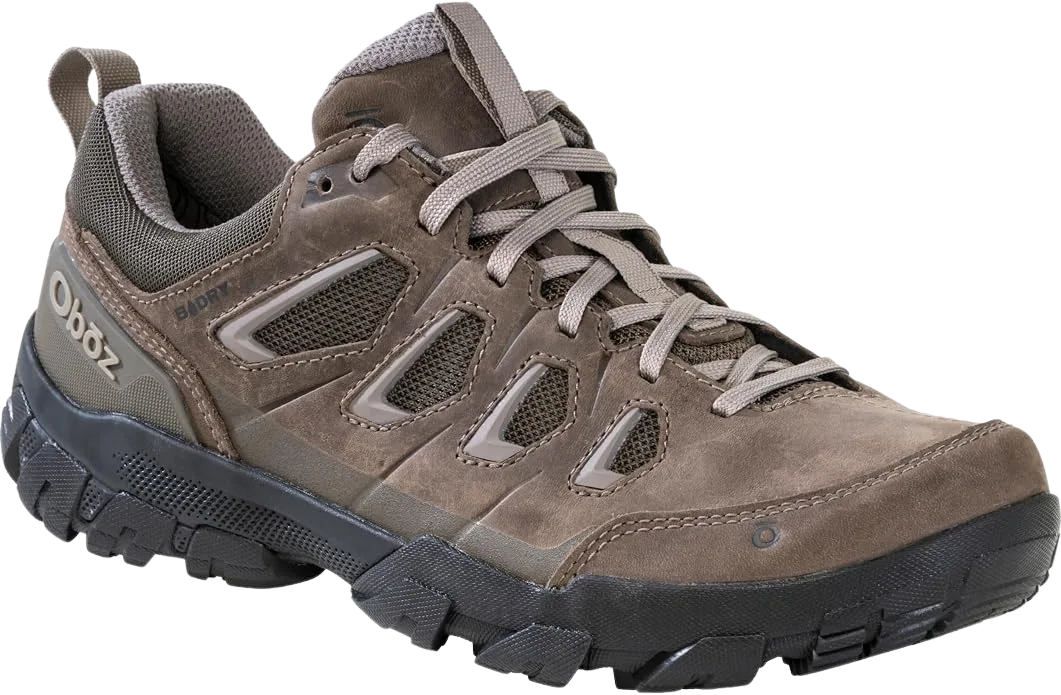
Who it is for: backpackers, and day hikers who carry more than most. The variable here is midsole firmness, not waterproofing. A soft midsole feels wonderful in the store and bottoms out under thirty-five pounds, at which point the shoe stops protecting your foot from the rock underneath it no matter how dry the inside stays.
That failure mode is the reason this category exists at all, and it is the same reason we keep a separate list of shoes built to hold up under a full pack for readers whose real question is about backpacking rather than about waterproofing.
What it does worse: the firmness that makes it work under load makes it less pleasant on a casual three-mile walk. If you never carry a pack, buy something softer and enjoy your life.
Best Lightweight: Danner Trail 2650 GTX
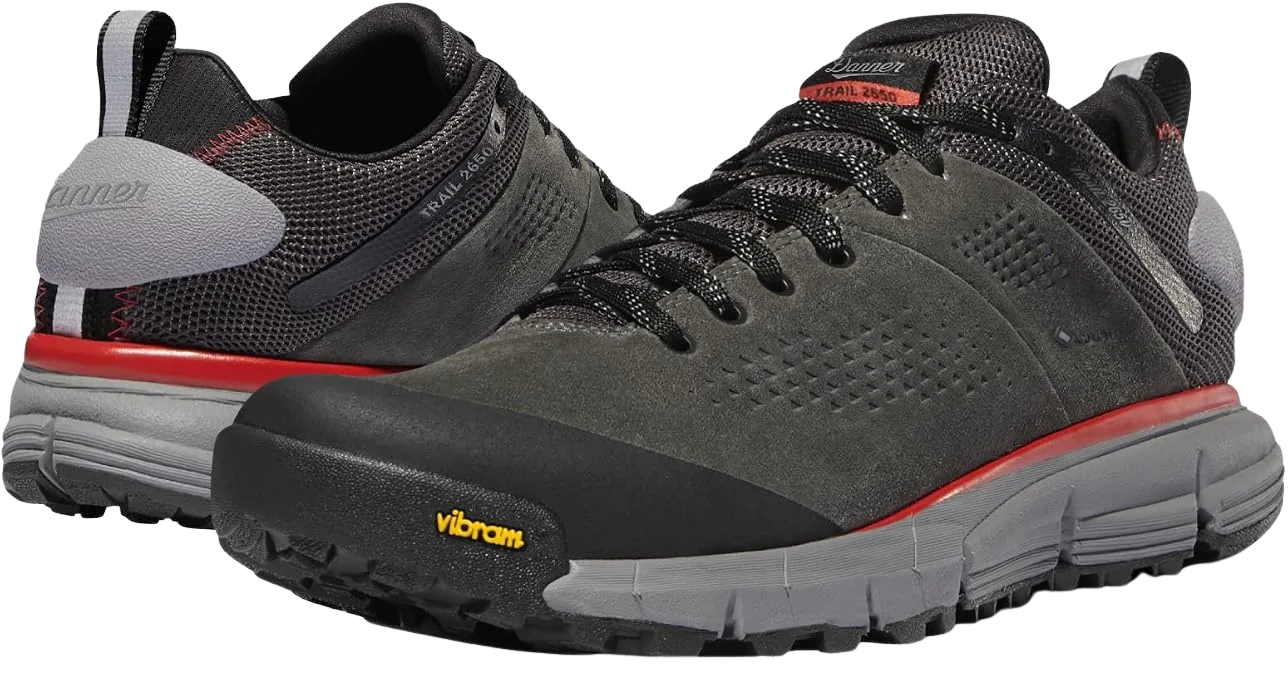
Who it is for: fast hikers, and anyone who tried GORE-TEX a decade ago, disliked how heavy and hot it felt, and wrote off the whole category. That reaction was reasonable at the time. It is a reaction to a shoe that no longer exists, and this is the pick that demonstrates why.
What it does worse: the lightweight construction trades durability over high mileage against a heavier shoe, and the fit runs on the narrow side of average. It is also the premium option in this list.
Notice that four different membranes appear across these five picks: GORE-TEX, KEEN.DRY, Merrell Dry, and B-DRY. That spread is deliberate. Rank these shoes by fit and midsole, then check that the membrane box is ticked. Ranking them by membrane brand first is how people end up in a shoe that keeps water out and hurts.
What PFAS-Free Waterproofing Actually Costs You
PFAS-free has become a sticker, and stickers are cheap. The useful version of this conversation is short: here is what the chemical did, here is the name of what replaced it, here is how you check the label instead of trusting the adjective, and here is the one real thing you give up.
What PFAS Are and Which Part of the Shoe They Were In
PFAS stands for per- and polyfluoroalkyl substances, the group commonly called forever chemicals. They have been used since the 1940s in rain gear, footwear, and ski wax, because fluorinated chemistry repels both water and oil better than anything else discovered since. The problem is the same property that makes them useful: they do not break down. They persist in the environment and accumulate in human tissue, and the EPA’s PFAS program now covers hazardous substance designation and drinking water limits.
Here is the distinction almost nobody draws, and it is the one that makes the rest of this section usable. The DWR is the outer coating that makes water bead on the fabric. The membrane is the inner film that blocks liquid water. Both of them could contain PFAS, they come from different suppliers, and they get replaced independently. A shoe can be half converted, with a PFC-free membrane and a fluorinated DWR still on the outside, or the reverse.
How to Verify a PFAS-Free Claim Before You Buy
Look for the membrane’s name, not the adjective on the box. That is the whole method, and it works because membrane names are specific and trackable while “eco” and “PFAS-free” printed on a hangtag are not.
The names worth knowing: GORE-TEX ePE, launched in fall 2022, is the PFC-free generation of the most common ePTFE membrane replacement in outdoor footwear. Patagonia’s H2No and Helly Hansen’s LIFA Infinity are the equivalents in their own product lines. Nikwax treatments are water-based and PFC-free, which matters for the maintenance section coming up next.
Brand policy dates give you a second check when the tongue label is ambiguous. REI banned PFAS in its apparel starting in 2024. Patagonia states that since spring 2025, no new membrane or repellent finish uses intentionally added PFAS. Those are dated, public, checkable positions rather than adjectives. If a brand cannot point you to something equivalent, treat the sticker as marketing, and note that the same waterproof-versus-water-resistant line shows up in rain pants, where the verification method transfers directly.
The One Thing You Actually Give Up
Honest accounting, because the marketing on both sides of this is loud. Gore says ePE is lighter and stronger than the membrane it replaced. Independent testing so far reports comparable performance, while openly admitting there is a shortage of head-to-head comparisons, so the confident claims in either direction are running ahead of the evidence.
The documented weak point of fluorine-free DWR is not repelling water. It is repelling oils and grease, which is a genuinely harder chemical problem, plus a somewhat shorter service life on the coating itself. Translated into what you will actually notice: your shoes will pick up a greasy mark more easily, and you will need DWR reapplication more often than you would have a decade ago.
That is a maintenance change — not a worse shoe. Which brings us to the part of this guide most likely to save you money.
Keeping the Waterproofing Working
This is the section that saves you the price of the shoe you were about to replace. The failure is visible in five seconds with a water bottle, and the fix is a small fraction of a new pair. Almost nobody does it, which is exactly why “my waterproof shoes stopped working after one season” is one of the most common complaints in the category.
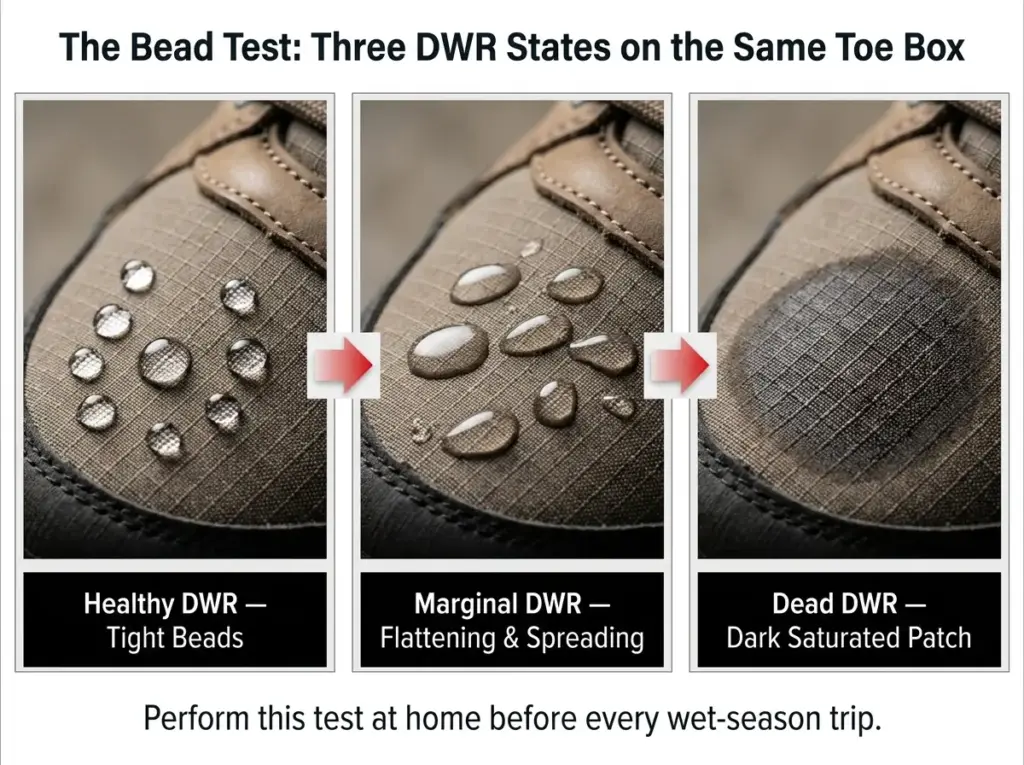
The Five-Second Bead Test
Pour a little water on the toe box and watch what it does.
If the water forms beads that sit up and roll off when you tilt the shoe, the DWR is alive and the shoe is fine. If the water spreads flat and soaks into the fabric, leaving a dark patch, the fabric is wetting out and the coating is gone. That is the entire diagnostic. It takes five seconds, it requires nothing you do not already own, and it tells you the single most useful thing about the state of your shoes.
The critical piece of interpretation: wetting out does not mean water is coming through. The membrane underneath is very probably intact and still blocking liquid water. What wetting out ends is breathability, because a saturated outer fabric has no dry surface for vapor to escape into, and the shoe gains weight while it happens.
So the shoe feels like it is leaking when it is not. The inside gets damp because your own vapor stopped escaping, the owner concludes the membrane failed, and a perfectly good pair of shoes gets replaced over a coating you could have renewed at home. That is a whole purchase cycle driven by a maintenance step nobody mentions at the register.
When to Reproof: a Schedule You’ll Actually Follow
Calendar-based maintenance schedules do not survive contact with real life, so here is a trigger-based one instead.
- Run the bead test every four to six outings.
- Run it after any hike with sustained rain or deep mud, regardless of the count.
- Reapply when the test fails, not on a date.
Set expectations on the first one: factory DWR typically starts fading after a couple of real outings, which is far earlier than most owners assume. New shoes are not exempt, and the first failed bead test often comes in the first month of ownership rather than the second season.
How to Reproof Without Wrecking Them
Three steps, in this order, and the order matters.
- Clean the shoes first. Dirt and trail grime physically block the treatment from bonding to the fabric. Reproofing over a dirty upper wastes the product and leaves you with patchy coverage.
- Apply to a damp shoe with a water-based treatment. Water-based products need the fabric wet to spread and penetrate evenly. This is the step people skip, and it is the difference between an even coating and streaks.
- Let them dry a full 24 hours before wearing them. Not overnight in a hurry before an early start. A full day.
Which product depends on your upper, and most shoes in this guide are mixed leather and textile rather than one or the other. We compared how wax and spray reproofing compare on different uppers in more depth, because a full-grain leather boot and a mesh-and-nubuck low-cut want genuinely different treatments.
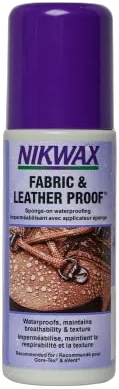
One bottle handles several rounds of reproofing across multiple pairs, which puts the running cost of keeping a waterproof shoe waterproof somewhere near trivial compared to replacing it. The reason nobody does this is not cost. It is that nobody tells you it is a thing.
The Short Version
Waterproof is a season, not an upgrade. Shoulder season, mud, and cold rain earn it. July in a dry climate does not, and buying a membrane for July is the most common wrong purchase in this category.
Your feet get wet from the inside more often than from the outside, and no membrane on the market fixes that. Dry camp socks every night, shoes off at breaks, and merino on damp days do more for your feet than any shoe you can buy.
The shoe you already own stays waterproof only as long as the coating on the outside does. Five-second bead test, water-based treatment on a damp shoe, twenty-four hours to dry, done.
Before you shop at all, go run the bead test on the shoes in your closet. A good half of the people who came here for a new pair need a bottle of reproofer and a dry pair of camp socks instead, and it takes five seconds to find out which group you are in.
Frequently Asked Questions
01Why do my feet still get wet in waterproof hiking shoes?
Almost always because the water came from the inside. A waterproof membrane can only move water as vapor, and a hiking pace produces sweat far faster than any membrane can push vapor out of a closed shoe. The other cause is a dead DWR coating, which stops the upper breathing and lets condensation build.
02How long do waterproof hiking shoes stay waterproof?
The membrane usually outlasts the shoe, but the water-repellent coating on the outside starts fading after a couple of real outings. Test it by pouring water on the toe box: beads that roll off mean it is fine, water that spreads and soaks in means it is time to reproof, which costs a fraction of a new pair.
03Are waterproof hiking shoes worth it for summer hiking?
For most summer hiking in a dry climate, no. A mesh shoe runs cooler and dries in hours instead of days. The best waterproof hiking shoes earn their place in shoulder season, mud, slush, wet morning grass and temperatures below roughly 60 °F, and hikers who do both are usually better off with two cheaper pairs.
04Can women wear men’s hiking shoes?
They can, but the fit usually fails in one specific place. Women’s feet average a narrower heel cup relative to the forefoot and the shoe is built on a lower-volume last, so a men’s shoe sized down leaves the heel loose. That shows up as heel lift on climbs and blisters around mile five, not in the store.
05Do waterproof hiking shoes work for stream crossings?
Only for crossings that stay below the collar. One step deeper and the shoe fills, and the same construction that kept water out now keeps it in. A flooded waterproof shoe can take days to dry while a mesh shoe takes hours, so on routes with frequent deep fords, drainage beats resistance.
Risk Disclaimer: Hiking, trekking, backpacking, and all related outdoor activities involve inherent
risks which may result in serious injury, illness, or death. The information provided on The Hiking Tribe is for
educational and informational purposes only. While we strive for accuracy, information on trails, gear, techniques,
and safety is not a substitute for your own best judgment and thorough preparation. Trail conditions, weather, and
other environmental factors change rapidly and may differ from what is described on this site. Always check with
official sources like park services for the most current alerts and conditions. Never undertake a hike beyond your
abilities and always be prepared for the unexpected. By using this website, you agree that you are solely
responsible for your own safety. Any reliance you place on our content is strictly at your own risk, and you assume
all liability for your actions and decisions in the outdoors. The Hiking Tribe and its authors will not be held
liable for any injury, damage, or loss sustained in connection with the use of the information herein.
Affiliate Disclosure: We are a participant in the Amazon Services LLC Associates Program, an
affiliate advertising program designed to provide a means for us to earn advertising fees by advertising and linking
to Amazon.com. As an Amazon Associate, we earn from qualifying purchases. We are also an official affiliate partner
of Black Diamond Equipment via the AvantLink network. If you click on a Black Diamond affiliate link and make a
purchase, we may earn a commission at no additional cost to you. We also participate in other affiliate programs and
may receive a commission on products purchased through our links. Additional terms are found in the terms of
service.