In this article
The most important structural part of your hiking boot is one you’ll never see, never touch, and probably never think about. It’s buried between two layers of the sole, and it’s the reason one boot edges across a steep rocky traverse while another folds like a wet sock the second you load a 40-pound pack. I’ve hiked in everything from featherweight trail runners to full-on mountaineering boots, and this one hidden component explains why each pair felt right or completely wrong underfoot. By the end of this, you’ll know which shank material, length, and stiffness your terrain actually calls for, and why your trail runner isn’t doing what you think it’s doing.
What Is a Boot Shank

Pick up a hiking boot and try to bend it in half. It resists. Pick up a running shoe and do the same thing, and it folds with no fight at all. That difference in your hands is mostly down to one part you can’t see: the boot shank.
The Hidden Layer Between Your Foot and the Ground
The shank is a flat, semi-rigid insert that sits between the midsole foam above and the outsole rubber below. It’s thin, usually 3 to 5 mm according to REI’s boot construction breakdown, and depending on the boot it runs anywhere from the heel to the arch, or the full length of the sole.
You will never see it on a boot you buy off the shelf because it’s permanently embedded in the sole stack. A cobbler resoling a worn pair sometimes has to cut the sole open just to confirm the shank is still in one piece. That’s how buried it is.
What a Shank Is NOT
This is where a lot of confusion starts, so let’s clear the deck. The shank is not the insole, the removable footbed you stand on and can pull out to wash. It’s not the outsole, the lugged rubber that grips the dirt. It’s not the midsole, the squishy foam that cushions each step.
The shank is the purely structural piece sandwiched between the last two, and it does no cushioning at all. Its whole job is to control how the sole behaves under load. If you want the full picture of how these pieces fit together, this complete breakdown of every hiking boot layer walks through the entire stack from footbed to lug.
Why the Shank Is Invisible by Design
Manufacturers build the shank in permanently because it’s a load-bearing part, not a comfort part you’d want to swap. The downside is that a shank is only as good as the boot around it. When a shank cracks or peels away from the sole, you can’t replace it on its own, the boot is either resoled or retired.
And you’ll usually know it failed before you know why: a once-stiff boot suddenly feels floppy underfoot, and you hear a faint creak on every step. Hikers call that the shank squeak, and it means the stiffener has given up.
What a Boot Shank Does
Stand on a sharp exposed root at mile 11 with 35 pounds on your back, and you feel the shank doing its job in your bones. No shank, and the root bends your foot right along with it. Good shank, and your foot stays flat while the root rolls harmlessly underneath. The part does three real things on the trail, and none of them is cushioning.
Torsional Rigidity — The Reason Your Foot Doesn’t Twist
The shank is the boot’s chassis. On angled rock or a side-hill traverse, the outsole wants to twist relative to your foot, and torsional rigidity is the resistance that stops it. Without that resistance, the sole wrings out like a wet towel and dumps the force straight into your ankle and knee instead of holding it in the structure.
This is the shank’s headline function, plain and simple. It’s also why a stiff sole protects your ankles more than a tall boot collar ever will, something I get into more in why torsional rigidity provides more real ankle protection than high-top height alone.
Stone Bruise Protection and Load Transfer
Step on a pointed rock and the force concentrates on one spot of the sole, then shoots straight up into the soft fat pad under your arch. Do that enough times and you get a stone bruise, a deep ache that lingers for days.
The shank spreads that point load across the whole midfoot, like a beam distributing weight on a bridge. Under a heavy pack this matters more, not less, because every pound on your back multiplies the force going through your sole on each step. If you’re trying to match that stiffness to the kind of ground you actually hike, these boot stiffness ratings by terrain type break it down by trail class.
Arch Support That Doesn’t Compress Out
Here’s the part nobody mentions. EVA midsole foam wears out, it packs down and loses its loft over a few hundred miles. The shank underneath doesn’t.
On a multi-day trip, it keeps delivering the same arch support on day five that it gave you on day one, even as the cushion above it fades. That’s a big reason a real backpacking boot holds its structure over the long haul in a way a trail runner can’t match. The foam softens. The shank stays put.
Weight on your feet costs you four to six times more energy than the same weight carried on your back. So a stiff shank isn’t just about protection, it’s about letting your boot do the load-spreading work instead of your arches. On long-mileage days, that’s the difference between feet that ache by lunch and feet that hold up to camp.
Shank Materials Compared
The gear shop hands you the boot. It almost never tells you what the shank is made of, and that material quietly decides whether your feet stay warm in January, how long the stiffener lasts, and whether the boot can ever take a crampon. There are four materials you’ll actually run into, plus steel as the old-school holdout.
Nylon and TPU — The Trail Workhorse
Most day hiking and light backpacking boots run a nylon or thermoplastic polyurethane (TPU) shank. These have a bit of memory, they flex slightly with your natural gait and then spring back, so you get arch support without the boot fighting your stride.
They’re light, affordable, and plenty for trail up to easy off-trail scrambling. What they won’t do is edge on technical rock or hold a serious crampon. You’ll find them in boots like the Merrell Moab and KEEN Targhee, the honest mid-range workhorses.
Fiberglass and Kevlar — The Backpacker’s Middle Ground
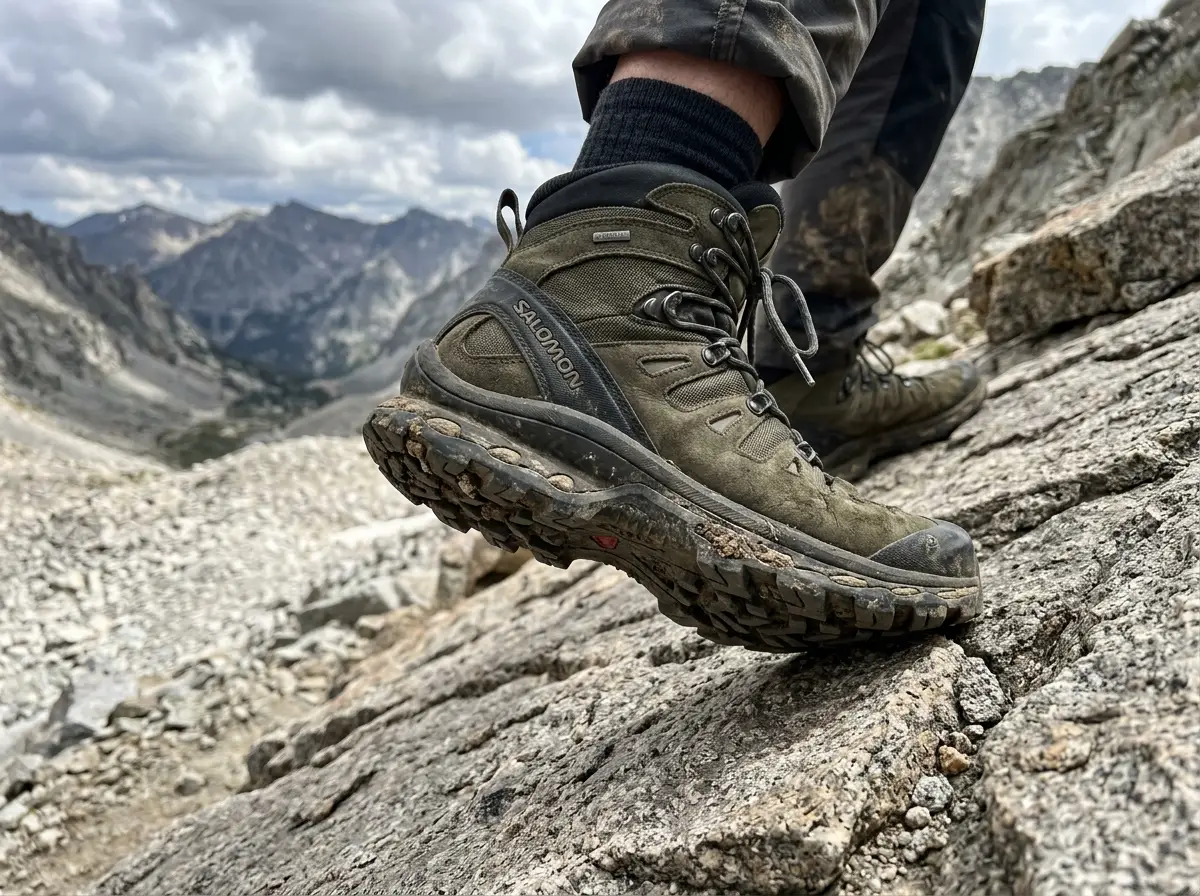
Step up to a fiberglass shank and you get noticeably more stiffness than nylon at far less weight than steel. That’s the standard in real multi-day backpacking boots. Kevlar composite blends add abrasion resistance on top of the stiffness, and neither material throws away heat the way steel does. This is the sweet spot for trips hauling 30 to 50 pounds across mixed ground, the kind of shank you’ll find in a Lowa Renegade or Salomon Quest.
Carbon Fiber — The Mountain Weight Champion
Carbon fiber delivers the best stiffness-to-weight ratio of any shank material, period. It’s the standard in technical mountaineering boots where you need a fully rigid sole without the weight penalty steel would bring. La Sportiva and Scarpa build their high-end lines around it. You pay for it, but the rigidity is permanent for the life of the boot.
Steel — And the Cold Bridge Problem
Steel gives you maximum stiffness for minimum cost, which is exactly why it still dominates work boots. For hiking, it carries one quiet flaw most buyers never hear about: thermal conductivity. Steel pulls cold straight up from frozen ground, through the shank, toward the plantar artery that feeds your foot.
In genuinely cold conditions, a steel shank can chill your feet faster than a composite one would, and that detail is never printed on the box. It’s the same logic as choosing an upper material for how it handles moisture and temperature, the way upper material affects breathability the same way shank material affects thermal performance. For winter hiking, a fiberglass, Kevlar, or nylon shank is simply warmer, which is why most modern hiking boots have walked away from steel and left it to the job site.
Full, 3/4, and Half Shank Lengths
Grab a hiking boot and a trail runner and flex both at the ball of the foot. The boot resists, the runner doesn’t, and a big part of that comes down to how far the shank reaches. Length sets the flex point, and the flex point sets how the boot moves under you on the trail.
Half Shank — Where Most Day Hiking Boots Land
A half shank runs from the heel to about the arch and leaves the forefoot free to bend. This is the most common setup in day hiking boots, and for good reason: it gives you arch support and some torsional resistance while still letting your foot roll through a natural stride on groomed trail. It won’t handle technical edging or an automatic crampon, but for most hikers on most days, it’s exactly enough boot.
Three-Quarter Shank — Backpacking and B1 Territory
A 3/4 shank stretches from the heel to just behind the ball of the foot. You get more torsional rigidity than a half shank while keeping a little forefoot flex, which is the balance you want for backpacking with 30 to 40 pounds on mixed terrain.
Most B1-rated boots, the ones that pair with strap-on crampons, live right here. If you’re trying to figure out where shank length fits into the bigger boot decision, our full hiking boot selection guide, which covers shank length as part of overall boot category, pulls the whole choice together.
Full Shank — Technical Ground and B2/B3 Boots
A full shank runs heel to toe and turns the entire sole into one rigid platform. Your foot can’t flex anywhere, which is the whole point: it’s built for edging on small rock holds, front-pointing up steep ice, and driving force through an automatic crampon.
Full shanks are required for B2 and B3 boots. The trade-off is real, though. On flat trail that rigid platform costs you energy, because your foot does all the flexing manually, which is exactly why mountaineering boots feel exhausting on a long flat approach.
Matching Shank Stiffness to Your Hiking (and When No Shank Is Right)
Here’s the mistake I see more than any other: people buy a boot based on how serious it looks, not how serious the trail is. A stiff shank on flat, smooth trail doesn’t help you. It fights your natural gait, lands you on your heel, and tires out your calves for nothing.
The stiffness only earns its keep when the ground gets rough enough to demand it. So let’s match the part to the job.
The Pack Weight Decision
Pack weight is the biggest single lever here, bigger than trail rating alone. Under 25 pounds on maintained trail, a trail runner or light shoe is honestly the better tool, you want a rock plate for puncture protection, not a structural shank. From 25 to 35 pounds on mixed terrain, a semi-rigid shank, nylon or TPU in a half to 3/4 length, keeps your feet from fatiguing as the load amplifies every step.
Over 35 pounds on rough ground, you want a proper backpacking boot with a fiberglass or Kevlar shank, at least 3/4 length. And technical terrain overrides all of it, full shank minimum no matter what the pack weighs. Pack weight also drives whether you need a taller boot at all, which is why pack weight also determines whether you need ankle height is worth reading alongside this.
The Terrain Ladder
Terrain class is the other axis. Class 1, maintained trail with minimal scrambling, a flexible shank is fine, chase cushion and fit instead. Class 2, off-trail, rocky, rooted, steeper pitches, you want a semi-rigid shank for torsional support.
Class 3, hands-on scrambling and edging on small holds, a stiff shank is non-negotiable, because this is where you balance your full weight on rock edges less than an inch wide. Class 4 and up, technical climbing, means a B2 or B3 boot with a full shank. Knowing where the line falls between a hiking boot and the next category up is half the battle, and where hiking boots end and mountaineering boots begin draws that line clearly.
When No Shank Is the Right Answer
This is the part the outdoor industry won’t say out loud, because it doesn’t sell premium boots. For most weekend hikers on maintained trail with a pack under 20 pounds, a shankless trail runner beats a stiff boot. Your foot moves naturally, your stabilizing muscles actually fire and get stronger over time, and the pack is light enough that you don’t need a shank spreading the load.
The classic error is buying a stiffer boot than the trail demands, then wondering why your feet ache on the flat approach to the one interesting section. The shank does honest work on rough ground. On smooth trail, it’s just friction you’re paying for. If easier trail is most of your hiking, it’s worth thinking about moving toward minimalist footwear on easy terrain instead of more boot.
Match your shank stiffness to the hardest terrain on the trip, not the average. The flat approach won’t punish you in a stiff boot, but a missing shank on the technical section absolutely will. And if you’re stuck in stiff boots on a long flat stretch, shorten your stride to land mid-foot instead of slamming your heel. Your calves will thank you at camp.
Shank vs. Rock Plate and Why Your Trail Runner Isn’t Doing What You Think
Every trail runner owner has said some version of this: my shoe is stiff enough, it’s got a rock plate. Then they roll an ankle on an off-camber rock or struggle to hold a line side-hilling across scree, and they can’t figure out why.
A shank and a rock plate sit in the same general spot in the sole, and you can’t see either one from the outside. But they do completely different jobs, and mixing them up is the most common gear misunderstanding I run into on the trail.
What a Rock Plate Actually Is
A rock plate is a thin, flexible TPU or nylon insert that sits roughly where a shank would, between the midsole and outsole. Its only job is puncture protection. When you step on a sharp rock or root, the plate spreads that point pressure across a wider area so the stone doesn’t bruise the soft tissue under your forefoot.
Here’s the catch: the rock plate flexes right along with your foot. It gives you zero torsional resistance, zero structural rigidity, zero load-bearing support. It stops bruises and nothing else.
What a Shank Actually Is (in Contrast)
The shank doesn’t flex with you, and that refusal to bend is the entire point. When your foot tries to twist or fold on uneven ground, the shank fights it. When a heavy pack drives force through your arch, the shank spreads that load across the whole midfoot. When you edge onto a rock ledge, the shank is the rigid platform you’re standing on.
Put simply: the rock plate stops bruises, the shank stops falls. Some boots, plenty of B1 models, carry both, a shank for structure and a rock plate for added stone protection. They complement each other. They are not the same thing.
The Real-World Test
You can feel the difference in about five seconds. Hold the toe of a trail runner in one hand and the heel in the other, then twist them in opposite directions. It folds easily, the rock plate does nothing to stop that.
Now do the same with a hiking boot. It resists hard, and that resistance is the shank. Some hikers own both and switch based on the day.
Others try to hike technical ground in trail runners and spend the whole hike wondering why their arches ache and their ankles keep rolling, the rock plate was never built for that work. The same twist holds up as a diagnostic later in a boot’s life too, the same press and twist tests that diagnose shank failure will tell you when a good boot has gone soft.
Do the twist test in the store, before you pay. Toe in one hand, heel in the other, twist opposite directions. A boot with a real shank pushes back hard. A trail runner with only a rock plate wrings out like a dish towel. Five seconds at the counter tells you more about a boot’s structure than any spec sheet on the wall.
Shank and Crampon Compatibility — the B-Rating System
This one catches people at the trailhead, the worst possible place to learn it. A hiker buys microspikes for a winter summit and finds out their trail runners won’t hold them. Or someone grabs strap-on crampons for a glacier day and discovers they won’t stay put on a soft-soled boot. Both are preventable with one piece of knowledge: your boot’s shank stiffness decides what you can strap to it.
The B-Rating System Explained
The B-rating runs from B0 to B3 and describes a boot’s sole rigidity for crampon use, set by UIAA safety standards. B0 is a flexible sole, no crampons. B1 is semi-rigid, a 3/4 shank, and takes strap-on C1 crampons, the hillwalking and microspike style.
B2 has a full shank plus a heel welt, the little protruding lip at the back, and takes semi-automatic C2 crampons. B3 has a full shank plus toe and heel welts and takes fully automatic C3 step-in bindings for technical ice.
If you want the deeper version of this, our full B0-B3 crampon compatibility guide walks through every pairing. For the broader boot-category context, REI’s hiking boot guide covers boot categories and their appropriate uses and lines up well with the rating system.
What This Means for Hikers (Not Mountaineers)
You don’t have to be a mountaineer for this to matter. Most hikers who want any winter traction need a B1 boot at minimum. Strap-on microspikes will technically clamp onto a trail runner, but a strap-on crampon with a heel lever needs a defined heel area that most trail runners just don’t have.
So if there’s any chance you’ll attach microspikes or crampons even once this winter, check the B-rating before you buy the boot. B1 is the entry point. A B0 trail runner with a C1 crampon is the kind of mismatch that works in theory and slides off in practice, which is the last thing you want on a frozen slope. If you’re still deciding which traction device you even need, microspikes vs crampons and when hikers actually need each sorts it out.
When to Think About B-Rating at the Gear Shop
Three moments to keep this in your back pocket. When a salesperson asks if you’ll use crampons and you say maybe, for some winter hikes, ask straight up for B1-rated boots. When you’re torn between two similar backpacking boots and one is B1, that rating is a real tiebreaker for four-season use.
And when you already own boots and want to add crampons, look up the boot’s B-rating before you buy the crampon, because a mismatched B and C pairing is the leading cause of crampons popping off mid-step. One spec, checked once, saves you a bad surprise on the snow.
If you think you’ll ever want winter traction with a lever-style attachment, buy a B1 boot from the start. Boots last years, and a single purchase decision locks in your crampon options for the boot’s whole life. Going B1 instead of B0 costs you almost nothing in comfort on summer trail and opens up four-season use down the road.
The Bottom Line on Boot Shanks
The shank is your boot’s chassis. Its job is torsional rigidity and load transfer, not cushion, and understanding that one fact separates a smart boot purchase from one made on looks and marketing.
Match shank stiffness to your hardest terrain and your heaviest pack, not to how rugged the boot appears on the shelf. On smooth trail with a light load, no shank at all is often the right call, and there’s nothing soft about admitting it.
Check your boot’s B-rating before you buy any winter traction device. That single spec tells you exactly which crampons will lock on and stay on.
Next time you’re at the gear shop, grab two boots and run the twist test. The one that fights back is protecting you in ways the softer one never will, right where it actually counts.
Frequently Asked Questions
01What is the difference between a full shank and a half shank in hiking boots?
A full shank runs heel to toe and makes the whole sole rigid, used in technical and mountaineering boots for edging and crampons. A half shank runs only from the heel to the arch, letting the forefoot flex naturally, which is standard in day hiking boots. The flex point sets both trail feel and crampon compatibility.
02Do trail running shoes have shanks?
Most trail runners do not have shanks. They have rock plates, thin flexible puncture shields that block sharp rocks but add no torsional rigidity. A rock plate and a shank sit in the same area of the sole but do different jobs. A trail runner flexes and twists freely; a shanked boot resists both.
03Is a steel shank better than a nylon shank for hiking?
For most hiking, nylon and composite shanks beat steel. Steel gives maximum stiffness but conducts cold away from the foot, a real problem on winter hikes. Modern boots use fiberglass, Kevlar composite, or nylon because they match steel’s rigidity without the thermal bridge effect that chills your feet.
04What kind of shank do I need for backpacking with a heavy pack?
For packs over 30 to 35 pounds on mixed terrain, you want at least a 3/4-length fiberglass or Kevlar composite shank. That gives enough torsional rigidity to handle load-amplified step forces without fighting your gait on easy ground. Full-shank boots are overkill for most backpacking unless you cross technical terrain.
05Do I need a stiff-shanked boot to use crampons?
Yes. Boot rigidity, set by the B-rating system, decides which crampons you can safely use. B1 boots with a 3/4 or near-full shank are the minimum for strap-on crampons. B2 boots with a full shank and heel welt are needed for semi-automatic crampons. Trail runners cannot hold lever-style crampons.
Risk Disclaimer: Hiking, trekking, backpacking, and all related outdoor activities involve inherent
risks which may result in serious injury, illness, or death. The information provided on The Hiking Tribe is for
educational and informational purposes only. While we strive for accuracy, information on trails, gear, techniques,
and safety is not a substitute for your own best judgment and thorough preparation. Trail conditions, weather, and
other environmental factors change rapidly and may differ from what is described on this site. Always check with
official sources like park services for the most current alerts and conditions. Never undertake a hike beyond your
abilities and always be prepared for the unexpected. By using this website, you agree that you are solely
responsible for your own safety. Any reliance you place on our content is strictly at your own risk, and you assume
all liability for your actions and decisions in the outdoors. The Hiking Tribe and its authors will not be held
liable for any injury, damage, or loss sustained in connection with the use of the information herein.
Affiliate Disclosure: We are a participant in the Amazon Services LLC Associates Program, an
affiliate advertising program designed to provide a means for us to earn advertising fees by advertising and linking
to Amazon.com. As an Amazon Associate, we earn from qualifying purchases. We are also an official affiliate partner
of Black Diamond Equipment via the AvantLink network. If you click on a Black Diamond affiliate link and make a
purchase, we may earn a commission at no additional cost to you. We also participate in other affiliate programs and
may receive a commission on products purchased through our links. Additional terms are found in the terms of
service.