In this article
The box said Wide. Mile six says otherwise. That gap between a label and a last is the whole problem, because “wide” means an anatomical shape on one shelf and a marketing adjective on the next, and nothing on the packaging tells you which one you’re holding.
Lab caliper measurements put real numbers on that: two models both sold as wide can differ by a centimeter or more in actual toe box width. Here’s what genuinely wide means, how to size for it, and which low-cut hiking shoes for wide feet hold up when your foot is actually wide, plus the two fit problems a wider shoe alone will never solve.
Four picks plus one honest contrast case, sorted by the specific wide-foot problem each one answers.
| Pick | Best For | Why It’s Genuinely Wide |
|---|---|---|
| Altra Lone Peak 9 | Best overall | FootShape anatomical last across the entire standard size run, no separate wide SKU |
| La Sportiva Ultra Raptor II Wide | Technical terrain and loaded packs | Explicitly labeled Wide SKU with a reinforced heel cup |
| KEEN Targhee 4 Low WP | Best first pair | Signature roomy toe box shape, forgiving out of the box |
| Nortiv 8 Wide Toe Box Waterproof | Budget-friendly pick | Explicit wide toe box and waterproofing at the low end of the category |
| Oboz Sawtooth X Low B-DRY | The teaching contrast | Roomier midfoot than average, but not a labeled 2E or 4E last |
Why Hiking Shoes Run Narrow in the First Place
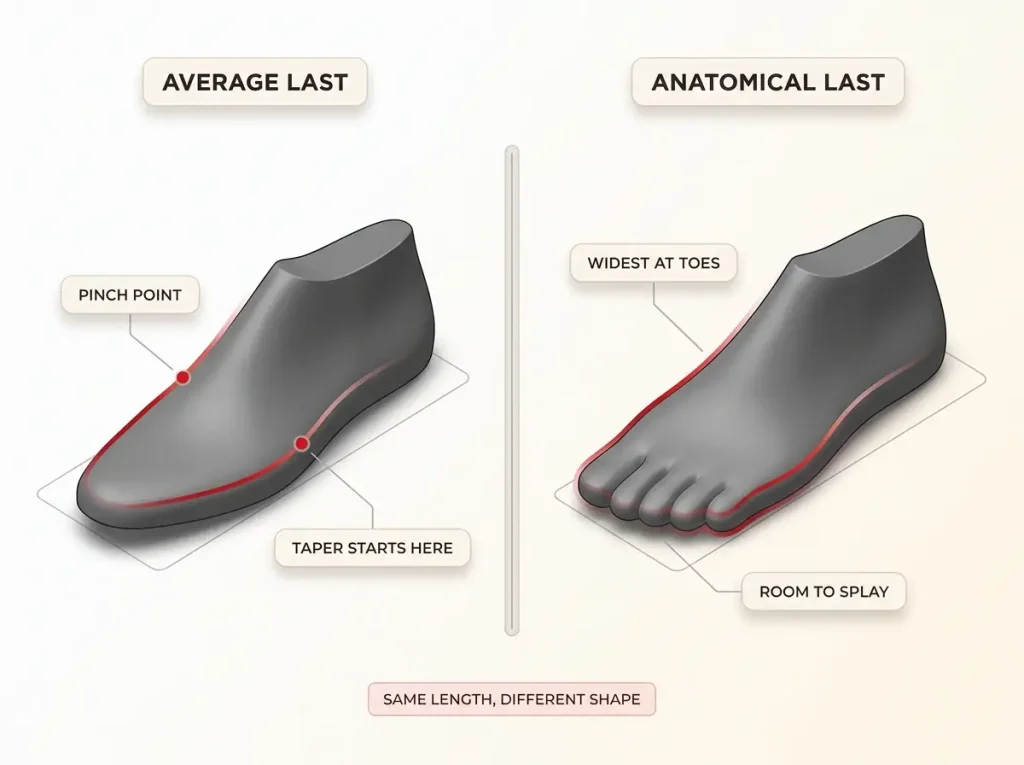
Every wide-footed hiker has stood in a shop and been told “that’s just how they run.” Nobody explains why they run that way. The answer is the shoe last, the foot-shaped form a shoe is built around, and most brands only ever cut one of them.
That last decides real width, not the upper. A soft mesh upper will stretch and bulge around a wide foot and feel like it’s giving you room, but the platform underneath keeps the same footprint it had on the shelf. Your foot spreads sideways over the edge of the midsole instead of sitting on it. If you want the engineering layer behind that, how a shoe’s midsole and last are actually built covers the construction side in detail.
Most brands design their one last around an average foot, then offer wide as an afterthought: a separate model number, a separate listing, sometimes only in one gender. That’s an inventory decision, not a design decision, and it shows up in how those shoes fit.
The economics behind it are dull and completely explain the outcome. Every extra width a brand offers multiplies its SKU count across every size and every colorway, and retailers have to stock all of it. Cutting one average last keeps the catalog small, and the hikers who don’t fit it are a rounding error on a spreadsheet.
There’s a second variable inside the last that almost nobody names, and it’s the reason two shoes with the same stated width can still feel different at the little toe. RunRepeat’s testing looks at how sharply the toe cap tapers in from the shoe’s widest point toward the tip. A generous platform with an aggressive taper still pinches the outside toe, because the width you measured sits behind the place your foot is actually complaining about.
That taper is also why “it fits everywhere except one spot” is such a common report. Width is not one number. It’s a shape that changes over the last two inches of the shoe, and only your foot can tell you where that shape stops working.
Two philosophies are worth naming, because once you can name them the whole wall of shoes sorts itself. Wide by design means the standard line is already built on an anatomical last that follows the natural foot shape, with the widest point at the toes. Altra and Topo Athletic work this way.
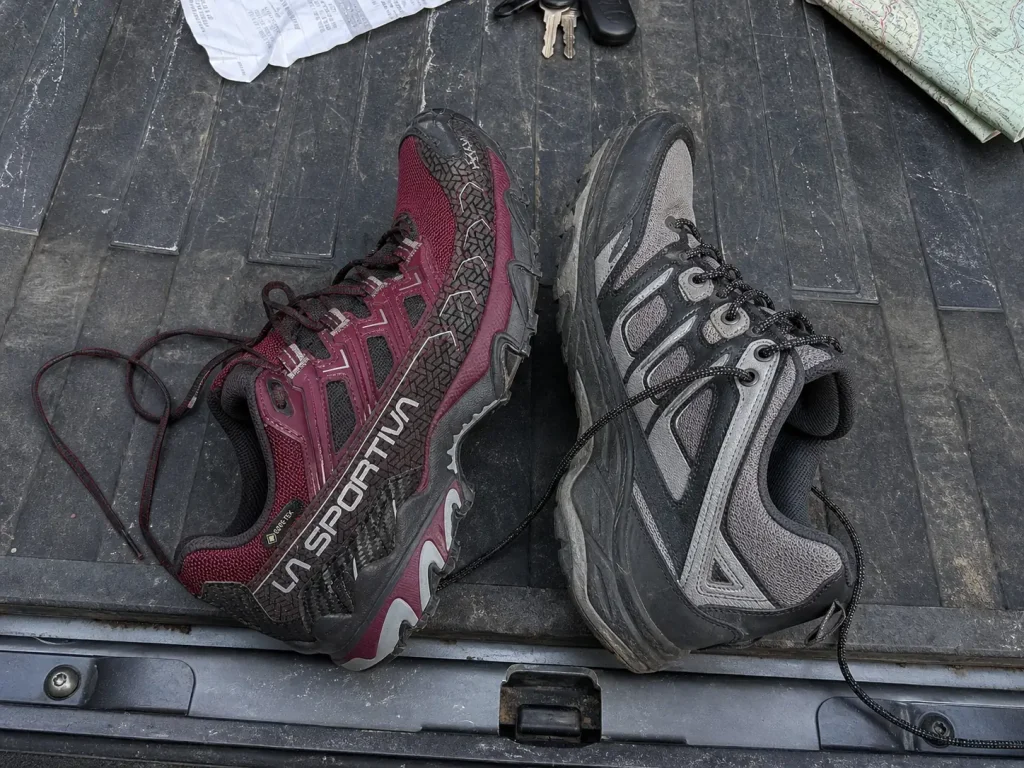
Wide as an add-on means a narrower base last with a specifically labeled Wide version sold alongside it. Merrell, La Sportiva and Salomon work this way.
The single most repeated mistake in fit threads follows directly from that split: buying the standard SKU of an add-on brand and waiting for it to break in wide. Break-in softens an upper. It does not widen a last. The shoe you’re wearing at mile 200 is the same shape it was in the store, just quieter about it.
This is also why two pairs from your own closet, same size, same category, can fit like different sports. You didn’t change. The form underneath changed.
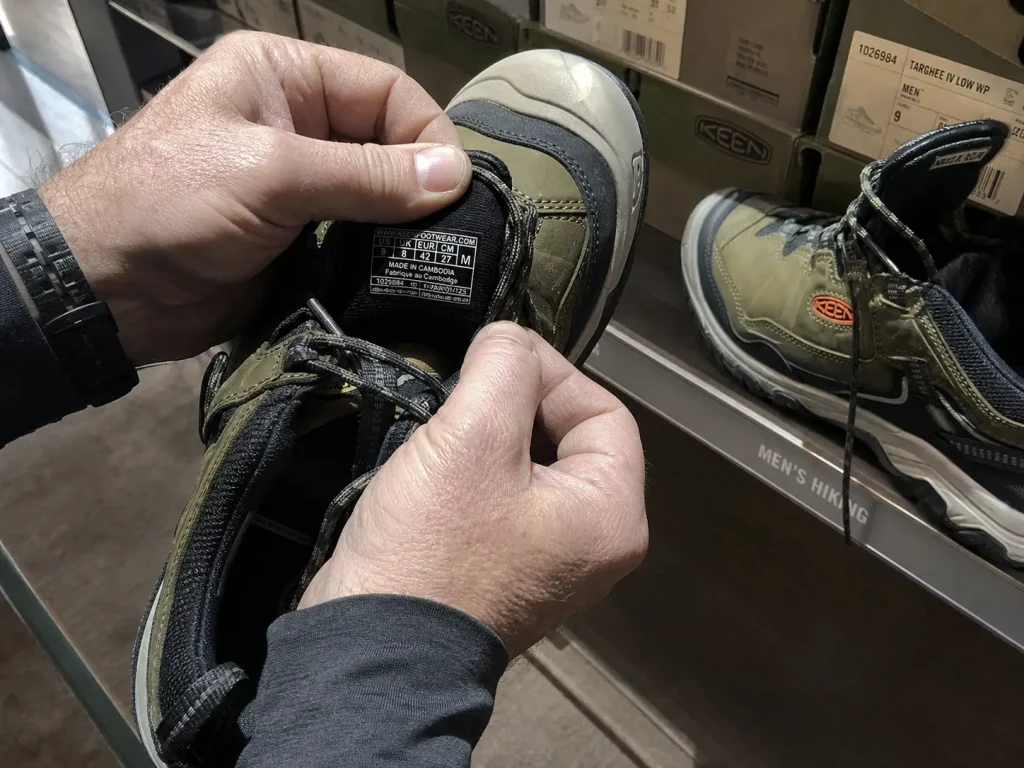
Stand on the insole. Pull it out of the shoe, put it on the floor, and step on it barefoot with your weight forward. If the ball of your foot hangs over the edge of that insole, the last is too narrow for you and no amount of lacing, stretching or breaking in will change it. It takes ten seconds and it settles the argument in the store.
Wide Fit vs Wide Toe Box, and Why the Difference Matters
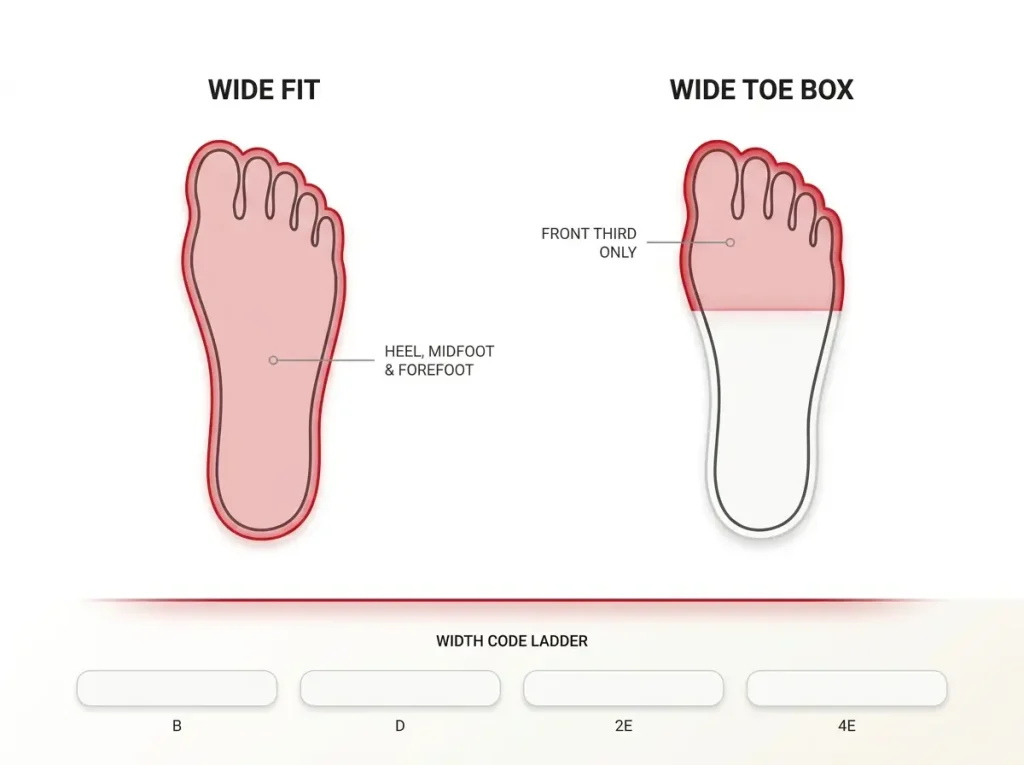
You have probably owned one of each without knowing it, and only one of them fixed anything. This is the section that explains why the wide shoe still crushed your midfoot.
A wide fit widens the entire shoe: heel, midfoot and forefoot together. A wide toe box widens the front third and leaves everything behind it alone. Two different problems, two different fixes, one word on the box covering both.
Diagnose yourself before you shop. If the pain is strictly at the toes and the ball of the foot, and the rest of the shoe feels fine, a roomier toe box may be all you need. If you feel pressure across the midfoot, or your foot visibly spills over the edge of the midsole when you stand up, you need a true wide last and a toe box alone will not rescue it.
The shoe width standards are simpler than they look. B is standard in women’s, D is standard in men’s and wide in women’s. A 2E width is wide in men’s, 4E is extra wide. A listing that says only “wide” with no width code attached is making a claim, not quoting a spec.
And labels are not measurements. RunRepeat’s caliper testing found toe box widths varying by 10mm or more between models both sold as wide, with the KEEN Targhee III measuring 106.4mm at its widest point. Two shoes, same adjective, a centimeter apart in the place that matters. There’s also volume you never see on a spec sheet: the toe bumper eats into that space too, and a thick rigid bumper can quietly take back a chunk of the width the listing promised.
The workaround the community already uses is reading reviews for two phrases: “true to width” and “runs narrow.” A dozen reviews with that shorthand in them will tell you more about a shoe’s actual cut than the product page ever will, because the people writing them measured with their feet.
What the Wrong Width Actually Does to Your Feet
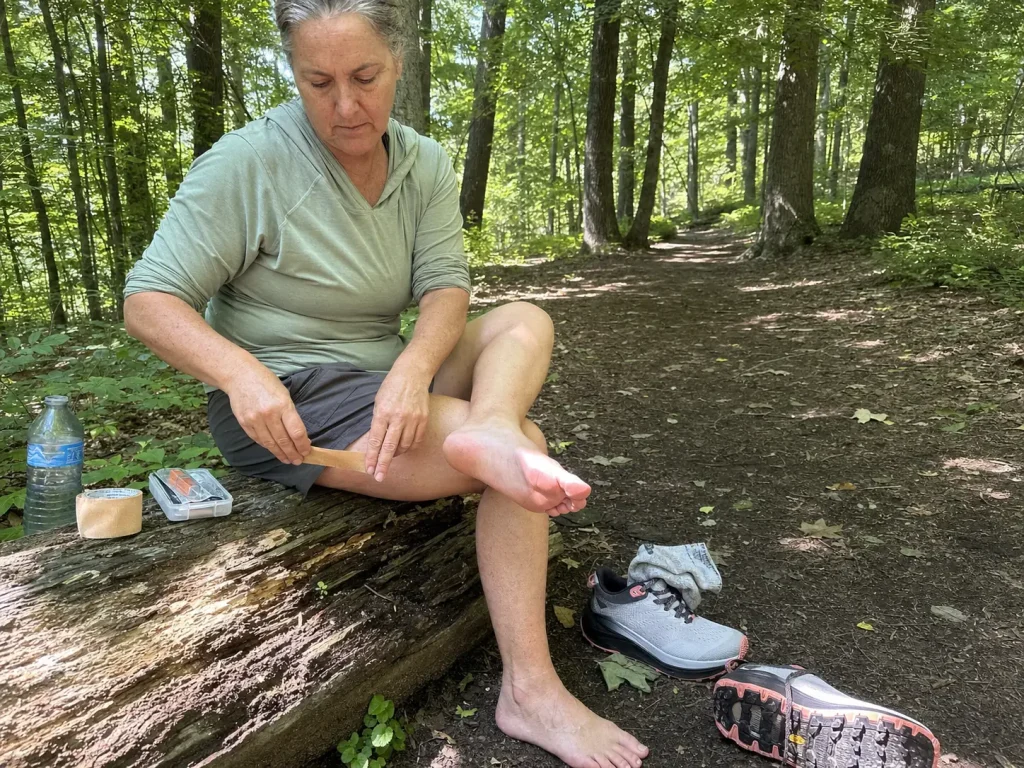
Most hikers blame the terrain, the mileage, or themselves. The honest version is that ill-fitting footwear does most of the damage before the trail gets a chance to. The American Hiking Society names ill-fitting footwear, not terrain, as the leading cause of trail blisters, alongside wet socks.
Blisters and hot spots come from movement and pressure, and both come from fit. A foot that’s compressed sideways doesn’t sit still; it shifts under load and rubs in the same square centimeter for hours.
Then there’s the story that turns up in every fit thread: the hiker who felt fine on the climb and lost a toenail on the way down. Black toenails are a length and width failure at once. The toes have room to slide forward on a steep descent and nothing holding the foot back, so they hit the front of the shoe a few thousand times before you reach the car.
Chronic pressure across a wide forefoot in a narrow last aggravates bunions and Morton’s neuroma, and a squeezed forefoot changes how you load the arch, which is how plantar fasciitis pain gets into the conversation. None of that is a toughness problem. It’s a geometry problem.
Learn the community term while you’re here. A hot spot is the warm, reddish pre-blister stage, and it’s the last moment a tape-and-liner-sock fix still works. Push past it and you’re managing a wound for the rest of the trip. If you’re already in that fight, toe socks are the other half of that fix, since they attack the rubbing between toes that a wide toe box alone leaves open.
Here’s the anti-sell part. None of this means you need a premium shoe. It means you need the right width. A budget-friendly shoe in your actual width beats a top-tier shoe in the wrong one, every single time, and it isn’t close.
How to Measure a Wide Foot and Size It Right
Everyone knows their shoe length. Almost nobody knows their width, which is exactly the number that decides whether this purchase works.
Measure width, not just length
The Brannock device at a shoe shop gives you both halves of the foot measurement, length and width. Most people only ever read the length off it, which is like checking the depth of a river and not the current. Ask for the width number and write it down.
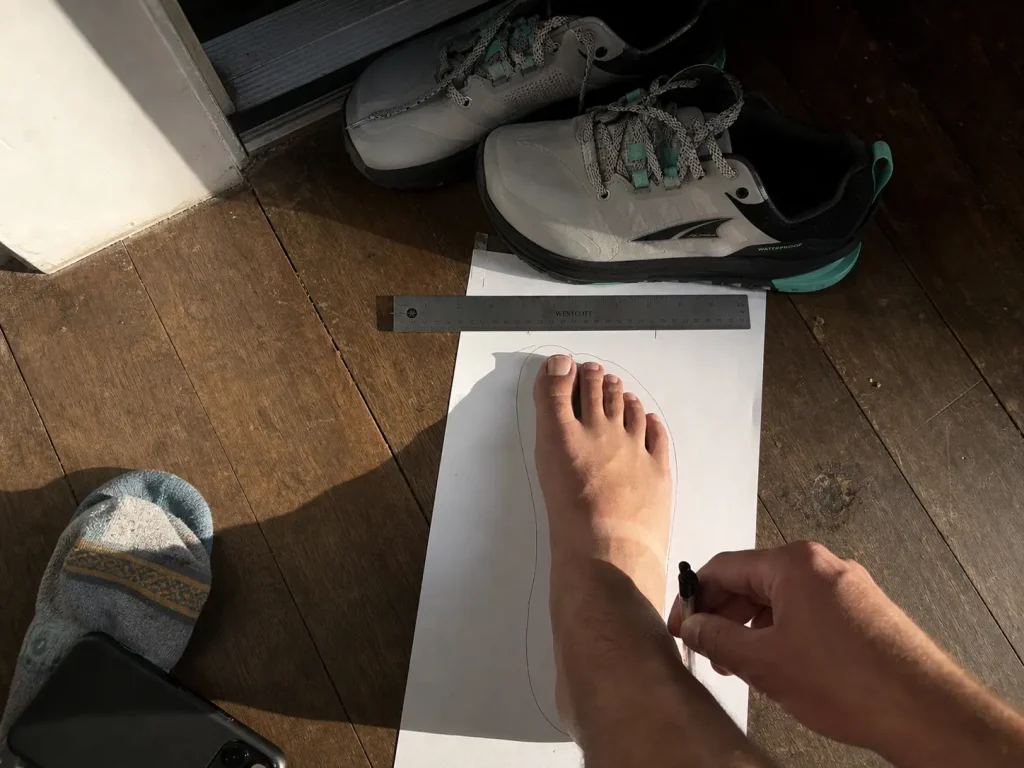
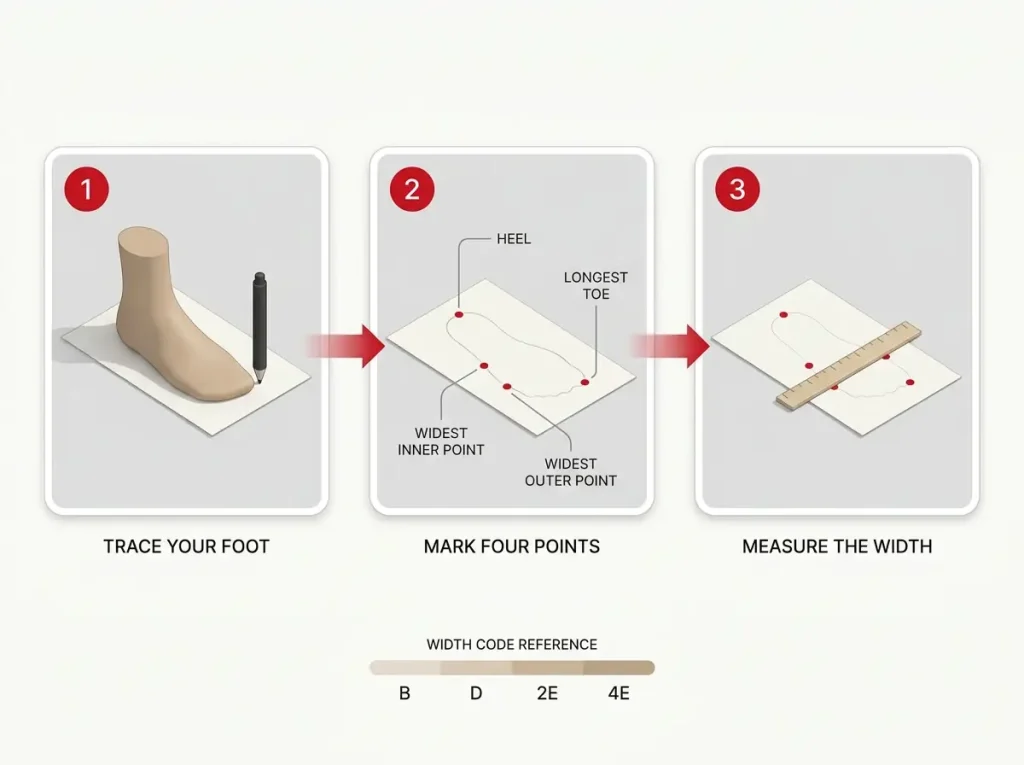
No shop nearby? Trace both feet on paper at home. Stand on the page with your weight on the foot, hold the pen vertical, and mark four points: back of the heel, tip of the longest toe, widest point on the inside, widest point on the outside.
Measure straight across between the two widest marks. That number is your forefoot width, and it’s the one brands are quietly failing you on.
Measure both feet and buy for the larger one. Asymmetry is normal, and it’s almost always the ignored foot that blisters. Measure standing, at the end of the day, which is when podiatrists recommend buying athletic shoes in the afternoon, when your feet are at their largest.
The thumb’s width rule and what it’s really for
Sizing guides call for roughly a thumb’s width of space between your longest toe and the front of the shoe. That gap is doing two jobs at once: absorbing mid-hike swelling, and stopping toe bang on descents. If you’ve only ever heard it framed as “room to grow,” you’ve been given half the rule.
Here’s the mistake it invites. Sizing up half a size to fix a width problem adds length in front of your toes and does nothing for the midfoot or the heel. You end up with a shoe that’s simultaneously too long and still too tight, and now your foot slides forward on every downhill. That’s how people arrive at a black toenail while trying to prevent one.
Try them on the way you’ll actually wear them
Wear the hiking socks you’ll actually have on trail, not the thin pair you happened to wear to the store. Sock thickness is real millimeters of volume, and swapping a dress sock for a midweight wool one can move a shoe from “snug” to “unwearable.”
Lace them fully, stand up, and walk a decline if the shop has a ramp. Width problems show up standing and loaded, not sitting on a bench. If everything checks out and you want to work through the rest of the fit checklist, the heel hold and flex-point tests are the next two worth running.
Your Feet Swell on the Trail, So Fit for Mile Ten
The shoe fits perfectly at the trailhead and starts pinching by lunch. First-timers assume they measured wrong. They didn’t. Their feet got bigger.
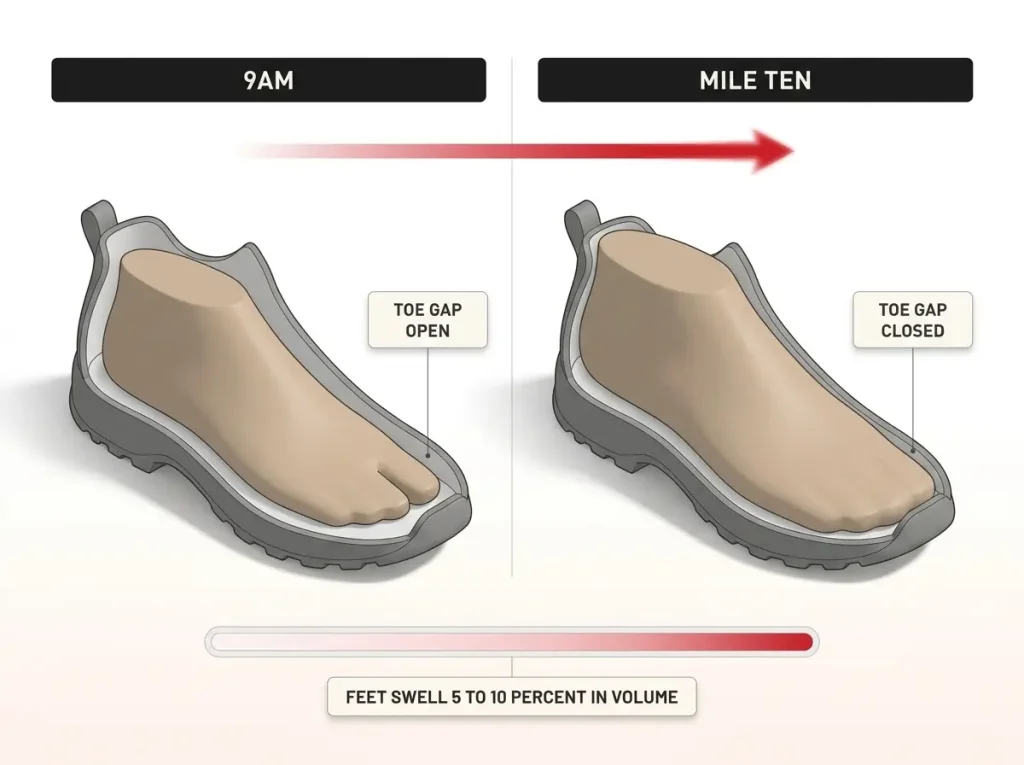
Feet can swell 5 to 10 percent in volume over a long hiking day. Heat, circulation, mileage and pack load all push in the same direction, and 5 to 10 percent of volume can add up to half a shoe size of change while the shoes are already on your feet. Nothing about that is a defect. It’s what feet do when you use them.
Which reframes the store fit completely. A 9am fitting measures the smallest foot you will have all day. A 5pm fitting, after you’ve been standing and walking, is much closer to your mile-ten foot. Buying at 9am and hiking at mile ten is how a correctly-measured shoe still ends up too tight.
The moment it turns is rarely dramatic. It’s a warm patch on the outside edge of the forefoot somewhere around lunch, then a proper hot spot by the time you start descending. Recognize that as foot swelling rather than a sizing mistake, because the response is completely different: you adjust, you don’t shop.
Heat matters more than most people expect here, which is worth remembering when you’re choosing a shoe. A waterproof membrane runs hotter, and heat is part of what swells your feet, so a fully waterproof wide shoe in August is a different fit experience than the same last in mesh.
Field adjustments that actually work, in the order you’d reach for them: back the laces off across the forefoot while keeping the ankle section locked, loosen fully at breaks and let the shoe open up, and on multi-day trips take the shoes off in camp so your feet can recover overnight. On a long thru-hike like the Pacific Crest Trail this is why people talk about sizing up a half size after the first few hundred miles, once the swelling stops being temporary.
The buying rule that falls out of all this: a genuinely wide last gives you swelling headroom that a roomy-but-standard-width shoe simply does not have. That’s the argument for buying wide even when the standard width feels acceptable at 9am in a carpeted store.
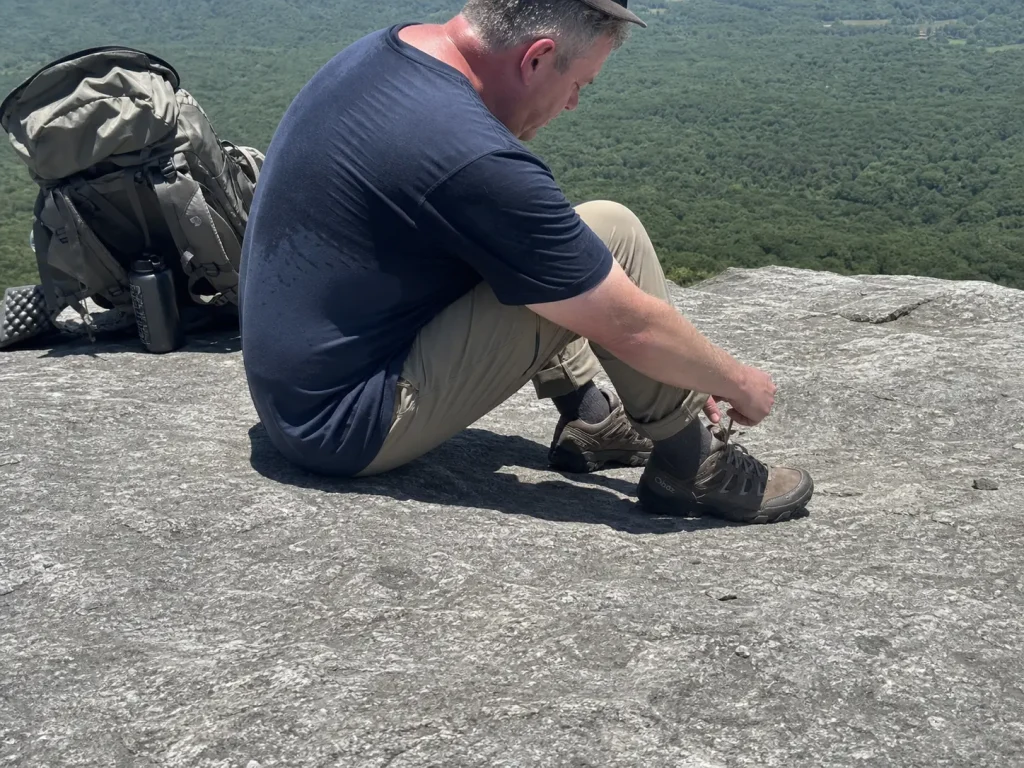
Re-lace at the first break, not at the first pain. Ten minutes of standing at a viewpoint is enough for your feet to start filling the shoe, and loosening the forefoot then costs you thirty seconds. Loosening it after a hot spot has already formed costs you the rest of the trip.
Wide Up Front, Normal at the Heel
You finally buy a true wide. The forefoot pain stops. And now your heel lifts on every climb, so you assume you bought the wrong shoe again. You didn’t. You bought the right shoe for half your foot.
Plenty of feet are wide at the forefoot and standard or narrow at the heel width. A true 2E last widens the whole shoe, which means it fixes the front and loosens the back in the same move. That’s not a manufacturing flaw. It’s the arithmetic of widening a single form.
The symptom check is quick. Heel lift on climbs, a rubbing spot at the back of the heel, socks that creep down inside the shoe. All three are volume problems, not length problems, and sizing down to grab the heel will just rebuild the forefoot problem you paid to solve.
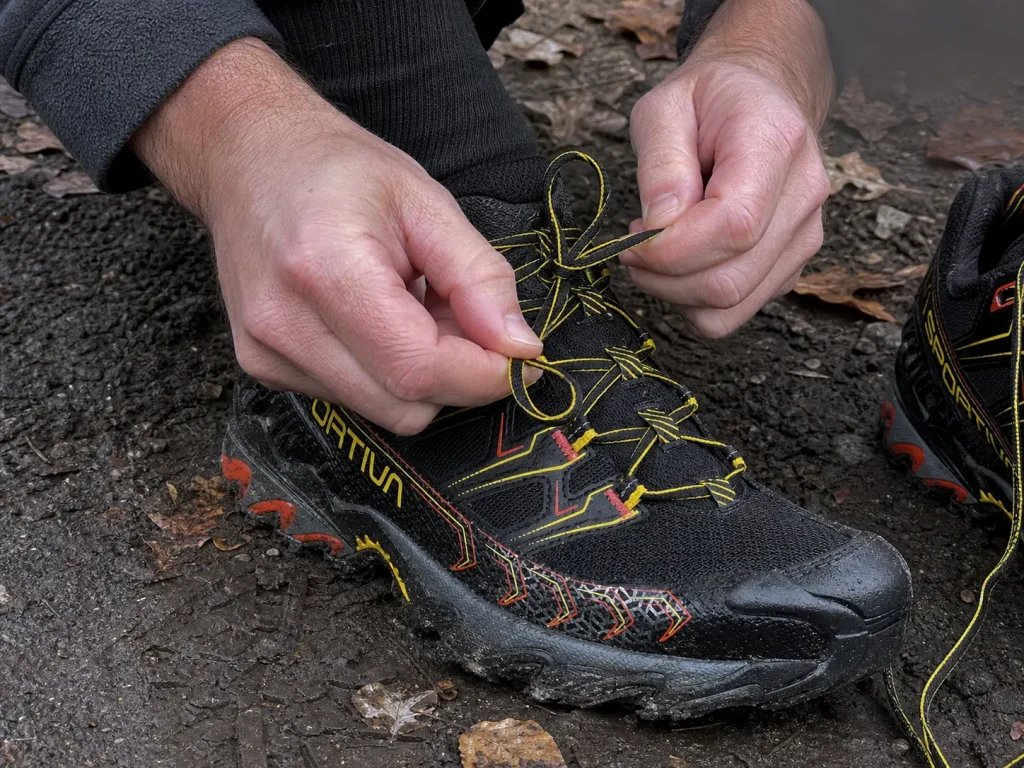
The fix costs nothing, and it lives entirely in the lacing system you already own. Heel-lock lacing, also called the runner’s loop, uses the top pair of eyelets to build a small loop on each side. Thread each lace through the opposite loop, then cinch.
It pulls the heel back and down into the heel cup without touching forefoot volume, which is the exact combination a wide-forefoot foot needs. It’s the cheapest fix in this entire article, and most hikers who need it have never been shown it. If you want the full heel-lock lacing walkthrough with the step-by-step photos, it’s written up for the opposite problem, same technique, opposite cause.
One shoe-level detail worth acting on: heel cup shape varies a lot between brands, and a structured heel counter holds a narrow heel better than a soft flexible one. Two shoes in the same width can behave completely differently back there. Pinch the heel counter between thumb and finger in the store. If it collapses easily, it will not hold a narrow heel over ten miles of climbing.
There’s a brand-level shortcut worth knowing before you order anything. Among the picks in this article, KEEN and Oboz both run a closer heel than Altra or La Sportiva, which is exactly the pairing a mismatched foot wants: room where you’re wide, structure where you’re not.
So the shopping order changes depending on how extreme your forefoot is. If you’re wide-ish up front with a heel that swims, start with the closer-heeled shoes and you may never need a lacing fix at all. If you genuinely measured a wide last, buy the wide anyway and solve the heel with the runner’s loop, because a pinched forefoot is a fit problem you can’t lace your way out of and a loose heel is one you can.
The order matters because most hikers do it backwards. They buy for the heel, feel the forefoot pinch on hike two, and start the search over with a slightly different shoe and the same underlying mistake.
Which Brands Build Wide and Which Bolt It On
Once you know the two philosophies, the wall of shoes sorts itself into piles. Here’s which pile you’re standing in front of.
Wide by design
Altra builds its whole standard line, Lone Peak and Olympus included, on the FootShape anatomical last, in every size. There’s no special version to hunt down and no wide listing to watch sell out. The regular shoe already has the toe splay room built in.
Topo Athletic runs the same philosophy on a slightly less extreme last with a conventional drop, which suits hikers who want the width without committing to zero drop.
What you accept in exchange is a distinctive shape, usually a lower drop than you’re used to, and a genuine transition period if you’re coming from a structured shoe. Calves and Achilles need a few weeks to catch up. Plan short hikes first.
Wide as a separate SKU
Merrell, La Sportiva and Salomon sell specifically labeled Wide versions of select low-cut models. These are genuine wide lasts, not softer uppers with a sticker. The catch is logistical: different listing, often a different ASIN, sometimes only in one gender, and the wide version sells out on its own schedule independent of the standard width.
The buying rule that follows is boring and it will save you a return. Verify the width code on the exact listing you’re adding to the cart, not on the model’s review page. Reviews cover the model. You’re buying a SKU.
For contrast, approach shoes are cut with a deliberately narrow forefoot, because a precise edge on rock needs a foot that can’t move inside the shoe. Same category of footwear, opposite design goal, which is a useful reminder that “narrow” isn’t laziness. It’s sometimes the point.
Roomy, but not truly wide
This is the pile most likely to burn you. These are shoes with a genuinely generous fit that were never cut on a wide last. KEEN’s signature toe box shape and Oboz’s easier midfoot both live here. Comfortable, forgiving, and enough shoe for a lot of feet, but not a substitute for 2E if you measured 2E.
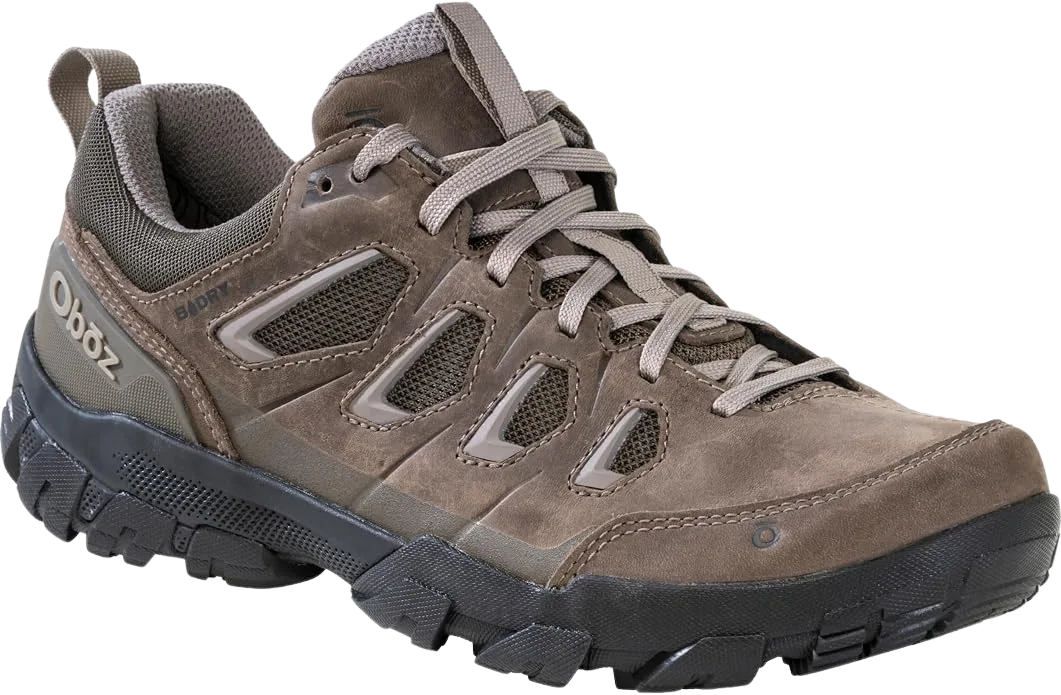
The Oboz Sawtooth X Low B-DRY (men’s · women’s) is here as the teaching contrast, not as a wide-fit pick. It gives you a genuinely easier midfoot than most standard-width shoes, B-DRY waterproofing, and enough structure under the arch for long days with a daypack.
Where it’s the right call: a medium-wide foot that wants support and waterproofing more than maximum width, or a hiker whose problem is “tight” rather than “impossible.” Where it’s the wrong call: if your foot already spills over the midsole edge in a standard width, this will not close that gap and you should be shopping the labeled-wide list instead. That distinction is the entire point of this section.
Men’s and Women’s Wide Fits Aren’t the Same Shoe
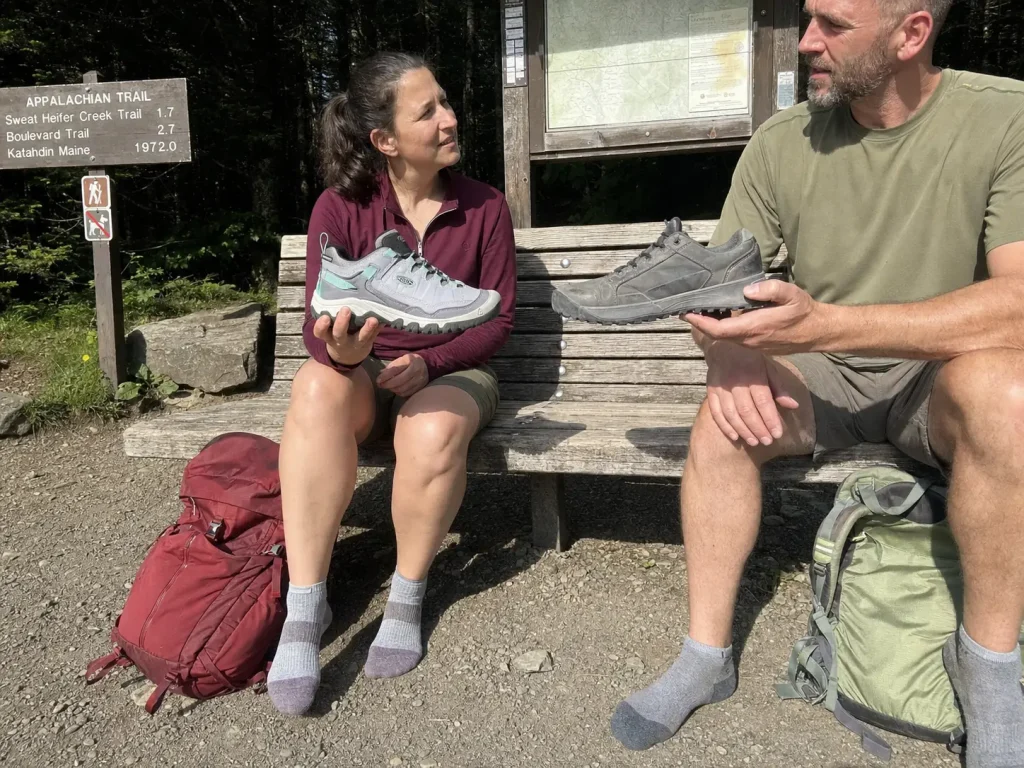
A shoe being available in wide doesn’t mean it’s available in wide for you. Women run into this constantly, and men shopping for a partner run into it just as often.
Start with the codes, because the same letter means different things by gender. D is roughly standard in men’s and counts as wide in women’s. 2E is wide in men’s. Read the gender first, then the code, or you’ll talk yourself into the wrong SKU with perfectly good arithmetic.
Women’s lasts are generally narrower at the heel and relatively wider at the forefoot, which is exactly the mismatch shape from the heel section above. That’s why heel-lock lacing pays off more often on women’s shoes: the geometry that makes a wide forefoot fit tends to come with heel volume you didn’t ask for. There’s more on women’s lasts and width options in more detail if that’s the fit you’re solving for.
Availability is genuinely uneven, and it isn’t your imagination. Some models offer wide only in men’s. The wide women’s version of a model frequently ships as its own listing with its own stock, so it goes out of stock on a completely separate schedule from the men’s.
There’s a workaround, and it comes with a real trade-off. Sizing across genders, roughly 1.5 sizes down from a men’s size to the women’s equivalent, gets some hikers into a wide they can’t otherwise buy. The heel and instep volume come along with the width, though, so it works far better for a wide forefoot with a normal heel than for the reverse. Try it in a store before you try it online.
Last practical note: if your size in Wide reads unavailable, don’t assume the model is dead. The standard-width listing or an alternate colorway may still be live, and wide sizes restock on their own timeline. Once width is solved, the next decision is usually waterproofing, and the men’s low-cut waterproof picks cover that side of the choice.
Best Hiking Shoes for Wide Feet
Four shoes, four different wide-foot problems. Every one of them is here because of how it’s wide, not because it’s popular. Each pick is either built wide by default or sold as a genuinely labeled Wide SKU, and each is named for the foot and the use case it actually suits. Nothing is on this list for being expensive, and if you’re still deciding between low and mid height, why low-cut shoes beat boots for most hikes makes the case before you spend anything.
One note on money before the picks, since it shapes the tiers: the wide-fit shelf spreads across a genuinely budget tier, a mid tier where most day-hiking shoes live, and a technical tier above it. Width itself isn’t what you’re paying for. Construction is.
Best Overall: Altra Lone Peak 9
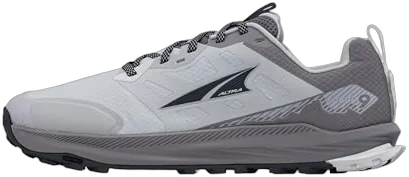
The Altra Lone Peak 9 (men’s · women’s) takes the top slot for a structural reason rather than a performance one. The FootShape last is wide at the toes across the entire standard size run, which removes the whole hunting problem: no separate listing, no width code to verify, no wide version that’s out of stock in your size while the standard sits there taunting you.
It’s also the shoe that makes the mechanism obvious. Put your foot in one and the toes splay instead of stacking. That’s what a foot-shaped last feels like, and once you’ve felt it you can’t unfeel how narrow most trail footwear is at the front.
The trade-offs are real and worth stating plainly. Zero drop asks your calves and Achilles to work differently, and jumping straight into a long day is how people end up sore in places they’ve never been sore before. Give it a few short hikes. The platform is also soft and flexible, closer to a trail runner than a boot in how the midsole cushioning behaves, which makes this a day-hiking and light-load tool rather than something to carry a heavy pack on.
Best for Technical Terrain and Loaded Packs: La Sportiva Ultra Raptor II Wide
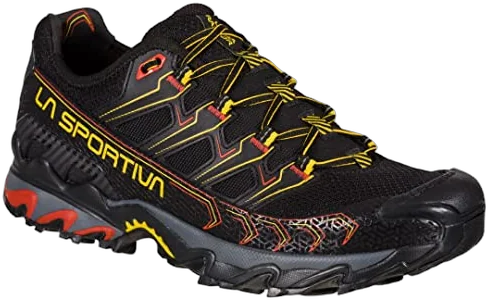
The La Sportiva Ultra Raptor II Wide (men’s · women’s) is the other path made concrete: an explicitly labeled Wide SKU from a brand that cuts its standard last narrow. The width here is designed in, not borrowed from a soft upper.
What you get for that is a shoe that behaves on rock. The FriXion XT outsole grip holds on wet slab better than most hiking-shoe rubber, and the reinforced heel cup keeps your foot located when the trail turns into loose rubble on a descent. The heel structure also matters for the mismatch problem: a wide last with a soft heel is exactly the combination that produces lift, and this one doesn’t have that weakness.
Trade-offs, stated flatly. It’s premium tier and it’s more shoe than a graded dirt path requires. Because the Wide is its own listing, you have to confirm the width code on the exact size and color you’re buying, since a colorway swap can quietly drop you back into the standard cut. And if you’re carrying real weight regularly, carrying a heavier load changes the shoe you want in ways worth reading before you commit.
Best First Pair: KEEN Targhee 4 Low WP
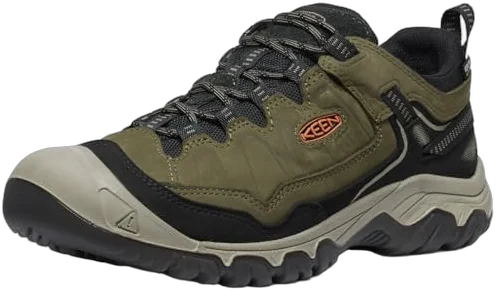
If this is your first pair and you’ve only recently discovered that your feet are the problem, the KEEN Targhee 4 Low WP (men’s · women’s) is the low-risk move. KEEN’s toe box shape is the widest thing about the brand’s identity, the waterproofing handles wet grass and a shallow water crossing, and the break-in is short enough that your first hike in them is a hike rather than a test.
It also keeps a conventional drop, which matters more than people expect for a first pair. You get width without simultaneously relearning how to walk, and that’s one variable instead of two.
Now the honest part, and it’s the same thing said in the brand section above: this is roomy and forgiving, not a labeled 2E last. That’s enough shoe for a lot of wide feet and not enough for all of them. If you measured a true 2E and your foot spills over the midsole in standard widths, treat this as a comfortable near-miss and go to the labeled-wide options instead.
Best Budget Pick: Nortiv 8 Wide Toe Box Waterproof
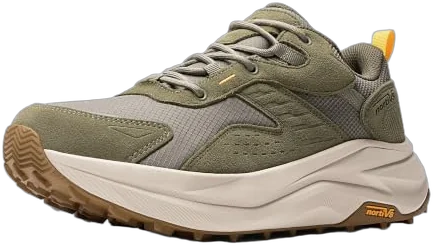
Every big roundup on this topic skews premium, and that leaves a lot of readers with one honest option: keep hiking in the wrong width. The Nortiv 8 Wide Toe Box Waterproof (men’s · women’s) exists to close that gap. It gives you an explicit wide toe box and a waterproof upper at a tier well below everything else on this page.
That matters more than gear snobbery admits. The reader who can’t spend premium money is the same reader most likely to be hiking in a narrow standard-width shoe right now, collecting hot spots and assuming that’s just what hiking feels like. It isn’t. Width is the variable that fixes that, and width is available cheap.
Here’s what you give up, without hedging. The EVA midsole is softer and less structured, so it flattens out faster under a load and gives you less support on uneven ground. The hardware, eyelets and laces especially, is not built for hundreds of miles.
Expect a shorter service life and don’t take it on a loaded multi-day over rock. For day hikes and moderate mileage in your actual width, it does the job the expensive shoe was going to do anyway.
If low-cut turns out not to be enough shoe for your terrain, hiking boots for wide feet follow the same wide-by-default versus labeled-SKU logic, with ankle support and ankle height changing which fit issues matter most.
Cheaper Fixes Before You Buy Another Pair
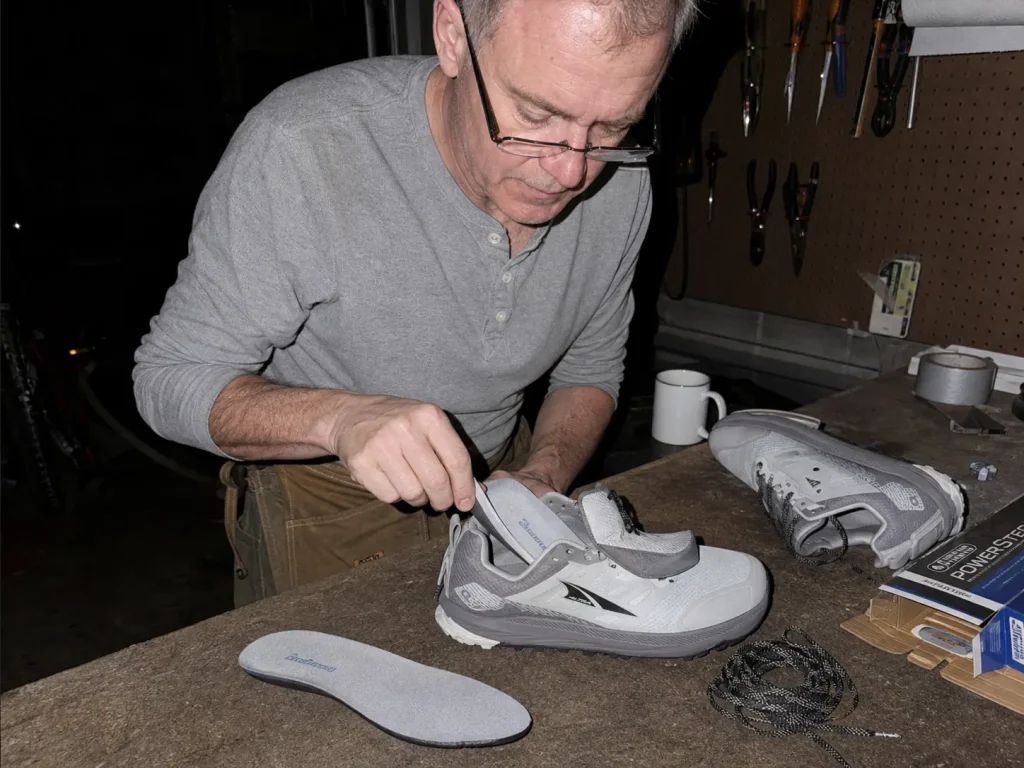
Not every width problem is a new-shoe problem. Some of them are a twenty-dollar problem, and a site that only ever tells you to rebuy isn’t worth reading.
Triage first, because this only works on the right shoes. Stand up in the shoe, loaded, and look at the edge of the midsole. If the upper is visibly bulging out over that edge, the shoe is genuinely too narrow and nothing aftermarket will save it.
Sell it, return it, or give it to someone with narrower feet. If the shoe is close but pressured, keep reading.
Insole swap is the highest-yield fix and the least intuitive. The stock insole is often the single widest object in the shoe, and swapping to a thinner or narrower-profile one gives you back real forefoot volume that the upper can then use. It works in the other direction too: a wider-profile insole helps a foot that’s sliding around inside a shoe that’s too roomy. The same trade-off logic applies to arch support, and whether an insole upgrade is worth it over long miles walks through when the swap earns its place and when it’s a placebo.
Lacing changes come next, in order of how much room they buy you. Traditional lacing pulls evenly across the whole upper, which is exactly the wrong distribution for a wide forefoot. Skip the eyelet directly over your pressure point and lace around it instead, which releases tension exactly where it hurts and nowhere else.
Switch to parallel or window lacing across a wide forefoot, which spreads pressure sideways instead of pulling the two sides of the upper toward each other. Then heel-lock the top pair, the runner’s loop from the heel section above, to hold the back down while the front stays open.
Sock volume is the cheapest variable on the list and the one people forget. Dropping from a thick winter sock to a midweight, or to a thin liner under a midweight, gives back millimeters exactly where a wide foot needs them. It costs nothing to test tomorrow. The catch is warmth and cushioning, so it’s a shoulder-season and summer fix more than a winter one.
A wide toe-box insole can rescue a shoe that’s 90 percent right for a fraction of what a replacement pair costs, so try it before you write the shoe off. Give it exactly two real hikes. If it hasn’t fixed the problem by the second one, it won’t fix it on the tenth, and you’ve learned that for the price of an insole instead of the price of a shoe.
The Bottom Line on Wide-Foot Fit
Check the width code, not the word wide. A label is a claim. A last is a shape, and only one of those two things is holding your foot.
Measure width at the end of the day, standing, in the hiking socks you’ll actually wear, and buy for your larger foot. That single ten-minute habit outperforms another hour of reading reviews.
Fix the heel with lacing before you buy a third pair chasing a shoe that fits everywhere at once. Most wide-foot hikers need one true wide shoe and one lacing technique, not an endless rotation of near-misses.
Trace both feet on paper tonight and measure across the widest points. You’ll know more about your next purchase in ten minutes than the last three product pages told you.
Frequently Asked Questions
01What trail shoes are best for wide feet?
Start with brands that build wide by default. Altra’s FootShape last is wide at the toes across the whole standard line, so there is no separate SKU to hunt. If you want a labeled Wide version instead, La Sportiva, Merrell and Salomon each offer one on select low-cut models.
02Do hiking shoes fit wide feet?
Most standard hiking shoes are built on an average-width last, so a genuinely wide foot needs a wide-by-default brand or a labeled wide-width SKU. You want extra room in the toe box and the midfoot. Check the width code on the listing you are buying, not the marketing page.
03What shoe brand is best for wide feet?
There is no single winner, because brands solve it two ways. Altra and Topo Athletic build their whole standard line on an anatomically wide last. Merrell, La Sportiva and Salomon sell separate labeled Wide SKUs. KEEN and Oboz sit in between: roomy, but not a true wide last.
04Should I size up if I have wide feet?
No. Sizing up adds length in front of your toes, not width across the midfoot or heel. You end up with a shoe that is too long and still too tight, and your foot slides forward on descents. Buy your measured length in a wider width instead.
05Which hiking boots are best for wide feet?
Boots follow the same two paths: wide-by-default lasts versus separately labeled Wide SKUs. Ankle height changes which fit problems matter most, so the picks differ. Low-cut shoes give a wide forefoot more room to splay, while boots give a mismatched heel more structure to hold onto.
Risk Disclaimer: Hiking, trekking, backpacking, and all related outdoor activities involve inherent
risks which may result in serious injury, illness, or death. The information provided on The Hiking Tribe is for
educational and informational purposes only. While we strive for accuracy, information on trails, gear, techniques,
and safety is not a substitute for your own best judgment and thorough preparation. Trail conditions, weather, and
other environmental factors change rapidly and may differ from what is described on this site. Always check with
official sources like park services for the most current alerts and conditions. Never undertake a hike beyond your
abilities and always be prepared for the unexpected. By using this website, you agree that you are solely
responsible for your own safety. Any reliance you place on our content is strictly at your own risk, and you assume
all liability for your actions and decisions in the outdoors. The Hiking Tribe and its authors will not be held
liable for any injury, damage, or loss sustained in connection with the use of the information herein.
Affiliate Disclosure: We are a participant in the Amazon Services LLC Associates Program, an
affiliate advertising program designed to provide a means for us to earn advertising fees by advertising and linking
to Amazon.com. As an Amazon Associate, we earn from qualifying purchases. We are also an official affiliate partner
of Black Diamond Equipment via the AvantLink network. If you click on a Black Diamond affiliate link and make a
purchase, we may earn a commission at no additional cost to you. We also participate in other affiliate programs and
may receive a commission on products purchased through our links. Additional terms are found in the terms of
service.