
In this article
You feel the pack tugging backward on every step. Your shoulders start to burn, so you reach up and haul the load lifters tighter, waiting for relief that never shows up. If anything, the ache gets worse. That backfire is the most common load lifter mistake there is, and it almost always means the strap you keep yanking on was never the real problem. Here’s what these two little straps actually do, the 45-degree angle you want, the order that makes them work, how to read when you’ve over-cranked them, and the honest cases where you should leave them alone.
What Load Lifter Straps Actually Do
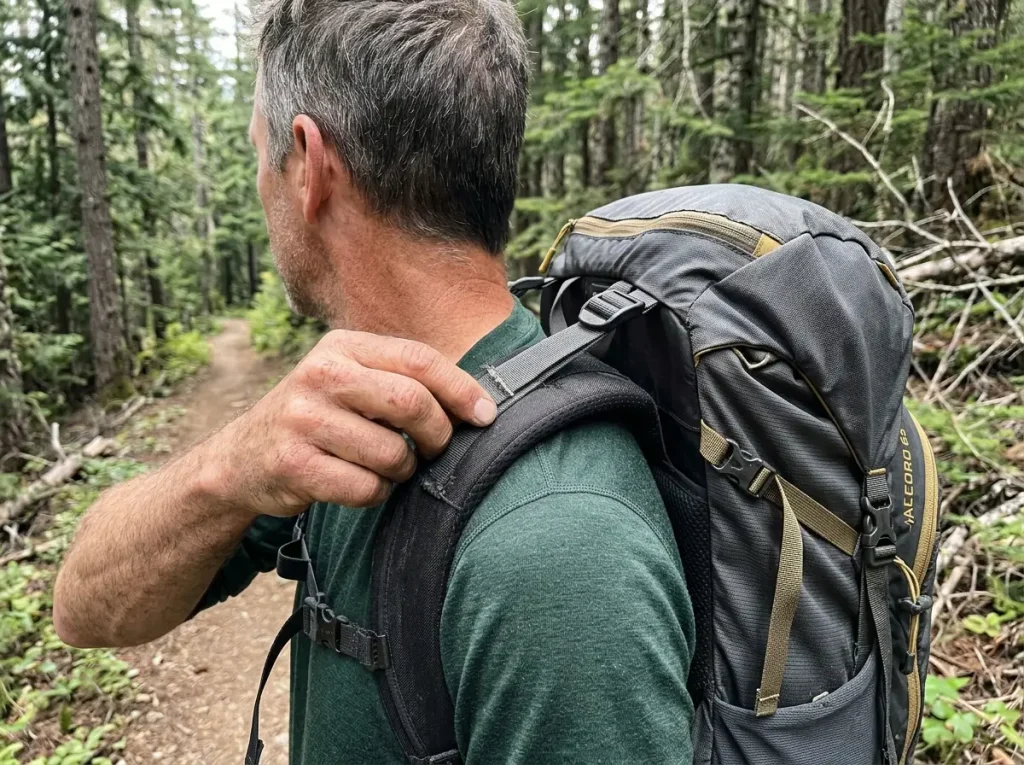
Look at the top of your shoulder straps. See those two skinny straps angling back to the top of the pack? Most hikers treat them like a volume knob for comfort, and that misread is where the trouble starts. Load lifters have one small job, and it is smaller than you think.
Where they connect on the pack
A load lifter, which some packs label a stabilizer strap, runs from the top of each padded shoulder strap up to an anchor point at the top of the pack frame. That short diagonal is the whole mechanism. When there is real weight in the bag and a frame to pull against, tensioning that strap draws the top of the pack inward toward your upper back instead of letting it flop away from you.
The connection only does anything on a pack with an internal frame. On a floppy frameless daypack there is nothing rigid up top to pull against, which is why those straps feel like decoration on a school backpack.
The one job they’re built for
The job is stability, not carrying. Load lifters pull the top of the pack in so the weight rides close to your spine and stops swaying around behind you. That is it. They are fine-tuning, not the foundation.
The actual load is supposed to sit on your hips. Your hip belt carries most of the weight on a properly fitted pack, and these top straps never change that math. Ask anyone who has hiked a long day with a heavy bag: when the pack feels light, it is because the belt is doing its job, not because the lifters are cranked.
Why hikers reach for the wrong strap
When your shoulders hurt, the load lifters are right there at eye level, easy to grab. So people yank them, the pain moves around for a minute, and they call it fixed. It is the single most common mistake with these straps, and it sets up the exact backfire in the title. The strap you can reach is rarely the strap that is wrong.
The 45-Degree Rule and Why It Works
Everyone repeats “45 degrees” like a magic number. It is not magic. It is just the angle where one strap does two jobs at the same time, and once you see why, you will stop reaching for a protractor.
What 45 degrees looks like on your back
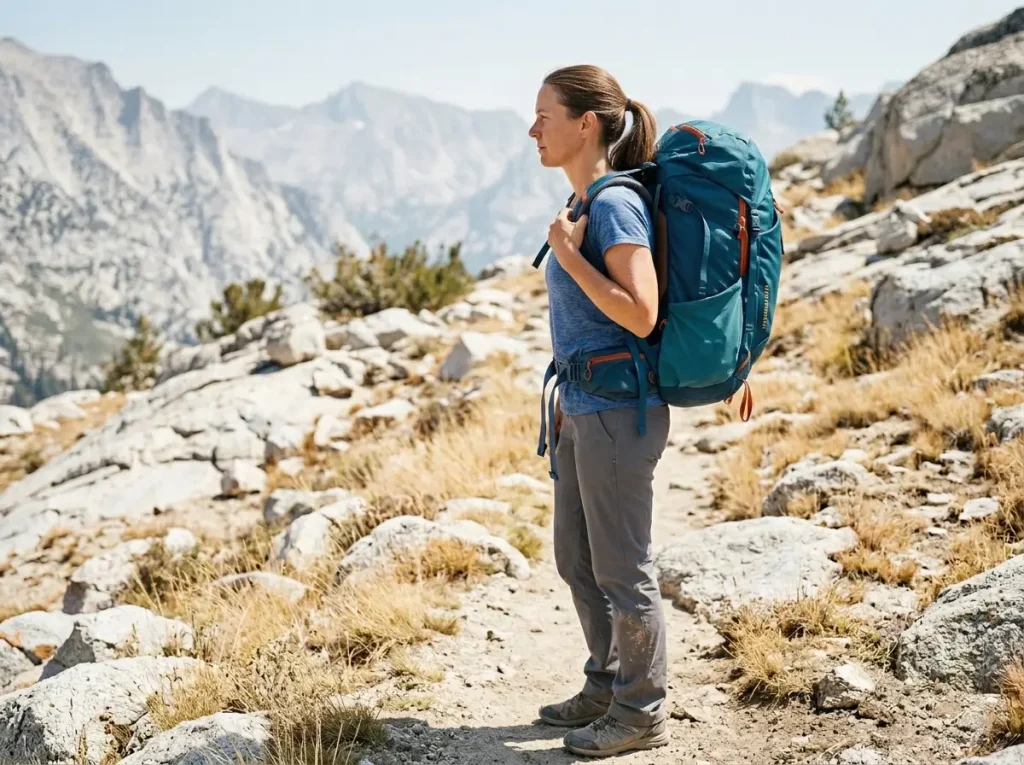
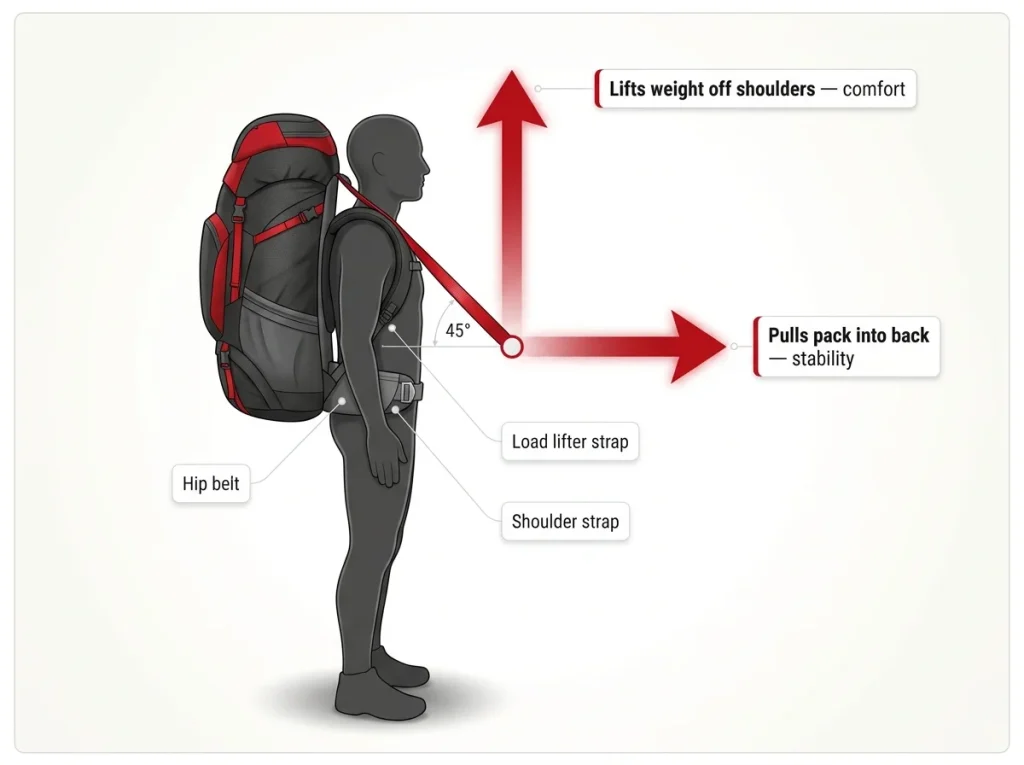
Loaded and tensioned, your load lifters should angle back toward the pack at roughly 45 degrees, running up and away from your shoulders to the frame. You do not need it exact. The accepted working range runs about 25 to 45 degrees, and some fitters stretch it to 30 to 60, so anywhere in that zone is doing the work.
The feel is the real test. At the right tension the top of the pack rests gently against your upper back, neither pulling away nor digging in. If you are not sure what the angle is doing back there, a quick mirror check or a glance from a hiking partner settles it. If you forget the top of the pack is even there, you nailed it.
The two jobs one strap is doing
Here is the part competitors skip. At 45 degrees the pull splits into two vectors at once. Part of it goes horizontal, pulling the pack into your back for stability. Part of it goes vertical, lifting a sliver of weight up off your shoulders for comfort. That balance is the whole reason the angle works.
Tilt too far toward horizontal and you get stability with no lift. Tilt too far toward vertical and you yank weight straight onto your shoulders. The 45 sits in the middle on purpose.
Why it’s a range, not a magic number
Pack sizes, torso lengths, and how high you packed the heavy stuff all nudge the angle a few degrees. Chasing a perfect 45 with a level app is a waste of a good hike. Get it in the neighborhood, trust the feel, and move on. The number is a starting point, not a finish line.
Set Them Last, Not First
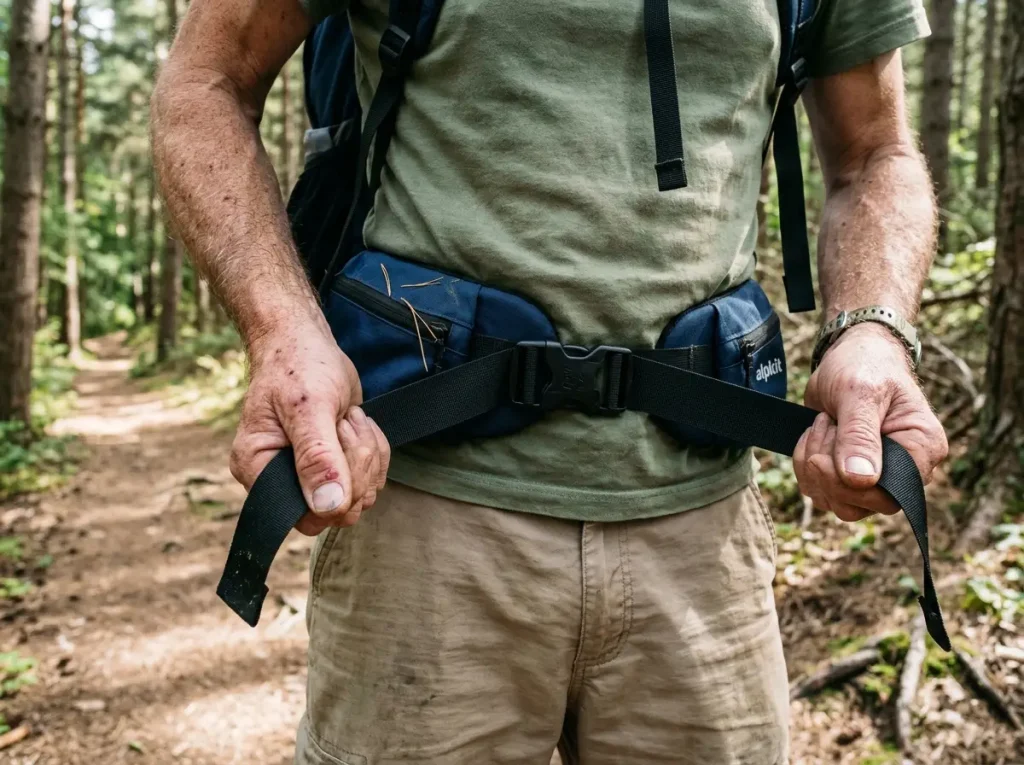
If you set your load lifters before the hip belt is locked in, you have already lost. You are fine-tuning a fit that does not exist yet. The order is the entire game, and it runs bottom to top.
The bottom-to-top sequence
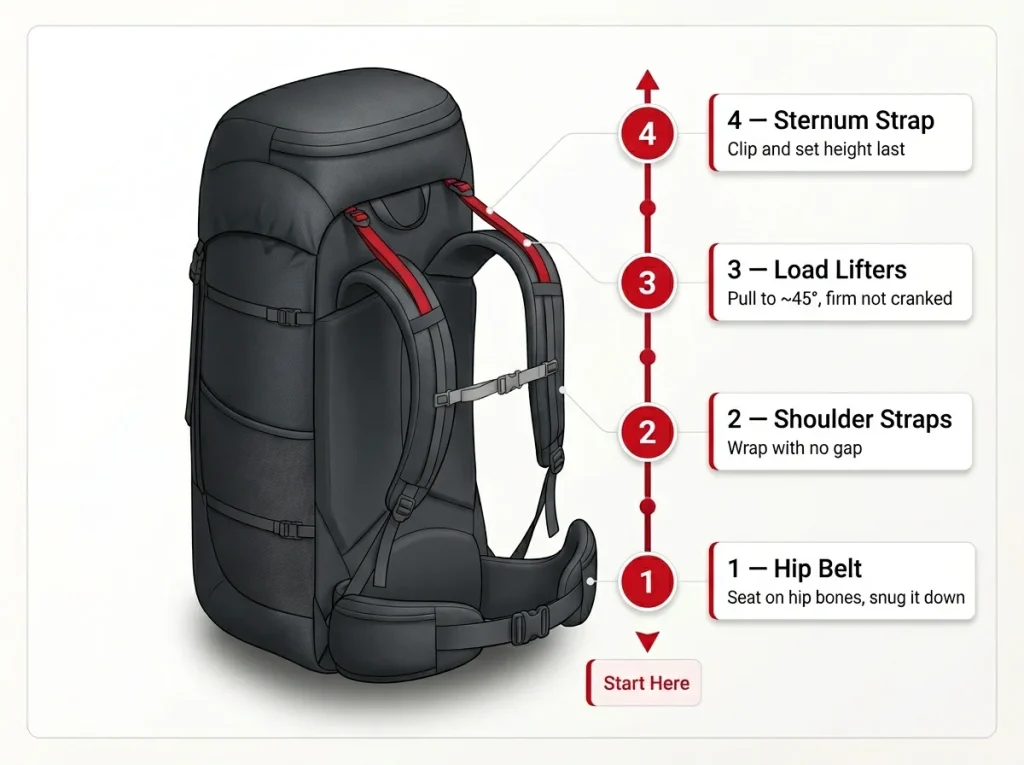
The correct order is hip belt, then shoulder straps, then load lifters, then sternum strap. You build the fit from the hips up, and the lifters are the second-to-last thing you touch. Set them first and they have nothing to fine-tune, so they do nothing but pinch.
If you want the full walkthrough of every strap in order, our guide on how to dial in the whole fit from the hip belt up covers the entire sequence on a loaded pack.
Why the hip belt comes first (and does most of the work)
The hip belt is the foundation because it carries the bulk of the load. The American Hiking Society notes the hip belt should carry roughly 60 to 80 percent of the weight, which means most of the fit is decided before you ever reach for a lifter. Seat the belt on top of your hip bones, snug it down, and you have done the heavy lifting of the adjustment.
Get this wrong and nothing above it can save you. A belt riding low on your rear, or left loose, dumps the weight onto your shoulders no matter what the top straps do.
When a pack feels wrong on trail, do not chase one strap. Loosen everything, re-seat the hip belt, and rebuild from the bottom. It takes fifteen seconds and fixes the fit faster than ten minutes of tugging on the lifters.
Where load lifters fall in the order
Once the belt and shoulder straps are set, the load lifters tune what is left. Pull them to that 45-degree zone, then clip and adjust the sternum strap to finish. The sternum strap is the last step, and getting the sternum strap height right keeps the shoulder straps from sliding outward. Leave it a touch loose so you can keep breathing easier on the climbs.
How to Tell You Cranked Them Too Tight

Here is the trap that gives this article its name. Your shoulders hurt, so you tighten the lifters, which pulls more weight onto your shoulders, which hurts more, so you tighten again. It is a loop that gets worse the harder you pull, and plenty of hikers ride it all the way to camp.
Signs you over-cranked them (and the gap test)
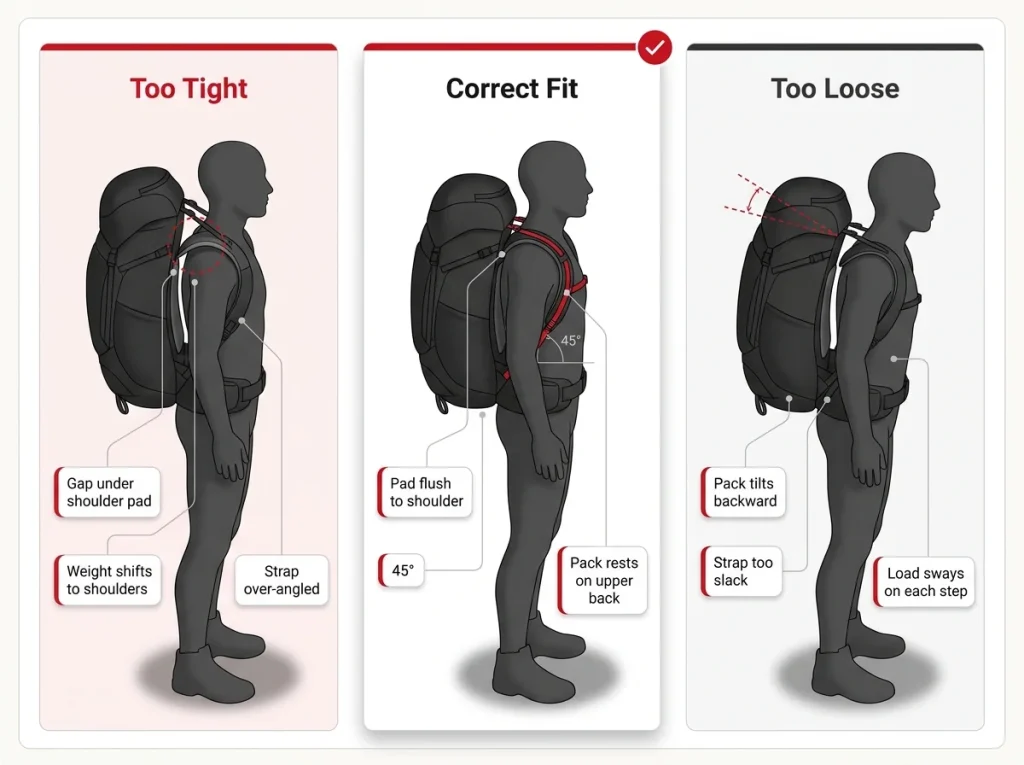
Over-tightened load lifters lift the shoulder-strap pads up off your shoulders. A gap opens under the pads, the weight slides onto the tops of your shoulders, and you may feel a pinch creeping into your neck or the front of your armpits. Crank them hard enough and you can even distort the pack’s back panel, bowing it away from the natural curve of your spine. That pinch is the tell.
The quickest check is the gap test. Stand up straight under the loaded pack and try to slide a flat hand between your shoulder and the strap pad. If your hand fits in that gap, the lifters are cranked too hard. Back them off until the pad settles down onto your shoulder and the top of the pack rests lightly against your upper back.
Run the gap test with the pack fully loaded, not empty in the gear room. An empty pack hides the problem, because there is no weight to drag the pads off your shoulders. Fifteen pounds in the bag tells the truth.
Signs they’re too loose
The opposite mistake is quieter but just as annoying. Too-loose load lifters let the top of the pack tilt backward, away from your spine. The pack sways on every step and you feel pulled slightly off balance, especially on uneven ground. If the top of the bag is flopping away from your back as you walk, the lifters need a touch more tension.
When the real problem is your hip belt, not your lifters
Now the part that breaks the cycle. Cranking load lifters never cures shoulder pain that is actually coming from your hip belt. If the belt sits below your hip bones or is left loose, the weight defaults straight to your shoulders, and no amount of lifter tension takes it back off. You are treating the symptom at the top while the cause sits at your waist.
The story that keeps coming up in fit threads is the mile-8 hiker whose shoulders are screaming, who keeps reaching up to tighten the lifters, and who only gets more miserable, because the belt slipped below the hip bones an hour ago. So when your shoulders hurt, check the belt first. Re-seat it on top of your hip bones and snug it before you touch anything up top. A belt that holds its position, which you can set up by learning to get your hip belt sitting right on your hips, fixes more shoulder pain than the lifters ever will.
Re-Tweak Them as the Trail Changes
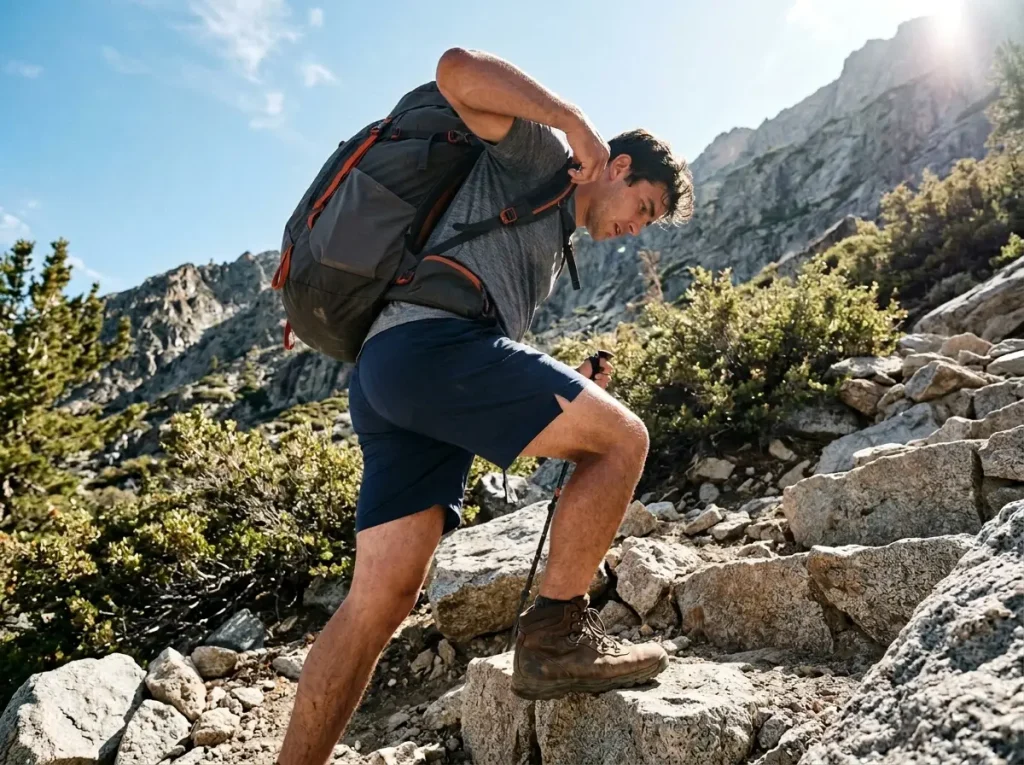
A pack that fit perfectly in the parking lot will feel wrong halfway up a steep climb. That is not a fit failure. That is just terrain, and the fix is a bit of dynamic adjustment on the move. Experienced backpackers reach up and tweak the load lifters without breaking stride, dozens of times a day, almost on autopilot.
Tighten on the climbs
On a steep uphill you lean into the slope, and that tips the pack back and away from you. Snug the load lifters a touch and you pull the top of the pack forward, stacking the load back over your hips where it belongs. The pack stops dragging at your shoulders and starts climbing with you instead of hanging off your back.
It is a small move, a quarter inch of webbing, not a full re-fit. A quick pull on each strap as the grade kicks up, and you keep walking.
Loosen on the descents
Going down is the opposite. Ease the load lifters off a little and the load settles lower onto the hip belt, dropping your center of gravity. A lower load is a more stable load when you are picking your way down loose or steep ground, and it spares your shoulders the constant jarring of a high, tight pack on every downhill step.
Leave a few inches of loose tail on your load-lifter straps instead of trimming them flush. You want enough webbing to grab and pull with a gloved hand on a cold climb, without stopping to fish for a stubby little tab.
Making it a habit, not a chore
New hikers set the straps once at the trailhead and never touch them again. Veterans treat the lifters like a steering wheel, a constant small input that matches the trail. You do not have to think hard about it. Tighten when the trail tips up, loosen when it tips down, and after a few trips your hand starts doing it before your brain catches up. That habit is the difference between fresh shoulders and fried ones by the time you reach camp.
When You Can’t Hit 45°, the Pack Doesn’t Fit
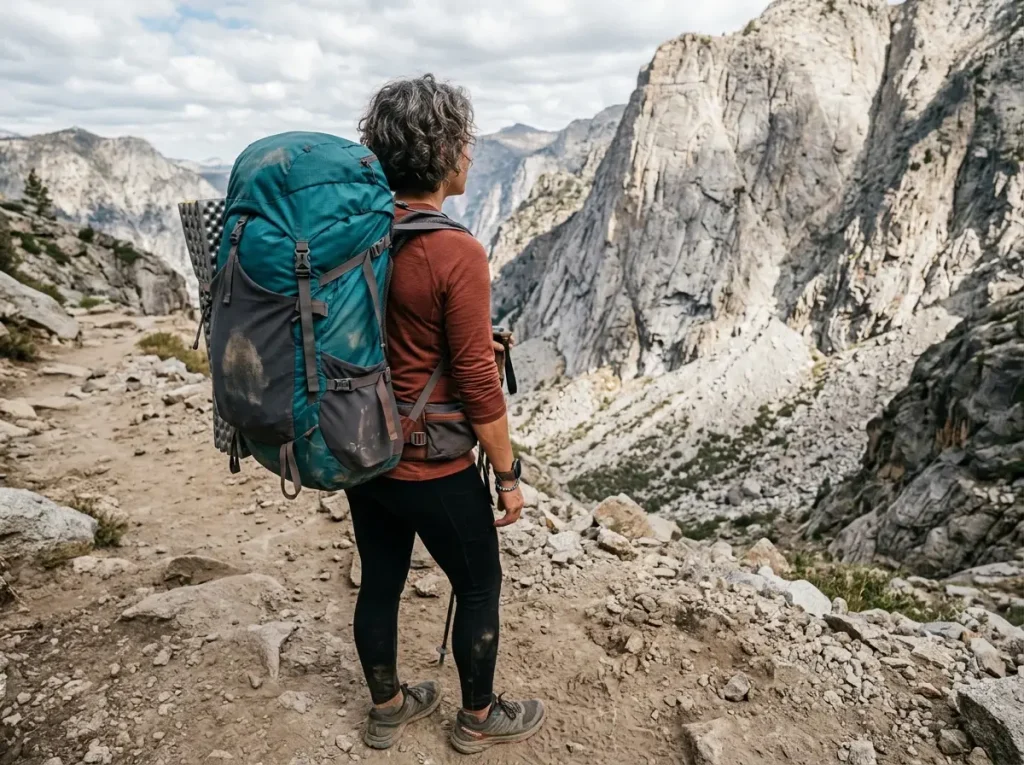
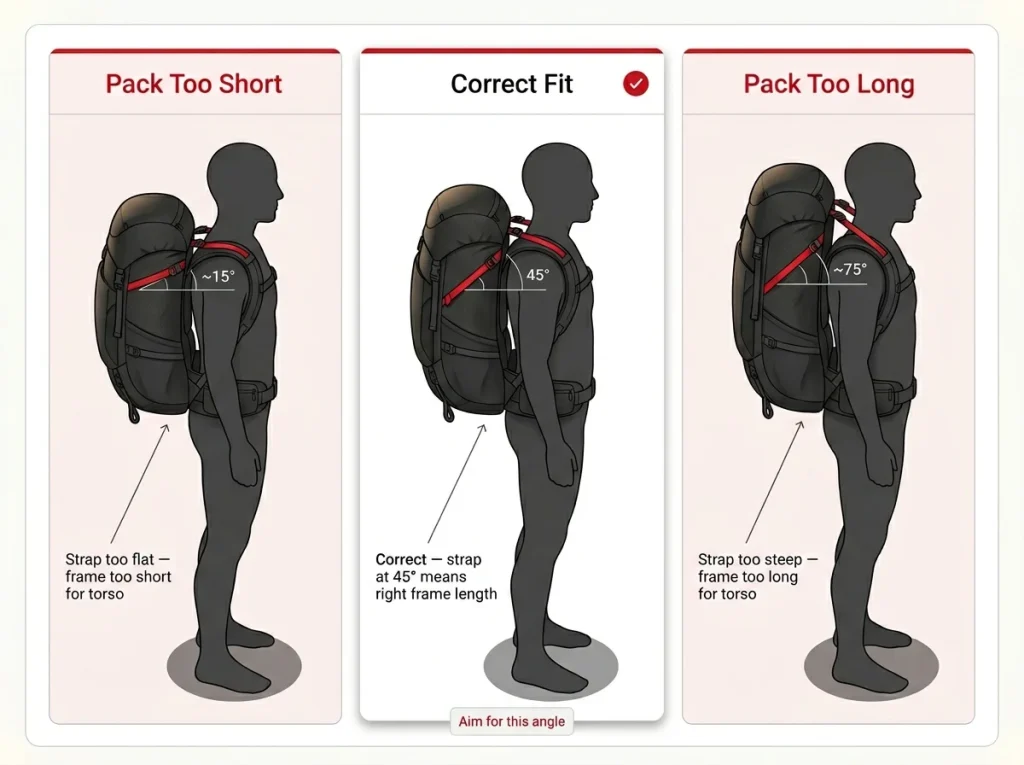
Here is the thing nobody tells you. Your load lifters are quietly diagnosing your pack size for free. If you cannot get them to 45 degrees no matter how you pull, stop adjusting. The pack is telling you something the fitting room never did.
Too flat or too steep, what the angle is telling you
The angle is a sizing readout. If your load lifters sit too flat, nearly horizontal, the pack frame is too short for your torso length. If they sit too steep, climbing close to vertical, the frame is too long. A correctly sized pack lands that strap in the 45-degree zone without a fight.
So the next time the angle looks off, read it before you crank it. Flat means short, steep means long, and 45 means the frame matches your back.
Why no strap fixes a sizing problem
If you physically cannot reach roughly 45 degrees at any tension, that is a torso-length mismatch, and no strap setting solves it. You can yank all day and the geometry will not change. This is the frustration behind every “why can’t I hit 45?” thread: the lifters were quietly flagging the wrong pack size the whole time, and the hiker kept blaming their technique.
The fix is a different size or a pack with an adjustable suspension, not more tension. When the diagnostic points to a sizing problem, our breakdown of how to choose a backpack that actually fits your torso walks you through getting the frame length right in the first place.
The adjustable-torso fix (and measuring first)
If you fall between sizes, a framed pack with an adjustable harness lets you slide the shoulder yoke up or down until the lifter angle lands right. A heavy-haul pack like the Gregory Baltoro 65 (men’s) or the women’s Gregory Deva 70 (women’s) gives you that adjustable torso range, which is exactly what you want if your measurement sits on a size border.
Before you buy anything, measure first. Knowing your torso length the right way takes the guesswork out of the whole thing and tells you whether a pack can even reach 45 degrees on your back before you load it up.
When Load Lifters Actually Matter (and When to Ignore Them)
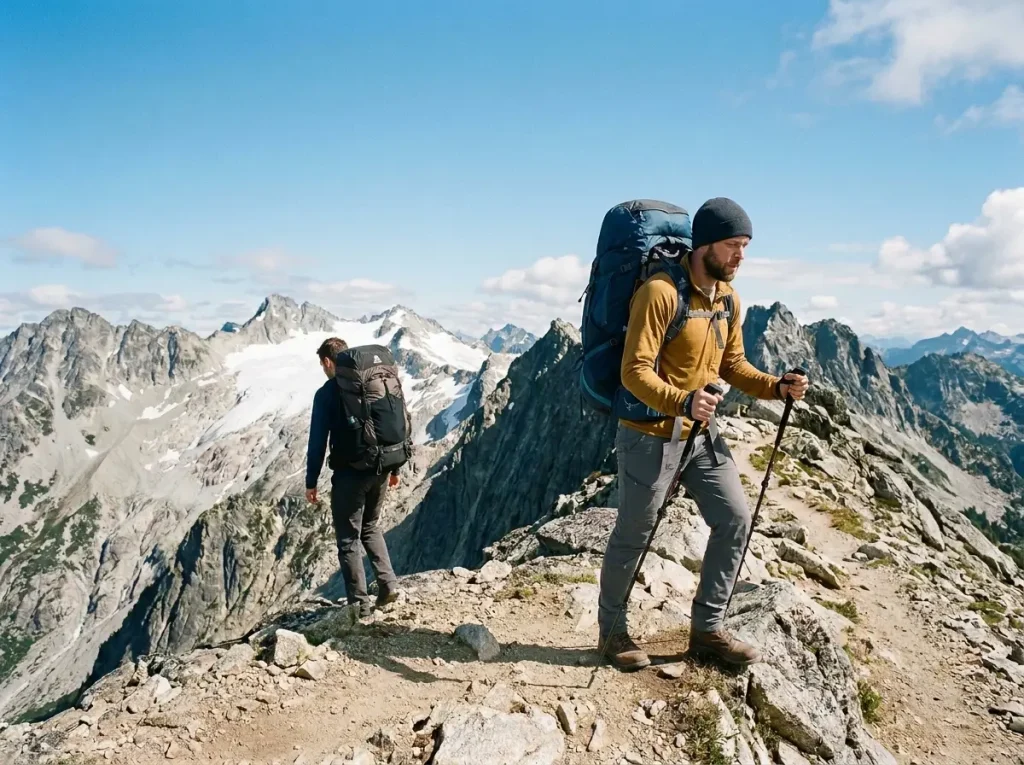
Before you go fiddling with load lifters on every pack you own, know that half of them do not need it. These straps only earn their keep under specific conditions, and chasing 45 degrees everywhere just wastes your time on packs that were never built for it.
The frame + weight threshold
Load lifters do real work on a framed pack carrying more than about 22 pounds. You need two things together: an internal frame stiff enough to pull against, and enough weight up top to actually need stabilizing. Below that, on a light load or a frameless bag, the straps mostly just deform fabric.
Where does the frame line really fall? Our guide on where the framed-versus-frameless line really falls digs into the weight threshold, and understanding how a pack’s suspension moves weight to your hips explains why a frame is what makes the lifters work at all.
Framed packs where the 45° rule pays off
A framed 40-liter-plus pack, the kind you carry on overnight and multi-day backpacking trips, is where the geometry actually shines. Something like the Osprey Atmos AG 65 (men’s) or the women’s Osprey Aura AG 65 (women’s) has a tensioned-mesh frame and an adjustable torso, so the lifter angle is easy to see and easy to set. It is the kind of pack people point to when they explain what good load-lifter geometry looks like.
You do not have to spend big to get a real frame, either. A lighter, budget-friendly option like the Granite Gear Crown3 60 sits right on the threshold with a removable frame. Frame in, the rule applies and the lifters do their thing. Frame out, the pack drops below the line and the straps go quiet, which is a useful way to feel the difference for yourself.
Frameless and ultralight, skip the rule
On a frameless or sub-2-pound ultralight pack, the load almost never rises above your shoulders, so there is nothing up high for the lifters to pull in. Tightening them just bends the fabric and changes nothing. The forum consensus among frameless users is simple: most people do not bother with the lifters at all, the pack rides on the shoulders regardless, and that is fine up to around 15 to 20 pounds.
So if you carry a good sub-2-pound frameless pack, do not chase the 45-degree rule. Rely on the hip belt and how you pack instead, keeping the heaviest items high and tight against your back. And the common question of whether daypacks need load lifters answers itself here: almost never, because a small daypack has neither the frame nor the weight to use them.
Conclusion
Load lifters fine-tune, the hip belt carries. Set the belt first, put the lifters second-to-last, and most of your fit problems sort themselves out. Aim for that 45-degree zone, firm and not cranked, and if a gap opens under your shoulder pads or the weight slides onto your shoulders, back them off instead of pulling harder. And read the angle before you fight it: if you cannot reach 45 at all, it is a sizing problem, and if your pack is frameless and light, the rule does not even apply.
Load up your pack, find a hill, and run the bottom-to-top sequence on a real walk. The whole thing clicks the moment you feel the top of the pack stop swaying and settle quietly against your back.
Frequently Asked Questions
01What angle should load lifter straps be at?
Aim for roughly 45 degrees, the strap angling back from your shoulder to the top of the pack. Anywhere in the 25 to 45 degree range does the job, so you do not need a protractor. At that angle the strap both pulls the pack into your back and lifts a little weight off your shoulders.
02Should load lifter straps be tight or loose?
Firm, not cranked. They should pull the top of the pack gently against your upper back without lifting the shoulder pads off your shoulders. If a gap opens under the pads they are too tight, and if the pack sways backward they are too loose.
03Why do my shoulders hurt even with my load lifters tightened?
Because tightening load lifters cannot fix pain that is coming from your hip belt. If the belt sits below your hip bones or is loose, the weight defaults to your shoulders, and cranking the lifters pulls even more weight up there. Reset the hip belt first.
04Do daypacks need load lifters?
Usually no. Load lifters only earn their keep on framed packs carrying more than about 20 pounds. On a small frameless daypack the load never rises above your shoulders, so the straps mostly just bend fabric and you can leave them alone.
05Can you over-tighten your load lifters?
Yes, and it is the most common mistake. Over-tightening opens a gap between your shoulders and the pads and dumps the load onto your shoulders, the opposite of what you wanted. Back them off until the top of the pack rests gently against your back.
Risk Disclaimer: Hiking, trekking, backpacking, and all related outdoor activities involve inherent
risks which may result in serious injury, illness, or death. The information provided on The Hiking Tribe is for
educational and informational purposes only. While we strive for accuracy, information on trails, gear, techniques,
and safety is not a substitute for your own best judgment and thorough preparation. Trail conditions, weather, and
other environmental factors change rapidly and may differ from what is described on this site. Always check with
official sources like park services for the most current alerts and conditions. Never undertake a hike beyond your
abilities and always be prepared for the unexpected. By using this website, you agree that you are solely
responsible for your own safety. Any reliance you place on our content is strictly at your own risk, and you assume
all liability for your actions and decisions in the outdoors. The Hiking Tribe and its authors will not be held
liable for any injury, damage, or loss sustained in connection with the use of the information herein.
Affiliate Disclosure: We are a participant in the Amazon Services LLC Associates Program, an
affiliate advertising program designed to provide a means for us to earn advertising fees by advertising and linking
to Amazon.com. As an Amazon Associate, we earn from qualifying purchases. We are also an official affiliate partner
of Black Diamond Equipment via the AvantLink network. If you click on a Black Diamond affiliate link and make a
purchase, we may earn a commission at no additional cost to you. We also participate in other affiliate programs and
may receive a commission on products purchased through our links. Additional terms are found in the terms of
service.