

















Nearly every new hiker makes the same two mistakes at the gear shop. They buy way more pack than the trip needs, then they size it to their height instead of their torso. Both feel logical. Both are wrong.
Strip away the marketing and a hiking backpack comes down to two numbers. One is set by your trip: how many liters you need. The other is set by your body: your torso length in inches. Get those two right and most of the rest is detail you can fine-tune on the trail. Ask anyone who’s watched a buddy haul a half-empty 65-liter pack on a flat weekend hike while their own snug 45 rode like part of their back, and you’ll hear the same thing: bigger is not safer, and taller does not mean a bigger size. Here’s how to nail both numbers, set the fit so the weight rides your hips, and skip the over-buy that trips up most beginners.
For the bigger picture on brands, features, and where each pack type fits, our complete guide to choosing a hiking backpack without wasting money ties it all together.
Start With Capacity — What Size Pack for Your Trip
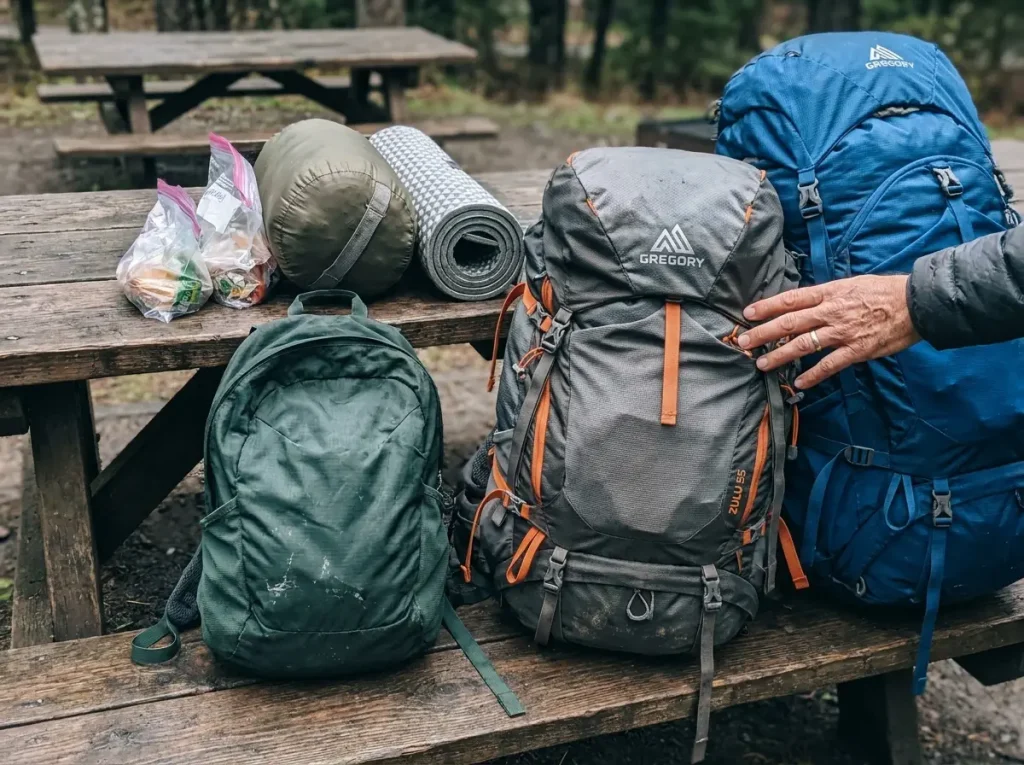
Here’s where people go wrong first. They picture the longest, wildest trip they might someday do, then buy for that. So a hiker who mostly does overnighters walks out with a 65-liter expedition hauler and spends the next two seasons carrying it half full.
Buy for the trip you actually do, not the one you imagine.
The liter ladder
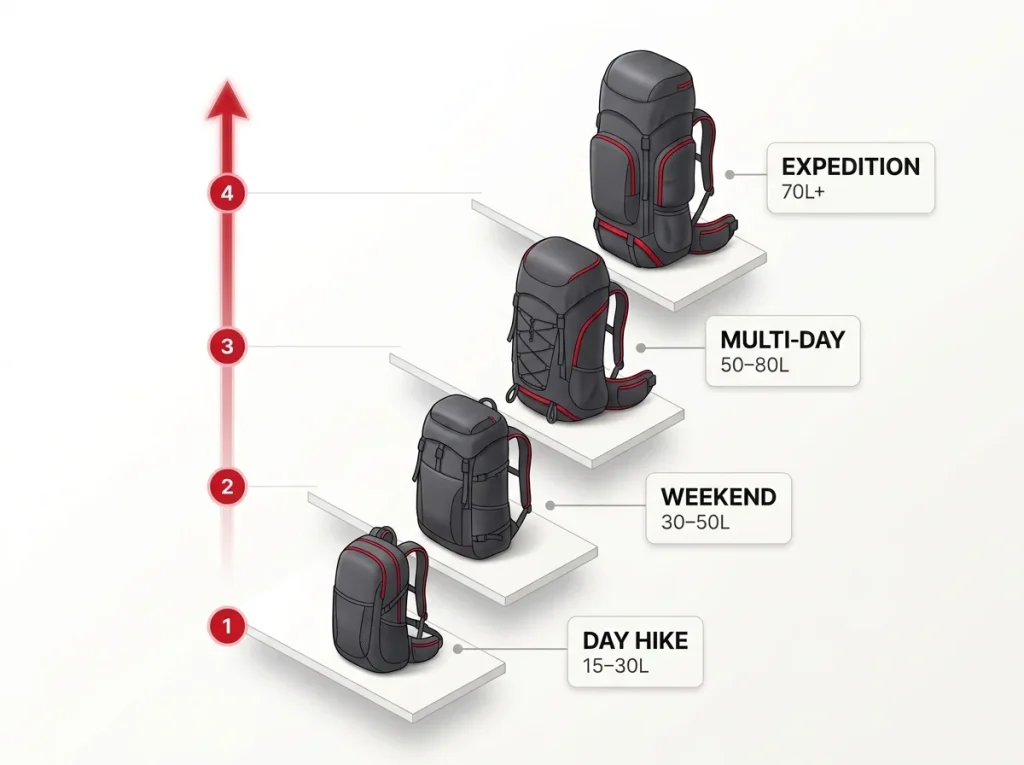
Pack capacity, or pack volume, is measured in liters (L) (you’ll still see cubic inches on some US-made packs), and it maps cleanly to trip length. REI’s widely-used breakdown is the one most hikers learn by: day hikes run 15–30L, weekend and overnight trips of one to three nights sit at 30–50L, multi-day trips of three to five nights climb to 50–80L, and full expeditions or winter loads push past 70L. Pick the rung that matches the longest trip you realistically take, not the dream thru-hike.
If you want the deeper breakdown of how the liters split between an overnight and a full weekend, that comparison goes a level past the ladder.
Why ~45L covers most weekends
Once your gear isn’t bulky, a 45L pack handles most one-to-three-night trips. The reason comes down to what the community calls the Big Three: your tent or shelter, sleeping bag, and sleeping pad. Those three items set your real minimum volume. Shrink them and everything else falls into place, which is why an efficient packer fits a weekend into 45 liters while someone with an old four-pound tent needs 60.
Your base weight (everything in the pack minus food, water, and fuel) drives this more than the pack itself.
An oversized pack carried half full is worse than a right-sized one carried full. The load floats and sways with every step instead of sitting tight against your back. If you can’t cinch the compression straps down enough to stop the sway, the pack is too big for the trip.
The Gregory Zulu 55 (men’s) and Jade 53 (women’s) sit right in that 50-to-55-liter range, the weekend sweet spot most hikers are happiest in (Zulu men’s · Jade women’s). It’s enough for a couple of nights without tempting you to fill empty space with gear you don’t need.
Where day packs sit
For a quick day hike, capacity and cost both drop fast. A simple packable bag like the ZOMAKE 25L (men’s and women’s, one unisex pack) holds the Ten Essentials, water, and a layer without a frame or a real hip belt. You don’t need to spend much, or carry much, for a few hours on trail.
Step up to a daypack with a real suspension and the Osprey Talon 22 men’s or Tempest 20 women’s covers all-day hikes and the messy 30-to-40-liter grey zone between a daypack and a backpacking pack (Talon men’s · Tempest women’s). If you’re stuck deciding where a daypack ends and a backpacking pack begins, that split is worth a read before you commit.
Why Torso Length, Not Height, Sets Your Size
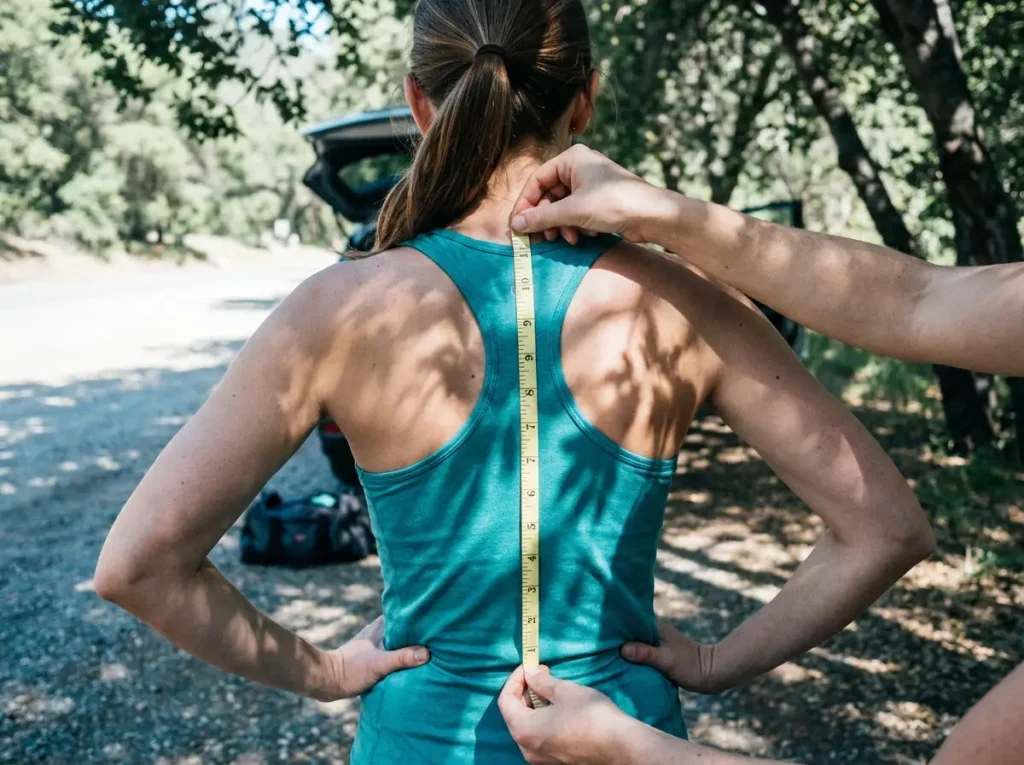
This is the one that surprises people. Pack size has almost nothing to do with how tall you are. It’s set by your torso length and your hip circumference. Height lies; the tape measure doesn’t. A six-foot guy can have a short torso, and a five-foot-four woman can have a long one, which is exactly why two friends the same height often need different pack sizes.
The two landmarks
Your torso length is the distance between two spots on your back. The top is the C7 vertebra, the bony bump you feel at the base of your neck when you tip your head forward. The bottom is the iliac crest, the line across the tops of your hip bones, the same shelf your hands rest on when you put them on your hips. Measure the distance along the curve of your spine between those two points and you have your number.
The full step-by-step on measuring your torso length the right way walks through doing it solo when no one’s around to help.
What your number means
Most torso lengths land between 15 and 22 inches, and packs are sold in size ranges that map to those inches: roughly small under 18, medium 18 to 20, large above 20, though every brand draws the lines a little differently. If your measurement falls outside the common range, or right on a boundary, you’re in adjustable torso territory. Don’t force a stock pack to fit a body it wasn’t cut for.
How to get measured
You can’t measure your own torso accurately by reaching behind your back. Have a friend run a soft tape from your C7 down to your iliac crest while you stand normally, or get fitted at a specialty outfitter who does this all day. An adjustable-torso pack buys you margin if you’re between sizes or still dialing in your number.
A wrong torso number can’t be cinched out later. If there’s a gap between the tops of your shoulders and the shoulder straps once the pack is loaded, the torso is too long, and no amount of strap-tightening will fix it. That’s a return, not an adjustment.
Dialing In the Hip Belt and Load Transfer
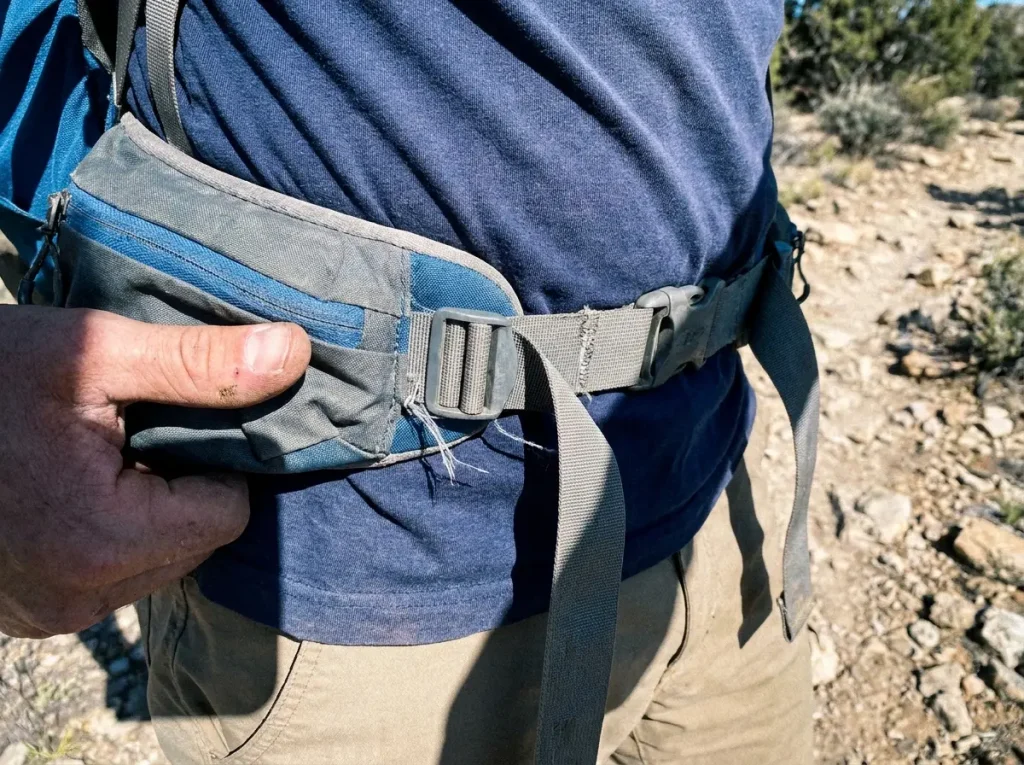
The weight should ride your hips, not hang off your collarbones. If your shoulders are screaming an hour into a hike, the hip belt isn’t doing its job, and that’s almost always a fit problem rather than a strength problem. The American Hiking Society’s rundown of pack fit and features lands on the same point.
Where the belt sits
The hip belt rides on top of the iliac crest, wrapping that shelf of bone, snug but not crushing. Set it too low and it slides down over the hips, dumping the load straight onto your shoulders. The pad should sandwich your hip bones, not float above them or sag below.
The 70–80% rule
A correctly fitted hip belt carries about 70–80% of the pack’s weight. The shoulders only stabilize and keep the load from tipping back. This is the whole point of a suspension system: whether the pack runs an internal frame, an external frame, or no frame at all (a frameless pack), the structure moves weight down to your hips, where your legs, your strongest muscles, do the carrying. How the frame and suspension actually move weight to your hips is worth understanding if a pack never feels right no matter how you set it.
When the belt is the problem
Here’s the gotcha most guides skip: many packs ship with one hip belt size for the whole pack. If your waist is narrow or wide, that single belt may never cinch onto your iliac crest, and that’s not something you tighten your way out of. Before you buy, confirm the belt actually closes onto the bone for your body. Wearing the belt too low and too tight to compensate just leaves your hips and thighs numb without transferring any real load. If your stock belt won’t seat right on the bone, a swappable or moldable belt is sometimes the fix, though it’s overkill for lighter loads.
The Strap System at a Glance
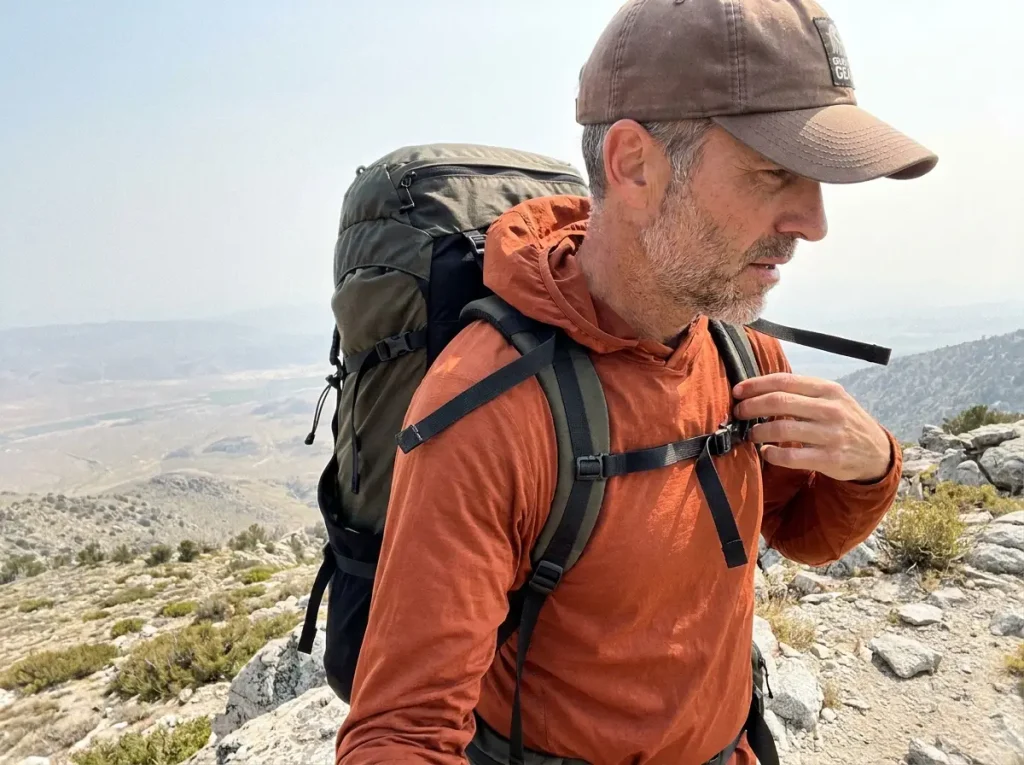
Most people crank every strap tight and wonder why the pack feels worse. There’s an order to it, and the straps each have a job.
Shoulder straps and load lifters
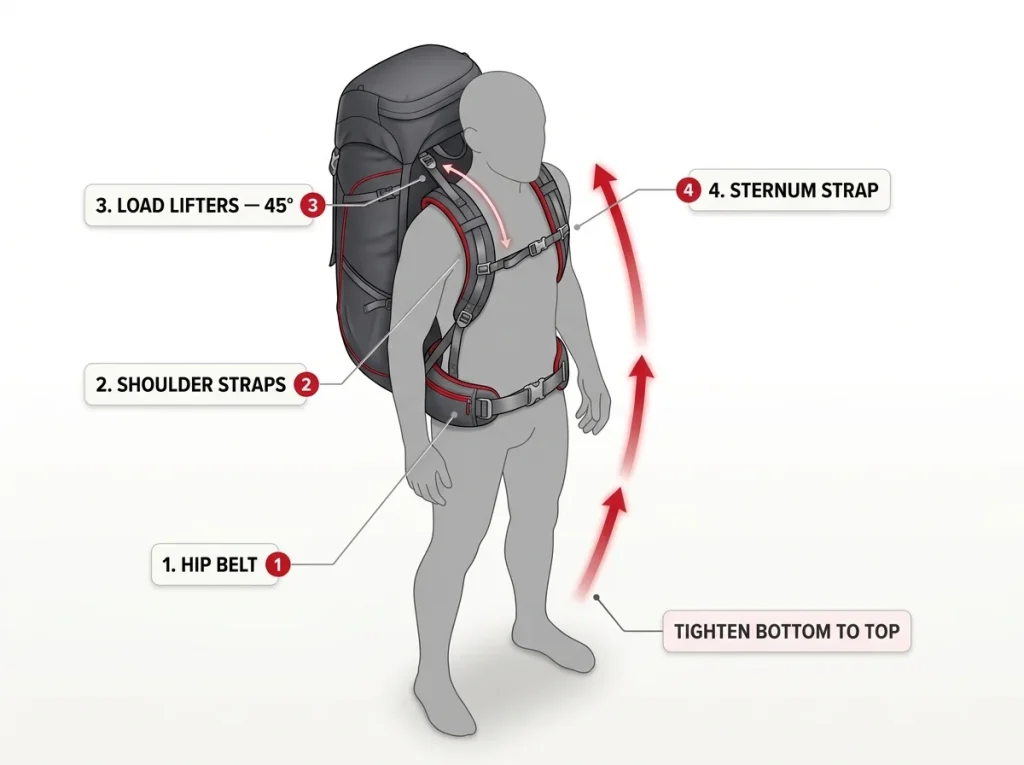
The shoulder straps wrap over and around your shoulders without gaps. Above them, the load-lifter straps run from the top of the shoulder straps back to the pack body, and they should form roughly a 45-degree angle. That angle is the tell. Crank them past 45 and you just yank the pack into your back and lift the belt off your hips; leave them too slack and the top of the load floats away from you. The full technique for setting your load lifters gets into why the angle matters more than the tension.
The sternum strap
The sternum strap clips across your chest about one inch below your collarbones. Higher and it chokes; lower and it does nothing. Its only job is keeping the shoulder straps from sliding outward, so where you set it is a small adjustment with an outsized effect on comfort.
The dial-in order
Adjust from the bottom up, every time:
- Loosen every strap before you start.
- Seat the hip belt on your iliac crest and buckle it.
- Snug the shoulder straps until they wrap with no gap.
- Set the load lifters to that 45-degree angle.
- Clip and adjust the sternum strap last.
If tightening the sternum strap still won’t keep the shoulder pads from sliding off your shoulders, you don’t need a tighter strap, you need a narrower harness. That’s a fit issue the straps can’t solve, and it’s especially common for smaller frames in a standard men’s pack.
Once the order makes sense, our full backpack fit guide walks the whole adjustment sequence start to finish.
Capacity and Fit Are Two Different Decisions
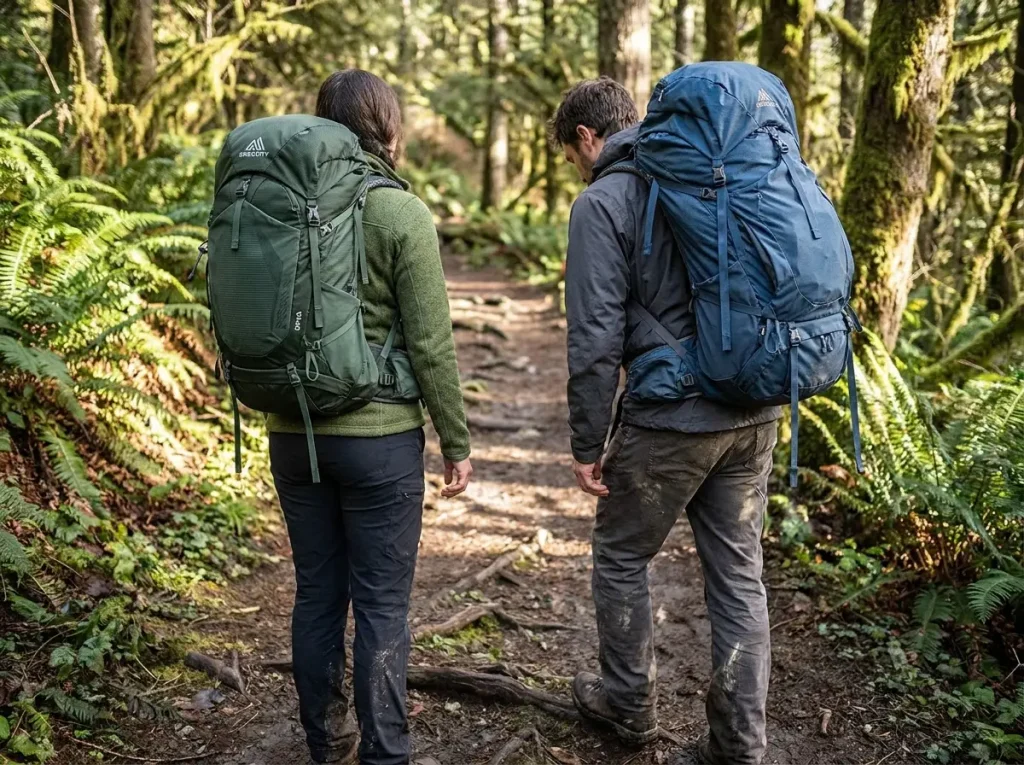
This is the part that ties the whole thing together, and it’s where most buying advice falls short. Capacity and fit are independent. They are two separate dials, not one.
Liters for the trip, size for the body
A petite hiker can carry a 65-liter pack comfortably if it’s torso-sized correctly. A tall guy can be miserable in that same 65 if the torso is too long for his back. Liters answer “what trip am I packing for.” Torso size answers “what body am I fitting.” Mixing them up is how people end up convinced they need a bigger or smaller pack when what they really need is a better-fitting one.
The over-buy trap
The over-buy comes from treating “bigger” as “safer.” It isn’t. An oversized pack carried half full lets the load shift and sway, and it genuinely handles worse than a right-sized pack packed full. You don’t get a safety margin from extra empty liters; you get a bag that won’t sit still. A pack that rides well sits tight on your hips and doesn’t move, and that’s far easier to achieve at the right capacity.
Right-sizing without going ultralight
Right-sizing doesn’t mean going extreme. Light does not have to mean tiny. The Granite Gear Crown3 60 (men’s and women’s fit, one unisex pack) is a good example: a framed 60-liter that comes in around two pounds and still handles multi-day loads without the bulk of a 70-liter hauler. It proves you can have the capacity for longer trips without the over-buy weight penalty. How much base weight you carry, and whether you need a frame at all, drives how much pack you actually need far more than the size of the trip alone.
Women’s, Short-Torso, and Long-Torso Fit (and the Loaded Test-Walk)
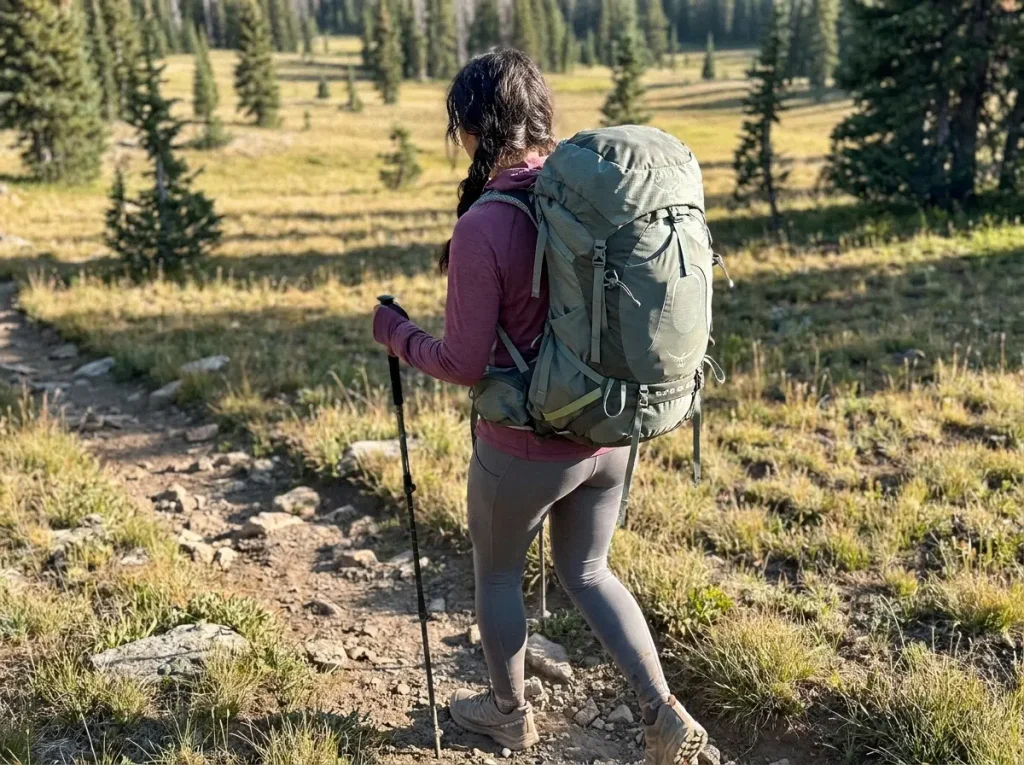
Stock packs are cut for an average body, and plenty of hikers aren’t average. This is where the gender-specific and adjustable options earn their place.
What a women’s pack actually changes
A women’s-specific pack isn’t a men’s pack in different colors. The geometry is different in three real ways: a shorter default torso, S-curved shoulder straps instead of straight ones, and a hip belt canted for a more flared pelvis. The S-curve matters because a straight strap pulls across the chest on many women, which a curved strap routes around. None of that is marketing; it’s a different shape for a differently-shaped body.
The Osprey Atmos AG 65 men’s and Aura AG 65 women’s pack is the reference here (Atmos men’s · Aura women’s): an adjustable-torso, internal-frame pack with a suspension that transfers load to the hips well, and the Aura carries the true women’s geometry rather than a recolor.
Short-torso man, long-torso woman
Bodies don’t read the label on the pack. If you’re a man with a short torso or a woman with a long one, go by your torso number, not the gender stamped on the tag. Favor adjustable-torso packs that can be set to your measurement. The number wins over the marketing, every time. If you’re a guy sizing around a shorter torso, our men’s pack picks flag the models with the most adjustment range.
The loaded test-walk
Here’s the step almost nobody does, and it’s the one that catches a bad fit before you pay. The empty pack in the store always feels fine. The loaded one tells the truth. Load the pack with realistic weight before you decide, use the store’s sandbags or water jugs if you have to, and walk for a few minutes. Pay attention to where the weight settles and whether your shoulders stay quiet. A pack that feels great empty and digs in loaded was never the right pack.
If your arms go numb 40 minutes in, that’s not the pack “breaking in.” It’s almost always a torso that’s too long, leaving the load stuck on your shoulders. Re-seat the belt, check the torso, and if the gap’s still there, take it back.
Putting the Two Numbers to Work
Choosing a hiking backpack stops being overwhelming the moment you treat it as two numbers instead of one big decision.
- Liters come from your trip, torso inches come from your body, and the two are independent.
- The hips carry the load, so seat the belt on your iliac crest and set the load lifters to 45 degrees.
- Size for the trip you actually take, not the imaginary epic, and load the pack before you buy it.
Measure your torso this week, then size your next pack to the trip in front of you instead of the one in your daydreams. That one shift saves more hikers from a bad pack than any spec sheet.
Frequently Asked Questions
01What size hiking backpack do I need for a day hike versus a multi-day trip?
Day hikes run 15–30L, weekends 30–50L, and multi-day trips of three to five nights 50–80L. Pick the rung for the longest trip you realistically do. Most weekend hikers are happiest around 40–50L.
02Should a backpack fit my height or my torso?
Your torso, not your height. Pack size is set by the distance from your C7 vertebra to your iliac crest. Two people the same height can need different sizes because their torsos differ.
03How much of a backpack’s weight should the hip belt carry?
About 70–80%. The belt rides on top of your iliac crest and your hips take the load, while the shoulders only stabilize it. If your shoulders ache, the belt is sitting too low.
04Is it better to buy a bigger backpack so I have extra room?
Usually no. An oversized pack carried half empty lets the load float and sway, so it carries worse than a right-sized pack that’s full. Size for the trip you take, not just in case.
05How do I know if a backpack is too big or too long for me?
A too-long torso leaves a gap between the tops of your shoulders and the straps, and the weight stays on your shoulders no matter how you cinch. If your arms go numb on a short walk, the torso is too long.

I've spent more than a decade researching hiking gear and trail technique. I read the specs, the forum threads and the long-term reviews, and every pick here comes with what it gets wrong.
End of the trail
You read every mile of this one. Here's where the trail goes next.