In this article
You clip the rain cover on at the first drizzle, feel like you’ve handled it, and roll into camp four hours later to find your sleeping bag damp anyway. The rain cover is the most oversold piece of waterproofing gear there is, and the hikers who actually keep their kit dry treat it as the last layer, not the plan. The truth is that no single product will waterproof your backpack. It takes a stack: fabric treatment, sealed seams, a liner, dry bags, and yes, a cover on top. Here’s the whole system, in order, and exactly where each piece fails so you can match the method to the weather instead of trusting one bag and hoping.
Water-Resistant Isn’t Waterproof, and That Gap Is Where Gear Gets Wet

Pick up almost any hiking pack and the tag will tell you it’s “water-resistant.” That word is doing a lot of quiet work. It means the fabric shrugs off a passing shower, not that your down bag survives six hours of mountain rain. Almost no standard backpacking pack is truly waterproof out of the box, and the spec sheet won’t tell you where it leaks. So before you spend a cent on sprays or covers, it helps to understand what you’re actually fighting. The construction details that set a pack’s baseline water resistance are worth weighing when you’re choosing a hiking backpack in the first place.
What the Hydrostatic Head Number Really Tells You
If you dig into a fabric’s specs, you’ll find a hydrostatic head rating, usually 1,500 to 3,000 mm on hiking packs. It’s a lab measurement of how tall a column of water the fabric holds back before it seeps through. Useful, but incomplete. That test measures static pressure on flat, unstressed fabric. It says nothing about what happens when a loaded shoulder strap or a cinched hip belt presses the same fabric hard against your back for hours. Localized pressure blows right past the static number, which is why a pack rated for a respectable column of water still wets through at the contact points.
Where Your Pack Leaks First (Straps, Hip Belt, Seams)
Water doesn’t soak in evenly. It finds the shoulder straps, the hip belt, the back panel, and the seams first, and those are exactly the spots a rain cover never reaches. The padded straps and belt act like sponges once they’re saturated, wicking moisture toward the main compartment. Worse, all that pressure comes from the same shoulder straps and hip belt that carry the load, so a pack that fits tight against your back leaks faster there than one riding loose. A fully soaked 42-liter pack can take on around 11 ounces of water, most of it stored in that back panel and the straps a cover leaves bare.
The PU Coating That Quietly Wears Out
Flip your pack inside out and you’ll see a thin, slightly rubbery film on the fabric’s inner face. That polyurethane (PU) coating is the real waterproof barrier, more than the outer fabric itself. The problem is it doesn’t last forever. Heat, humidity, and time break it down, and it starts to flake or peel away from the fabric in a process called hydrolysis. Once that coating delaminates, no amount of spray or cover brings it back. A pack that smells faintly sweet or musty is already telling you the coating is breaking down, which matters later when we talk about drying.
The Layered Waterproofing System That Actually Keeps Gear Dry
Stop thinking about waterproofing as one product to buy. It’s a stack, and the order of the layers matters more than any single piece in it. Each layer backs up the one outside it, so when the cover blows off or the fabric wets through, the next layer down still has you covered. This is the part most guides skip. They hand you a flat list of options as if a rain cover and a pack liner do the same job. They don’t. One sheds rain off the outside, the other keeps water away from your gear on the inside, and you want both working together.
The Five Layers, In Order
Built from the fabric out, the system goes like this. First, a DWR spray that refreshes the fabric’s ability to bead water. Second, seam sealer on the stressed stitch lines where needle holes pierce the coating. Third, a pack liner inside the main compartment, a waterproof bag that holds everything. Fourth, individual dry bags for the things that can’t get wet, like your sleep system and electronics. Fifth and last, the rain cover on the outside, and only when conditions call for it. Read that order again and notice the cover sits at the bottom of the priority list, not the top.
Why the Rain Cover Goes Last, Not First
Here’s the reframe that changes how you pack. The liner and dry bags are your real defense. The cover is a convenience layer. A liner doesn’t care that your straps are soaked or your back panel is dripping, because it waterproofs from the inside out. The cover, meanwhile, only protects the surfaces it can physically reach, and it bails on you the moment the wind picks up. If you internalize one idea from this whole article, make it this: build from the inside out, and the cover becomes a nice-to-have instead of a single point of failure.
Matching the System to the Forecast
You don’t need every layer on every hike, and knowing which to deploy is half the skill. For a light drizzle on a day hike, refreshed DWR plus a cover is plenty. For a sustained storm on an overnight, the liner does the heavy lifting and the cover just keeps the pack fabric from getting waterlogged and heavy. And for a deep stream crossing where the pack can go fully under, the liner and dry bags are the only thing that matters, because a cover floats right off and a soaked pack body just adds weight. This is where reading a stream crossing safely and waterproofing your gear become the same skill.
The story that keeps coming up in thru-hiker threads is the same one: someone’s pack went under at a crossing, the rain cover floated away downstream, and the only reason the sleeping bag stayed dry was the liner. Pack like the cover will fail, because one day it will.
Method 1: Refresh the Fabric With a DWR Spray
This is the cheapest, most-skipped maintenance step in the whole stack. DWR stands for durable water repellent, the factory treatment that makes water bead up and roll off your pack instead of soaking in. It wears off with use, and most people don’t think about it until the pack is already drinking water. Re-treating the fabric won’t make a worn-out pack waterproof on its own, but it’s the foundation the other layers sit on, and it keeps the fabric from getting heavy and slow to dry.
The Wet-Out Test (How to Know It’s Time)
You don’t have to guess when the DWR is spent. Splash a little water on the pack and watch. If it beads up and rolls off, you’re fine. If it soaks in and the fabric darkens, the treatment has wet out, and that visible failure shows up weeks before the fabric actually starts leaking. That early warning is the whole point. Catch the wet-out on the back porch and you fix it in five minutes. Miss it and you find out at mile nine in a downpour. Make the splash test a habit before any trip with rain in the forecast.
How to Reapply DWR Step by Step
Re-treating is simple. Clean the pack first, because spray bonds to fabric, not trail grime. Let it dry, then mist an even coat of a spray-on repellent across the outer fabric, paying extra attention to the top and shoulders that catch the most rain. For most packs the go-to is the Nikwax TX.Direct Spray-On, a water-based, PFAS-free formula that plays well with nylon and most coatings. If you can’t find it, the GEAR AID Revivex DWR Spray does the same job and handles softshell and Gore-Tex fabrics nicely. This kind of reproofing takes five minutes, so plan on reapplying roughly every 20 to 30 wash cycles or 10 to 15 hours of hard rain. A single bottle treats several pieces of gear, so it’s a low-cost habit, not a splurge.
Heat reactivates DWR. After the spray dries, run a hair dryer on medium over the fabric for about 15 minutes and the repellency snaps back stronger. It works in the field too if you’ve got a few minutes near a fire’s edge. The same heat-first protocol that revives worn-out DWR on a jacket works on a pack.
The same logic carries over to the rest of your kit, and there’s a full heat-first walkthrough in our guide to restoring DWR if you want to dial it in.
When DWR Spray Is the Wrong Move (DCF, Silnylon, Waxed Canvas)
Here’s where people waste money. DWR isn’t universal. On a Dyneema Composite Fabric pack, sometimes still called cuben fiber, the kind you’ll find among the lightest ultralight packs that are waterproof by construction, spray does nothing measurable, because DCF is already waterproof and the only thing that leaks is the seam tape. On silnylon, the silicone impregnation already sheds water, so your effort belongs on the seams instead. And on waxed canvas, like a Fjällräven or Filson pack, DWR won’t even bond. Canvas waterproofing is its own job: those fabrics need a fresh coat of wax like Otter Wax or Fjällräven Greenland Wax, not a synthetic repellent. The regulatory side has shifted here too, since the older fluorinated DWR chemistry relied on PFAS, the “forever chemicals” regulators are phasing out of outdoor gear, and the newer water-based formulas now match them on initial repellency. Going PFAS-free is no longer a performance trade.
Method 2: Seal the Stitch Holes Nobody Thinks About
Every needle that built your pack punched a hole straight through the waterproof coating. A typical pack has thousands of them. Yet most packs ship without sealing a single seam, unlike tents and rain jackets where taped seams are standard. Those stitch lines are direct water paths to your gear, and in sustained rain they leak quietly while you’re congratulating yourself on the cover. Sealing them is tedious and unglamorous, which is exactly why nobody does it, and why it’s one of the highest-return ten minutes you’ll spend on your kit.
Why Pack Seams Aren’t Taped From the Factory
Tents and jackets get factory seam tape because the manufacturer assumes they’ll face standing water and wind-driven rain. Packs usually don’t get the same treatment, partly to save weight and cost, partly because the maker assumes you’ll add a cover. So the stitching sits there exposed, a row of tiny punctures through the one layer that’s supposed to keep water out. On an older pack with a tired PU coating, those seams are often the first place you’ll see a damp patch spreading on the inside.
Which Seams Actually Need Sealing
You don’t have to seal every inch. Focus on the high-stress, high-exposure seams: the bottom panel that sets down in mud and puddles, the seam under the lid where rain pools, and anywhere the main pack body meets a zipper or an external pocket. Those are the spots that take the most water and flex the most in use. Skip the decorative stitching and the lightly loaded panels. Twenty minutes on the seams that matter beats two hours trying to coat the whole pack.
How to Apply Seam Sealer Without a Mess
The technique is straightforward but unforgiving of shortcuts. The pack has to be clean and bone dry, or the sealer never bonds and peels off within a week, which is the single most common mistake here. Turn the pack inside out where you can, run a thin bead of GEAR AID Seam Grip WP along the inside of the stitch line, and smooth it with a gloved finger or the included brush. One tube seals roughly 12 feet of seam and works on nylon, canvas, and vinyl. Then leave it alone for a full 24 hours to cure before it sees a drop of rain. If you’ve ever sealed a tent floor, it’s the same seam-sealing method that keeps a tent dry, just on a smaller canvas.
Method 3: Line the Inside, Your Real Defense
If you do exactly one thing on this list, do this one. A pack liner is a waterproof bag that goes inside your main compartment and holds everything you own. It’s the layer that stands between a downpour and a dry sleeping bag, and it’s the reason experienced hikers can let their pack fabric soak through without losing a wink of sleep. There’s a full breakdown of why a pack liner beats a rain cover, and why a one-dollar bag often wins, but the short version is this: a liner waterproofs from the inside, so it doesn’t care about soaked straps, a wet back panel, or a cover that blew off in the night.
The Commercial Liner Worth Buying
If you want a purpose-built waterproof liner, the Sea to Summit Ultra-SIL Pack Liner is the one most hikers land on. It’s a 30-denier ripstop nylon bag with a roll-top closure, weighs around 100 grams, and packs down to nothing. The large size swallows a 40 to 70-liter pack with room to roll the top down properly, which is what actually makes the seal. It’s the comfortable, durable choice if you’d rather buy once and forget about it, and it shrugs off the abuse of being stuffed and unstuffed every day on a long trip.
The Trash Bag Trick That Works Just as Well
Now the part the gear shops won’t tell you. A heavy-duty contractor trash compactor bag, the 2 to 3-mil kind, does almost exactly the same job for about a dollar. Thru-hikers have leaned on the trash bag trick for decades, and it isn’t an emergency hack, it’s a legitimate technique. Add a strip of Gorilla Tape to reinforce the bottom and you’ve got a liner that performs within a hair of the commercial version. It’s lighter on your wallet and easy to replace mid-trip at any hardware or grocery store. The only real downside is durability, since a compactor bag might last a couple of weeks of hard use where the silnylon version lasts years.
However you seal a liner, the fold is what matters. With a trash bag, press the air out, roll the opening down several turns, then twist and tuck it under the load. That roll-and-twist makes a submersion-grade seal with no buckle, the same closure principle a roll-top dry bag uses.
Dry Bags for the Things You Can’t Replace
The liner handles the bulk, but the items you truly can’t afford to lose, your electronics, your documents, and your down sleep gear, earn a second barrier. Individual dry bags give you that redundancy, and they keep the inside of your pack organized while they’re at it. The Earth Pak Waterproof Dry Bag is the best value in the category, a roll-top dry sack that ships with an IPX8-rated waterproof phone case, which quietly solves the electronics problem in the same purchase. That roll-top seal is the same closure principle a dry-top pack lid uses, and once you trust it you stop worrying about your phone in a storm.
Color-code your dry bags. Blue for the sleep system, red for electronics, yellow for food is the convention a lot of long-distance hikers settle on. When you’re digging through a packed bag in the dark with a headlamp dying, finding things by color beats squeezing every sack to guess what’s inside.
Method 4: The Rain Cover, Why the Popular Pick Comes Last
Here’s the piece everyone reaches for first and the one that disappoints most. A rain cover is the stretchy shell that pulls over the outside of your pack, and on its own it’s a half-measure. That’s not a reason to throw it out. Used for what it’s actually good at, it earns a spot in the system. The mistake is treating it as the whole plan, which is exactly the trap the cover’s marketing sets and the reason your gear keeps getting wet despite it.
What a Rain Cover Actually Protects
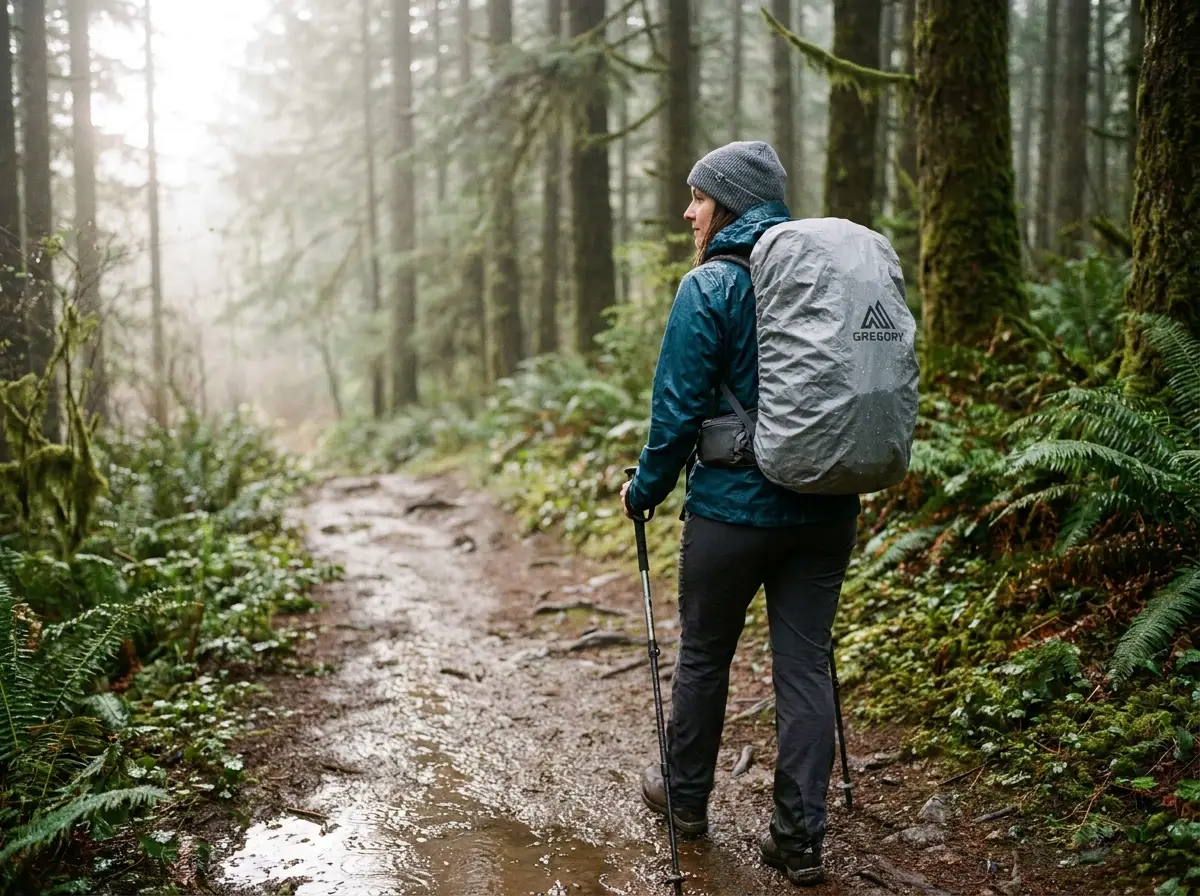
Give the cover its due. In light, vertical rain it sheds water off the main pack body before the fabric saturates, which keeps the pack lighter and dries faster afterward. It also takes the brunt of abrasion and trail spray on a brushy path. For a short day hike under gentle rain, a cover plus decent DWR genuinely is enough, and you can leave the liner at home. The trouble starts the moment the weather gets serious, because the cover’s coverage has hard limits the marketing photos never show.
The Sail Effect and Other Failure Points
A cover only protects the surfaces it physically wraps. The back panel pressed against your spine, the shoulder straps, and the hip belt all stay exposed, and in lateral or wind-driven rain the water marches straight into those gaps. Then there’s the sail effect: in wind over about 30 miles per hour, the cover catches air like a kite and yanks the load off balance, which is the last thing you want on an exposed ridge. Covers also snag on brush and ride up, leaving the bottom of the pack open to spray. None of this makes the cover useless. It makes it a supplement, never a substitute.
When the wind gusts hard enough to flap the cover against the pack, take it off. A cover catching wind on a ridgeline destabilizes your load and can stagger you on bad footing. If your liner is doing its job, you lose nothing by stowing the cover and trusting the layer underneath.
When a Cover Still Earns Its Place
So should you carry one? For most hikers, yes, as the outer layer over a liner, not instead of one. The Osprey Ultralight Raincover is the recognizable, packable pick, fitting most 30 to 50-liter packs and stuffing into its own pocket. If you’d rather spend less, a non-branded Joy Walker cover covers the same range for a fraction of the cost and does the job. Either way, think of the cover as the convenience that keeps your pack from getting heavy and waterlogged, while the liner inside is what keeps your gear dry. That division of labor is the whole reason the cover sits last in the stack.
Drying Your Pack So It Doesn’t Rot From the Inside
Here’s the part nobody talks about, and it’s the one that decides how many seasons your pack lasts. The damage doesn’t happen in the rain. It happens in the week the wet pack sits forgotten in a closet. Mold and PU hydrolysis both start within 48 to 72 hours in a damp, stored pack, and once hydrolysis kicks off there’s no reversing it, only prevention. Spend ten minutes drying the pack right and you add years to its life. Skip it and you’re shopping for a replacement sooner than you should be.
The Post-Hike Drying Routine
The routine is quick. Empty the pack completely, including the side pockets you always forget. Unzip every compartment so air moves through. Hang it upside down in a ventilated space, a garage or a covered porch, for at least four to six hours. Then check the hip belt foam last, because that dense padding holds the most moisture and dries slowest, and a pack that feels dry on the outside can still be damp in the belt. Don’t rush it back into storage just because the fabric looks dry to the eye.
That Musty Smell Is PU Hydrolysis
You know the smell. Pull an old pack out of the gear closet and it hits you, a sweet, musty odor that no amount of airing fully clears. That’s PU hydrolysis, the polyurethane coating breaking down chemically as trapped moisture and warmth eat away at it. The smell is the coating telling you it’s failing, and it’s the same delamination that turns the inner face flaky and tacky. Catching it early and drying religiously slows it down, but past a certain point the coating is gone and the pack’s waterproofing goes with it. That’s the line where careful drying crosses into knowing when PU hydrolysis means it’s time to replace the pack.
How to Store a Pack Between Trips
Storage is the last piece, and it’s easy to get wrong. Once the pack is fully dry, store it loose and uncompressed, never stuffed tight in a compression sack or crammed into a bin. Trapped moisture needs somewhere to finish escaping, and compression seals it against the coating, which is exactly the condition hydrolysis loves. A loose pack on a shelf or hung in an open closet keeps air moving around it. The single fastest way to grow mold is to zip a damp pack into a sealed tote “to deal with later,” so deal with it now and your pack thanks you for years.
The Bottom Line on Keeping Your Gear Dry
Waterproofing a backpack isn’t one purchase, it’s a layered system you build from the fabric out. Treat the fabric, seal the seams, line the inside, bag what you can’t replace, and add the cover only when the weather earns it. The liner and dry bags are your real defense, and the rain cover is the optional last layer, not the foundation everyone mistakes it for. And whatever stack you run, drying the pack properly after the trip is what makes all of it last.
Before your next wet forecast, build the system that weather actually calls for instead of the one product a search result told you to buy. A drizzle and a deep crossing need different layers, and now you know which ones to reach for.
Frequently Asked Questions
01Does waterproofing spray actually work on backpacks?
Yes, but it refreshes water repellency rather than making a pack fully waterproof. A DWR spray restores the fabric’s ability to bead water so it does not soak in and get heavy. It works best as the base layer of a system, paired with a liner.
02Is a rain cover or a pack liner better for hiking?
A pack liner keeps your gear drier because it waterproofs from the inside, unaffected by soaked straps or wind. A rain cover only shields the surfaces it wraps and blows off in gusts. For serious rain, the liner wins, with the cover as a useful supplement.
03How long does backpack waterproofing last before you reapply?
Plan on refreshing DWR every 20 to 30 wash cycles or 10 to 15 hours of hard rain. The real signal is the wet-out test: when water stops beading and soaks in instead, it is time to reapply, often a season or two of regular use.
04Can you waterproof a backpack without a rain cover?
Absolutely, and many experienced hikers do. A pack liner plus individual dry bags keeps your gear dry without any cover at all. The pack fabric may get wet and heavy, but everything inside stays protected, which is what actually matters in a storm.
05Will a trash bag really keep gear as dry as a pack liner?
For waterproofing, yes. A heavy-duty contractor compactor bag performs within a hair of a commercial liner for about a dollar. The trash bag trick is a long-standing thru-hiker method. The only trade-off is durability, since it tears sooner under daily abuse.
Risk Disclaimer: Hiking, trekking, backpacking, and all related outdoor activities involve inherent
risks which may result in serious injury, illness, or death. The information provided on The Hiking Tribe is for
educational and informational purposes only. While we strive for accuracy, information on trails, gear, techniques,
and safety is not a substitute for your own best judgment and thorough preparation. Trail conditions, weather, and
other environmental factors change rapidly and may differ from what is described on this site. Always check with
official sources like park services for the most current alerts and conditions. Never undertake a hike beyond your
abilities and always be prepared for the unexpected. By using this website, you agree that you are solely
responsible for your own safety. Any reliance you place on our content is strictly at your own risk, and you assume
all liability for your actions and decisions in the outdoors. The Hiking Tribe and its authors will not be held
liable for any injury, damage, or loss sustained in connection with the use of the information herein.
Affiliate Disclosure: We are a participant in the Amazon Services LLC Associates Program, an
affiliate advertising program designed to provide a means for us to earn advertising fees by advertising and linking
to Amazon.com. As an Amazon Associate, we earn from qualifying purchases. We are also an official affiliate partner
of Black Diamond Equipment via the AvantLink network. If you click on a Black Diamond affiliate link and make a
purchase, we may earn a commission at no additional cost to you. We also participate in other affiliate programs and
may receive a commission on products purchased through our links. Additional terms are found in the terms of
service.