In this article
Three miles in, your shoulders are burning and you’re already scanning every flat rock as a place to drop the pack. Here’s the thing: the pack probably isn’t too heavy. It’s set up wrong. Ask anyone who’s logged real trail miles and the same line comes back, when shoulders ache by lunch, the hip belt is almost always the culprit, not the straps. A loaded pack is built to ride your hips, and most of them don’t because the fit was never dialed. This is how to fit a backpack properly, bottom-to-top, plus how to read the exact pain it’s handing you and trace it back to the one strap that’s off. If the pack itself is the wrong size, no amount of tuning saves it, and that starts with choosing the right pack in the first place.
What Properly Fitted Actually Means (Your Hips Do the Work)
The 80/20 Rule That Changes Everything
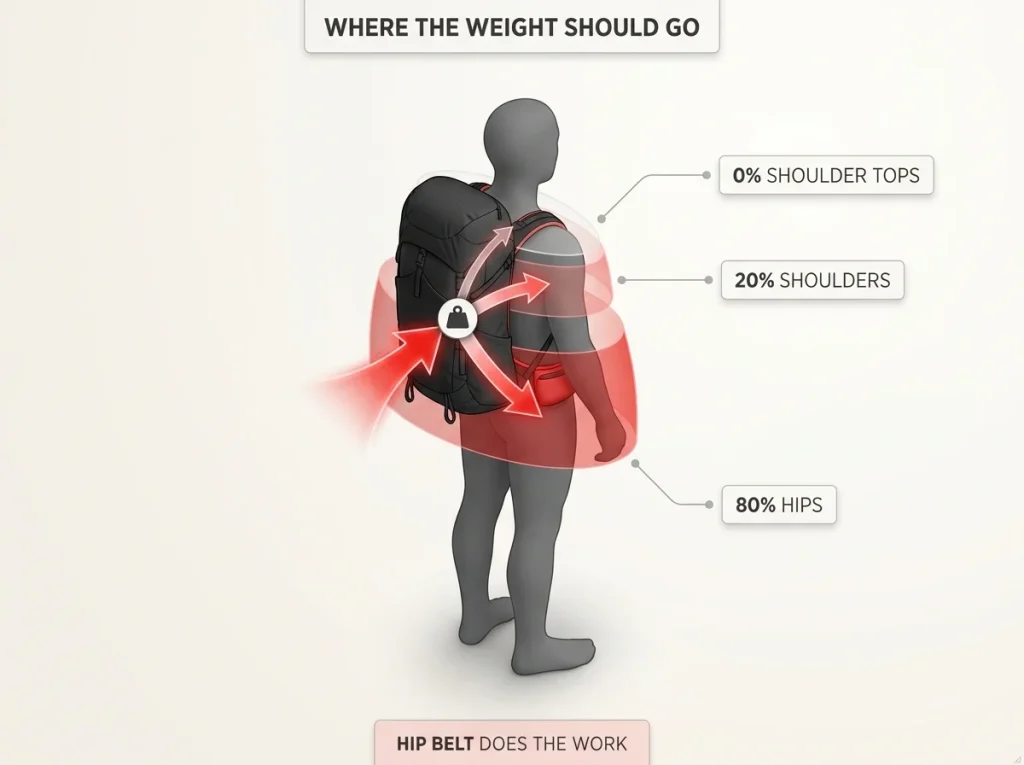
A backpack that fits right puts about 80 percent of the load on your hips and roughly 20 percent on your shoulders. The very top of your shoulders should carry almost nothing. That single ratio is the whole game, and it’s the part most people never hear. Your hip bones are built to carry weight all day. Your shoulders and neck are not, which is why they’re the first thing to complain.
The hip belt is the device that does the transfer. Everything above it, the shoulder straps, the load lifters, the sternum strap, exists to keep the pack snug against your back so it doesn’t sway. None of those straps is supposed to hold the weight. When they end up holding it anyway, that’s when the aching shoulders, the red marks, and the numb hands show up.
Your Shoulders Are Stabilizers, Not Load-Bearers
Think of the shoulder straps the way you’d think of a seatbelt. They keep you in position. They don’t carry you. The “sore shoulders by lunch” hiker who blames his shoulder straps for two seasons is almost always running a hip belt that quit transferring the load somewhere in the first mile.
Want to feel where the weight belongs? With the pack on, hook your thumbs under the front of the hip belt and lift it up an inch. If your shoulders suddenly relax, that’s the load coming off them and onto your hips, exactly where it should have been the whole time.
The Quick Belt-Lift Gut Check
That belt-lift trick is also your fastest diagnostic. If lifting the belt makes a big difference, your belt isn’t doing its job yet. If it barely changes anything, the belt is already carrying the load and you’re most of the way to a good fit.
Load It and Loosen Everything Before You Touch a Strap
Why an Empty Pack Lies to You
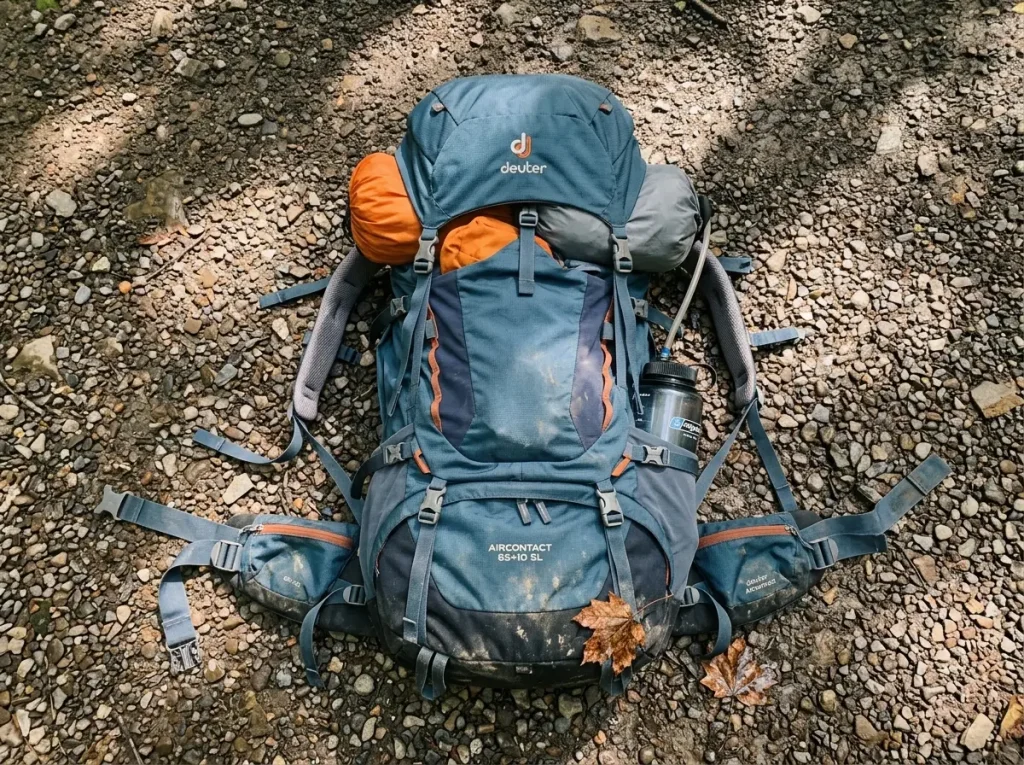
Fitting an empty pack tells you nothing useful. With no weight in it, the suspension has nothing to react to, so it’ll feel fine no matter how the torso is set. Then you load 25 pounds on the trail and wonder why it rides like a sack of bricks. Put 15 to 20 pounds in the pack before you fit it. Books, water jugs, whatever’s handy. You want enough weight that the frame and belt behave the way they will on a real hike.
While you’re at it, pack the heavy stuff high and tight against the back panel. We’ll come back to why that matters for fit at the end, but a badly loaded bag will fight every adjustment you make.
Loosen Every Strap Back to Zero
Before you tighten anything, loosen everything. Hip belt, shoulder straps, load lifters, sternum strap, all the way out. You’re building the fit from scratch, bottom to top, and you can’t do that if half the straps are already cranked from last trip. Starting from zero is the difference between a fit that’s dialed and one that’s just “good enough until it hurts.”
Dial In Torso Length Before Anything Else
Torso Length, Not Your Height
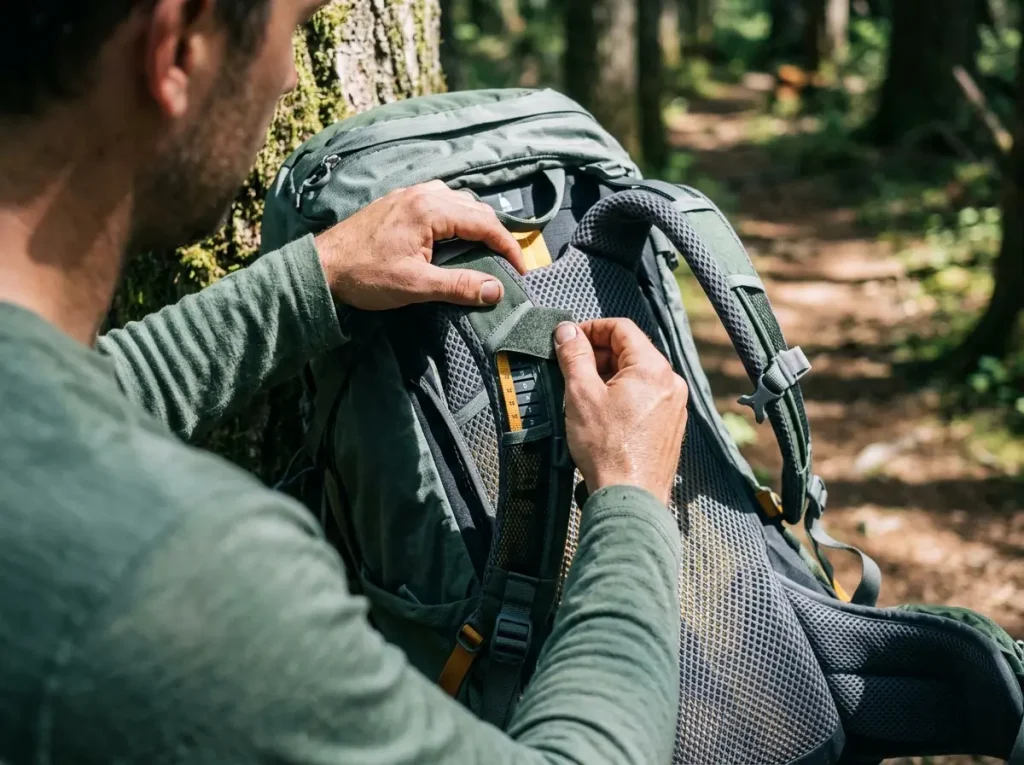
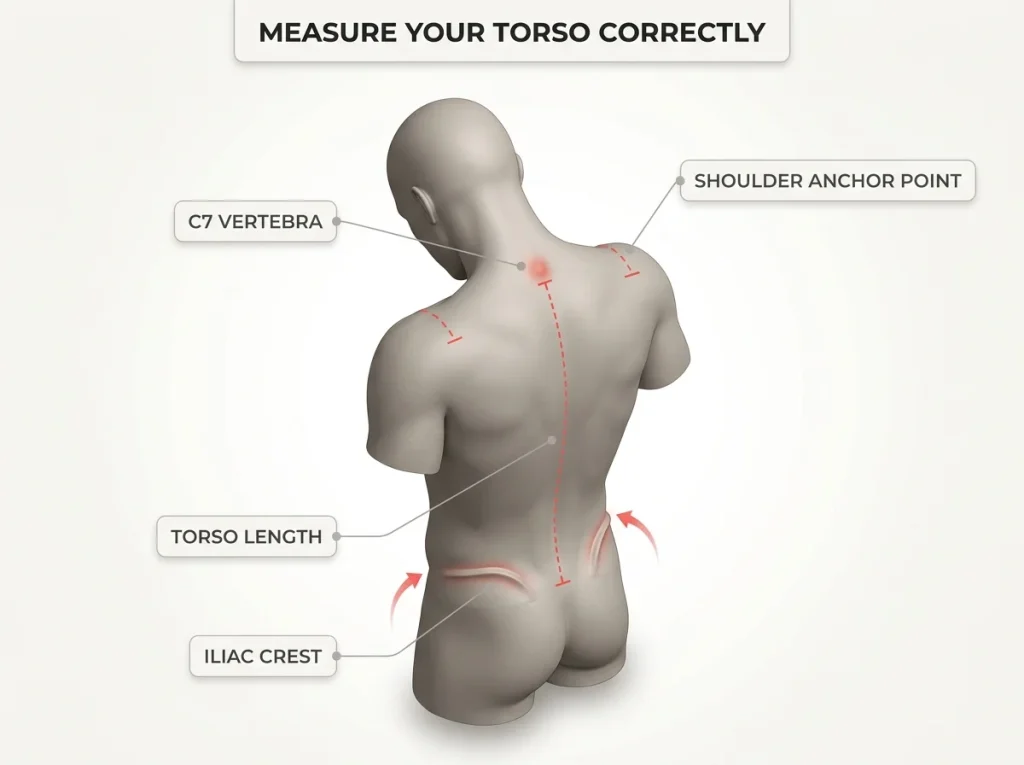
Here’s where people buy the wrong size and blame the straps for years. Pack fit runs on torso length, not your height. Two people who stand exactly the same height can need different torso sizes, because the pack rides your spine, not your legs. Torso length is measured from your C7 vertebra, the knob at the base of your neck when you tip your head forward, down to the shelf of your iliac crest. Most brands sort it into ranges: small under 18 inches, medium 18 to 22, large over 22. If you’ve never done it, measuring your torso length from the C7 down to your iliac crest takes two minutes and saves you a season of misery.
Reading the Shoulder Anchor Points
Once the pack is on, look at where the shoulder straps anchor into the back panel. Those anchor points should sit one to two inches below the top of your shoulders, level with the top of your shoulder blades. If the anchor is riding up above your shoulders, the torso is set too long, and a too-long torso means the hip belt can’t reach your crest no matter how you cinch it.
On an adjustable-suspension pack, you fix this by sliding the torso yoke before you touch a single strap. The Osprey Atmos AG 65 (men’s · women’s Aura AG 65) is the easy reference here. Its Anti-Gravity yoke slides up and down on a ladder so you can set the torso to your exact length, then build the rest of the fit on top of it.
The Half-Inch That Makes the Belt Slip
This is the fix nobody tells beginners. The single most common “my belt won’t stay up” complaint isn’t a belly and it isn’t a worn-out belt. It’s a torso set about half an inch too long. That little bit of extra length lets the hip belt creep down off the crest under load until it’s sitting on your soft waist, doing nothing. Shorten the torso roughly half an inch and the belt locks back onto the bone and holds. People crank the belt tighter to stop the slipping when the real cause was up at the torso the whole time.
Seat the Hip Belt on Your Iliac Crest First
Find the Bony Shelf
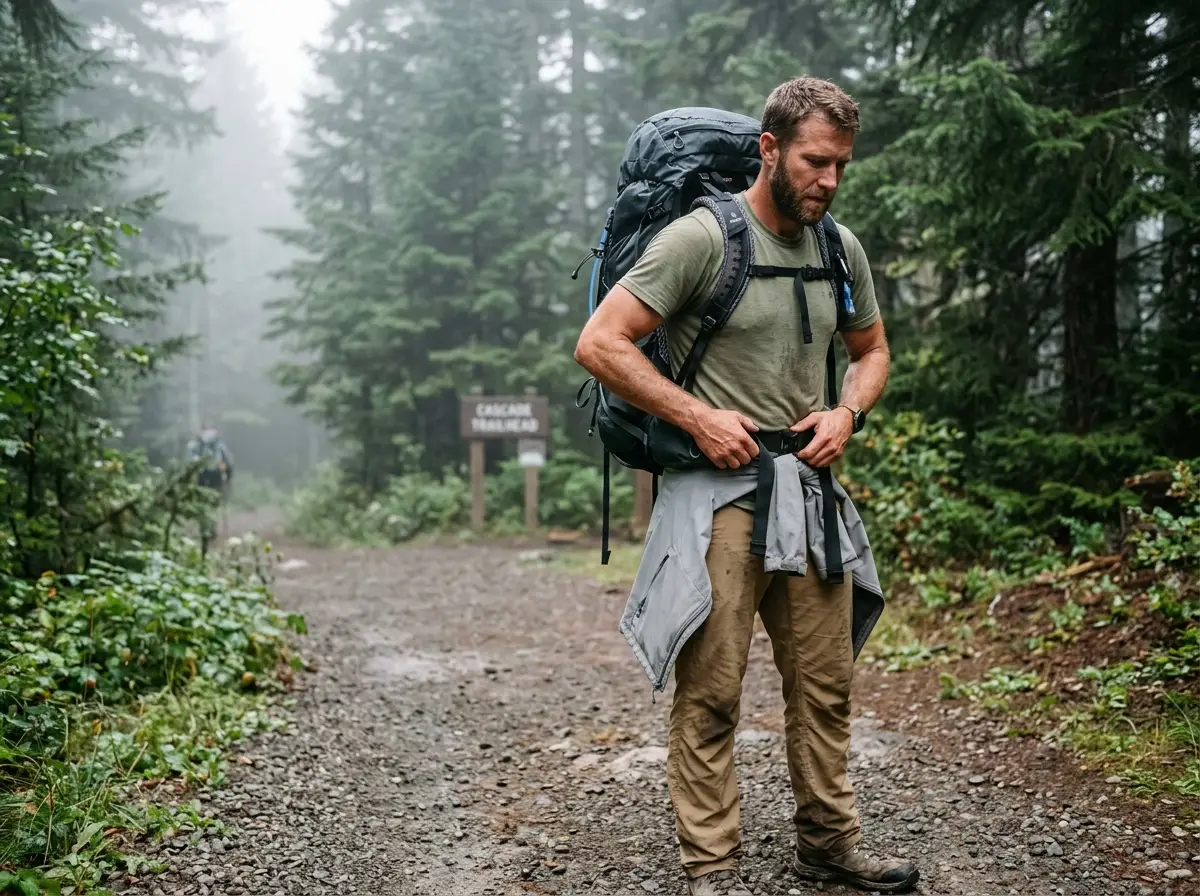
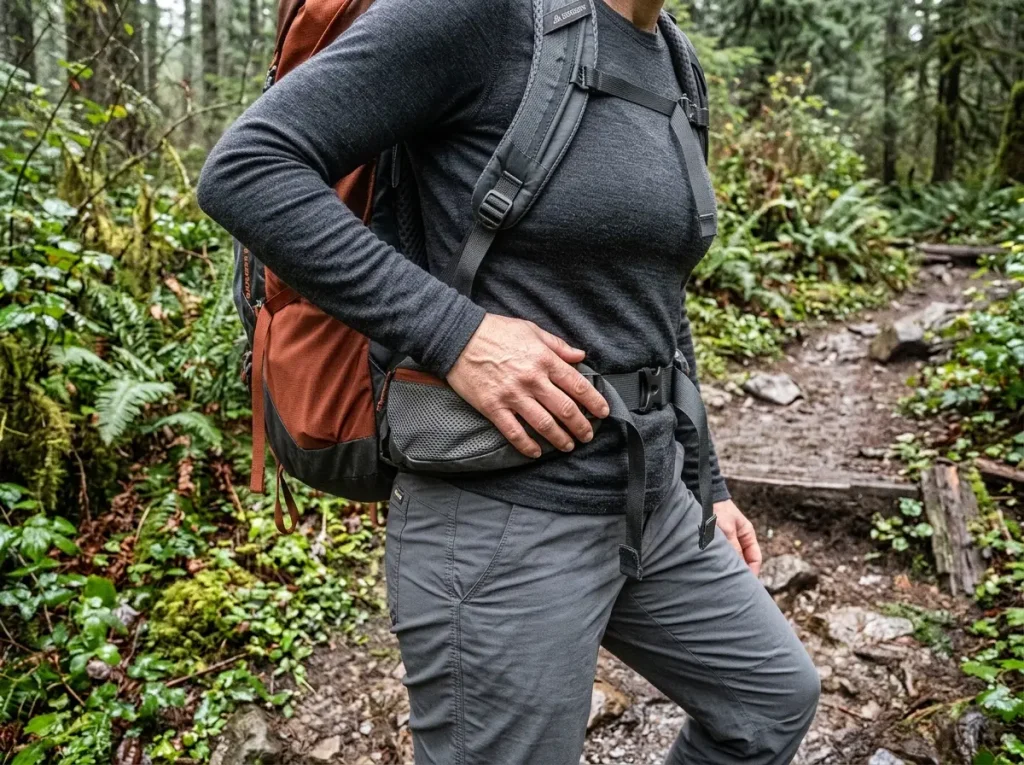
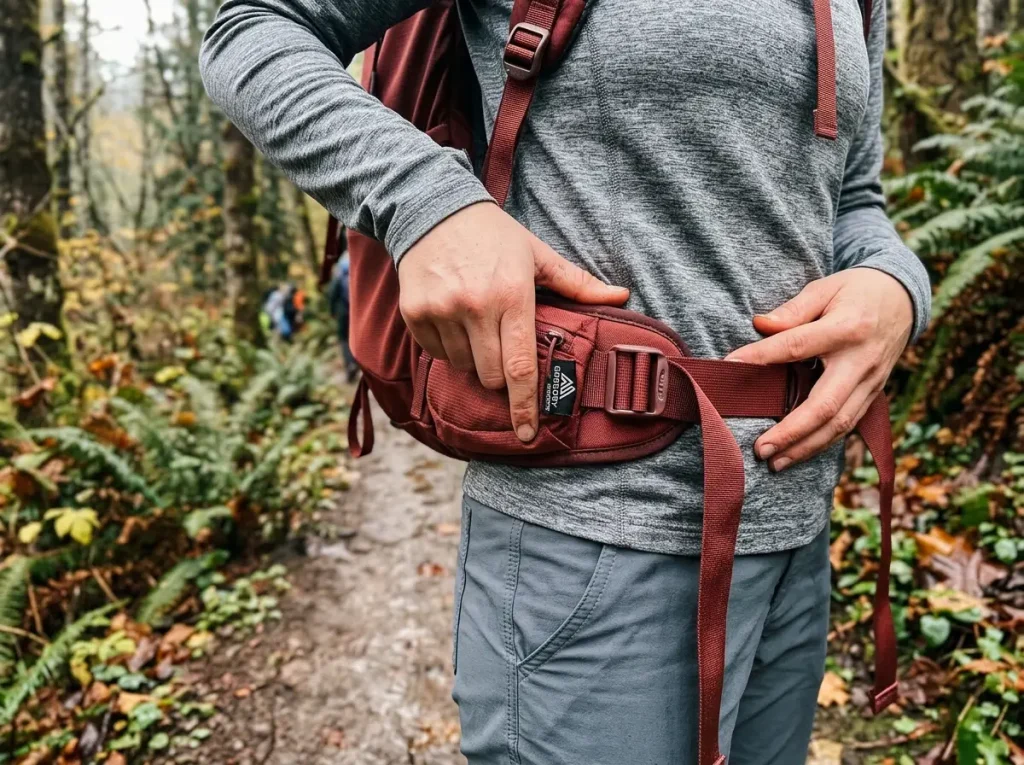
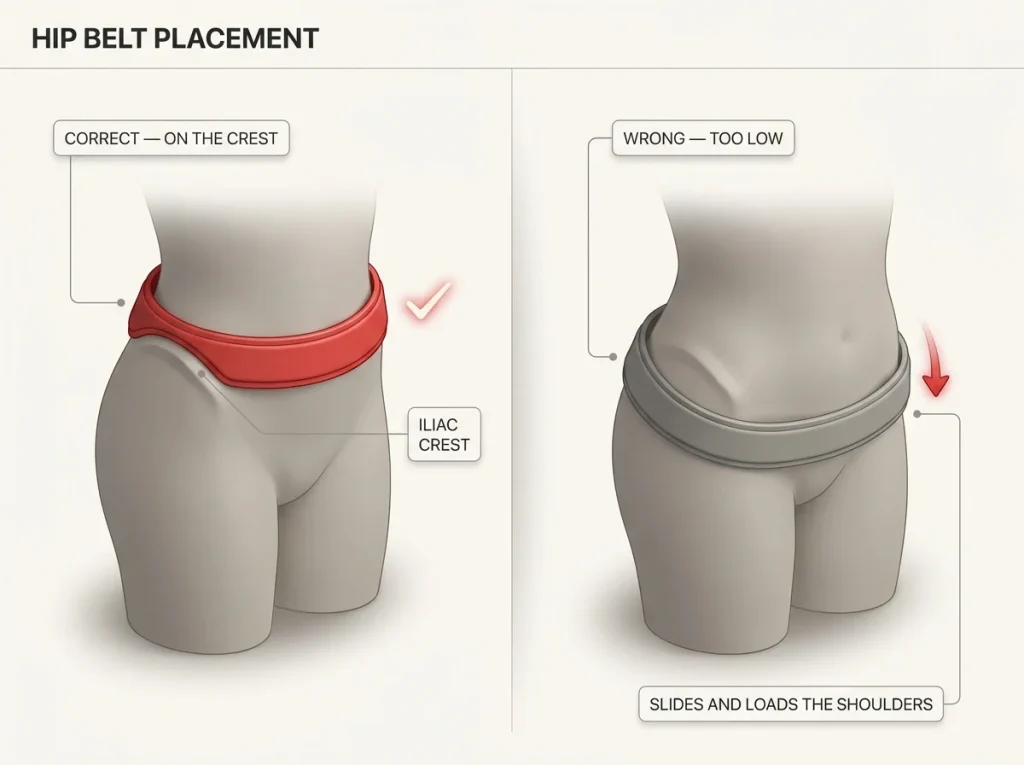
With the torso set, the belt comes first in the actual fitting sequence. Find your iliac crest, the bony shelf along the top of your hip bones. Put your hands on your hips and press down until you feel bone. That ridge is where the padded part of the belt rides, centered so the buckle sits over your belly button and the padding wraps the bone on each side, with the lumbar pad of the back panel resting in the small of your back just above it. Your front hip bones should land on the padding, with the top of your rear hip bones tucked under the upper half of the belt. That’s the position where weight actually transfers.
Most people wear the belt like a pants belt, down on the soft waist, because that’s where a belt “goes.” That habit is exactly why it slides down and the shoulders take over.
The Thumb Test for Belt Tension
Cinch the belt snug, pulling the stabilizer straps on each side of the belt evenly. Snug, not a tourniquet. Here’s the field test: try to slide a thumb flat between the belt and your hip bone. If you can’t get the thumb in, you’ve cranked it too tight, and an over-tight belt bruises and pinches. If there’s a lot of room, you’re too loose and the load will sag onto your shoulders. A flat thumb’s worth of pressure over the bone is the sweet spot. If you’re still wondering whether a moldable hip belt is worth it for how the belt seats on your crest, the honest answer for most hikers is no, not until you’ve nailed the basic placement first.
The Gregory Paragon 58 (men’s · women’s Maven 55) is a solid mid-price example of an adjustable-torso pack, and the Maven’s more conical women’s belt is a preview of why a women’s belt seats differently, which we’ll get to.
Cinch the hip belt while you’re slightly bent forward at the waist, then stand up straight. Standing tall pulls the belt up onto the crest and seats it on the bone, instead of catching it low on your waist where it’ll just slide.
Where Your Waistband and Belt Collide
One thing nobody mentions: your pants waistband and the hip belt are fighting for the same inch of hip. A thick waistband, a belt buckle, or low-slung pants can park right under the pack belt and create pressure points that rub raw by afternoon. If your pants keep sliding down under a loaded pack, that collision is usually why. Smooth, low-bulk waistbands sit better under a hip belt.
Snug the Shoulders, Then Angle the Load Lifters
Snug, Don’t Hang
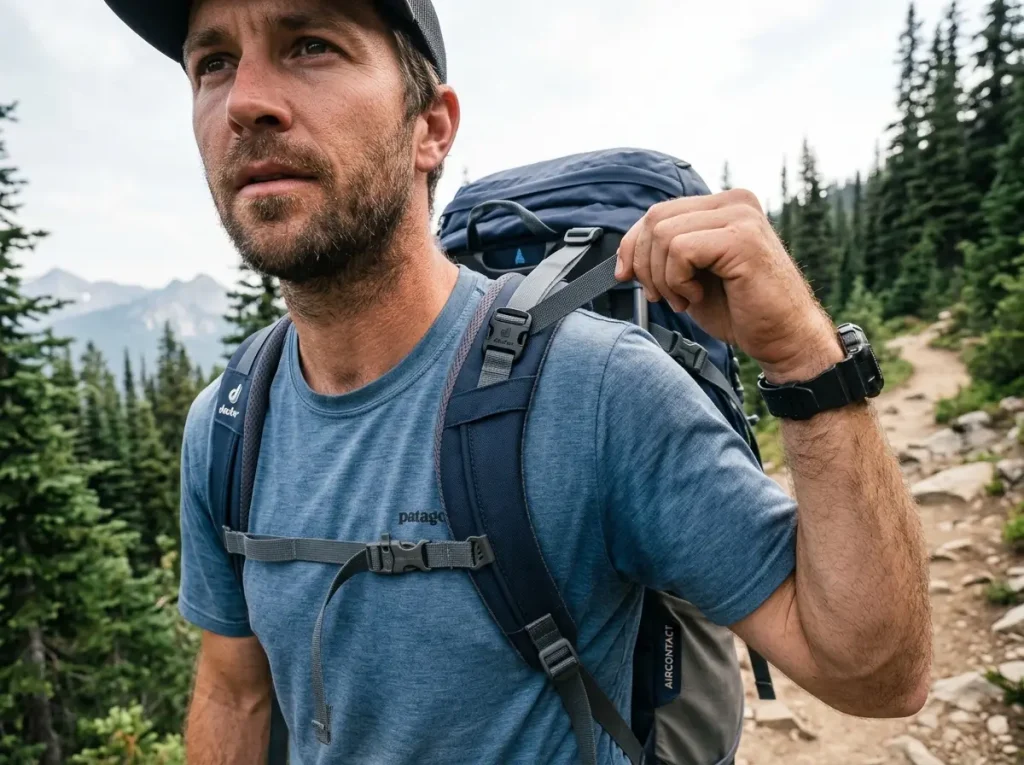
With the belt carrying the load, pull the shoulder straps down and back until they’re snug against the top of your shoulders and the front of your chest. Snug means the straps follow the curve of your shoulder with no gap, not that they’re hauling the pack up. If you feel the weight shift onto your shoulders as you tighten, you’ve gone too far, ease them back off. The belt does the carrying. The shoulders just close the gap.
The 45-Degree Load Lifter
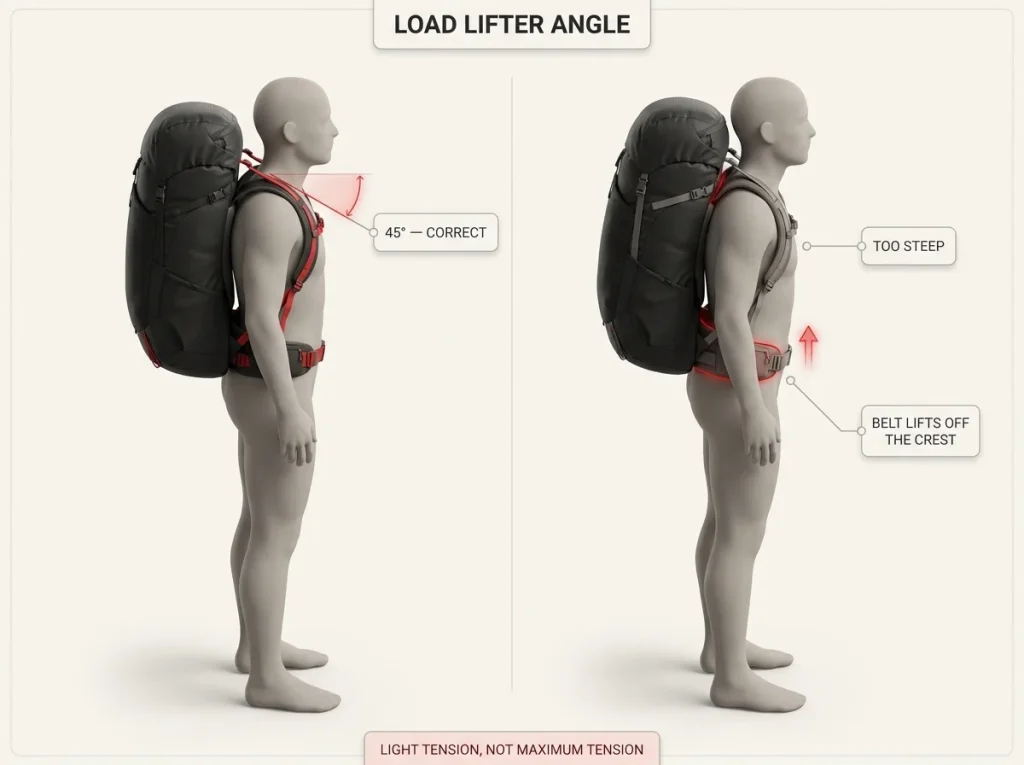
Now the part people get backwards. The load lifters are the short straps running from the top of the shoulder straps up to the top of the pack frame. They should angle back at roughly 45 degrees, with just light tension, enough to pull the top of the pack in toward you so it doesn’t flop away from your back.
This is where the fit goes wrong for a lot of hikers. Cranking the load lifters down hard feels great for about five minutes, then your shoulders are screaming by lunch. Over-tightening them lifts the hip belt up off your crest and dumps the weight straight back onto your shoulders, the exact opposite of what you wanted. If yours are cranked tight, easing off the load lifters usually makes the pack carry better, not worse. Light tension, 45 degrees, done.
Set the Sternum Strap Without Choking
Last strap. The sternum strap, sometimes called a chest strap, clips across your chest and keeps the shoulder straps from sliding outward off your shoulders. Set it about an inch below your collarbones with light tension. Tight enough that the straps stay put, never so tight it pulls them inward or restricts a deep breath. If the sternum strap height feels too high or too low, slide it on its rail until it sits comfortably below the collarbone and breathes easy.
Match the Pain to the Strap
The Symptom-to-Cause Table
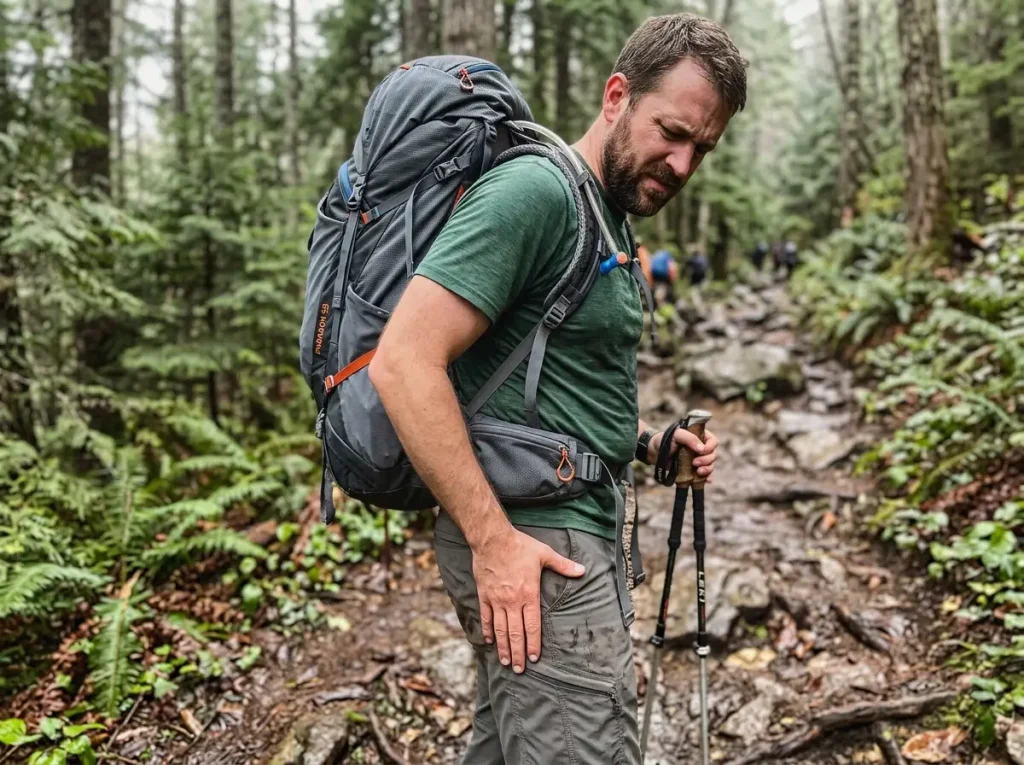
Your body is telling you precisely what’s off. Once you can read the signal, you fix the pack in 30 seconds without taking it off and guessing. Here’s the map from what hurts to what’s wrong to what to do about it.
| What Hurts | Likely Cause | On-Trail Fix |
|---|---|---|
| Aching shoulders | Belt too loose or too low, or torso set too long | Re-seat the belt on the crest, cinch firm, re-snug the shoulders |
| Bruised, pinching hips | Belt riding too high so it bites, or cinched too hard | Drop it onto the crest and back off the tension |
| Burning, numb outer thigh | Belt too low or too tight, pinching a nerve | Loosen the belt, do not tighten it |
| Pack pulls you backward | Load lifters loose, or heavy gear packed low and far back | Tension lifters to 45°, repack heavy items high and against the back |
| Red marks on shoulder tops | Shoulders carrying weight the belt should hold | Re-seat and tighten the belt until the shoulders go quiet |
The Burning Thigh Nobody Warns You About
This one catches people off guard. A burning, tingling, or numb patch on the outer front of your thigh after a long day isn’t a pulled muscle. It has a name. That patch is meralgia paresthetica, a compressed nerve, and a hip belt worn too low or cinched too tight presses right on the lateral femoral cutaneous nerve that feeds the skin there. The fix is the one that feels wrong: loosen the belt, don’t tighten it. Drop it onto the crest, ease the tension, and the pressure comes off the nerve. The hiker who assumes that burning thigh is just fatigue and cranks the belt tighter to “support” it is making it worse with every mile.
Reading Your Pack on the Trail
Out on the trail, hikers have their own shorthand for all this. A belt that’s “riding down” or showing the “belly factor” is creeping off the crest. A “hot spot” is a rub starting before it becomes a blister. A pack that “pulls you backward” is loaded wrong. Learn the table above and you stop guessing, you just diagnose and adjust. For the full measure-and-adjust walkthrough to dial a pain-free carry from the ground up, it pays to practice the whole sequence at home first.
If a symptom shows up mid-hike, fix one thing at a time and walk a few minutes before changing anything else. Adjust three straps at once and you’ll never learn which one was actually the problem. The table works because each ache points at a single cause.
Why a Women’s or Short Torso Fits Differently

What a Women’s Frame Actually Changes
Sometimes the fit fails before you touch a single strap, because the pack geometry doesn’t match your frame. Women’s-specific packs aren’t just a paint job. They run a shorter and narrower torso range, the shoulder straps are set closer together and shaped for a narrower build, and the hip belt is more conical to match wider hips over a narrower waist. Put a short-torso hiker in a too-long unisex pack and the belt parks on her waist while the shoulder anchors ride up above her shoulders. No strap adjustment rescues that. The women’s Aura AG 65 and Maven 55 mentioned earlier exist for exactly this reason. If you’re comparing options, this roundup of women’s hiking backpacks sized by torso length sorts them by frame, not by color.
When the Belt Bottoms Out
A narrow-waisted hiker often runs into a different wall. You cinch the hip belt and it runs out of strap before it’s actually tight on the bone. That’s “bottoming out,” and it means the belt or the pack is simply too big for your frame. It’s a sizing problem, not a technique problem, and no amount of pulling fixes it. The answer is a smaller hip belt or an interchangeable one, which many packs offer as a swap.
Daypacks, Budget Packs, and When the Rules Bend
Lighter Loads, Looser Rules
The whole 80/20 hip-belt gospel assumes a loaded pack. Drop down to a daypack with under 15 pounds in it and the rules loosen up. The same fit logic still applies, set the torso, seat the belt, snug the shoulders, but a light load means a lighter belt is doing less work, and that’s fine. The Osprey Talon 22 (men’s · women’s Tempest 20) shows the same fit thinking scaled down to a daypack with a slimmer belt.
Go lighter still and some packs skip the real hip belt entirely. A packable pack like the ZOMAKE 25L is built to ride on your shoulders by design. There’s no belt to transfer load, so the rule is simple: keep what you put in it light. Under 15 pounds, your shoulders can handle it for a day. Load it like a backpacking pack and you’ll feel every pound on your neck.
Budget Doesn’t Always Mean Fixed Torso
Here’s a gotcha most fit guides skip entirely. A lot of budget and entry-level packs have a fixed torso. You can’t slide the yoke, so the torso length is whatever the factory set, which makes buying the right size up front critical, there’s no tuning it later. Before you spend ten minutes trying to adjust a torso that doesn’t move, check whether yours actually does. The suspension type your pack uses tells you what you’re working with.
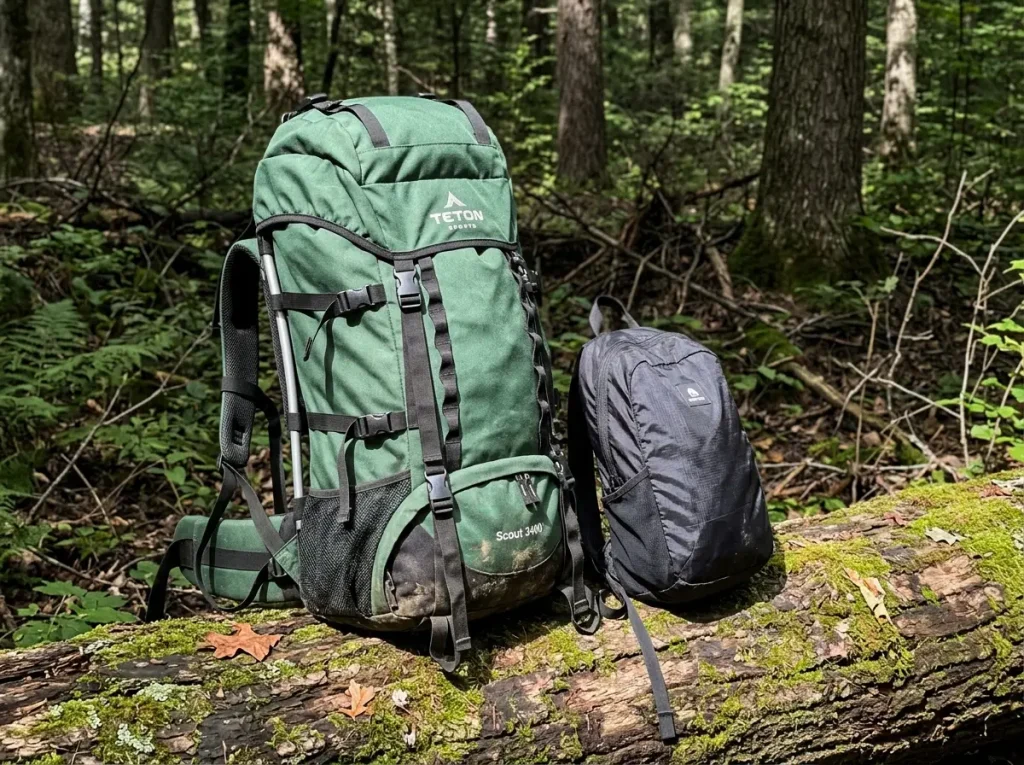
That said, budget doesn’t automatically mean fixed. The TETON Sports Scout 3400 is the rare cheap internal-frame pack that genuinely has an adjustable torso, along with an adjustable waist and chest and real aluminum stays, at a fraction of a premium pack’s cost. It proves you don’t have to spend big to get a torso you can actually tune.
How You Pack It Changes How It Fits
Heavy Gear Rides High and Tight
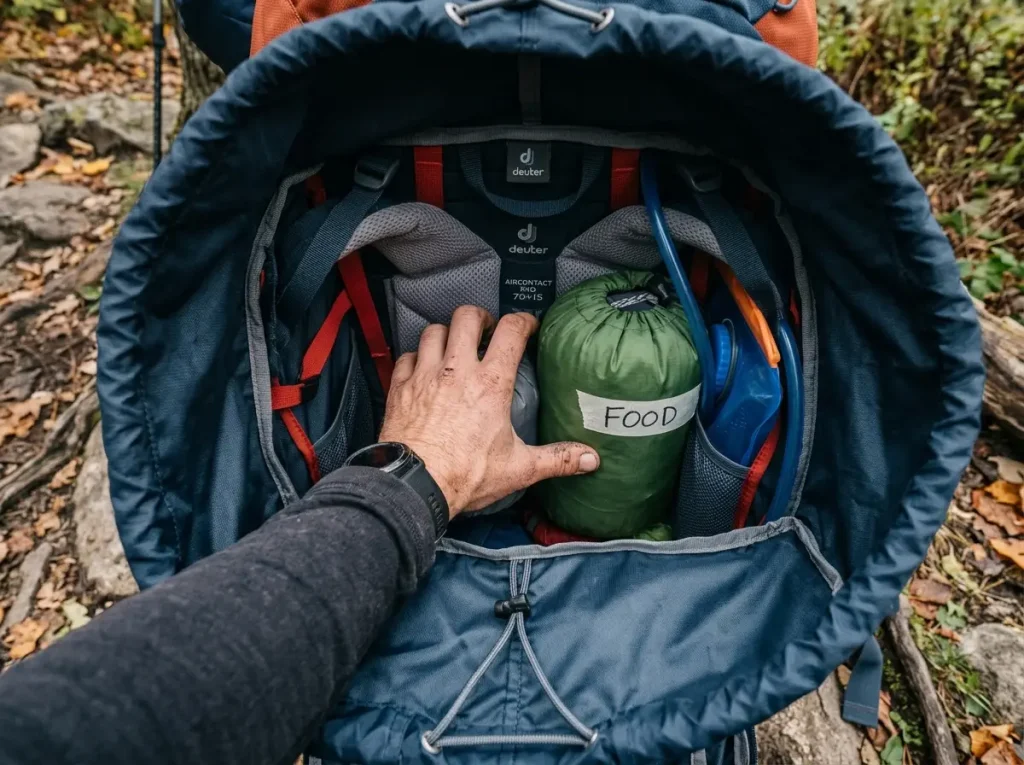
A perfectly adjusted pack still rides wrong if the weight is in the wrong place. Fit and packing are one system. Heavy items, your food bag, water, stove kit, belong high in the pack and tight against the back panel, centered right over your hips. That placement keeps your center of gravity stacked over your hip bones instead of hanging off your back. Pack the heavy stuff low or let it sag away from your back and the pack pulls you backward, and no strap fixes that. People read “pulls you backward” as a load-lifter problem and crank the lifters, when it’s really a packing problem. Heavy and high, snug to the spine.
Re-Tune as the Load Drops
The fit you set in the driveway isn’t the fit you have at mile ten. As you drink water and eat through your food, the load drops and shifts, and the pack settles differently. Re-snug the belt, ease the shoulders, glance at the load lifters. On a long climb, a lot of hikers loosen the belt a hair and let the shoulders take a little more for a few minutes, then swap it back, just to move the pressure around. A pack that fits is one you keep tuning, not one you set once and forget.
Conclusion
Three things to walk away with. First, your hips carry the load, so fit bottom-to-top from the belt up and let the shoulders just steady the pack. Second, read the pain, because every ache maps to one strap or to your torso length, and that turns a mystery into a 30-second fix. Third, the right-sized pack beats any amount of cranking, so get the torso and frame right before you blame the straps.
Load a pack with 15 to 20 pounds this week and run the bottom-to-top sequence in your driveway. Learn what a dialed pack actually feels like on your hips before you’re three miles deep and eyeing the rocks.
Frequently Asked Questions
01How should a hiking backpack fit?
A hiking backpack should put about 80 percent of the load on your hips and 20 percent on your shoulders. The hip belt rides on the iliac crest, and the shoulder anchors sit one to two inches below the top of your shoulders.
02Where should a hip belt sit on a backpack?
The hip belt sits on top of your iliac crest, the bony shelf along the top of your hip bones, with the buckle centered. The padding wraps the bone, not your soft waist below it. That bony shelf is the only place the weight actually transfers.
03How tight should backpack shoulder straps be?
Shoulder straps should be snug enough to follow the curve of your shoulder with no gap, but not carrying the load. If you feel weight shift onto your shoulders as you tighten, ease them back. The hip belt does the carrying.
04Why does my hip belt keep sliding down?
Usually the torso is set about half an inch too long, which lets the belt creep down off the crest under load. Shorten the torso roughly half an inch and the belt holds on the bone. Cranking it tighter treats the symptom, not the cause.
05Why is my outer thigh numb after hiking?
A numb or burning patch on your outer thigh is often meralgia paresthetica, where a too-low or too-tight hip belt pinches a thigh nerve. The fix is counterintuitive: loosen the belt and seat it up on the crest rather than tightening it.
Risk Disclaimer: Hiking, trekking, backpacking, and all related outdoor activities involve inherent
risks which may result in serious injury, illness, or death. The information provided on The Hiking Tribe is for
educational and informational purposes only. While we strive for accuracy, information on trails, gear, techniques,
and safety is not a substitute for your own best judgment and thorough preparation. Trail conditions, weather, and
other environmental factors change rapidly and may differ from what is described on this site. Always check with
official sources like park services for the most current alerts and conditions. Never undertake a hike beyond your
abilities and always be prepared for the unexpected. By using this website, you agree that you are solely
responsible for your own safety. Any reliance you place on our content is strictly at your own risk, and you assume
all liability for your actions and decisions in the outdoors. The Hiking Tribe and its authors will not be held
liable for any injury, damage, or loss sustained in connection with the use of the information herein.
Affiliate Disclosure: We are a participant in the Amazon Services LLC Associates Program, an
affiliate advertising program designed to provide a means for us to earn advertising fees by advertising and linking
to Amazon.com. As an Amazon Associate, we earn from qualifying purchases. We are also an official affiliate partner
of Black Diamond Equipment via the AvantLink network. If you click on a Black Diamond affiliate link and make a
purchase, we may earn a commission at no additional cost to you. We also participate in other affiliate programs and
may receive a commission on products purchased through our links. Additional terms are found in the terms of
service.