

In this article
The journey into hiking often begins with a question that reveals a critical misunderstanding: “Can’t I just use my school backpack?” The answer, grounded in the science of how we carry weight, is a definitive no. A school bag places 100 percent of its load on your shoulders, leading to rapid fatigue and injury. This guide will deconstruct the two core types of technical hiking packs—daypacks and backpacking packs—to transform your understanding from simply choosing a bag to strategically selecting an integrated performance system—your most crucial partner on the trail. By the end, you will understand how trip duration and gear volume define the line between a daypack and a backpacking pack, grasp the engineering behind a pack’s suspension system and how it masterfully transfers up to 80 percent of the load to your hips, learn how to match your pack to your skill level, from a forgiving, high-capacity pack for beginners to a streamlined, minimalist system for experts, and master the simple, precise steps to measure your torso and fit your pack, unlocking its full potential for comfort and performance.
Why Can’t I Just Use a School Backpack for Hiking?

A standard school backpack or rucksack is a simple sack with straps, designed to place 100 percent of its load directly onto the shoulder muscles—the trapezius. This design works for light loads over short distances, but as weight increases, it forces the wearer into a forward-leaning posture to counterbalance the load. The core of a technical hiking pack is its suspension system, comprised of an internal frame, a hip belt, shoulder straps, and load lifters. This system is engineered with a single goal: to transfer the majority of the weight off the weaker shoulders and onto the body’s strongest, most stable platform—the pelvic girdle and legs.
Pro-Tip: If you’re testing a pack in-store, load it with 20 pounds and walk around for ten minutes. If your shoulders ache more than your hips, the suspension isn’t doing its job.
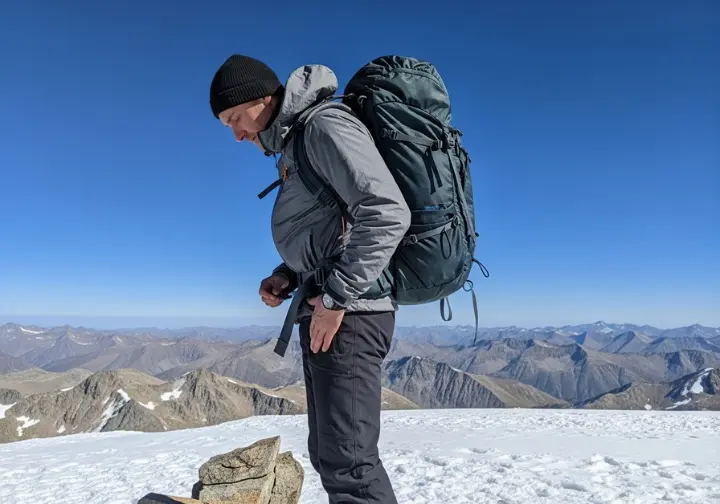
Scientific research confirms that carrying loads over 10–15 percent of body weight without a proper suspension system significantly alters gait, increases forward lean, and heightens the risk of musculoskeletal injury. A correctly fitted backpacking pack can transfer approximately 80 percent of the load to the hips, leaving the shoulders to simply stabilize the top of the pack. The hip belt is the foundation of this system, securely gripping the iliac crest—the top of the hip bones—to support the weight. This biomechanical advantage is the reason a hiker can comfortably carry 30, 40, or even 50 pounds for miles, while the same weight in a school backpack would become excruciatingly painful in a short time. peer-reviewed research on gait kinetics corroborates these findings, and understanding this core principle makes the next distinction crystal clear: it’s not about size, but about the specific problem each pack system is designed to solve. Once you grasp this, the natural follow-up is building a beginner’s hiking kit to understand what goes inside your new technical pack.
What’s the Defining Line Between a Daypack and a Backpacking Pack?

A daypack is a compact system designed to carry essentials for a single-day adventure without an overnight stay. Its primary purpose is to hold the Ten Essentials, like extra layers, water, food, and navigation tools. Daypack capacity typically ranges from 10 to 35 liters; packs under 20 L are for short, fair-weather hikes, while 20–35 L packs accommodate more gear for full-day excursions in variable weather. A backpacking pack is a high-capacity system engineered to transport a complete mobile shelter—tent, sleeping system, kitchen, food, and clothing—for multi-day trips. Their capacity starts around 40 L and can exceed 80 L, directly correlating to trip duration: 40–50 L for weekends (1–3 nights), 50–70 L for multi-day trips (3–5 nights), and 70 L+ for extended expeditions or winter camping.
Pro-Tip: If your day hike involves bulky winter layers or a climbing rack, treat yourself to a 30–35 L technical daypack with a real hip belt; your shoulders will thank you at mile 15.
The key functional difference lies in the frame and hip belt. A daypack often has a minimal or frameless design, and its hip belt—if present—is typically a simple webbing strap for stability. Conversely, a robust internal frame and a heavily padded, load-bearing hip belt are the defining, non-negotiable features of a backpacking pack. A modern category, the “technical daypack,” is emerging; these advanced daypacks incorporate lightweight frames and padded hip belts, blurring the lines and allowing for comfortable carriage of heavier day-loads—such as when climbing or winter day hiking. This evolution highlights that the choice is about the weight and bulk of your gear load, not just the name on the label. For a practical look at what actually goes into a daypack, see a complete day hike packing list.
| Attribute | Daypack | Backpacking Pack |
|---|---|---|
| Primary Use | Single-day hikes, travel, commuting | Overnight and multi-day trips |
| Capacity (Liters) | 10 – 35 L | 40 – 80+ L |
| Typical Load Weight | 5 – 20 lbs | 25 – 60+ lbs |
| Frame System | Frameless, framesheet, or light internal frame | Robust internal or external frame |
| Hip Belt Function | Primarily for stability (webbing strap) or light load support (padded) | Primary load-bearing component (heavily padded) |
| Key Features | Hydration sleeve, few pockets, lightweight | Load lifters, sleeping bag compartment, multiple access points, robust attachments |
| Price Range | $40 – $250 | $150 – $400+ |
How is a Modern Hiking Pack Engineered for Performance?
What components make up the pack’s suspension system?
The suspension system is the pack’s engine, an integrated set of components that transfers the load to your body. It consists of the frame, harness, and back panel. The frame provides the pack’s structure. Internal frames—the modern standard—use plastic framesheets, aluminum stays, or peripheral wire hoops to provide rigidity and channel weight to the hips. The harness is your direct connection to the load; it includes the shoulder straps, a load-bearing hip belt, load lifter straps, and a sternum strap. The back panel is the surface against your back; designs focus on balancing stability with ventilation, using either foam with air channels or a suspended “trampoline-style” mesh.
Load lifters are small but crucial straps connecting the shoulder harness to the top of the frame. When tightened to an optimal 45-degree angle, they pull the pack’s weight in toward your center of gravity, preventing it from sagging and perfecting the load transfer to the hips. A close-to-body back panel (like Osprey’s AirScape™) prioritizes stability for dynamic movement, while a tension-mesh back panel (like Osprey’s AirSpeed™) maximizes ventilation for hot weather. In a backpacking pack, the hip belt is a robust, structural component designed to cradle the iliac crest; in a daypack, it’s often just a webbing strap for stability. This single component difference reveals the pack’s intended load-bearing capacity. Frameless packs exist for ultralight experts, but they require meticulous packing skill, as the hiker uses their gear—like a foam sleeping pad—to create a “virtual frame.” For a deeper dive into choosing specific models once you understand these components, see choosing your hiker’s backpack.
How do materials and features impact a pack’s durability and function?
A pack’s fabric is a balance of weight, durability, and cost. The most common materials are Nylon and Polyester. Fabric weight is measured in Denier (D); a higher number like 600 D indicates a thicker, more abrasion-resistant thread than a lower number like 100 D. Specialty fabrics like CORDURA® offer exceptional abrasion resistance, while ripstop weaves incorporate a grid of stronger threads to prevent tears from spreading. Key features define how you access your gear; top-loading is traditional, while front panel access—a large “J” or “U” zip—allows you to open the pack like a suitcase.
Modern high-end packs increasingly use ultralight, ultra-strong materials like Dyneema® Composite Fabric (DCF), which is inherently waterproof but comes at a premium price and has lower abrasion resistance. Sustainability is now a key marker of quality; look for bluesign® approved materials and PFC-free DWR (Durable Water Repellent) coatings, which signal environmentally responsible manufacturing. Practical features include a separate sleeping bag compartment for easy access, a large front “shove-it” pocket for wet gear, and specialized attachments like Stow-on-the-Go™ trekking pole loops. Hydration compatibility is standard, but an external hydration sleeve is a premium feature that allows for refilling a reservoir without unpacking the main compartment. If you’re curious how these materials fit into the broader ultralight philosophy, explore choosing lightweight backpacking gear.
How Do You Choose the Right Pack for Your Hike?
What is the correct way to measure and fit a backpack?
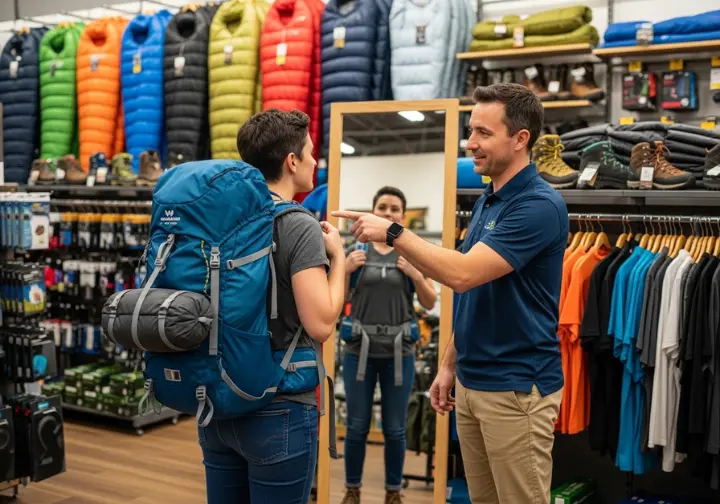
The most critical element of pack selection is fit, which is determined by your torso length, not your overall height. To measure your torso, locate your C7 vertebra—the bony bump at the base of your neck—and your iliac crest—the top shelf of your hip bones. The distance between these two points is your torso length. When trying on a pack, load it with 15–20 lbs to simulate real-world use. Start by loosening all the straps. The adjustment sequence is crucial: 1) Position and tighten the hip belt first so it’s centered on your iliac crest. 2) Snug the shoulder straps. 3) Gently tension the load lifters. 4) Clip and adjust the sternum strap.
Following this exact sequence ensures the weight is properly supported by your hips before the shoulder straps are engaged for stability. Getting the order wrong will result in an uncomfortable carry. Women-specific packs are not a gimmick; they are designed for anatomical differences, typically featuring shorter torso lengths, narrower and S-curved shoulder straps, and differently angled hip belts. A perfect fit means the shoulder straps contour smoothly over your shoulders with no gaps, and there is no significant downward pressure on the tops of your shoulders. An improper fit completely negates the benefits of even the most advanced suspension system, leading to pain, chafing, and potential injury. This 15-minute process is the most important part of your purchase. Once the fit is dialed in, transitioning from day hiker to backpacker becomes the natural next step.
How does your skill level and hiking environment dictate your pack choice?
Your pack choice should evolve with your skills. A beginner hiker benefits from a forgiving, comfortable pack with a robust frame and a larger capacity—50–65 L—to accommodate bulkier, budget-oriented gear and less-than-perfect packing. An intermediate hiker begins to balance comfort with efficiency; they might choose a streamlined 45–55 L pack or a large 35–40 L technical daypack to push into minimalism for overnight trips. An expert or ultralight hiker prioritizes performance and minimalism above all; they often choose frameless or minimalist-frame packs under 2.5 lbs, made from advanced materials, accepting the trade-offs of less padding and lower load capacity. This progression moves from prioritizing comfort, to balancing features, to optimizing for weight and efficiency.
The environment is the ultimate gear calculator. A desert hike, requiring massive water carries—water weighs 2.2 lbs/liter—demands a pack with a heavy-duty suspension capable of handling 45–50 lb loads. An alpine climb requires a streamlined pack with robust attachments for an ice axe and crampons. A trip in bear country—like Colorado’s Four Pass Loop—requires a pack that can comfortably accommodate a rigid, bulky bear canister, often dictating a 60 L+ volume. By first considering your skill level and then calculating the specific gear demands of your environment, you can strategically select a pack system with the right volume, suspension, and features for a safe and successful trip. For concrete examples, see planning Colorado hiking trips.
Conclusion
The 80/20 Rule: A technical hiking pack’s primary function is to transfer approximately 80 percent of the load to your hips, using a sophisticated suspension system that simple rucksacks lack. Form Follows Duration: The fundamental choice between a daypack (10–35 L) and a backpacking pack (40 L+) is dictated by your trip’s duration and the corresponding volume of gear. Fit Over Features: An expensive, feature-rich pack is worthless without a proper fit. Measuring your torso length and following the precise adjustment sequence is non-negotiable. Hike Your Own Hike: The ideal pack evolves with you. Match its capacity and features to your current skill level and the specific demands of the environment you intend to explore. Now that you have the framework, explore our complete library of gear guides and trail breakdowns to put your knowledge into practice.
Frequently Asked Questions
What is the best size backpack for a day hike?
For most day hikes, a pack between 20 and 30 liters is ideal. This provides enough space for the Ten Essentials, including extra layers, food, and water, without encouraging overpacking.
Can you use a backpacking pack for a day hike?
Yes, you can, but it is generally not recommended. A large, mostly empty pack can be floppy and unstable, and its heavier weight is unnecessary for a day trip. However, it can be useful for training hikes where you want to simulate a heavy load.
What are the best ways to test the durability of a pack?
Look for a high denier fabric (400D or higher), reinforced stitching in high-stress areas like shoulder straps, and quality hardware from reputable brands like YKK zippers. Reading long-term reviews from experienced hikers can also provide real-world insight into a pack’s durability.
How do I properly pack my pack for maximum comfort and balance?
Pack heavy items close to your spine in the middle of your back to maintain your center of gravity. Place lighter, bulkier items like a sleeping bag at the bottom, and items you need to access frequently in the top lid or external pockets.
Risk Disclaimer: Hiking, trekking, backpacking, and all related outdoor activities involve inherent risks which may result in serious injury, illness, or death. The information provided on The Hiking Tribe is for educational and informational purposes only. While we strive for accuracy, information on trails, gear, techniques, and safety is not a substitute for your own best judgment and thorough preparation. Trail conditions, weather, and other environmental factors change rapidly and may differ from what is described on this site. Always check with official sources like park services for the most current alerts and conditions. Never undertake a hike beyond your abilities and always be prepared for the unexpected. By using this website, you agree that you are solely responsible for your own safety. Any reliance you place on our content is strictly at your own risk, and you assume all liability for your actions and decisions in the outdoors. The Hiking Tribe and its authors will not be held liable for any injury, damage, or loss sustained in connection with the use of the information herein.
Affiliate Disclosure: We are a participant in the Amazon Services LLC Associates Program, an affiliate advertising program designed to provide a means for us to earn advertising fees by advertising and linking to Amazon.com. As an Amazon Associate, we earn from qualifying purchases. We also participate in other affiliate programs and may receive a commission on products purchased through our links, at no extra cost to you. Additional terms are found in the terms of service.


