

In this article
Learning how to use map and compass is more than just a backup plan; it is a skillset that represents a statement of self-reliance and a path to a deeper connection with the outdoors. This guide moves beyond passively following a digital screen, teaching you the active and engaging skills of traditional navigation. By achieving mastery of these tools, you’ll build confidence, sharpen your situational awareness, and develop a richer mental map of the terrain, becoming a more competent and liberated outdoorsperson with robust hiking navigation skills.
The Enduring Wisdom of Finding Your Own Way

The core philosophy behind learning analog navigation contrasts the passive nature of following a GPS with the active, engaging, and resilient skill of using a map and compass. It is established not just as a backup navigation plan but as a path to deeper environmental connection and self-reliance.
Why Analog Skills Are More Critical Than Ever
Relying solely on modern navigation systems in the wilderness presents specific vulnerabilities. While a GPS system and smartphones are powerful, their reliability is conditional and introduces significant, often underestimated, risks for hikers. The argument is built on the practical limitations of consumer electronics in a backcountry setting.
A primary vulnerability is the finite battery life of a functional GPS unit, which can be shortened by cold weather or multi-day trips, rendering a GPS receiver useless. Dense forest canopies, steep canyons, or severe weather can obstruct the GPS signal, causing a loss of connection when it is most needed. Many popular mapping apps also depend on cellular service, which is often unavailable in remote areas where good navigation skills are most vital. GPS devices are also physically fragile; a single drop or submersion can cause complete failure.
These technological failures are connected to sobering search and rescue (SAR) statistics, which show that many lost hikers go missing due to a simple lapse in situational awareness fostered by over-reliance on technology. Data reveals that most lost individuals are found close to a trail, a fact that highlights how small potential navigation errors can lead to large consequences. These are the kinds of environmental challenges and potential signal loss that make these skills so important when, for example, you are backpacking in Northern California.
The Psychology of Active Navigation
Exploring the cognitive and psychological benefits of using traditional navigation tools reveals a skill that cultivates a deeper connection with the natural world. Its value extends far beyond mere survival, fundamentally changing a hiker’s relationship with the environment.
Individuals who rely on the Global Positioning System do not build a “mental map” in the same way as those using a map and compass. The continuous process of building a mental map by relating the paper map to the surrounding terrain is a profound cognitive exercise that fosters superior situational awareness. This deeper understanding becomes a form of environmental literacy, transforming the landscape from abstract waypoints into an interconnected tapestry of ridges, valleys, and peaks.
The act of using these tools is a form of active learning that builds an intuitive understanding of the land. Drawing a parallel to Plato’s “Ship of State” analogy, the “true navigator” must be deeply engaged with the fundamental elements of their environment. By developing these learned skills, the modern hiker steps into this timeless role, cultivating a more meaningful experience, much like the stories of resilience, healing, and self-discovery found in great trail literature.
Assembling Your Analog Navigation Toolkit
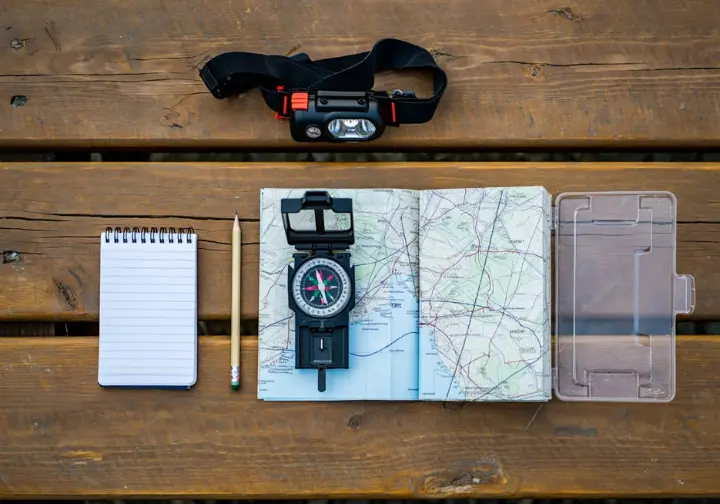
Putting together your toolkit involves detailing the essential physical navigation equipment required for analog navigation. We will focus on the non-negotiable duo of the map and compass, explaining how to choose the right models and introducing key supporting gear that enhances a navigator’s effectiveness in the field.
Choosing Your Compass
A buyer’s gear guide for selecting a hiking compass should emphasize that a simple button compass is insufficient for serious navigation. To truly navigate, you must choose a purpose-built instrument designed for taking precise bearings and interacting with a map. The most versatile of the primary compasses is the baseplate compass, a proper tool ideal for hikers due to its transparent design for map work. Mirror sighting compasses offer increased navigation accuracy for off-trail travel, while lensatic and thumb compasses serve more specialized purposes.
When looking at the best compasses for beginners, a checklist of key features is helpful. The most important is adjustable declination, as it dramatically reduces calculation errors. Other crucial features include a sighting mirror for accuracy, a clinometer for assessing avalanche terrain, a global needle for international travel (compatible with systems like Galileo), and luminescent markings for low-light use. As part of your foundational gear and safety checks, choosing the right navigational compass is paramount.
To help, this table summarizes trusted models from brands like Suunto (who also make a Suunto GPS watch), Silva, and Brunton, categorized by user type and price. This provides actionable recommendations, helping you balance features with your budget and intended use.
| User Type | Recommended Models | Estimated Price | Key Features |
|---|---|---|---|
| Beginner | Suunto A-10, Silva Starter 1-2-3 | $20 – $30 | Basic, reliable, clear baseplate |
| Serious Hiker | Suunto MC-2, Silva Ranger 2.0 | $50 – $70 | Adjustable declination, sighting mirror |
| Mountaineer | Brunton TruArc 15, Suunto MC-2G | $70 – $100 | Global needle, clinometer |
Selecting the Right Topographic Map
A high-quality topographic map is the essential partner to a compass. A “topo” map is defined by its most critical feature: contour lines, which show the three-dimensional shape of the terrain by representing elevation, allowing you to visualize mountains and valleys from printed maps.
When choosing a map, start with the publisher. You can find standard topographic maps for the U.S. from the USGS, or you can opt for durable, hiker-focused maps from companies like National Geographic Geographic Trails Illustrated. Pay close attention to map scale; large scale maps like the USGS topo map 1:24,000 show more detail and are preferred for hiking, while small-scale maps are better for long-distance planning.
The map’s revision date is also important, as terrain features can change, and magnetic declination shifts over time. Finally, consider the material. Modern waterproof, tear-resistant synthetic paper is ideal, but traditional maps are fine if kept in a protective case. Remember that your core items include navigation tools, and the right map is half of that team.
Anatomy of a Baseplate Compass
Understanding the components of a standard baseplate compass is the first step to using it effectively, as each part serves a specific function. The transparent baseplate has straight edges used for drawing lines and aligning with a route on the map.
There are two key arrows. The Direction-of-Travel Arrow points toward your destination, while the Orienting Arrow (often called the “shed”) is inside the housing and is used to align with the magnetic needle. This is the basis for the popular “Red in the Shed” mnemonic for setting a bearing. The rotating bezel, marked with 360 degrees, is turned to set a specific bearing, which is then read at the fixed Index Line.
Inside the liquid-filled housing, the magnetized needle’s red end always points to magnetic north. The housing also contains parallel orienting lines that you will align with the map’s north-south grid lines. This detailed breakdown demystifies the tool and prepares you for practical application, just as knowing the parts of other essential gear, like carrying a knife or multi-tool, makes you a safer hiker.
The Language of the Land: Becoming Fluent in Topographic Maps
Becoming fluent in the language of the land is about learning topographic map reading. We will move from the foundational concept of contour lines to identifying specific landforms and understanding the map’s scale and symbols, aiming to build true “map literacy” and teach you how to read a topographic map.
Decoding Contour Lines
Contour lines are the most distinctive and important feature on a topographic map. The fundamental principle is that a contour line connects points of equal elevation; if you were to walk along one, you would neither climb nor descend.
To interpret them, you need to know a few key terms. The contour interval is the constant vertical distance between adjacent lines, a value that is always stated in the map’s legend. Index contours are the thicker, labeled lines that make it easy to quickly determine a specific elevation. The true art of map reading is in the ability to study terrain by interpreting the spacing of these lines: closely spaced lines indicate steep slopes, while widely spaced lines represent flat or gently sloped ground.
Identifying Landforms with Contours
Pattern recognition will teach you how to identify specific geological features by the shape and arrangement of contour lines. This is a key skill for visualizing the 3D landscape from the 2D map and seeing its distinct geological features.
Major landforms appear in clear patterns. Peaks and hills are shown as a series of concentric, closed loops, with the smallest loop marking the summit. A common point of confusion is distinguishing ridges from valleys. Ridges are shown as U-shaped or V-shaped lines that point downhill. Valleys and drainages have V-shapes that point uphill, toward higher elevation. Other important features include a saddle (an hourglass shape between two high points), a depression (a closed loop with inward-pointing hachure marks), and other key landmarks.
Understanding Map Symbols and Colors
Think of this as a dictionary for the map’s “vocabulary,” explaining how symbols and colors represent real-world features. The map legend is the definitive key for what each symbol means.
Map publishers widely adopt the standardized color code used by the USGS. Brown is used for elevation and relief, such as contour lines. Blue signifies water features like rivers and lakes. Green indicates vegetation like forests, while white represents open terrain such as meadows. Black and red are used for man-made features; black for trails and buildings, and red for major highways and public land survey lines.
The Heart of the Matter: How to Use a Baseplate Compass
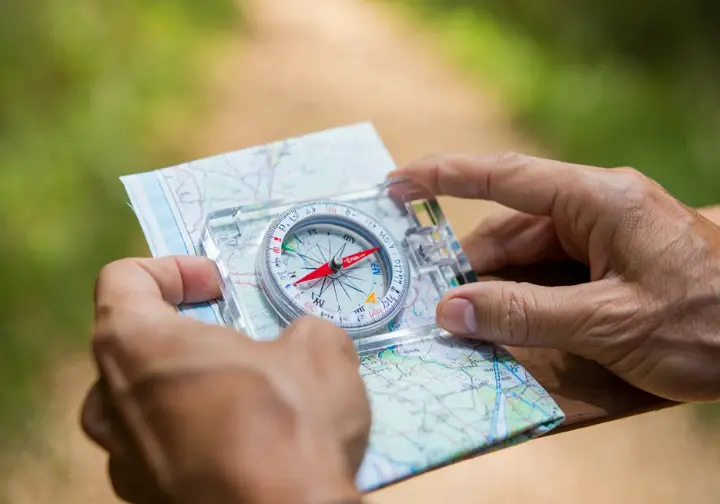
Moving from theory to practice, we now focus on the core navigation skills of using a compass with a map. We will demystify the concepts of the “three norths” and magnetic declination before providing step-by-step instructions for the fundamental skill of how to use a baseplate compass.
Demystifying the Three Norths
A primary point of confusion for those starting beginner land navigation is the existence of more than one “north”. Understanding the three distinct norths is essential for using a map and compass together for precise navigation.
First is True North, the fixed direction to the geographic North Pole where all lines of longitude converge; maps are typically oriented to this north. Next is Magnetic North, which is the direction a compass needle points, drawn to the wandering magnetic pole located in the Canadian Arctic. These two points are not the same. Finally, Grid North is a navigational convention referring to the north-south lines of a map’s grid, such as the Universal Transverse Mercator (UTM) grid system. For most hiking purposes, the difference between Grid and True North is negligible.
Understanding Magnetic Declination
Magnetic declination is the most critical compass adjustment you must make. It is defined as the angular difference between True North (what your map shows) and Magnetic North (where your compass points). Failing to account for this is one of the most common and significant errors in navigation, affecting overall navigation precision.
An error of just one degree can set a hiker off course by nearly 100 feet over a single mile; over longer distances, this small error can result in being completely lost. The local declination value is printed on topographic maps, but because this value changes over time, it is vital to check the map’s revision date. To get the most accurate and current value, consult the National Oceanic and Atmospheric Administration (NOAA) website.
There are two methods to apply declination: use a compass with an adjustable feature for a “set it and forget it” approach, or perform a manual calculation with every bearing. The adjustable compass is convenient, but mastering the manual method demonstrates true competence.
Taking and Following a Bearing
Here are clear instructions for the fundamental technique of taking a bearing from a map. First, place the edge of your compass on the map to form a line connecting your current position (Point A) to your destination (Point B), ensuring the Direction-of-Travel arrow points toward B.
Next, holding the baseplate still, rotate the bezel until the orienting lines on the compass are parallel with the map’s north-south grid lines, with the orienting arrow pointing to the north of the map. The bearing is then read from the index line. To follow that bearing, hold the compass level and turn your body until the red end of the magnetic needle is perfectly aligned inside the orienting arrow. This is the classic “Red is in the Shed” technique. The Direction-of-Travel arrow now points exactly to your destination for effective tracking. The reverse process—taking a bearing from a landmark and plotting it on the map—is crucial for triangulation.
Field Techniques for Real-World Navigation
Foundational knowledge is translated into practical navigation scenarios through the most essential routines a hiker will use on the trail. We will cover everything from orienting the map to finding your position and navigating around obstacles.
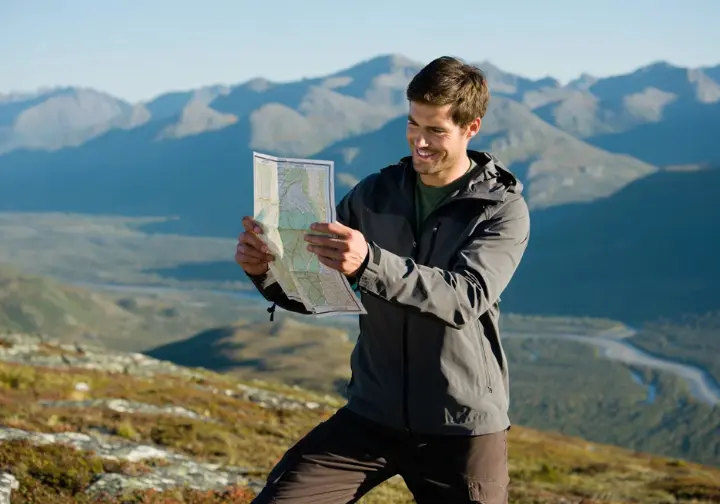
The Foundational Routine: Orienting Your Map
Orienting your map is the single most important and frequent action a navigator performs in the field. This simple routine, which aligns the 2D map with the 3D world, makes terrain association intuitive and dramatically reduces errors.
First, ensure your declination is correctly set on your compass. Place the compass on the map and align its edge with a north-south grid line. Set the compass bezel to North (360°) and hold the map and compass together as a single unit. Now, turn your body until the magnetic needle is “in the shed,” aligned with the orienting arrow. At this point, the map is perfectly oriented, allowing you to correlate map features with the actual landscape in front of you.
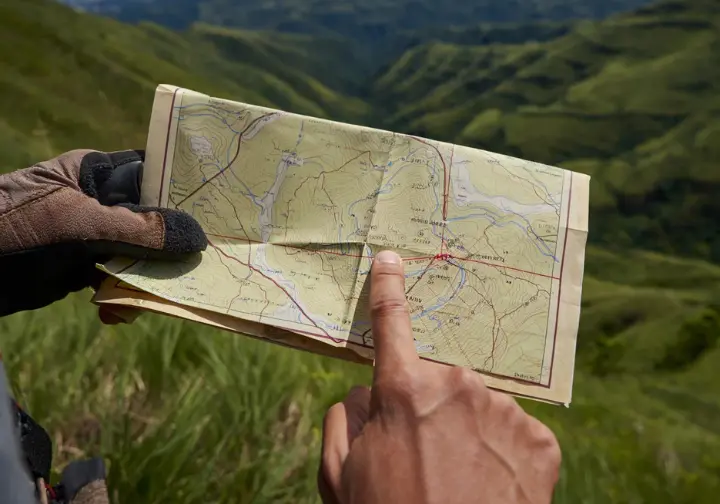
Finding Yourself with Triangulation (Resection)
The standard procedure for pinpointing your location on a map when you are uncertain of your exact positioning is a calm, methodical skill, not a panic move. This technique for determining your location is known as resection or triangulation.
The process begins by identifying at least two (preferably three) distinct, known landmarks that are visible in the landscape and also identifiable on your map, such as prominent peaks or towers. Take a precise magnetic bearing to the first landmark. Place the compass on the map with a corner of the baseplate on the landmark’s symbol, then pivot the entire compass until the orienting lines are parallel with the map’s grid lines.
Draw a line along the compass edge from the landmark back toward your general location. Repeat this for a second landmark. The point where the two lines intersect is your approximate location. A third bearing creates a small “triangle of error,” inside which you are located.
Navigating Around Obstacles
A systematic method for navigating around obstacles like swamps or cliffs that block a direct line of travel is the “box method”. It’s a reliable way to bypass an obstacle and return to the original bearing line with smart route management.
Upon reaching the obstacle, turn exactly 90 degrees from your original bearing. Walk in this new direction, carefully counting your paces until you are clear of the obstacle’s width. After counting your paces (e.g., 100 paces), turn back to your original bearing and walk past the obstacle’s length. Finally, turn 90 degrees in the opposite direction of the first turn and walk for the exact same number of paces you counted earlier. This action places you precisely back on your original line of travel, allowing you to choose between your primary route or alternate routes.
Developing the Navigator’s Mindset

Moving beyond basic mechanics, we’ll now explore advanced navigation techniques and emergency preparedness. The focus is on cultivating the mindset of an expert navigator, who uses terrain, time, and celestial bodies as guides and knows how to react calmly and logically if disorientation occurs.
Using Handrails, Backstops, and Aiming Off
These advanced navigation skills provide an efficient way to travel without constantly staring at a compass. “Handrails” are linear features like rivers, ridges, or shorelines that you can simply follow to guide your general direction. A “backstop” is a prominent linear feature on the map, like a major trail or river, that lies beyond your target and provides a safety net against overshooting it.
The clever technique of “aiming off” is useful when your target is a small point on a large linear feature, like a cabin on a trail. Instead of aiming directly for it, you intentionally aim for a point on the trail definitively to one side. When you hit the trail, you know with certainty which way to turn to reach your target, eliminating a 50/50 guess. These navigation decisions are part of a sound navigation strategy.
Navigating Without a Compass
In a true emergency where navigation instruments have been lost or broken, there is life-saving knowledge for a true emergency that you can use. You can rely on tool-free navigation methods that use the predictable movements of celestial bodies.
During the day, use the “shadow-stick method” to find an east-west line. Push a stick into the ground, mark the tip of its shadow, wait about 20 minutes, and mark the shadow’s new tip. The line between the first mark (west) and the second mark (east) provides a reliable directional line. With an analog watch in the Northern Hemisphere, you can find south by pointing the hour hand at the sun; the line bisecting the angle between the hour hand and 12 o’clock points approximately south.
For nighttime navigation, find Polaris (the North Star) using the two “pointer stars” in the Big Dipper. Guidance is also available for finding direction in the Southern Hemisphere using the Southern Cross constellation.
The S.T.O.P. Protocol for Getting Lost
When you realize you are lost, panic is the greatest danger. The S.T.O.P. protocol is a universally accepted emergency procedure to manage this situation with safe navigation practices. When you need demanding exceptional self-reliance and planning to survive, this method is your first line of defense.
- S is for Stop: The instant you feel lost, stop moving. This prevents you from wandering further from the trail, which is often closer than you think.
- T is for Think: Calm your mind and replay your recent movements. Identify your last known certain location and any landmarks you passed.
- O is for Observe: Get out your map and compass. Look for identifiable features in your surroundings that you can locate on the map.
- P is for Plan: Based on your observations, formulate a logical plan. If you can confidently retrace your steps, that is often the best action. If not, especially if it’s getting dark or you are injured, staying put is the safest strategy.
Conclusion: Your Journey to Navigational Freedom
Mastering analog navigation is a journey toward profound self-reliance, transforming you from a passive follower of technology into an active participant in your adventure. The core navigation skillset involves three interconnected fluencies: learning the language of the topographic map, understanding the mechanics of the compass, and knowing how to use them together to account for declination. The true value lies not just in the backup it provides, but in the deeper relationship it fosters with the wilderness and the enhanced navigational competence it cultivates. Consistent practice in low-stakes environments is the key to building the confidence needed to rely on these robust navigation skills when it truly matters. Embracing this timeless skillset is the ultimate expression of freedom in the backcountry, empowering you to explore with confidence.
Frequently Asked Questions about Analog Navigation
What is the single most common mistake beginners make with a map and compass? +
Do I really need an expensive compass to start? +
How can I practice if I don’t live near mountains or large wild areas? +
What’s more important to master first, the map or the compass? +
We are a participant in the Amazon Services LLC Associates Program, an affiliate advertising program designed to provide a means for sites to earn advertising fees by advertising and linking to Amazon.com. As an Amazon Associate I earn from qualifying purchases. We also participate in other affiliate programs. The information provided on this website is provided for entertainment purposes only. We make no representations or warranties of any kind, expressed or implied, about the completeness, accuracy, adequacy, legality, usefulness, reliability, suitability, or availability of the information, or about anything else. Any reliance you place on the information is therefore strictly at your own risk. Additional terms are found in the terms of service.


