In this article
The air bites, the wind howls, and your hiking partner’s shivering has become uncontrollable. This isn’t just being cold; it’s the onset of accidental hypothermia, a medical emergency defined as a drop in core body temperature below 95°F (35°C). That moment of fear is a crossroads. One path leads to panic and uncertainty. The other, the one we’re taking today, leads to readiness. This guide provides a hiker-specific response protocol to transform that fear into confidence, providing the essential knowledge of how to treat hypothermia and prevent it, turning life-saving information into wilderness instinct.
This guide covers the full spectrum of hypothermia management on the trail. We’ll start by learning the primary causes of hypothermia—how your body loses heat through four key mechanisms. Then, we’ll master the observable hypothermia symptoms to distinguish between the different stages of severity, no thermometer required. Most importantly, you will learn the treatment steps to act decisively, following a clear protocol that includes building a life-saving “Hypo-Burrito” with the emergency gear you already carry. Finally, we’ll cover the prevention measures that serve as your first and best line of defense, so you can stop the crisis before it ever begins.
Why Is a Hiker’s Body So Vulnerable to Cold?
To win a battle, you must first understand the battlefield. In the wilderness, the battlefield is your body’s constant struggle against the causes of hypothermia, primarily prolonged cold exposure. Risk factors like exhaustion, dehydration, and inadequate clothing choices compound this cold stress. The “why” behind every piece of gear and every treatment step is rooted in the simple, unforgiving physics of heat loss.
How Does Heat Escape in the Wild?
Your body is a furnace, constantly generating heat. The cold environment is a thief, constantly trying to steal it through four primary pathways. Conduction is heat loss through direct contact. When you sit on a cold rock or damp ground, that surface pulls warmth directly from your body. Convection is heat loss to moving air or water. The layer of warm air your body creates is stripped away by wind, forcing your body to expend precious energy to heat a new one.
Then there’s Evaporation. When liquid turns to vapor on your skin, it has a powerful cooling effect. Sweat-soaked or wet clothing is a primary risk factor, as it can lose up to 90% of its insulating value, actively pulling heat from your core. Lastly, Radiation is the natural process of heat radiating from your body into the colder environment. Up to 50% of this radiant heat loss can occur from an uncovered head.
These mechanisms rarely act alone; their true danger lies in the Multiplier Effect. A hiker sitting on a wet log (conduction) in wet/windy conditions (convection) while wearing damp clothing (evaporation) faces a catastrophic rate of heat loss. Every effective intervention is based on The Insulating Barrier Principle: your sleeping pad blocks conduction, your rain shell blocks convection, and your dry layers trap air. Never underestimate Water’s Critical Danger. Immersion in cold water accelerates convective heat loss up to 25 times faster than in air, making it an acute threat. To truly understand how to build this barrier, you need to master an effective winter layering system.
| The Hiker’s Layering System | |||
|---|---|---|---|
| Layer | Function | Recommended Materials | Critical Avoidance |
| Base | Manages moisture (wicking sweat away from the skin) to prevent evaporative cooling. | Merino Wool, Synthetic Polyester/Polypropylene | Cotton. Becomes soaked, actively pulling heat from the body (Evaporation/Conduction). |
| Mid | Provides primary warmth and regulates temperature during activity; traps air close to the body. | Fleece (Polyester), Light Wool, Technical Sweatshirt Fabric | Cotton. Retains moisture and loses all insulating value when damp. |
| Insulation | Captures the maximum amount of still air (The Insulating Barrier Principle) for heat retention during rest or low activity. | Down (Goose/Duck), Synthetic Fill (Primaloft, etc.), Heavy Fleece | Cotton. Useless as an insulating layer; heavy and slow to dry. |
| Shell | Blocks external elements (wind and rain) to prevent Convection and maintain the loft of insulation layers. | Waterproof/Breathable Membranes, Nylon, Treated Fabrics | Non-Breathable Plastic/Rubber. Traps sweat, leading to rapid cooling (Evaporation) beneath the barrier. |
Knowing how heat escapes is half the battle. For a definitive scientific look, the Wilderness Medical Society’s hypothermia thermodynamics provides an in-depth explanation.
How Do You Recognize Hypothermia on the Trail?
In the field, you don’t have clinical equipment for diagnosis methods like blood tests. Your eyes and ears are your tools. Learning to read the symptoms of hypothermia is a non-negotiable skill. This is about practical, field-ready diagnosis to determine the severity of the condition.
What Are the Three Stages of Hypothermia?
We break the stages of hypothermia down into three categories—mild, moderate, and severe—based on observable signs. The single most important sign is shivering. Its presence, or its absence, will dictate your entire hypothermia treatment plan.
The first signs of Mild Hypothermia (HT I) include vigorous, uncontrollable shivering. This is a good sign! It means the body is still fighting. We call this stage “The -umbles.” The person is alert but may start to show signs of fumbling (clumsiness, lack of coordination), mumbling (slurred speech or speech problems), stumbling, and grumbling (confusion, poor judgment). The presence of shivering is The Critical Diagnostic Sign; it tells you the patient can likely assist in their own rewarming.
Moderate Hypothermia (HT II) is “The Drop-Off.” The key indicator is that the shivering stops. This is a critical danger sign, as the body’s shivering mechanism is failing. Symptoms worsen; the victim becomes more confused and withdrawn, and may exhibit irrational behavior like paradoxical undressing. Muscle stiffness, slow, shallow breathing, and a weak pulse become more pronounced. Drowsiness can progress to loss of consciousness.
Severe Hypothermia (HT III/IV) is “Apparent Death.” The patient becomes unresponsive and may appear unconscious. Vital signs diminish drastically, and breathing and pulse can become so slow and shallow they are difficult to detect, leading to cardiorespiratory failure. A major complication at this stage is cardiac arrest. Here, we rely on the wilderness emergency medicine mantra: “A patient is not dead until they are warm and dead.” Profound hypothermia can have a protective effect on the brain, making resuscitation possible even after long periods. This is why Field Staging Matters. Correctly identifying the stage dictates whether you should “fuel the shiver” or “package and evacuate” for emergency medical care.
Once you’ve identified the stage of suspected hypothermia, your response must be immediate. For an authoritative medical breakdown, see the NCBI’s clinical definition of hypothermia stages. This crisis fits within the larger context of handling a hiker’s emergency.
What Are the Immediate First Aid Steps on the Trail?
Theory is one thing; action is another. Here are the universal and stage-specific treatment steps for hypothermia in the wilderness.
How Do You Treat Mild Hypothermia (Patient is Shivering)?
As long as the patient is experiencing vigorous shivering, they are your ally. Your job is to support their body’s efforts with passive rewarming—creating a warm environment and letting their body do the work.
The Universal First Action is to move the person to a warm, dry location. Your objective is no longer the summit; it is survival. Stop all travel and get the patient out of the cold. Your next goal is to Prevent Further Heat Loss. Gently remove wet clothing and replace it with dry, warm items. Cover with dry blankets, focusing on the center body. Insulate them from the ground with a sleeping pad or backpack. Finally, and most importantly, Fuel the Shiver. Provide high-carbohydrate foods like oral glucose gels to replenish depleted glucose stores. If the person is fully alert, offer warm sweet drinks or other warm beverages. Calories are critical to sustain shivering.
This stage is an energy crisis. If glucose stores are depleted, shivering will stop. Continuous fueling is non-negotiable. If uninjured, encourage Gentle Exercise like walking in place. Throughout this process, Monitor Closely. Monitor breathing and watch for any change in condition. If shivering stops or their mental state worsens, you must change your strategy immediately. To learn more, check out this guide to high-energy snacks for the trail. For a clear, medically-vetted guide, review The Mayo Clinic’s first aid for hypothermia.
But if the shivering stops, the game changes completely. They are a fragile system you must protect at all costs.
How Do You Treat Moderate to Severe Hypothermia (Patient is NOT Shivering)?
When shivering ceases, you must seek medical attention. The new priorities are to stop all further heat loss, protect the patient, and arrange for immediate evacuation. The foundation of this is The Gentle Handling Principle. A cold heart is extremely irritable and prone to fatal complications like arrhythmias or even cardiac arrest. Keep the patient horizontal and move them as little as possible. There should be No Oral Intake due to the high risk of choking. Your primary tool is Passive Rewarming by building a Hypothermia Wrap.
If available, you can begin Active External Rewarming. This involves applying external heat sources like warm compresses or a chemical hot pack (wrapped in cloth) ONLY to the patient’s core—the neck, chest, and groin. You must understand The Danger of Afterdrop. Never warm the limbs first; avoid direct heat on arms and legs. This can trigger a rush of cold blood to the core and cause cardiac arrest. At the same time, Arrange Evacuation. Call 911 or use a satellite messenger. Hypothermic patients in this stage require advanced medicine and active internal rewarming techniques like warm IV fluids, airway rewarming, or even cardiopulmonary bypass to stabilize patients in an intensive care unit (ICU). If the patient is unresponsive with no signs of life, begin CPR if you are trained. For more on Choosing a satellite messenger, our guide can help.
The single most effective tool you can deploy in this remote treatment scenario is the Hypo-Wrap. For the gold standard on this topic, consult the Wilderness Medical Society’s treatment guidelines.
Pro-Tip: When moving a patient in this fragile state, avoid sitting them up or having them walk. If you need to move them onto a tarp or pad, log-roll them. This involves at least two rescuers—one to stabilize the head and neck, and one to gently roll the torso and hips as a single, solid unit, keeping the spine aligned and minimizing jarring movements.
How Do You Build a “Hypo-Burrito” with Standard Hiking Gear?
This is arguably the most critical of the rewarming techniques for severe hypothermia in the field. It’s a human thermos you build with standard hiking gear. Mastering its construction is a life-saving skill.
What Is the Layering Sequence for a Hypothermia Wrap?
Think of it as building a life-saving cocoon, layer by layer, from the outside in.
First is Layer 1 (Outer Shell). Lay a waterproof tarp on the ground. Next, Layer 2 (Conduction Barrier). Place a closed-cell foam sleeping pad in the center. Then comes Layer 3 (Insulation). Unzip a sleeping bag completely and lay it open on the pad, adding any other insulation you have. Now for the Patient Preparation: As gently as possible, remove the patient’s wet clothes and dry and dress them in dry layers.
Optionally, add Layer 4 (Vapor Barrier). Wrap the patient in one or more space blankets. Now, Place Patient & Add Heat. Gently place them on the open sleeping bag and put your wrapped hot water bottles on their neck, chest, armpits, and groin. Now, Wrap the Burrito. Zip the sleeping bag, fold the tarp over their feet, then fold the sides over snugly. Finally, Create a Hood. Fold the top of the tarp down to cover head, protecting it from heat loss while leaving the face clear.
Your Trailside Treatment Kit Essentials
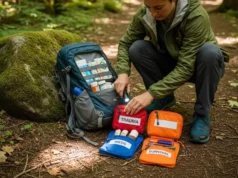
Effective hypothermia prevention and treatment begins with your packing essentials. Your kit should always include a waterproof/windproof outer shell, insulating layers (fleece, down), a hat and mittens, and extra socks. For emergencies, add a lightweight tarp, a closed-cell foam pad, one or two emergency space blankets, and several chemical hand warmers. This gear is the foundation for any field treatment, including the Hypo-Wrap.
Pro-Tip: Nalgene-style hard plastic water bottles make excellent hot water sources. Fill them with hot (not boiling) water, tighten the lid securely, and always wrap them in a spare sock or shirt. An unwrapped bottle can easily cause burns on a patient who cannot feel or react to the intense heat.
Building this shelter correctly depends on understanding deadly mistakes. The USDA Forest Service hypothermia safety guide reinforces these core principles. The gear used is part of any essential backpacking gear checklist.
What Are the Most Common and Dangerous Mistakes in Treatment?
In first aid, what you avoid is often as important as what you do. Ignoring the strict rules of hypothermia treatment can be fatal.
Why Is Rubbing Limbs or Rapid Rewarming So Dangerous?
The answer is a phenomenon called Afterdrop, where a patient’s core temperature falls even after rescue begins. In a hypothermic state, blood vessels in the limbs are constricted. The Fatal Mistake is rapid rewarming of the extremities, for example, by rubbing them. This causes the vessels to dilate suddenly. This creates The Shock to the Heart, allowing a large volume of cold, acidic blood to rush to the core, which can trigger fatal arrhythmias and cardiac arrest. This is why the rules are strict: handle gently, keep horizontal, and warm the core first.
The “Don’ts” List—what to avoid—is absolute: DON’T give alcohol or caffeine. DON’T apply direct, intense heat. DON’T rub or massage the limbs. DON’T assume an unresponsive victim is dead. And be aware of Paradoxical Undressing. In late-stage hypothermia, a disoriented victim may try to remove clothing. Believe the symptoms, not the victim. A person undressing in the cold is in a dire medical emergency. For a great outdoor-focused explanation, read A review of hypothermia by Mountaineering Scotland.
The best way to handle these mistakes is through proactive prevention.
Conclusion
Hypothermia is a medical emergency that can occur even in cool temperatures, especially when Cold, Wet, Wind, and Exhaustion are combined. Your most critical diagnostic tool is the presence or absence of shivering, which dictates your entire strategy: “fuel the shiver” for mild cases, or “package and protect” for moderate and severe hypothermia. For any patient who is not shivering, your only goals are to stop all further heat loss with a Hypothermia Wrap and arrange an immediate evacuation, always handling them gently to protect their heart from complications. Ultimately, hypothermia prevention through proper layering clothing, staying fueled with warm fluids, and managing exertion is the most effective treatment of all. The prognosis to recover from hypothermia improves dramatically with prompt, appropriate care.
Master these skills before you need them. Explore our full library of wilderness safety and first aid guides to build your confidence and competence on the trail.
Frequently Asked Questions about Treating Hypothermia on the Trail
What are the first signs of hypothermia?
The first signs of mild hypothermia are often called “the -umbles”: **shivering**, **fumbling** hands (clumsiness), **mumbling** or slurred speech, and **stumbling** or poor coordination. A person may also seem apathetic, confused, or show impaired judgment.
What should you NOT do when treating hypothermia?
Never **rub or massage** the person’s arms and legs or apply direct, intense heat to them, as this rapid rewarming can trigger a fatal heart problem called **”afterdrop.”** Also avoid giving them **alcohol or caffeine** and, if they are not fully alert, do not give them anything by mouth.
Can you give someone with hypothermia alcohol to warm them up?
No, you must **never give alcohol** to a person with hypothermia. Alcohol causes blood vessels to dilate, which creates a false sensation of warmth while actually increasing heat loss from the body’s core, making the situation worse.
How do you make a hypothermia wrap?
You create a layered **”human thermos”** by placing a sleeping pad and an open sleeping bag on top of a waterproof tarp. After replacing the patient’s wet clothing with dry ones, you place them inside, apply warm compresses or wrapped hot water bottles to their core (**neck, chest, groin**), and wrap the entire system snugly around them.
Risk Disclaimer: Hiking, trekking, backpacking, and all related outdoor activities involve inherent risks which may result in serious injury, illness, or death. The information provided on The Hiking Tribe is for educational and informational purposes only. While we strive for accuracy, information on trails, gear, techniques, and safety is not a substitute for your own best judgment and thorough preparation. Trail conditions, weather, and other environmental factors change rapidly and may differ from what is described on this site. Always check with official sources like park services for the most current alerts and conditions. Never undertake a hike beyond your abilities and always be prepared for the unexpected. By using this website, you agree that you are solely responsible for your own safety. Any reliance you place on our content is strictly at your own risk, and you assume all liability for your actions and decisions in the outdoors. The Hiking Tribe and its authors will not be held liable for any injury, damage, or loss sustained in connection with the use of the information herein.
Affiliate Disclosure: We are a participant in the Amazon Services LLC Associates Program, an affiliate advertising program designed to provide a means for us to earn advertising fees by advertising and linking to Amazon.com. As an Amazon Associate, we earn from qualifying purchases. We also participate in other affiliate programs and may receive a commission on products purchased through our links, at no extra cost to you. Additional terms are found in the terms of service.


