

In this article
Planning for gates of the arctic backpacking is unlike preparing for any other trip in the US National Park system. This is America’s last true wilderness, a place that demands complete self-reliance and rewards the prepared with unparalleled solitude. Welcome to your comprehensive blueprint for this incredible undertaking. Your journey to the Arctic Circle starts here, where we will demystify the complex logistics and break down viable route options into understandable archetypes. You will learn about the unique challenges and profound rewards of visiting a park with no trails, roads, or facilities, gain a step-by-step framework for tackling expedition logistics from transportation to budgeting, explore different trip styles to help you choose the right adventure for your skill level, and finally, cover the critical safety protocols for managing the park’s primary hazards: grizzly bears and relentless river crossings.
The Gates of the Arctic Expedition: An Overview
Before you book a flight or buy a single piece of gear, it’s crucial to understand what makes Gates of the Arctic National Park fundamentally different. Its raw, uncompromising nature is its greatest appeal and its most significant challenge. You’ll learn about its core identity, its absolute unsuitability for novice hikers, and the expeditionary mindset required for any successful trip.
What is Gates of the Arctic National Park?
Gates of the Arctic is the northernmost and second-largest national park in the US, a staggering 8.4 million acres of the Brooks Range located entirely north of the Arctic Circle. Its defining characteristic—and the one you must respect above all else—is the complete absence of any established infrastructure. There are no roads, no trails, and no visitor facilities of any kind within its boundaries.
The park is a “trailless wilderness” in the purest sense. All travel is cross-country, demanding a high degree of self-sufficiency, expert navigation skills, and the physical fortitude to move through a difficult landscape. This inherent difficulty is why it remains the least-visited national park, a fact that preserves its pristine and solitary character, making it one of one of America’s bucket-list hiking destinations for those who are prepared. The land itself is a vast expanse of glacier-carved valleys, rugged mountains, and immense Arctic tundra ecosystems that have been home to indigenous peoples like the Nunamiut Iñupiat for millennia, a cultural history that deserves as much respect as the environment itself.
A Warning for Beginners: Why This Park is Different
Let there be no ambiguity: this is not a destination for inexperienced backpackers. The National Park Service is explicit in its warning to potential visitors.
Visitors to the park should be “proficient in outdoor survival skills” and be prepared to care for their own life and their partner(s) if an emergency arises.
Unlike other parks where a ranger station might be a few hours away, help in the remote Gates of the Arctic can be days away and is entirely dependent on fickle weather conditions. A self-rescue mindset is not just a recommendation; it is a prerequisite for entry. You must be able to handle any emergency on your own. For the experienced backpacker who is an Arctic beginner, our goal is to bridge the knowledge gap regarding the specific and unique challenges of this environment. For those still transitioning from day-hiker to backpacker, gaining more basic backpacking skills on less committing trips first is essential.
Expedition Blueprint: Mastering Your Trip Logistics
Tackling logistics is often the biggest hurdle for most aspiring visitors. A trip to Gates of the Arctic is as much a project management challenge as it is a physical one. We break down the complex process of getting to and into the park, budgeting for the expedition, and understanding the crucial timing of your visit.
The Access Funnel: Getting to the Edge of the Wilderness
Your journey into the wilderness is a multi-step process that funnels you from civilization to the remote heart of the park. All personal trips effectively begin in Fairbanks, which serves as the primary logistical hub for final gear purchases, supplies, and connecting flights from its airport. From Fairbanks, you must take smaller commercial flight connections to one of the three main gateway communities: Bettles, Coldfoot, or the native village of Anaktuvuk Pass.
These communities are the final jumping-off points. From one of them, the last step into the park is via a chartered air taxi. These specialized bush planes, which can be equipped with wheels for gravel bars or floats for lakes, are the most common method for accessing the park’s interior. A more challenging but viable alternative is driving the Dalton Highway, which runs along the park’s eastern boundary. This approach requires you to park at a pull-off and begin to hike west directly into the park, making it a popular choice for long trips. No matter how you get there, having the right backpack for travel is key for these initial stages.
DIY vs. Guided Trips: Choosing Your Path
Early in your planning, you face a fundamental choice: go it alone or hire a guide. A DIY (Do-It-Yourself) trip offers the ultimate freedom and can be more budget-friendly, but it places the entire burden of planning, risk management, and execution squarely on your shoulders. The success or failure of the entire trip rests with you and your team.
A guided backpacking trip, offered by a handful of expert outfitters, removes the immense logistical burden and provides a significant safety net in the form of a professional, experienced guide. They handle the flights, food, and route planning. This convenience and safety, however, comes at a significantly higher cost and offers less flexibility in your itinerary. This decision between DIY and a guided trip is a critical one that shapes every other aspect of your plan, forcing you to weigh cost, convenience, safety, and your desire for autonomy.
Budgeting Your Expedition: A Realistic Cost Breakdown
A trip to Gates of the Arctic is a significant financial investment. For a DIY trip, the single largest expense is the chartered air taxi, which can cost between $600 and $2,000 each way for the entire plane. This cost is typically split among the members of your group, making group size a major budgetary factor. Additional costs include your commercial flights to Fairbanks and then on to a gateway community, which can run approximately $150-$350 per person each way. You must also budget for food, canister fuel, a satellite messenger subscription, and any specialized gear for your full pack.
A guided trip simplifies budgeting into a single, all-inclusive price. These expeditions can range from around $5,000 to over $7,000 per person for a 7-10 day trip. This fee covers your expert guide, all food, community flights from Fairbanks, and the air taxi charters into and out of the park. For any trip, remember that bear-resistant food containers are required for all overnight visitors.
Timing & Seasonality: When is the Best Time to Go?
The viable backpacking season in Gates of the Arctic is brutally short, generally running from mid-June to mid-September. Within this window, each month presents a distinct set of trade-offs, and snow has been recorded in any month of the year. There is no “perfect” time; you must simply choose which challenges you prefer to face.
June often has lingering snowpack in the high passes, which can make trekking difficult or impossible without an ice axe, but it typically has fewer mosquitos. July is the warmest month, boasting the 24-hour “midnight sun,” but this is also the absolute peak of mosquito season, which can be maddening. August sees the mosquito population decline, the tundra begin to blush with brilliant fall colors, and cooler temperatures prevail, and cold nights become the norm. However, it also brings less daylight and a significantly higher chance of cold rain and freezing nighttime temperatures, requiring specialized gear for cold conditions.
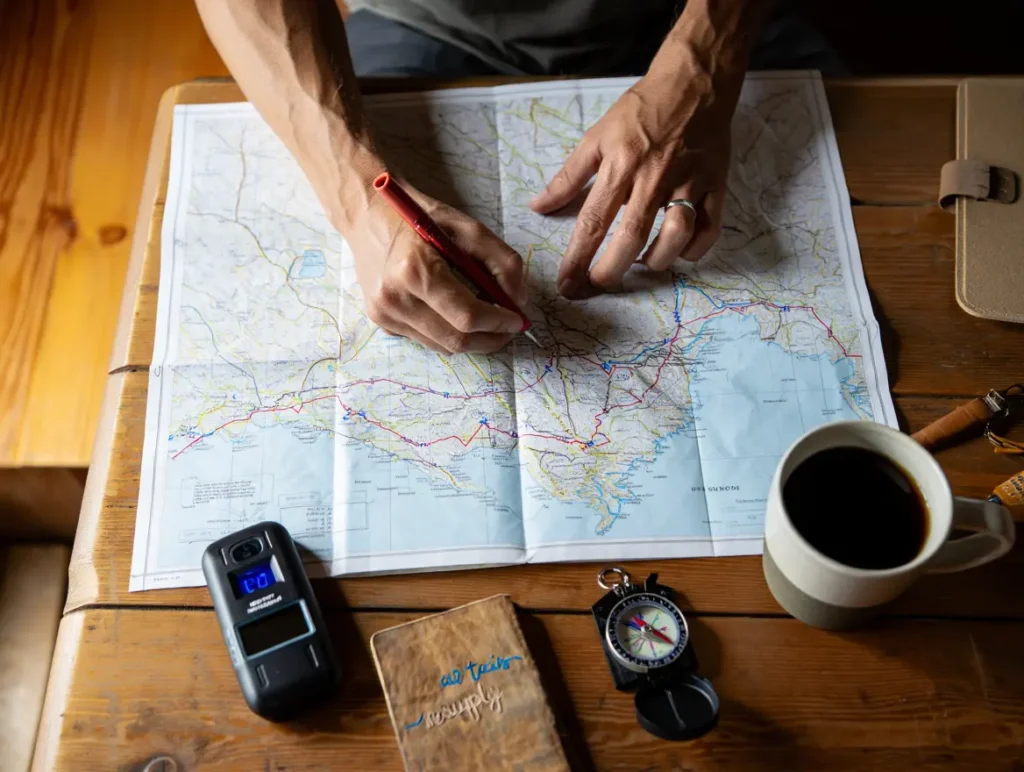
Charting Your Course: The Route Archetype Framework
To solve the most confusing part of planning—choosing where to go—we’ve developed a unique framework. The sheer emptiness of the park can feel paralyzing. Instead of listing dozens of individual cool trip reports, we group potential journeys into four distinct “archetypes” so you can easily compare styles of adventure and find the one that best matches your skills, budget, and goals.
The Four Gates of the Arctic Route Archetypes
- The Roadside Traverse: A classic point-to-point journey, often starting from the Dalton Highway near Atigun Pass and hiking west to a village like Anaktuvuk Pass. This traverse emphasizes ultimate self-sufficiency and the profound sense of crossing a vast landscape under your own power. The logistics are simpler on the front end, but it is physically grueling and a true test of endurance, putting it on par with some of the world’s best long-distance hiking.
- The Fly-in Pilgrimage: This trip style involves flying to a specific, iconic destination, with the Arrigetch Peaks being the most famous example. The journey is focused on reaching a world-class mountain objective, setting up a basecamp, and exploring the dramatic cirques and valleys of that singular location.
- The River Expedition: This archetype uses packrafts to travel one of the park’s six Wild and Scenic Rivers, like the Alatna or Noatak. The trip often combines tough hiking sections with long stretches of paddling, offering a unique and efficient way to see how the landscape changes from alpine headwaters to boreal forest.
- The “First-Timer’s” Fly-in Loop: This is the most approachable style for an experienced hiker who is new to the Arctic. It involves a charter flight dropping you off at a lake or gravel bar with a plan to hike a manageable loop, like the Anaktuvuk Loop Hike, or explore from a basecamp, with a pre-arranged pickup at the same or a nearby location. This minimizes the complex logistics of a long traverse.
Arctic Wilderness Route Archetypes
Explore different ways to experience the remote wilderness of the Arctic, from challenging expeditions to more accessible adventures.
Primary Access
Drive Dalton Hwy; hike in/out or fly out from a village.
Typical Duration
8-14 Days
Key Skills Required
- Advanced navigation
- High endurance
- River crossing
The “Payoff”
Ultimate self-sufficiency, solitude, sense of a true journey.
Primary Access
Fly to Bettles; floatplane to location.
Typical Duration
7-10 Days
Key Skills Required
- Off-trail hiking
- Boulder-hopping
- Bear awareness
- Iconic (this isn’t a skill but listed, kept for consistency)
The “Payoff”
Stunning granite scenery; world-class basecamp potential.
Primary Access
Fly to Bettles; floatplane to headwater lake; hike & float.
Typical Duration
10-14 Days
Key Skills Required
- Packrafting (Class I-III)
- River reading
- Expedition logistics
The “Payoff”
Experiencing the landscape change from alpine to boreal forest via river.
Primary Access
Fly to Coldfoot/Bettles; wheel/float plane drop-off & pick-up.
Typical Duration
5-7 Days
Key Skills Required
- Core backpacking skills
- Navigation
- Self-sufficiency
The “Payoff”
A taste of true Arctic wilderness with more manageable logistics.
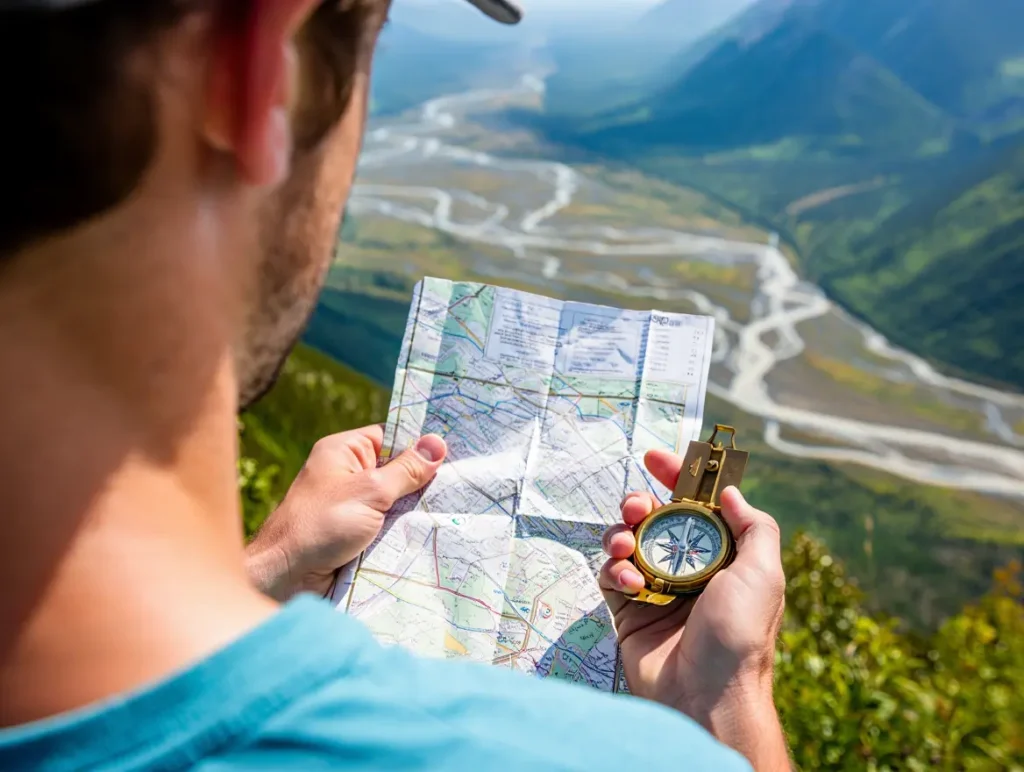
Navigation in a Trailless Wilderness
In Gates of the Arctic, your ability to navigate is your most critical skill. You cannot rely solely on a GPS device, as batteries die and electronics fail. Your essential toolkit must include physical topographic maps (at a detailed 1:63,360 or 1:24,000 scale) and a reliable liquid-filled compass. A GPS, or one of the many free hiking apps with GPS backup, should be treated as a secondary tool for confirming your position.
Here, navigation is done by landform. You learn to follow river corridors as natural highways, aim for low points in mountain passes, and read the subtle contours of the terrain to find the path of least resistance. You will often find and follow faint game trails created by generations of caribou. An emergency communication device, like a Garmin inReach or SPOT, is absolutely non-negotiable. In this Alaska backcountry landscape, it is your only reliable link to the outside world in case of a life-threatening emergency.
Mastering the Arctic Environment: Skills and Safety
A successful expedition hinges on your ability to safely manage the unique and high-consequence challenges of the Arctic. It’s not enough to be a strong hiker; you must be a smart and cautious one. You’ll find critical, in-depth protocols for how to navigate grizzly encounters and powerful river crossings.
High-Consequence Risk 1: Grizzly Bear Safety Protocol
The park is home to a healthy population of grizzly bears, and seeing one is a privilege that comes with immense responsibility. Your primary strategy must always be prevention. Make consistent noise by talking loudly, clapping, or calling out “hey bear!” every few minutes, especially in dense brush or near loud streams. The goal is to avoid surprising a bear at close range.
Proper food storage is not optional; it is mandatory. All food, garbage, and scented items (like toothpaste and sunscreen) must be stored in a certified bear-resistant food container (BRFC). Your cooking and eating area should be located at least 100 yards downwind from your tent. Finally, you must carry bear spray. Keep it immediately accessible on your backpack’s hip belt or chest strap—not inside your pack—and be sure you know how to deploy it instantly. If you do have an encounter, stand your ground, speak in a calm voice, and never, ever run.
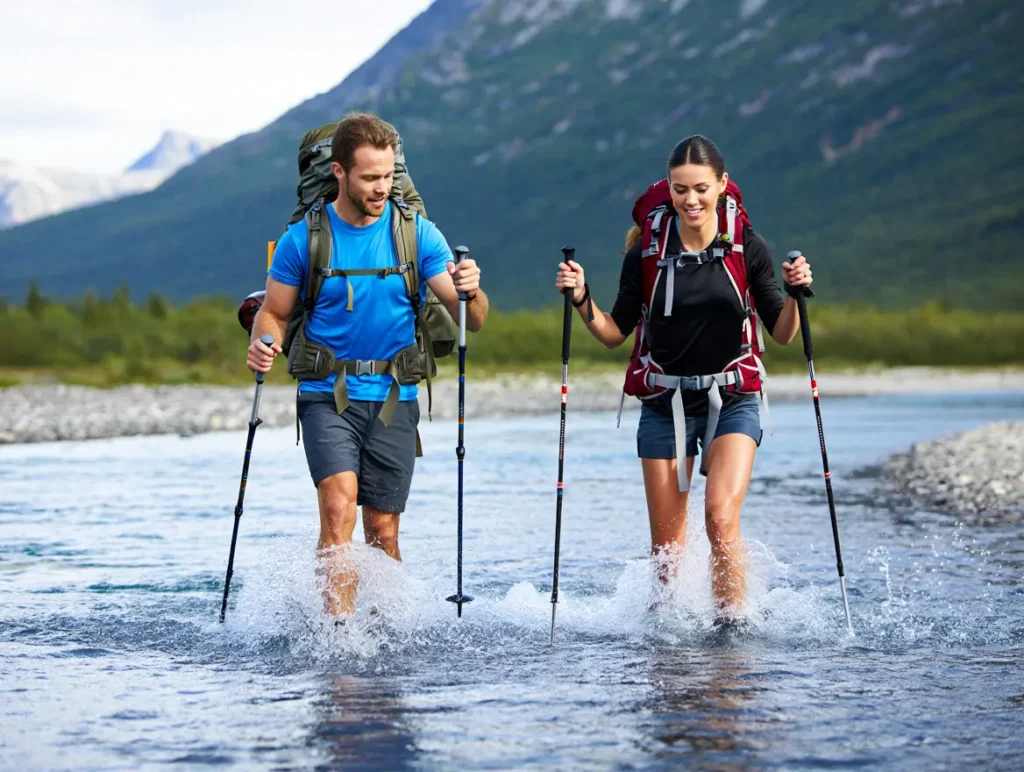
High-Consequence Risk 2: River Crossing Technique
You will cross countless streams and rivers, and they represent one of the most significant and underestimated dangers in the park. Water is powerful, cold, and relentless. Never attempt to cross a river that is deeper than your upper thigh or moving faster than you can comfortably walk. If you have any doubt, find another spot or wait, as avalanche danger can also affect river levels.
[PRO-TIP] Before entering the water, always unbuckle your backpack’s hip belt and sternum strap. This allows you to shed your bag instantly if you fall, preventing it from dragging you under.
Look for wide, braided sections where the river splits into multiple channels; the current here will be slower and shallower. When you cross, face upstream into the current and use sturdy trekking poles to form a stable tripod with your feet. Shuffle sideways, planting your poles firmly with each step. For group crossings, link arms to provide mutual support and stability. Remember that rivers are often at their lowest in the morning after cold nights, so patience can be your most important tool.
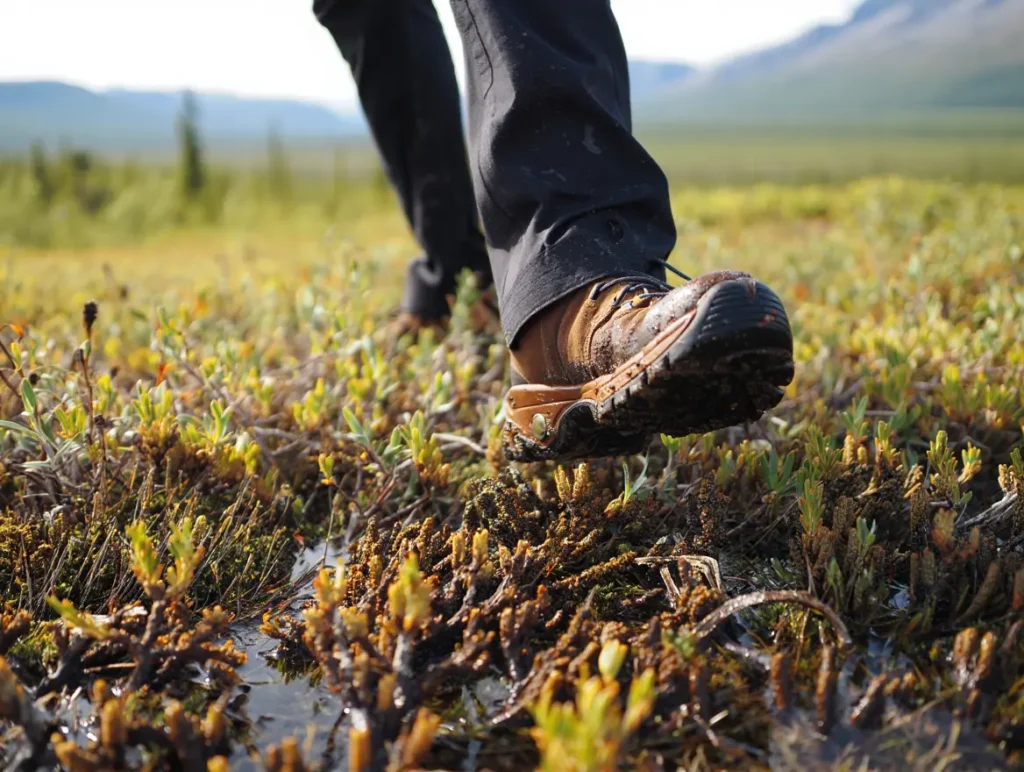
The Terrain-Fatigue Feedback Loop: Understanding Tussocks
The most infamous feature of the Arctic groundcover is the tussock. These are ankle-twisting, dinner-plate-sized clumps of sedge grass that grow in boggy areas, making walking incredibly slow, awkward, and energy-sapping. A realistic miles/day hiking pace across tussock fields is often just one mile per hour, a pace that can be mentally demoralizing. This reality is central to what we call the “Terrain-Fatigue Feedback Loop.”
The brutal terrain forces a slow pace. This slow pace means you must carry a heavy pack with many days of food and fuel. That heavy pack, in turn, amplifies your fatigue, which makes the already difficult terrain feel even more punishing. Understanding this vicious cycle is the key to successful planning. It reinforces the absolute necessity of conservative daily mileage goals (plan for 5-7 miles/day, not 15), packing high-calorie food, and using lightweight-but-robust gear. Embracing a guide to effective pacing is crucial to avoid being physically and mentally broken by the landscape.
Gearing Up: The Arctic-Weight Kit
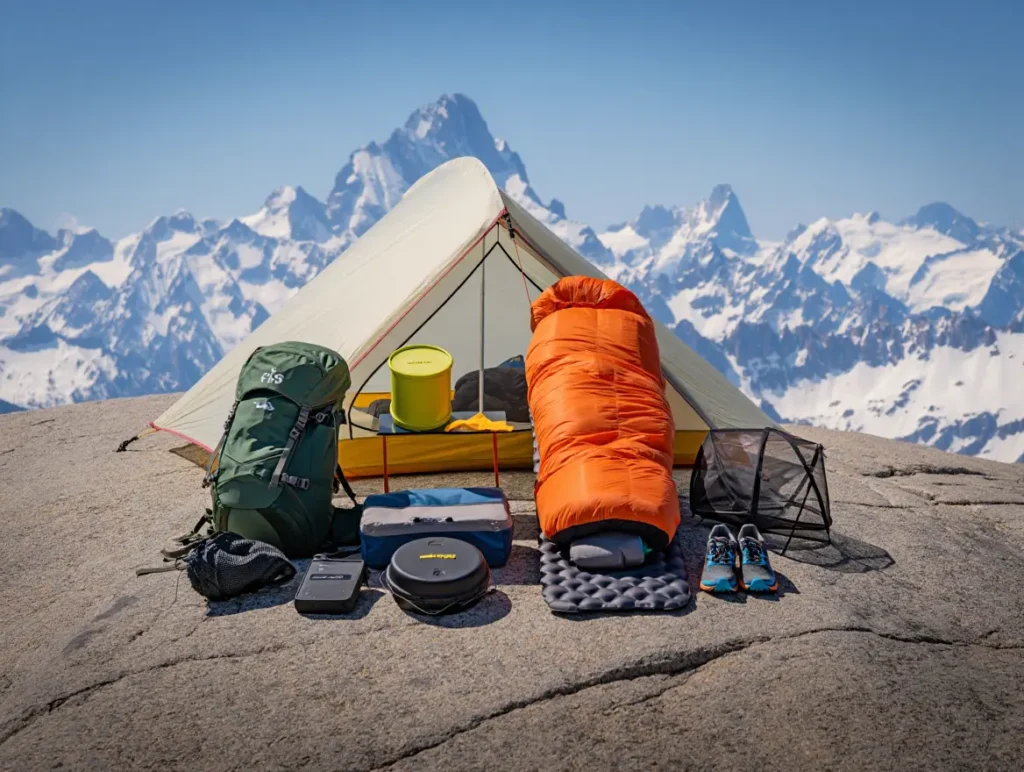
A standard backpacking gear list is not enough for Gates of the Arctic. The environment is too harsh, too wet, and too unforgiving for corner-cutting. Your safety and success depend on specific gear systems and strategies designed to keep you warm and functional when you are days from the nearest road.
The Arctic-Appropriate Backpacking System
While ultralight principles are valuable, the realities of the Arctic often demand what we call an “Arctic-weight” approach. This means consciously prioritizing robust, reliable, and warmer gear over the absolute lightest options available. A broken tent pole or a soaked sleeping bag is not an inconvenience here; it’s a potential survival situation.
Your “Big Three” (pack, shelter, and sleep system) are the foundation of your kit. A durable, highly water-resistant backpack with effective backpack rain covers is recommended to comfortably carry your bulky gear and ten-plus days of food. Strong tents with a double-wall design are often preferred because they manage condensation far more effectively in the persistently damp environment. Your sleep system is your primary defense against hypothermia and a critical tool for recovery. A sleeping bag or quilt rated to at least 20°F (-6°C) is recommended even in summer, paired with an insulated sleeping pad with an R-value of 4.0 or higher.
Critical Gear Sub-Systems: Bugs, Feet, and Food
Beyond the Big Three, several sub-systems require special attention. For bug protection, a head net is non-negotiable and weighs almost nothing. Many veteran Arctic hikers also swear by a full bug jacket and treating their outer clothing with Permethrin to create a formidable defense against the severe mosquito swarms of July.
For foot care, embrace a “wet foot management” system. Your feet will be wet all day, every day. Do not waste energy trying to keep them dry while hiking. Instead, pair thin, non-cotton socks with non-waterproof trail runners that drain quickly. The critical step is what you do in camp: immediately remove your wet shoes and socks and switch to a dedicated pair of warm, dry camp socks and shoes. This routine is essential to prevent trench foot and other debilitating skin issues. Lastly, when packing your food and scented items, you must carry extra in your pack, which should be lined with a thick compactor bag for added waterproofing. The possibility of a multi-day delay in your pickup flight due to weather is very real. Always plan for at least two to three extra hiking days of food and fuel beyond your intended itinerary.
Conclusion: Embracing the True Wilderness
Backpacking in Gates of the Arctic is less of a trip and more of an expedition. It requires a significant investment in research, planning, and skill development that goes far beyond a typical wilderness outing. Success is built on a foundation of meticulous logistical preparedness, realistic route selection based on your true abilities, and an unwavering commitment to safety protocols.
By breaking down the monumental task of planning into manageable steps—logistics, routes, safety, and gear—the seemingly impossible becomes achievable. The reward for this immense effort is an experience that few will ever know: the profound solitude, the empowering challenge, and the deep, unforgettable connection with one of America’s last truly wild landscapes of mountains and glaciers. You don’t just visit Gates of the Arctic; you earn it.
Share your questions or your own Gates of the Arctic planning experiences in the comments below to help our community of hikers!
Frequently Asked Questions about Gates of the Arctic Backpacking
How much does it cost to backpack Gates of the Arctic?
The cost varies dramatically between a DIY trip and a guided one. For a DIY trip, the main expense is the air taxi charter, which typically runs $1,200-$4,000 round trip per plane, plus flights to Alaska. A guided trip usually costs $5,000-$7,000+ per person.
Can you backpack in Gates of the Arctic without a guide?
Yes, it is common for experienced hikers to go without a guide. This requires complete self-sufficiency, expert-level navigation skills, and a self-rescue mindset, as there are no park services, rescue teams, or established trails to rely on.
How hard is it to hike in Gates of the Arctic?
It is extremely physically and mentally demanding, even for seasoned hikers. The primary challenges are the complete lack of trails, the energy-sapping nature of walking on tussocks, frequent and potentially dangerous river crossings, and carrying heavy packs with over a week’s worth of food.
What is the best time of year to visit Gates of the Arctic?
The short season runs from mid-June to mid-September. June has fewer bugs but more snow. July offers peak daylight but also peak mosquitos. August has beautiful fall colors and fewer bugs, but a higher chance of cold rain and freezing temperatures.
We are a participant in the Amazon Services LLC Associates Program, an affiliate advertising program designed to provide a means for sites to earn advertising fees by advertising and linking to Amazon.com. As an Amazon Associate I earn from qualifying purchases. We also participate in other affiliate programs. The information provided on this website is provided for entertainment purposes only. We make no representations or warranties of any kind, expressed or implied, about the completeness, accuracy, adequacy, legality, usefulness, reliability, suitability, or availability of the information, or about anything else. Any reliance you place on the information is therefore strictly at your own risk. Additional terms are found in the terms of service.


