

In this article
Zion’s immense popularity means a successful hiking trip is determined as much by logistical planning as by physical fitness. With over 5 million visitors in 2021, the park manages crowds with a mandatory shuttle, competitive permit lotteries, and a challenging parking situation. Mastering these three hurdles is the first and most critical step before choosing from the many hiking trails at Zion National Park. This guide provides the essential blueprint for navigating the Zion NPS systems, ensuring you spend more time on the trail and less time in a queue.
First, Plan Your Trip: Navigating Shuttles, Parking, and Permits
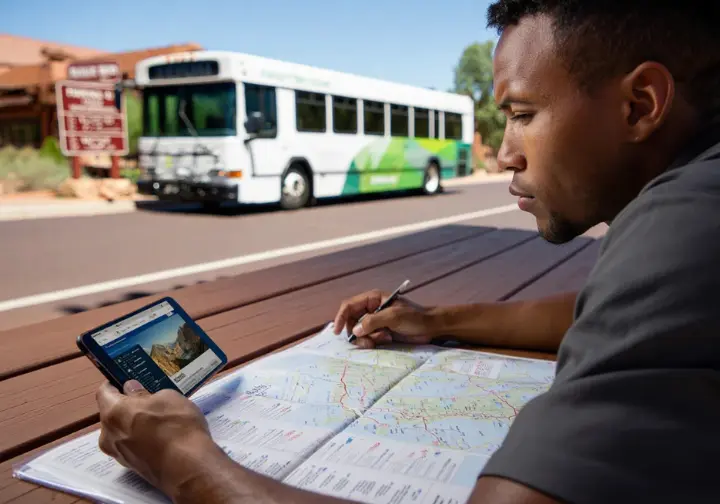
Before you even think about which hike to take, you must master Zion’s core logistics. We’ll walk you through the mandatory Zion shuttle system, the daily battle for parking, and the competitive permit lotteries that control access to the park’s most famous adventures.
The Mandatory Shuttle System Explained
For most of the year (March through November and holidays), the Zion Canyon Scenic Drive is closed to private vehicles. This makes the mandatory shuttle system the only way to access the first trailhead for most routes. You cannot drive your personal car on this road during shuttle season, even outside operating hours. This system reduces congestion and protects the narrow canyon’s environment.
Two distinct, free shuttle systems work together. The Springdale Line, or Town Shuttle, circulates through the gateway town, dropping visitors at the park’s pedestrian entrance near the Zion Visitor Center. From there, the Zion Canyon Line, or Park Shuttle, starts and makes nine stops—each a trailshuttle stop—at key trailheads like The Grotto and Temple of Sinawava. Getting a grip on these logistics is a fundamental part of planning your first hiking trips.
No tickets are needed for the shuttles, but you must have a valid park pass. Buses arrive every 5-15 minutes, but lines get very long during peak hours. A full round trip on the Zion Canyon Line takes about 90 minutes. A critical safety tip: never wait for the last shuttle. They are often full, and missing it means a long, dark walk back. Also, the Weeping Rock stop and its trails are closed indefinitely due to a rockfall, so always check for trail closures.
The Parking Predicament and How to Solve It
Parking inside Zion National Park is the first major challenge. The lots at the Zion Canyon Visitor Center are extremely limited and fill by 8:00 or 9:00 a.m. year-round, often earlier. Once full, the park may temporarily close the Zion-Mt. Carmel Highway near the canyon junction to incoming traffic. You can get current information from the park’s official Traffic and travel tips page.
The best strategy is to bypass the in-park lots entirely. Park your vehicle in Springdale and use the free town shuttle to access the walk-in entrance. This eliminates the stress of hunting for a spot. Springdale offers many paid lots with daily rates up to $40. A town parking receipt does not grant park entry, and your park pass does not cover Springdale parking. Never park on vegetation or block traffic, as you will be cited and towed.
A top-tier tip is to book lodging in Springdale that includes private guest parking, or reserve a spot at the Watchman Campground or South Campground if you plan on camping. This amenity saves money and removes a daily source of stress, letting you walk to a shuttle stop or the park entrance. Thinking through these details is one of the essential tips for beginner hikers.
How to Get a Permit for Angels Landing
Access to the final, thrilling half-mile of the Angels Landing hike, known as the “chained section,” is strictly managed by a hiking permit system. This section is a scramble along a narrow rock spine with sheer drop-offs where hikers use bolted chains for support. A permit is required to hike past Scout Lookout onto this portion of the trail.
There are two ways to obtain one of the required Angels Landing hiking permits, both managed through Recreation.gov. The Seasonal Lottery is for advance planners, with applications open quarterly for the upcoming season. You can select up to seven ranked date and time choices for a non-refundable $6 application fee.
For last-minute visitors, the Day-Before Lottery offers a second, though highly competitive, chance. You can apply on Recreation.gov from 12:01 a.m. to 3:00 p.m. MT the day before your desired hike. If successful, a $3 per-person fee is charged. The confirmation email is your permit; print or download it, as cell service is unreliable. Rangers at Scout Lookout will require the permit email and a matching photo ID, making this one of the most iconic bucket list hiking trails that requires advance preparation.
How to Get a Permit for The Subway
The Subway is a strenuous, 9-mile semi-technical hike through the Left Fork of North Creek, famous for its unique tube-like canyon sections. A wilderness permit is mandatory for any entry to protect its fragile ecosystem and ensure visitor safety, with access limited to 80 people per day. The permit covers both the non-technical “bottom-up” route and the technical “top-down” canyoneering route.
Most of the canyoneering permits are available through a Seasonal Lottery on Recreation.gov, which you can apply for up to four months in advance for a $6 fee. A small number of any remaining permits may be available through a Daily Lottery two days before the hike date. The riskiest option is to try for a last-minute Walk-in Permit at the Zion Wilderness Desk.
Unlike Angels Landing, this permit is a physical tag. The reservation holder must go to the Zion Canyon Visitor Center Wilderness Desk in person to pick it up. This process includes a mandatory safety briefing from a ranger and requires you to provide your vehicle information. This hike demands specialized footwear for wet conditions due to the constant wading.
The Best Hiking Trails at Zion National Park by Difficulty
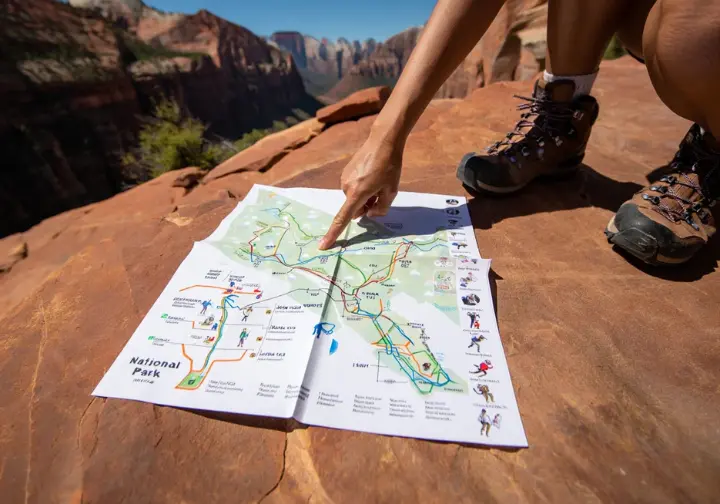
Zion offers over 90 miles of trails catering to every ability level. We’ve provided a comprehensive catalog of the best hiking trails at Zion National Park, organized by difficulty—from easy, paved riverside strolls perfect for families to strenuous, world-renowned adventures for the well-prepared hiker.
Zion’s Best Hikes at a Glance
This table provides a scannable overview of Zion’s premier hiking trails for efficient planning. You can find more official details, including trailhead location maps, in the National Park Service’s Zion Canyon trail descriptions. Use this chart for quickly choosing trails suited to your fitness level and logistical preparations.
Zion National Park Hikes
Filter trails by difficulty to find your next adventure.
Pa’rus Trail
Starts at the Visitor Center. Paved and accessible, perfect for all visitors and pets.
Riverside Walk
Starts at Temple of Sinawava. The paved gateway to the bottom-up Narrows hike.
Lower Emerald Pool
Starts at Zion Lodge. An iconic trail leading to a lush oasis and waterfalls.
Canyon Overlook
Starts at East Side Tunnel. A short hike with a massive reward: a stunning high-elevation viewpoint.
The Watchman Trail
Starts at the Visitor Center. Offers incredible views of the lower canyon and Pa’rus Valley.
Emerald Pools Loop
Starts at The Grotto/Lodge. A complete loop visiting the Lower, Middle, and Upper pools.
Scout Lookout
Starts at The Grotto. A demanding hike to a stunning viewpoint, without the final chained section of Angels Landing.
Angels Landing
Starts at The Grotto. Zion’s most famous, thrilling, and exposed hike along a narrow spine with chains.
The Narrows
Starts at Temple of Sinawava. Walk directly in the Virgin River through a towering slot canyon.
Observation Point
Starts from East Mesa Trail. A long but relatively flat hike to the highest viewpoint in Zion.
Easy Hikes: Accessible Beauty for Everyone
The Pa’rus Trail is a 3.2-mile paved path along the Virgin River. It’s the park’s most accessible trail and the only one where leashed pets and bicycles are allowed, making it a perfect easy out-and-back hike for families. The Riverside Walk is a beautiful 2.0-mile paved trail and gateway to The Narrows, offering a spectacular preview without getting wet. For these easy walks, a good pair of comfortable walking shoes is all you need.
Another great option is the Lower Emerald Pool Trail, a 1.2-mile paved but sometimes uneven path to a lush oasis where waterfalls cascade from above. Swimming is prohibited to protect the fragile ecosystem. Lastly, the Grotto Trail is a flat, 1.0-mile connector between the Zion Lodge (Stop #5) and The Grotto (Stop #6). It’s a quiet alternative to the bus and an excellent spot to see mule deer. Check out this guide for more ideas on short and easy hikes.
Moderate Hikes: Rewarding Views for More Effort
The Watchman Trail is a 3.2-mile route near the Visitor Center that climbs to a fantastic overlook of the lower canyon and iconic Watchman peak. It offers a classic Zion vista without needing the shuttle. On the park’s East Side, the Canyon Overlook Trail is a 1.0-mile rocky and uneven dirt trail that delivers some of the most breathtaking, epic Zion views for relatively little effort. The trail itself is an adventure with boardwalks and alcoves, but canyon overlook parking is extremely limited.
The Emerald Pools Trail loop is a classic 3.0-mile experience connecting all three pools. The trail to the Middle and Upper pools is unpaved, rocky, and a bit of a steep trail, leading to a pool at the base of a 300-foot cliff of beautiful red rock. The Kayenta Trail is a 1.8-mile unpaved trail connecting The Grotto to the Emerald Pools system, offering a more scenic route than starting from the lodge. These moderate hikesthese trails have uneven terrain, so you’ll want supportive hiking boots. For a list of some of the best kid-friendly trails, AllTrails offers a great resource.
Strenuous Hikes: Epic Adventures for the Well-Prepared
For well-conditioned hikers seeking a challenge, Scout Lookout is a 3.6-mile hike that is the first, strenuous part of the Angels Landing trail. It includes the infamous “Walter’s Wiggles” and offers world-class canyon views, making it the best alternative for those without a permit. The full Angels Landing (permit required) continues for a final half-mile scramble to the summit along a narrow sandstone fin with thousand-foot drop-offs. It is an extremely exposed route not suitable for everyone.
The Narrows (Bottom-Up) is Zion’s quintessential river hike, a water hike involving walking up to 9.4 miles in the Virgin River itself. No permit is required for this day hike, but it is very strenuous due to the slippery river rocks. The greatest danger is flash floods. Observation Point via East Mesa Trail is a 7.0-mile alternative route to arguably the best view in Zion. Many hikers find that using trekking poles for stability greatly improves their experience on these difficult hikes.
Escaping the Crowds: Exploring Zion’s Quieter Corners
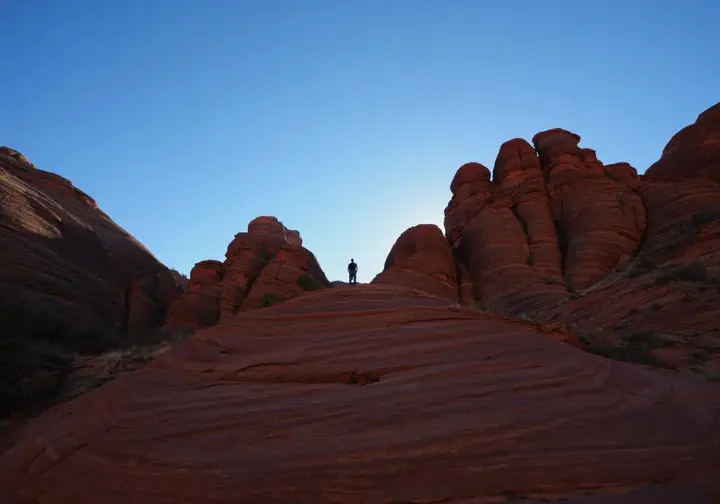
For visitors willing to venture beyond the main canyon’s shuttle route, Zion offers vast, serene landscapes without the crowds. We’ll reveal how to find solitude by exploring the Kolob Canyons district and the park’s stunning East Side for a true wilderness experience.
Kolob Canyons: Zion’s Peaceful Northwest
Located in the park’s northwest corner, the Kolob Canyons district is a separate, less-visited section of southwestern Utah accessed off I-15. It’s a peaceful alternative with dramatic, finger-like canyons of red Navajo Sandstone. This area is great for finding hidden gem trails away from the main thoroughfare.
The signature moderate hike here is the Taylor Creek Trail, a 5-mile round-trip trek that follows a creek into a narrow canyon. It passes two historic homestead cabins before ending at the impressive Double Arch Alcove. For a much longer day, the 14-mile La Verkin Creek Trail leads to Kolob Arch, one of the world’s largest freestanding arches, and is a great off-the-beaten-path hike. These trails are also wonderful options if you’re creating your own guide to hiking Zion with kids.
The East Side: Vistas Without the Wait
The region of Zion east of the Zion-Mt. Carmel Tunnel is a high-desert landscape of slickrock and ponderosa pines explored by car. Often overlooked, it’s an excellent area to ditch the crowds at Zion. The scenic drive itself is incredible.
Besides the popular Canyon Overlook Trail, this area offers great opportunities for off-trail exploration. Visitors can park in pull-offs and wander into Clear Creek, the main dry wash paralleling Route 9, to find solitude in its sculpted narrows. The East Side is also home to numerous unpublicized points of interest, including hidden slot canyons and petroglyph sites. To protect these fragile resources, their locations are not widely advertised, but you can inquire with rangers about how to discover unique, less-crowded local trails responsibly.
Your Essential Zion Field Manual: Safety, Gear, and Etiquette
Zion’s untamed beauty and natural landscape present real dangers, from flash floods to extreme heat. Consider this your field manual for a safe visit, covering primary hazards, a comprehensive gear checklist, and the Leave No Trace principles needed to protect this fragile desert landscape.
Know the Risks: Zion’s Natural Hazards
A full guide to Zion’s natural hazards is available, but some risks stand out. Flash Floods are the most serious threat, especially in slot canyons like The Narrows. Always check for trail closure information and never enter a slot canyon if rain is in the forecast. Extreme Heat is a major danger, with temperatures often over 100°F. The rule is to carry and drink at least one gallon of water per person, per day.
Steep cliffs and exposure are responsible for numerous accidents. Stay on the trail, be aware of your footing on loose gravel, and stay back from cliff edges. Hypothermia is a risk even on warm days when hiking in The Narrows due to the cold river. Avoid cotton clothing and pack extra insulating layers. Also be aware of toxic cyanobacteria; do not submerge your head or drink the water. Being prepared means carrying the Ten Essentials for safety.
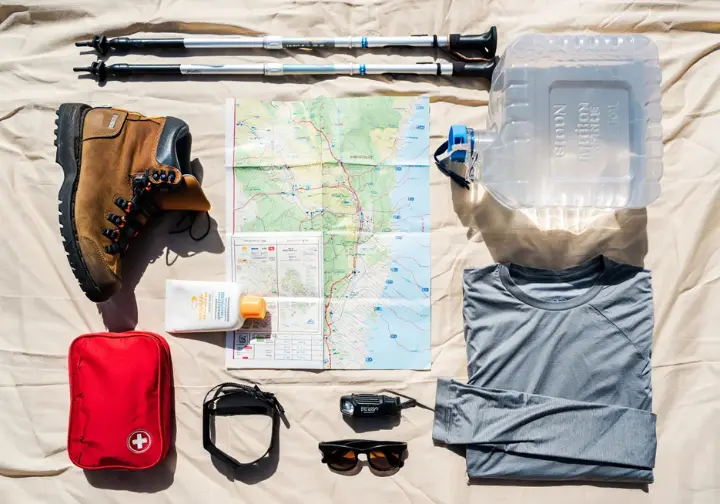
The Ultimate Zion Hiking Gear Checklist
All day hikers should carry the Ten Essentials, adapted for Zion’s desert. This includes a navigation system (downloaded park maps), a headlamp, sun protection, a first-aid kit, and extra food and water. Carry at least one gallon of water per person in your backpack. Your clothing should be layers of moisture-wicking fabrics. Sturdy, broken-in hiking boots or trail runners with excellent traction are mandatory for most hiking trails in Zion National Park Utah. This is a list of essential items to bring on a day hike.
For The Narrows hike, specialized gear is needed. This includes sturdy, closed-toe canyoneering shoes, neoprene socks, and a sturdy walking stick or hiking poles for balance. A waterproof dry bag is also needed to protect electronics and extra layers. In cooler seasons, you must be prepared for preventing hypothermia with waterproof dry pants or a full drysuit. This gear can be rented in Springdale.
Conclusion: Your Blueprint for an Unforgettable Adventure
The key takeaway is that a successful Zion trip begins long before you reach the trailhead. Mastering the shuttle, parking, and permit lotteries is the foundation for a stress-free adventure on the zion national park hiking trails. Choose hikes that align with your group’s fitness, time, and tolerance for crowds. Respect the park’s natural hazards by checking the weather, carrying proper gear and sufficient water, and knowing your limits. To truly experience Zion’s majesty, consider the less-traveled Zion trail options in Kolob Canyons and the East Side to find the solitude that makes this national park so special.
Frequently Asked Questions about Hiking Trails at Zion National Park
What is the best month to hike in Zion to avoid crowds? +
Can I hike any part of Angels Landing without a permit? +
Do I really need special shoes to hike The Narrows? +
What is the biggest danger to hikers in Zion? +
We are a participant in the Amazon Services LLC Associates Program, an affiliate advertising program designed to provide a means for sites to earn advertising fees by advertising and linking to Amazon.com. As an Amazon Associate I earn from qualifying purchases. We also participate in other affiliate programs. The information provided on this website is provided for entertainment purposes only. We make no representations or warranties of any kind, expressed or implied, about the completeness, accuracy, adequacy, legality, usefulness, reliability, suitability, or availability of the information, or about anything else. Any reliance you place on the information is therefore strictly at your own risk. Additional terms are found in the terms of service.


