

In this article
Poor trail nutrition can quickly ruin a hiking experience, turning an adventure into a slog. Many hikers treat meal planning as an afterthought, often getting stuck with basic trail mix or store-bought granola, leading to under-fueled and exhausting trips. This guide will transform your approach to backpacking food, moving far beyond granola to make delicious meals a highlight of any wilderness journey. Effective meal planning is a cornerstone of a successful trail trip, directly boosting your physical energy, nutrition, and performance. Food on the trail is more than just fuel; it’s a source of comfort, a morale booster, and a well-earned reward. We’ll empower you with the knowledge to plan and prepare delicious, nutritious, and efficient meals that elevate your adventures.
The Science of Fueling: Nailing Your Trail Nutrition
To truly master your trail menu, it helps to delve into the core principles of trail nutrition. We’ll move beyond simple food ideas to explain the science behind fueling your body for strenuous activity, covering how to calculate caloric needs, balance macronutrients, and master the critical concept of calorie density.
The Hiker’s Calorie Equation
A common guideline for daily calorie intake for backpackers is 2,500 to 4,500 calories, which translates to about 1.5 to 2.5 pounds of food per person per day. This is just a starting point, as individual needs vary significantly. Factors like age, gender, and body weight influence your specific caloric needs. Trip-specific variables, including pack weight, hiking intensity, trip duration, elevation gain, and even the climate, are also critical considerations for your meals and snack portions.
For a more precise estimate, you can use formulas like the Harris-Benedict equation to find your Resting Metabolic Rate (RMR) as a baseline. To this, you can add the calories burned during activity, estimated using Metabolic Equivalents (METs). However, personal experience is the most reliable guide for fine-tuning your food needs. When you’re just starting, use calculators for an initial estimate, pack a little extra food, and keep a journal on shorter trips. Tracking what you eat, your energy levels, and any leftovers will help you calibrate perfectly for future hikes, an essential part of packing the right essentials. For a deeper look into the process, consider planning your backpacking menu.
The Macronutrient Trio: Carbs, Fats, and Protein
Achieving optimal hiking performance and recovery depends on balancing the three macronutrients. Carbohydrates are the body’s primary and most accessible energy source; complex carbs from whole grains like quick oats provide sustained fuel for the long haul. Protein is vital for muscle repair and recovery, helping to prevent muscle loss on multi-day treks. Trail-friendly protein sources include foil pouches of tuna or salmon, jerky, your favorite nuts, and seeds.
Fats are the most calorie-dense macronutrient, delivering more than twice the energy per gram compared to carbs or protein. They are a source of slow-burning, long-term energy essential for endurance. For long-distance hiking, Dr. Brenda Braaten’s expert-recommended caloric breakdown is 45-55% carbohydrates, 35-40% fats, and 10-15% protein. This fat-forward ratio is specifically adapted for high-demand endurance activities and represents the ideal hiker’s diet. Understanding this balance is one of the essential tips for beginner hikers.
The Golden Rule: Mastering Calorie Density
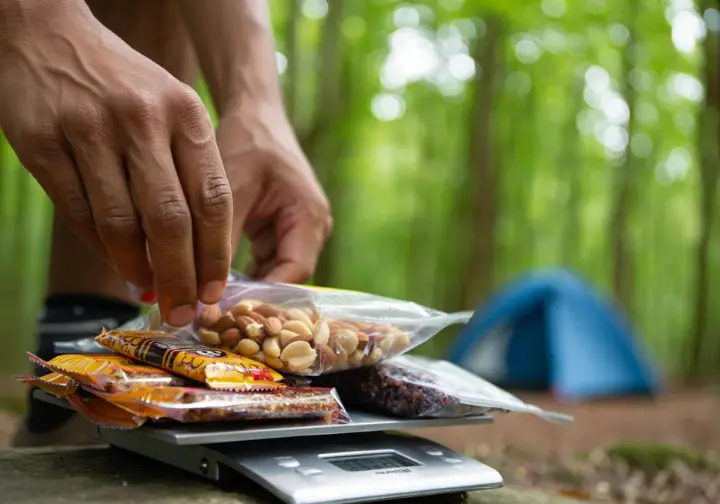
Calorie density is the measure of calories per unit of weight, typically calories per ounce. It is the single most important principle for lightweight backpacking, as the objective is to maximize your energy while minimizing the weight and volume of the food in your pack. The gold standard for efficient backpacking food is to aim for items that provide at least 100 calories per ounce, with 125 calories per ounce being even better. This standard allows a hiker to carry less weight for the same amount of energy.
Prioritize “calorie-dense champions” in your food bag. These include fats and oils like olive oil or canola oil (nearly 250 cal/oz), nuts and nut butters, hard cheeses, and seeds like sunflower and flax seeds. At the same time, you should limit or avoid low-density foods. This category includes water-heavy items like fresh fruits, which are best for day one, and bulky, airy baked goods like fresh bread. This is why tortillas are a far superior alternative to bread for backpacking. This strategy is a core component of meal planning for ultralight backpacking and a key philosophy in ultralight backpacking in general.
Sourcing Your Food: DIY, Grocery Stores, and Pre-Packaged Meals

Acquiring trail food involves practical strategies that cater to different budgets, time commitments, and personal tastes. Here, we’ll explore the pros and cons of making your own dehydrated meals and even your own granola, hacking your local grocery store for backpacking staples, and choosing the best commercial freeze-dried options for ultimate convenience.
Grocery Store Hacks for Hikers
Your local grocery store is a goldmine for affordable and convenient backpacking food, often a better choice than relying only on expensive specialty meals. To make the process efficient, organize your shopping list by aisle. The bulk bins are a backpacker’s paradise, letting you purchase the exact quantities you need, which reduces both cost and packaging waste. Key items to look for here include nuts, seeds, dried fruit, cereal, quick oats, and Textured Vegetable Protein (TVP). You can even find good-for-you ingredients to make a quick trail mix.
Your checklist should span several aisles. Visit the rice and pasta aisle for carbohydrate backbones like instant rice, couscous, and Knorr sides. The canned goods aisle is great for foil pouches of tuna or chicken, while the deli section offers hard cheeses and cured meats. Don’t overlook the condiment aisle for single-serving packets of peanut butter, olive oil, and hot sauce. A popular snack option like Nature Valley granolas can also be found here, though creating a homemade granola recipe often yields a more healthy granola option.
DIY Dehydration: A Beginner’s Guide
DIY dehydration is a popular method for saving money, controlling ingredients, and getting better taste. One of the best baking recipes for the trail is a go-to granola recipe. A simple granola can be made with basic pantry ingredients. You can easily make a nut-free granola by using seeds instead of your favorite nuts. The base recipe for a healthy granola often involves mixing gluten-free oats with natural sweeteners like maple syrup or pure honey, a bit of canola oil, and spices like cinnamon or pumpkin pie spice.
Spread the granola mixture on a standard baking tray and bake gluten-free until golden. Stir the dry granola halfway through to ensure it gets granola crispy all over. Let the granola cool completely on the pan to form yummy granola clusters and big chunks. This homemade friendly recipe is perfect for a great breakfast with yogurt or for road trip snacking. This approach also allows you to control the flavor profile and create unique granola flavors, from cranberry orange granola to gingerbread granola.
The Best Pre-Packaged Meals
For many hikers, the sheer convenience of pre-packaged freeze-dried meals is worth the higher cost, especially after a strenuous day when simple prep is a top priority. Many experienced hikers use a hybrid approach, mixing DIY staples with a favorite commercial recipe for a first-night treat or a reward. This gives you the best of both worlds.
When choosing pre-packaged options, several brands consistently receive top ratings for taste and nutrition. Below is a table of some of the best backpacking meals tested by the hiking community, featuring brands like Peak Refuel, Backpacker’s Pantry, and Mountain House.
Backpacking Meal Comparison
Filter by dietary needs to find the best meal for your trip.
Peak Refuel
High Protein, Gourmet Flavor. Standout meal: Beef Pasta Marinara.
Backpacker’s Pantry
Bold Flavors, High Calorie. Standout meal: Pad Thai.
Good To-Go
Dehydrated, Not Freeze-Dried. Standout meal: Herbed Mushroom Risotto.
Mountain House
Classic Comfort Food, Long Shelf Life. Standout meal: Beef Stroganoff.
This table provides concrete, actionable recommendations from well-regarded brands, helping you choose from a diverse range of flavors and dietary accommodations. If you’re considering a brand like Good To-Go, checking specific allergen information can be very helpful.
The Trail Recipe Collection for Every Hiker
The heart of this guide is its diverse collection of specific, easy-to-follow recipes, organized by cooking style to cater to everyone from the ultralight, no-cook purist to the backcountry gourmet. We’ve also included dedicated options for plant-based adventurers to ensure everyone eats well on the trail.
No Stove, No Problem: No-Cook & Cold-Soaking Recipes
No-cook and cold-soaking techniques are the preferred methods for ultralight backpackers and many thru-hikers who want to save weight and time by leaving the stove and fuel behind. The principle is simple: rehydrate your ingredients with cold water in a secure, leak-proof container like a cleaned-out Talenti jar. It’s the core of the ultimate guide to stoveless backpacking.
The first recipe, “No-Cook Spicy Peanut Noodles,” is a delicious recipe where you combine ramen noodles, peanut butter powder, and crushed peanuts at home. Another great option is a “Cold-Soaked Hummus Bowl.” Pack hummus powder and olive oil, rehydrate the powder with cold water, and serve with sturdy crackers or Fritos for a satisfying and protein-rich lunch or dinner. Finally, don’t underestimate “Creative No-Cook Wraps.” Flour tortillas are durable and perfect for various fillings like a tuna salad mix, or hard salami and cheese with mustard.
One-Pot Wonders for the Classic Backpacker
This cooking style is for the majority of hikers who carry a stove and want a simple, hot meal with minimal cleanup. “Freezer bag cooking” is a popular method where ingredients are pre-assembled at home in a freezer bag; on the trail, you just eat after adding boiling water. It’s a key technique in many one-pot backpacking meal recipes.
The legendary “Ramen Bomb” is a calorie-dense staple on long-distance trails. This easy recipe combines ramen, instant mashed potatoes, and a protein source like chicken or tuna for a simple recovery meal. Another trail-tested favorite recipe is “Skurka’s Beans & Rice with Fritos,” championed by adventurer Andrew Skurka. This savory meal combines instant rice and refried bean flakes with spices like chili powder, rehydrated and topped with cheese and crushed Fritos. For ultimate comfort food, try “Cheesy Bacon Mashed Potatoes.” Simply combine a pouch of Idahoan loaded mashed potatoes with bacon bits, a cheese stick, and a tablespoon of olive oil for extra flavor.
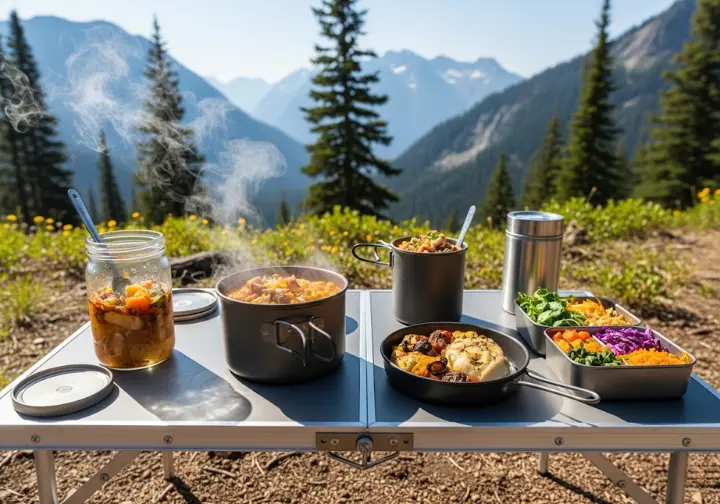
Gourmet on the Go for the Backcountry Culinarian
For hikers who believe a stunning view deserves an equally impressive meal and don’t mind a bit more effort, these recipes are perfect. They might require a frying pan or a few fresh ingredients, making them ideal for shorter trips. This approach to backcountry cooking beyond freeze-dried dishes elevates the experience, turning a simple meal into memorable backcountry dining.
A “Backcountry Skillet Pizza” is a surprisingly achievable trail meal. Create a dough from Bisquick mix, spread it in an oiled skillet, and top it with sauce, hard cheese, and pepperoni before cooking. For a simple but elegant dish, try “Red Pepper Pasta Aglio e Olio.” It uses fast-cooking angel hair pasta tossed with olive oil and a pre-mixed spice blend. Finally, for a warm pie-like dessert, make a “Backcountry Apple Crisp.” Rehydrate dried apple slices and top them with a pre-mixed crumble of granola, brown sugar, cinnamon, and powdered butter for a sweet treat. For this kind of cooking you will need a proper campfire cooking kit.
Plant-Powered Peaks: Vegetarian & Vegan Recipes
A growing number of hikers are vegetarian or vegan, making high-energy, plant-based options more important than ever. Key ingredients for plant-based protein and fat include TVP, nutritional yeast, lentils, and nuts. There are many fantastic vegetarian backpacking meal ideas to explore.
“Vegan Curry Couscous” is a fast-cooking and flavorful veggie meal. A hearty classic is “Vegetarian Backcountry Chili.” This recipe uses a base of dehydrated black bean flakes, tomato powder, and nutritional yeast, seasoned with chili powder and cumin, served topped with Fritos. For a more gourmet option, try “Queet’s Valley Shepherd’s Pie (Vegetarian).” This allergy-friendly recipe involves sautéing baked tofu, rehydrating vegetables in a mushroom gravy made with vegan butter, and serving the mixture topped with a scoop of instant mashed potatoes.
Essential Knowledge for a Safe and Clean Camp Kitchen
Beyond the recipes, the responsibilities of backcountry cooking are paramount. Now we’ll shift focus to cover the essential gear, the ethical principles of Leave No Trace related to food, and the non-negotiable safety protocols for storing food in wildlife habitats.
Gearing Up: Your Essential Backpacking Cook Kit
Every hiker needs a few universal essentials, regardless of their cooking style. This includes a long-handled spoon (critical for eating from pouches), a proper food storage system like a bear canister or hang bag, and a dedicated trash bag to pack everything out. These items are part of any list of essential backpacking gear.
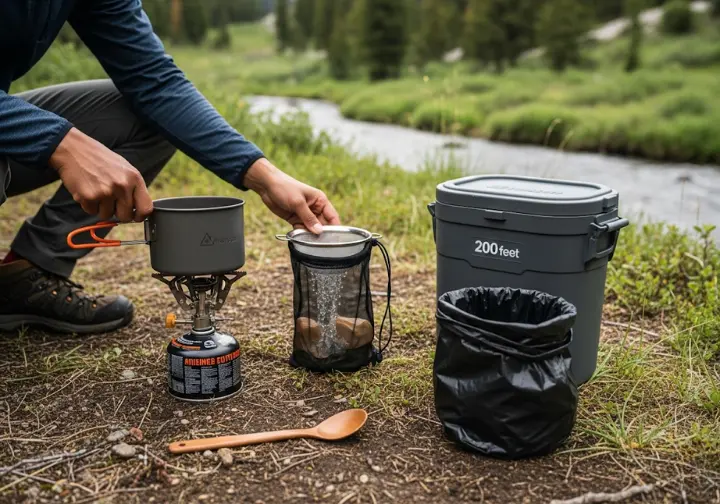
For one-pot cooking, you’ll need a lightweight canister stove, a fuel canister, a 750-900ml pot, and a reliable lighter with a backup. For no-cook or cold-soaking, your primary gear is a reliable leak-proof container. A proper cleanup kit includes a small dropper bottle of biodegradable soap and a small scrubber. You can find a comprehensive breakdown by checking your camp kitchen checklist.
The Hiker’s Code: Leave No Trace for Food and Waste
The Leave No Trace Seven Principles are the ethical cornerstone of responsible outdoor recreation. Following these principles, especially with food, is non-negotiable. Principle 3, Dispose of Waste Properly, is the most critical for backcountry kitchens. The rule is simple: “Pack it in, pack it out.” This applies to all trash, including small organic scraps from any ingredient.
The correct procedure for washing dishes requires you to carry water 200 feet away from any lake or stream, use minimal biodegradable soap, and strain the dishwater to pack out all food particles before scattering the gray water. Also, you should always favor lightweight stoves for cooking over campfires. Campfires can cause ecological damage and should never be used to burn trash, as it rarely burns completely and leaves scented residue. Understanding these Leave No Trace principles is fundamental for every hiker.
Bear-Aware Dining: Safe Food Storage
Proper food storage is a critical safety measure in bear country, protecting both your food supply and the animals by preventing them from becoming habituated to humans. From a bear’s perspective, “food” is anything with a scent. This includes all food, trash, and scented toiletries like toothpaste, soap with a vanilla scent, and sunscreen, all of which must be stored securely together.
Approved storage methods vary by region, so always check local regulations. The most secure method is a hard-sided bear canister, which is required in many high-use areas like the Sierra Nevada. It’s also wise to use the “Bearmuda Triangle” concept: set up your kitchen area for cooking and eating at least 100 yards downwind from your tent, and never store any scented items inside the tent. All food should be secured immediately after meals. Proper bear safety and storing food is a key skill, and it’s a crucial consideration for what to do with food outside of your pack for safety.
Conclusion: Fueling Your Adventures, Not Your Fears
Trail food is a critical component of a successful hike, impacting both physical energy and psychological morale. With effective planning, it transforms from a source of stress into a satisfying reward. By understanding calorie density, balancing macronutrients, and choosing a sourcing strategy that fits your style, any hiker can build a lightweight, delicious, and effective meal plan.
We encourage you to start simple. Try a few of these recipes at home and keep a food journal on your next short trip to dial in your personal needs. Most importantly, enjoying great real food in the backcountry comes with the non-negotiable responsibility of following Leave No Trace principles and storing food safely to protect our wild places and the animals that inhabit them.
Frequently Asked Questions about Backpacking Food and Meal Planning
What is the easiest way to add more calories to my meals without adding a lot of weight? +
How do I wash my dishes on the trail without harming the environment? +
I’m a vegetarian hiker. How can I make sure I get enough protein? +
Do I really need a bear canister, or is hanging my food good enough? +
We are a participant in the Amazon Services LLC Associates Program, an affiliate advertising program designed to provide a means for sites to earn advertising fees by advertising and linking to Amazon.com. As an Amazon Associate I earn from qualifying purchases. We also participate in other affiliate programs. The information provided on this website is provided for entertainment purposes only. We make no representations or warranties of any kind, expressed or implied, about the completeness, accuracy, adequacy, legality, usefulness, reliability, suitability, or availability of the information, or about anything else. Any reliance you place on the information is therefore strictly at your own risk. Additional terms are found in the terms of service.


