

In this article
Move beyond simple gear lists and embrace a comprehensive framework for choosing lightweight backpacking gear. You’ll explore the philosophy, practical strategies, and system-based approach that empowers you to shed pounds, enhance comfort, and build the confidence to hike farther and more enjoyably. The journey to a lighter pack is about gaining skills, not just acquiring stuff. You will learn a phased, strategic framework for weight reduction, starting with zero-cost wins that anyone can implement today. We will then dive deep into each gear category—from the “Big Three” to cook systems—to understand the critical trade-offs, and finally, address the advanced topics of safety, environmental responsibility, and the economics of lightweight gear.
The Philosophy and Principles of Lightweight Backpacking
To truly master lightweight backpacking, you must first establish its foundational concepts. Think of it as a skill-based discipline where you clarify key terminology and explore the core benefits of reducing pack weight, addressing the “why” before the “what.”
Defining the Spectrum: From Traditional to Ultralight
To begin any journey, you must first understand the language of the landscape. In backpacking, the most important term for measuring your load is “base weight.” This is the total weight of your backpack and all its contents, excluding consumables like food, water, and fuel. This provides a consistent way to compare pack weights and track your personal progress, as it doesn’t fluctuate day to day.
Using base weight as the primary metric, the community generally recognizes a spectrum of backpacking styles. These are flexible guidelines, not rigid rules, meant to help you understand different approaches:
- Traditional: Base weight of 20-30+ lbs. This approach prioritizes comfort in camp with feature-rich gear and multiple “just-in-case” items.
- Lightweight: Base weight of 10-20 lbs. Here, hikers begin making conscious trade-offs between on-trail efficiency and in-camp comfort.
- Ultralight (UL): Base weight under 10 lbs. This minimalist discipline requires a highly optimized system and a greater reliance on skills over redundant equipment.
- Super Ultralight (SUL): Base weight under 5 lbs. An expert-level niche requiring highly specialized gear and advanced wilderness skills.
The fundamental difference between these categories is a philosophical one. A traditional mindset prioritizes comfort at the campsite, while a lightweight or ultralight mindset prioritizes comfort, mobility, and efficiency while you are hiking. This shift is crucial for making effective choices for your entire backpacking kit. It’s important to see this not as an exclusive club defined by arbitrary weight numbers, but as an accessible path of skill development open to all hikers. The goal isn’t to earn a label, but to make your time camping and hiking in the outdoors more enjoyable.
Backpacking Styles Comparison
An overview of different backpacking philosophies based on typical base weight and approach to gear.
Core Philosophy
Prioritize comfort and preparedness at camp. “Better to have it and not need it.”
Typical Gear Approach
Feature-rich, durable, often heavy gear. Multiple “just-in-case” items and comfort luxuries.
Core Philosophy
A balance between on-trail efficiency and in-camp comfort. Conscious trade-offs begin.
Typical Gear Approach
Lighter versions of traditional gear. Elimination of obvious redundancies.
Core Philosophy
Prioritize on-trail comfort, mobility, and distance. “Less is more.” Skills over gear.
Typical Gear Approach
Minimalist, multi-purpose, often frameless gear. Advanced materials like Dyneema.
Core Philosophy
Extreme minimalism and efficiency. Pushing the boundaries of what is necessary.
Typical Gear Approach
Highly specialized, often DIY or cottage-industry gear. Highest reliance on skill.
The “Why” Behind the Weight: Core Benefits of a Lighter Pack
The motivation to reduce pack weight extends far beyond bragging rights. The most significant benefit is the drastic reduction of physical strain on your body. Carrying a heavy load takes a toll on the joints of your back and knees and fatigues your shoulder and leg muscles. Research shows you can significantly reduce strain on the knees during descents and mitigate both acute injuries and the risk of chronic pain, turning backpacking into a lifelong activity.
This physical relief directly translates to more enjoyment on the trail. When you aren’t constantly distracted by aching shoulder straps or sore hips, you can better immerse yourself in the natural surroundings. With less excess weight, you can travel the same distance with significantly less fatigue, which opens up more of the backcountry on shorter trips. Ultimately, your hike becomes more fun and less like work. A lighter pack can even increase safety; since fatigue is a leading contributor to trail accidents like slips and falls, a lighter load inherently reduces this risk. A simplified gear system also fosters mental clarity, with fewer items to manage, track, or potentially lose.
Adopting the Mindset: It’s About Skills, Not Just Stuff
Successfully lightening your load demands more than just buying new equipment; it requires a fundamental shift in mindset. The modern ultralight movement was largely catalyzed by Ray Jardine, who championed a system based on wilderness skills over heavy gear, framing it not as a safety net but as a liability that saps energy. His philosophy challenged the industry ethos that “heavy-duty” was synonymous with safety.
Contemporary experts like Andrew Skurka have refined this, providing a crucial, modern balance. Skurka cautions against “stupid light” choices, where shedding ounces compromises essential safety or comfort. The goal is to be as light as possible, but as heavy as necessary. This intellectual shift directly addresses the common beginner pitfall of “packing your fears”—carrying redundant items as a psychological safety blanket. The lightweight mindset replaces fear-based packing with knowledge-based packing. Instead of a huge first-aid kit, you learn to build one tailored to likely injuries. Instead of carrying multiple heavy clothes, you learn the principles of layering.
This highlights a virtuous cycle: skill acquisition enables weight reduction. As your confidence grows in skills like campsite selection and knot-tying, you can trust lighter, more versatile gear like a tarp instead of a heavy tent. The lighter pack then lets you travel farther, gaining even more experience and honing your skills further.
A Strategic Framework for Reducing Pack Weight

Lightening your backpack is a systematic process. Follow this practical, step-by-step roadmap, starting with no-cost strategies and progressing to strategic gear audits. The entire process is designed to be accessible and manageable for everyone.
The First Step: Weigh Everything & Create a Gear List
The foundational step in any weight-reduction effort is to establish a clear, data-driven baseline. It is impossible to effectively shed pounds without first knowing precisely where they are. Using a simple kitchen or luggage scale, weigh every single item of your backpacking gear, from the backpack itself down to individual tent poles. Log this data in a spreadsheet or a purpose-built online tool like LighterPack.com, which is a common practice in the ultralight community. For a structured format, you can use a comprehensive gear list template developed by Andrew Skurka. This methodical process to Create a Gear List often yields surprising revelations, immediately highlighting the heaviest items and offering “aha!” moments for weight savings that previously went unnoticed.
Phase 1: No-Cost Wins & Behavioral Shifts
Significant weight reduction can be achieved without spending a dime. The single most effective and cheapest strategy is to simply take less stuff. After each trip, critically analyze everything you packed. If an item went unused (and isn’t a non-negotiable safety item like a first-aid kit), consider leaving it at home next time. This iterative process of refinement is the cornerstone of an efficient kit.
Embrace multi-purpose gear to eliminate redundancy. Your trekking poles can double as the supports for your tent, a stuff sack filled with a jacket becomes a pillow, and your smartphone can replace a separate camera, GPS, and book. Another easy win is to repackage all consumables. Never carry full-sized commercial containers; instead, decant items like sunscreen and soap into a tiny, lightweight dropper bottle. You can also ditch the heavy, often ineffective pack rain cover and instead use an inexpensive, waterproof trash compactor bag as a waterproof pack liner. This nearly bulletproof method creates a waterproof fortress for your gear that weighs next to nothing.
Phase 2: The “Big Three” / “Big Four” Audit
After maximizing no-cost strategies, the next phase involves auditing the ‘Big Three’: your backpack, shelter, and sleep system (your sleeping bag or quilt). Some hikers expand this to the “Big Four,” adding the sleeping pads to this core group. These items are the heaviest in your pack, so focusing your investment here yields the most dramatic reduction in base weight. Saving two pounds on a tent is far more impactful than saving half an ounce on a spoon.
[PRO-TIP] The order of operations is critical: the backpack should be the last of the Big Three you choose. The volume and weight of your shelter and sleep system directly dictate the size and type of backpack required.
This sequential approach creates a compounding effect. For example, upgrading from a heavy tent and sleeping bag to a lightweight backpacking quilt and trekking pole shelter doesn’t just save the weight of those items. The new, less bulky kit allows you to switch from a heavy 60-liter pack to a minimalist 40-liter frameless pack. The total weight savings is massive, far more than the sum of the individual upgrades, and was only made possible by upgrading the other items first.
Phase 3: The Art of Packing for Weight Distribution
How gear is packed inside the backpack is as important for your on-trail comfort as the gear itself. Proper load distribution minimizes the pack’s effect on your natural center of gravity and ensures a stable, comfortable carry. The guiding principle is to place the heaviest gear—typically your food bags, water, and cook pot—close to your spine and vertically centered in the middle of your back. Placing heavy items too high makes the pack unstable, while placing them too low creates a pendulum effect that pulls you backward.
Organize your gear based on accessibility. Items needed only at the end of the day, like your sleep system, belong at the bottom in the sleeping bag compartment if your pack has one. Items you might need during the day, like a rain jacket or insulating layer, should be near the top. The most frequently accessed items—water bottle, snacks, map, sunscreen, and headlamp—should be stored in an exterior backpack pocket for quick access without having to stop and unpack everything.
The Definitive Guide to Lightweight Gear Selection
Now, let’s dive into a detailed breakdown of each major gear category. Get an overview of your options, understand the key decision criteria, and see illustrative product examples to guide you in making informed choices.
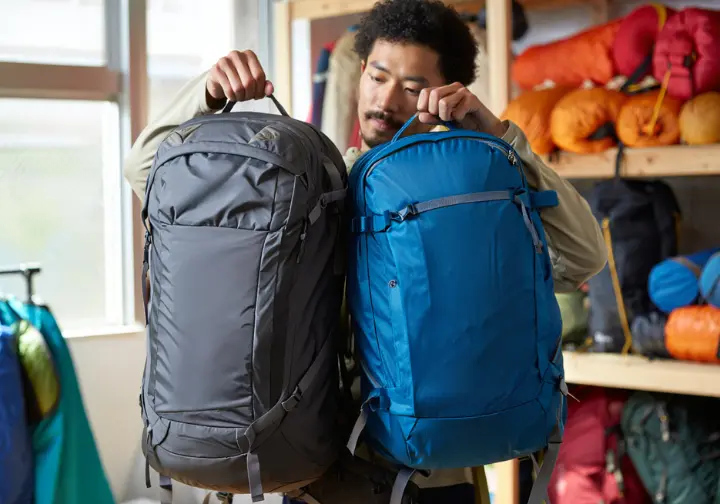
Choosing Your Backpack
Once you’ve lightened your other gear, you can select a well-designed backpacking pack. Modern backpacks range from supportive internal frame models, like those from Osprey Backpacks or Granite Gear, to minimalist frameless sacks. Internal frame packs are the most common and are designed to transfer weight to your hips, while frameless packs are the lightest but require meticulous packing and a very low base weight to be comfortable.
The two most critical decision criteria are capacity and fit. With a lightweight kit, a smaller pack of 30-50 liters is often sufficient, which enforces packing discipline. More importantly, the pack must fit your torso length correctly. A poorly fitting lightweight pack will be far more uncomfortable than a well-fitting heavier pack. High-end ultralight packs often use advanced materials like Dyneema Composite Fabric (DCF) or Robic nylon, which offer an exceptional strength-to-weight ratio but come at a significant price premium.
Choosing Your Shelter
Choosing Your Shelter is a balancing act between weight, livability, and weather protection. While specific backpacking tent recommendations depend on your needs, options range from familiar double-wall tents, which offer excellent ventilation and bug protection, to single-wall tents, which are lighter but more prone to condensation. The lightest options are minimalist tarps, which offer superb protection when pitched correctly but require skill and provide no floor. Hammocks are an excellent choice in forested areas, while bivy sacks are best for minimalist situations where a tiny footprint is critical.
The core decision is a trade-off between weight and livability—how much interior space and comfort are you willing to sacrifice for weight savings? You must also choose between a freestanding design, which can be pitched almost anywhere, and non-freestanding shelters, which are lighter but rely on trekking poles and must be staked out securely. Many tents also come with a separate tent footprint to protect the floor from abrasion.
Choosing Your Sleep System
A comfortable night’s sleep is critical for recovery. Your sleep system has two main parts: the sleeping bag or quilt, and the sleeping pads. Backpacking quilt designs are often preferred by lightweight hikers because they save weight by eliminating the zipper and the compressed, ineffective insulation on the bottom. Traditional mummy sleeping bags, however, are often warmer and simpler to use for those who don’t want to fuss with drafts.
Sleeping Bag vs. Quilt Comparison
An in-depth look at two popular ultralight sleeping systems for backpackers.
Pros
- Draft-free warmth
- Integrated hood
- Simple to use
Cons
- Heavier
- Bulkier
- Restrictive feel
- Insulation on bottom is compressed and inefficient
Best For
Cold sleepers, users who prioritize simplicity and maximum warmth
Pros
- Lighter
- More compressible
- Versatile (can open like a blanket)
- Less restrictive
Cons
- Can be drafty
- Requires a warm hat/hood
- Requires more user adjustment
Best For
Weight-conscious hikers, side/restless sleepers, warmer conditions
For sleeping pads, the choice is between inflatable air pads and closed-cell foam (CCF) pads. Air pads offer superior comfort and pack down very small but can be punctured. CCF pads are indestructible and cheap but are bulky and less comfortable. When choosing, look at the insulation type (down vs. synthetic for bags/quilts) and the R-value for pads, which measures resistance to heat loss to the cold ground.
Sleeping Pad Comparison: Inflatable vs. Foam
A detailed look at the two most common sleeping pad types for hikers.
Pros
Highly comfortable, very packable, excellent insulation for weight
Cons
Risk of puncture/leaks, more expensive, can be noisy
Best For
Hikers prioritizing comfort and packability
Pros
Indestructible, inexpensive, versatile (can be used as a seat)
Cons
Bulky (carried outside pack), less comfortable, lower insulation for its size
Best For
Thru-hikers, prioritizing durability, budget-conscious hikers
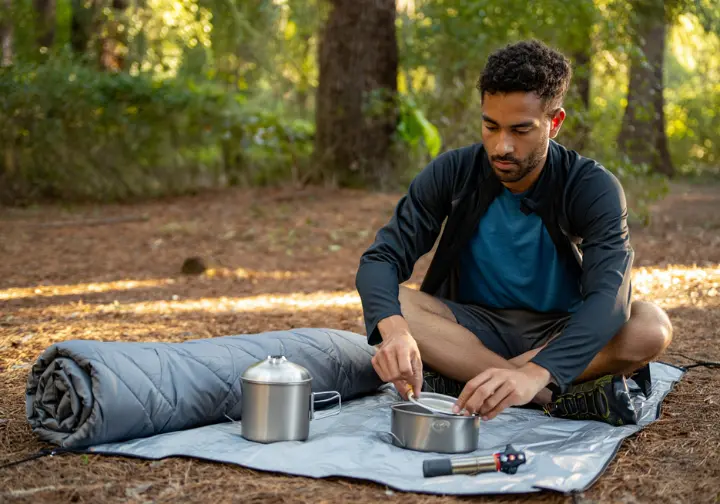
Choosing Your Cook System
The right Choosing Your Cook System depends entirely on your meal plan. If you only boil water for dehydrated meals you can buy or are preparing your own backpacking meals, your needs are different from someone who enjoys more elaborate cooking. Integrated canister systems like a Jetboil are incredibly fast and fuel-efficient for boiling water, but they are heavier and offer poor simmer control. Small canister stoves that screw onto a fuel canister, like the MSR PocketRocket, are very light and often have excellent simmer control but are less efficient in wind.
The central trade-off is fuel efficiency versus stove weight. You must also consider your cookware material. Titanium is the lightest and strongest but heats unevenly, making it best for boiling water. Anodized aluminum offers a great balance of weight, cost, and even heat distribution, making it better for actual cooking.
Backpacking Stove Comparison
Detailed breakdown of popular backpacking stoves for various needs.
Avg. Boil Time (1L)
~3m 30s
Simmer Control
Good
Best For
All-around performance, reliability
Avg. Boil Time (1L)
~3m 5s
Simmer Control
Excellent
Best For
Windy conditions, actual cooking
Avg. Boil Time (1L)
< 3m
Simmer Control
Poor
Best For
Speed, boiling water only
Avg. Boil Time (1L)
~2m 55s
Simmer Control
Fair
Best For
Extreme wind, fuel efficiency
Avg. Boil Time (1L)
~4m 30s
Simmer Control
Poor
Best For
Absolute lightest weight, budget
Choosing Your Water Treatment System
Treating water is a non-negotiable safety practice. The best Water Treatment System for you depends on water source quality and personal preference. Squeeze filters like the Sawyer Squeeze are popular for solo use due to their speed and low weight. Gravity filters are effortless and great for groups, as they use a dedicated water collection bag to do the work, while chemical treatments (drops or tablets) are the lightest option but require a long wait time and can affect the water’s taste.
A critical safety distinction is between a water filter and a purifier. A filter removes larger pathogens like bacteria and protozoa, which is sufficient for most of North America. A purifier also eliminates viruses, which is recommended for international travel or areas with high contamination risk. When choosing, consider flow rate, weight, ease of use, and required maintenance like backflushing.
Assembling Your Clothing System
Your clothing items are your first line of defense against the elements. The key to an effective and lightweight clothing system is layering, which allows for fine-tuned temperature regulation. The system consists of three parts: a moisture-wicking base layer (merino wool or synthetic) to pull sweat away from your skin, an insulating mid-layer (fleece or a puffy jacket) to trap body heat, and a protective shell layer (a waterproof rain jacket) to block wind and rain.
[PRO-TIP] The one fabric to always avoid for any layer is cotton. Cotton absorbs moisture, loses all insulating properties when wet, and takes forever to dry, creating a serious risk of hypothermia. This is why you’ll often hear the phrase “cotton kills.”
Advocate for a minimalist wardrobe: one set of hiking clothes and one dry set for sleeping. Carrying multiple “just-in-case” outfits is a common beginner mistake that adds significant weight. Finally, consider your footwear. Many lightweight backpackers have moved away from heavy leather boots toward lightweight, breathable trail running shoes, which are more comfortable and dry much faster in most three-season backpacking conditions.
Essential Ancillary Gear (The Ten Essentials, Lightweight Edition)
A lightweight backpacker still carries all of The ‘Ten Essentials’, but in optimized, minimalist forms. This classic safety list, recommended by organizations like the U.S. National Park Service, is a system for preparedness.
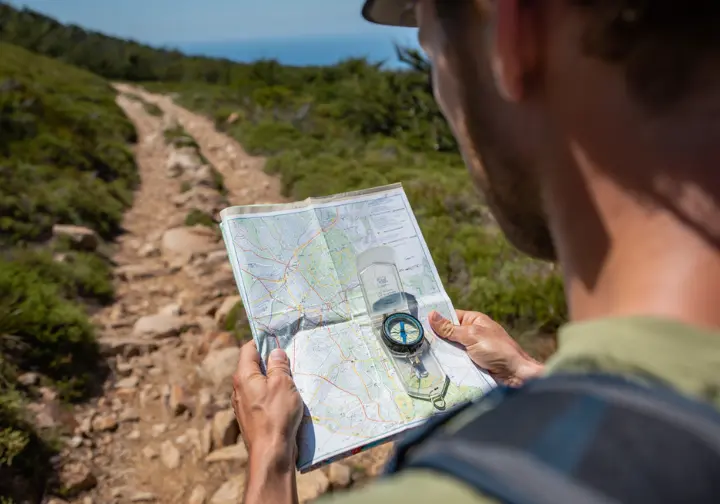
- Navigation: A smartphone with a GPS app (like Gaia GPS) and a small power bank or battery, backed up by a paper map and compass.
- Sun Protection: A small bottle of sunscreen, SPF lip balm, sunglasses, and a brimmed hat.
- Insulation: Your puffy jacket, rain jacket, and warm hat from your clothing system.
- Illumination: A small, rechargeable LED headlamp like the Nitecore NU25.
- First-Aid: A minimal, personalized first aid gear kit in a Ziploc bag with blister treatment, bandages, and pain relief.
- Fire: A mini Bic lighter and a few stormproof matches.
- Repair Kit & Tools: A small roll of Tenacious Tape and a tiny multi-tool or razor blade.
- Nutrition: An extra day’s worth of no-cook, high-calorie food, like an energy bar.
- Hydration: Your water treatment system and water bottle.
- Emergency Shelter: An ultralight bag-shaped emergency blanket.
Many hikers also consider trekking poles essential. They significantly reduce strain on the knees and can be used to pitch many ultralight tents, saving the weight of dedicated tent poles.
Advanced Context: Safety, Responsibility, and Economics
To round out your expertise, it’s time to address the critical contextual questions surrounding lightweight backpacking. Understanding these nuances builds trust and demonstrates a level of knowledge that goes beyond simple gear reviews.
The Ultralight Safety Imperative: Is It Dangerous?
A common misconception is that ultralight backpacking is inherently dangerous. The reality is that unpreparedness is dangerous, not the philosophy of carrying less weight. A knowledgeable ultralight backpacker can be significantly safer than a traditional backpacker lugging a heavy load, primarily due to the drastic reduction in physical fatigue—a major cause of stumbles and poor decisions.
The danger arises from “stupid light” choices: leaving behind essential safety equipment to save a few ounces. A responsible lightweight approach acknowledges the reduced margin for error and mitigates it with skill, knowledge, and a carefully selected set of non-negotiable safety gear. You must still be prepared to handle emergencies, which means always carrying a reliable navigation system, a functional first-aid kit, a dependable headlamp, and an emergency shelter.
Lightweight Hiking and Leave No Trace (LNT)
The principles of lightweight backpacking and the ethics of Leave No Trace are not just compatible; they are deeply intertwined. A minimalist mindset directly encourages more responsible backcountry practices outlined in The Seven Principles of LNT. For example, the meticulous planning required for a lightweight trip is also the first principle of LNT. Many ultralight hikers choose to forgo campfires entirely, which aligns perfectly with minimizing campfire impacts and preventing wildfires.
A lighter pack can even enable better LNT practices. Freed from an excessively heavy load, a hiker can carry enough water to “dry camp” away from crowded, high-impact water sources. This allows them to practice stealth camping on durable surfaces, dispersing their impact and avoiding the overuse of popular sites.
The Economics of Ounces: Cost vs. Weight vs. Comfort
A frank discussion of the financial realities is essential. One of the biggest barriers to entry is the high cost of premium ultralight gear made from advanced materials like Dyneema and titanium. This leads to a crucial economic principle: the law of diminishing returns. The first few pounds are easy and cheap to shed, but as your base weight gets lower, shedding each additional ounce becomes exponentially more expensive to save.
However, it is a fallacy that you must be wealthy to go ultralight. A budget-conscious approach is entirely feasible by focusing on clever, low-cost substitutions: using a $1 plastic bag as a pack liner instead of a $40 rain cover, or making your own alcohol stove instead of buying a canister stove that requires proprietary fuel canisters. This complex interplay of affordability and comfort items can be simplified into a mental model for purchasing decisions: the “Pick Two” triangle of Weight, Cost, and Comfort/Durability. You can generally optimize your gear for any two of these attributes, but rarely all three.
- Light & Cheap: Will likely sacrifice comfort and durability.
- Light & Comfortable/Durable: Will be very expensive.
- Cheap & Comfortable/Durable: Will be heavy.
Understanding this framework empowers you to make intentional choices that align with your personal priorities and budget.
Conclusion
Choosing lightweight gear is a journey of skill-building and self-discovery, not just a shopping trip. To get started, focus on reducing weight with no-cost strategies and a critical mindset before making expensive purchases. The most significant gains will come from upgrading the “Big Three”—shelter, sleeping bag, and backpack—as a synergistic system. Always balance the pursuit of a lower base weight with the non-negotiable requirements of safety, ethics, and your personal budget. The goal is not to achieve a label, but to increase your enjoyment, safety, and efficiency on the trail.
Share your favorite lightweight gear hack or “no-cost win” in the comments below!
Frequently Asked Questions about Lightweight Backpacking Gear
What is considered a lightweight backpack?
A “lightweight” backpacking style generally targets a base weight between 10 and 20 pounds, while an “ultralight” approach aims for under 10 pounds. This “base weight” refers to the total weight of your pack and permanent gear, excluding consumables like food, water, and fuel.
How do I lighten my backpack load?
Start with no-cost methods: weigh all your gear, carry only what you truly need, eliminate redundant items, and repackage consumables. After exhausting these free options, focus your budget on upgrading the “Big Three”—your shelter, sleeping bag, and backpack—for the most significant weight savings.
What is a good base weight for lightweight backpacking?
A great goal for a lightweight backpacker is a base weight under 20 pounds, with the ultralight target being under 10 pounds. Ultimately, the “best” base weight is personal; it’s whatever allows you to be safe, comfortable, and enjoy your hike based on your skills and the trip’s specific demands.
What are the “Big Four” backpacking items?
The “Big Three” refers to your backpack, shelter, and sleep system (your sleeping bag or quilt), which are typically the heaviest items you carry. The “Big Four” simply expands this group to include your sleeping pad, as it is also a substantial contributor to your overall base weight.
Risk Disclaimer: Hiking, trekking, backpacking, and all related outdoor activities involve inherent risks which may result in serious injury, illness, or death. The information provided on The Hiking Tribe is for educational and informational purposes only. While we strive for accuracy, information on trails, gear, techniques, and safety is not a substitute for your own best judgment and thorough preparation. Trail conditions, weather, and other environmental factors change rapidly and may differ from what is described on this site. Always check with official sources like park services for the most current alerts and conditions. Never undertake a hike beyond your abilities and always be prepared for the unexpected. By using this website, you agree that you are solely responsible for your own safety. Any reliance you place on our content is strictly at your own risk, and you assume all liability for your actions and decisions in the outdoors. The Hiking Tribe and its authors will not be held liable for any injury, damage, or loss sustained in connection with the use of the information herein.
Affiliate Disclosure: We are a participant in the Amazon Services LLC Associates Program, an affiliate advertising program designed to provide a means for us to earn advertising fees by advertising and linking to Amazon.com. As an Amazon Associate, we earn from qualifying purchases. We also participate in other affiliate programs and may receive a commission on products purchased through our links, at no extra cost to you. Additional terms are found in the terms of service.


