

















You’re three days into a trek in a country you don’t live in, the nearest gear shop is a bus ride and a language barrier away, and the shoes that felt perfect on your local Saturday loop have gone flat and hot underfoot. The problem usually isn’t the brand. It’s that the shoe was never built to carry a loaded pack in the first place, and nothing printed on the box told you that.
Footwear engineers and long-distance guides keep landing on the same unglamorous answer to what separates good trekking shoes from ordinary hiking shoes, and it has nothing to do with the height of the collar around your ankle. It’s the sole. Specifically, how much the forefoot resists bending when you press on it.
Below: what actually divides a trekking shoe from a hiking shoe, five specific pairs worth your money sorted by real use case, and the fit, traction, and waterproofing calls that decide whether they hold up on day four.
Here’s how the five picks sort out before we get into the reasoning behind each one.
| Pick | Best For | Why It Earns the Slot |
|---|---|---|
| La Sportiva Spire GTX | Best overall | Stiff enough underfoot to actually deserve the trekking label, with a Gore-Tex membrane for cold and wet ground |
| Merrell Moab 3 | Budget slot | Non-waterproof mesh and a forgiving last that fits a wider range of feet than most of the category |
| Oboz Sawtooth X Low B-DRY | Wide feet | Real forefoot volume rather than a stretched-out narrow last, plus a B-DRY membrane |
| KEEN Targhee 4 Low WP | A loaded pack | Wide, stable platform built around heel hold when you’re carrying weight |
| Altra Lone Peak 9 | Lightweight, fast days | Zero-drop, roomy toe box, low stack height, if you give it a genuine adaptation period |
What Actually Makes Good Trekking Shoes Different From Hiking Shoes
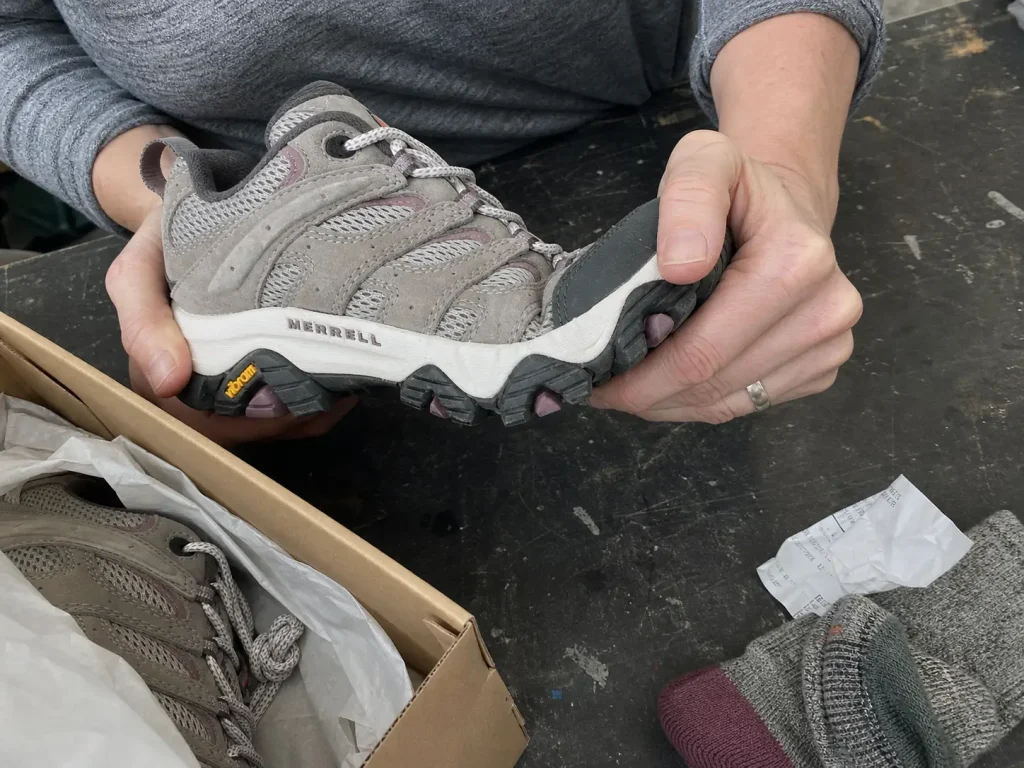
Picture the trailhead version of this conversation. Someone holds up two shoes that look nearly identical and asks which one is the trekking shoe. The honest answer is: flex them and find out.
Hold the heel in one hand. Press the toe upward with the other. One folds like a sneaker. One resists through the midfoot and barely moves.
That’s the whole difference, and it has nothing to do with the word printed on the box.
Sole Stiffness Is the Real Dividing Line
Sole stiffness is the property that changes how a shoe behaves under a pack, and it lives in the midsole, which you can’t see from the outside. A flexible sole lets your foot do more of the work. That’s efficient and pleasant on moderate ground when you’re carrying almost nothing, because your foot is a spring and a flexible shoe lets it act like one.
Add twenty-five or thirty pounds on your back and the math changes. Every step now drives more force through the same surface area of foot. A stiffer sole spreads that force across the whole platform instead of letting it concentrate wherever the shoe happens to fold. It also stops the shoe from wrapping around every rock and root you step on, which is what makes a long rocky day feel like you’ve been walking on gravel in socks.
The catch is that stiffness feels wrong in the store. You try on a genuinely stiff trekking shoe on a flat carpeted floor with no pack, and it feels clumsy, unresponsive, and like too much shoe. That sensation is not a warning sign. It’s the shoe doing a job you aren’t asking it to do yet.
Do the flex test on the shoes already in your closet before you shop for new ones. If your current pair folds nearly in half and you keep finishing loaded hikes with sore, hot feet, you don’t have a brand problem. You have a stiffness problem, and now you know what to ask for.
Why Cut Height Gets Blamed for the Wrong Thing
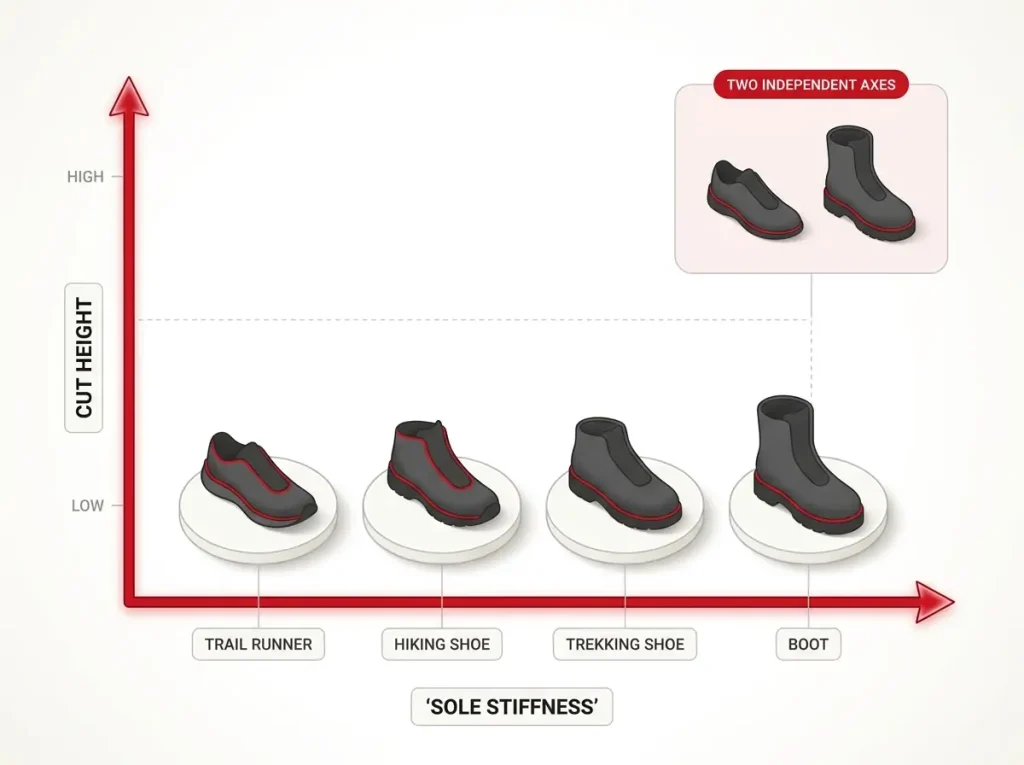
Cut height is a completely separate axis. Low, mid, and high collars change how much debris gets in, how much material sits against your ankle bone, and how warm the shoe runs.
What the collar does not do is carry load. Ankle support is the phrase everyone reaches for here, and it oversells what fabric wrapped around your ankle bone can actually do. It cannot hold up the weight of a pack, no matter how tall it is. A low-cut hiking shoe with a stiff sole does more for you under load than a tall soft one.
This is why people buy the tallest hiking boot in the store, hike thirty miles in it, and still finish beaten up. They bought height when they needed stiffness. The two things get confused because tall boots have historically also been stiff, so the correlation is real even though the causation isn’t. Once you separate the axes, the whole hiking footwear category gets easier to shop, which is also why low-cut shoes beat boots for most hikes as long as the sole underneath is doing its job.
There’s also a vocabulary problem hiding here. “Trekking shoe” is largely a European and international retail term. The exact same shoe is usually sold in the US market as a hiking shoe. That naming gap is the reason this search exists at all, and it’s why so many articles about trekking shoes just quietly write “hiking shoes” for two thousand words and hope nobody notices.
Trekking Shoe vs Hiking Shoe vs Trail Runner in One Pass
Here’s the plain-language placement so you can locate yourself.
A trail runner is the most flexible option, the lightest, and the least protective. It’s built for speed on established trail you can see coming, with little or no weight on your back.
A hiking shoe sits in the middle: some structure, moderate flex, comfortable for day hikes and light overnight loads. A trekking shoe, in the sense the international market uses the word, is the stiff end of the low-cut spectrum. It’s built for rough ground, multiple days, and a pack that actually weighs something.
Boots extend the same stiffness spectrum further and add ankle coverage on top, but that’s a separate decision, not the next rung on the same ladder.
The mistake that costs people money is assuming the sturdier-looking shoe is the more capable one. Chunky uppers, thick leather panels, and aggressive branding all read as “serious” on a shelf. The actual capability is in a midsole you can’t inspect visually, which is why the flex test beats the eyeball test every time. If you’re wondering where approach shoes fit into the same spectrum, they’re a fourth category that trades some of that stiffness for sticky rubber and precision on rock.
The Five Trekking Shoes Worth Your Money
Five picks, one per genuine situation. This isn’t a leaderboard where number one beats number five. It’s five different problems with five different answers, and the right one depends on your foot shape and what’s on your back.
Every pick below is stated as a trade-off. You’ll get what it’s good at and who should skip it, because the second half is the part that actually saves you money.
All five are sold in men’s and women’s lasts. Those aren’t cosmetic variants. The women’s version is typically built on a narrower heel and a different volume profile, so pick the one that matches your foot rather than the one that matches the label.
Best Overall: La Sportiva Spire GTX
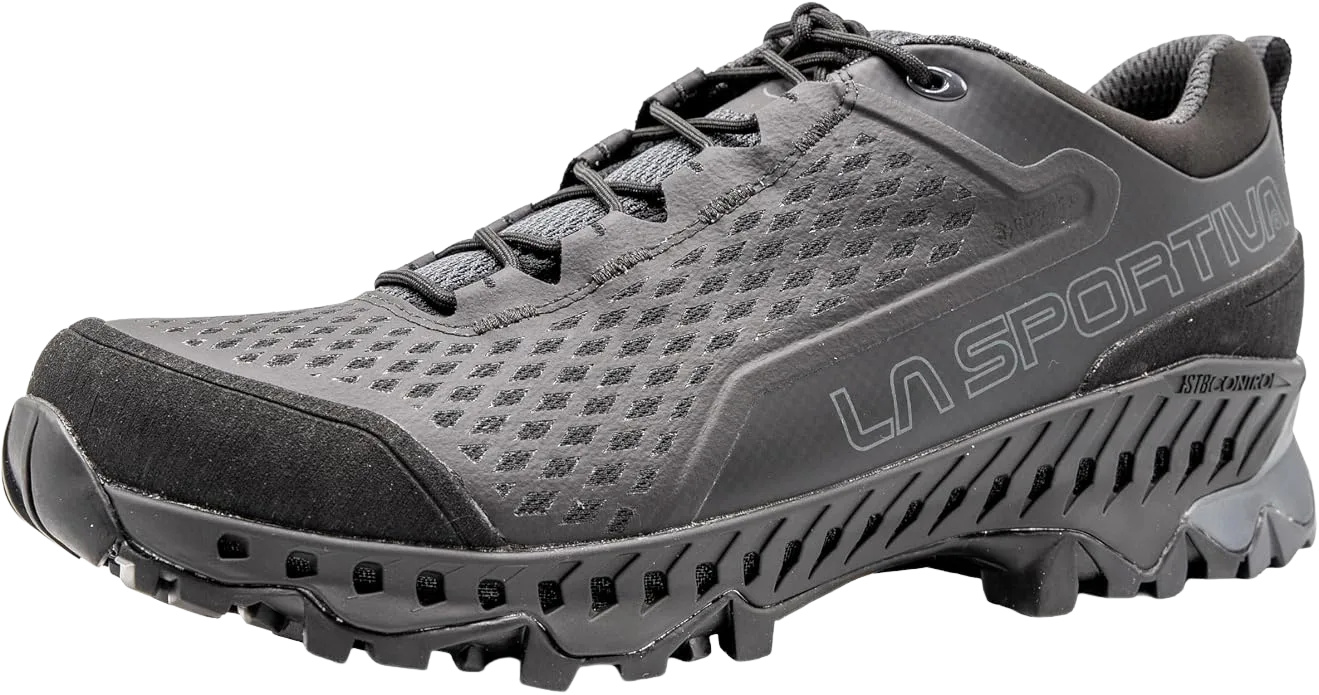
The Spire sits in the premium slot, and the honest justification for that is the midsole. Run the flex test on it against almost anything else in this list and you’ll feel the difference immediately. That stiffness is what keeps rocks from telegraphing through on hour eight of a long day with weight on your back.
The last is on the technical side, meaning it wraps closely through the midfoot. That’s an advantage if your foot is medium volume and a problem if it isn’t. Wide-footed readers should start with the Oboz or the Altra below instead of trying to size up into room that isn’t there.
If the premium slot doesn’t work for your budget, the Merrell below solves a genuinely different problem for a lot less, and for many people it solves the more important one.
Best Budget Pick: Merrell Moab 3
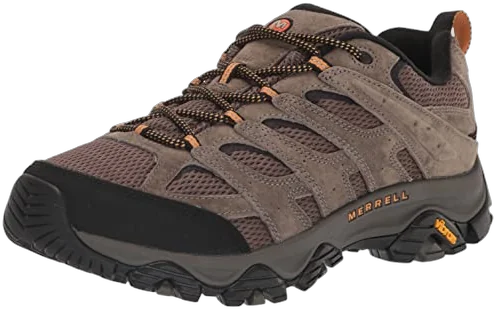
The Moab’s reputation is built on an enormous base of owners with wildly different feet who all found it comfortable, and that’s a real signal. Fit tolerance solves more actual trail pain than any spec on a box, because the most sophisticated shoe in the world is useless if it rubs your heel raw on day one.
The version linked here is the non-waterproof mesh build, and that’s deliberate. On hot, dry, or dusty routes the mesh is genuinely the better choice, and the reasoning behind that is in the waterproofing section below.
What it isn’t is a heavy-load shoe. The sole is on the flexible end of this list. If you’re carrying a real multi-day pack over rough ground, the Spire or the KEEN will hold up better on day three.
Best for Wide Feet: Oboz Sawtooth X Low B-DRY
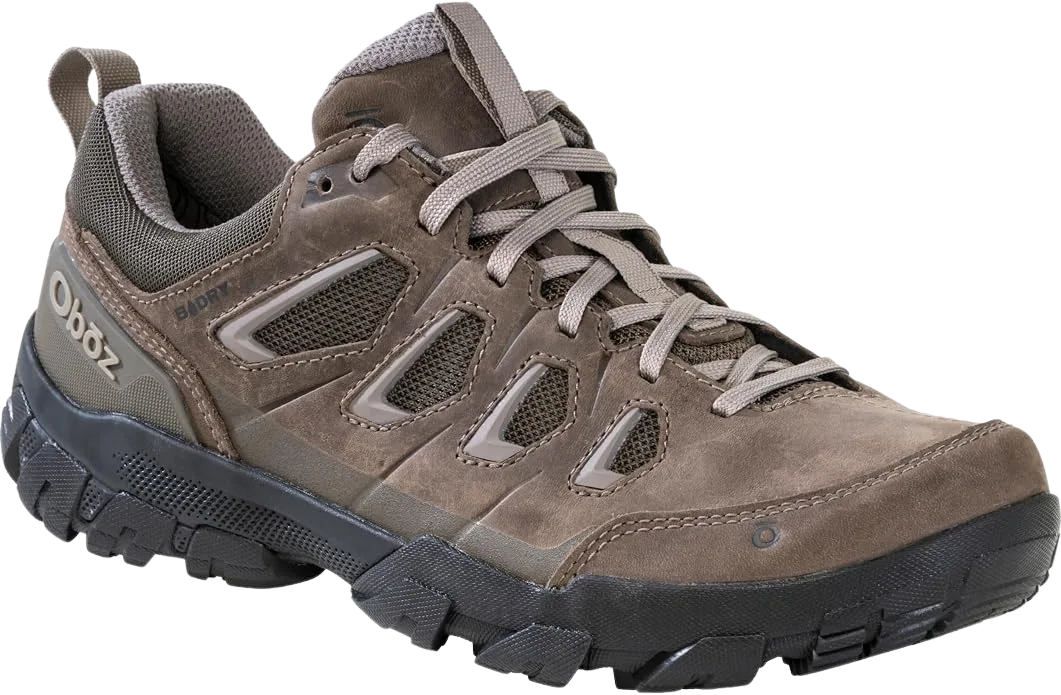
Width and volume are two different measurements, and most brands only address the first one. Width is how far your foot spreads across the ball. Volume is how much three-dimensional space your foot occupies inside the shoe, including instep height. A high-volume foot in a low-volume shoe gets pressure across the top of the instep no matter what width letter is on the box.
The Sawtooth addresses both, which is why it shows up so often in wide-foot conversations. If width is your actual problem rather than a symptom of buying the wrong last, it’s worth comparing against the women’s wide-fit options worth comparing before you commit.
Best for a Loaded Pack: KEEN Targhee 4 Low WP
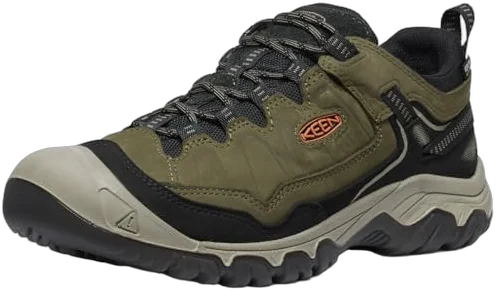
Heel hold is the variable people underrate most when they’re carrying weight. A pack shifts your center of mass backward and upward, which means every off-camber step tries to rotate your foot inside the shoe. A heel that locks down turns that into a non-event. A heel that lets your foot slide turns it into an ankle roll or, at minimum, a blister factory.
The Targhee’s platform is broad, which helps for the same reason a wider base helps anything carrying a load. The trade-off is warmth. Between the membrane and the fairly closed upper, this shoe holds heat, so read the waterproofing section below before you take it somewhere tropical.
Lightweight, Trail-Runner Feel: Altra Lone Peak 9
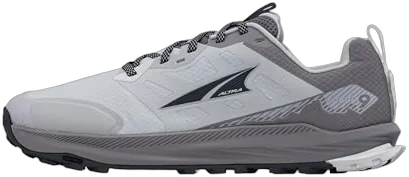
The Lone Peak has a devoted following among thru-hike veterans and other long-distance hikers, and the reason is the toe box. Feet splay under load and over miles, and most shoes fight that. This one accommodates it.
The zero-drop platform deserves a genuine warning rather than a footnote. If you’ve spent your life in shoes with a raised heel, your calves and Achilles have adapted to that geometry. Dropping to zero changes the loading pattern and needs a real transition period measured in weeks of gradually increasing mileage. Doing that transition on the trail during a trip you’ve been planning for a year is how people end up limping.
Waterproof or Not — The Trade-Off Nobody Puts on the Box
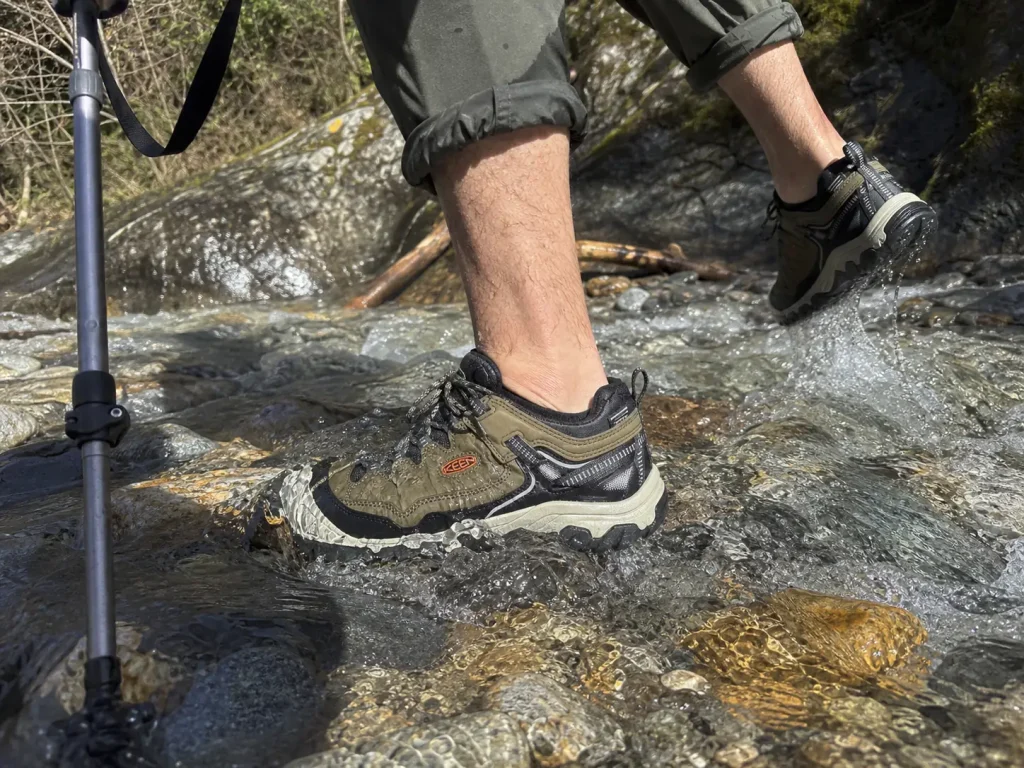
Everyone learns this once, usually at a stream crossing. Your waterproof shoes keep water out beautifully right up until water comes in over the collar. Then the same membrane that kept the rain out keeps the water in, and you squelch for the rest of the day. Meanwhile the person in mesh shoes drained in about a minute and is walking mostly dry an hour later.
How a Waterproof Membrane Actually Works
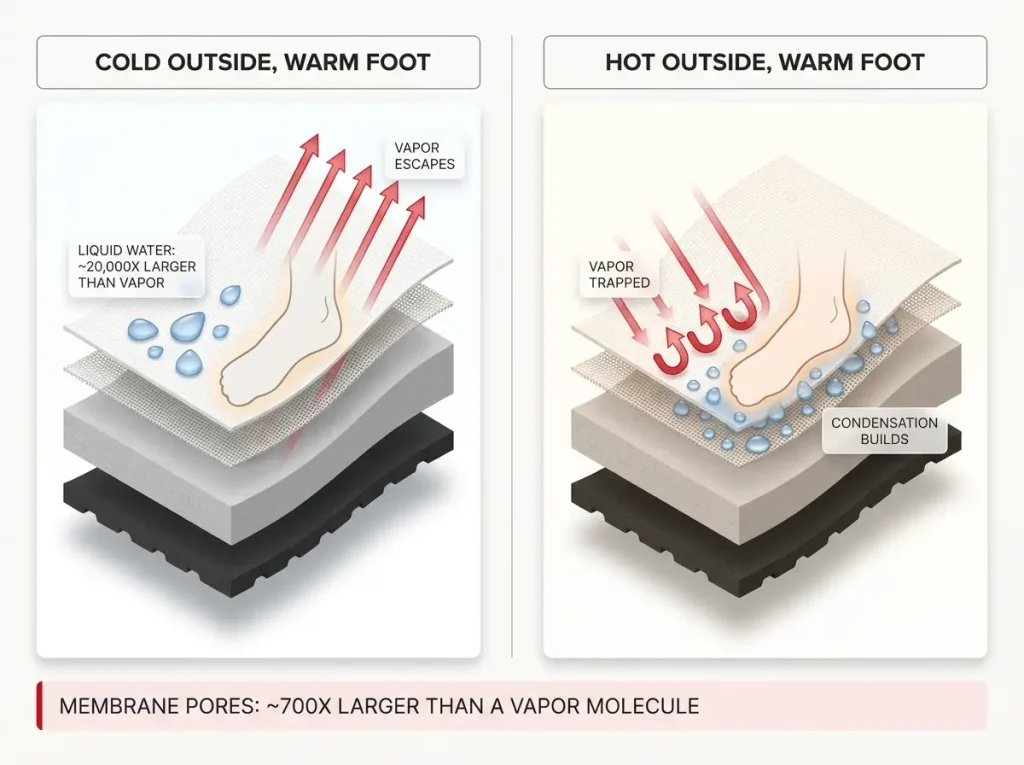
The mechanism is simpler than the marketing suggests. A Gore-Tex membrane is engineered with pores roughly 20,000 times smaller than a droplet of liquid water but around 700 times larger than a molecule of water vapor. Liquid can’t get in. Vapor can get out.
That’s the entire trick, and it’s genuinely clever.
This is why “waterproof breathable” isn’t a contradiction. The two words are describing two different states of the same substance, and the membrane discriminates between them by size.
When It Stops Breathing
Here’s the part the box leaves off. Vapor doesn’t move through the membrane because it wants to. It moves because there’s a gradient pushing it, a difference in temperature and humidity between the inside of your shoe and the air outside.
On a cold morning that gradient is steep. Your foot is warm and damp, the outside air is cold and dry, and vapor moves outward briskly. The shoe genuinely breathes.
On a hot, humid afternoon, the outside air is approaching your skin temperature and is already loaded with moisture. The driving force collapses. The membrane hasn’t failed and nothing is broken, but vapor has nowhere to go, so it stays inside and condenses. Your feet get soaked from the inside on a completely dry trail, which is exactly why Gore-Tex shoes can still feel wet inside when it hasn’t rained in a week.
This is a well-understood engineering problem rather than a blogger’s complaint, and GORE-TEX now ships constructions built specifically to reduce that overheating problem.
Pick the Membrane for the Trip, Not the Rule
That mechanism gives you an actual decision rule instead of a preference.
A membrane earns its place in cold and wet conditions: alpine mornings, shoulder-season trekking, sustained rain, snowmelt, and anywhere your feet would otherwise be cold and wet for hours. Cold plus wet is a real problem, and the membrane solves it.
A membrane becomes a liability in hot and humid conditions: a summer Camino across open country, the lower rainforest zone on a Kilimanjaro route, or any long day above 80 degrees. There, breathable mesh that drains fast beats a membrane that traps sweat.
One more thing worth budgeting for. Membranes tend to age out before the rest of the shoe does. Long-distance hikers report waterproofing degrading well before the outsole or upper wear out, so treat the membrane as a feature with a shelf life rather than a permanent property of the shoe.
The most common mistake in this whole category is treating waterproofing as a free upgrade you check because it’s available. It isn’t free. It costs breathability, and whether that trade is worth making depends entirely on where you’re going.
Traction — What the Outsole Is Actually Doing Under You
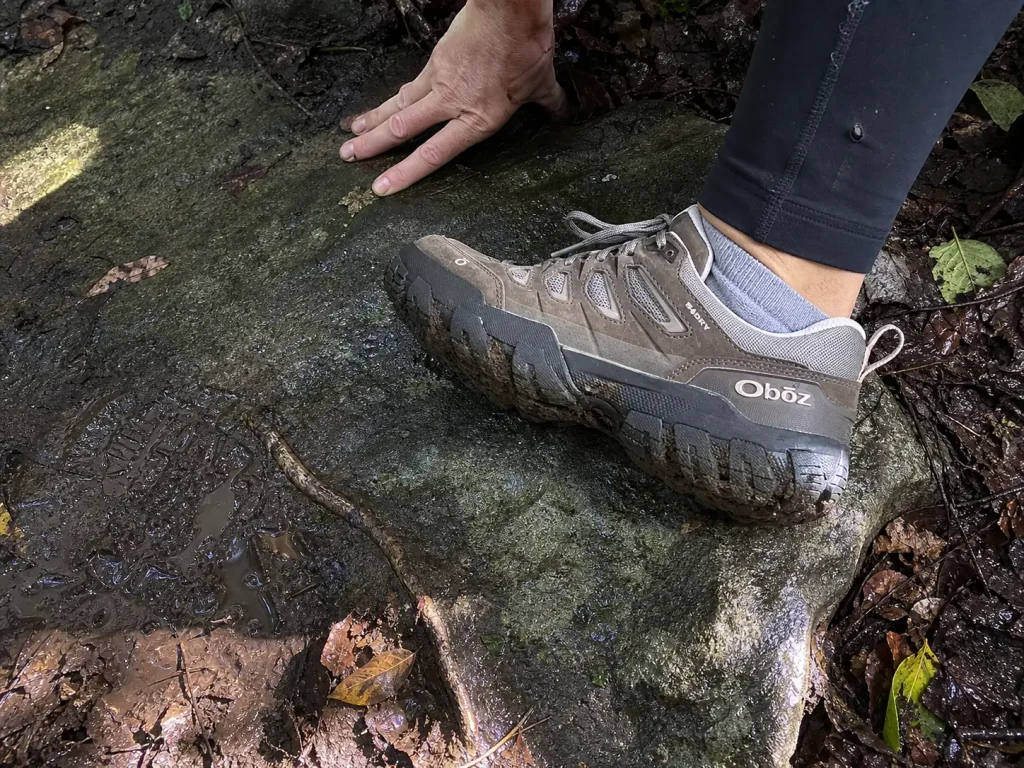
Everyone remembers the exact step where their shoes let go. A wet root at an awkward angle. A slick granite slab. A greasy clay descent after rain.
Traction isn’t one property. It’s several different jobs, and the feature that solves one often makes another slightly worse.
Rubber Compound vs Lug Pattern
Two separate things are happening under your foot.
Rubber compound governs grip on hard, smooth surfaces: wet rock, slab, polished roots, worn stone steps. Softer, stickier compounds deform slightly into surface texture and hold. Harder compounds don’t, but they last longer.
Lug depth and lug geometry govern loose surfaces: mud, scree, wet dirt, soft ground. Here the shoe isn’t gripping a surface, it’s biting into one and then shedding what it picked up. Deep, well-spaced lugs do that. Shallow ones pack up with mud and turn into slicks.
These are separate problems solved by separate features, which is why no single outsole is best at everything and why which outsole rubber actually grips wet rock is a different question from which one handles mud.
Where Deep Lugs Help and Where They Hurt
Deep aggressive lugs feel great in a store. They look capable, they grip the carpet convincingly, and they suggest the shoe means business.
On smooth wet rock they can actively hurt you. Grip on hard surfaces is largely a function of contact area, and tall lugs reduce contact area by lifting the shoe onto a series of small rubber posts instead of laying a broad patch of rubber on the rock. On slab, a flatter outsole with a stickier compound will usually outperform a knobby one.
Softer compounds carry their own cost in durability. They grip better and wear faster, because abrasion resistance and stickiness pull in opposite directions, and the wear shows up quickest on abrasive granite, decomposed rock, and gravel road sections. If your route has long approach roads, expect to trade some sole life for that slab confidence.
Matching One Outsole to a Multi-Terrain Trek
Here’s what makes trekking different from a day hike. On a single afternoon you can pick a shoe for the terrain because you know what the terrain is. On a multi-day trek you’ll cross forest duff, wet rock, a muddy trail section, gravel road, and short stretches of genuinely technical terrain, all in the same pair of shoes.
That makes the honest goal a competent generalist rather than a specialist. A moderate lug depth with a reasonably sticky compound handles everything acceptably. A mud-specialist outsole will scare you on the wet stone sections, and a slab-specialist will slide on the descent through clay.
One piece of community shorthand worth learning: a Vibram logo on the outsole names a family of compounds, not a single guarantee, and the same caveat applies to Salomon’s Contagrip labeling. Two shoes carrying the same brandmark on the sole can behave noticeably differently, because each brand makes dozens of formulations aimed at different jobs.
Fit and Sizing — The Free Test That Prevents Most of the Damage
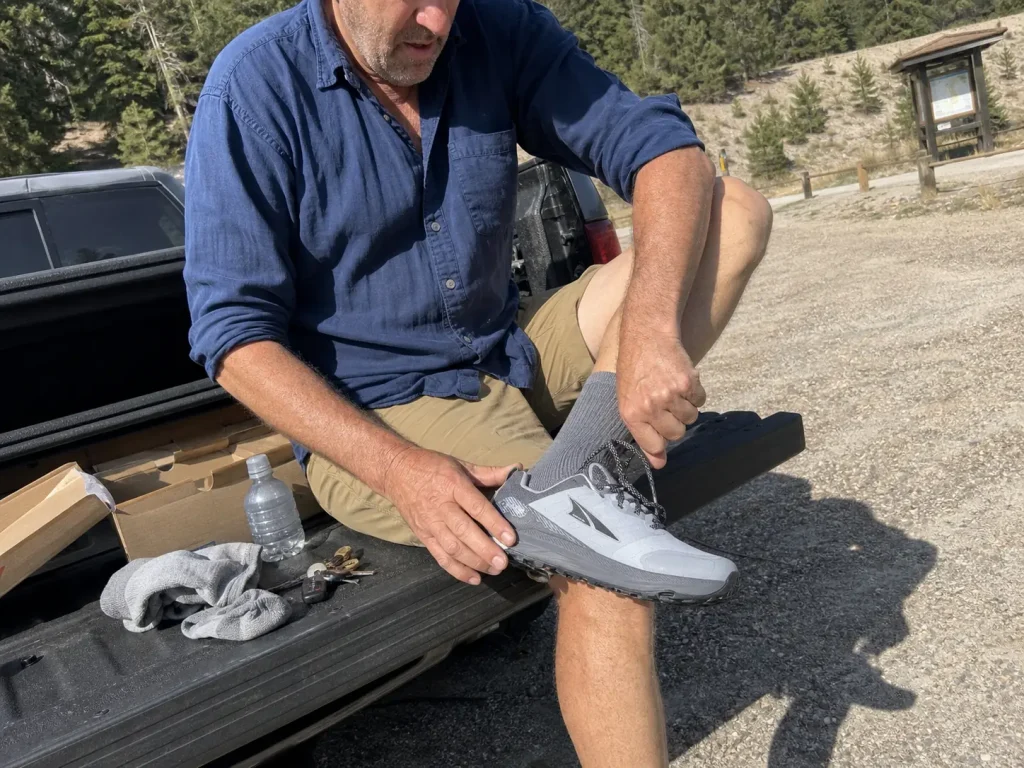
Black toenails are almost never a toughness problem. They’re a descent problem. Two thousand feet of downhill drives your foot forward into the front of the shoe, over and over, and a toe box that was fine on flat ground in an air-conditioned store turns out to be a millimeter too short.
The check that prevents this takes less time than lacing the shoe.
The Thumb’s-Width Check and the Half-Size-Up Rule
Stand up in the shoe, unlaced, and slide your foot all the way forward until your longest toe touches the front. You should be able to fit roughly a thumb’s width between your heel and the back of the shoe. Alternatively, laced and standing, press down in front of your longest toe: you want about a thumb’s width of space before the end. Fitters sometimes call this the finger test, and it’s the same measurement either way.
Sizing up is normal here: a half size up from street-shoe size for most people, and sometimes a full size. This surprises people who have worn the same size for twenty years, but street shoes aren’t asked to absorb two thousand feet of descent.
Two things make this worse than it sounds. Feet swell over trail miles, and they swell more in heat. A shoe fitted at nine in the morning in a cool store is being fitted at the smallest your foot will be all day. If you can try shoes on in the evening, after walking, do that instead.
Heel Lock, Toe Box, and Foot Volume
Length is only one of three fit variables, and they fail independently.
Heel lock is whether your heel stays put when you walk uphill, and a firm heel counter, the stiffened cup wrapped around the back of your heel, is what makes it possible. Lift the heel deliberately with the shoe laced. A small amount of movement is normal; a clear lift means friction on every step, which means blisters regardless of how good the rest of the fit is.
Toe box is width and shape at the front. Your toes should be able to spread without pressing sideways against the upper, which is why a narrow forefoot on the shoe rules out a whole range of models for some people no matter what length they buy. This is also where a descent gets violent, so it’s worth knowing what to feel for in a toe bumper while you’re checking the front of the shoe.
Volume is the one people miss. It’s the three-dimensional space inside the shoe, especially over the instep.
A high-volume foot in a low-volume shoe gets a pressure band across the top of the foot that no amount of width or length fixes. If lacing pressure is your recurring complaint, volume is probably your problem, not width. Readers managing an existing foot condition such as plantar fasciitis can also check a shoe’s status in the American Podiatric Medical Association’s Seal of Acceptance database before buying, since the APMA Seal of Acceptance is awarded by podiatrists rather than by the brand.
Break In on Your Terms, Not the Trip’s
Break-in is measured in real miles, not in hours of wearing them around the house, and the break-in period you need scales with how different the new shoe is from your old one. The working standard among people who hike a lot is a three to five mile test-drive hike on actual trail, carrying something, while the shoe is still returnable.
That last clause is the whole point. A shoe that reveals a problem on a local test hike is a return. The same shoe revealing the same problem on day two of a trip is a week of misery you can’t do anything about.
The mistake that ruins trips is buying shoes the week before departure so they’ll be fresh. Fresh isn’t a virtue. Proven is.
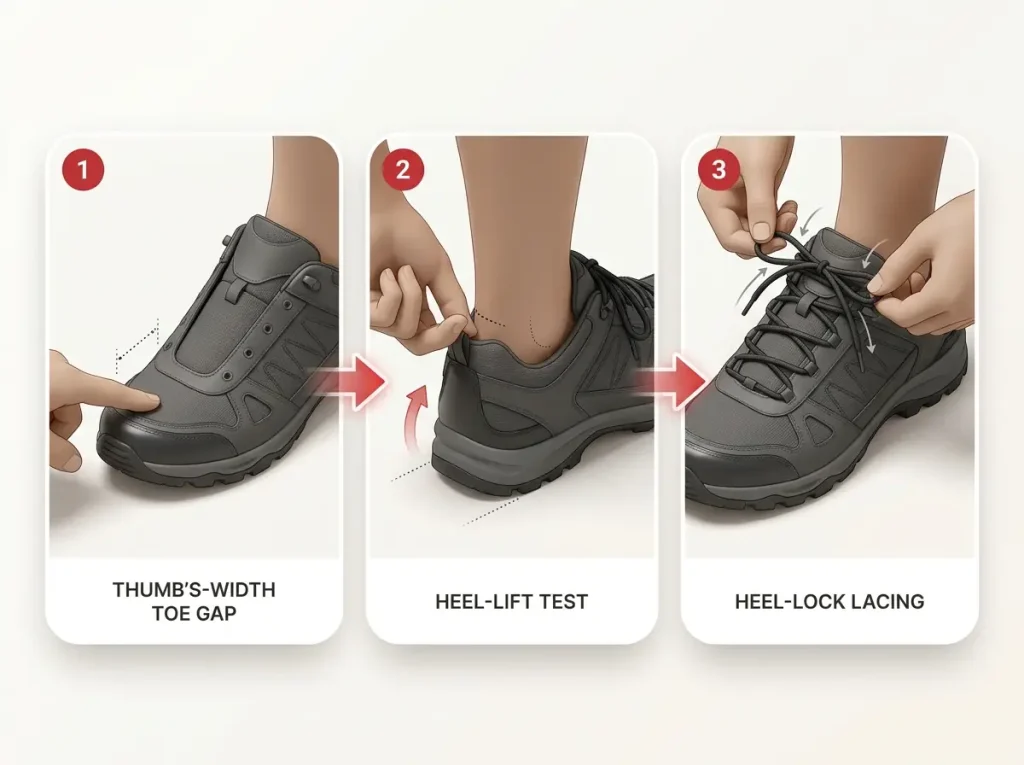
Find a steep hill and walk down it for five minutes during your test hike. Uphill tells you about heel lock; downhill is the only thing that tells you whether the toe box is long enough. Almost nobody does this before a purchase, and it’s where black toenails come from.
Weight, Cushioning, and Stack Height Under a Real Pack
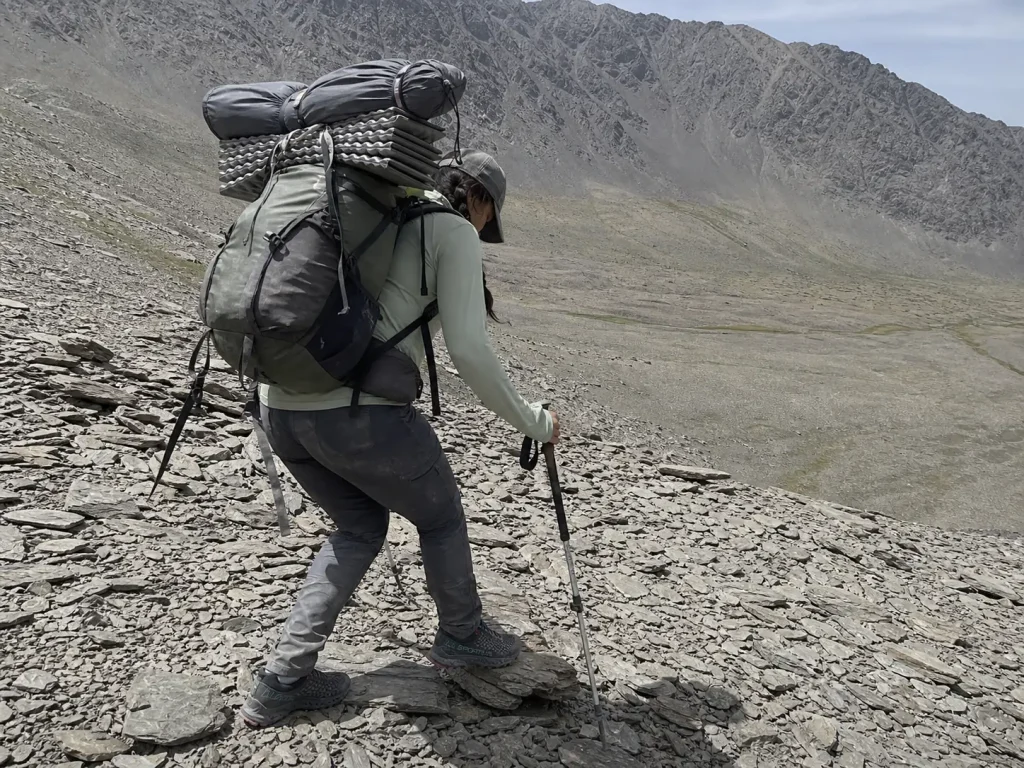
The shoe felt great on the shakedown walk around the neighborhood. Then you added a loaded pack, and by the afternoon of day two the midsole had gone flat and every rock was arriving straight into your heel. Nothing broke. The shoe just ran out of foam.
Why Pack Weight Changes the Shoe
Research on long-distance hikers backs up what this feels like. A cross-sectional study on plantar pressure and backpack load found that carrying a pack heavier than roughly 10% of the hiker’s own weight produces a measurable increase in plantar pressure, the force distributed across the underside of your foot, and that the increase scales with the load.
The practical consequence is worth stating plainly, because most gear writing gets this backwards. Pack weight, not distance, is often the variable that decides whether a shoe works. Fifteen flat miles with a daypack and eight rough miles with a full multi-day load are not the same test, and the second one is far harder on the shoe.
For a 170-pound hiker, that 10% threshold is around 17 pounds. A weekend overnight kit clears it easily. A week-long self-supported trek clears it by a wide margin.
Bottoming Out, and How to Spot It Coming
“Bottoming out” is the trail term for a midsole compressing flat under load and no longer cushioning anything. Foam absorbs impact by deforming and springing back. Under sustained heavy load, and after enough miles, it stops springing back the way it did.
What it feels like is specific and recognizable. Ground texture starts arriving sharply through the shoe. Your heels ache in a bruised way rather than a sore-muscle way. It’s typically worst on day two or three of a loaded trip, which is exactly the point where you’re furthest from being able to do anything about it.
Two checks before a trip. Press your thumb hard into the midsole foam along the side; if it feels dense and dead rather than resilient, it’s compressed. And look at the wear pattern: heavily creased, wrinkled midsole foam is compressed foam.
Do your final pre-trip test hike with the pack fully loaded, at the weight you’ll actually carry, water included. A shoe that feels supportive empty and mushy at trip weight has just told you something you’d otherwise learn on day two in another country.
Stack Height and Heel-to-Toe Drop
Stack height is how much material sits between your foot and the ground. More stack means more cushioning and more insulation from sharp terrain, but it also raises you further from the ground and makes the platform slightly less stable on uneven surfaces. Less stack means better ground feel and stability, and more of every rock reaching your foot. Some shoes split the difference with a rock plate, a thin stiff layer between midsole and outsole that buys protection without adding height.
Heel-to-toe drop is the height difference between the heel and the forefoot. A higher drop shifts load forward and shortens the effective demand on the calf and Achilles. Zero drop puts heel and forefoot level and asks your calf and Achilles to do more work through each step, which is what heel-to-toe drop means for your knees and for everything else up the chain.
Neither setting is correct in the abstract. What matters is that your legs have adapted to whatever you currently wear, and changing it is a training decision rather than a shopping decision. Switching platforms in the weeks before a big trek is the single most avoidable way to arrive at a trailhead with an angry Achilles.
Here’s the part that ties this section back to the first one. A stiffer, slightly overbuilt-feeling shoe earns its keep precisely on the trips where you’re carrying weight for multiple days, even though it feels like too much shoe on a flat local walk with an empty pack. The test walk is not the trip.
Blisters, Hot Spots, and the Foot Care That Keeps a Trek Going
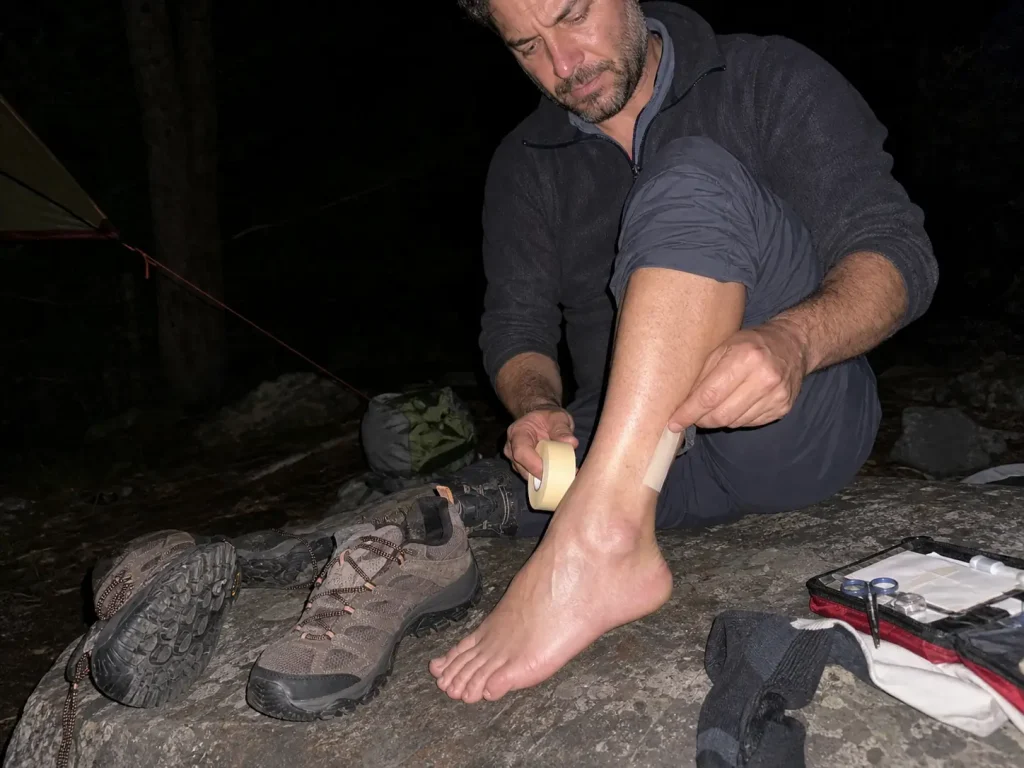
A blister is never a surprise. It announces itself as a hot spot an hour before it becomes a problem, and the entire skill is stopping to deal with it while it’s still just a warm patch, which is exactly the moment nobody wants to stop.
Blisters and sprains together affect roughly 20% of hikers, and they cluster among people unaccustomed to long-distance walking or breaking in new footwear on the trip itself. Both of those are purchase-and-timing problems rather than bad luck, which is good news: it means blister prevention starts at the register, not in the first-aid kit.
Hot Spot vs Blister
A hot spot is friction being applied to skin faster than the skin can tolerate. Layers of tissue are sliding against each other, generating heat, but nothing has separated yet. It feels warm, then slightly raw, then irritating.
A blister is the next stage: the layers have separated and fluid has filled the gap. Once that happens, you’re managing a wound for the rest of the trip.
The window between the two is usually somewhere between twenty minutes and an hour of walking. During that window, the fix is free and takes two minutes. After it, the fix takes daily attention and can change how you walk, which then creates new problems elsewhere.
Learning the phrase “hot spot” matters more than it sounds. Naming the stage makes people act on it. Without the vocabulary, it’s just a vague discomfort that seems like it might go away.
Socks, Moisture, and Friction
The mechanism is friction plus moisture plus time, so the fix targets all three.
Moisture softens skin and dramatically lowers its friction tolerance, which is why blisters cluster on hot days and after stream crossings. Merino or synthetic socks that move moisture away from the skin outperform cotton by a wide margin, and this is one of the few places in hiking where the cheap option is also the wrong option.
A liner system takes it further. A thin inner sock and a thicker outer sock let the two layers slide against each other instead of against your skin. Some people find this transformative and some find it unnecessary; if you’re blister-prone, it’s worth the experiment.
Changing socks at lunch on a hot day is an underrated move. Dry socks reset the moisture half of the equation for the entire afternoon, and a damp pair strapped to the outside of your pack dries as you walk.
Field Treatment That Doesn’t End the Trip
Carry tape. Whether it’s kinesiology tape, leukotape, or a dedicated blister patch matters less than having something and applying it at the hot spot stage, on clean dry skin, with no wrinkles in the tape.
If a blister has already formed, keep it covered and clean, cushion around it rather than directly on top of it, and reduce the friction that caused it in the first place. That usually means a sock change, a lacing adjustment, or both.
The habit that separates people who finish treks from people who abandon them is stopping at the first hot spot even when it’s inconvenient. Five minutes from the trailhead, ten minutes before a summit, in the rain, whenever. On a multi-day trek the cost of not stopping compounds every subsequent day, because tomorrow you walk on it again.
Buying for One Big Trek Abroad
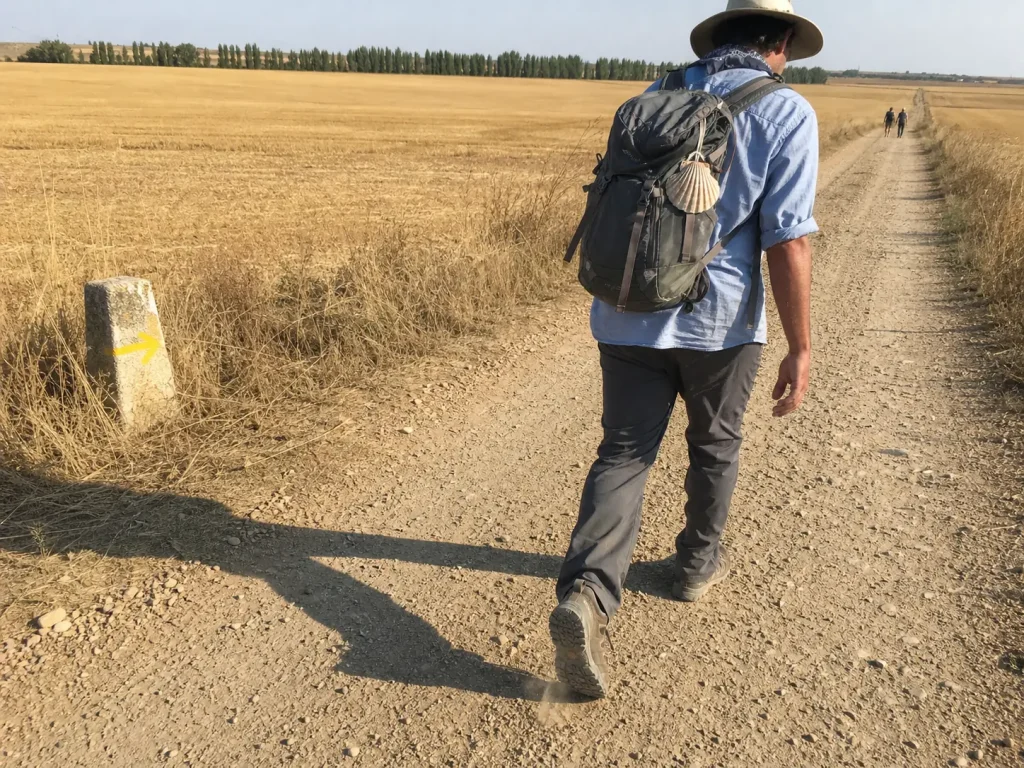
Domestic day hiking has a safety net. A bad shoe means a bad afternoon and a drive home, and you’re back to normal by dinner.
Three days into the Camino, or above the treeline on a Kilimanjaro route, that same failure becomes the trip. There’s no gear shop that stocks your model in your size, no return window, and no way to swap out mid-route. The stakes are different, so the buying process should be different too.
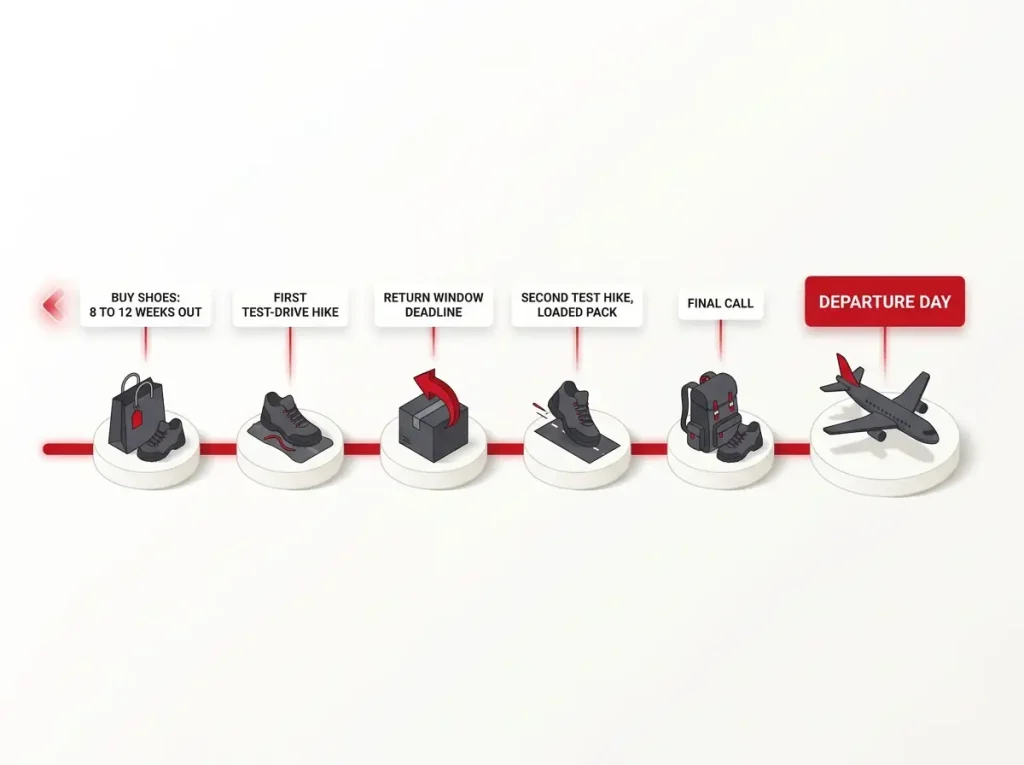
Build the Break-In Window Backward From Departure
Start from the departure date and work backward.
You want the shoes in hand eight to twelve weeks out. That gives you time for a first three to five mile test-drive hike within the return window, a decision point where returning them is still free, then a second longer hike with a loaded pack, and finally enough remaining weeks to put real mileage on the pair you committed to.
The order matters. The test hike has to happen while the return is still live, which means the first weekend after they arrive, not the weekend before you fly. Almost everyone who ends up in trouble did the test hike too late to act on what it told them.
If you’re switching platforms, to zero drop or to a noticeably stiffer sole, double that window. Adaptation is measured in weeks of progressively increasing mileage, not in a single long walk.
Climate and Terrain Decide the Membrane
Apply the mechanism from the waterproofing section to your actual destination rather than to a general rule.
A shoulder-season Tour du Mont Blanc, an Everest Base Camp trek with cold mornings and snowmelt underfoot, or any Scottish or Patagonian route: the membrane earns its place. Cold and wet is the condition it was designed for, and cold wet feet on a multi-day trip degrade everything from your mood to your decision-making.
A summer Camino de Santiago crossing the Spanish meseta, or the lower rainforest zone on Kilimanjaro before you gain altitude: the membrane works against you. Hot and humid collapses the vapor gradient, the shoe stops breathing, and you get soaked from the inside on dry ground.
Mixed itineraries are the hard case, and altitude treks are usually mixed by definition, since you can start in humid forest and finish in freezing scree. For those, the honest answer is usually a non-membrane shoe plus a warm sock system, because you can add warmth but you can’t add breathability.
Who Carries the Weight Changes the Shoe
This one gets missed constantly, and it changes the answer completely.
On a porter-supported trek, or a route with vehicle support and hut-to-hut logistics, you’re walking with a daypack. Your pack weight may never cross that 10% threshold. In that case, a lighter, more flexible shoe is genuinely appropriate, and buying the stiffest thing on the shelf just gives you a heavy shoe that never gets to do its job.
On a self-supported trek where you carry your food, shelter, and water, you’re well over the threshold from day one. That’s where sole stiffness stops being a preference and starts being the whole point.
Ask the specific question of your itinerary before you shop: what will actually be on my back, on the hardest day? The honest answer to that question picks the shoe.
Plan for the Failure You Can’t Drive Home From
Redundancy looks different abroad. You don’t need a second identical pair, but you do need a plan for the failure modes that end trips.
A delaminating sole is repairable in the field with a strong adhesive and cord if you’re carrying either, and unrepairable if you aren’t. Lace failure is trivially preventable with one spare lace. Insole compression is fixable if you packed a spare insole and unfixable if you didn’t. Total shoe failure is the one that genuinely ends things, which is the argument for shoes that already have a few hundred proven miles rather than shoes that are brand new.
Camp shoes or sandals earn their weight on a long trek for exactly this reason. They give your feet a break each evening, they cover stream crossings, and in the worst case they’re a way to keep walking.
Once the footwear question is settled, the next planning step is usually paperwork, and the trekking permits and visa rules that catch international hikers off guard have derailed more trips than blisters have.
What’s Actually Worth Paying For
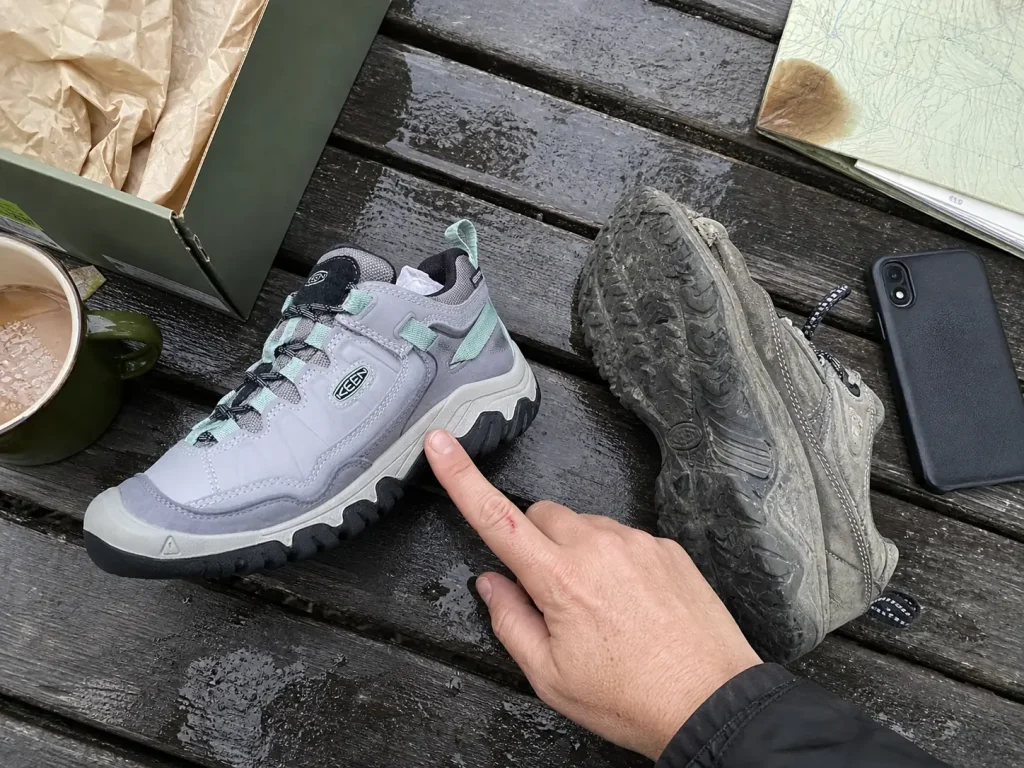
This is the gear-shop conversation where somebody finally tells you the truth: two of these features will change your trip, one of them matters only if you’re going somewhere cold and wet, and the rest are printed on the box because boxes need words.
Features That Change the Trip
Sole stiffness matched to your load is the one that defines the category. It’s the difference between arriving at camp tired and arriving at camp beaten up, and it’s the feature that actually separates a trekking shoe from everything else. Pay for it if you’re carrying weight. Don’t pay for it if you aren’t.
A competent outsole compound is the second. Grip on wet rock is the thing standing between you and a fall, and unlike most features, you feel the difference immediately rather than on day three. This doesn’t mean the stickiest available compound; it means one that isn’t obviously cheap.
A last that genuinely fits your foot’s width and volume is the third, and it’s the one people underweight most. Fit is not a feature you can upgrade later. Insoles help with volume and arch support, and they cannot make a narrow shoe wide or a short shoe long.
Together those three sit in the mid tier of the market, which is where most people’s money is best spent. Moving up from a budget hiking shoe usually buys real improvements in all three at once. Moving from mid to a premium hiking shoe typically buys refinement in one of them plus materials that last longer, which is a fair trade if you hike a lot and a poor one if you hike four weekends a year.
The One That Depends Entirely on Where You’re Going
A waterproof membrane is the conditional purchase, and the condition is specific rather than vague.
Worth the upcharge: cold destinations, wet destinations, shoulder seasons, snowmelt, sustained rain, and anywhere your feet would otherwise be cold and soaked for hours at a stretch.
Not worth it, and actively working against you: hot destinations, humid destinations, summer routes across open ground, and anywhere you’ll be crossing water deep enough to come in over the collar anyway.
There’s no universal answer here, which is why so much gear writing dodges it by recommending waterproof as a default. The default is wrong about half the time.
What the Label Is Doing Instead of Telling You Something
Proprietary technology names are the most reliable place to overpay. A branded name for what is usually EVA foam underneath, or for a cushioning system or support chassis, describes a family of materials rather than a measurable property. Two shoes with the same technology label can perform very differently, and there’s usually no published number attached to the claim that would let you compare them.
This is worth understanding as a general shopping skill, because why hiking shoe technology labels tell you almost nothing applies across the entire outdoor market, not just to footwear.
Aggressive lug depth is the other frequent overbuy. Deep lugs are a real feature for a muddy trail and soft ground. If you hike dry rocky trail, you’re buying a specialist tool for terrain you never encounter, and paying in wet-rock grip for the privilege.
And the reframe worth stating plainly, because it undercuts everything else in this section: the most expensive shoe that doesn’t fit your foot shape is a worse buy than the budget shoe that does. Every time. There’s no spec that compensates for a heel that slips or a toe box that’s too narrow, which is exactly why a forgiving, widely-fitting budget shoe competes seriously against much more sophisticated footwear.
The Footing Risks That Compound on a Multi-Day Trek
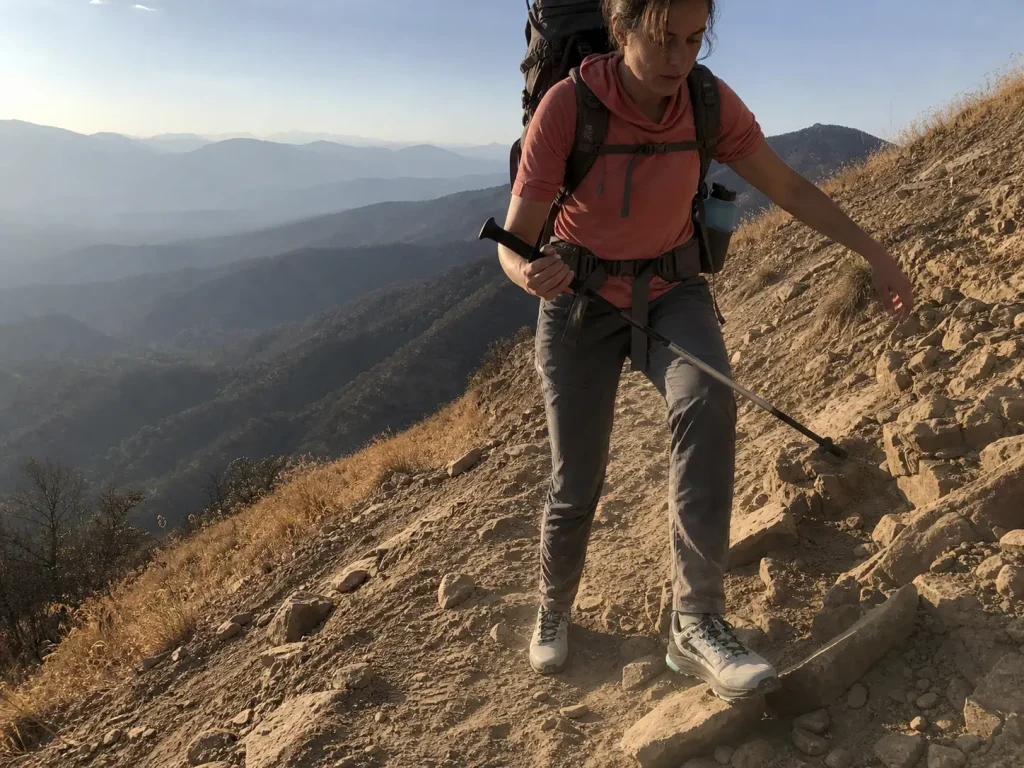
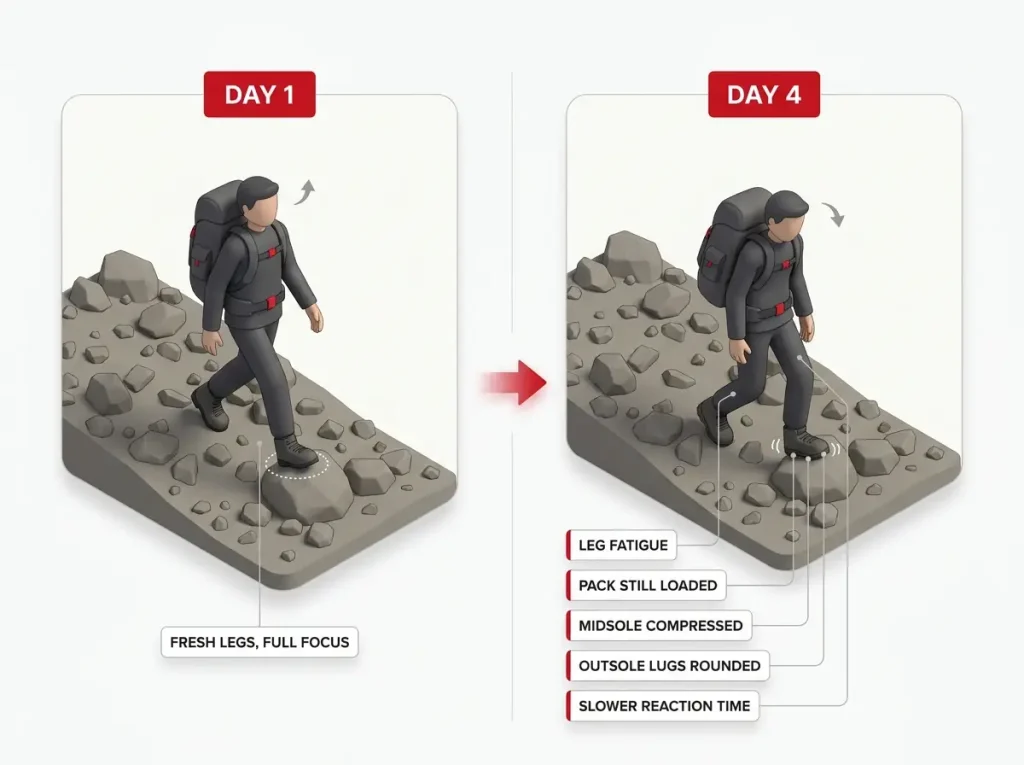
Day one you’re sharp. Every foot placement is deliberate, you’re scanning ahead, and the scree crossing gets your full attention.
Day four your legs are tired, the pack is still heavy, and the same crossing gets less precision and slower reflexes. The terrain didn’t change. You did, and the shoe is the only variable in the system still trying to do its full job.
Why Day Four Is Not Day One
This isn’t a hypothetical concern. A peer-reviewed study of backpackers at Philmont Scout Ranch found that 7% of participants reported an injury during their 12-day trek. On a real multi-day trip, injury isn’t a rare edge case; it’s a meaningful fraction of the group.
The injuries in that study spanned knee, ankle, leg, foot, hand, and arm. That distribution tells you something important: poor footing doesn’t just cause foot problems. It causes falls, and falls injure whatever hits the ground. Traction and stability affect far more than blister risk.
Three things arrive at the same time on a long trek. Your muscles are fatigued, so stabilization is slower. Your attention is degraded, so hazards get spotted later. And your gear has been wearing down the entire time.
Day four is when all three are at their worst simultaneously.
Stream Crossings and Off-Camber Ground
A stream crossing with a loaded pack is the highest-consequence routine move in trekking. Your center of mass is high and shifted back, the rocks are wet and often algae-covered, and the water is pushing on your legs.
What you want underfoot is a sticky compound and a stable platform, and what you want after the crossing is for the water to leave. A shoe that drains empties in a minute or two and keeps walking. A membrane shoe that took water over the collar holds it, and now you’re walking on saturated skin for hours, which is the exact condition that produces blisters fastest. This is why drainage beats waterproofing at wet crossings on routes with a lot of water.
Off-camber ground, meaning a slope running across your line of travel rather than up or down it, tests heel hold specifically. Your foot wants to slide toward the downhill edge of the shoe. A locked heel prevents that. A loose heel means your foot is repeatedly sliding sideways, and on tired legs that’s how ankle rolls happen.
What Wears Out Before You Notice
Three things degrade quietly.
Outsole lugs round off. It’s gradual, so you don’t perceive it, but rounded lugs bite noticeably less into loose ground and the change is most obvious right when you need them, on a steep loose descent.
Midsole foam compresses. This is the bottoming out from earlier, and it’s the one that produces bruised heels and the sense that every rock is coming straight through. Once it’s gone it doesn’t come back.
Membranes fail before uppers do, and they fail invisibly. There’s no visual indicator. You find out when your feet get wet in conditions they didn’t used to.
Mid-trip, check the lugs on the outside edge of the heel and the ball of the foot, press the midsole for that dead, dense feel, and pay attention if your feet start getting damp in conditions that used to be fine. If you’re specifically shopping for something that holds up under load, backpacking shoes that won’t bottom out at mile 10 is the deeper treatment of the midsole problem.
Save the hardest terrain for the morning when you can. Guides route this way on purpose. Scree, exposed traverses, and wet crossings are meaningfully safer on fresh legs, and pushing them to the end of a long day is when tired ankles start rolling on ground that looked easy.
The Short Version
Flex the shoe before you trust the label. Sole stiffness matched to your load is what actually makes a trekking shoe a trekking shoe, and cut height is a separate question with a separate answer.
Buy for the trip you’re taking, not the trip in the marketing photo. Climate decides the membrane, pack weight decides the midsole, and the same shoe can be the right call for one route and the wrong one for the next.
Give yourself a real break-in window. A returnable problem is a small problem. The same problem on day three in a country where you can’t replace the shoe is the whole trip.
Before you buy anything, go get the shoes already in your closet and run the flex test and the thumb’s-width check on them. Whatever they tell you about your own foot, its width, its volume, whether your heel holds, is the most useful information you’ll carry into the next purchase.
Frequently Asked Questions
01Which brand shoes are best for trekking?
No single brand wins. Each earns its place through fit philosophy: La Sportiva for a technical, medium-volume last, Oboz and Altra for wide feet, KEEN for a stable loaded-pack platform, Merrell for fit tolerance. Match the brand to your foot shape and load, not to a ranking.
02Is there a difference between hiking and trekking shoes?
Yes, but it is sole stiffness, not cut height. A trekking shoe’s stiffer sole supports a loaded pack on rough multi-day ground; a hiking shoe’s flexible sole rewards lighter, faster movement. Trekking is also largely an international retail term for the same shoe. Use the flex test described above.
03Which is better, Merrell or Hoka?
Neither, because they solve different problems. Merrell’s strength in this category is a forgiving, roomy last that fits a wide range of feet. Hoka’s is high stack height and a rockered ride built around cushioning. Treat it as a fit and load question rather than a brand ranking.
04What is the best footwear for hiking and trekking?
A low-cut shoe with a sole stiff enough for the pack you actually carry. Trail runners suit fast, light days; hiking shoes suit day hikes and light overnights; trekking shoes suit rough multi-day ground with weight. Boots add coverage, not load support. Fit beats specs in all four cases.
05How do I make sure trekking shoes actually fit before a big trip?
Run the thumb’s-width check and a heel-lift test in the store, then put three to five real trail miles on them while the return window is still open. Feet swell over miles and in heat, so fit in the evening if you can. The week before departure is far too late to find out.

I've spent more than a decade researching hiking gear and trail technique. I read the specs, the forum threads and the long-term reviews, and every pick here comes with what it gets wrong.
End of the trail
You read every mile of this one. Here's where the trail goes next.