

In this article
Imagine the final mile of a punishing descent, each footfall hammering a familiar bolt of pain through your knees until the trail dissolves into a blur of rock and root. Now picture that same slope, but instead of bracing for impact you are flowing downward, arms and core engaged, adjustable trekking poles—whether flip-lock telescoping or collapsible folding (Z-pole)—biting rhythmically into the earth and turning what was once a gauntlet into controlled, confident momentum. That transformation is exactly what this illustrated step-by-step tutorial delivers. We will move trekking poles from the realm of optional accessories to technical extensions of your body, grounding every recommendation in peer-reviewed biomechanics and thousands of backcountry miles. By the end, you will understand the science that reduces knee stress by up to 25 % on downhill terrain, recognize how carbon vs aluminum weight, cork vs foam vs rubber grips, and external lever vs twist locking mechanisms each serve different missions, and possess the field techniques—from the 90-degree elbow angle sizing rule to the up-from-the-bottom wrist-strap technique—that make the system instinctive. You will also carry a hiker’s ethic: wide rubber tip protectors in place when slickrock or pavement is underfoot, poles collapsed and stowed on long flat sections, and the quiet satisfaction of leaving no trace except footprints that feel mysteriously lighter.
Your Interactive Pole Length Calculator
Stop guessing your trekking pole length. Use our interactive tool to get a precise, terrain-specific recommendation in seconds. Just enter your height, select the slope, and get your perfect length for uphills, downhills, and everything in between.
Why Do Trekking Poles Make Such a Difference?

How do they protect your joints and reduce impact?
At the heart of every pole plant lies force attenuation: the instant the carbide steel tip touches ground, a measurable share of body and pack weight is rerouted through the stronger musculature of the arms, shoulders, and core, sparing the knees, hips, and ankles from absorbing the full shock of each step. On steep descents this effect becomes a literal braking system, preventing the quadriceps and patellofemoral joint from becoming the sole shock absorber of the mountain. A landmark study published on ResearchGate documented reductions in knee joint forces of 12-25 % on a 25-degree slope, a figure achieved not merely by pressing down on the poles but also through a subtle postural shift.
To plant the poles in front you instinctively lean slightly into the grade, shortening the moment arm the knee must resist and further diminishing shear and compressive loads. While the downhill benefit is dramatic, the story on level ground is more nuanced; legs remain the engines of propulsion, yet poles still lower plantar pressure by up to 24 % and the joint-sparing effect is amplified when a heavy backpack adds extra patellofemoral stress. Taken together, these mechanisms convert what could be cumulative micro-trauma into sustainable mileage, a truth that dovetails with a comprehensive approach to foot care and blister prevention for long-term hiking longevity.
How do they improve stability and balance?
Plant a pole and you have just doubled the number of contact points between body and earth, transforming a biped into a dynamic quadruped with a dramatically widened base of support. The immediate payoff is a lower effective center of gravity and a measurable reduction in postural sway, invaluable when edging across a log over a creek, teetering on loose scree, or glissading through a snow patch. That enhanced stability slashes the incidence of slips and falls—the leading cause of acute backcountry injury—and the psychological dividend is just as valuable: freed from staring at every foot placement, hikers lift their gaze to the horizon and absorb the landscape instead of fearing it.
Research in PubMed confirms that under load, pole users promoted kinematics more similar to unloaded walking, maintaining longer stride length and a more natural gait pattern that counters the awkward, fatigued shuffle that often accompanies a heavy pack. The upshot is a body that moves with efficiency and confidence, a skill set that complements the foundational advice found in essential tips for beginner hikers and sets the stage for the endurance illusion that follows.
What is the “endurance illusion”?
Swing a pair of poles and you recruit the triceps, shoulders, lats, and core into the hiking equation, effectively redistributing muscular workload away from the legs. Laboratory data reveal a 15 % drop in lower-limb muscle activity when the upper body joins the effort, yet this assistance is not metabolically free; oxygen consumption, heart rate, and total energy expenditure all rise, with one study on level ground showing a 22.6 % increase in VO2. The paradox is that hikers consistently report feeling less tired even as their cardiovascular systems work harder, a phenomenon known as the perceived exertion paradox.
Objective heart-rate monitors climb while subjective Rating of Perceived Exertion (RPE) scores fall because endurance is often limited by localized muscle fatigue—burning quads or calves—rather than absolute cardio capacity. By off-loading some of that localized strain onto fresh upper-body muscles, poles delay the onset of leg fatigue, allowing you to travel farther or faster before hitting the same wall of exhaustion. A comprehensive review in PMC A Review of Biomechanical and Physiological Effects corroborates both the 22.6 % VO2 increase and the 14.8 % decrease in lower limb muscle activity, and the strategic takeaway meshes perfectly with a sustainable pace built on energy management.
How Do I Choose the Right Trekking Poles?
What’s the difference between Aluminum and Carbon Fiber poles?
Shaft material—whether aluminum or carbon fiber—is the primary driver of pole weight, stiffness, vibration damping, and cost, and it dictates the story your poles will tell when pushed past their limit. Aluminum adjustable trekking poles are the reliable workhorses: 50–100 g heavier per pair, yet durable, budget-friendly, and prone to bending rather than breaking when overloaded, which means a creased shaft can often be straightened in the field and pressed back into service—ideal for risk-averse backpackers or those who rely on poles to pitch ultralight shelters.
Trekking Pole Material & Design Comparison
Expand each section to compare the key attributes of different options.
Option 1: Aluminum
Weight: Heavier.
Durability: High (bends, does not break).
Cost: Lower.
Vibration: More.
Best For: Durability, budget, and remote trips.
Option 2: Carbon Fiber
Weight: Lighter.
Durability: Lower (brittle, can snap).
Cost: Higher.
Vibration: Less.
Best For: Weight savings, ultralight hiking, and trail running.
Option 1: Telescoping
Adjustability: High.
Strength: High.
Packed Size: Longer.
Deployment: Slower.
Best For: All-around use, backpacking, tent setup.
Option 2: Folding (Z-Pole)
Adjustability: Low to none.
Strength: Lower.
Packed Size: Very compact.
Deployment: Very fast.
Best For: Trail running, travel, ultralight packing.
Option 1: External Lever Lock
Reliability: High.
Ease of Use: High (works with gloves).
Maintenance: Easy (user-adjustable).
Weight: Heavier.
Best For: All conditions, reliability.
Option 2: Internal Twist Lock
Reliability: Lower (can slip or seize).
Ease of Use: Lower (difficult with gloves).
Maintenance: Difficult.
Weight: Lighter.
Best For: Minimalist designs.
Option 1: Cork
Molds to hand, wicks sweat, durable, good vibration damping. Premium feel and performance, especially in heat.
Option 2: EVA Foam / Rubber
EVA Foam: Soft, lightweight, absorbs moisture. Good all-around comfort.
Rubber: Best grip in cold/wet, but not breathable and can cause blisters in warmth.
Carbon fiber is the high-performance thoroughbred—feather-light, stiffer for crisp power transfer, and superb at damping high-frequency chatter that can irritate wrists on long descents, but that performance comes at a premium price and with a brittle edge; under extreme stress carbon is more likely to snap or splinter catastrophically. The decision is therefore a philosophical wager: ultralight hikers, trail runners, or climbers counting every gram will choose carbon to reduce swing weight and cumulative fatigue, while beginners, budget-minded trekkers, and anyone historically hard on gear will find aluminum the forgiving choice. For curated product recommendations that align with either philosophy, consult our comprehensive guide to the best trekking poles.
Should I get Telescoping or Folding (Z-Pole) poles?
Traditional telescoping poles slide into themselves in two or three sections, delivering the widest range of length adjustment and rock-solid durability, making them the Swiss-army choice for hikers who need to fine-tune height between uphill grunt and downhill cruise or who lash poles to a pack for airline travel. Folding (Z-pole) designs collapse like tent poles into a bundle shorter than a loaf of bread and lighter than most smartphones, a dream for trail runners, climbers who want poles only for the approach, or travelers stuffing gear into carry-on luggage.
Telescoping models remain stronger and field-serviceable, and their adjustability lets them moonlight as tarp or tent supports, while folding poles deploy in a heartbeat and disappear inside a pack, though they sacrifice strength, rarely allow length adjustment, and can be finicky to re-tension if the internal cord stretches. Fixed-length poles exist as the minimalist extreme—lightest of all—but their lack of adjustability relegates them to niche applications like Nordic track workouts rather than real-world topography. If your adventures skew toward durability and versatility, telescoping is the default; if every gram and cubic inch is audited under the ultralight ethos, folding poles align with the philosophy of ultralight backpacking.
Which locking mechanism is most reliable?
A locking mechanism—whether external lever lock (e.g., Black Diamond FlickLock) or internal twist lock—is the silent guardian between you and an unexpected face-plant. External lever locks use a cam-style lever that clamps the upper shaft like a vise, delivering security you can verify by eye and adjust with a bare hand or glove, even when sleet is stinging your knuckles. Internal twist locks rely on an expander plug wedged against the inner wall of the shaft, a design that shaves grams and streamlines appearance but is notorious for slipping when plastic wears, seizing when grit or moisture intrudes, or freezing solid when over-torqued.
Lever locks win on reliability, ease of field maintenance, and simple tension adjustment with a micro-screwdriver or built-in dial, while twist locks tempt weight-weenies with sleek minimalism at the cost of frustration and potential failure. For safety and sanity, reputable brands now overwhelmingly favor external lever systems, and investing in them dovetails with building a modular and adaptable gear system that can be serviced on trail and trusted anywhere.
What are the best materials for grips and straps?
Grip material—cork, EVA foam, or rubber—dictates how your hands feel at mile five and mile twenty-five. Cork grips, harvested from the bark of Portuguese oaks, resist moisture, damp vibration, and over hundreds of miles compress into a custom imprint of your palm, making them the premium choice for all-day comfort. EVA foam is softer and lighter out of the box, absorbs sweat like a sponge, and dries quickly, though it can pack out and feel less precise over time.
Rubber grips excel in winter: they insulate against cold aluminum and offer positive purchase when mittens are involved, but on bare skin in summer they can raise blisters faster than you can say “death grip.” Extended foam sleeves below the primary grip let you choke down for short, steep traverses without stopping to adjust length, a small feature with outsized utility. The wrist strap, often left/right-specific and padded, is not a leash—it is a load-bearing sling that transfers force from your fingers to the sturdy architecture of your wrist and forearm. When properly adjusted, the strap allows your hand and fingers to remain relaxed, merely guiding the pole, which is the key to preventing hand, wrist, and forearm fatigue on long hikes.
How Do I Use Trekking Poles Correctly on the Trail?
How do I find the correct baseline length for my poles?
Start on flat or gently rolling terrain wearing the hiking shoes you will actually use and adjust the pole until your elbow forms a 90-degree angle and your forearm is parallel to the ground; this is the 90-Degree Rule and the fastest path to biomechanical efficiency. For a cross-check, use the Formula Method: multiply your height in centimeters by 0.68 and the result is your baseline length in centimeters—both methods almost always agree within a centimeter, giving you confidence that physics is on your side.
Most manufacturers print height-based sizing charts on the shaft or packaging; trust them as a starting point but always fine-tune by feel. When working with a three-section telescoping pole, fully extend the bottom section to its stop mark first, then use the upper lock for micro-adjustments, leaving the most accessible lever free for on-the-fly tweaks while the trail climbs and falls. Once the length is dialed, clamp down every lock with a firm snap and bounce your weight on the pole—any slippage now is a warning you should heed before committing to a scree slope. For an even deeper dive, consult our complete guide to hiking pole sizing and adjustment.
What is the “up-from-the-bottom” wrist strap technique?
Most hikers thread their hand down through the strap loop and then squeeze the grip for dear life—exactly wrong and a recipe for burning forearms and numb fingers. The correct sequence is to insert your hand up through the bottom of the open strap loop, then bring the hand down to grasp the grip so the webbing wraps smoothly across the back of the wrist and the padded portion cradles the heel of your palm; this is the “Up-From-the-Bottom” Technique.
When tensioned snugly but not tourniquet-tight, the strap becomes the primary load path, allowing your fingers to relax into a gentle curl that guides rather than clenches the pole. The payoff is immediate: power generated by the triceps and lats transfers through the strap into the shaft, while blood continues to circulate freely through hands that no longer cramp at the thought of another thousand vertical feet. Mastering this single skill is the difference between poles feeling like an awkward afterthought and an integrated extension of your body, an ethos echoed in Ultralight backpacking prioritizes skills and mindset.
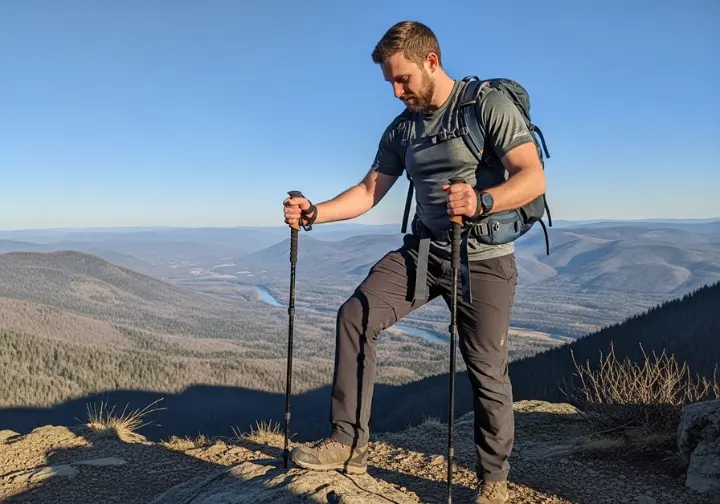
How should I adjust my poles for uphill, downhill, and traversing?
Adjustability is the feature that separates casual users from mountain magicians. For sustained uphill climbs, shorten your baseline length by 5–10 cm so you can plant close to your feet and drive powerfully without hunching; for downhill descents, lengthen by 5–10 cm to plant ahead of your body and let the poles absorb braking forces that would otherwise hammer your knees. When the trail cuts diagonally across a slope, set the uphill pole shorter and the downhill pole longer so your shoulders stay level and your torso remains upright, a trick that prevents the lopsided fatigue that accumulates over long traverses.
Pro-Tip: Mark your ideal uphill and downhill lengths with a wrap of bright tape just above the locks; when the grade changes you can slide and clamp without counting centimeters.
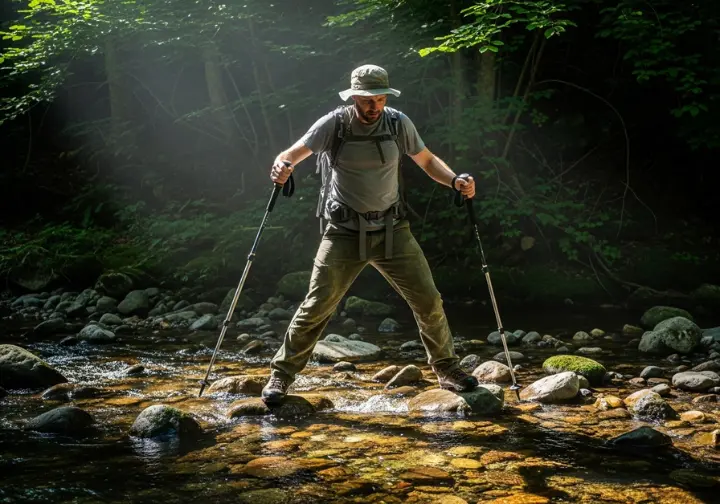
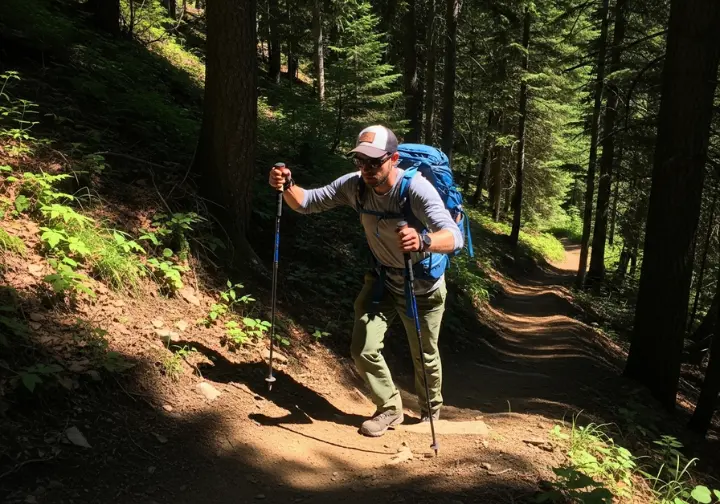
On short undulations where constant tweaking is impractical, slide your hand down the extended foam sleeve on the uphill pole—effectively shortening it by 20 cm in two seconds flat. Steep ascents invite a double-plant: both poles ahead, two steps up to them, repeat, turning a calf-burner into a measured crawl. On descents, keep knees soft and steps short, resisting the urge to lock joints and lean on poles as crutches. For stream crossings, lengthen the poles enough to reach the streambed, plant wide, and establish a stable tripod before committing your weight, a maneuver best practiced on a trail with varied terrain like Alum Cave Trail.
How Do I Advance My Skills and Responsibilities?
What is the difference between Trekking and Nordic Walking?
Trekking poles are engineered for support, stability, and load relief on broken backcountry terrain, whereas Nordic walking poles are fitness tools designed to turn a suburban sidewalk into a full-body cardio workout. The clearest line in the sand is the strap: Nordic poles terminate in a glove-like harness that lets the user fully release the grip on the backswing, generating powerful propulsion unavailable to trekking systems. Trekking straps are simple, comfortable loops meant only to prevent drops and transfer modest loads.
Technique diverges just as sharply—Nordic walking demands a long, aggressive arm swing with a deliberate, angled pole plant that actively launches the walker forward, while trekking technique emphasizes vertical support and lateral stability over forward thrust. Because of these design and movement differences, attempting Nordic technique with trekking gear is inefficient at best and risks overloading the wrist at worst. Nordic poles also ship with angled rubber “paws” optimized for pavement grip, whereas trekking poles use sharp carbide tips meant for dirt and stone. Understanding which discipline you are pursuing ensures you carry the right tool and employ the right biomechanics, a distinction reinforced by Walking Poles – Physiopedia.
How can I use poles responsibly and Leave No Trace?
Every pole plant is an opportunity to honor the second Leave No Trace principle—Travel on Durable Surfaces—or to violate it. Carbide steel tips, repeated by thousands of boots and poles, scar soft sandstone, chip igneous edges, and gouge cryptobiotic crusts that took centuries to form. The signature “click-clack” on rock also intrudes on the wilderness soundscape, infringing on the seventh principle of respecting other visitors.
The simplest and most effective mitigation is the humble rubber tip protector: slip on a wide rubber walking tip whenever the tread turns to slickrock, granite slabs, or paved approaches and you eliminate scarring while gaining traction and silence. Beyond tips, cultivate intentional footwork: plant tips in the center of the established tread, avoid trampling fragile shoulders, and when the trail mellows to a long, flat traverse, consider collapsing poles entirely and stowing them to erase impact altogether. The highest form of LNT is situational awareness—recognizing when poles add value and when they simply add noise, a mindset explored in depth in our guide to mastering outdoor ethics.
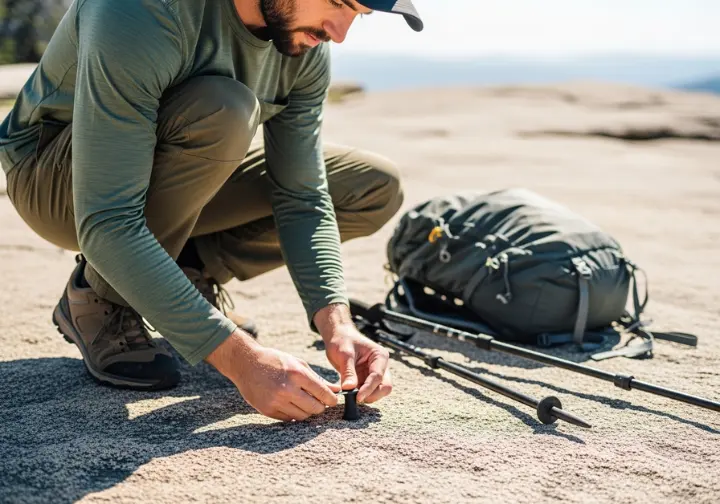
How do I properly clean and maintain my poles?
Routine maintenance begins the moment you reach the trailhead parking lot. Disassemble each section completely, wipe shafts and expanders with a damp cloth to remove grit, sweat, and acidic soil, then air-dry every segment before reassembly—moisture left inside invites corrosion and seizing. Resist the temptation to spray oil or WD-40 on locks or shafts; lubricants compromise friction-based systems and attract abrasive grime.
Pro-Tip: After drying, loosely store poles assembled but unlocked; this prevents long-term compression set in O-rings and keeps collars from seizing between trips.
If an external lever lock starts to slip, flip the lever open and give the tension screw a quarter-turn clockwise until it snaps shut with authority—an on-trail fix that takes thirty seconds with the micro-tool on your keychain. A persistently slipping twist-lock usually signals a worn expander plug; disassemble, rinse, and if the problem persists, order a replacement part from the manufacturer—another reason to invest in reputable brands with robust spare-part ecosystems. Periodic inspection of tips and baskets ensures you won’t discover a missing carbide point halfway down a scree chute. By treating maintenance as part of the adventure, you not only extend the life of your gear but also model stewardship that aligns with transition from enjoying trails to actively maintaining them.
Conclusion
Science confirms that trekking poles reduce peak knee forces by up to 25 % on descents, transform balance by widening your base of support, and create the endurance illusion that lets you hike farther before your legs cry uncle. Gear choice—aluminum vs carbon fiber, telescoping vs folding, lever vs twist locks, cork vs EVA grips—is a strategic calculation of durability, weight, and personal risk tolerance. Mastery demands more than ownership; it requires learning the 90-degree baseline length, the up-from-the-bottom strap technique, and dynamic terrain adjustments that turn two sticks into a seamless extension of your body. Finally, responsible use—wide rubber tip protectors on rock, stowing poles on mellow tread, and regular maintenance—elevates you from gear owner to trail steward. Lace up, lock down, and step onto your next descent with the confidence that every pole plant is backed by evidence, experience, and respect for the wild.
Frequently Asked Questions
Do you really need trekking poles for hiking?
No piece of gear is mandatory, yet trekking poles offer measurable, peer-reviewed advantages in joint protection, stability, and endurance that most hikers find transformative. Their value skyrockets on routes with significant elevation change, uneven footing, or heavy pack loads, where the reduction in knee forces and increase in balance can be the difference between finishing strong and limping home.
How do I stop my hands from hurting when using trekking poles?
Pain almost always stems from the “death grip” created when hikers ignore the wrist strap. Adopt the up-from-the-bottom technique so the strap carries the load, relax your fingers, and let the pole pivot naturally in your palm. If hot spots persist, choose grips made of moisture-managing cork or plush EVA foam rather than slick rubber.
Should I use one or two trekking poles?
Always use two poles as a matched pair. Two poles create a balanced, symmetrical support system that maximizes stability and distributes joint load evenly across both sides of the body. A single hiking staff is useful on gentle ground but cannot match the biomechanical benefits of a dual-pole system on technical terrain.
Can trekking poles damage trails?
Yes, sharp carbide tips can scar rock and contribute to erosion. To prevent damage and follow Leave No Trace ethics, you should always use removable rubber tip protectors when hiking on rock or other hard surfaces.
Risk Disclaimer: Hiking, trekking, backpacking, and all related outdoor activities involve inherent risks which may result in serious injury, illness, or death. The information provided on The Hiking Tribe is for educational and informational purposes only. While we strive for accuracy, information on trails, gear, techniques, and safety is not a substitute for your own best judgment and thorough preparation. Trail conditions, weather, and other environmental factors change rapidly and may differ from what is described on this site. Always check with official sources like park services for the most current alerts and conditions. Never undertake a hike beyond your abilities and always be prepared for the unexpected. By using this website, you agree that you are solely responsible for your own safety. Any reliance you place on our content is strictly at your own risk, and you assume all liability for your actions and decisions in the outdoors. The Hiking Tribe and its authors will not be held liable for any injury, damage, or loss sustained in connection with the use of the information herein.
Affiliate Disclosure: We are a participant in the Amazon Services LLC Associates Program, an affiliate advertising program designed to provide a means for us to earn advertising fees by advertising and linking to Amazon.com. As an Amazon Associate, we earn from qualifying purchases. We also participate in other affiliate programs and may receive a commission on products purchased through our links, at no extra cost to you. Additional terms are found in the terms of service.


