

In this article
- The Science of Soreness: Understanding How Blisters Form
- The Foundation of Prevention: Your Footwear System
- A Hiker’s Ritual: Proactive On-Trail Foot Care
- Your Trailside Blister Clinic: Taping and First-Aid
- Trailside Triage: How to Treat Blisters Safely
- Key Takeaways: Walk On, Pain-Free
- Frequently Asked Questions about Hiking Blisters
Blisters are not just a simple nuisance on the trail; they are the single most common medical issue that can prematurely end a hike. Statistics show that blisters are the top medical complaint among hikers, impacting up to 95% of people on long treks and standing as the number one reason thru-hikers quit. The most effective treatment, according to podiatrists and expert hikers, is to prevent them from ever forming in the first place. This guide introduces the concept of a “Foot System,” where your anatomy, footwear, socks, and habits must work in harmony for effective hiking blister care. We will provide a comprehensive approach and blister prevention tips to turn blister prevention from a game of luck into a disciplined skill.
The Science of Soreness: Understanding How Blisters Form

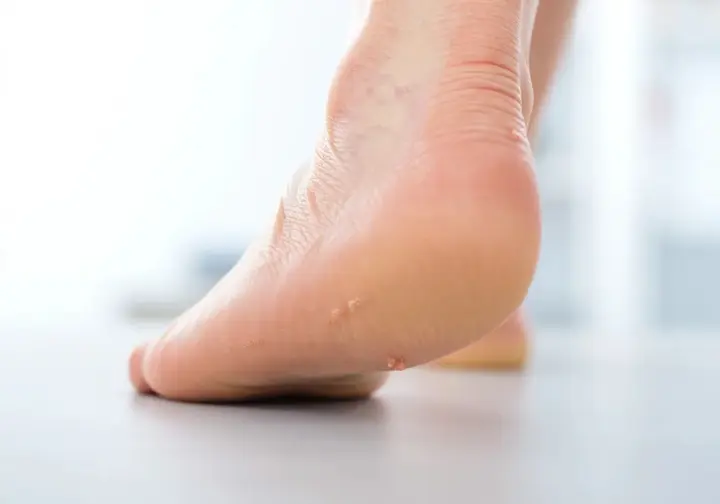
To master how to prevent hiking blisters, you must first understand the four primary factors that conspire to create them. This destructive quartet consists of friction, moisture, heat, and pressure. Grasping how these elements work together is the foundational step in foot care for hikers and keeping your feet healthy on any trail.
The Role of Friction (Shear Force)
The main culprit behind friction blisters is not simple rubbing but a mechanical force known as shear. This occurs when the outer layer of your skin, the epidermis, moves along with your sock and shoe, but the deeper tissue layers do not move with it. Imagine pressing your thumb on a ripe peach and wiggling it; the skin moves, but the flesh beneath does not, creating a separation. This same action happens inside your footwear, causing foot friction blisters.
Your body’s natural response to this shear-induced injury is to fill that gap with lymphatic fluid. This fluid is meant to cushion the damaged tissue, but in doing so, it creates the tender, fluid-filled bubble we recognize as a blister, transforming the lowly foot blister into a major problem for any hiker. There is a new paradigm to explain causation that offers deeper insight into this process.
Moisture: Friction’s Top Accomplice
Moisture is friction’s most effective partner in crime. When skin becomes wet, whether from sweat or external sources like rain, it grows significantly softer and more fragile. This softened, damp skin has a much higher coefficient of friction. Consequently, the same shear forces that dry skin could easily handle become far more damaging when the skin is moist, leading to likely blisters.
A 2024 study on Camino de Santiago pilgrims confirmed this, finding a significant link between hikers who reported having wet socks and a higher incidence of blisters. This research underscores the absolute necessity of moisture management and properly handling wet conditions. The National Library of Medicine also details the Influence of skin hydration level on skin friction.
Heat and Pressure Points
Heat, generated primarily by the friction inside your shoe, creates a vicious cycle that encourages blister formation. As your feet become hotter, they naturally sweat more, which in turn increases the moisture level inside your socks. This combination of heat and moisture further softens the skin, making it extremely vulnerable to the effects of shear forces and creating a perfect breeding ground for blisters to develop.
Pressure is the factor that focuses this friction on specific blister locations. A tight spot in your boot, an irritating seam, or even a wrinkle in a sock can create a localized pressure point where shear forces are magnified, turning these into blister prone areas. It is this concentrated pressure on a small patch of skin that leads to the formation of a “hotspot”—the critical warning sign that precedes a full-blown blister.
The Foundation of Prevention: Your Footwear System
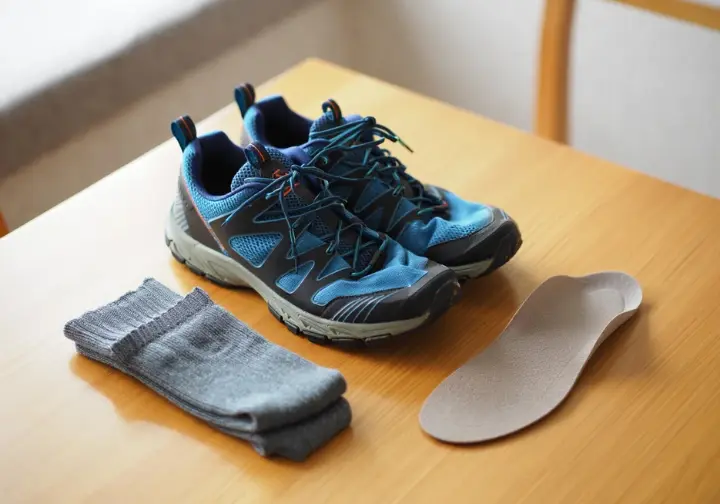
A blister-free hike depends on a footwear system where every component works in perfect concert. We will break down the three critical elements—shoes, socks, and accessories—that must function together to create a stable, dry, and low-friction environment for your hiking feet.
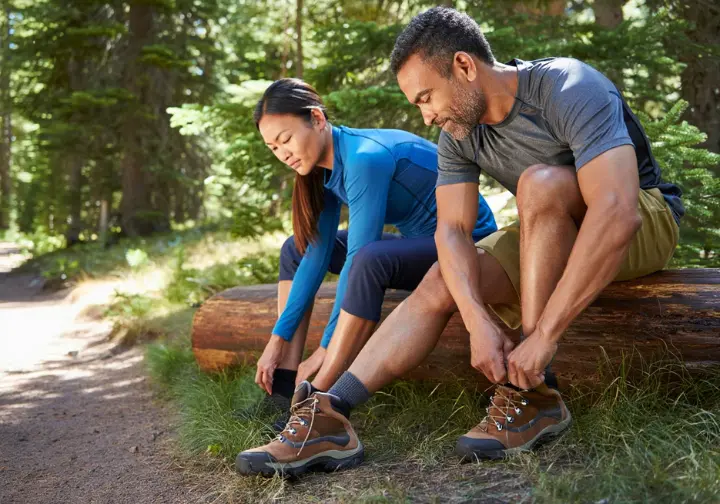
Choosing Your Footwear: Boots vs. Trail Runners
Experts agree that proper fit is the single most important factor when selecting hiking footwear, far more so than brand, style, or price. To get the best fit, you should always shop for shoes in the afternoon when your feet are naturally swollen and test them on an incline board if possible. A key element of how to choose a hiking boot is ensuring you have the right hiking boots with a snug fit without pressure points.
Many long-distance hikers have shifted away from heavy leather boots toward lighter, more flexible trail running shoes. The main benefits of these trail runners are a minimal break-in period, quicker drying times, and reduced foot fatigue over long miles on challenging terrain. Look for a wide, foot-shaped toe box, a feature championed by brands like Altra and Topo. This design allows your toes to splay naturally and accommodates swelling, which helps prevent pinch blisters.
The Waterproofing Paradox
When choosing footwear, it is vital to understand the “waterproofing paradox”. While membranes like Gore-Tex are excellent at keeping external water out, they are notoriously poor at letting internal moisture—your sweat—escape. This trapped sweat creates a damp, high-friction environment inside the shoe, which is an ideal recipe for blister formation, especially on a multi-day trek. This is a detail many new hikers overlook.
For this reason, many experienced thru-hikers now opt for non-waterproof, highly breathable footwear. These shoes will get wet during stream crossings or rain, but they also dry out exponentially faster. This leads to less cumulative time with damp feet against your skin, a key factor in prevention, even if you own a great pair of waterproof hiking shoes.
The Critical Role of Hiking Socks
The golden rule of good hiking socks is to avoid cotton at all costs. Cotton acts like a sponge, absorbing moisture and holding it directly against your skin, which maximizes friction and essentially guarantees blisters issues. The superior materials are Merino wool and synthetic blends. These fabrics excel at wicking moisture away from the skin to the outer layers of the fabric where it can evaporate, keeping the foot drier and reducing friction.
A highly effective strategy is the two-sock system, which involves wearing a thin, moisture-wicking liner sock under a thicker, primary hiking sock. This system moves the primary point of friction from your delicate skin to the interface between the two sock layers. An evolution of this system uses Injinji toe socks as a liner. By encasing each toe in fabric, this method eliminates the skin-on-skin friction that causes painful toe blisters. Understanding The Critical Role of Hiking Socks is foundational to foot care.
Essential Footwear Accessories: Gaiters & Insoles
Gaiters are a key defensive accessory for your feet. These fabric coverings attach to your shoes and wrap around your ankles, creating a seal that prevents trail debris like sand, trail grime, and pebbles from getting inside your hiking shoes. Any foreign object in your shoe, no matter how small, acts like sandpaper, dramatically increasing friction and causing preventable blisters. A good pair of hiking gaiters is a small investment with a big payoff.
Aftermarket insoles can also play an important role. While not a direct prevention tool, a quality insole can improve the overall fit of your shoe and provide arch support. This stabilizes your foot, reduces excessive movement within the shoe, and thereby indirectly lessens the shear forces that lead to blisters.
A Hiker’s Ritual: Proactive On-Trail Foot Care
Great gear is only half the battle; the other half is the active discipline of foot care. We’ll outline a chronological set of rituals—actions taken before, during, and after hiking—to transform prevention from a collection of tips into an actionable, habit-forming strategy.
Pre-Hike Foot Preparation
Just like your muscles, the skin on your feet benefits from conditioning. Gradually increasing your mileage in the weeks before a major hiking trip helps toughen the skin, making it more resilient to the stresses of the trail. If you have a blister history in certain spots, pay close attention to them before you even start the hike. This type of Pre-Hike Foot Preparation is a core skill for any serious hiker.
Beware the “Callus Conundrum”: excessively thick, hard calluses are inflexible and can lead to deep, painful blisters forming underneath them. The best practice is to smooth thick calluses with a pumice stone to keep skin tough yet pliable. Additionally, trim your toenails short and file them smooth. Applying moisturizer nightly in the week before a hike can also improve skin elasticity.
On-Trail Discipline: The ‘Stop and Fix’ Mentality
The single most critical on-trail habit is to stop immediately and address a “hotspot”. A hotspot is the precursor to a blister—a localized area that feels warm, tender, or irritated. Trying to push through this initial discomfort is a costly mistake that almost guarantees a full-blown blister will form, a point the American Hiking Society emphasizes. This is one of the most effective on-trail preventative techniques.
Adopt a disciplined routine during any rest break of 15 minutes or more: take off your shoes and socks to let your feet air dry. This simple act dramatically reduces the cumulative moisture that softens skin. Also, carry at least one spare pair of socks and change into a dry pair at midday. The damp pair can be strapped to the outside of your pack to dry.
End-of-Day Recovery Rituals
The very first task upon reaching camp should be end-of-hike blister care: remove your hiking shoes and socks, then thoroughly clean and dry the feet. This removes the sweat, dirt, and bacteria that can weaken skin overnight and compromise its integrity for the next day’s hike.
Every multi-day hiker should carry a pair of “sacred socks”. These are warm, dry, clean socks used only for camp and sleeping; they are never hiked in and are crucial for recovery. After your feet are clean, apply a healing salve or balm to remoisturize the skin and create a protective barrier. Finally, gently massage and elevate your feet to reduce inflammation and drain fluids from the day’s swelling.
Your Trailside Blister Clinic: Taping and First-Aid
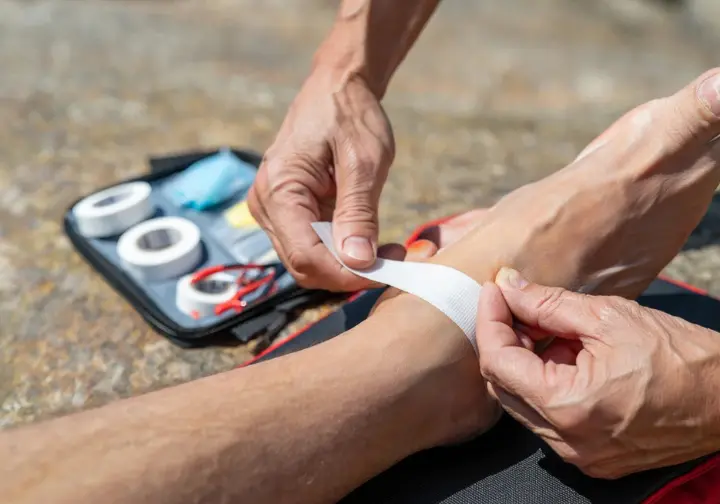
When prevention fails, you’ll need the right tools and techniques for treating blisters on feet. We’ll cover how to build a specialized blister kit and provide a deep dive into taping—the single most powerful trail tool for both preventing and managing hotspots on the trail.
Assembling Your Dedicated Blister Kit
A dedicated blister kit should be a small, well-organized component of your larger first-aid system. Being unprepared for this common hiking injury is a significant failure in planning. For a deeper dive on blister management items, the Wilderness Medical Society offers a guide, Blisters-Part-2, that details advanced options.
Essential components for your blister kit include a preferred tape like Leukotape, moleskin for padding, alcohol swabs for cleaning, antibiotic ointment, small scissors, and a sterile needle. Many companies sell pre-made blister prevention kits, but building your own allows for customization. Advanced items include Tincture of Benzoin, hydrocolloid dressings like Compeed, and ENGO blister patches.
Choosing the Right Blister Tape
Leukotape P is widely considered the “gold standard” for blister prevention among thru-hikers. Its superiority lies in its incredible adhesion that stays on for days, even when wet, and its slick, low-friction surface. GearJunkie explains Why Leukotape Is the Surprise Solution for many hikers.
Moleskin, by contrast, is a classic but is better used for blister padding rather than friction management. It is bulky, absorbs moisture, and has a tendency to slip and bunch up inside a sock, potentially causing new problems. Kinesiology Tape is a flexible option, ideal for conforming to contoured areas like toes and ankles where a rigid tape might wrinkle. Avoid using Duct Tape unless it’s a true last resort, as it traps moisture and can rip blistered skin off upon removal.
Mastering Taping Techniques
Proper application is just as important as the tape itself. Always begin by cleaning the skin with an alcohol swab to remove natural oils and ensure the site is completely dry for better adhesion. An essential technique is to round the corners of any piece of tape with scissors. Sharp corners are notorious for snagging on socks, causing the tape to peel up prematurely.
Pay attention to the orientation of the tape, which can vary depending on different blister sites. Since the shear force on the heel is typically vertical, tape should also be applied vertically—anchored under the heel and pulled up the Achilles—to counter that force. For toes, where flexible kinesiology tape often works best, a common method is to lay one strip over the hotspot and secure it with a second strip wrapped around the toe without tension to allow for swelling.
Trailside Triage: How to Treat Blisters Safely

When a blister forms despite your best efforts, you need a step-by-step protocol for blister management. We’ll tackle the most contentious decision—whether to drain the blister—and outline the safe procedures for treatment and dressing to prevent infection and allow you to continue your hike.
The Great Debate: To Pop or Not to Pop?
The conservative medical approach, advocated by bodies like the American Academy of Dermatology, provides clear guidelines on how to prevent and treat blisters, advising against draining a blister. Their reasoning is that the intact skin provides a perfect sterile barrier, and popping it opens a pathway for infection. This approach is best if the blister is small.
The pragmatic wilderness approach, however, argues that a large, tense blister on a multi-day trip will likely pop on its own anyway. In this context, performing a controlled, sterile drain is often the lesser of two evils, a viewpoint detailed in this how to prevent and treat blisters video from NOLS. Never drain a blood blister or any blister that shows signs of infection.
The Safe Blister Draining Protocol
The first step is always hygiene. Thoroughly wash your hands, then clean the blister and the surrounding area with an alcohol swab to minimize the risk of infection. Next, properly sterilize your tool, which is typically a safety pin or needle. The best method is to heat the tip in a flame until it glows red, then allow it to cool completely before use.
When you’re ready, make one or two small punctures near the base of the blister, where it meets intact skin. The most crucial rule of draining is to gently massage the fluid out but do not remove the roof of skin. This collapsed blister roof acts as a natural, biological dressing that protects the raw, healing tissue underneath.
Dressing and Protecting the Blister
The universally recommended method for protecting a popped blister is the “donut hole.” Cut a piece of moleskin or thicker molefoam with a blister-size hole in the center that is slightly larger than the blister itself. A quality blister pad works well here. The donut is adhered to the skin surrounding the blister, so its padding elevates the sock and shoe away from the tender area, relieving all direct pressure. You can fill the open hole with antibiotic ointment.
If the skin has already torn off, you must treat the deroofed blister as an open wound. Clean it carefully, apply antibiotic ointment, and cover it with a sterile, non-stick dressing or a padded blister bandage. This scenario is the ideal time to use an advanced hydrocolloid gel dressing, like Compeed or a BlisterPod hydrocolloid. These are most effective on a clean, deroofed blister, as they create a cushioned, moist healing environment and provide significant pain relief.
Monitoring for Infection
An infected blister can quickly escalate from a simple inconvenience to a serious medical issue, so you must know the warning signs. The primary red flags of infection include increasing pain, redness that spreads away from the blister site, localized warmth, swelling, or the formation of cloudy, yellow, or green pus.
If you notice any of these signs, a medical evaluation is necessary. The most serious warning sign is the appearance of red streaks progressing up your leg from the wound. This is a potential sign of cellulitis or lymphangitis and should be treated as a medical emergency requiring immediate attention.
Key Takeaways: Walk On, Pain-Free
The most critical lesson is to shift your mindset from reactive treatment to proactive prevention for blister-free feet. Blister-free hiking is a skill that is learned and practiced, not simply a matter of luck.
- Think in Systems: Always consider your “Foot System”. Your feet, socks, and footwear must work together harmoniously. Even the best boots will fail with cotton socks, and the best socks can’t help a poorly-laced shoe.
- Stop Immediately: Master the on-trail discipline of stopping to address any hotspot the moment you feel it. Pushing through the initial irritation is the single most common mistake and the surest way to develop a full-blown blister injury.
- Be Prepared: Assemble a dedicated blister kit before your hike and know how to use every item in it. Your kit should contain tools for prevention, like Leukotape, and meaningful blister treatment.
Mastering your foot care ensures that your hiking memories are of the incredible views and rewarding miles, not the persistent blister struggles that held you back. Happy trails!
Frequently Asked Questions about Hiking Blisters
What is the absolute best tape to use for preventing blisters? +
Should I choose waterproof or non-waterproof hiking shoes to prevent blisters? +
What are the signs of an infected blister, and what should I do? +
Is it safe to drain a blood blister on the trail? +
We are a participant in the Amazon Services LLC Associates Program, an affiliate advertising program designed to provide a means for sites to earn advertising fees by advertising and linking to Amazon.com. As an Amazon Associate I earn from qualifying purchases. We also participate in other affiliate programs. The information provided on this website is provided for entertainment purposes only. We make no representations or warranties of any kind, expressed or implied, about the completeness, accuracy, adequacy, legality, usefulness, reliability, suitability, or availability of the information, or about anything else. Any reliance you place on the information is therefore strictly at your own risk. Additional terms are found in the terms of service.


