

In this article
- The Science of Sizing: Why Correct Pole Length Matters
- How Long Should Hiking Poles Be? Finding Your Base Length
- Adjusting on the Trail: Dynamic Sizing for Varied Terrain
- Advanced Techniques: Mastering Poles in Technical Situations
- Key Takeaways on Hiking Pole Length
- Frequently Asked Questions about Hiking Pole Sizing
This guide provides a definitive framework for determining the correct hiking pole length for your body and hiking style, moving beyond simple rules to answer the key question: what size hiking poles do I need? We’ll explore the science behind their use, showing you how to unlock peak performance as correct sizing can reduce joint load by up to 25%. You’ll master three core sizing methods, including the universal 90-degree rule and data-driven formulas. We will also detail how to dynamically adjust your trekking poles for any terrain. By the end, you’ll have the knowledge to advance your skills, transforming your hiking pole from a simple accessory into a high-performance tool that enhances endurance, improves stability, and protects your joints, ensuring you can remain a lifelong hiker on many good hikes to come.
The Science of Sizing: Why Correct Pole Length Matters

Understanding the biomechanics of pole use reveals why sizing is not a matter of simple preference but a critical factor in performance and long-term health. The right pole length optimizes force transfer and stability, directly impacting how your body interacts with the trail over every hike.
Reducing Joint Load and Impact
The most significant benefit of using trekking poles is the quantifiable reduction of stress on your lower body joints, particularly the knees, hips, and ankles. With every step on a descent, these joints absorb immense impact forces. Properly sized poles allow you to transfer a portion of this load to your arms and upper body, a welcome relief over many miles. This is one of many benefits like reduced joint strain that proper gear provides.
Scientific studies have demonstrated that a trekking pole can decrease the compressive force on the knees by as much as 25%. This is a direct result of the reduction in ground reaction forces. For hikers with pre-existing knee conditions or those carrying heavy packs, the cumulative load reduction over a long time can prevent debilitating pain and injury, which is critical for preserving joint integrity over a lifetime of hiking.
A shorter pole section length, often with the grip at navel height, is sometimes favored by experienced trekkers specifically to maximize this vertical load-bearing capacity. This technique feels like “lifting” weight off the legs, providing significant relief on steep and punishing descents.
Enhancing Stability and Balance
A bipedal hiker is inherently less stable than a quadruped, and trekking poles effectively turn a hiker into a four-legged creature. This widens your base of support on the trails and significantly reduces postural sway—the natural side-to-side movement your body makes to maintain balance. This is just as important for overall safety as staying on marked trails.
This stability advantage is most pronounced on challenging or uneven terrain like loose scree, slippery mud, snow patches, or a rocky mountain path. A secure pole plant can be the difference between a minor stumble and a serious fall, especially when a heavy backpack raises your center of gravity.
During hazardous situations like river crossings, poles become an indispensable safety tool. Using two poles to create a wide, stable tripod base allows you to probe the river’s depth and maintain firm contact while shuffling across, providing critical stability against the force of the current.
The Metabolic Paradox: Working Harder, Feeling Better
A fascinating aspect of pole use is that it objectively increases the overall metabolic cost of trekking. Scientific research analyzing the Effects of Backpack Load and Trekking Poles shows that using them leads to higher oxygen consumption (VO2) and heart rate. By these physiological metrics, your body is working harder.
The paradox lies in your subjective experience. Despite the increased metabolic output, the perceived exertion for many walkers can decrease, particularly on steep ascents. This is because the additional workload is distributed to the upper body, reducing the strain on the leg muscles, which are the primary source of perceived fatigue for most backpackers.
This phenomenon allows hikers to improve cardiovascular fitness and increase calorie expenditure without feeling more punishment. For a thru-hiker, this means being able to maintain a faster pace for longer on a long trek, though it requires careful planning to meet increased caloric needs.
How Long Should Hiking Poles Be? Finding Your Base Length
Determining your initial pole length is the foundational step for all other techniques. The goal is to establish a personalized baseline that you can then adjust for the terrain. This section covers the most reliable methods for answering “how tall should hiking poles be?”
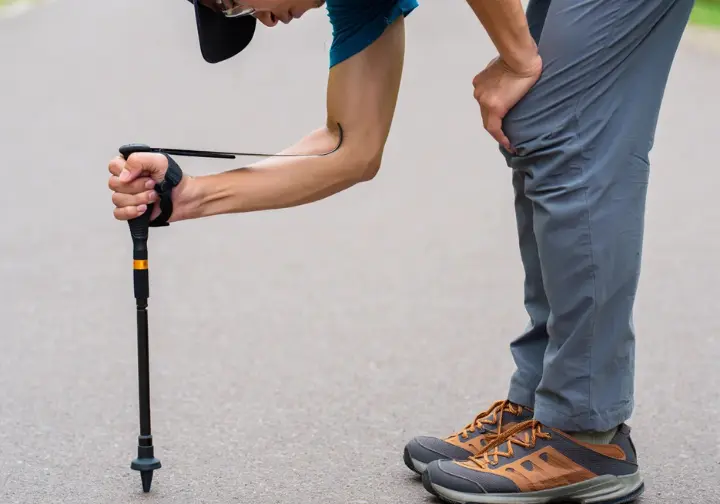
Method 1: The 90-Degree Rule
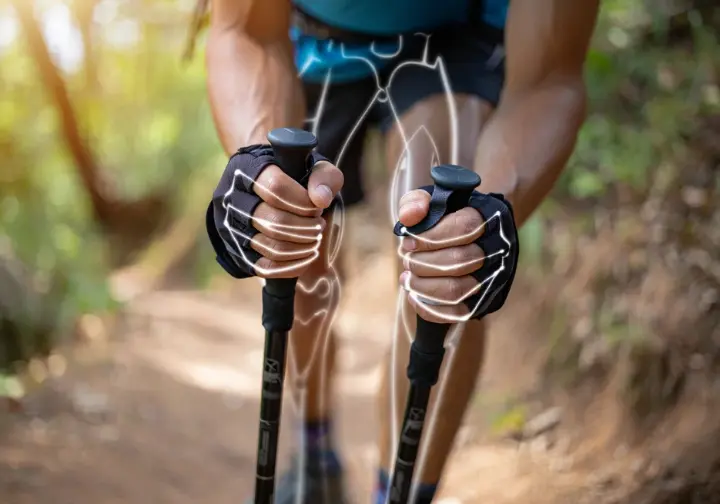
The most universally accepted method for finding your baseline pole length is the “90-degree rule.” This technique is the ideal starting point for hikers of all experience levels as it promotes a neutral, low-strain posture for walking on flat terrain. It’s a simple measurement that creates a right angle for optimal form.
To perform the measurement, stand upright on a flat surface while wearing your primary hiking shoes or boots. Hold the pole grip with the tip on the ground near your foot. Adjust the pole’s length until your elbow forms a 90-degree angle with your forearm parallel to the ground.
A useful variation for soft terrain like mud or snow is to flip the pole upside down. Place the handle on the ground and grip the shaft just above the basket until you achieve the same 90-degree elbow bend.
Method 2: Sizing Charts and Formulas
For hikers who prefer a data-driven approach or want a quick estimate before purchasing poles, sizing charts and formulas provide an excellent cross-check. These methods correlate a hiker’s height with a suggested pole length, helping to clear up any online debates about conflicting sizing suggestions.
A common formula is: Your Height in cm × 0.68 = Suggested Pole Length in cm. A 6-foot-tall hiker (183 cm) would calculate a suggested length of approximately 124 cm. How a manufacturer suggests poles varies, so always check their specific chart.
Most brands also provide charts with a recommended range. These are useful because body proportions can vary, so a range is often more practical than a single number for your hiking poles.
Hiking Pole Sizing Calculator
This tool helps you find a starting length for your hiking poles based on the common formula: (Your Height in cm × 0.68). Always check the manufacturer’s specific chart.
Your result will appear here.
Recommended Range:105 – 110 cm(Approx. 41″ – 43″)
Recommended Range:110 – 115 cm(Approx. 43″ – 45″)
Recommended Range:115 – 120 cm(Approx. 45″ – 47″)
Recommended Range:120 – 125 cm(Approx. 47″ – 49″)
Recommended Range:125 – 130 cm(Approx. 49″ – 51″)
Recommended Range:130 cm+(Approx. 51″+)
Recommended Range:130 cm+(Approx. 51″+)
Recommended Range:130 cm+(Approx. 51″+)
Method 3: Expert Deviations for Performance
While the 90-degree rule is an excellent baseline for stability, experienced hikers often deviate from it. Some, especially those with a background in using skis, prefer a longer setting for propulsion, similar to Nordic walking. They plant the poles behind their body to generate forward momentum.
Conversely, another school of thought advocates for a shorter setting, with the grip at navel height, to maximize vertical load transfer. Proponents argue it provides more relief for tired knees. Some experts may even opt for fixed-length poles set to a specific length for a known trek.
Adjusting on the Trail: Dynamic Sizing for Varied Terrain
Hey hikers! The primary advantage of adjustable poles is changing their length to match the terrain. Mastering this on-the-fly adjustment is key to maintaining efficiency and safety as the trail’s elevation and steepness change.
The Standard Protocol for Slopes
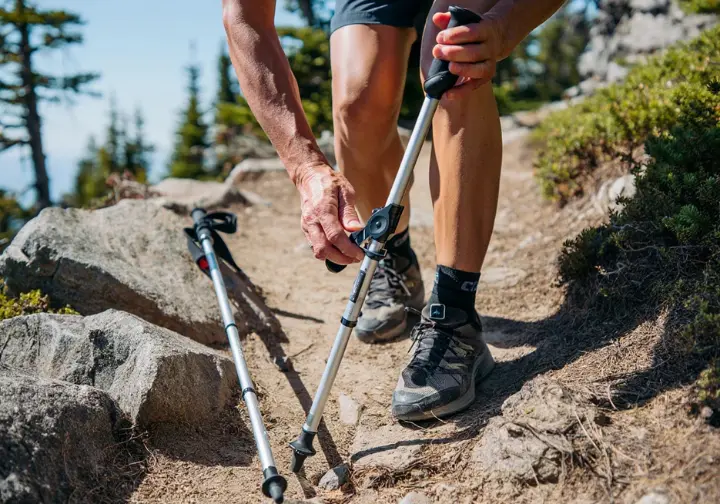
The established best practice for steep terrain is to modify pole length for any sustained change in gradient. For a steep uphill, you should shorten your poles by 5 to 10 centimeters. The greater the steepness, the shorter the pole should be. The correct pole height provides better leverage.
For long downhill sections, you should lengthen your hiking poles by 5 to 10 centimeters. This allows you to plant the poles further out in front of you, which helps you maintain a more upright posture. As many videos on Downhill Pole Adjustments demonstrate, this technique significantly absorbs impact on steep and punishing descents.
Traversing and Side-Hilling
When hiking across a slope, your poles should be adjusted asymmetrically. This is a crucial skill for staying comfortable and safe on contoured trails.
The uphill pole should be shortened significantly, while the downhill pole (your left pole if traversing left) should be lengthened. This allows you to plant both poles at a comfortable level relative to your body, keeping your shoulders level and your weight centered over your stride.
Without this adjustment, you would be forced to either uncomfortably crunch your body into the hillside or lean precariously away from it.
The Pragmatist’s Dilemma: Adjust vs. Adapt
Despite the benefits, many walkers find it tedious to stop and adjust their poles for every short up-and-down. This has led to an alternative technique that depends on an extended grip. The goal is to avoid stopping to change the pole section length.
Many modern poles feature a secondary grip made of foam or cork. This allows a hiker to “choke down” on the pole during brief uphill sections, effectively shortening its working length without using the locking mechanism.
For short descents, some hikers adapt by palming the top of the pole grip. For long, sustained grades, adjust the length; for rolling hills, use the extended grip.
Advanced Techniques: Mastering Poles in Technical Situations
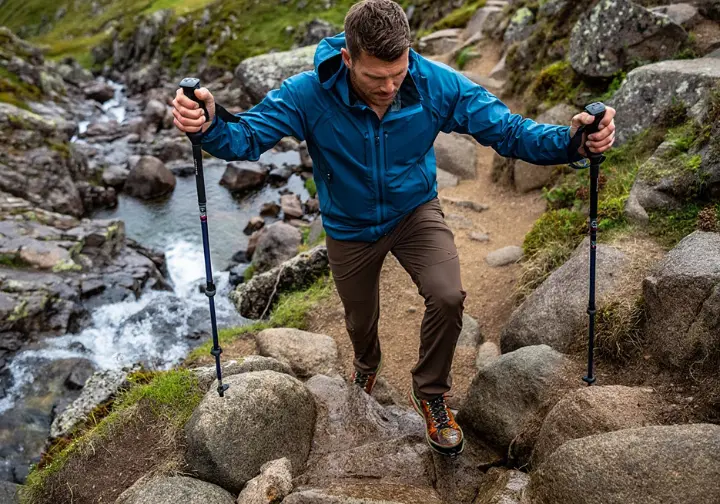
Beyond basic sizing, trekking poles are versatile tools for advanced maneuvers in challenging terrain. Mastering these techniques enhances both safety and efficiency.
The Double-Pole Plant for Power
On exceptionally steep sections or when navigating large rock steps, a basic alternating gait may not provide enough power. The double-pole plant is a highly effective technique. A good Uphill Pole Technique for Trail video can show this in action.
The technique involves planting both poles simultaneously ahead. From this anchored position, you engage your entire upper body to push up and through the step. This is especially useful on scrambles or when navigating large rock steps.
This maneuver provides maximum stability and gives you a significant burst of propulsion, conserving leg energy on the most demanding parts of a climb.
Safe River and Stream Crossings
River crossings are one of the most dangerous situations hikers face, and trekking poles are an essential piece of safety equipment. Before entering the water on soft terrain, poles should be lengthened and used to probe for depth and obstacles.
The safest technique is the tripod method. Face upstream, leaning into the current, and use your two poles to create a wide, stable base with your legs. Shuffle-step sideways, always ensuring at least two points of contact are firmly planted.
As a rule, a crossing should not be attempted if the water is fast-flowing and deeper than your mid-thigh. Poles provide the stability needed to resist the force of the water.
The Pole-Supported Shelter System
For ultralight backpackers and thru-hikers, a key advantage of trekking poles is their dual-purpose function as the structural frame for a non-freestanding tent or tarp. This system, often using either adjustable or a fixed trekking pole, eliminates the need for dedicated tent poles.
The most common shelter configurations are the A-frame, where two poles act as vertical supports, and the lean-to. The poles must be set to the precise length specified by the shelter manufacturer to ensure a taut, stable pitch.
To prevent damage, the pole should be oriented with the handle on the ground and the tip pointing up into a reinforced grommet on the tarp.
Key Takeaways on Hiking Pole Length
Mastering your hiking poles is a journey of personal discovery, but it starts with a solid foundation. The “correct” length is not a single number but a dynamic setting that you control to maximize performance on the trail.
- Start with the 90-Degree Rule: Use the 90-degree elbow bend as your universal baseline for flat hiking and rolling terrain. It’s the most reliable starting point.
- Adjust for the Slope: Always shorten your poles by 5-10 cm for sustained ascents and lengthen them by 5-10 cm for sustained descents.
- Don’t Be Afraid to Experiment: Once you’re comfortable, experiment with slightly longer or shorter settings to see what feels best for your body and hiking style.
- Invest in Features You’ll Use: On rolling terrain, an extended grip is a practical feature that allows you to adapt without constant adjustment.
- Proper Use is a Skill: Pole length is one part of the equation. Proper gait and using wrist straps correctly are equally important for efficiency.
Frequently Asked Questions about Hiking Pole Sizing
What is the difference between trekking poles, walking sticks, and Nordic walking poles? +
Do I need special baskets for hiking in snow or mud? +
What if my adjustable poles start slipping? +
How tight should I make the wrist straps? +
We are a participant in the Amazon Services LLC Associates Program, an affiliate advertising program designed to provide a means for sites to earn advertising fees by advertising and linking to Amazon.com. As an Amazon Associate I earn from qualifying purchases. We also participate in other affiliate programs. The information provided on this website is provided for entertainment purposes only. We make no representations or warranties of any kind, expressed or implied, about the completeness, accuracy, adequacy, legality, usefulness, reliability, suitability, or availability of the information, or about anything else. Any reliance you place on the information is therefore strictly at your own risk. Additional terms are found in the terms of service.


