

In this article
- The Foundation – Sourcing and Selecting Your Timber
- The Art of Patience – Curing and Preparing the Wood
- The Transformation – From Branch to Ergonomic Staff
- The Final Touches – Finishing and Customization
- The Staff in Action – Practical Use and Advanced Insights
- Conclusion: Honoring the Path Ahead with a Self-Made Companion
- Frequently Asked Questions about Making a Hiking Stick
This project is more than a simple DIY craft; it is an act of self-reliance and a way for the dedicated hiker (senderista) to forge a deeper connection with the outdoors. This guide on how to make a hiking stick represents the creation of a true companion for the trail. We will move beyond simple decoration to cover every step required to turn a found branch into a functional, ergonomic, and personal piece of hiking gear. This master-level guide details everything from responsible sourcing and wood science to detailed crafting, finishing, and field use. This is a rewarding process that deepens the hiking experience, resulting in a perfect hiking companion.
The Foundation – Sourcing and Selecting Your Timber

This first critical phase of the project takes place in the wilderness. It establishes the principles of responsible collection and provides the technical knowledge needed to select the ideal piece of timber for a strong, durable, and lightweight hiking staff. Learning how to make hiking stick begins in the forest.
The Hiker’s Ethos: Responsible and Legal Wood Sourcing
This project begins with a non-negotiable ethical framework grounded in the Leave No Trace Seven Principles. Cutting live or standing dead trees is strictly prohibited, as they are vital components of the forest ecosystem, providing habitat and preserving the natural landscape. Any action should align with the principle to Minimize Campfire Impacts and other aspects of responsible trail use.
The only ethically sound source for a hiking stick is wood that is “down and dead”—a downed branch already on the ground and fully detached from its source. This practice minimizes your impact and ensures no harm is done to a living organism. Before collecting any wood from a local forest or state forest, you must check with the local land management agency. Regulations vary drastically, and many parks may ban collection entirely. It is your responsibility to know and follow local rules. Some guidelines may permit collecting a single stick for personal use, but verification is always the first step.
Wood Species Analysis: Strength, Weight, and Durability
The choice of wood dictates the final performance characteristics of your walking stick. Hardwoods are denser, stronger, and generally preferred over a soft wood like pine or spruce, which are lighter but less durable. Top-tier hardwoods include Hickory, the gold standard for strength; Ash, which offers an excellent balance of strength and flexibility; and Oak, known for being durable. Hazel is another excellent and accessible choice, as it often grows straight and is easy to work. Some makers even have success with willow if a thick, dry piece is found.
This table provides objective data to help you select a wood that matches your goals.
| Wood Species | Janka Hardness (lbf) | Density (lb/ft³) | Bending Strength (psi) | Hiker’s Notes |
|---|---|---|---|---|
| Hickory | 1,820 | 51 | 20,200 | The strongest choice. Heavy, but nearly unbreakable. An heirloom-quality wood. |
| Ash (White) | 1,320 | 42 | 15,000 | The classic choice for tool handles. Great shock absorption and flex. |
| Oak (White) | 1,360 | 47 | 15,200 | Very strong and highly rot-resistant. A heavy but extremely durable option. |
| Hazel | ~1,100 (estimated) | 38 | ~13,000 | Grows straight, is strong for its weight, and seasons well. A top pick for makers. |
| Cedar (Aromatic) | 900 | 33 | 8,800 | Very lightweight and aromatic, but soft and not as durable for hard use. |
Other viable options include Bamboo for its strength-to-weight ratio, or the unique “Devil’s Walking Stick,” though you should find more Devil’s Walking Stick information before selecting it due to its thorny brush.
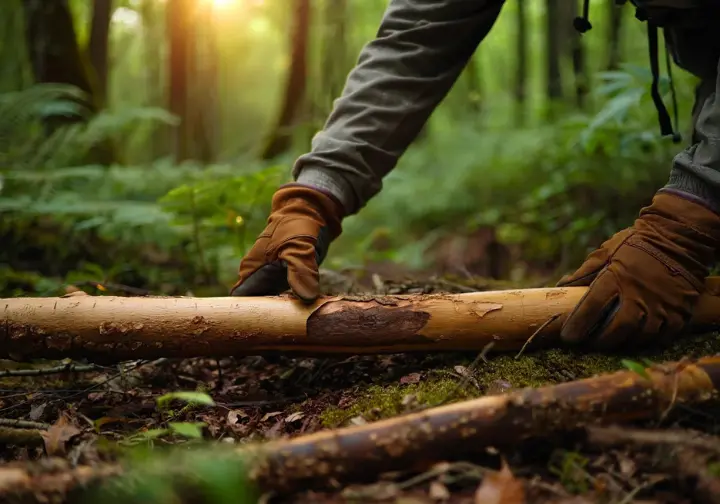
How to Make a Hiking Stick: Identifying the Perfect Branch
When searching for the perfect branch on the forest floor, look for one that is dead but not decayed. Test its soundness by whacking it firmly against a rock or log; a solid “thud” indicates good wood. Select a straight stick to ensure structural integrity. While minor curves add character, severe “dog-leg” bends create weak points. A decent walking stick starts with a solid, straight piece of trunk wood.
Look for a starting diameter of 1 to 2 inches at the top. Remember that wood can shrink as it dries, so starting with a substantial piece ensures the final stick will have a comfortable feel. For a truly versatile hiking staff, a longer stick is preferable. Select a piece that is significantly longer than your final desired stick length to account for trimming. The “chin or neck height” rule is a good guideline for a proper hiking stick staff, allowing multiple hand positions for your hike.
The Art of Patience – Curing and Preparing the Wood
This is the most time-intensive phase of the project: seasoning the wood. This process ensures the final new hiking stick is strong, stable, and free from defects like cracks and warping.
The First Step: Debarking Techniques and Timing
Removing the bark from your green stick allows for even drying and creates a smooth, comfortable surface. Peeling a fresh, wet wood stick is far easier. This method, however, accelerates drying and significantly increases the risk of the wood cracking. Examining the stick beforehand is key.
Leaving the bark on during the initial drying phase forces the wood to dry more slowly and evenly, greatly reducing the risk of splits. This results in a more stable final product, though removing the dried-on bark later is more labor-intensive. For debarking, use a sharp knife or drawknife with shallow, controlled strokes, always cutting away from your body for safety.
The Science of Seasoning: A Deep Dive into Air-Drying
Seasoning is the process of reducing the wood’s moisture content. Drying green woods makes the wood lighter, stronger, and, most important, stabilizes it to prevent future warping. For a simple rustic stick, a few weeks of drying may suffice. For a high-quality, heirloom-grade staff, proper seasoning can take months or even years.
A good rule of thumb for air-drying hardwood lumber is to allow one year of drying time for every inch of thickness. The optimal conditions for drying are in a cool, dry, well-ventilated area, protected from sun and rain. You can learn about the practicalities in air-drying lumber from university extensions. To ensure airflow around the entire stick, elevate it off the ground.
Preventing Defects: How to Avoid Cracks and Warping
Cracking, or “checking,” is a common frustration with many wooden sticks. It occurs because moisture escapes much faster from the ends, creating stress that splits the grain woods. The single most important solution is to seal the cut ends of the branch immediately. This critical step slows moisture loss from the ends, forcing the wood to dry more evenly.
You can seal the ends with melted wax, a dab of paint, or a commercial wood sealer. To prevent warping, store the current stick so that it stays straight. You can achieve this by bundling it tightly with other sticks or strapping it securely to a rigid object like a piece of lumber during the drying process. Similar to the principles for drying firewood, controlling moisture loss is the goal.
The Transformation – From Branch to Ergonomic Staff
With a properly seasoned blank, you can now begin the active crafting process. This stage of trail making focuses on transforming the raw wood into a functional and comfortable tool, emphasizing precise sizing, smooth shaping, and the ergonomics of the handgrip.
Sizing for the Trail: Determining Your Ideal Length
Once the wood is fully seasoned, you can make the final cut for length. A true hiking staff for serious trekking benefits from being longer than a simple walking stick for a stroll. The traditional sizing method is fine for flat ground but limited on varied mountain terrain.
We strongly recommend a final length that reaches your chin or neck. This provides extra length, allowing you to “choke up” on the staff during steep ascents and hold the very tip for better reach and stability on descents. This versatility distinguishes a high-performance hiking stick from a casual walking stick and is a feature you will appreciate on challenging trails.
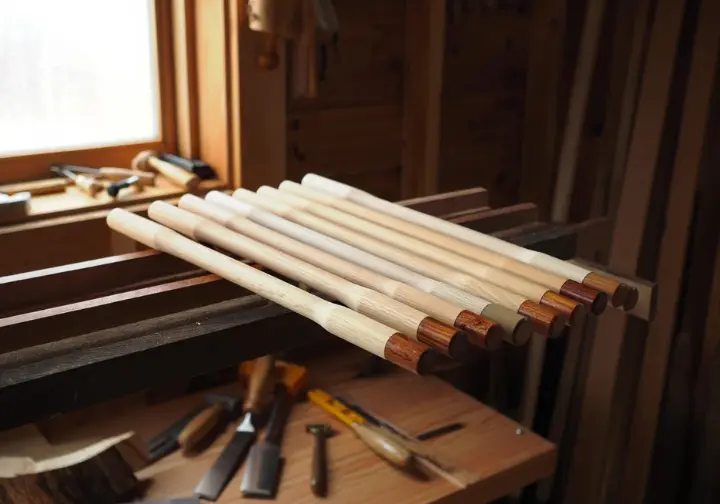
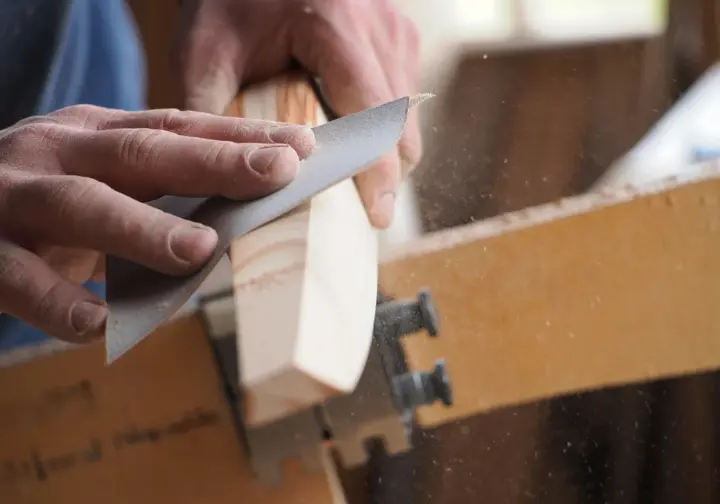
The Shaping Process: From Rough Branch to Smooth Staff
For shaping and smoothing the staff, a variety of tools can be employed, from knives and a flat wood rasp to optional power tools. Carefully smooth down any knots or stubs from side branches and twigs. These must be made flush with the shaft to prevent discomfort.
Sanding is the most time-consuming yet rewarding step. Progress through increasingly finer grits of sandpaper—for example, starting with a coarse 80-grit, moving to 120-grit, and finishing with a fine 220-grit. After the final sand, clean all dust from the wood with a tack cloth or a natural fiber brush dampened with mineral spirits, not water, to avoid raising the grain.
Ergonomics in Hand: Designing a Functional Grip
A focus on ergonomic design promotes long-distance comfort and endurance. A poorly shaped grip can lead to fatigue. Eliminate all sharp edges and contour the handle to be slightly oval, preserving the natural shape of the wood where possible. The most important feature is the “palm swell”—a slight bulge that fits the hollow of your palm.
This swell increases the surface contact area, allowing for a more relaxed, secure hold that distributes pressure evenly. This reduces muscle strain on the wrist, a concept well-understood in professional Hand Tool Design principles. You can carve this ergonomic grip or just smooth the wood for comfortable natural handles. Wearing rubber gloves can help your grip during the carving process.
The Final Touches – Finishing and Customization
This is the final stage of learning how to make a walking stick for hiking, where the shaped wood is protected and customized. These touches transform the staff into a complete and reliable piece of hiking gear.
Protecting Your Investment: Choosing the Right Finish
A finish is necessary to protect the wood from moisture and dirt. The choice of finish is a decision about durability and feel. Polyurethane offers high protection but can have a plastic feel. Penetrating oils give a natural feel but require more maintenance. Knowing the best outdoor wood finish is helpful. This is how you create excellent hiking sticks.
| Wood Species | Janka Hardness (lbf) | Density (lb/ft³) | Bending Strength (psi) | Hiker’s Notes |
|---|---|---|---|---|
| Hickory | 1,820 | 51 | 20,200 | The strongest choice. Heavy, but nearly unbreakable. An heirloom-quality wood. |
| Ash (White) | 1,320 | 42 | 15,000 | The classic choice for tool handles. Great shock absorption and flex. |
| Oak (White) | 1,360 | 47 | 15,200 | Very strong and highly rot-resistant. A heavy but extremely durable option. |
| Hazel | ~1,100 (estimated) | 38 | ~13,000 | Grows straight, is strong for its weight, and seasons well. A top pick for makers. |
| Cedar (Aromatic) | 900 | 33 | 8,800 | Very lightweight and aromatic, but soft and not as durable for hard use. |
Apply multiple thin coats rather than one thick one. Hanging the stick prevents drips. For film-forming finishes, lightly “scuff” the dry coat with very fine sandpaper before applying the next. This gives the new coat a surface to grip, ensuring a strong finish.
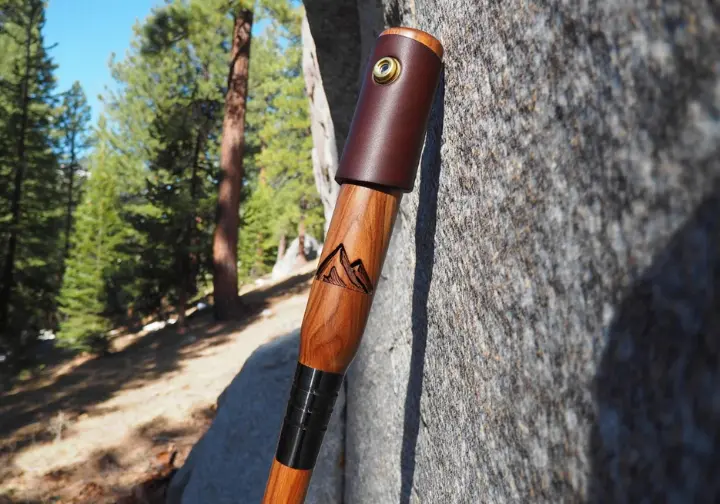
Enhancing Functionality: Grips, Straps, and Tips
Practical customizations enhance the staff’s function and safety. If you didn’t carve a grip, you can add one. A Paracord wrap provides excellent grip and emergency cordage. A leather wrap offers a classic look. A wrist strap or lanyard is highly important. A simple method for installation is to drill a hole through the staff below the grip area and tie a loop of strong cord through it.
Protecting the bottom tip with a ferrule is also wise to prevent the wood from splitting. A simple wedge of hardwood can be driven into a pre-drilled hole in the tip for reinforcement. Options include a replaceable rubber tip, a traditional copper cap, or a metal spike for soft ground. This will be your new hiking buddy for many miles.
Personalizing Your Staff: An Introduction to Decorative Craft
Decorative techniques can turn your functional staff into a unique work of art that any rugged mountain man would be proud of. Wood burning is an accessible way to add patterns. For those less confident, transfer sheets allow a printed design to be adhered to the wood as a template for burning.
More advanced techniques include relief carving. You can also create a stone inlay, where a channel is carved, filled with crushed stone mixed with adhesive, and then sanded flush. Many artisans have perfected their own crushed stone inlay techniques for stunning results. Another practical feature is to embed a small button compass into the top of the staff to help you navigate a steep mount or deep ravine.
The Staff in Action – Practical Use and Advanced Insights
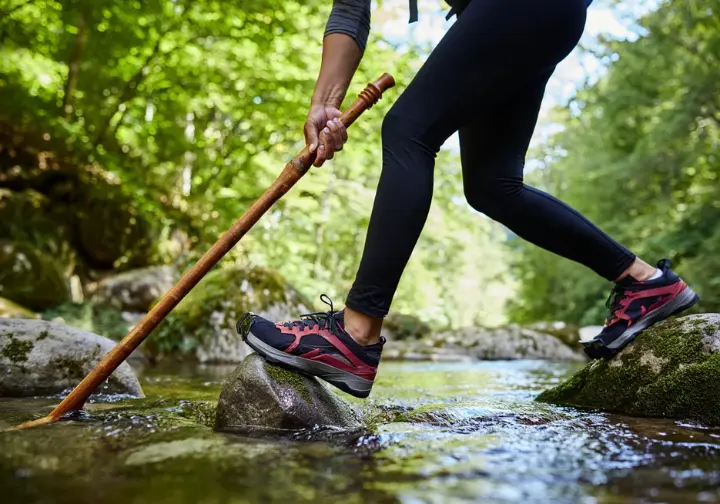
This final section bridges the gap between the workshop and the wilderness. It explores the staff’s versatile applications, from simple walking to advanced wilderness utility.
Beyond Walking: Bushcraft and Survival Applications
A sturdy wooden staff is a multi-functional bushcraft tool that can perform tasks a lightweight trekking pole cannot. It can serve as a ridgepole or center pole for an emergency tarp shelter, useful when you’re deep in the woods with just your backpack. Carving a small notch near the top helps secure guylines.
The staff acts as an extension of your senses. It can be used to probe the depth of water, test the stability of a snow bridge, or check for loose rocks or soft ground before you commit your weight. It’s invaluable for maintaining your pace over slippery logs. A solid piece of hardwood can also be used for security. As many bushcraft experts explain, learning how to make a walking staff is a foundational skill for any serious outdoors person.
On-Trail Troubleshooting: Addressing Common Problems
This guide can help with issues that arise. If your wood cracks, the cause is almost always drying too quickly. A warped stick is caused by uneven drying. While some minor warps can be steamed out, proper storage is the real solution.
On the trail, rubber tips can wear out. You might consider more durable options for your hiking sticks. If your hand and wrist get tired and sore on long hikes, it may be linked to an improperly shaped grip. This is especially true on tough off-trail bushwhacks where you rely on your staff heavily.
Handcrafted Staff vs. Modern Trekking Pole: An Honest Comparison
The choice between traditional walking sticks and a modern synthetic trekking pole is one of hiking philosophy. The wooden staff offers unmatched durability. It is superior for bushcraft and provides a deep personal connection. The cons are that it is heavier and has a fixed length.
The Case for Trekking Poles is that they are extremely lightweight, highly adjustable, and offer shock absorption. They also provide bilateral support. The right choice depends on your personal priorities, whether you value the self-reliant feel of a wood staff or the modern efficiency of a trekking pole.
Conclusion: Honoring the Path Ahead with a Self-Made Companion
The process of crafting a hiking stick is a full-circle one that begins and ends in the wild. It starts with a respectfully sourced branch and culminates in a reliable companion. The patient curing, careful shaping, and thoughtful finishing are as rewarding as the final product. By understanding wood science, responsible sourcing, and ergonomic design, you transform a humble piece of timber into a functional work of art. This project is a tangible expression of a love for the trail and a commitment to self-reliance, honoring the path ahead with a tool shaped by your own hands.
Frequently Asked Questions about Making a Hiking Stick
What’s the fastest way to dry a stick without it cracking? +
What is the best all-around wood for a beginner to use? +
My finished staff feels slippery. What’s the best finish for a secure grip? +
Do I really need a wrist strap? +
We are a participant in the Amazon Services LLC Associates Program, an affiliate advertising program designed to provide a means for sites to earn advertising fees by advertising and linking to Amazon.com. As an Amazon Associate I earn from qualifying purchases. We also participate in other affiliate programs. The information provided on this website is provided for entertainment purposes only. We make no representations or warranties of any kind, expressed or implied, about the completeness, accuracy, adequacy, legality, usefulness, reliability, suitability, or availability of the information, or about anything else. Any reliance you place on the information is therefore strictly at your own risk. Additional terms are found in the terms of service.


