

In this article
- The Foundation First: Your Core Comfort & Safety System
- The Ten Essentials: Your Backcountry Safety Net
- From List to Mindset: The Modern Systems Approach
- 1. Navigation (To Find Your Way)
- 2. Illumination (To See in the Dark)
- 3. Sun Protection (To Prevent Burns & Damage)
- 4. First-Aid (To Treat Minor Injuries)
- 5. Repair Kit & Tools (To Fix Broken Gear)
- 6. Fire (For Emergency Warmth & Signaling)
- 7. Emergency Shelter (To Protect from Elements)
- 8. Extra Food (For Unexpected Delays)
- 9. Extra Water (To Stay Hydrated)
- 10. Extra Clothes (For Emergency Insulation)
- Smart Spending: Building Your Beginner Hiking Kit on a Budget
- Beyond the Basics: Gear Considerations for Women
- Conclusion: Preparedness is a Skill, Not Just a Checklist
- Frequently Asked Questions about Beginner Hiking Equipment
This guide moves beyond a simple checklist to teach the philosophy of preparedness, exploring the ‘why’ behind each piece of hiking equipment for beginners to transform you from a novice into a confident, self-sufficient hiker. We understand that feeling overwhelmed by endless gear options, conflicting advice, and the fear of making costly mistakes can be a major hurdle for any beginner. That’s why this guide provides a definitive, step-by-step framework for assembling your essential hiking gear for beginners, focusing on safety, value, and practical knowledge. We will start with the three most critical pieces of gear that directly impact your comfort on the trail, then build your safety net with the modern “Ten Essentials” system. By the end, you will know not just what to pack for your hikes, but why you’re packing it, empowering you to make smart decisions for any day hike or future adventure.
The Foundation First: Your Core Comfort & Safety System

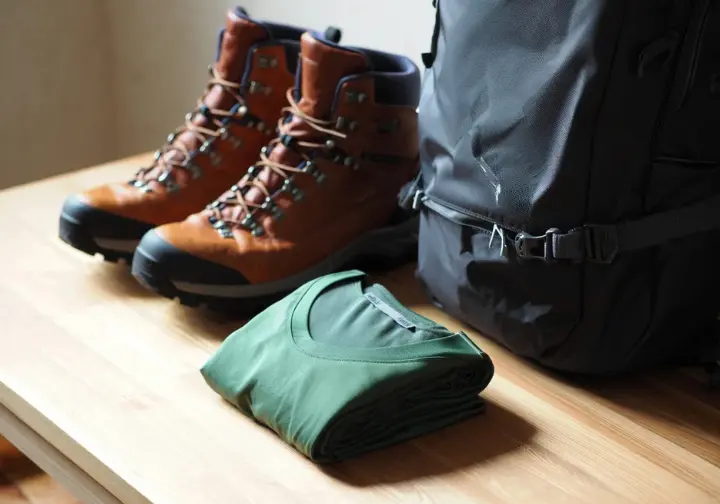
Before diving into the full safety checklist, we must address the three items that have the biggest impact on a beginner hiker’s physical comfort and ability to complete a hike safely. Getting this right prevents the most common issues like blisters, back pain, and dangerous temperature swings during outdoor recreation.
Choosing Your First Hiking Footwear
This is the single most important gear decision a beginner will make. Improper footwear is the leading cause of on-trail misery and can lead to trip-ending blisters or injuries. Your choice between hiking boots, hiking shoes, and trail runners depends entirely on the type of terrain you’ll be on and your personal support needs. Lightweight trail-running shoes are flexible and ideal for well-maintained trails, while high-ankle boots offer maximum ankle support and protection for rocky, uneven ground. Getting familiar with how to shop for hiking boots is a critical first step.
When selecting your hiking boot or shoe, focus on three key features: traction, support, and waterproofing. Deep, widely-spaced lugs on the outsole provide grip on the hiking trail. A stiff-enough midsole prevents foot fatigue. A waterproof but breathable membrane like Gore-Tex is a valuable feature for most climates, preventing water from getting in while allowing sweat to escape, which is critical for blister prevention. The process of choosing the right hiking footwear will set the stage for all your future adventures.
Proper fit is non-negotiable and the primary defense against blisters. Always shop for boots in the afternoon when your feet are slightly swollen and wear the type of thick socks you’ll hike in. Ensure there’s a thumb’s width of space between your longest toe and the end of the shoe. Crucially, you must break in new gear on shorter hikes before committing to a long hike to identify and address any potential hot spots.
Selecting the Right Daypack
A daypack is the command center for your hike, carrying all your essentials, so choosing the right one is crucial for comfort and organization. The most important factor is capacity, measured in liters. For most day hikes, a 20-30L pack provides ample space for the Ten Essentials without encouraging overpacking. A common beginner mistake is carrying a heavy pack, which leads to unnecessary weight and fatigue. Many backpacks are available, so find one that fits your needs.
Fit is as important for a hiking backpack as it is for boots. An ill-fitting pack will cause back and shoulder pain. Look for a pack that matches your torso length (not your height) and has an adjustable hip belt and sternum strap with well-designed straps. A properly fitted hip belt should carry about 80% of the pack’s weight, taking the load off your shoulders. Knowing how to select a day hiking rucksack properly is a skill in itself.
Key features to look for in a beginner daypack include a hydration reservoir sleeve, side pockets for water bottles, and load-lifter straps. A pack cover is also a wise addition for rainy weather. For more detailed guidance, the Washington Trails Association offers excellent advice on how to choose a backpack. Good back-panel ventilation is also a significant plus, helping to minimize the dreaded “sweaty back” syndrome.
The Art of Layering: What to Wear Hiking
The phrase “cotton kills” is a cardinal rule in hiking for a life-saving reason. Cotton absorbs moisture and dries very slowly, losing all insulating properties when wet. This can lead to hypothermia, even in mild weather. Always choose the right gear/clothing made from moisture-wicking fabrics like merino wool or synthetics (polyester, nylon) that pull sweat away from your skin to keep you dry and comfortable.
The layering system is a versatile technique for managing your body temperature. It consists of three parts: a moisture-wicking base layer, an insulating mid-layer like a fleece or puffy jacket, and a protective outer shell like a hiking coat or rain jacket. This system allows you to add or remove layers as your hiking pace or the weather changes. Selecting the right clothing for hiking is about function, not fashion, and includes items like hiking pants.
Your choice of hiking socks is just as critical as your boots for preventing blisters. They should be made of merino wool or a synthetic blend, never cotton. Quality socks provide cushioning, wick moisture, and fit snugly without bunching. This creates the perfect environment for happy, blister-free feet, whether you’re on easy trail routes or challenging hikes.
The Ten Essentials: Your Backcountry Safety Net

This is the heart of hiker preparedness. Originally a simple list of items, it has evolved into a smarter “systems” approach that encourages you to think about function. Carrying these systems ensures you can respond to an emergency and safely spend an unexpected night in the wilderness.
From List to Mindset: The Modern Systems Approach
The Ten Essentials concept was originated in the 1930s by The Mountaineers, a Seattle-based club, to improve outdoor safety. It was formally published in their seminal 1974 book, Mountaineering: The Freedom of the Hills, with the purpose of enabling hikers to prevent emergencies and to survive an unplanned night outside. This historical context underscores the system’s proven, life-saving legacy for backcountry hikers.
The “Classic” list consisted of ten specific items. The “Modern Systems” approach, popularized by organizations like REI, re-frames the list around ten functional systems, such as Navigation and Illumination. This encourages critical thinking. Instead of just checking “knife” off a list, you ask, “How will I repair my gear?” which might mean carrying a multi-tool and duct tape. Learning what are the ten essentials is a foundational skill for any hiker.
This shift to a systems-based mindset is a superior mental model for beginners because it promotes adaptability. The gear you pack for your “Navigation” system might change depending on the trail’s remoteness or your familiarity with it. This flexible thinking—a core skill of an experienced hiker—is why a flexible systems approach is so important to learn.
1. Navigation (To Find Your Way)
- The Why: Getting lost is a primary cause of search and rescue (SAR) incidents. A review of search and rescue in US National Parks showed that many operations involved victims who were not injured, but simply lost on the trails. Your navigation system is your primary tool to prevent this.
- The What: This system must include a non-battery-dependent backup. The gold standard is a physical topographic map of the area and a baseplate compass. Your digital tools include a GPS device, a smartphone with a navigation app like Gaia GPS (with downloaded trail maps), and a power bank.
- How to Choose: Every hiker, without exception, should carry a paper map and compass and know the basics of using them to navigate from the trailhead to the summit. For your digital tool, a smartphone is sufficient for most beginner day hiking on well-marked trails. Truly mastering map-reading skills is a goal to work towards.
2. Illumination (To See in the Dark)
- The Why: A simple hike that takes longer than expected can easily end in darkness, a leading factor in disorientation and injuries from trips and falls. Having a reliable light source is non-negotiable, even if you plan to be back to your pickup at the trailhead long before sunset.
- The What: The best tool for this system is a headlamp, as it keeps your hands free for using trekking poles or scrambling. Your backup can be a small flashlight. Always carry spare batteries for your primary light. Your pack should always contain some form of illumination (headlamp/flashlight).
- How to Choose: For a beginner, a basic headlamp like the Petzl Tikkina is an excellent choice. Look for a model with at least 150-200 lumens and a red-light mode to preserve night vision. As explained by Washington State Parks, these are part of the 10 essentials for every outdoor adventure.
3. Sun Protection (To Prevent Burns & Damage)
- The Why: Sunburn is a serious issue that can ruin a hike. Exposure to UV radiation is often higher at altitude and on reflective surfaces like snow or water, making protection important even on cloudy days under a thick forest canopy.
- The What: This is a multi-part system. It includes sunglasses, broad-spectrum sunscreen (SPF 30+), a wide-brimmed hat, and sun-protective clothing (with a UPF rating). According to the American Hiking Society, this is one of the core 10 Essentials of Hiking.
- How to Choose: Choose sunglasses that block 99-100% of UVA/UVB rays. For clothing, a simple long-sleeve synthetic shirt and a hat are great starting points. Hiking hats are crucial for UV protection, providing direct coverage. Remember to reapply sunscreen frequently.
4. First-Aid (To Treat Minor Injuries)
- The Why: While serious injuries are rare, minor cuts, scrapes, and especially blisters are extremely common. A first-aid kit allows you to treat these issues on the spot, preventing them from becoming a bigger problem.
- The What: You can buy a pre-made hiking first-aid kit or build your own. It should contain supplies for wound care (bandages, antiseptic wipes, gauze), blister treatment (moleskin), common medications, and personal items like menstrual supplies.
- How to Choose: For a beginner, a compact, pre-made kit is a great starting point. As you gain experience, you’ll learn to customize it. Always inspect your kit before each hike to restock used items. Having a first-aid kit is non-negotiable for safety.
5. Repair Kit & Tools (To Fix Broken Gear)
- The Why: Gear can fail. A broken shoelace, a torn backpack strap, or a malfunctioning trekking pole can create a problem miles from anywhere. A small repair kit with the right tool allows you to make temporary fixes to get you home safely.
- The What: This system is simple but powerful. At a minimum, it should include a multi-tool or knife, and a small roll of tenacious tape or duct tape. Cable ties can also be useful.
- How to Choose: You don’t need a large multi-tool. A simple model with a knife blade, pliers, and a screwdriver is sufficient. Tape is one of the most versatile repair items. Strong trekking poles are great, but knowing how to fix one is even better. The Sierra Club includes this in their version of the Ten Essentials from the Sierra Club.
6. Fire (For Emergency Warmth & Signaling)
- The Why: In an unexpected overnight situation, a fire provides warmth to stave off hypothermia and can be a signal. This is an emergency-only tool and must be used responsibly, following Leave No Trace principles and local fire regulations, especially in national forests and other wilderness areas.
- The What: Your fire-starting kit must be waterproof and contain multiple ignition methods. This includes a lighter, waterproof matches, and a fire starter like dryer lint soaked in wax or commercial cubes.
- How to Choose: A simple Bic lighter is most reliable. Your backup should be waterproof matches. Practice using your fire starter at home in a safe environment like a designated campsite so you are confident in an emergency. While this is for emergencies, understanding fire is part of outdoorsmanship, much like with campfire cooking.
7. Emergency Shelter (To Protect from Elements)
- The Why: If you are injured or lost and forced to spend an unplanned night out, exposure to wind and rain is a primary cause of hypothermia. An emergency shelter protects you from these elements.
- The What: This doesn’t mean carrying one of the multi-person tents on a day hike. The most common emergency shelter is an ultralight, heat-reflective emergency bivy or space blanket. These items are small, light, and can be life-saving.
- How to Choose: An emergency bivy is generally superior to a simple blanket as it’s shaped like a sleeping bag. They are inexpensive and compact enough that there is no excuse not to have one. It is a very different piece of equipment from a full trekking tent used for backpacking or camping.
8. Extra Food (For Unexpected Delays)
- The Why: A strenuous hike might take longer than planned. Having extra food prevents the energy bonk that can lead to poor decision-making and provides the calories to stay warm in an emergency.
- The What: You should carry enough food for your planned hike, plus at least one extra day’s worth of emergency food like extra trail mix or energy bars. This emergency food should be no-cook and non-perishable.
- How to Choose: Good options for emergency average camping food include dense energy bars, nut butters, and dried fruit. Effective trail nutrition is about more than just your planned mid-hike lunch break; it’s about being prepared for the unexpected. Keep your emergency rations separate.
9. Extra Water (To Stay Hydrated)
- The Why: Dehydration impairs physical and cognitive function, increasing your risk of heat exhaustion and poor judgment, especially on hot hikes. You need enough water and a way to treat more from natural sources.
- The What: Your hydration system consists of the water you carry and a method to treat more. Treatment methods include squeeze filters like the Sawyer Squeeze, UV purifiers, or chemical tablets.
- How to Choose: Plan to drink about a half-liter of water per hour, and adjust upwards for heat and exertion. A squeeze filter is an excellent, lightweight choice for a beginner’s water treatment system. It’s helpful to understand the difference between water filters and purifiers when making your selection.
10. Extra Clothes (For Emergency Insulation)
- The Why: This system is distinct from the layers you wear while actively hiking. These are extra insulating clothes, kept dry in your pack, for an emergency. They are your primary defense against hypothermia on cold summits or in unexpected weather.
- The What: This should include an extra insulating layer. Good options include a puffy jacket, an extra fleece layer, a warm hat, and an extra pair of wool socks. These items should be packed in a waterproof dry sack.
- How to Choose: The specific cold-weather gear will depend on the season, but the principle remains: pack one more warm layer than you think you will need. A packable puffy jacket is a great investment. The principles are similar to those used in winter hiking layering, just adapted for your specific conditions.
Smart Spending: Building Your Beginner Hiking Kit on a Budget

The cost of expensive gear shouldn’t be a barrier to getting outdoors. With a strategic approach, you can assemble a safe and effective kit without breaking the bank. The key is knowing where to invest and where you can find affordable alternatives, including quality second hand gear.
Worthy Splurges vs. Smart Savings
Your hiking footwear is the number one place to invest. Well-made, properly fitting shoes will pay dividends in comfort and injury prevention. A quality, well-fitting backpack is the second most important investment. You can save significantly on apparel. Any non-cotton athletic wear from an outdoor recreation store like Decathlon or even Target will work perfectly well for a beginner. You can also save by building your own first-aid kit.
The strategy is to prioritize purchases based on impact. Start with quality footwear and socks, even if it means finding discounted hiking boots to make it affordable. Use an old school backpack if you must, and wear gym clothes. As you hike more, you can progressively upgrade other pieces of your regular hiking gear.
Top Budget-Friendly Gear Picks
You don’t need high-end brands to be safe and comfortable. Many companies produce excellent, reliable gear. For rainwear, the Frogg Toggs Ultra-Lite² is a legendary budget option. For trekking poles, Cascade Mountain Tech offers carbon fiber poles that are cheaper than big-name brands. In illumination, the Petzl Tikkina or Black Diamond Spot Lite are affordable headlamps perfect for beginners.
Retailers like Decathlon are a fantastic resource for budget-friendly packs, apparel, and accessories. By researching these value-oriented brands and exploring budget-conscious approaches like buying used gear, you can assemble a complete kit of new equipment for a surprisingly low initial investment.
Beyond the Basics: Gear Considerations for Women

Standard “unisex” gear is often designed for a male frame, which can lead to poor fit and discomfort for women. Understanding the functional advantages of women-specific designs is key to building a comfortable and effective hiking system.
Why Women-Specific Gear Matters
Women’s backpacks are not just about different colors. They are engineered with key anatomical differences in mind: shorter torso lengths, narrower S-curved shoulder straps, and canted hip belts designed to sit on wider hips. This distributes weight more effectively. Similarly, selecting the best walking/hiking boots for women involves looking at models built on a different last, which typically feature a narrower heel and a wider forefoot for a more precise fit.
Perhaps the most important piece of a woman’s layering system is a supportive, non-cotton sports bra. Chafing from poorly fitting straps or moisture-trapping fabric can be incredibly painful on a long hike. Choose a moisture-wicking model designed for high-impact activity to ensure comfort and support on the trail.
Conclusion: Preparedness is a Skill, Not Just a Checklist
You are now equipped with the knowledge to build a beginner hiking kit that prioritizes safety, comfort, and function. The Ten Essentials are more than a list; they represent a mindset of preparedness and self-reliance that is the hallmark of a skilled hiker.
- Foundation First: Your most critical investments are well-fitting footwear, a comfortable daypack, and a proper non-cotton layering system.
- Think in Systems: Embrace the modern “systems” approach to the Ten Essentials. This encourages you to adapt your gear to the specific demands of each hike.
- Start Small & Learn: You don’t need the most expensive gear to start. Begin with shorter, well-marked local trails to test your gear, build confidence, and learn what works for you and your hiking buddy.
- Next Steps: As you become more comfortable, you can explore more challenging terrain and longer hikes, eventually transitioning to your first overnight backpacking trip.
Frequently Asked Questions about Beginner Hiking Equipment
Do I really need to carry all Ten Essentials for a short, popular hike? +
If I can only afford to splurge on one item, what should it be? +
How heavy should my daypack be? +
I’m comfortable with day hiking. What’s the next step? +
We are a participant in the Amazon Services LLC Associates Program, an affiliate advertising program designed to provide a means for sites to earn advertising fees by advertising and linking to Amazon.com. As an Amazon Associate I earn from qualifying purchases. We also participate in other affiliate programs. The information provided on this website is provided for entertainment purposes only. We make no representations or warranties of any kind, expressed or implied, about the completeness, accuracy, adequacy, legality, usefulness, reliability, suitability, or availability of the information, or about anything else. Any reliance you place on the information is therefore strictly at your own risk. Additional terms are found in the terms of service.


