In this article
You’re eyeing the 30-liter pack because it feels like the safe choice. More room, more options, never caught short. Here’s the truth every honest hiker lands on eventually: for day hiking, the bigger pack is usually the wrong call, and the size most people grab isn’t the size they actually use. The right daypack, or day hiking rucksack if that’s what you grew up calling it, comes down to two things almost nobody checks before buying: the load you really carry, and how the pack sits on your back. This guide settles the 20L versus 30L question, shows why fit beats liters, and gives you honest picks for every kind of day.
What Size Daypack You Actually Need

Walk any popular trail on a Saturday and you’ll see it: people swimming in packs two-thirds full of air, the load swaying with every step. They bought big to be ready for anything. What they got is a bag that rides poorly because it’s never packed the way it was designed to be. Before you pick a number, it helps to know what each size actually does, and our complete guide to choosing a hiking backpack goes deeper on the whole system if you want the full picture.
The 20L to 25L Sweet Spot
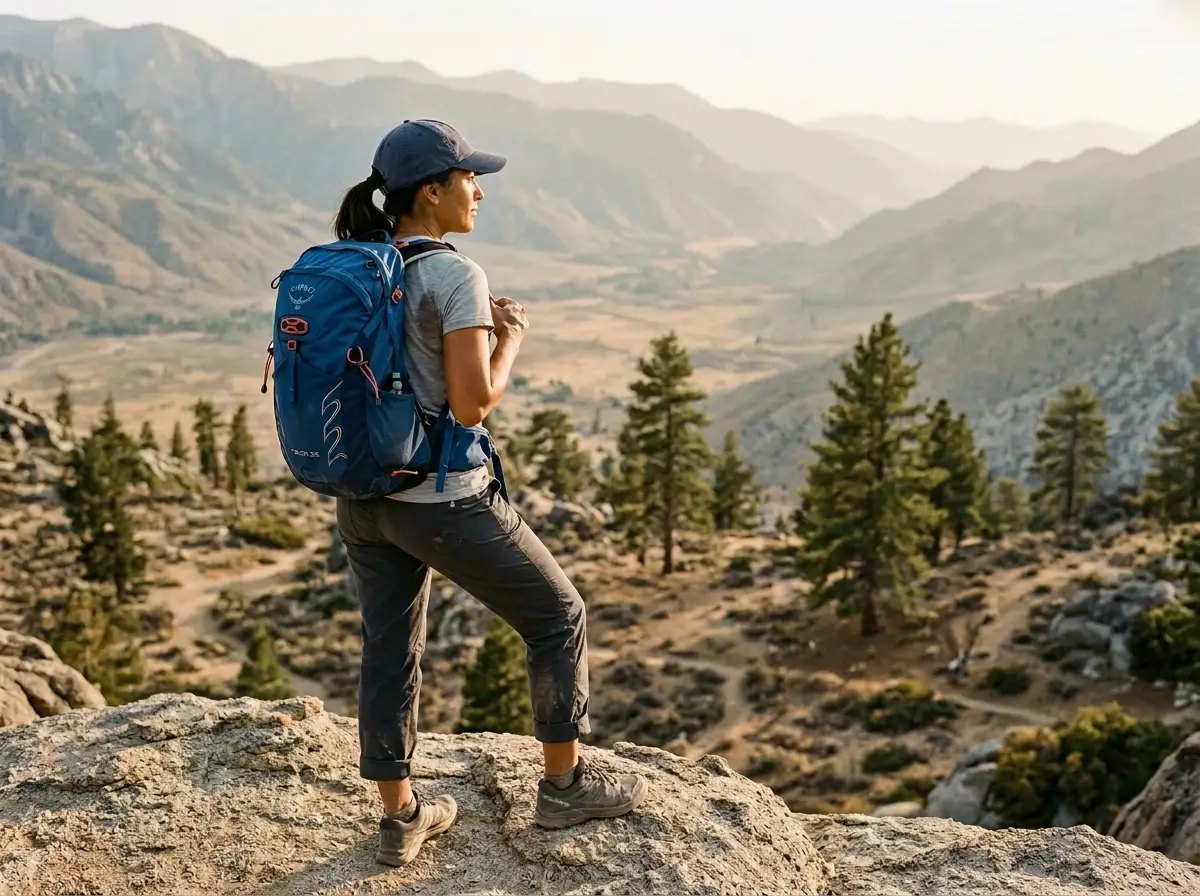
For a standard full-day hike, 20 to 25 liters is the size that does almost everything. It swallows a couple liters of water, lunch and snacks, an extra layer, sunscreen, a first-aid kit, and the rest of the 10 essentials with a little room left for a shed jacket. Around 25 liters is the all-around number most everyday hikers settle on after a season or two. It’s big enough that you’re not playing Tetris at the trailhead, small enough that you can’t overpack it into a boat anchor.
The reason this range wins is simple. A pack carries best when it’s mostly full, because the load sits as one stable mass against your back instead of shifting around in empty space. A 22-liter pack packed for a real day hike is a solid, predictable thing on your shoulders.
A 25-liter pack handles roughly nine out of ten day hikes people actually do. If you’re sizing up “just in case,” you’re buying for the one big day a year and carrying that empty space the other fifty-one weekends. Buy the size you’ll use, not the size you fear.
When You Actually Want 30 Liters
Thirty liters earns its place on specific days, not as a default. Cold-weather hikes mean a puffy, a heavier shell, gloves and a hat, and that bulk needs somewhere to go. Photographers hauling a camera body and a lens or two need the room. Parents carrying snacks, layers and water for small kids who carry nothing themselves know exactly why they own a bigger pack.
The line to watch is where a daypack stops being a daypack. Once you’re regularly filling 30-plus liters, you’re brushing up against overnight territory, where a daypack gives way to a true backpacking pack. For a single day on the trail, 30 liters should feel like a deliberate choice for a bulky load, not your everyday bag.
When a Sub-20L Pack Is Enough
Short, fair-weather hikes don’t need much. For a two or three hour trail in good conditions, a sub-20L pack holds water, a snack, a light layer and your phone with no fuss. At that size and a near-empty 10 to 15 pound carry, you don’t even need a real hip belt, just a webbing strap to keep the bag from bouncing.
Smaller packs also move better when the ground gets technical. A trim 15-liter pack sits close and high, which keeps your balance over your feet on a scramble instead of pulling you around. The mistake is going so small that the 10 essentials stop fitting, because the safety kit sets the floor on size no matter how fast and light you want to go.
Why Fit Beats Liters (Torso Length and Hip Belt)
Here’s where most of the regret lives. The pack felt fine in the parking lot. By the second climb the straps are sawing into your shoulders, the bag is creeping up your spine, and you’re convinced the brand cheaped out. Almost always, the pack was just the wrong fit, and no number of liters fixes that. Pack volume tells you how much you can carry; fit tells you whether carrying it ruins your day. The official REI walkthrough below shows how a pack actually sits on a real back, which is hard to picture from a spec sheet.
How to Measure Your Torso Length at Home
Pack fit runs off your torso length, not your height. Two hikers who stand exactly the same can need different pack sizes, because the distance from shoulders to hips is what the harness is built around. That’s also why you can’t trust the size label alone: a “medium” maps to different torso ranges across Osprey, Gregory and Deuter, so you match your number to that brand’s chart, every time.
Finding the number is easy and you can do it solo. Tip your head forward and feel for the bony bump where your neck meets your shoulders, the C7 vertebra. That’s the top. The bottom is the midpoint of your iliac crest, the shelf you hit when you put your hands on your hips. Measure the distance along your back between those two points and you’ve got your torso length, no store trip required. If you want the detailed version with the landmarks called out, here’s the full walkthrough for measuring your torso length.
No tailor’s tape? Run a piece of string from your C7 bump down to your iliac-crest line, mark it, then hold it against any tape measure or yardstick. It gets you within range before you ever order online, and it’s the trick people swear by in pack-fit threads.
Hip Belt vs Webbing Strap
The waist piece on a pack is doing one of two very different jobs. A thin webbing strap is an anti-bounce belt: it keeps a light pack from flopping around, nothing more. A padded hip belt is a load-bearing system that transfers weight off your shoulders and onto your hips, which is where you actually want it on a long day.
The cutoff is roughly 15 pounds. Under that, a webbing strap is fine and a hip belt is overkill. Once you’ve loaded water, layers and the day’s gear past 15 pounds, you want a real padded belt, and you want to actually use it. The classic rookie move is leaving the hip belt loose and wondering why your shoulders are screaming. Cinch the belt first so it carries the load, then snug the shoulder straps.
Women’s Fit and Why the Label Isn’t the Whole Story
A women’s-specific pack usually means narrower straps with more curve, a shorter back panel, and a hip belt shaped for a different angle. For a lot of hikers, that geometry just fits better, full stop. The Osprey Tempest, Gregory Jade and the women’s Black Diamond Pursuit all use that kind of build.
But the label is a starting point, not the answer. Fit is individual, and plenty of people are most comfortable across the gender line in either direction. The right pick is whichever torso and hip fit is actually correct for your frame, so it’s worth trying both. If you want options built around that geometry, our fit-first roundup of women’s hiking packs is a good next stop.
The Daypack Features That Earn Their Weight
Spec sheets love to list features. Most of them don’t change your hike, and a few of them change it a lot. The trick is knowing which is which before you pay for a pack covered in straps and pockets you’ll never touch. Name what you don’t need and the choice gets simpler.
Suspension and Back-Panel Ventilation
Suspension is the frame and back structure that decides where your load ends up. A frameless pack is just a soft bag, light but with no help moving weight to your hips. A framesheet or internal frame gives the pack some spine, so a heavier load transfers down to the belt instead of hanging off your shoulders. More frame means more comfortable weight, at the cost of a few ounces, and it’s worth understanding how the different backpack suspension systems compare before you decide how much you need.
Then there’s your back sweat. A suspended mesh back panel, the kind hikers call a trampoline back panel, tensions a screen of mesh so the pack body floats off your spine and air moves through the gap. Against a hot, humid climb, that airflow is the difference between a damp shirt and a soaked one. Foam back panels sit flatter and offer less breathability, but they ride closer for scrambling. Pick based on how much you sweat and how technical your trails get.
Pockets, Access, and Organization
The pockets that matter are the ones you use without stopping. Hip-belt pockets put your phone, snacks and lip balm within reach while you walk, which sounds minor until you’ve hiked with and without them. Side water bottle pockets you can actually reach while wearing the pack give you quick access without the stop-drop-and-dig routine. Stretchy side pockets and external loops also handle a stashed layer or trekking pole attachment when you want your hands free.
Beyond that, more organization is mostly personal taste. A simple top-loader with one big main pocket works great for most day hikes. A panel-loader with a U-zip that opens like a suitcase makes finding gear easier but adds zippers that can fail. Don’t pay for fifteen compartments if you’re a person who throws everything in one bag anyway.
Hydration Compatibility
Most modern daypacks are hydration compatible, with an internal sleeve for a reservoir and a port for the hose. If you like drinking on the move without breaking stride, that’s the setup you want, and a few packs even include the hydration bladder so you’re not buying it separately.
The honest version: a reservoir is convenient but not mandatory. Two bottles in the side pockets cost nothing extra, are easier to clean, and let you see exactly how much water you have left. Decide which camp you’re in before you pay a premium for a hydration-specific pack.
The Best Daypacks for Day Hiking by Category
These are honest picks sorted by what you hike, not a fifteen-pack data dump. Each one is here because it does a specific job well. The summary card gives you the fast version; the paragraphs under it give you the trade-offs, because no pack is perfect for everyone.
Best Overall: Osprey Talon 22 and Tempest 22

The Talon and Tempest hit the sweet spot on purpose. At 22 liters with a ventilated AirScape back, a proper hip belt with pockets, and a yoke that slides to match your torso, it covers the things that actually make a daypack comfortable. It’s the pack to beat for a standard full day, and the one most people should look at first.
The honest cons: it’s mid-range, not budget, and the adjustable harness adds a little weight over a stripped-down bag. If you only hike short and easy, it’s more pack than you need. For everything from local summits to long all-day routes, it’s hard to do better.
Best Budget: Osprey Daylite Plus 20L
If you’re buying your first daypack and don’t want to overthink it, the Daylite Plus is the easy answer. Twenty liters, a hydration sleeve, simple panel access, and a price that doesn’t sting. It pulls double duty as a travel and everyday bag, which is why so many of them end up as the pack people grab on instinct.
What you give up is a load-hauling hip belt and a structured frame. This is a light-load pack, happiest under 15 pounds or so. Stuff it with winter layers and three liters of water and it’ll let you know. For easy and moderate days, it’s the most pack you can get for the money.
Best Ventilation: Gregory Zulu 24 LT and Jade 24
Some people barely sweat through their backs. If you’re not one of them, ventilation stops being a nice-to-have and becomes the whole point. The Zulu and Jade use Gregory’s FreeFloat suspended mesh, the trampoline-style panel that tensions a screen between you and the pack so air actually flows. On a hot, grinding climb, you feel the difference.
The trade-off with suspended-mesh packs is that they ride a touch farther from your back, which some hikers notice on technical ground. At 24 liters it also sits at the larger end of day sizing. For hot-weather hikers and anyone who hates a swampy back, it’s worth it.
Best Hydration: Gregory Citro 24 H2O and Juno 24 H2O
The Citro and Juno solve a small annoyance neatly: they come with a reservoir in the box, so you’re not hunting down a compatible bladder after you buy the pack. Pair that with a ventilated suspension and you’ve got a setup built for hot, long days where staying on top of your water matters most.
The catch is that an included reservoir nudges the price up, and if you’re a two-bottles person you’re paying for a part you won’t use. But for the hiker who drinks on the move and wants it sorted out of the box, this is the simplest path to a dialed hydration pack.
Best Lightweight: Deuter Speed Lite 25
The Speed Lite splits the difference that trips up a lot of lightweight shoppers. Go too minimal and you get a frameless sack that sags under a real load; the Speed Lite keeps enough structure to carry gear on a long, fast day while still coming in around a pound and a half. It’s the pack for higher-mileage days when you want to keep moving.
It’s not a load hauler, and it’s not the cheapest pack here. If your days are short and casual, you don’t need it. But for ambitious day hikes where ounces add up and you still need 25 liters of real capacity, it’s a smart middle ground.
Best Small Pack: Black Diamond Pursuit 15
Not every hike needs 20-plus liters. For a quick summit, a trail run with gear, or a scrambly route where you want your hands free and your weight tight to your back, 15 liters is plenty. The Pursuit rides close and stable, which is exactly what you want when the ground turns to rock.
It’s deliberately small, so it’s a second pack for most people rather than their only one. Pack winter layers or a full day’s water and you’ll run out of room fast. For short and technical days, that compactness is the feature, not the limitation.
The Mistakes That Ruin a Good Daypack
You can buy the right pack and still have a miserable day if you fall into the traps the roundups gloss over. These are the three that come up the most, and the good news is that all of them are easy to sidestep once you know to look. As always, the fix starts with naming where it goes wrong.
Buying Too Big for One Big Day
The most common mistake is sizing for your hardest possible day instead of your typical one. You picture the cold, long, layer-heavy hike and buy 35 liters to be ready. Then every normal Saturday loop, that pack is two-thirds air, what hikers call dead volume, swaying loose because there’s nothing in it to hold it steady.
An oversized pack also quietly invites overpacking. Empty space gets filled, and the extra stuff you didn’t need becomes weight you carry for no reason. Size for the hike you do most weekends. Rent, borrow, or keep a bigger pack around for the rare day that actually needs it.
The Frameless Trap Past 25 Pounds
A frameless pack is a joy when it’s light and a punishment when it isn’t. The rule of thumb is straightforward: frameless rides comfortably up to about 25 pounds, and past 25 to 30 pounds a frame starts to earn its keep. Cross that line and the pack sags into your back and the straps dig into your shoulders, because there’s no structure to move the load to your hips. It’s worth knowing exactly where frameless packs stop being comfortable before you commit.
Do the quick math before a cold-weather hike. Three liters of water alone is about 6.6 pounds. Add a puffy, a rain layer, food, and the rest of the kit, and a featherweight 14-ounce pack can blow past its load ceiling fast. That’s not the pack failing; it’s the wrong tool for that load.
A cheap rain cover, or a dollar trash-compactor bag used as a pack liner, keeps your gear drier than most “water-resistant” pack fabric does in a real downpour. Buy the cheap insurance and skip paying a premium for a “weatherproof” label that still wets through at the seams.
Trusting Water-Resistant in Real Rain
Here’s the one that gets people on a bluebird-forecast day: a water-resistant pack is not a waterproof pack. Most are built from a ripstop nylon (its toughness measured in denier, where a higher number means more abrasion resistance and durability) with a DWR coating, and that weather resistance only sheds light drizzle. In a real downpour the water finds the seams and the zippers first, and your sandwich and spare socks come out damp. The forecast was wrong, and so was the assumption that the pack would handle it.
The fix costs almost nothing. A pack rain cover or a simple liner inside the bag does more than the fabric ever will, and you can decide between a pack liner versus a rain cover depending on your trails. Toss whichever you choose in the bottom of your pack and forget about it until the sky opens up.
How to Load a Daypack So It Carries Right
This is the free upgrade nobody tells you about. The same pack with the same gear can feel like two different bags depending on where you put the weight. It’s pure field knowledge, and once it clicks you’ll do it automatically every time you pack.
Where the Heavy Stuff Goes
The principle is simple: heavy items ride high and tight against your spine, at about mid-back height. Water, the heaviest layer, anything dense goes there, close to your center of gravity. Light and bulky things, like a puffy or a rain shell, fill in low and toward the outside.
Get this right and the load sits over your hips and feels like part of you. Get it wrong, with the heavy stuff low and sagging away from your back, and the pack pulls backward on your shoulders all day. Good weight distribution changes comfort more than which pack you bought, which is why a well-loaded budget pack can out-carry a poorly loaded expensive one.
Weigh the loaded pack, not the empty one, when you’re deciding whether you need a frame. The spec sheet lists the bag’s weight, but your shoulders feel the total. Throw the packed bag on a bathroom scale once and you’ll know which side of the 25-pound line you actually live on.
Keeping the Load Balanced
Side-to-side balance matters as much as front-to-back. A full water bottle stuffed in one side pocket with nothing to counter it will pull you off-line on uneven ground, and you’ll feel your legs fighting it all day without quite knowing why. Spread the weight evenly across both sides.
This matters more the rougher the trail gets. On a flat path you can get away with a lopsided load, but on a rocky traverse or a steep descent, an unbalanced pack nudges you exactly when you want to be steady. Pack symmetrical, and the trail does the work instead of your stabilizer muscles.
Cinch, Then Fine-Tune the Straps
Once it’s loaded, compression straps pull everything tight so the load moves with you instead of bouncing against you. Cinch them down until the pack feels like a single solid unit. A sloppy, loose load saps energy with every step.
Then set the harness in order. Loosen everything, settle the hip belt so it carries the weight, snug the shoulder straps, clip the sternum strap, and only then dial in the load-lifter straps to about a 45-degree angle. The most common error is yanking the load lifters to fix shoulder pain when the real fix is letting the hip belt do its job first.
Matching Your Daypack to the Hike and the 10 Essentials
Strip away the gear talk and a daypack has one job: carry what gets you home safely and comfortably. Size follows the job, not the other way around. Figure out what the day actually demands, and the right pack picks itself.
The 10 Essentials Set Your Minimum Size
The 10 essentials, navigation, light, sun protection, first aid, a knife or repair kit, fire, shelter, extra food, extra water, and extra layers, are the kit that sets the real floor on pack size. Whatever pack you choose has to hold all of it with room for the day’s food and water on top. If a pack can’t fit the safety kit, it’s too small, no matter how light it is. Run through the full 10 Essentials day-hiking checklist and you’ll have a clear sense of the volume you’re working with.
Part of that kit is planning to pack out everything you bring in. Following the Leave No Trace Center for Outdoor Ethics’ pack-it-out principle means your pack needs a little room for trash too, your wrappers and anyone else’s you find along the way. It’s not a lecture, it’s just what decent hikers do, and it’s one more reason a too-small pack causes problems.
Short, Long, and Cold-Weather Days
Match the size to the day in front of you. A short, fair-weather hike runs fine on a sub-20L pack. A standard all-day outing wants that 20 to 25 liter sweet spot. A cold-weather day, a long route, or anything with bulky layers pushes you toward 25 to 30 liters, which is the one time the bigger pack is the right answer instead of the lazy one.
Water usually drives the decision more than anything else, because it’s the single heaviest item you carry most days. A hot, exposed route where you need to haul three liters changes your math fast, and it’s another reason to plan around the real load rather than a round number on a tag.
Fast-and-Light Without Going Too Small
The fast-and-light crowd gets a lot right. A trim pack moves better, tires you less, and makes a long day feel shorter. But minimal still has to clear the same bar: it has to hold the 10 essentials and enough water for the conditions. Going so small that you leave the safety kit behind isn’t lightweight, it’s underprepared.
The honest take is that a 15 to 20 liter pack or a hiking vest is a tool for a specific kind of day, fast, warm, and well-traveled, not a flex for every hike. Pick the smallest pack that still fits what the day genuinely requires, and not a liter less.
Conclusion
Three things to carry away from all this. First, a 20 to 25 liter daypack handles almost every day hike you’ll actually do, so buy the size you use, not the size you fear. Second, fit decides comfort more than liters ever will, which means your torso length and a properly cinched hip belt matter more than the number on the tag. Third, load it heavy-and-high, and keep a cheap rain cover in the bottom, because the small habits beat the expensive features.
Before your next hike, do one thing: measure your torso, then pack a real day’s gear into whatever pack you already own and see where it actually sits on your back. That five-minute test tells you more than any spec sheet, and it’ll show you exactly what to look for if it turns out you need something new.
Frequently Asked Questions
01Is a 20L or 30L daypack better for day hikes?
For most day hikes, a 20 to 25 liter daypack wins. It fits water, food, layers and the 10 essentials without dead volume. Save 30 liters for cold-weather or bulky-layer days, or hauling gear for kids.
02What’s the difference between a daypack and a rucksack?
They’re the same thing. Rucksack is the older or British term for a backpack, and daypack is the common US word for a small pack sized for a single day on the trail. No real gear difference.
03Do I need a hip belt on a daypack?
Under about 15 pounds, a simple webbing strap is fine. Once you load water and layers past that, a padded hip belt transfers weight off your shoulders onto your hips, which is what keeps you comfortable on longer days.
04How much water should a day hiking daypack carry?
Plan for the route and the heat, since water is the heaviest item you carry. A typical day runs one to three liters, and that weight is a big reason 20 to 25 liters, not an empty 30, is the realistic size.
05Can a daypack work for a one-night trip?
A 30 to 35 liter daypack can handle a minimal ultralight overnight, but most daypacks lack the frame and volume for sleep gear. Once you need that much capacity regularly, a dedicated backpacking pack carries it far better.
Risk Disclaimer: Hiking, trekking, backpacking, and all related outdoor activities involve inherent
risks which may result in serious injury, illness, or death. The information provided on The Hiking Tribe is for
educational and informational purposes only. While we strive for accuracy, information on trails, gear, techniques,
and safety is not a substitute for your own best judgment and thorough preparation. Trail conditions, weather, and
other environmental factors change rapidly and may differ from what is described on this site. Always check with
official sources like park services for the most current alerts and conditions. Never undertake a hike beyond your
abilities and always be prepared for the unexpected. By using this website, you agree that you are solely
responsible for your own safety. Any reliance you place on our content is strictly at your own risk, and you assume
all liability for your actions and decisions in the outdoors. The Hiking Tribe and its authors will not be held
liable for any injury, damage, or loss sustained in connection with the use of the information herein.
Affiliate Disclosure: We are a participant in the Amazon Services LLC Associates Program, an
affiliate advertising program designed to provide a means for us to earn advertising fees by advertising and linking
to Amazon.com. As an Amazon Associate, we earn from qualifying purchases. We are also an official affiliate partner
of Black Diamond Equipment via the AvantLink network. If you click on a Black Diamond affiliate link and make a
purchase, we may earn a commission at no additional cost to you. We also participate in other affiliate programs and
may receive a commission on products purchased through our links. Additional terms are found in the terms of
service.