

In this article
- The Foundations of Digital Navigation
- Pre-Hike Intelligence: Mastering the Map
- A Comparative Analysis of Planning Tools
- The Blueprint in Action: A Step-by-Step Workflow
- The Responsible Cartographer: Digital Ethics and Leave No Trace
- Conclusion: Charting Your Own Adventures
- Frequently Asked Questions about Digital Route Planning
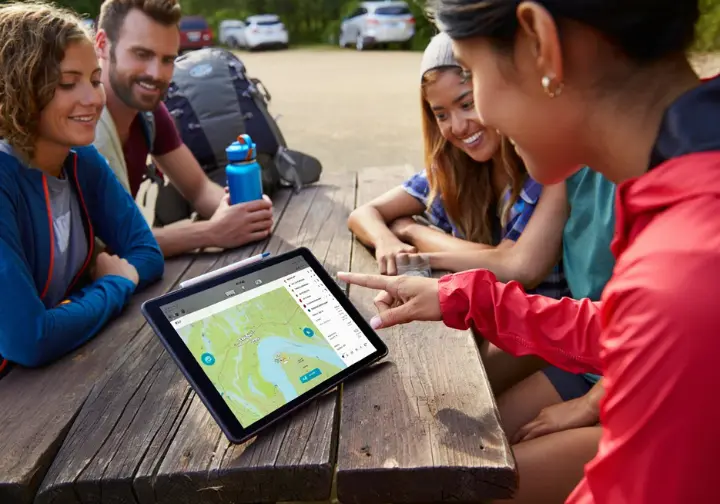
There is a unique sense of empowerment that comes from creating your own custom hiking route, a feeling far removed from simply downloading a premade route. This guide frames digital route planning not as a mere technical task, but as a core hiking skill. Mastering the process of planning hiking route designs enhances safety, builds confidence, and opens the door to truly unique adventures. We will take a comprehensive, step-by-step journey through the entire workflow, from foundational concepts to a field-ready GPX file. You will learn to confidently plan your own hikes, perfectly tailored to your goals and skill level.
The world of navigation has seen a dramatic shift from paper maps to powerful digital tools. Understanding the fundamentals of this technology—what GPX files are and the distinct roles of waypoints, routes, and tracks—is crucial for your safety and for effective planning. This article will guide you through understanding the language of digital navigation, choosing the right tools and software, mastering the techniques, and planning with a sense of responsibility.
The Foundations of Digital Navigation

Before you can effectively use any route-planning tool, you must understand the language of digital maps and the fundamental concepts that underpin all digital navigation. A firm grasp of the critical differences between the data types you will be working with is the bedrock of safe backcountry travel.
Defining the Digital Compass: What is a GPX File?
A GPX file, or GPS Exchange Format, is a simple text file written in XML that has become the universal standard for geographic data. It is not a map itself, but rather a set of instructions—a list of coordinates—that a mapping application or GPS unit reads and plots onto a base map to become visually useful. Its standardized gpx file format is what makes it the common language of the outdoor world, allowing gpx file data to be exchanged between different devices and software programs.
The accessibility of this technology is a relatively recent development, tied directly to a U.S. military policy change in the year 2000. When the feature known as Selective Availability, which intentionally degraded accuracy for civilian users of the Global Positioning System (GPS) gps system powered by gps satellites, was turned off, it dramatically increased the precision of consumer gps units. This single event paved the way for the powerful navigation tools we use today. GPS-based Navigation is a core component of the Ten Essentials, and the GPX file is its fundamental tool.
A GPX file contains three primary types of gpx data elements: gpx waypoints, gpx routes, and gpx tracks. Mastering the specific function of each of these building blocks is the most important first step for any aspiring route planner, as it directly impacts how you plan route options and navigate safely.
The Building Blocks: Waypoints, Routes, and Tracks
A waypoint is a single, specific location defined by GPS coordinates (latitude and longitude), acting like a digital pushpin. During the planning process, hikers use waypoints to mark significant points such as trailheads, campsites, reliable water sources, or tricky junctions. While on the trail, they can be used to record new points of interest or hazards. Modern apps even allow for adding rich data like custom icons, photos, and notes to each one.
A route is a sequence of waypoints that represents an intended path of travel; it is the plan of where you want to go. A route is created before a hike begins on a computer by using mapping software to place route pins/waypoints at the start, at a key turn, and at the destination, which the software then connects in sequence. This is a core skill needed when planning a multi-day trip.
A track is the detailed “breadcrumb trail” showing where a gps device has actually traveled. It is composed of a dense series of recorded track points, making it a record of a journey, not a plan. A single track point is just one of these recorded coordinates. When you download a high-quality trail guide from an authoritative source, it is most often provided as a track because it represents a precise path that has been physically walked and verified.
The Critical “Route” vs. “Track” Distinction
The difference between a “route” and a “track” is the single most critical concept for new users to grasp, with profound implications for safety on the trail. Put simply: a route is the plan, while a track is the record. This distinction dictates how your navigation device behaves and is one of the most important pieces of knowledge for ensuring fundamental safety for beginner hikers.
When navigating with a GPX Route, a GPS device will often try to “recalculate” a new path if you stray, much like a car’s turn-by-turn navigation. In the backcountry, this routing feature is extremely dangerous. The device may simply draw a straight line—a new calculated route—to the next waypoint, potentially leading you over a cliff or through impassable terrain. This “auto-routing” is a known and serious pitfall of some routing options.
Conversely, when you follow track data, the device simply shows your current location in relation to the pre-recorded line—the exact route to be followed. If you stray, it will not perform a new route calculation; it will clearly show you are off the verified path and indicate the direction back to it. For this reason, the overwhelming consensus among experts is that for navigating a specific hiking trail, a GPX Track is the preferred and much safer format.
Pre-Hike Intelligence: Mastering the Map
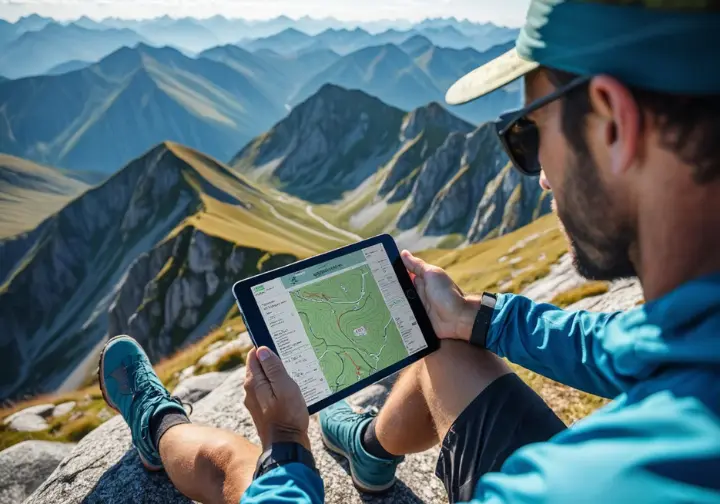
Developing “pre-hike intelligence”—the crucial ability to read and interpret topographic maps and elevation profiles—is our focus here. This skill transforms a digital planning tool from a simple line-drawer into a sophisticated platform for mapping hiking trails, assessing difficulty, and making informed decisions before ever setting foot on the trail. This practice directly aligns with the first principle of Leave No Trace: Plan Ahead and Prepare.
How to Read a Topographic Map
A topographic map is the foundational canvas for any serious hike plan, using contour lines to depict the three-dimensional shape of the landscape. Each brown contour line connects points of equal elevation. The key to understanding steepness is the contour interval. The closer the lines are, the steeper the terrain. This is one of the most learning fundamental navigation skills for anyone taking up the activity, a true step beyond relying on a basic Google Map.
Index lines are typically every fifth contour line, drawn darker and labeled with the specific elevation, serving as your primary altitude reference. The map’s legend defines the scale and explains color codes for features. You can find high-quality official US Forest Service maps that are excellent for practicing these skills, a world apart from a standard mapping presentation.
By interpreting the patterns these lines create, you can identify major landscape features from a 2D map. A series of concentric circles indicates a summit, U- or V-shaped lines pointing downhill represent a ridge, and V-shaped lines pointing uphill represent a gully or ravine. A saddle or pass often appears as an hourglass shape in the contour lines.
How to Interpret an Elevation Profile
An elevation profile provides a side view of your route, plotting elevation on the vertical (Y) axis against distance on the horizontal (X) axis. This tool is invaluable for quickly understanding the physical demands of a hike. It’s important to first check the scales on both axes; an exaggerated vertical scale can make a gentle walk look like a monumental climb.
The single most important metric for gauging effort is the total ascent and descent. This represents the cumulative elevation you will gain and lose over the whole route. A route that starts and ends at the same elevation has a net change of zero, but it could involve thousands of feet of climbing, which is a far better indicator of its true difficulty.
Beyond the total numbers, the shape of the profile reveals the character of the terrain. You can determine if the route is one long, sustained climb or if it consists of many short, steep, “punchy” climbs over rolling hills. Each of these hike types requires very different pacing strategies, and analyzing the profile helps you know when to conserve energy.
The Pre-Hike Safety Checklist
The most critical step in planning is an honest assessment of your abilities and those of everyone in your group. According to authoritative sources like the National Park Service, you must ensure the chosen trail is appropriate for the least experienced person. This includes evaluating physical fitness, experience, and comfort with the planned mileage and elevation gain.
Before finalizing any route, you must check for current conditions. This involves researching the latest weather forecasts, trail closures, fire restrictions, and wildlife advisories issued by the land manager, such as a National Forest or Park. This information is often available on their official websites.
Always leave a detailed trip plan with a trusted person. This plan should include your intended route, start and end times, contact information, and a designated “panic time.” A responsible planner also prepares a “Plan B” in case conditions make the primary objective unsafe. Finally, carrying the Ten Essentials is non-negotiable, as this system of gear is a foundational safety protocol.
A Comparative Analysis of Planning Tools
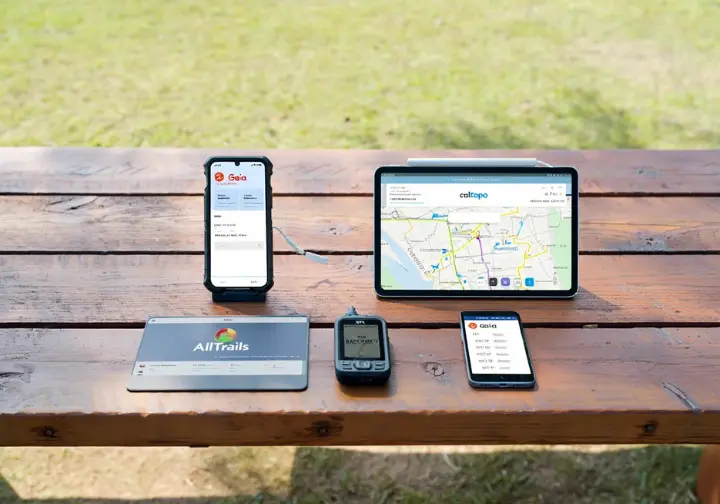
To help you choose the right app, we offer a deep, comparative analysis of the four leading platforms in the digital hiking landscape. The goal is to empower hikers to select the tool that best aligns with their specific mission, from casual trail discovery to highly technical, off-trail expedition planning.
Deep Dive: Gaia GPS for Serious Hikers
The Gaia GPS app is widely regarded as the go-to tool for dedicated hikers who need a powerful app for custom planning and navigation. Its core strength lies in its balance of professional-grade features and an intuitive user interface. It’s a favorite for those who have graduated from simpler apps and are ready for more control.
Its standout feature is its vast map catalog. A premium subscription unlocks hundreds of layers, including National Geographic Trails Illustrated maps and official USGS and USFS topographic maps. This allows planners to layer and compare different map types for a comprehensive view. Its offline capabilities are a core strength, allowing users to download multiple map layers for use far from cell service.
The ideal Gaia GPS user is a dedicated hiker, backpacker, or overlander who regularly plans multi-day trips. They value a feature-rich tool for custom navigation but also appreciate a well-designed user experience. A useful feature for these users is the “Public Tracks” overlay, which shows where other users have traveled, helping to verify trail locations.
Deep Dive: CalTopo for Technical Planners
CalTopo for hikers is unquestionably the most powerful and technical route-planning tool available to the public, designed from a cartographer’s perspective with a focus on data analysis. It is the preferred tool for meticulous planners, off-trail adventurers, and search-and-rescue professionals. While its web interface is where it truly shines, the mobile app is a capable field companion.
Its key features are found on the desktop, including best-in-class map layers like high-resolution LiDAR-based terrain and detailed slope-angle shading for avalanche assessment. Its route-building tools are superior for complex tasks. A critical feature lacking in many other platforms is its robust printing function for generating high-quality PDF maps as a backup to a professional gps device like a Garmin GPSMAP.
The ideal CalTopo user is a “power user” who prioritizes analytical power over simplicity. This includes backcountry skiers who depend on slope-angle shading for safety and explorers planning routes in trailless wilderness, a scenario where this tool excels.
Deep Dive: AllTrails for Trail Discovery
AllTrails is best understood not as a technical planning tool but as a massive, crowd-sourced library of trails. Its primary value is in discovering popular routes. Its interface is designed for ease of use, making it exceptionally accessible for beginners. The Google Map app serves a similar discovery purpose, but AllTrails is specialized for hiking.
The core feature is its database of over 450,000 trails, each with user-submitted photos, reviews, and difficulty ratings. This social proof is invaluable for assessing current trail conditions. The platform’s powerful filters allow users to find trails based on specific criteria like dog-friendliness or wheelchair accessibility.
The typical AllTrails user is a beginner or casual hiker whose main goal is to find a reliable day hike. They are more of a “trail-finder” than a “route-builder”. Users often become frustrated with the platform’s limitations when their skills advance and they want to build a proper route from scratch.
Deep Dive: onX Backcountry for Land Data
onX Backcountry carved out its niche by evolving from the hunting world and focusing on a critical data type: land ownership. Its defining feature is the clear and accurate mapping of public and private land boundaries, which is invaluable for avoiding trespassing.
The premier feature is its land data layer, which shows property lines for public and private parcels. The app is structured around “Modes” for different activities like hiking or skiing, which tailors the visible data to the user’s needs. It also integrates data from other sources, such as climbing routes from Mountain Project.
The ideal onX user is often a multi-sport adventurer who also hunts, fish, or climbs. It is particularly useful for anyone who frequently explores areas near private land where certainty about legal access is a top priority.
The Blueprint in Action: A Step-by-Step Workflow
Here, we provide a flexible, step-by-step workflow for translating a hike idea into a field-ready GPX file. Expert planners often use a multi-platform approach, leveraging the unique strengths of each tool for different stages of the process, such as using a road trip planner for logistics, then refining the hike in CalTopo.
Phase 1: Choosing Your Starting Platform
The first step is to consciously choose the right tool for the job. If your goal is to find a popular trail for a day hike, your workflow should begin with AllTrails. Its massive library of user reviews and photos is the most efficient resource for simple trail discovery.
If your goal is to plan a custom route that largely follows existing trails, the best starting points are Gaia GPS or onX Backcountry. These platforms offer the best balance of existing trail data and flexible route-creation tools needed for this type of route planning.
If your objective involves significant off-trail travel or requires creating high-quality printed maps, your workflow must begin with CalTopo. Its unmatched analytical power and customization are essential for creating a viable route in demanding terrain.
Phase 2: Drawing the Initial Path
This phase involves creating gpx tracks by physically drawing the line on the map. The concept is universal: you click to create a series of points that the software connects. In apps like Gaia GPS, this process is often aided by “snap-to-trail” functionality, which relies on underlying data from routable maps, such as those from Open Street Maps (OSM map data).
For more control or for plotting off-trail sections, all platforms offer a manual or “Drawing Mode”. This mode simply connects your clicks with straight lines, giving you precise control. This is the primary method used in a powerful tool like CalTopo, which excels at plotting exact off-trail paths that don’t exist in any database of routable roads.
The tools vary slightly by name—”Create Route” in Gaia GPS, “Line” object in CalTopo—but the fundamental process of clicking to create a path remains the same. Understanding when to use automated snap-to-trail versus manual drawing is key.
Phase 3: Refining, Analyzing, and Modifying
Once the raw line is drawn, the refining phase turns it into a rich plan. The first step is to add mapmarkers or waypoints to mark critical locations like water sources, potential campsites, or key junctions. All major platforms provide tools for adding and labeling these crucial route points.
Before finalizing, you must consult the statistics panel, which provides total distance, cumulative elevation gain/loss, and the elevation profile. This step is an essential reality check. In advanced tools, analysis can be more granular, showing different route points with unique data.
The ability to easily modify a route is important. All platforms allow for basic edits like letting you click and drag any part of the line to reroute it. Most also include tools to reverse a route’s direction. For more advanced needs, CalTopo allows for complex operations like splitting a single route into two separate segments.
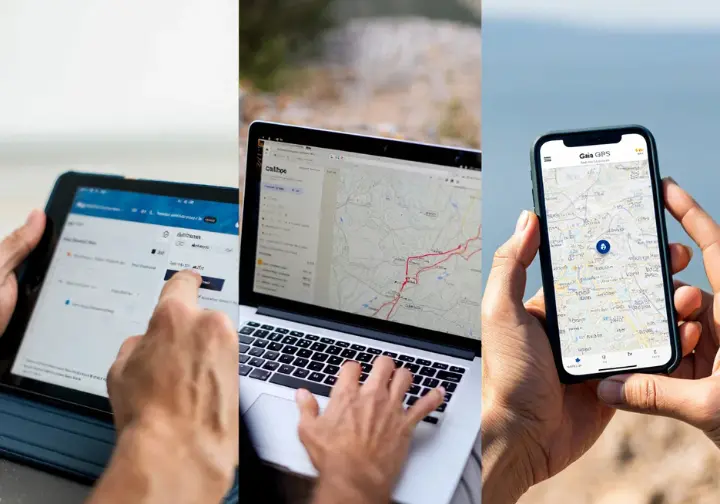
Phase 4: Exporting, Syncing, and Offline Use
The final step transforms your plan into a usable file for field navigation. Each platform provides a mechanism to export the created route as a GPX file. This process lets you save gpx files to your computer or cloud service.
When exporting, it is critical to select gpx file options carefully. CalTopo’s export menu forces a choice between “Track” and “Route.” As established, selecting “Track” is the best practice, as it provides a precise line to follow. Some Garmin GPX extensions or other proprietary gpx extensions can add more data, but the core gpx format is universal.
If you plan and navigate within the same ecosystem, your route will typically sync automatically. If using different apps, you will import the exported GPX file into your preferred navigation gps app. The final, non-negotiable step is to download the necessary map layers for offline use, which makes preparation essential for offline navigation.
The Responsible Cartographer: Digital Ethics and Leave No Trace

The power to create tracks and share precise digital hiking routes comes with a new set of ethical responsibilities. We’ll cover how to apply Leave No Trace principles during the planning phase and the best practices for sharing locations and gpx files responsibly.
Applying LNT Principles to Digital Planning
The seven principles of Leave No Trace (LNT) provide a robust framework for minimizing impact, and they apply in the digital planning phase. The very act of creating a detailed route is an embodiment of Principle 1: Plan Ahead and Prepare, as it ensures you know regulations and are prepared.
Digital tools are powerful for adhering to Principle 2: Travel and Camp on Durable Surfaces. When drawing an off-trail route, a planner must use satellite and topo maps to intentionally guide the path over durable surfaces like rock, while actively avoiding fragile vegetation.
When selecting potential campsites, the same principle applies. Waypoints for campsites should be marked on durable surfaces and at least 200 feet from lakes and streams to protect sensitive riparian zones. In applying Principle 7: Be Considerate of Other Visitors, campsites should be planned out of sight of the main trail.
The Geotagging Dilemma and Sharing GPX Files Responsibly
The practice of “geotagging” has been linked to severe overcrowding and ecological damage. To combat this, the LNT Center for Outdoor Ethics recommends tagging thoughtfully. Instead of tagging a specific, sensitive location, tag a more general area, such as the national park instead of the specific lake.
Sharing a GPX file is a generous act but carries significant responsibility. The most responsible approach is to share files selectively and always accompany the file with a detailed description of the route’s difficulty and hazards. A clear disclaimer that the user assumes all responsibility is essential.
You must also be mindful of what a GPX file reveals. A track can pinpoint a fragile archaeological site or sensitive wildlife habitat, and similar gpx files for such routes should not be widely distributed. A track can also reveal personal data, so always review a file to ensure it does not contain sensitive personal information before sharing.
Conclusion: Charting Your Own Adventures
The Route Planner’s Blueprint: From Idea to GPX File has shown that digital route planning is an attainable and essential skill. By following the workflow from understanding the basics to responsibly sharing a finished plan, you can unlock new levels of hiking freedom and safety.
- Master the Language: The most critical step is understanding the difference between a Route (a plan) and a Track (a record). For safety, always navigate by following a GPX Track.
- Intelligence is Key: Effective planning requires pre-hike intelligence: the ability to read a topographic map to understand terrain and to interpret an elevation profile to gauge difficulty.
- The Right Tool for the Mission: There is no single “best” app. Use AllTrails for discovery, Gaia GPS for balanced custom planning, CalTopo for technical analysis, and onX for land ownership data.
- Plan and Share Responsibly: The power to create and share routes comes with the responsibility to protect wild places. Apply Leave No Trace principles and be thoughtful about how you share sensitive location data.
Frequently Asked Questions about Digital Route Planning
What is the most important difference between a GPX Route and a GPX Track for hiking? +
Can I use my phone for GPS navigation if I don’t have cell service? +
Which app is best for a beginner who just wants to find a local trail? +
Why do I need to look at a topographic map if the app shows me the trail? +
We are a participant in the Amazon Services LLC Associates Program, an affiliate advertising program designed to provide a means for sites to earn advertising fees by advertising and linking to Amazon.com. As an Amazon Associate I earn from qualifying purchases. We also participate in other affiliate programs. The information provided on this website is provided for entertainment purposes only. We make no representations or warranties of any kind, expressed or implied, about the completeness, accuracy, adequacy, legality, usefulness, reliability, suitability, or availability of the information, or about anything else. Any reliance you place on the information is therefore strictly at your own risk. Additional terms are found in the terms of service.


