

In this article
- Your Starting Line – Foundational Trailhead Logistics
- The Parking Puzzle – A Strategic Guide for Every Hiker
- Mastering the Shuttle System – Your Free Ride to the Rim
- Integrated Logistics & Alternatives
- Essential Trail Context for a Responsible “hiker”
- Key Takeaways on Bright Angel Trailhead Logistics
- Frequently Asked Questions about the Bright Angel Trailhead
Navigating the parking and shuttle logistics for the Grand Canyon’s Bright Angel Trail in Arizona can feel like a daunting first obstacle. We acknowledge this common pain point—the system at the Grand Canyon National Park’s South Rim can be overwhelming, especially for first-time visitors. This guide reframes that challenge, treating it not as a chore, but as the first strategic step in a successful and responsible hike. Our core thesis is that mastering these logistics is fundamental to a safe and well-executed hiking plan, directly affecting the experience for all hikers. We offer a solution: a clear, comprehensive blueprint that breaks down the entire system into simple, actionable strategies, empowering every hiker, from the day-tripper to the seasoned backpacker, to manage the system with the confidence of a park veteran.
Your Starting Line – Foundational Trailhead Logistics

Before you can build a parking or shuttle plan, you must understand the ground-truth about the Bright Angel Trailhead. It’s critical to know its precise location, the essential facilities available, and how to check its constantly changing operational status. This information is the bedrock of your plan for this great trail.
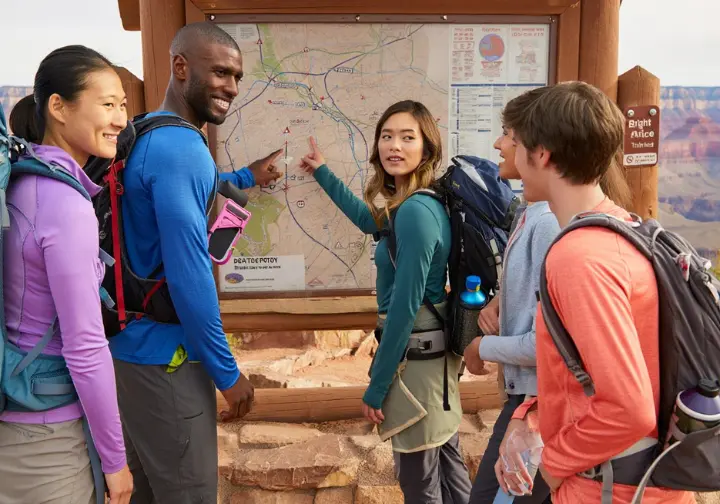
Pinpointing the Trailhead: Location & Landmarks
While its GPS-friendly address is 15 Bright Angel Trail, Grand Canyon Village, AZ 86023, landmark-based navigation is often more practical within the park. The trail head sits at a trailhead elevation of 6,840 feet in the heart of the Grand Canyon Village historic district. It is located just west of the Bright Angel Lodge, with Lookout Studio and Kolb Studio nearby.
The most prominent and unmistakable visual landmark for identifying the start of your hike is the stone mule corral located directly across from the trail’s entrance. This structure is a constant reminder of the trail’s shared-use nature. The trailhead is a short uphill walk from the Hermit Road Interchange shuttle stops and a manageable 5 to 10-minute walk from Maswik Lodge. For the most current details, see the official National Park Service information.
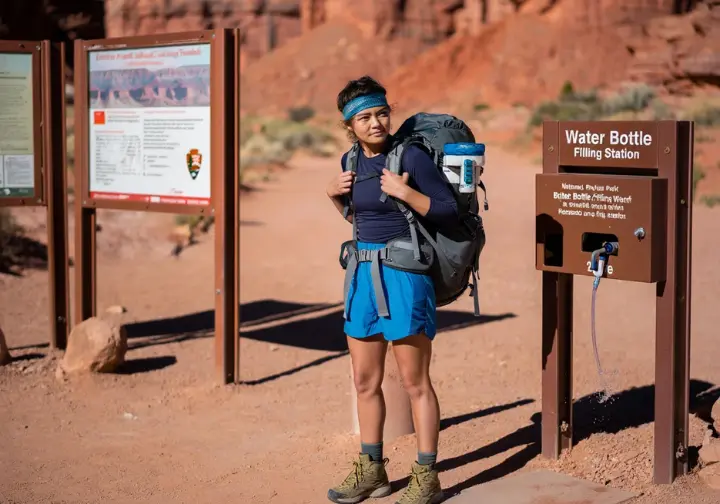
At-a-Glance Trailhead Facilities: Your Pre-Hike Checklist
Think of the trailhead facilities as your final staging ground for a safe journey into the canyon. Public restrooms are located right at the start, offering a last-minute convenience before a long hike. The most critical amenity here is the potable water filling station on the side of the restroom building. This is your last chance to top off every bottle and reservoir before descending.
The National Park Service has also installed comprehensive informational signage, which often includes a trail map. This now includes a modern QR code that provides real-time data on trail conditions, weather, and closures. If the technology fails, a park ranger is your best source of information. The functional mule corral serves not just as a landmark but as an active hub for mule trips. This underscores the need for hikers to be prepared for encounters with pack animals. It is the perfect spot for a final check of your essential items before you hike to the 1.5 Mile Resthouse or beyond.
CRITICAL: Live Status & Alerts (Your Go/No-Go Decision)
A logistical plan is not static; it must be verified against current park alerts. Ignoring these can have serious consequences. A major Trans-Canyon Waterline replacement project is the single most significant factor currently impacting access, with trail closures affecting the trail from Havasupai Gardens down to Bright Angel Creek and Phantom Ranch as of early 2025.
Be aware that water availability at the 1.5-Mile and 3-Mile Resthouses is never guaranteed. It is seasonal, typically running from May to September, but is always subject to pipeline breaks. The NPS also issues “Excessive Heat Warnings,” which must be taken seriously, as the temperature increases dramatically with every foot of descent; be aware that snakes and other wildlife may also be more active. Hiking in this heat is a leading cause of emergencies. For the most reliable information, always check with a ranger at the Backcountry Information office, check the official trail description and warnings, or use the trailhead QR code. These alerts reinforce the need to Hike Smart and carry more water and supplies than you think you need.
The Parking Puzzle – A Strategic Guide for Every Hiker
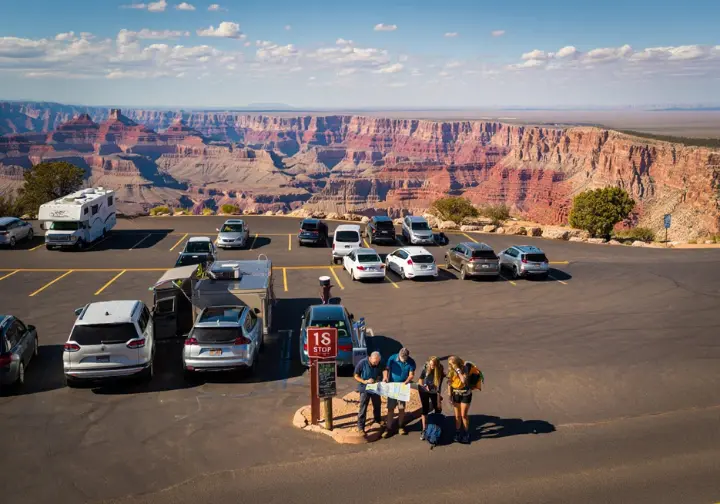
Solving the bright angel trail parking puzzle is a key part of accessing the Bright Angel Trail. Here, we move beyond simple directions to offer a detailed breakdown with strategic, tiered plans based on your specific hiker profile—day hiker, backpacker, or RV user—to eliminate stress and wasted time.
The Fundamental Choice: Park & Walk vs. Park & Ride
Every hiker faces a primary logistical decision: attempt to park very close to the trailhead or park in a larger, more distant lot and use the free shuttle. The “Park & Walk” strategy for bright angel trailhead parking offers the clear advantage of having your vehicle immediately accessible upon completing your hike. Its major drawback is the extremely limited number of spots, which fill up well before sunrise.
The “Park & Ride” strategy is the more reliable and often mandatory approach for anyone arriving after mid-morning. This involves parking in the large lots near the Grand Canyon Visitor Center and using the shuttle system. During peak seasons like Spring Break and summer, the Park & Ride strategy is the most practical option. You can find more tips for visiting during summer on the park’s website.
The Day Hiker’s Plan (The Early Bird Strategy)
For day hikers aiming to park nearby, the strategy is a race against the clock. Your Primary Target is the small, semi-hidden lot directly adjacent to the trailhead, but any avid hiker knows that securing a spot here requires a pre-sunrise arrival. If that lot is full, your Secondary Targets are the general parking areas around Bright Angel Lodge and the lot near Maswik Lodge, both a 5-10 minute walk away.
Here is the crucial Contingency Plan: if you arrive after 9:30 AM, do not waste time hunting for a spot. Immediately pivot to the Park & Ride strategy. Drive directly to the large lots at the Visitor Center (Lots 1-4) or the Backcountry Information Center (Lot D) and take the shuttle. For those just starting out, this simple rule can save hours of frustration. Check the official South Rim parking information for maps and details.
The Backpacker’s Mandate (Overnight Parking Protocol)
There is a non-negotiable rule for backpackers leaving a vehicle overnight in the park. The designated long-term parking area is the Backcountry Information Center (BIC), also known as Lot D. This is the only approved location and the unanimous recommendation for anyone with a backcountry permit for hikes to places like Bright Angel Campground.
The benefits of Lot D are strategic: it is a key stop on the early morning Hikers’ Express shuttle, often has available space, and is a very short walk from the Bright Angel Trailhead when you finish your multi-day trip. Lot D is generally safe for overnight parking, and no special vehicle permit is required beyond your standard park entrance fee. This protocol is a key part of transitioning to overnight trips. You can find answers to other common questions in the park’s list of frequently asked hiking questions.
The RV & Oversized Vehicle Approach (The “Plan Ahead” Rule)
Visitors with RVs (over 22 feet) or trailers face significant constraints and must plan ahead. There are only three designated in-park lots for oversized vehicles: Lot 1 at the Visitor Center, Lot B at Market Plaza, and Lot D at the Backcountry Information Center, a hub for multiple trailheads. These typically fill well before 9:30 AM.
The single best strategy for securing an in-park RV spot is arriving early. For those arriving midday in summer, the Tusayan Park & Ride is a lifeline. It allows you to bypass entrance station lines and the difficult search for in-park parking. For overnight stays, the in-park RV campground with full hookups is Trailer Village, which requires reservations far in advance. If you are planning their camping setup, you’ll find more details about visiting the South Rim in an RV online.
Mastering the Shuttle System – Your Free Ride to the Rim
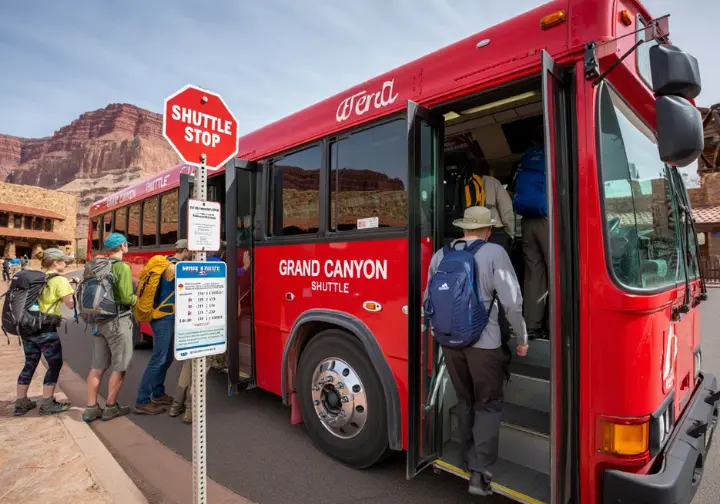
Decoding the free Grand Canyon shuttle system is key to a stress-free trip, as it’s an essential logistical tool for any serious hiker. Understanding the purpose and key stops of each route relevant to accessing the Bright Angel Trail is vital for building a safe and efficient itinerary.
The Lifeline: Village (Blue) Route
The Village (Blue) Route is the workhorse of the park’s transportation network and the most critical route for reaching the Bright Angel Trailhead from the main parking areas. Its primary purpose is to run a continuous loop connecting the large parking lots at the Visitor Center and Lot D with the lodges and facilities in Grand Canyon Village.
For hikers, the key stops are the Grand Canyon Visitor Center (for Park & Ride users), the Backcountry Information Center (for backpackers parked in Lot D), and the Bright Angel Lodge/Hermit Road Transfer stops. From these last two, it’s just a short walk to the trailhead. During peak summer hours, the bus runs very frequently, about every 10-15 minutes, making it a reliable option. You can see a map and get official Village (Blue) Route information from the NPS.
The Loop Hiker’s Special: Hikers’ Express & Kaibab (Orange) Route
These two routes are indispensable for hikers undertaking the popular South Kaibab to Bright Angel loop, as private vehicles are not permitted to access the South Kaibab Trailhead. The South Kaibab is a notoriously steep trail with very little shade. The Hikers’ Express is a specialized, early-morning shuttle designed to get hikers onto the trail for a cool and safe start. In summer, it departs as early as 4, 5, and 6 AM.
The Kaibab (Orange) Route is the all-day option for reaching the South Kaibab Trailhead, running a circuit from the Visitor Center. The standard plan for a loop hike is simple: park at Lot D, take the Orange Route to South Kaibab, complete the Grand Canyon loop, and emerge from the Bright Angel Trail with only a short walk back to your car. This loop is one of the most classic long-distance routes in any national park. You can check the Hikers’ Express Shuttle Bus schedule and find Kaibab Rim (Orange) Route details online.
Seasonal Shuttle Operations: A Year-Round Guide
Shuttle operations change significantly with the seasons, and your planning must account for the correct time of year. In the Fall (September-November), the last buses run earlier, the Tusayan (Purple) Route ceases operation, and the Hikers’ Express schedule may be adjusted.
The most dramatic changes occur in Winter (December-February). The Hermit (Red) Route is suspended, and Hermit Road opens to private vehicles, allowing access to the Hermit Trail trailhead. Other routes run on a reduced frequency, and the Hikers’ Express runs much later, with 8 AM and 9 AM departures. Spring (March-May) sees a full ramp-up of service, but Spring Break is an extremely busy period with long lines and full buses. Be sure to check how the park transitions to winter operations if planning a trip during that time.
Integrated Logistics & Alternatives
Putting it all together, we’ll synthesize the parking and shuttle information into coherent, step-by-step itineraries for common hiking scenarios. This guide also covers crucial backup plans and alternative transport options for situations where the main shuttle system isn’t the right fit for your schedule.
Scenario B: Backpacking the Classic Loop (South Kaibab Down, Bright Angel Up)
The objective here is to position your vehicle for a convenient exit after a strenuous, multi-day hike. The day before your hiking trip begins, park your vehicle in the designated overnight area, Lot D, at the Backcountry Information Center (BIC). This gets the most tedious part of your logistics out of the way early.
On the morning of your hike, you can simply walk from your car in Lot D to a nearby stop and board the early morning Hikers’ Express shuttle for the ride to the South Kaibab Trailhead, the start of an amazing natural hike. At the triumphant conclusion of your trip to Bright Angel Campground near Phantom Ranch, after ascending the Bright Angel Trail in your hiking boots, you emerge at the rim with only a short walk back to your vehicle—a huge relief for tired legs. This meticulous planning starts with a well-prepared gear list.
Scenario C: Arriving Midday During Spring Break
For this high-congestion scenario, the objective is to avoid guaranteed traffic jams and completely full parking lots inside the park. Follow this direct, non-negotiable instruction: do not attempt to drive into Grand Canyon Village. Park your vehicle in the gateway town of Tusayan.
Once parked, purchase your park pass in Tusayan and take the Tusayan (Purple) Route shuttle into the park. This shuttle bypasses the long entrance lines and drops you at the main Visitor Center. From the Visitor Center, you will transfer to a westbound Village (Blue) Route shuttle to reach the Bright Angel Trailhead area. This two-shuttle plan is by far the most efficient use of your time. The NPS offers other shuttle bus tips and Spring Break hacks.
When Shuttles Aren’t an Option: Taxi Service & Other Transport
There are alternatives for when the shuttle system doesn’t meet your specific needs, such as non-standard start times or late finishes. An often-overlooked tool is the 24-hour taxi service operated by Xanterra. The contact number is 928-638-2631; consider this a strategic tool, not a luxury.
You can use the taxi to arrange a pre-dawn ride to the South Kaibab Trailhead even earlier than the first shuttle. It can also serve as a safety net if you finish a hike after the last bus has run. For backpackers undertaking the multi-day Rim-to-Rim hike, the Trans-Canyon Shuttle is the primary logistical link, though it requires advance booking. Knowing these park public transportation options, including the taxi number, is like having a ‘hidden gem’ on your planning list. The Rim-to-Rim shuttle service is a separate entity for that specific trek.
Essential Trail Context for a Responsible “hiker”
Finally, let’s elevate the guide beyond mere logistics by connecting the planning process to a safe, respectful, and successful on-trail experience. We’ll cover crucial trail-specific knowledge, like mule etiquette, that distinguishes a prepared hiker from a casual tourist on this popular hiking trail.
Mule Etiquette: Sharing the Trail with Canyon Icons
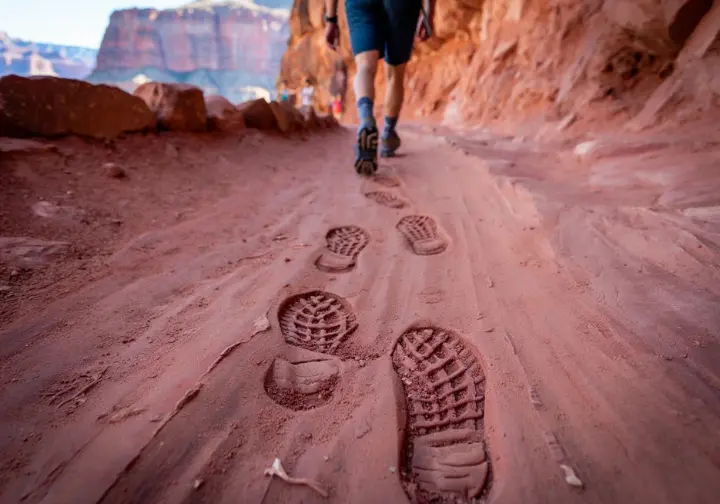
The Bright Angel Trail is a working path shared with iconic mule trains that carry supplies and visitors into the canyon. The rules for encountering this animal are absolute and designed for the safety of hikers, wranglers, and the mules themselves. You’ll likely see other cool wildlife too, as mule deer and squirrels are very common along the upper portions of the trail.
When you meet a mule train, you must step off the trail on the uphill side, away from the cliff edge. Follow all verbal directions from the wrangler, and remain quiet and still as they pass. The final instruction is critical: do not return to the trail until the last mule is at least 50 feet past your position. This prevents any risk of being crowded or kicked. Knowing how to react while sharing the trail with mule trains is the mark of a respectful and prepared hiker. These forced stops also give you a moment to catch your breath and maintain your energy and focus.
Connecting Arrival Strategy to Hike Success
Your logistical choices are not separate from the hike itself; they are foundational elements of your overall safety and enjoyment strategy. For example, choosing an “Early Bird” parking strategy for this fabulous trail is not just about convenience. It means starting your descent in cooler temperatures, which conserves your energy and water while also letting you face fewer crowds on the trail.
Likewise, using the shuttle system to enable a South Kaibab to Bright Angel loop allows you to experience the panoramic views of the South Kaibab on the descent. You can then save the more gradual, water-rich, and shaded Angel Trail for the strenuous climb out. By diligently planning these details—checking alerts, choosing the right parking, and mastering the shuttles—you avoid a killer hike and set the stage for success. Your logistical plan is your safety plan, allowing you to focus on the profound experience of the canyon.
Key Takeaways on Bright Angel Trailhead Logistics
- Plan, Then Verify: Your logistical plan is only as good as the most recent information. Always check the official NPS website for real-time alerts on trail closures, water availability, and weather before you leave for the trailhead.
- Time is Your Most Valuable Asset: Your arrival time dictates your parking and shuttle strategy. Arrive before sunrise for a chance at a close-in parking spot; after 9:30 AM, pivot immediately to the “Park & Ride” strategy from the Visitor Center to save time and frustration.
- Park by Your Profile: Your parking choice should match your hike. Day hikers can try for close spots early on. Backpackers MUST use the designated overnight lot (Lot D). RV users must use designated lots and should consider the Tusayan shuttle during peak season.
- The Park Shuttle is Your Friend: The free shuttle system is an essential tool, not just a convenience. Use the Hikers’ Express and Kaibab (Orange) Route for the classic S. Kaibab-Bright Angel loop, and rely on the Village (Blue) Route as the main artery from parking lots.
- Logistics Equal Safety: A smooth arrival and departure plan directly translates to a safer hike. Starting early means hiking in cooler temperatures. Knowing your shuttle schedule prevents being stranded. Your pre-hike planning is your first and most important safety measure.
Frequently Asked Questions about the Bright Angel Trailhead
Can I leave my car parked overnight to hike the Bright Angel Trail? +
What is the absolute earliest I can get to the South Kaibab Trailhead for a loop hike? +
I’m arriving at the Grand Canyon at noon on a summer Saturday. What is my best plan to get to the Bright Angel Trailhead? +
Is there water available right at the Bright Angel Trailhead? +
We are a participant in the Amazon Services LLC Associates Program, an affiliate advertising program designed to provide a means for sites to earn advertising fees by advertising and linking to Amazon.com. As an Amazon Associate I earn from qualifying purchases. We also participate in other affiliate programs. The information provided on this website is provided for entertainment purposes only. We make no representations or warranties of any kind, expressed or implied, about the completeness, accuracy, adequacy, legality, usefulness, reliability, suitability, or availability of the information, or about anything else. Any reliance you place on the information is therefore strictly at your own risk. Additional terms are found in the terms of service.


